

A guide to the pristine Zelenci Nature Reserve, Slovenia
Somewhat of a hidden gem among Slovenia’s many natural highlights, the Zelenci Nature Reserve is a pristine wetland area encircling the incredibly stunning Zelenci Lake.
Nestled between Kranjska Gora and the border of Italy, Zelenci is a bit of a blink and you miss it, as it is carefully disguised by the lush vegetation just off road #202 in the direction of Italy.
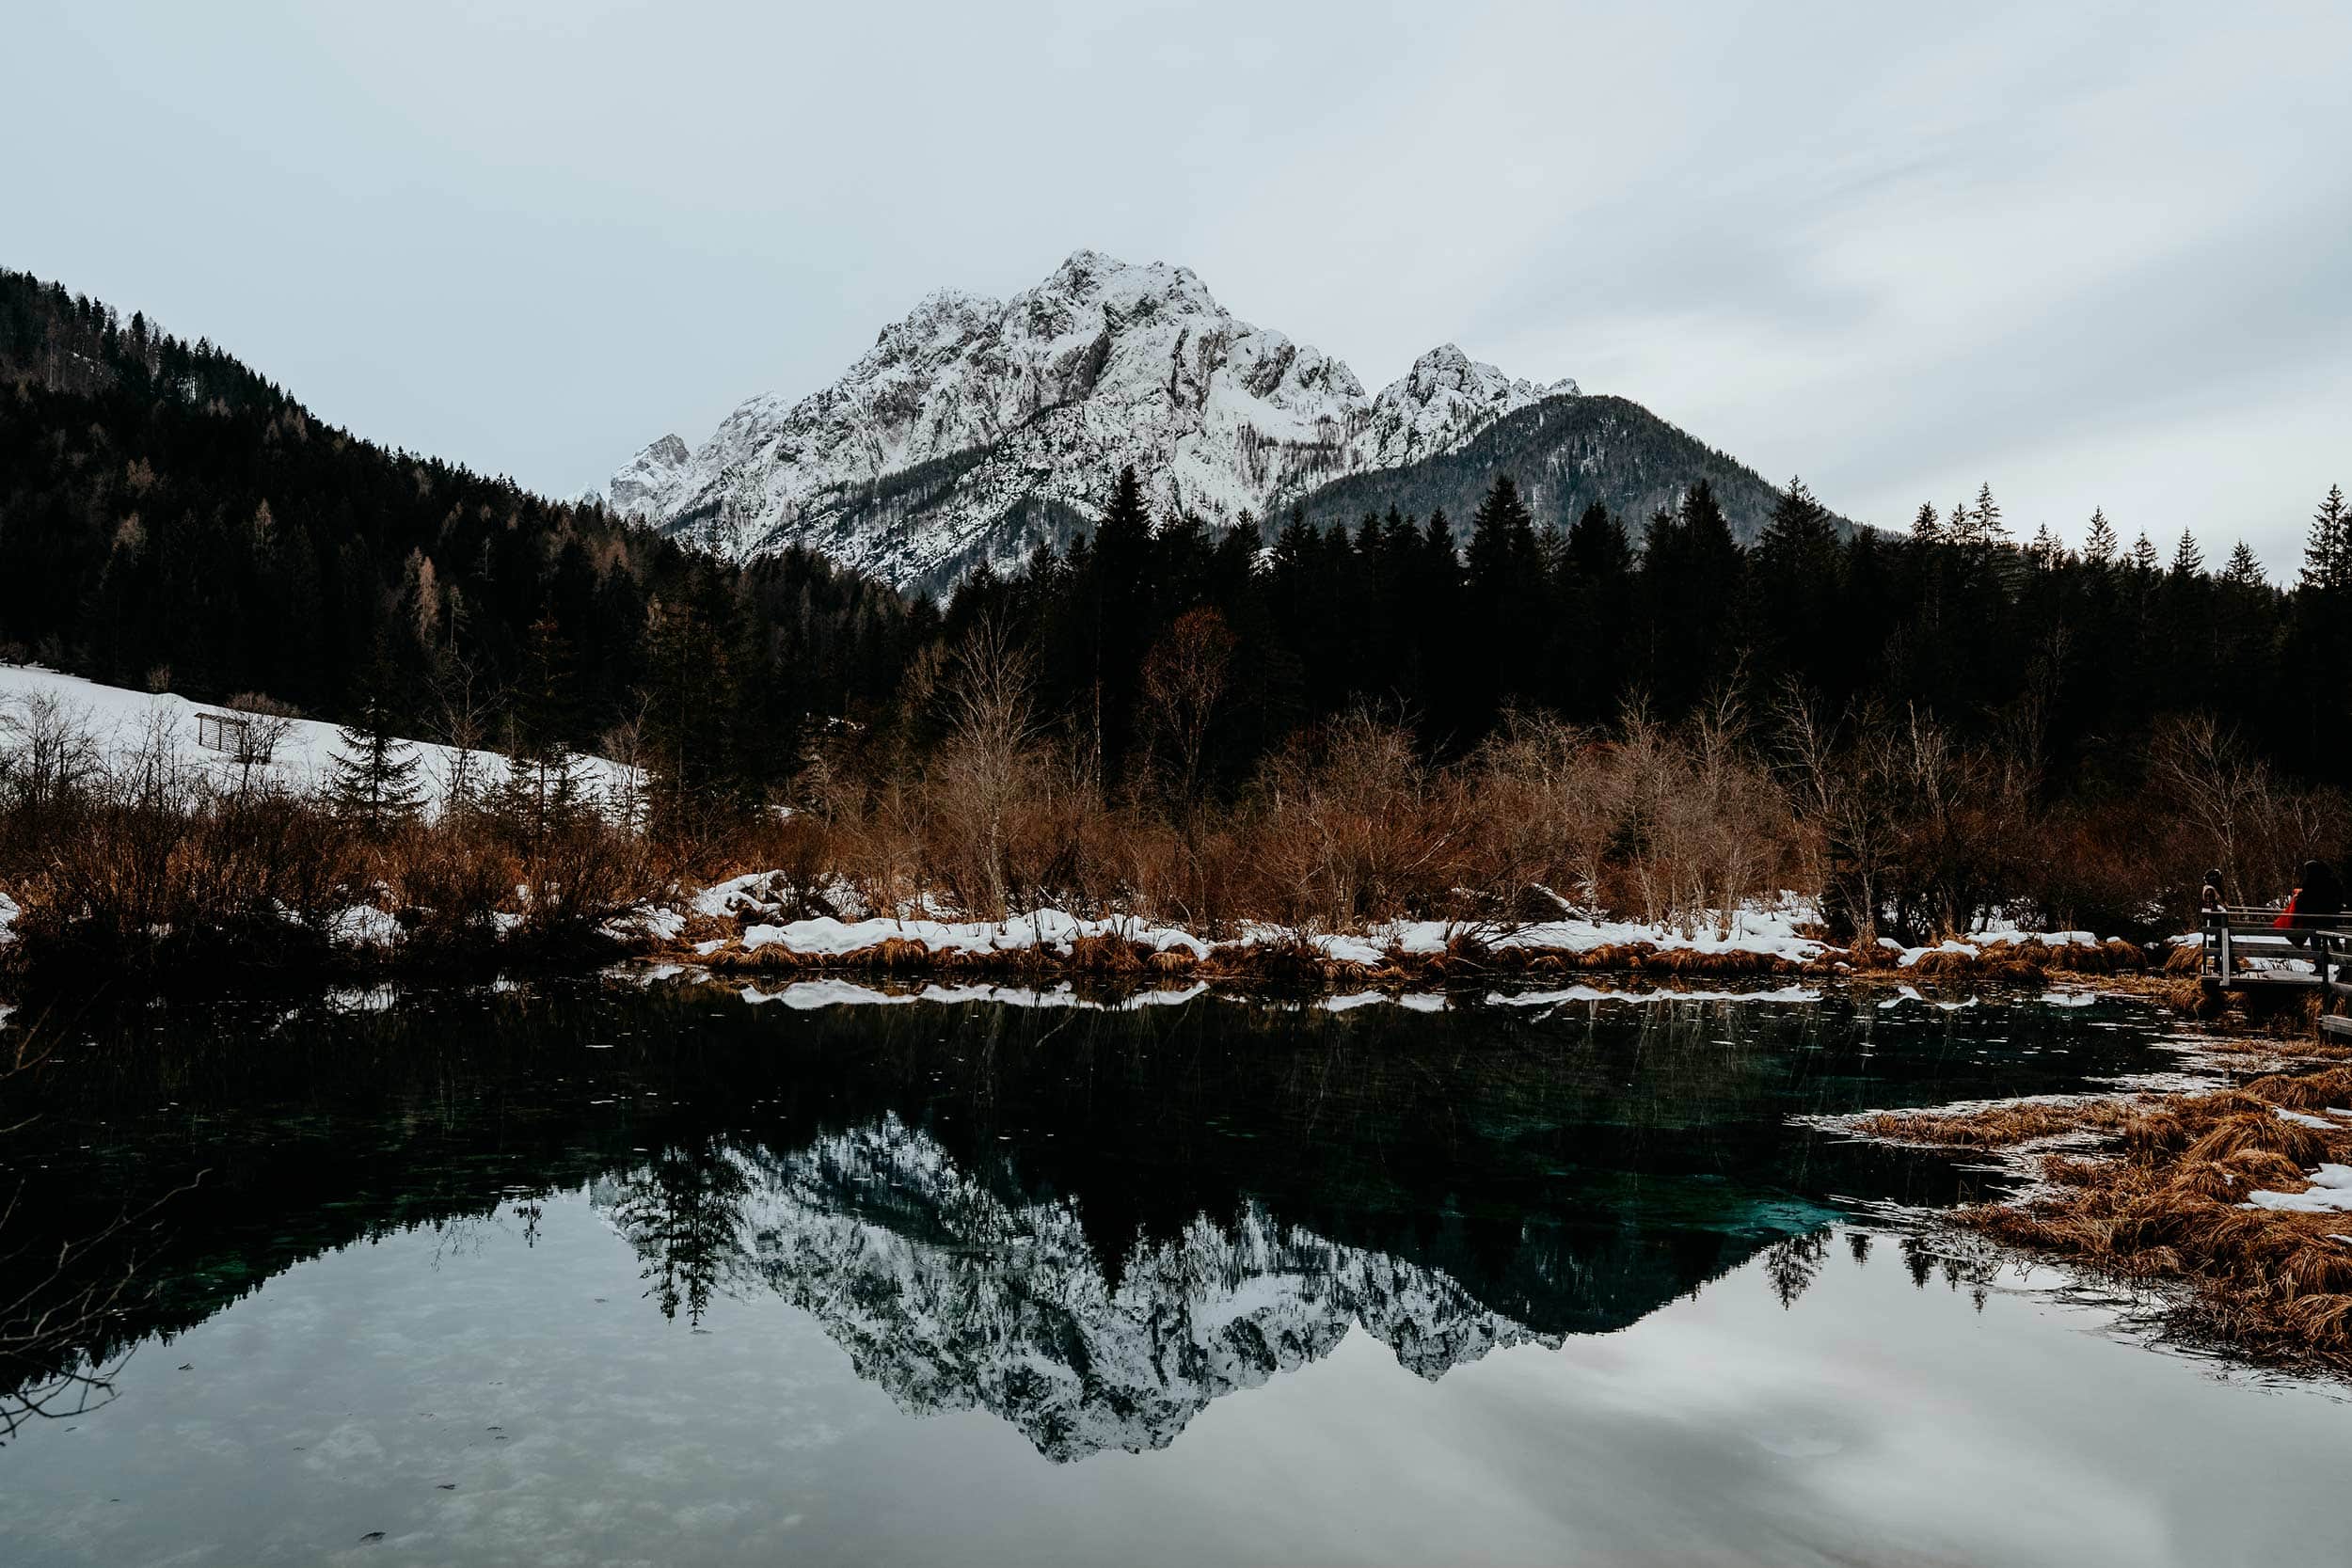
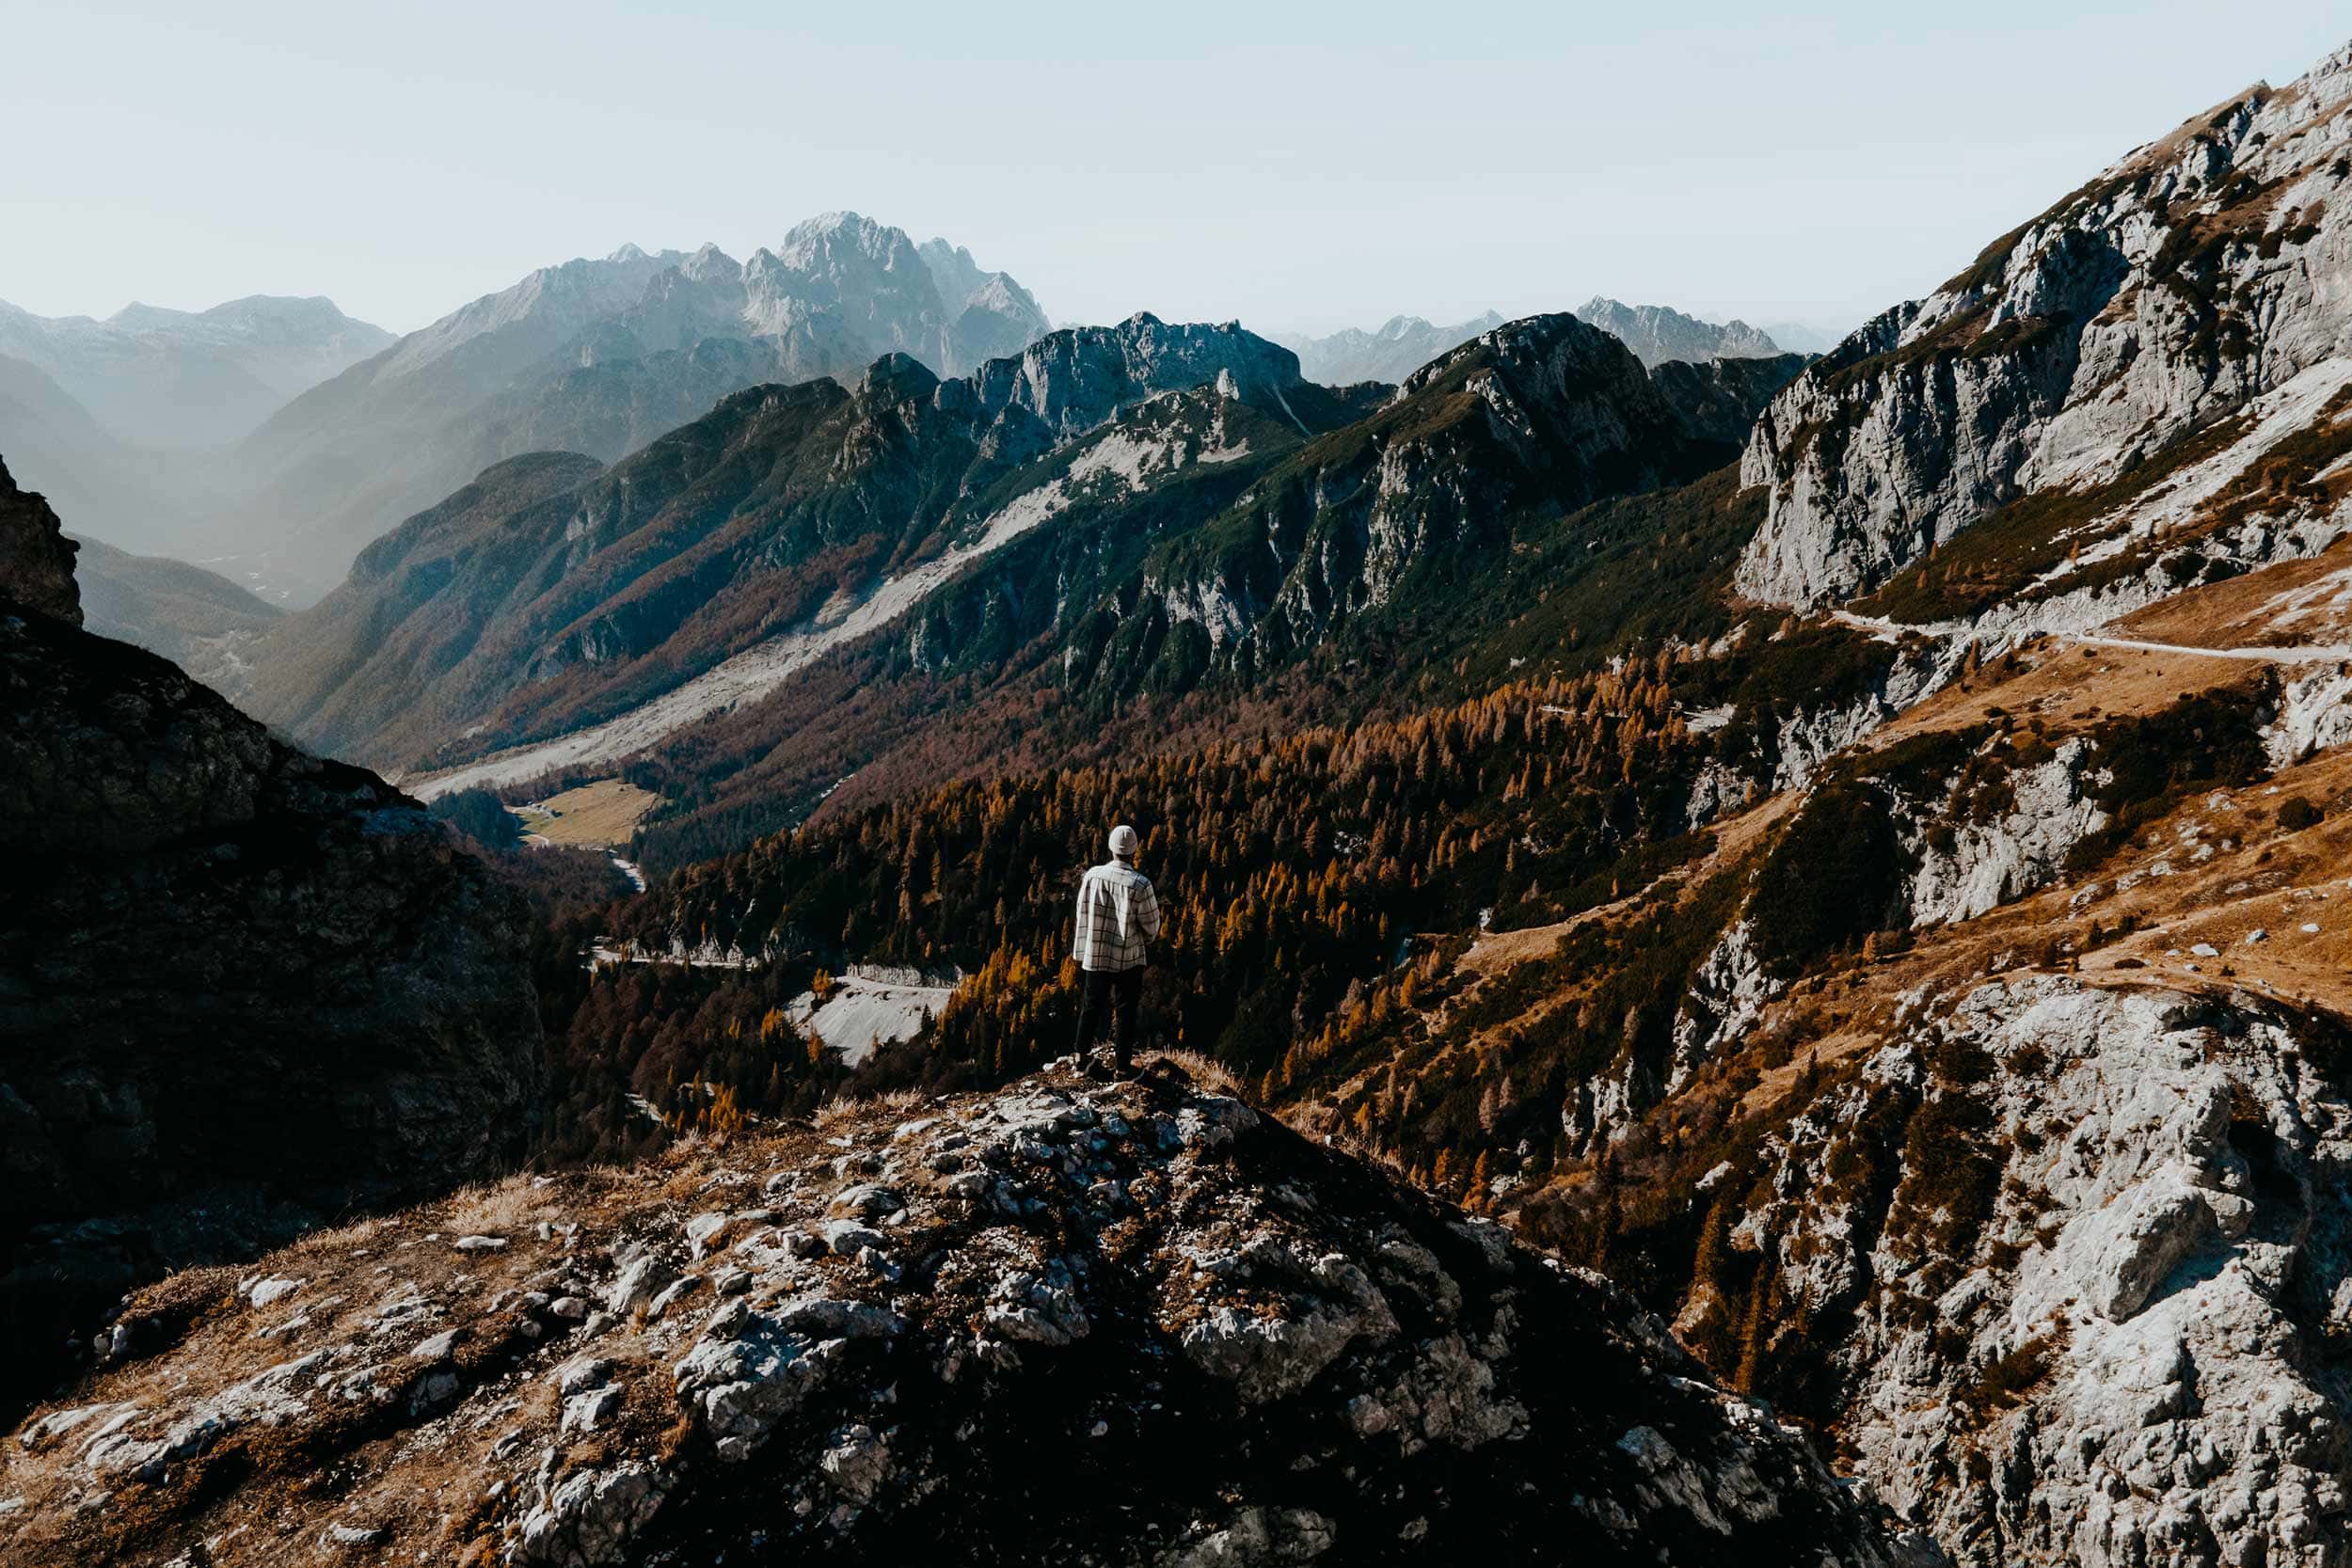
Though the reserve is relatively compact, this quaint slice of paradise will capture your heart in the blink of an eye, as it provides visitors mesmerizing views of the emerald-green lake and the towering peaks of the Julian Alps in the distance.
On top of that, Zelenci is close to some of Slovenia’s absolute highlights, including the stunning Lake Jasna, the winding roads of the Vrsic Pass, and the notorious Mangart Saddle, making it super easy to incorporate into an adventurous Slovenia road trip itinerary.
It’s a place of unrivalled beauty, and during my visit in the autumn of 2022, I immediately knew I wanted to come back here during the winter months when the pristine snow-covered natural surroundings make for an even more magical scene.
After now having visited Zelenci twice, I’ve curated all the essentials to help you plan and organise your own visit here, including advice on how to get there, where to stay and how to combine it with other Slovenia highlights – enjoy reading!
If you choose to use any of the links on this page, I may receive a small commission at no extra cost to you. By using these links, you’ll have a direct impact on WTSW and my ability to continue to create free insightful travel content for you. If you find any of my tips useful, you can support me by buying a virtual coffee here.
A guide to Zelenci Nature Reserve, Slovenia
Where is Zelenci Nature Reserve
The Zelenci Nature Reserve is nestled in the foothills of the Julian Alps in the very northwest of Slovenia, about 5 kilometres drive from the popular town of Kranjska Gora.
It is located at the crossroads of Central Europe, as the picturesque area borders with Italy on the west and Austria on the south.
The reserve itself is set within a stunning alpine valley on the northern edge of the Triglav National Park, only just off road #202 in the direction of Italy.
About Zelenci Nature Reserve
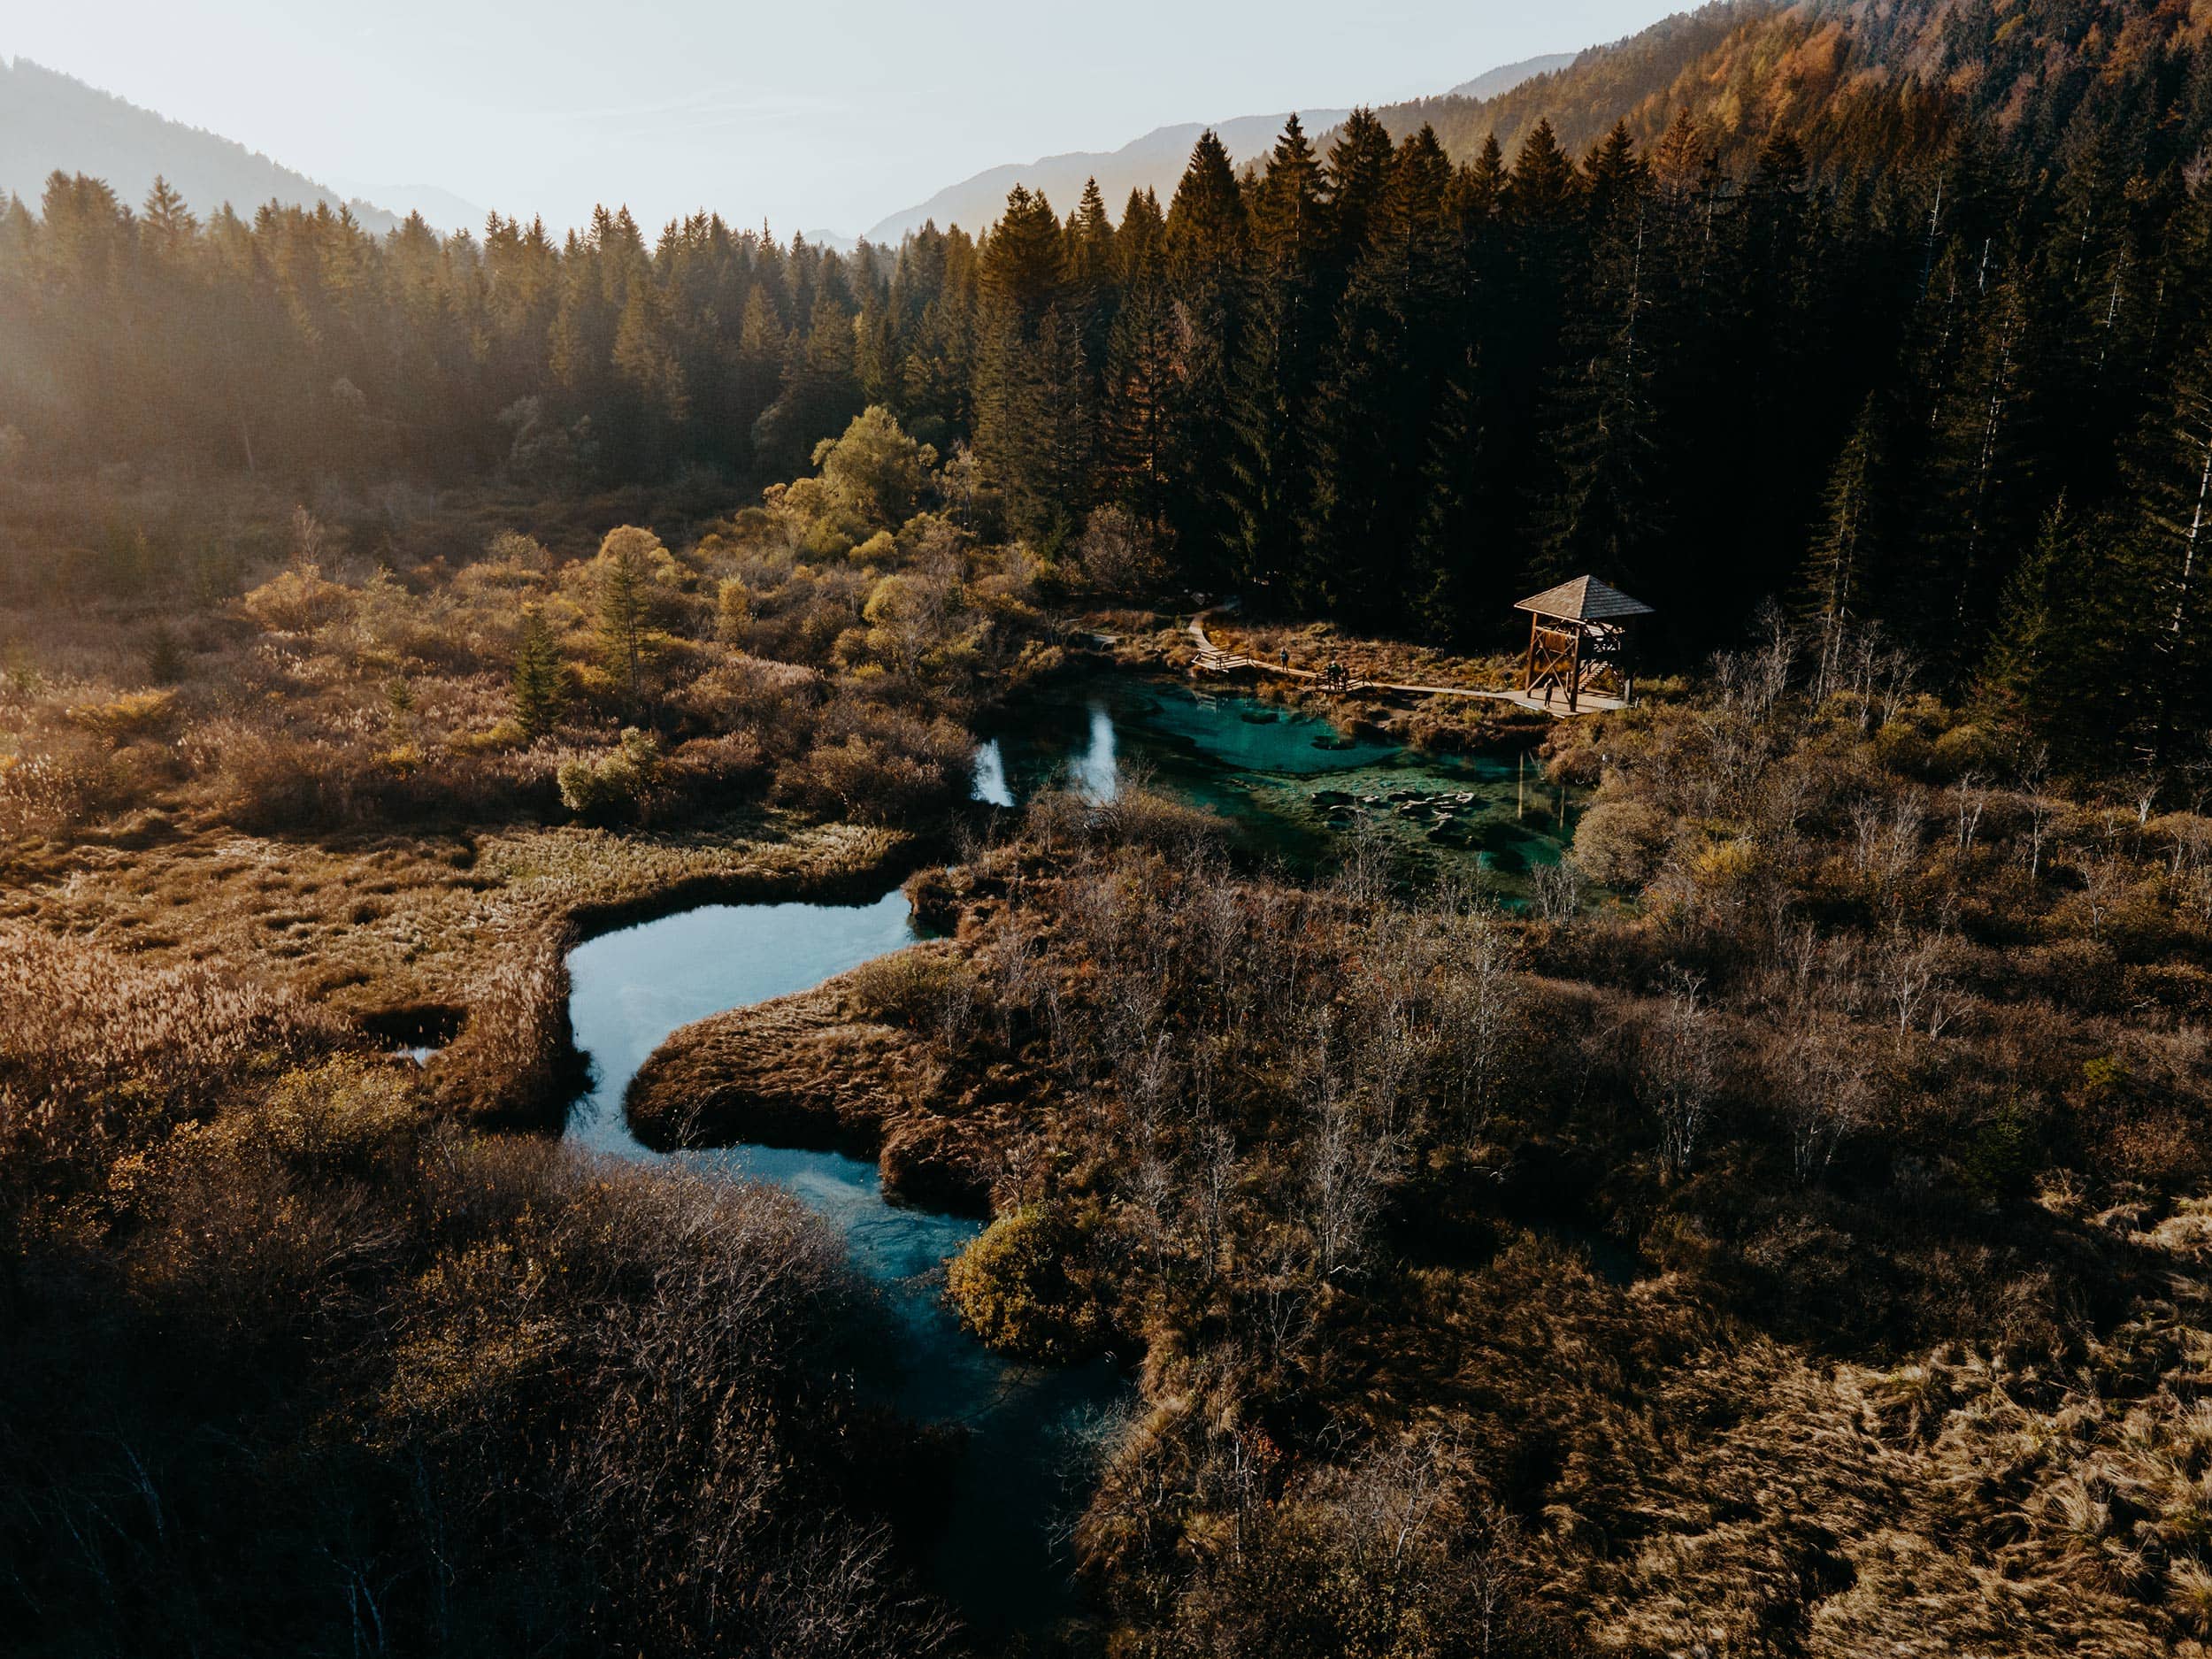
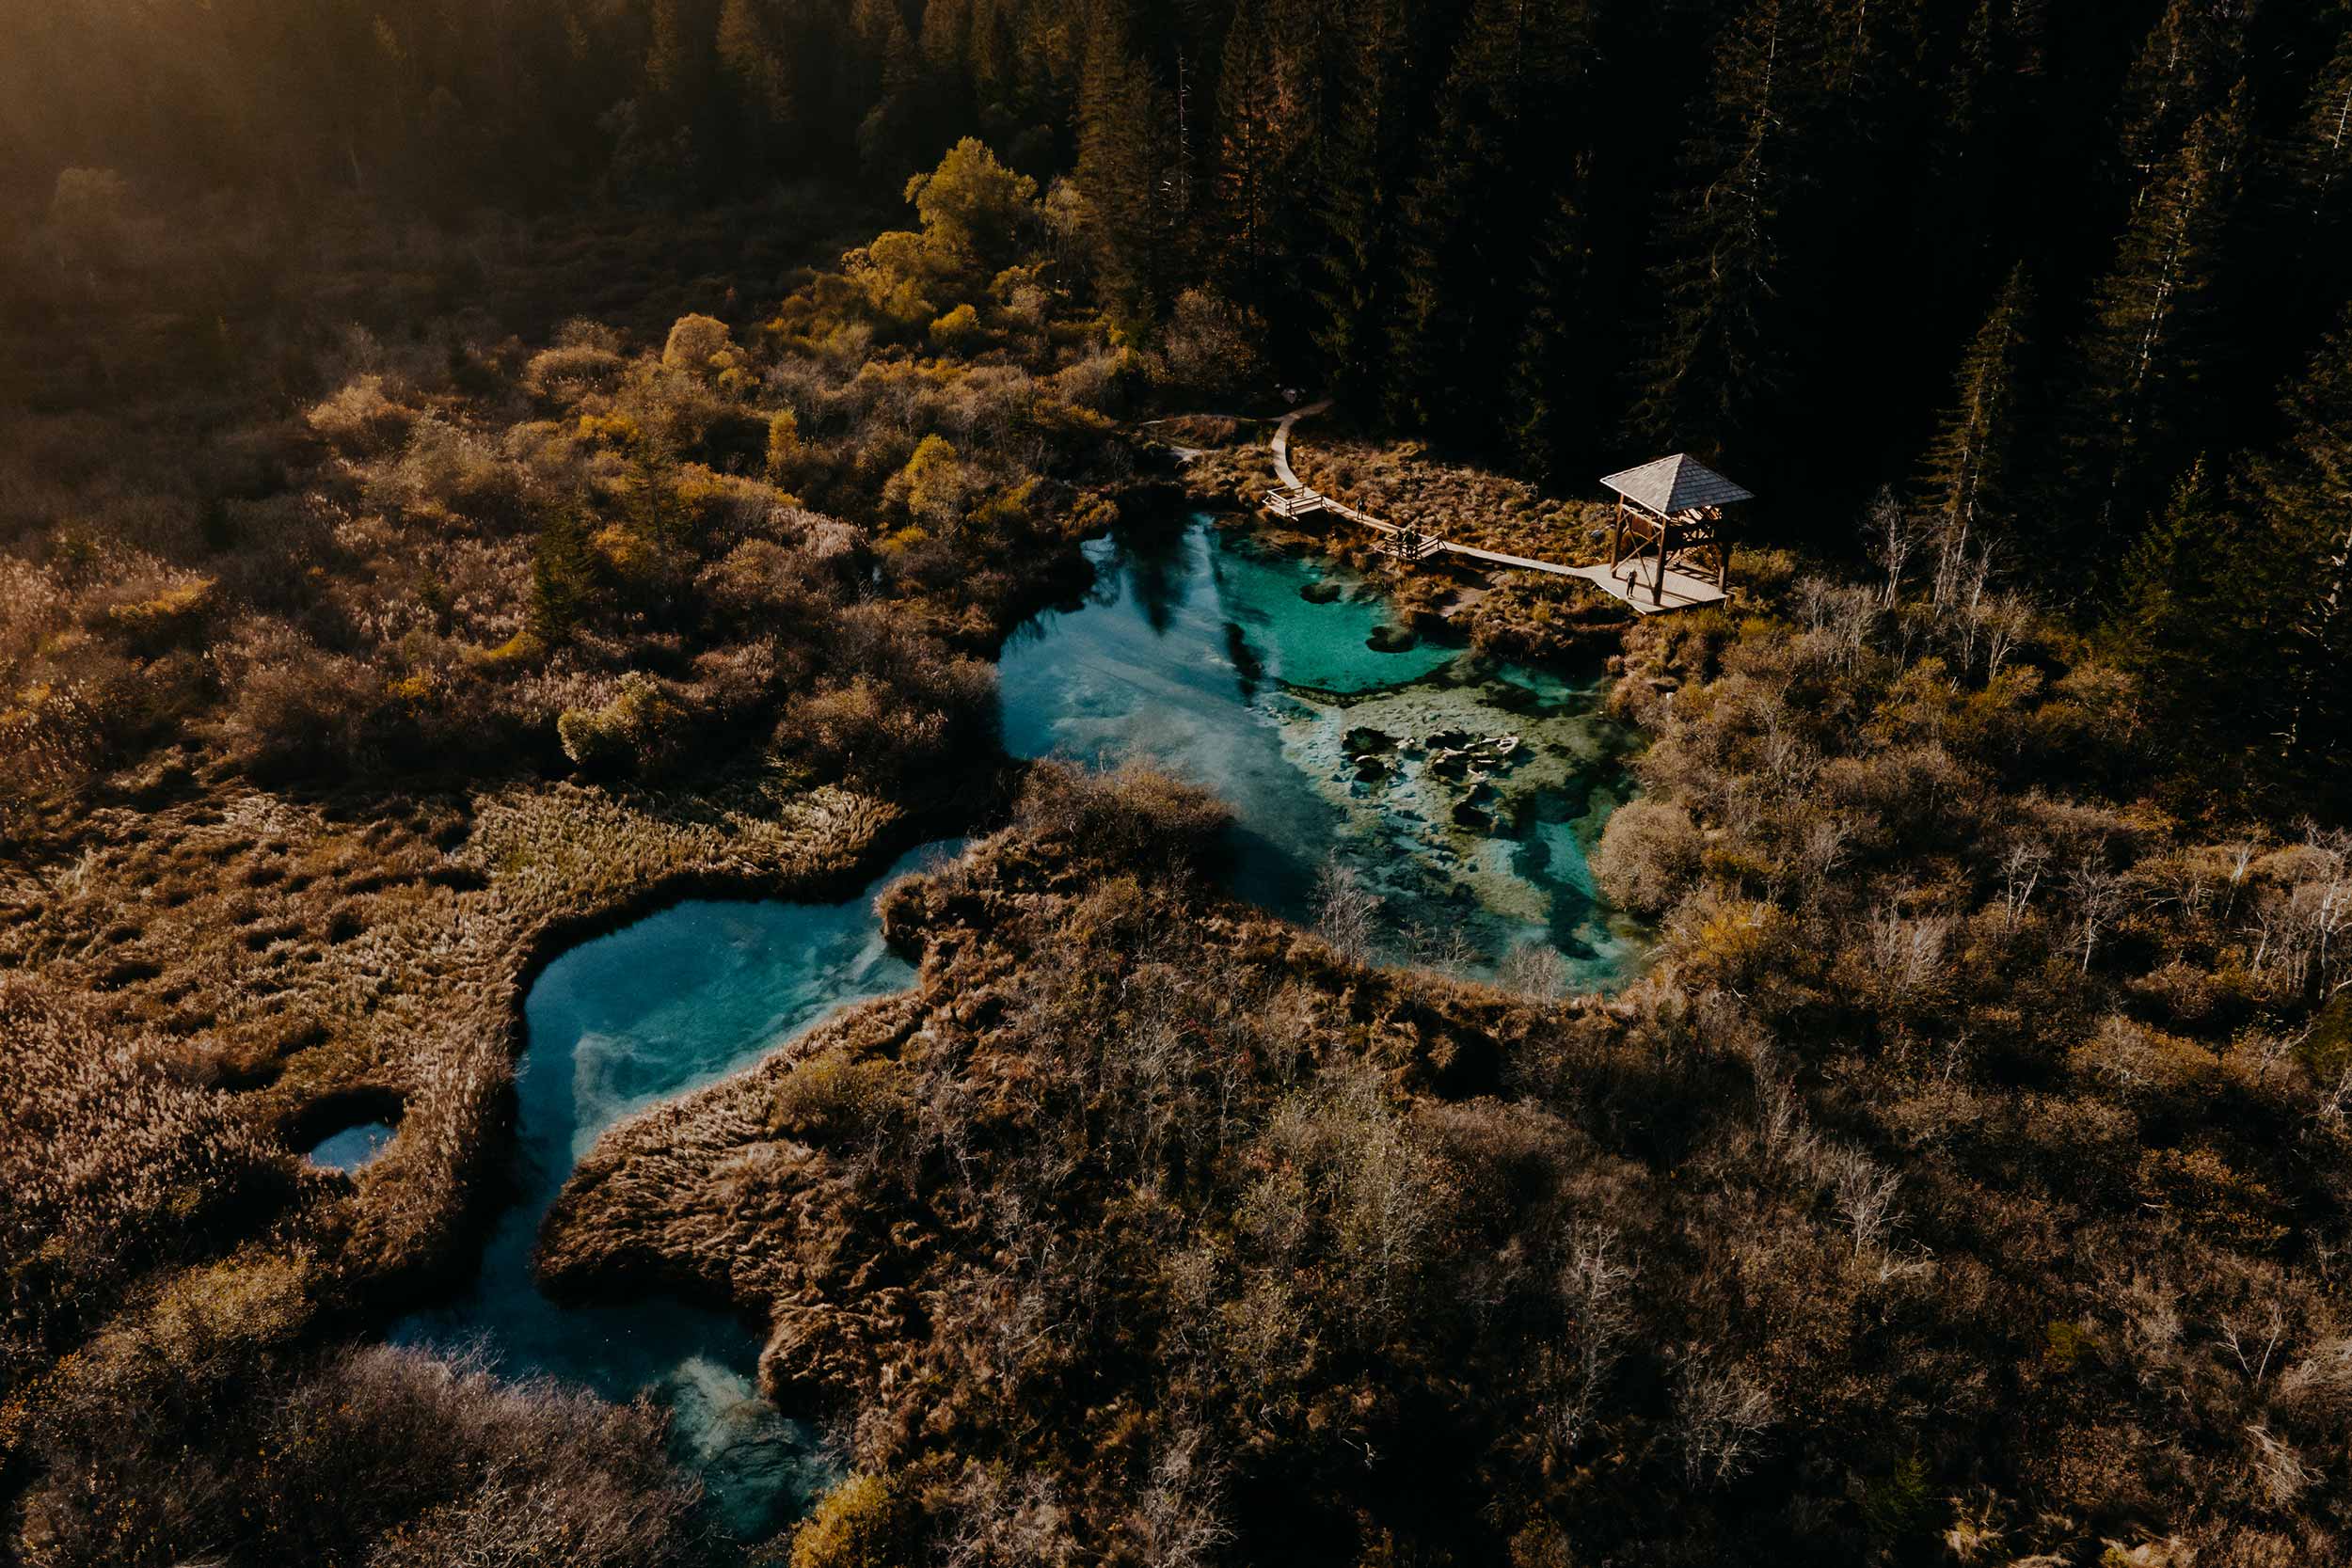
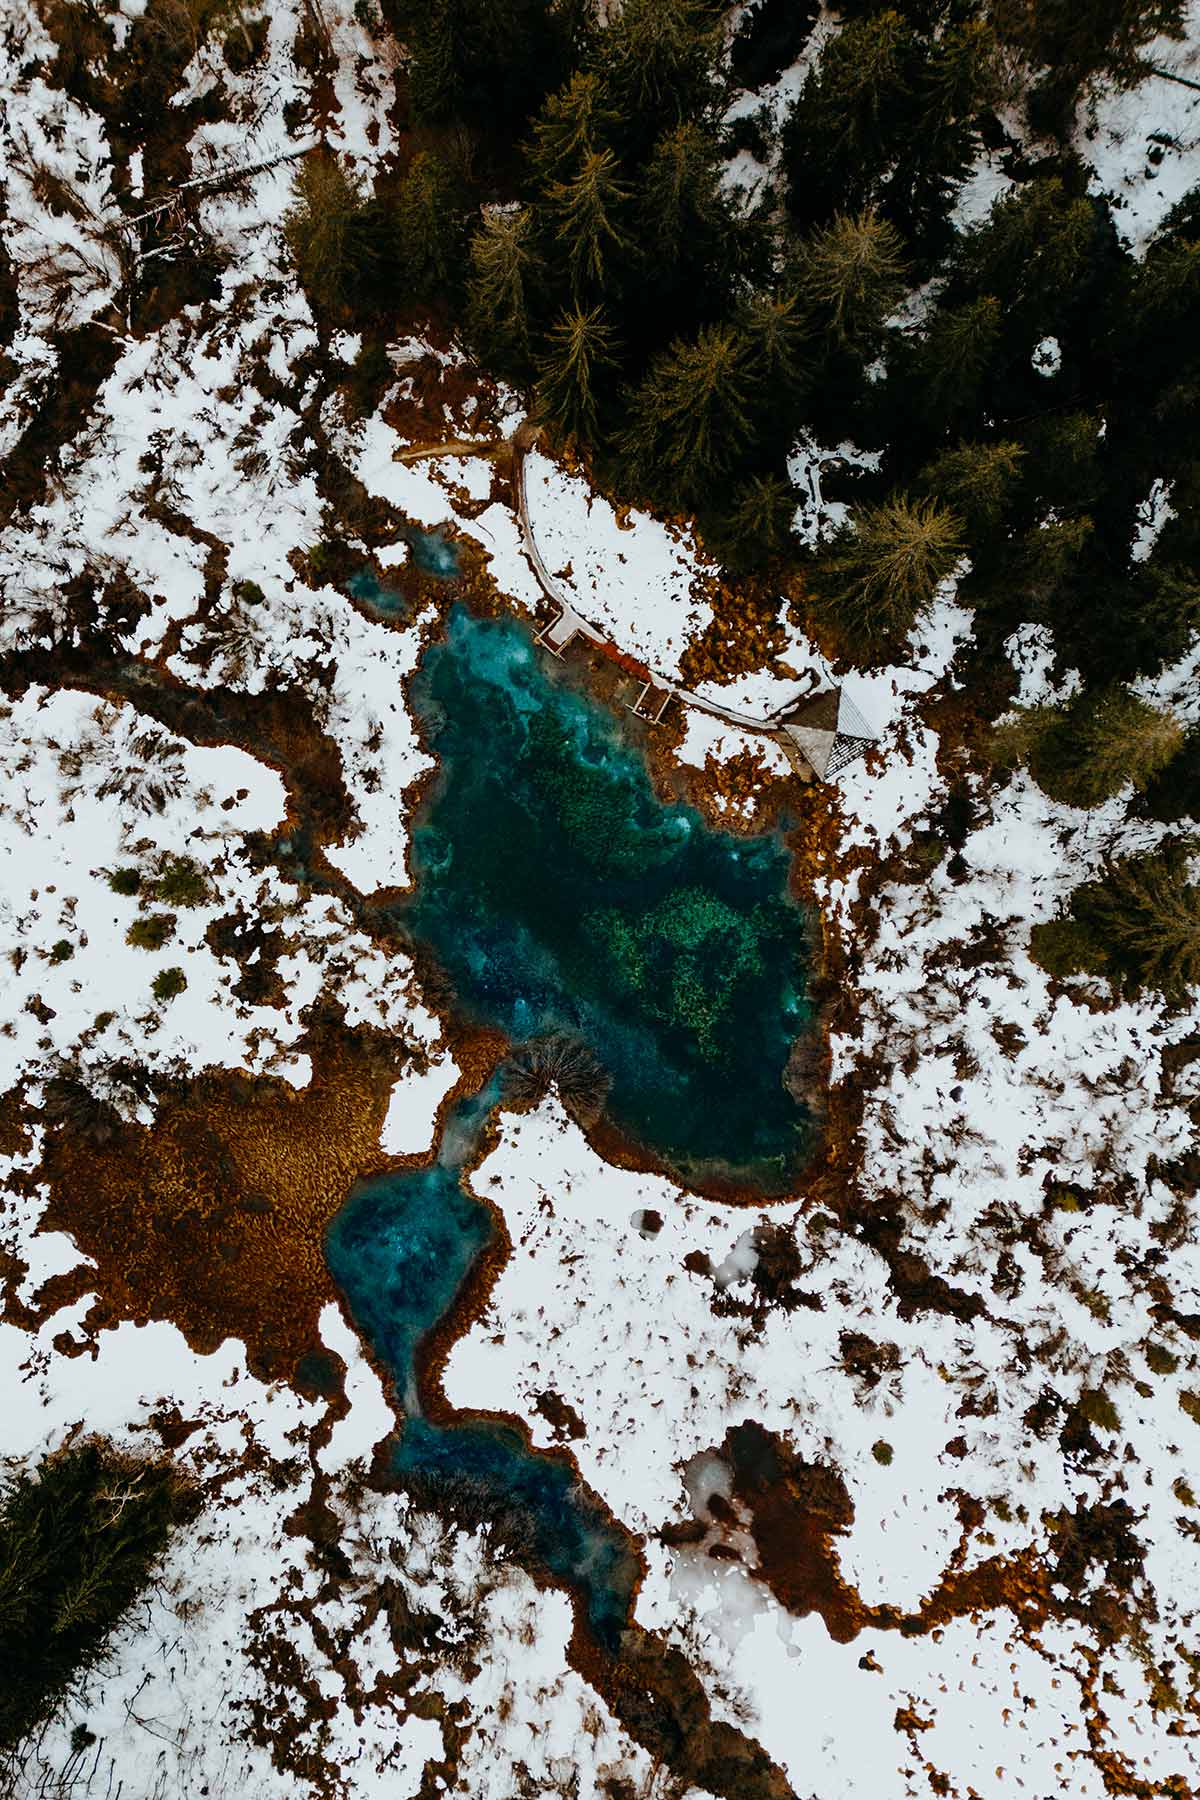
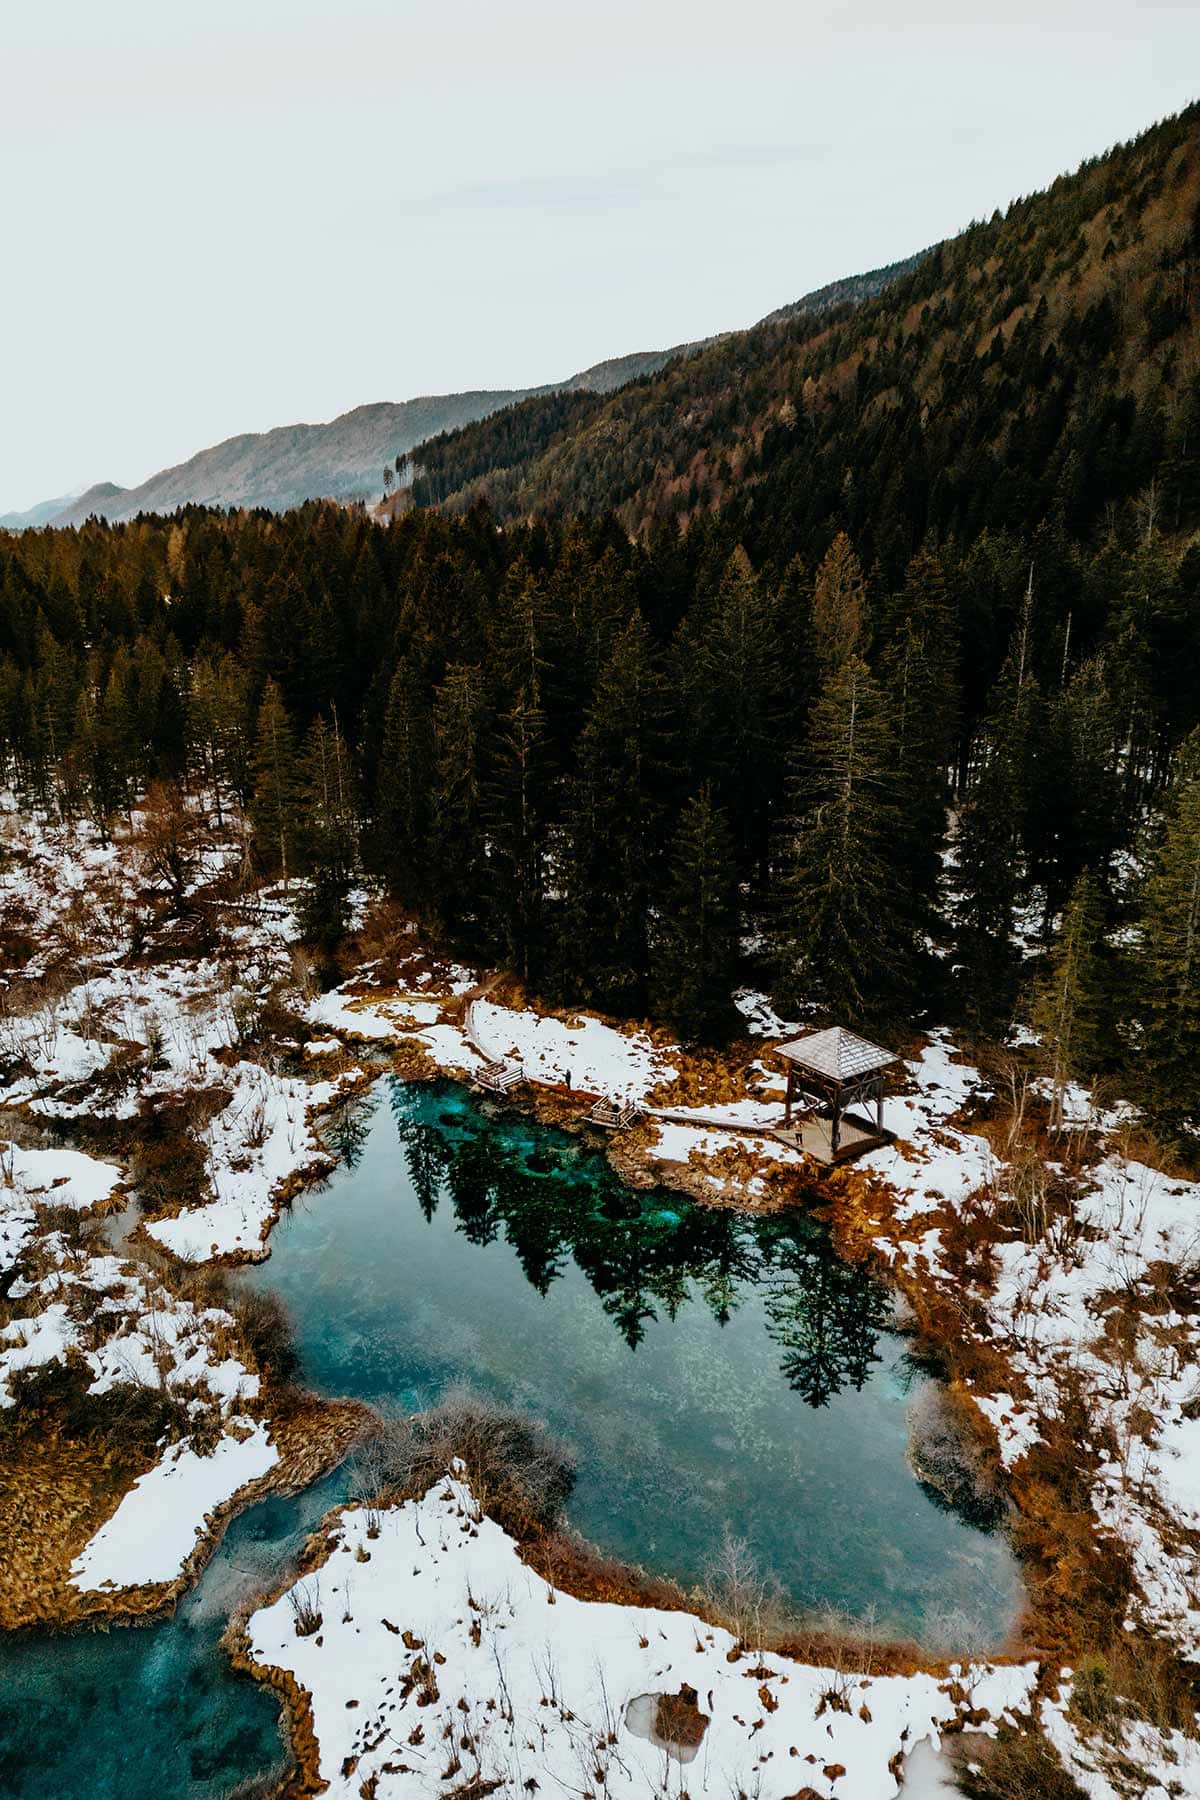
Covering roughly 15 hectares of untouched natural splendour, the Zelenci Nature Reserve is well-known for its emerald-green lake and the scenic wetlands surrounding it.
With incredible natural and geological feats, this reserve is home to a wide variety of flora and fauna, including Common Rosefinches, Viviparous Lizards and European Adders to name a few.
For the above reasons, it is highly advised to remain on the path at all times, so don’t think it’s okay to wander off the path to obtain a slightly different perspective of the lake.
Thanks to the combination of the reserve’s phenomenal appearance and the distinctive flora and fauna that is found here, Zelenci was officially declared a nature reserve by the municipality of Jesenice in 1992.
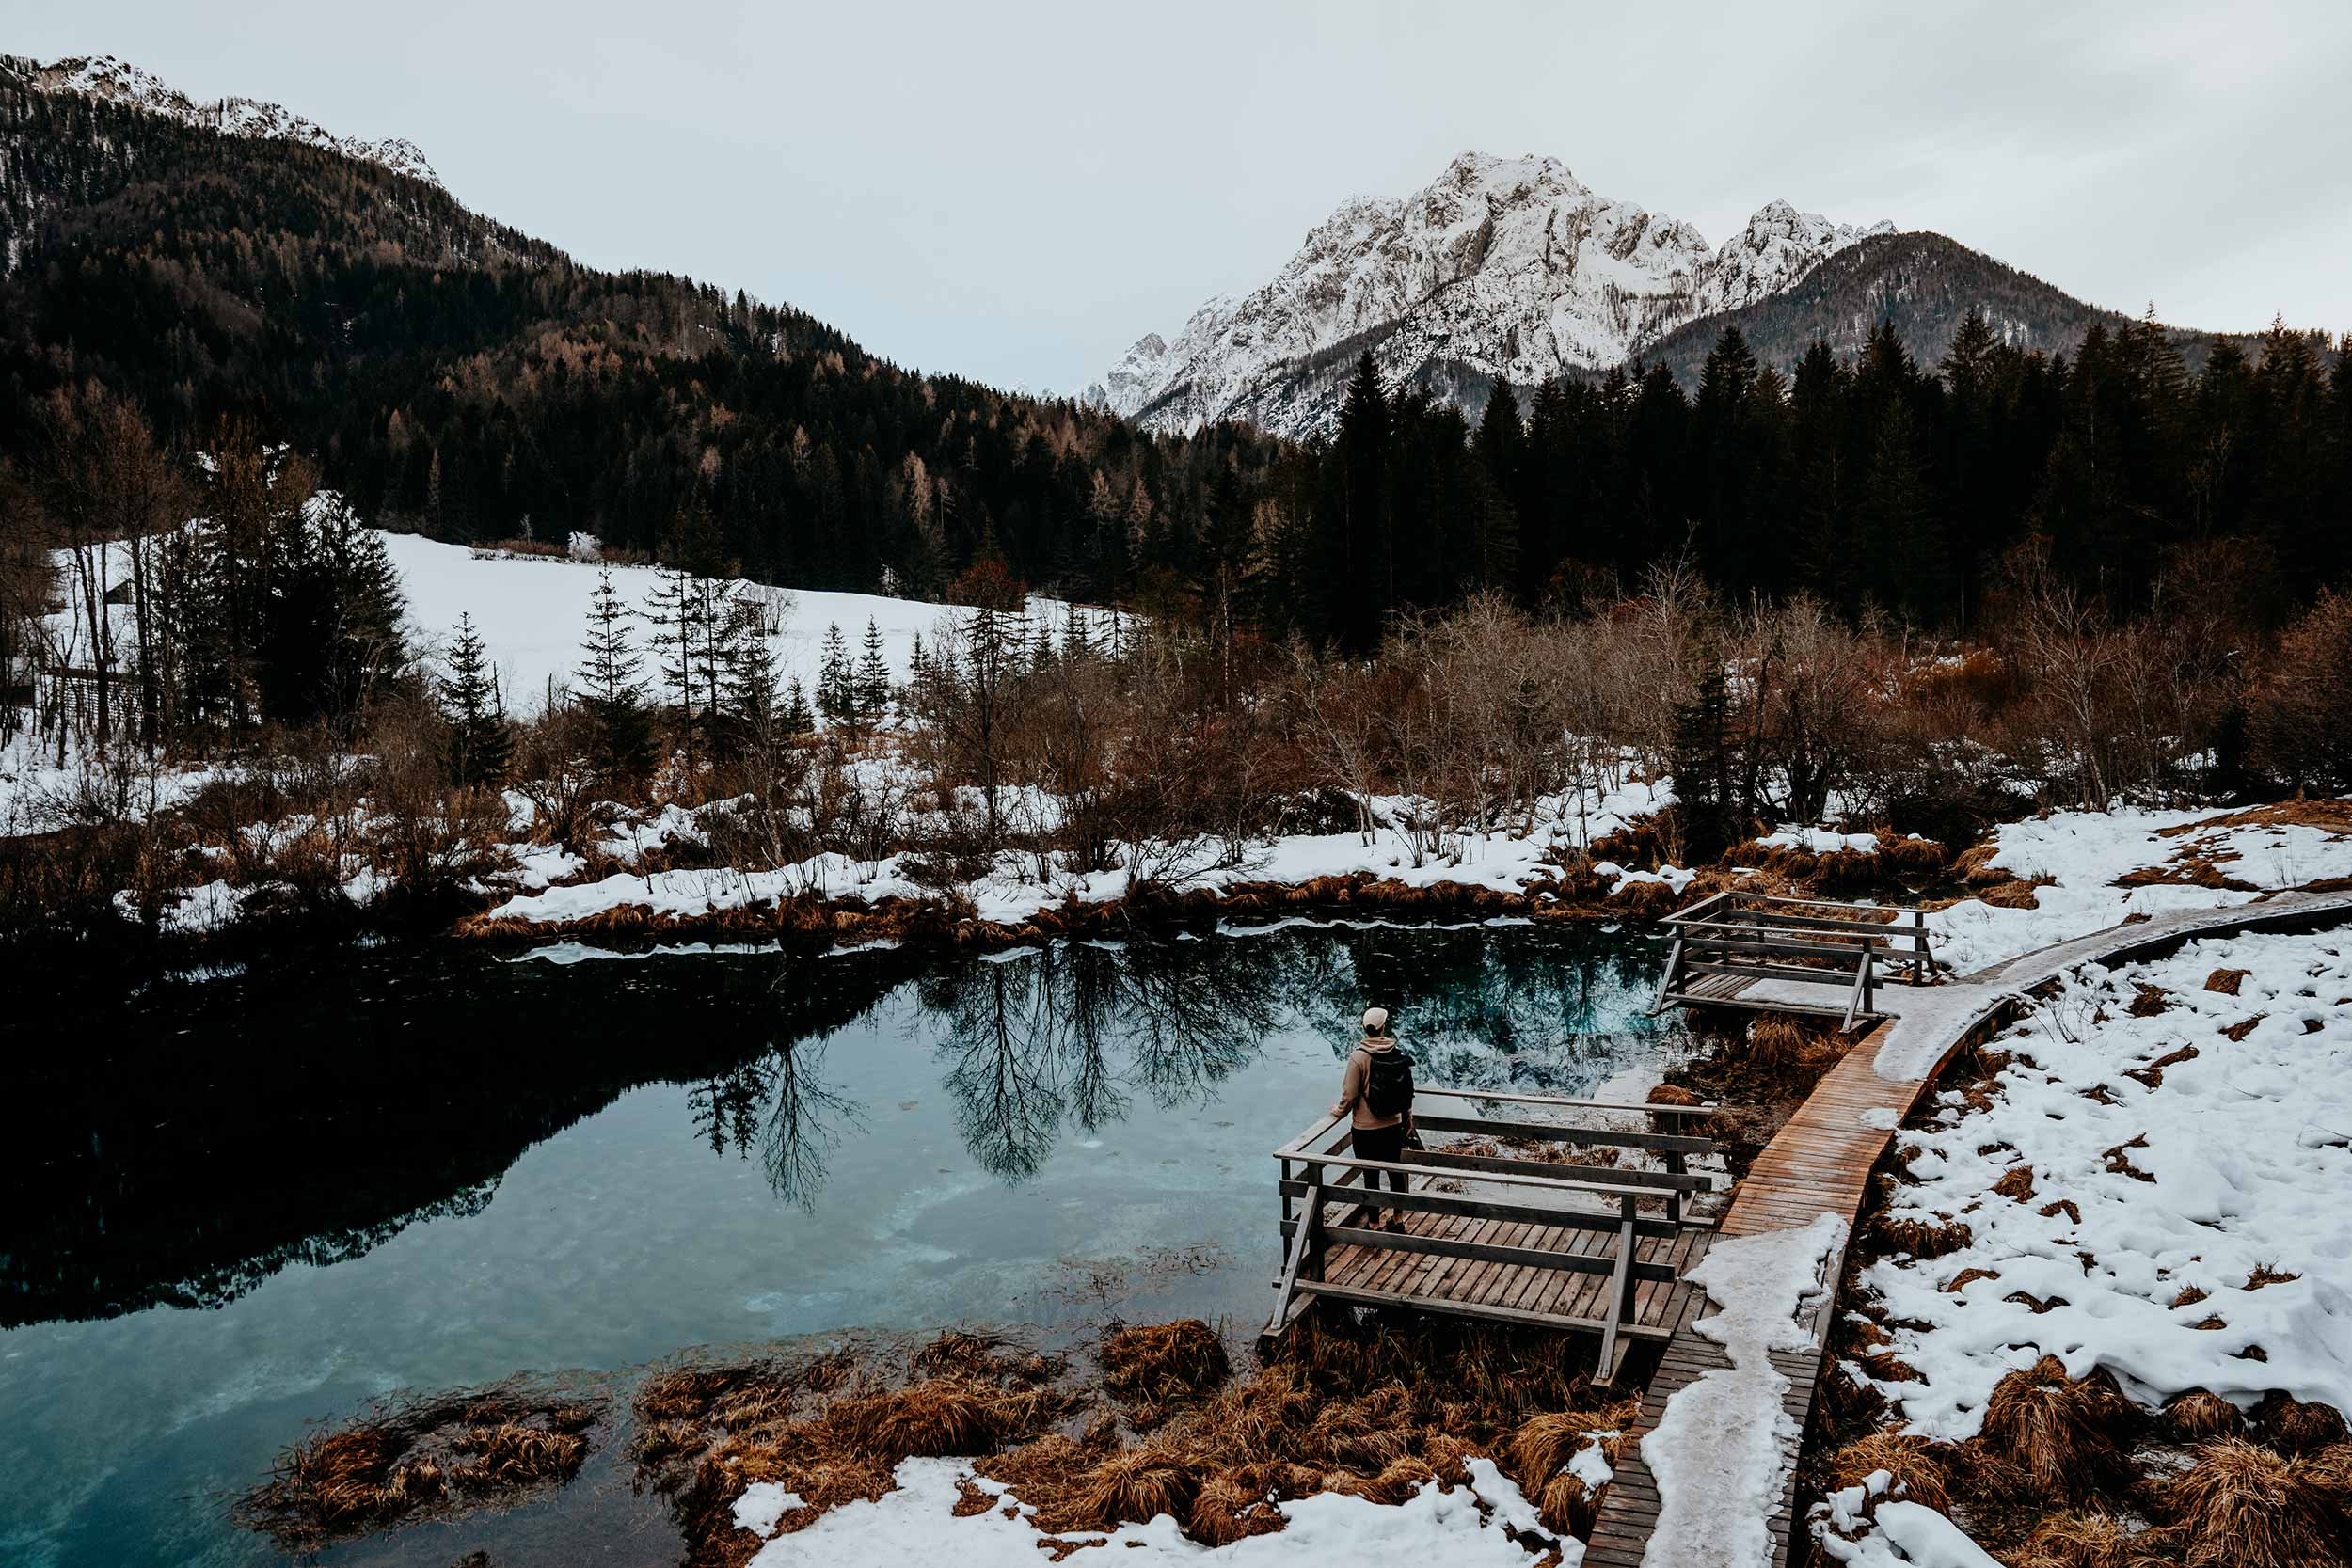
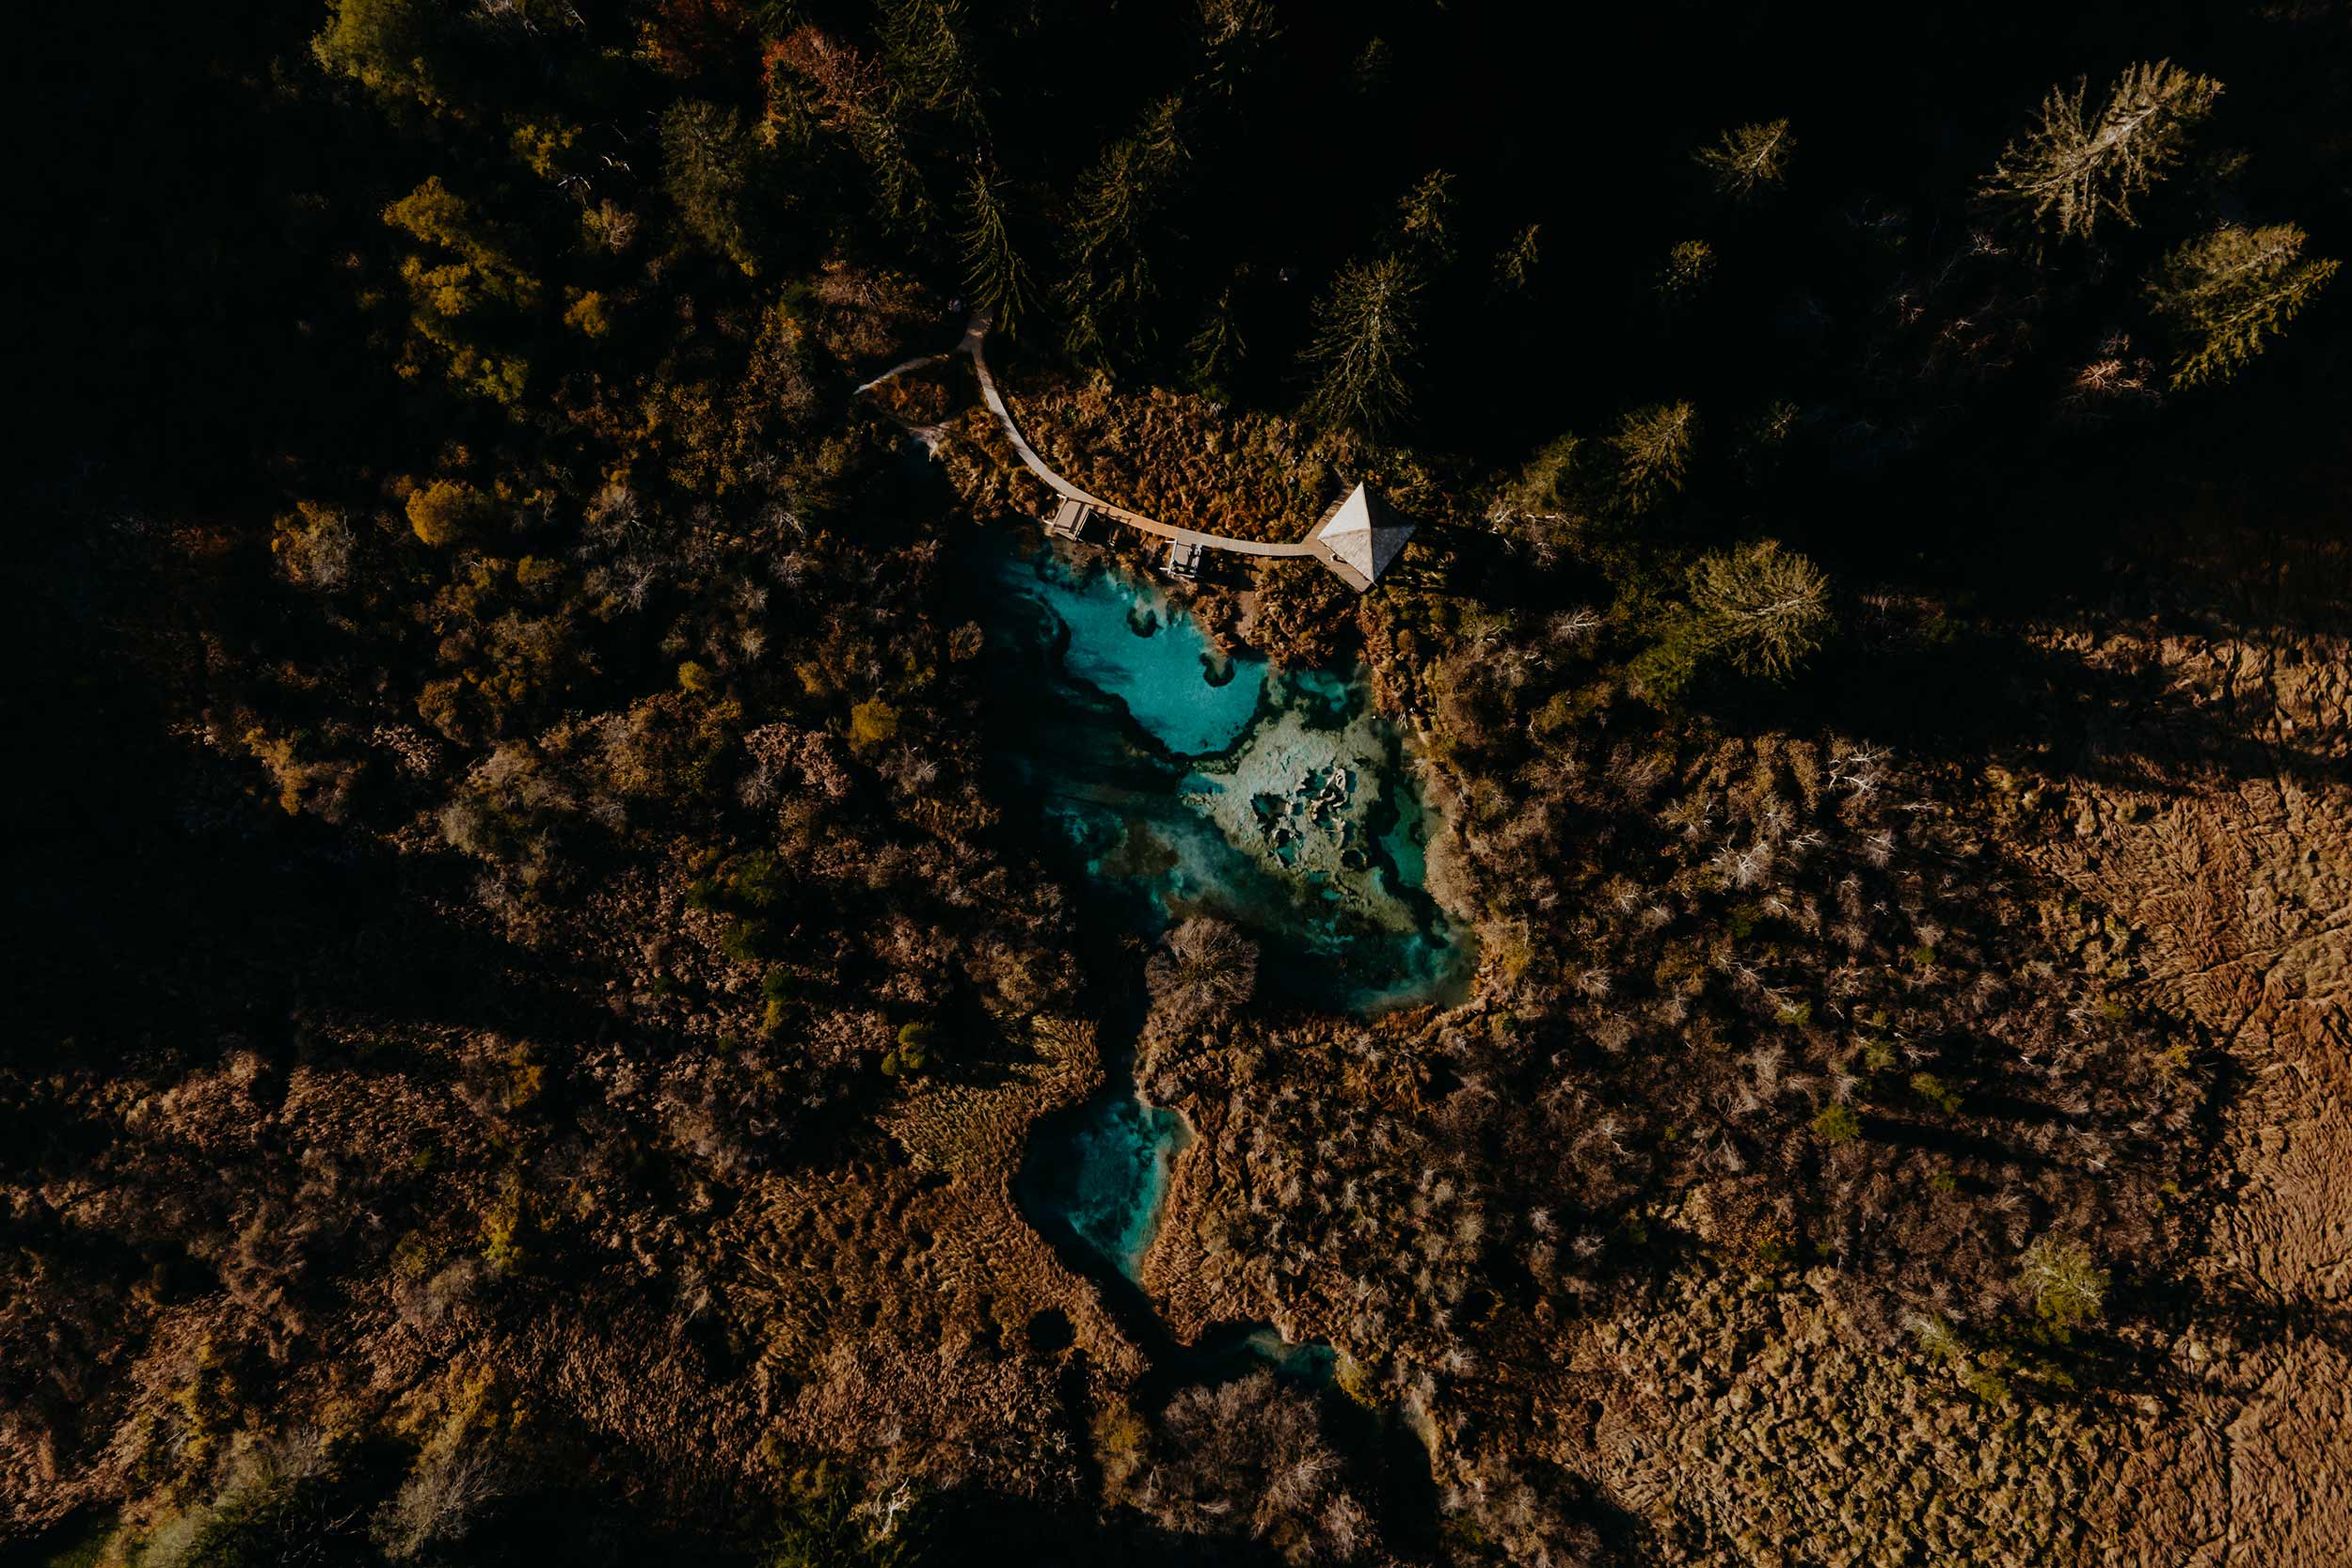
Named after its emerald-green colour (Zelenci meaning green in Slovenian), the eponymous lake is the absolute centrepiece of the reserve, and will not freeze during the colder winter months as the temperature stays pretty constant throughout the year at 6°C.
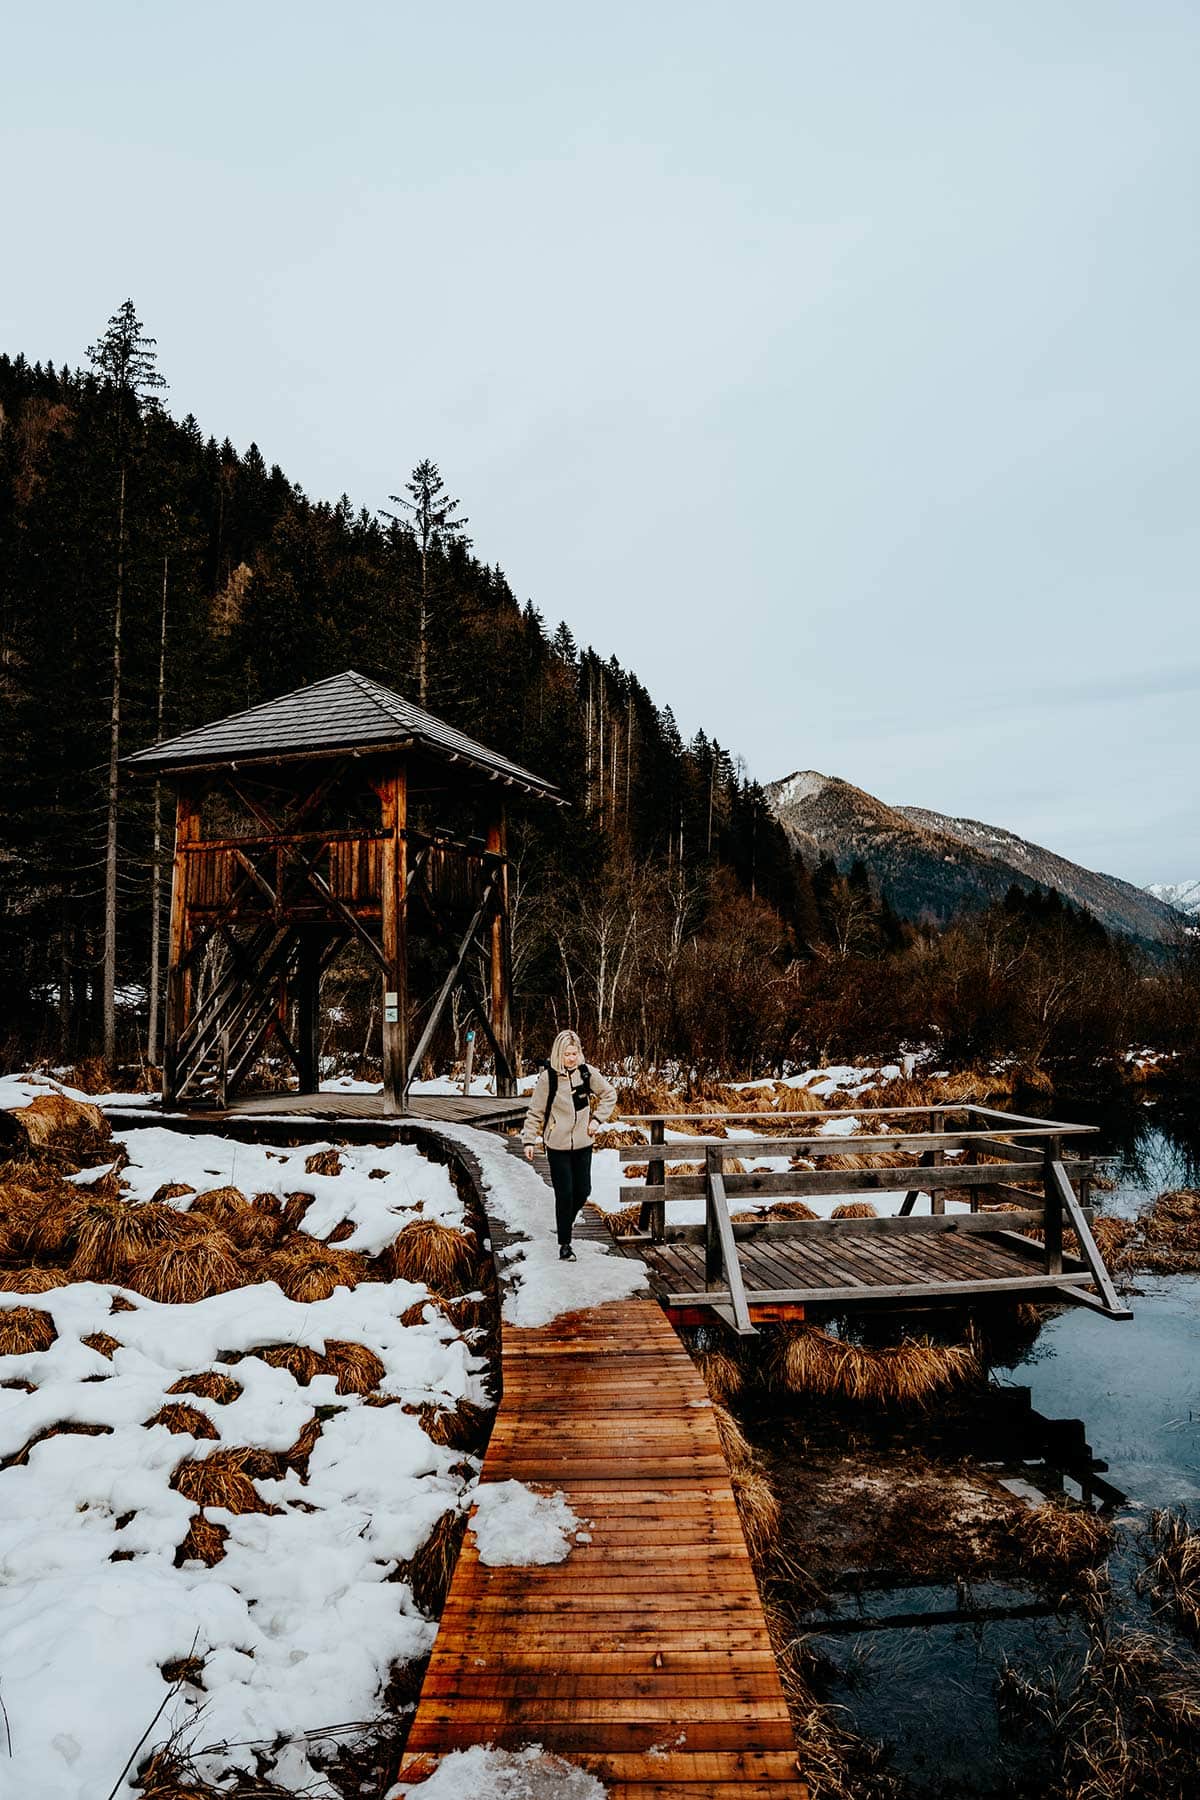
The reserve itself is relatively compact and is home to a short but scenic boardwalk, which eventually guides you to a scenic observation tower that is nestled on the edge of the lake.
As it’s located in the foothills of the Triglav National Park, the views that are obtained here are truly breathtaking and will leave visitors with an unforgettable outdoor experience.
How to get to Zelenci Nature Reserve
Zelenci is impressively easy to visit, especially if you set out on an adventurous road trip in Slovenia (coming soon).
If you’re travelling from Bled, Bovec, Mangart, Vrisc, or Lake Jasna by car, you have to make your way over to Kransjka Gora, before heading west along the #202 road in the direction of Italy.
Once you’ve passed Kranjska Gora, it takes only 5km until you reach the Zelenci Nature Reserve, where you’ll notice a small parking lot on the left side of the main road.
If you’re spending a few days in Kranjska Gora, it’s also completely possible to walk to Zelenci.
From Kranjska Gora, it takes about 1 – 1.5 hours to complete the 5km trail from Kransjka Gora to the reserve’s parking lot.
Since Zelenci is tucked away in the very northwest of Slovenia, public transportation options are limited, with no bus stop close to Zelenci Nature Reserve.
If you’re still keen to take the local bus, the closest bus stop is situated in Podkoren, about 15-minutes walk away from the reserve.
Zelenci Nature Reserve Path
When arriving at the reserve, it’s pretty straightforward to reach the Zelenci lake, as there’s only one walking path between the car park and the lake.
Guiding you through the dense forest of Zelenci, the path is scenic, well-maintained and only 500 metres long, and it should take only 15 minutes before you reach Zelenci Lake.
Once you’re done taking in the spectacular views, you simply follow the exact same path back to the car park.
Since the reserve is pretty well maintained, the path is accessible at any time of year.
The pristine Zelenci Lake
At the core of the Zelenci Nature Reserve is the utterly stunning Zelenci Lake, a pristine emerald lake that is also referred to as the Zelenci Springs.
Crystal clear, and as tranquil as can be, the lake is truly breathtaking, making it the perfect refuge for a wide variety of impressive water creatures, nesting birds, and even amphibians.
On top of that, the lake is home to an observation tower that provides even more impressive views of Lake Zelenci, not to mention the incredible surroundings; think towering pine trees, lush vegetation, and the snow-topped peaks of the Julian Alps that mirror in the calm waters of the lake.
A moment here is a moment well spent, and if you ask me, Zelenci is one of the absolute highlights on any adventurous road trip through Slovenia.
Zelenci Nature Reserve | The essentials
The best time of year to visit Zelenci Nature Reserve
As with most places in Slovenia, Zelenci Nature Reserve is truly stunning at any time of year.
I’ve visited Zelenci Nature Reserve twice now, and have seen it covered in snow during winter, and completely taken over by the golden hues of autumn in fall – both circumstances were exceptionally beautiful and great for photography.
Then there is summer (June to August), which is generally the best time to visit Slovenia given its excellent weather and lengthy days.
However, it is worth noting that Zelenci gets extremely busy throughout the European summer months, so, therefore, I’d personally prefer a visit during the shoulder seasons.
The best time of day to visit Zelenci Nature Reserve
Since Zelenci’s is rapidly increasing in popularity, I would strongly advise arriving at the reserve early in the morning, when it’s a lot less crowded.
Furthermore, the light conditions will also be more in your favour during an early visit, as the gentle morning light transforms the lake into a huge mirror reflecting the stunningly beautiful surroundings of the lake.
To me, the time of day is significantly more important than the time of year when visiting Zelenci, given the best views are acquired if you look towards the west, meaning you get blinded by the sun in the afternoon.
Another thing worth mentioning is that Zelenci becomes pretty busy during the weekends.
I personally visited Zelenci Nature Reserve in the early morning and had excellent light conditions and only a few other people around, which was great for photography.
Where to stay in Kransjka Gora
If you’re travelling around Slovenia slowly, I’d suggest spending some time in Kransjka Gora, so you can easily explore Zelenci and other surrounding highlights as a day trip from your base in this quaint little town.
Milka Boutique Hotel | By far the most luxurious option in Kransjka Gora, Milka Boutique Hotel offers an exceptional boutique experience in the heart of the Julian Alps. All rooms are decorated to perfection and offer breathtaking vistas over Lake Jasna.
Triangel Boutique Hotel | Located in a pristine alpine valley just outside Kranjska Gora, the Triangel Boutique Hotel boasts spacious well-designed rooms, a fitness centre, free parking and a pretty good in-house restaurant. Though the price is a little on the higher end at €250 a night, this stunning boutique will easily live up to its price tag. Not completely convinced? Let the superb reviews do the talking here.
Hisa Kosobrin | Easily the best apartment I stumbled on during my research, Hisa Kosobrin is a collection of 6 incredibly stunning apartments only a few minutes away from the centre of Kranjska Gora, giving your overall experience a more intimate vibe. Some apartments come with a sauna, which is a great addition too.
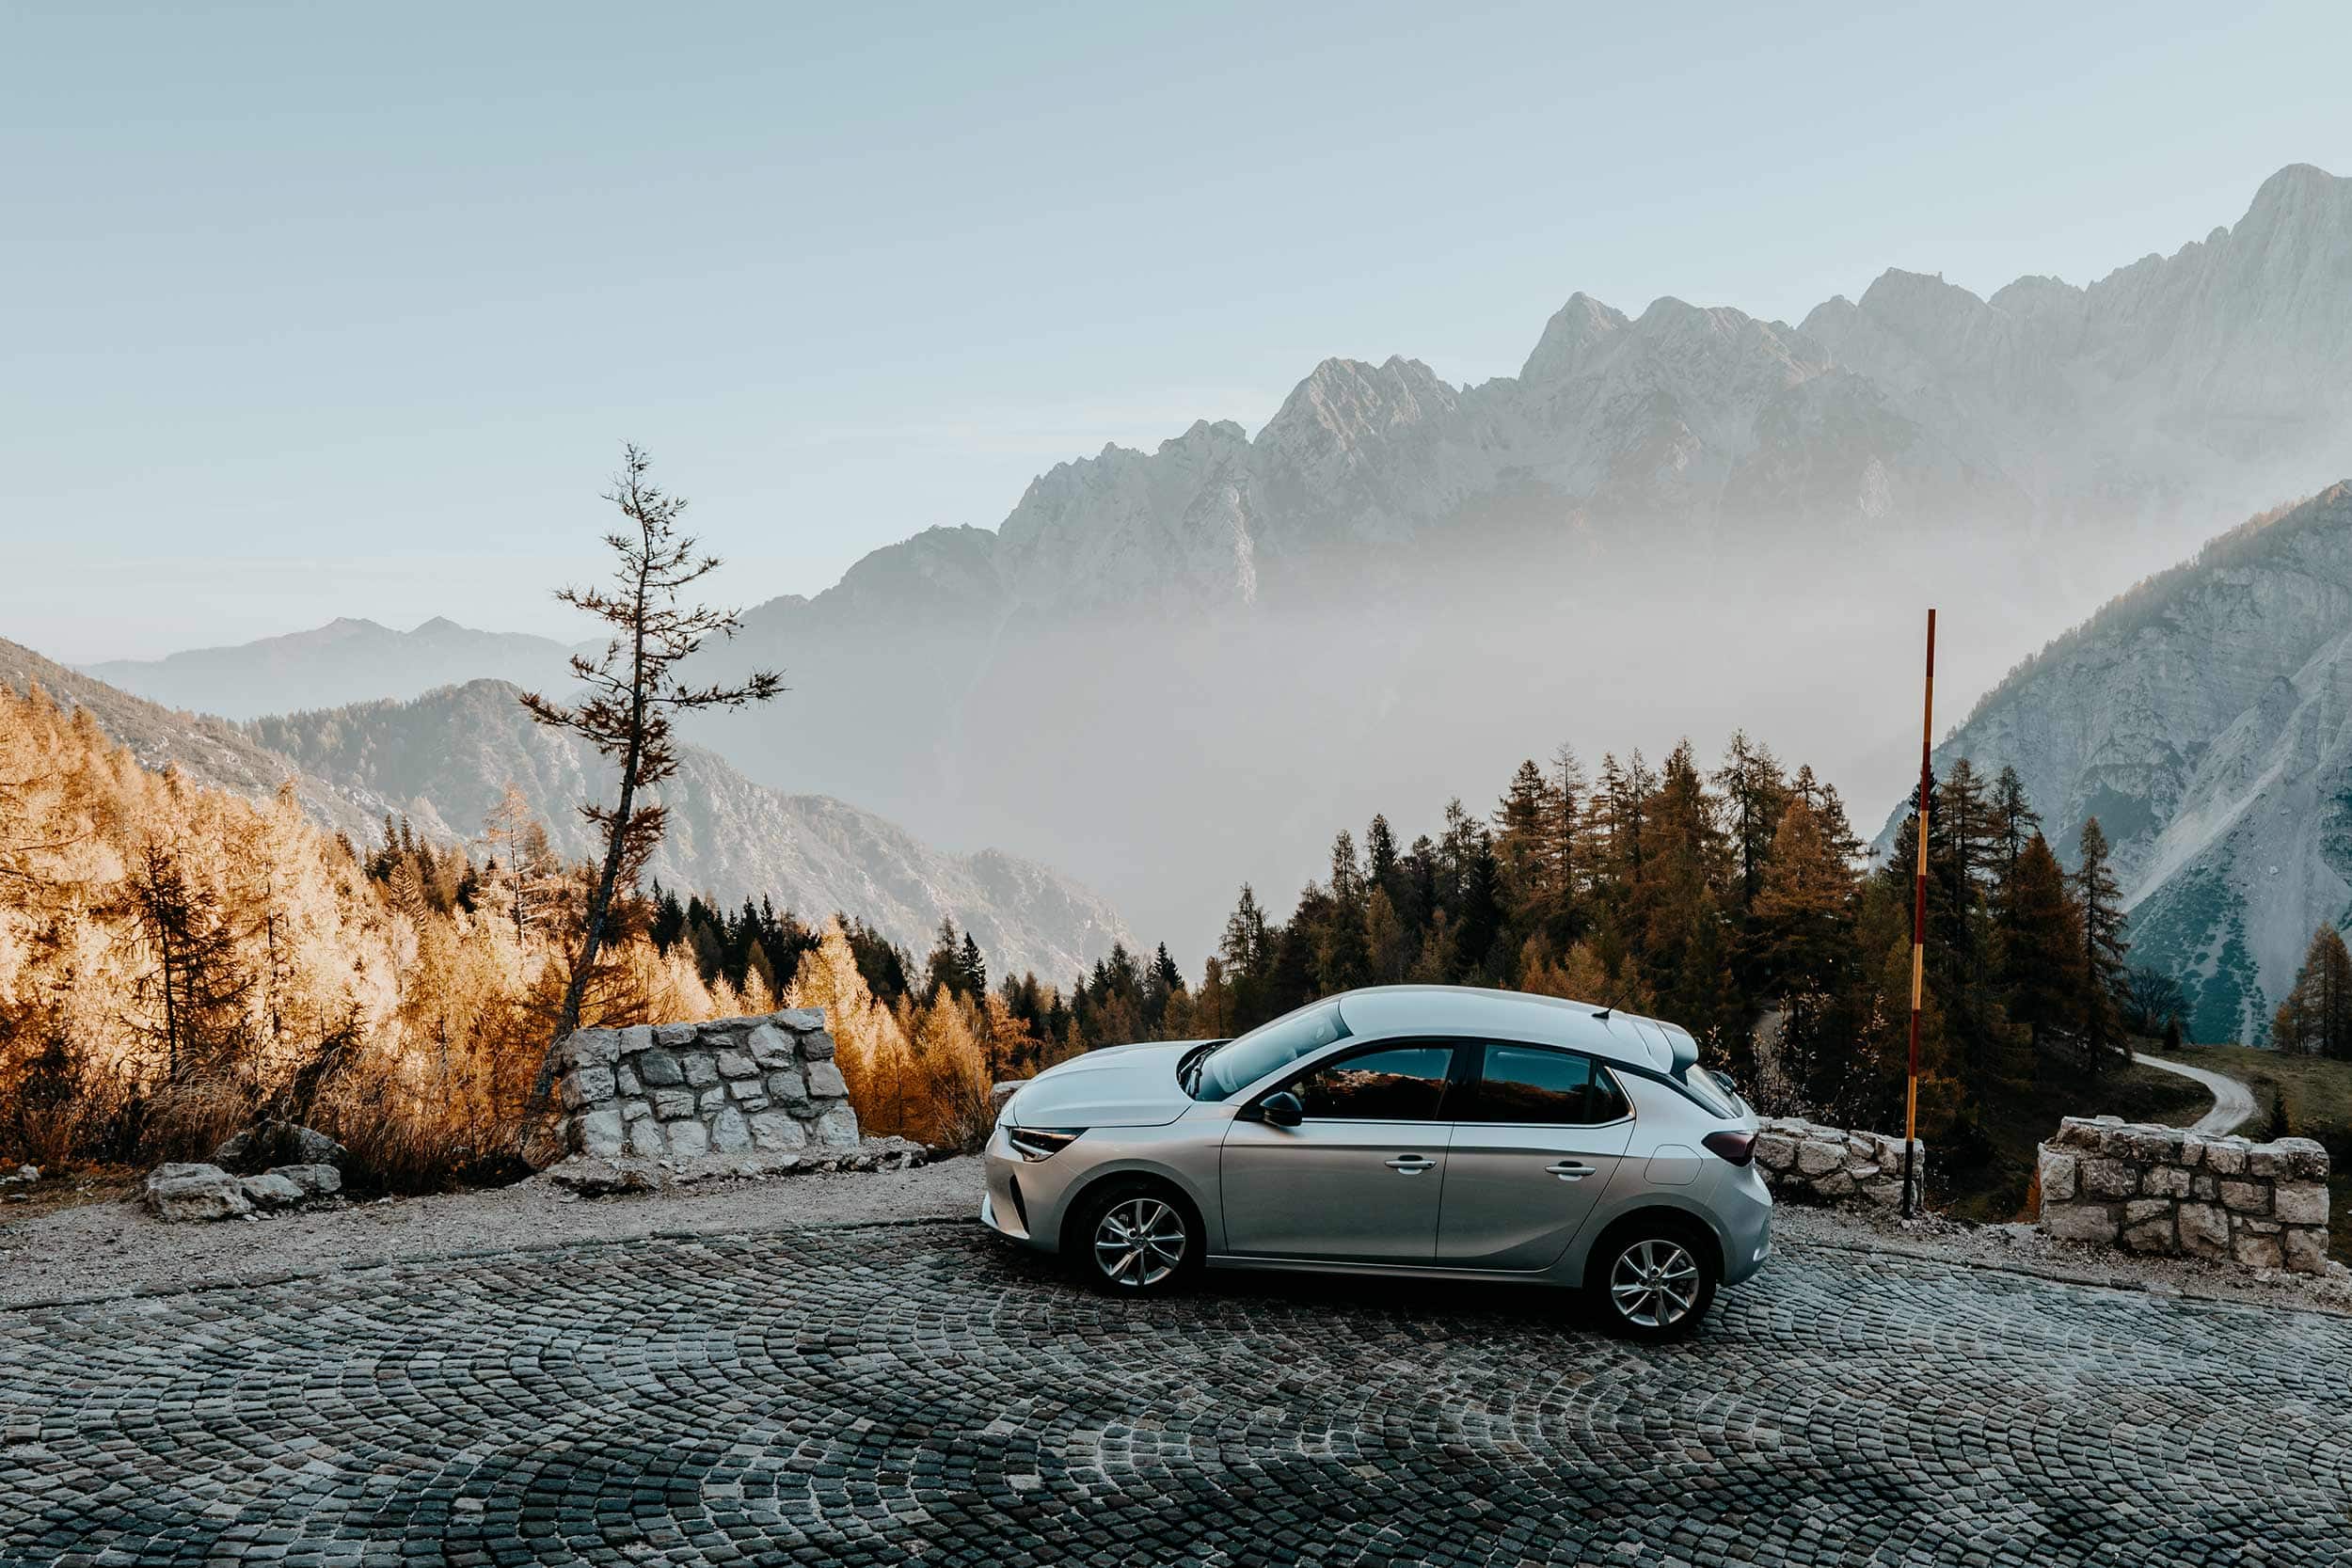
Renting a car in Slovenia
If you’re keen to do an epic road trip in Slovenia, I’d highly recommend sorting out a rental car in advance, so you’ll have all the freedom to visit wherever, whenever suits you.
I always use Rentalcars.com for my car rentals, as they have all the major rental car companies on offer, excellent service, and additional insurance – plus, it’s super easy to find yourself a deal here.
Alternatively, Discover Cars is a great reliable option too.
I’ve also written a comprehensive guide on driving in Slovenia (coming soon), so make sure you give that a read too – you can find it here.

What’s next?
The Zelenci Nature Reserve is situated in one of the most popular areas of Slovenia, so there’s a lot more to be sought out and enjoyed here.
Besides Zelenci, this area is also home to other fascinating highlights, including Lake Jasna, the Vrsic Pass, Mangart Saddle, and the Pericnik Falls to name but a few.
If you’re keen to see how to fit these incredible places into your Slovenia itinerary, I highly recommend checking out my 10-day Slovenia itinerary (coming soon), which is packed with useful advice, first-hand tips, and all the Slovenia travel essentials.
Slovenia travel essentials
Though I wouldn’t necessarily label the Zelenci Nature Reserve as a challenging activity, I do think it’s a smart idea to bring some essentials, especially if you have intentions to combine it with other more adventurous natural highlights in the region.
To help you have a comfortable time here, I’d suggest bringing the following items:
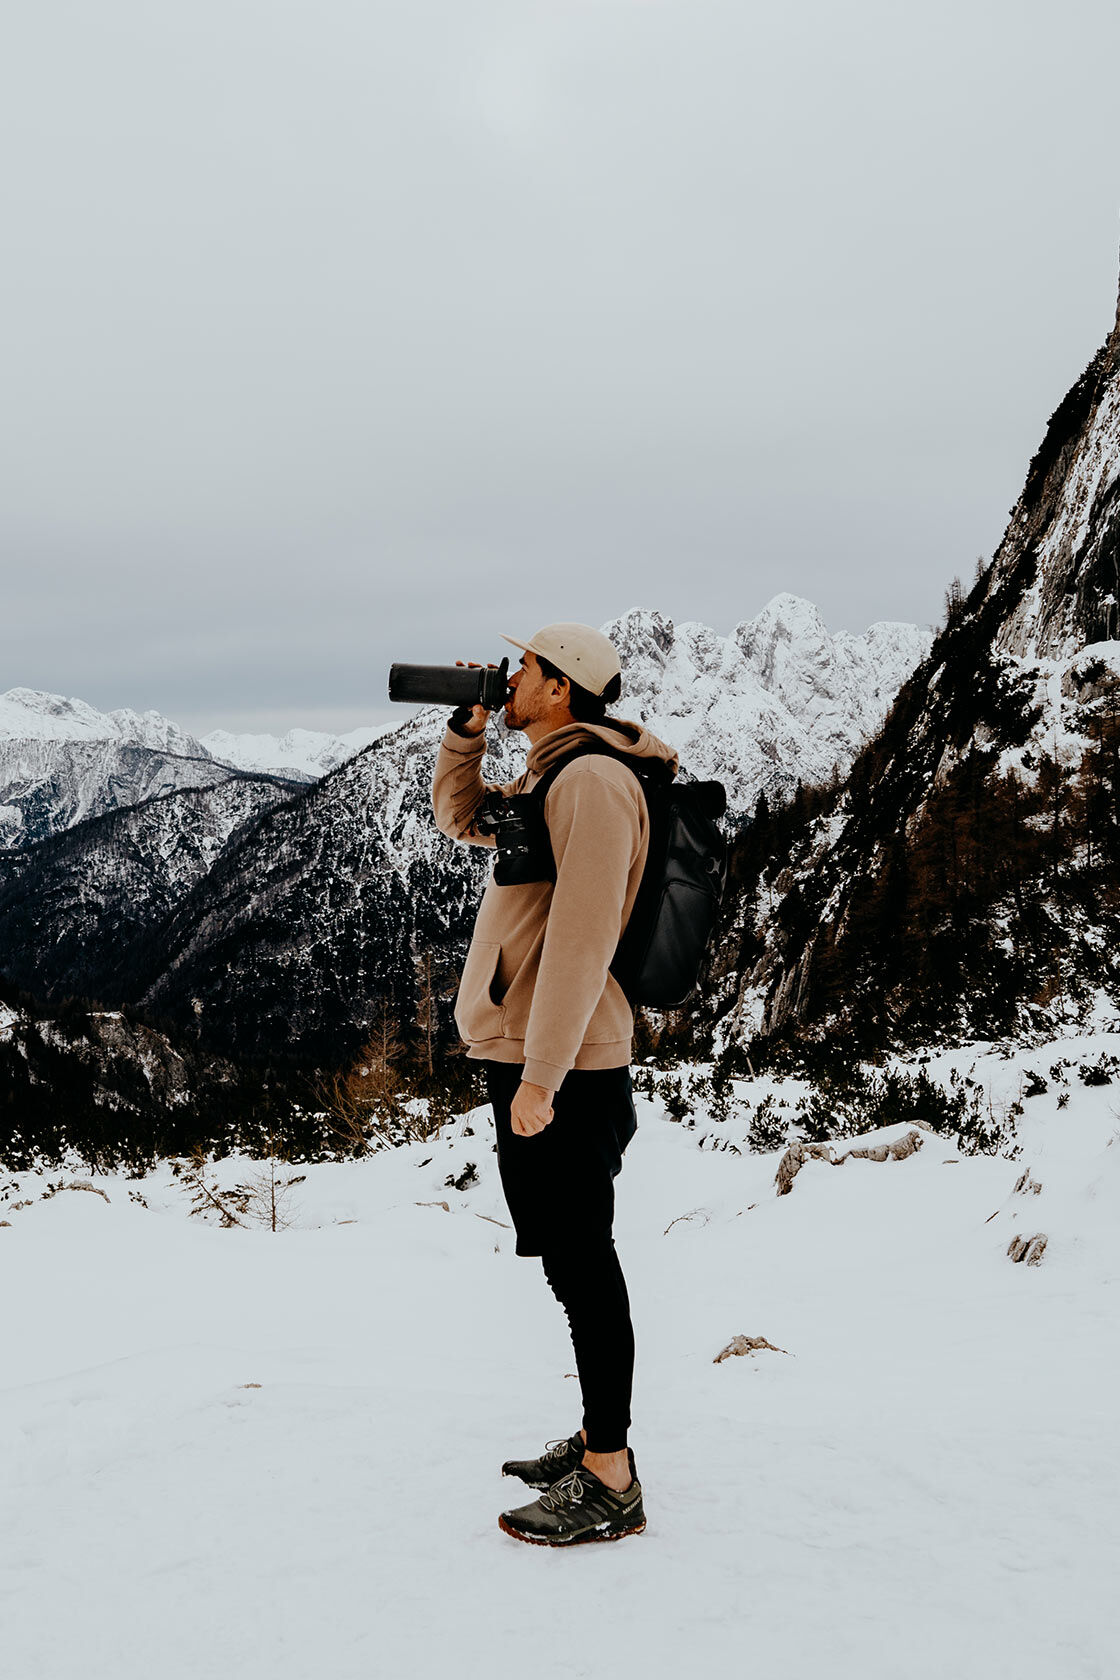
A reusable water bottle | One travel essential that I carry with me at all times is the Grayl Geopress. This reusable water purification bottle allows me to fill up water from almost every water source, making it one of my best investments to date.
A hoodie | Depending on the time of year of course, I advise bringing an extra layer in the form of a hoodie to keep you warm if needed. Since Zelenci is surrounded by forest, this extra layer might come in handy at any given time.
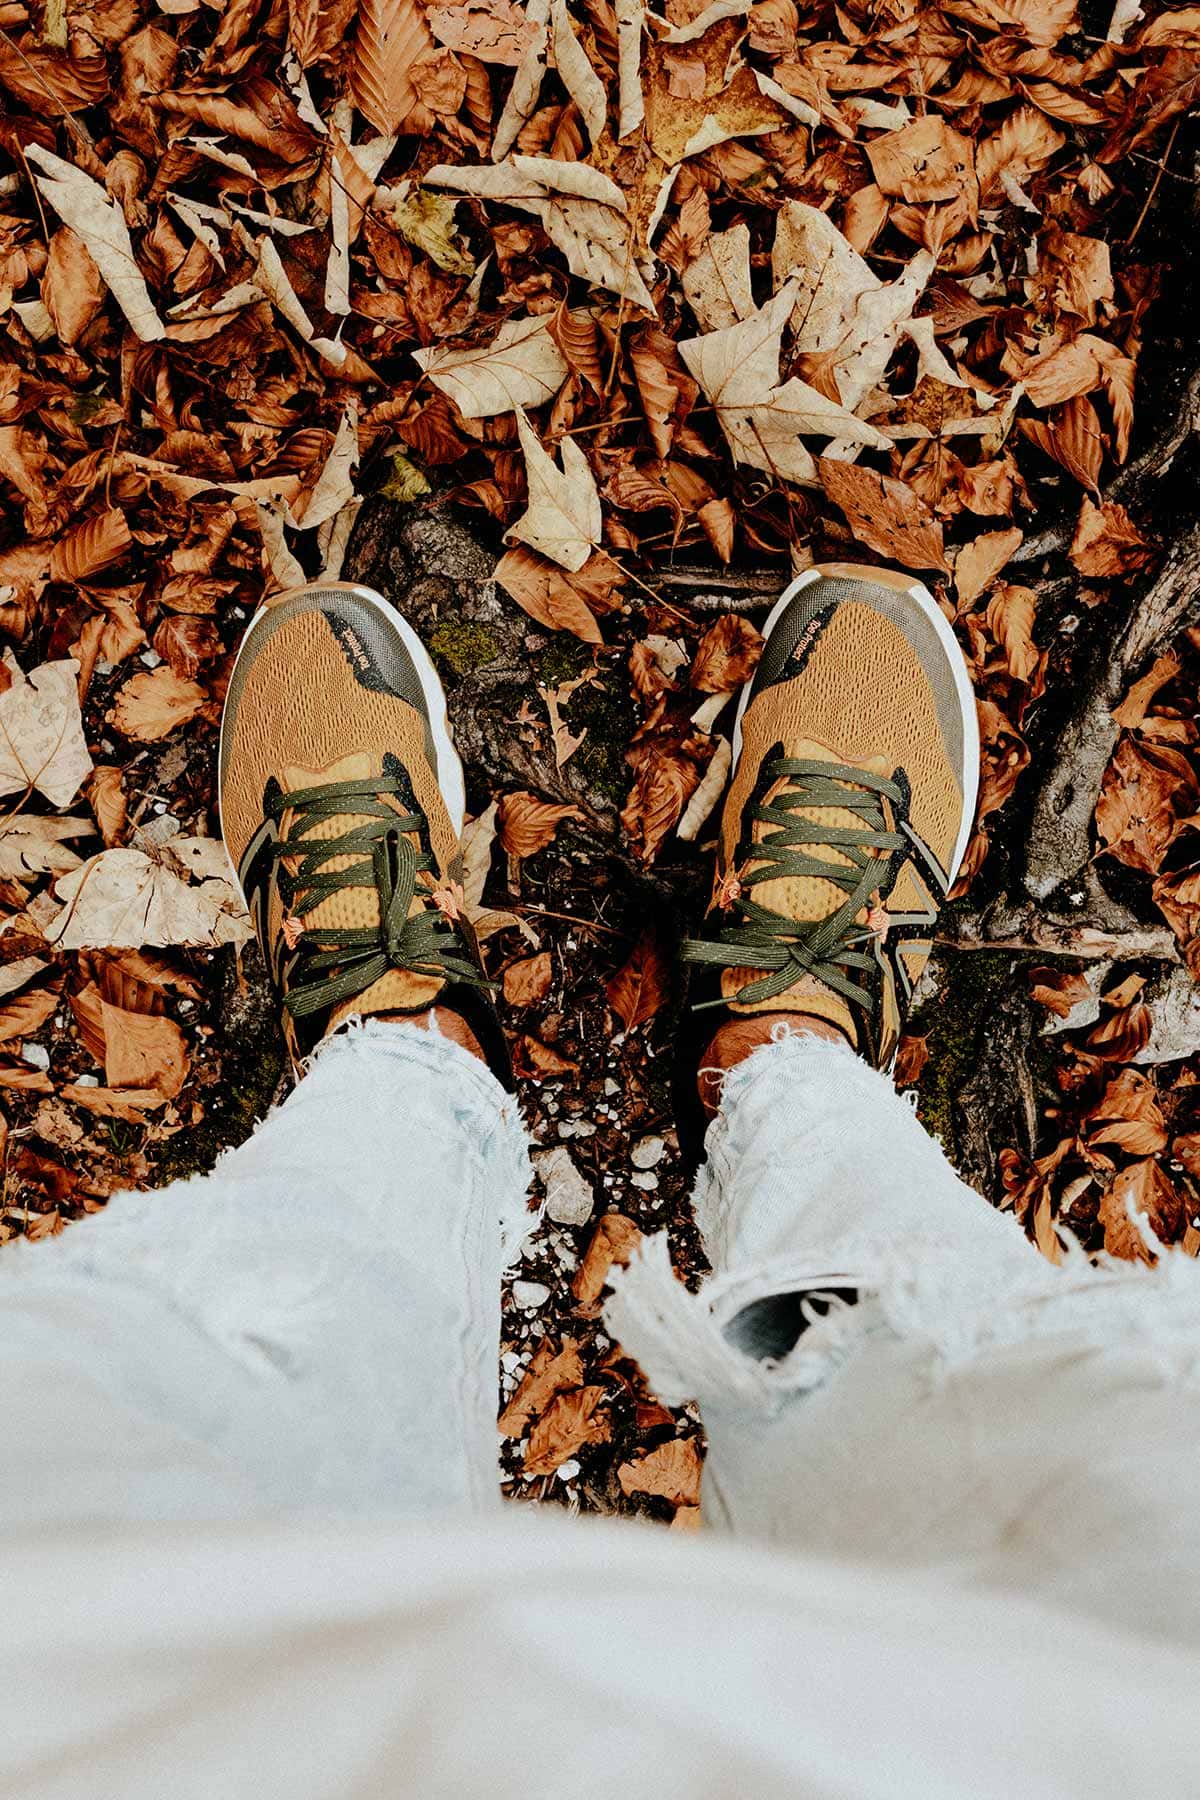
A sturdy pair of sneakers | Though the walk in the Zelenci Nature Reserve is relatively easy, it’s not a bad thing to wear a pair of sturdy trail runners. I often use the New Balance Hierro V7, and I’m pretty satisfied with the grip and comfort they provide me with when I’m out in nature.
A camera | Like most places in Slovenia, Zelenci and its natural features are incredible for hobbyists and professional photographers alike. For that reason, I advise bringing your camera, so you can capture heaps of photos while there. Curious about my photography gear, make sure you see what’s in my camera bag.
Leave no footprints | Slovenia is a slice of untouched natural paradise, and it’s our responsibility to keep it that way. So make sure you expect the location at all times, and bring your trash when wrapping up your time in the Zelenci Nature Reserve.
Stay safe in Slovenia | Travel insurance
Since Slovenia has plenty of adventurous activities on offer, I advise everyone to sort out good travel insurance before setting out on their own adventure.
While I believe that it’s unlikely to experience any troubles when following the advice in this guide, something unfortunate can happen at any time, whether it’s an injury, a stolen camera, or an accident on the road.
For travel insurance, I use Heymondo, as they offer full covid-19 coverage, as well as a handy app with 24-hour medical assistance. Make sure you check it out – readers of WTSW receive 5% off any insurance policy too.
Cheers!
I’ve been on this travel blogging journey since 2019.
If you appreciate what I do here, these are some ways you can support me.

14 Incredible things to do in Valencia, Spain's La capital del Turia
Since I’m currently living in Valencia, this article will be updated regularly with my latest findings.
Valencia, Spain’s third largest city is flooded with history and offers a plethora of captivating things to see and do, yet still manages to feel as if you’re visiting a small pueblo.
It’s a city that will quickly grow on you, as every roam around the historic centre will reveal something new or unexplored. Think authentic tapas eateries, captivating museums, and plenty of historical heritage to appeal to even the most seasoned of travellers.
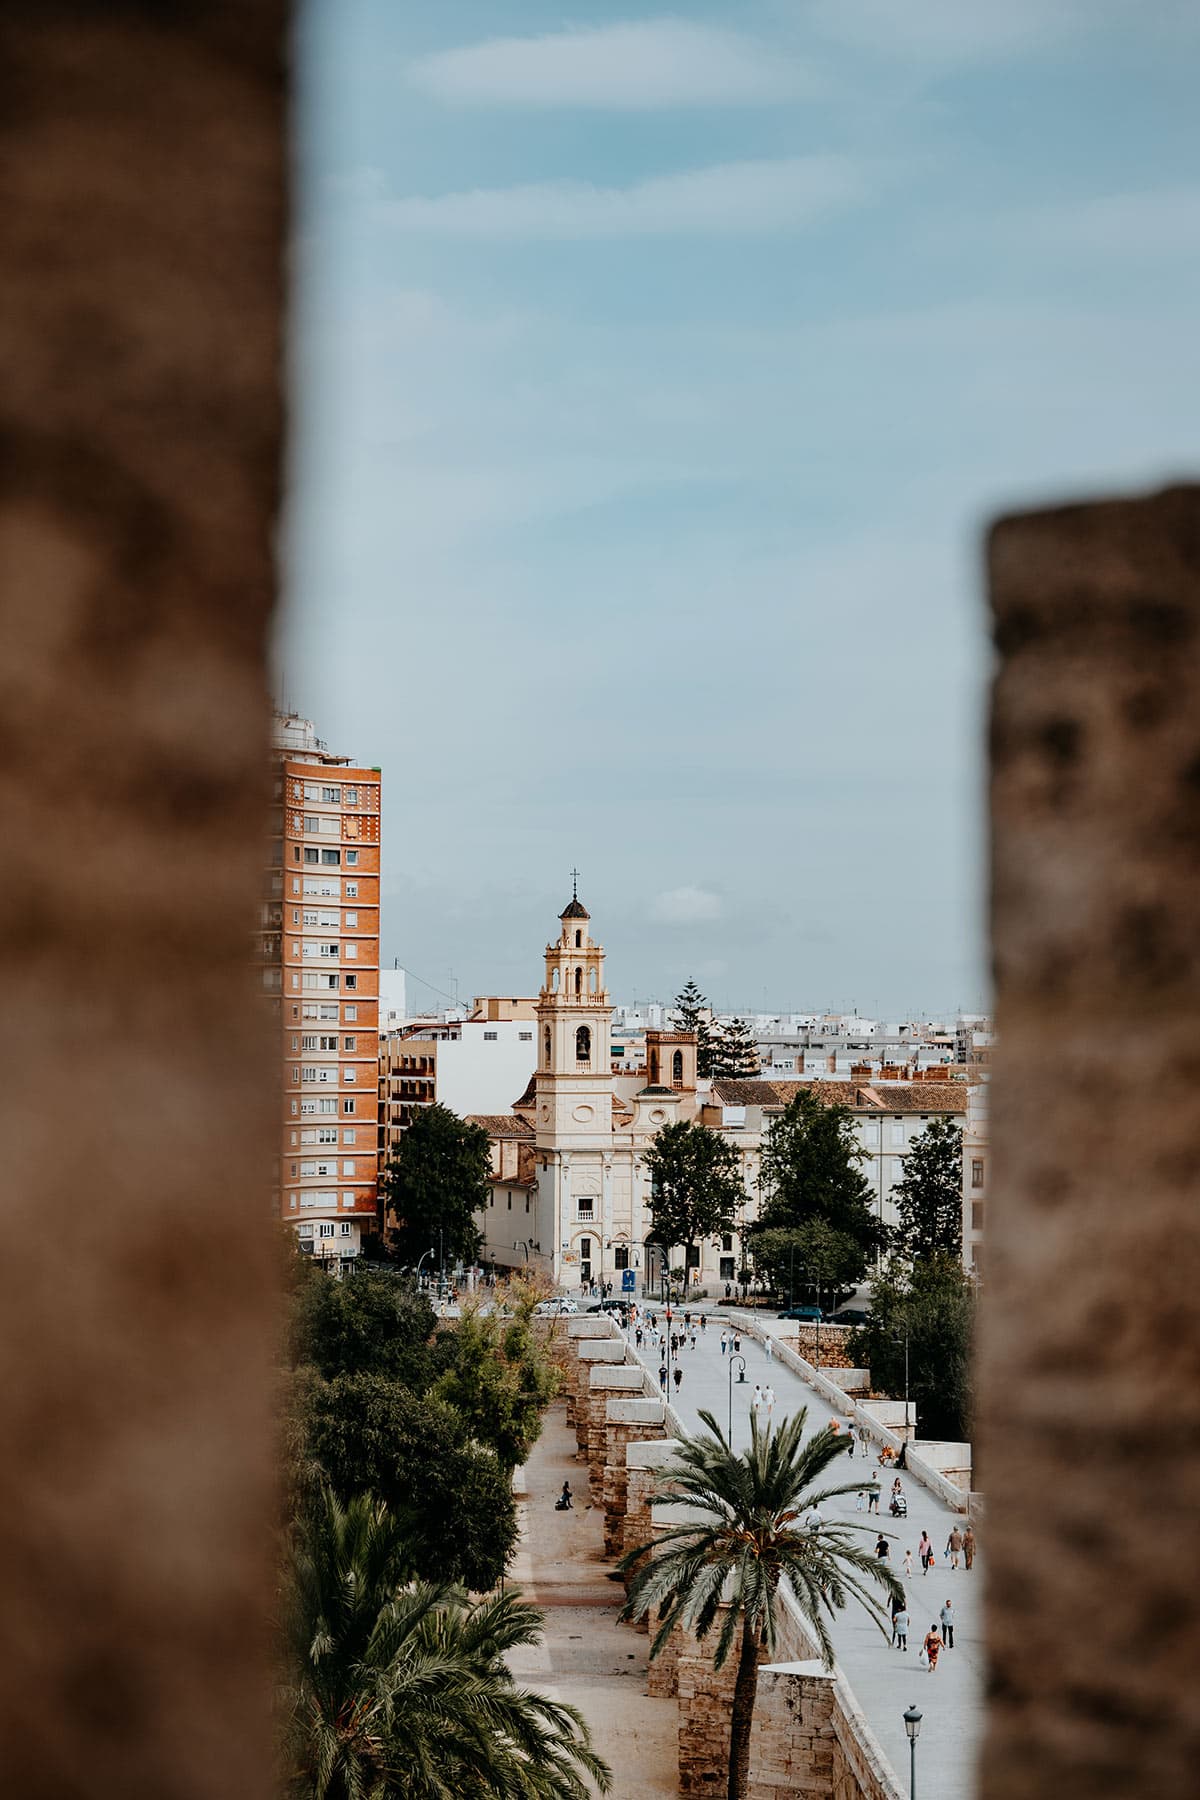
From the futuristic Ciudad de las Artes y las Ciencias to the age-old Torres de Serranos, the exceptional stretches of beach to Mercado Central; one of Europe’s largest covered markets, there are a myriad of things that will keep you amused when visiting Valencia.
But despite Valencia’s exquisite flair and captivating history, this hasn’t always been the case.
You see, Valencia has long been overlooked in favour of Spain’s big two; Madrid and Barcelona.
However, times change and ‘La Capital del Turia’ is now thriving as ever, with hipster-ish cafes popping up at just about every corner, trendy contemporary restaurants setting the tone for mouthwatering culinary experiences, and long-standing traditions that survived the test of time.
All of this ensured that Valencia became one of the most popular city trip destinations in Europe, with over 2.2 million visitors annually. It even earned the prestigious status of ‘ best city to live in’ by the world’s leading expat community; InterNations, and an equally impressive mention by renowned media outlet Forbes.
After now living in Valencia for over 1 year, I feel confident to say that I have my fair share of expertise on what this vibrant and charming city has to offer to travellers.
In this guide, I’ll cover the absolute best things to do in Valencia, a few personal favourites in terms of where to eat and drink, plus my picks on where to stay.
If you choose to use any of the links on this page, I may receive a small commission at no extra cost to you. By using these links, you’ll have a direct impact on WTSW and my ability to continue to create free insightful travel content for you. If you find any of my tips useful, you can support me by buying a virtual coffee here.
Where is Valencia
Valencia is located on the southeast coast of Spain and is considered the third-largest city in Spain, right after Madrid and Barcelona.
Known for its stunning beaches, vibrant culture, and mouthwatering cuisine, the capital of the eponymous province of Valencia has around 800,000 inhabitants and is unquestionably one of Spain’s most popular coastal cities, if not Europe.
Where to stay in Valencia
If you’re looking to visit Valencia during the popular European summer months, I simply can’t stress it enough to sort out your accommodation rather soon than later.
However, with so many incredible options to choose from, it can be quite daunting at times.
Luckily for you, I’ve already done proper research and curated the best options in my Where to stay in Valencia (coming soon) guide.
Based on my own experiences, choosing the right base from which to explore Valencia is quite an essential part of your research, so my curated guide will be of good use to help you find the right spot for you.
If you’re solely here for some quick inspiration, these are some of my absolute favourites out of the bunch:
Caro Hotel | Nestled in a picturesque laneway in the heart of Valencia, Caro Hotel is set within a 19th-century palace and boasts a modern design with exciting historical elements. It’s basically as if you’re staying in an art museum, with 26 beautifully designed rooms that all have their own unique features.
YOURS boutique stay | Set within Valencia’s trendy Russafa neighbourhood, this designer apartment is perfected down to the last detail, with an exceptionally minimal and spacious feel to it. The apartment-style YOURS hotel is, in my opinion, the perfect base from which to explore Valencia. If there’s one place that comes close to my ideal apartment, I’m pretty sure it’s this one, so make sure you check it out here.
Marqués House | If you’re looking for a stunning, contemporary hotel with spacious and tastefully decorated rooms in the heart of the historic centre of Valencia, look no further. Located just a stone’s throw away from all the best things to do in Valencia, Marqués House is known for its high standards and excellent hospitality, which is clearly noticeable throughout the entire property.

Grab a Valencia Tourist Card – Safe money and time
If you’re anything like me and prefer to get the absolute most out of your time when visiting a new place, I’d recommend getting your hands on a Valencia Tourist Card, as it will give you access to lots of things to do in the city.
Since it combines free public transport (which comes in handy as an airport transfer), entrance to Valencia’s public museums, and up to 50% discount on popular tourist attractions, the Valencia Tourist Card will simply be your key to the city.
The card is available in 24, 48 and 72-hour versions, and is best bought online and in advance so you can instantly use it for the metro to get from the airport to the city centre.
If you’re already in the city, yet still thinking of buying one, they are also available at the official Valencia Tourist Office.
14 incredible things to do in Valencia, Spain
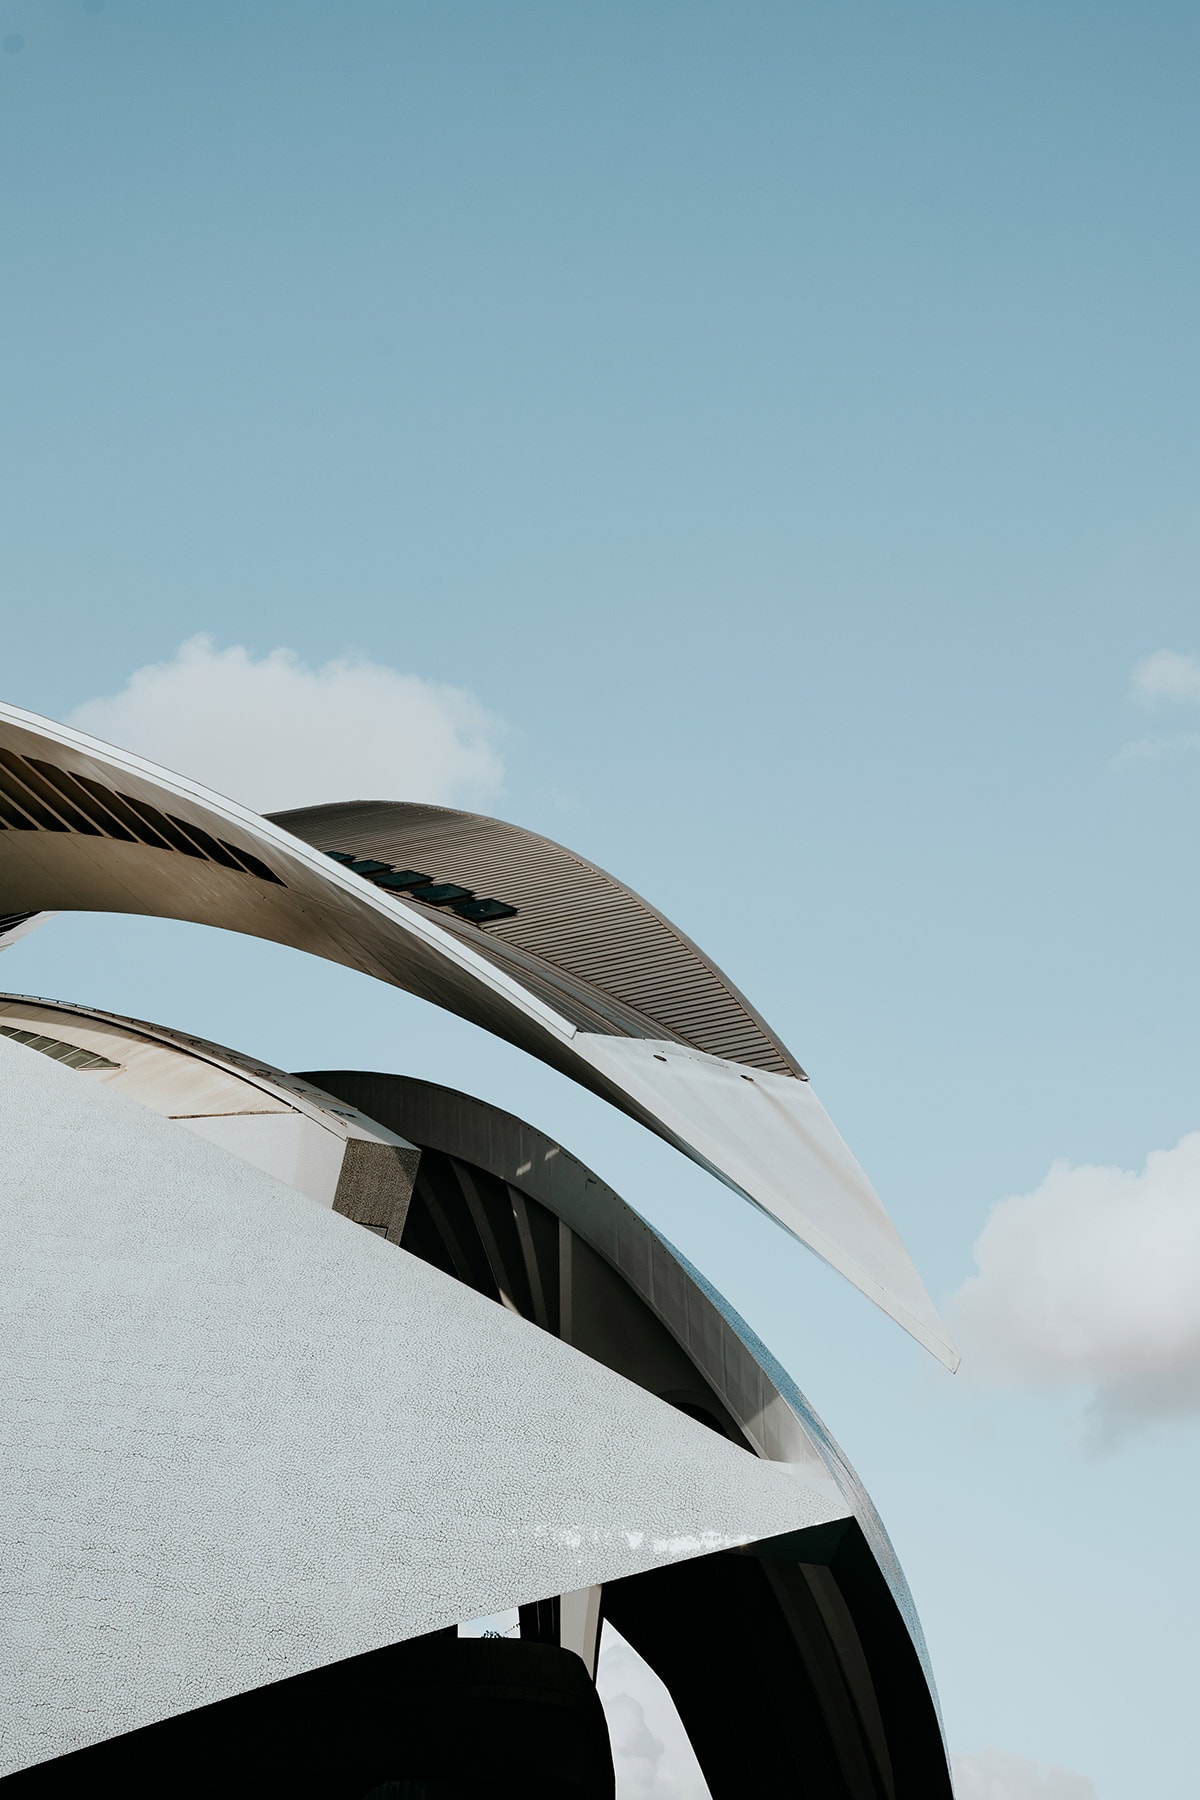
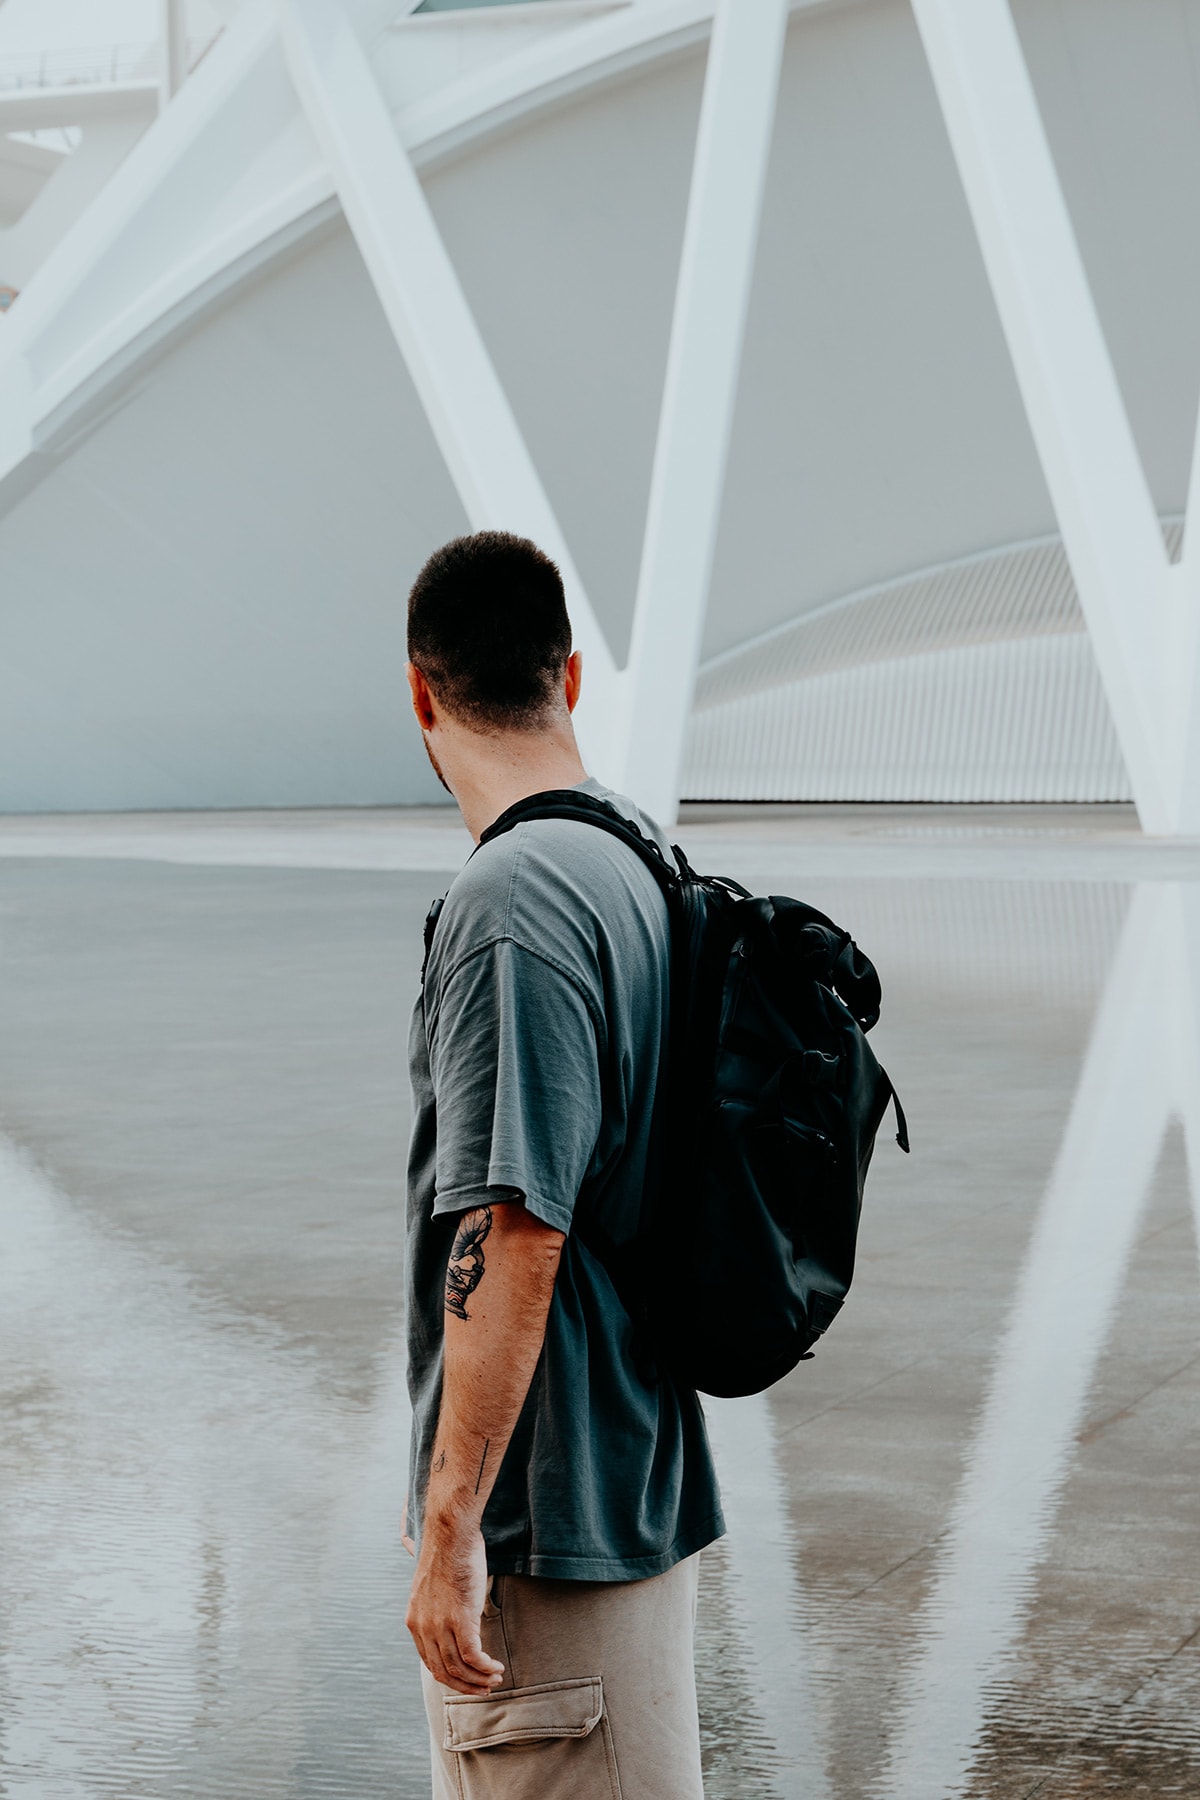
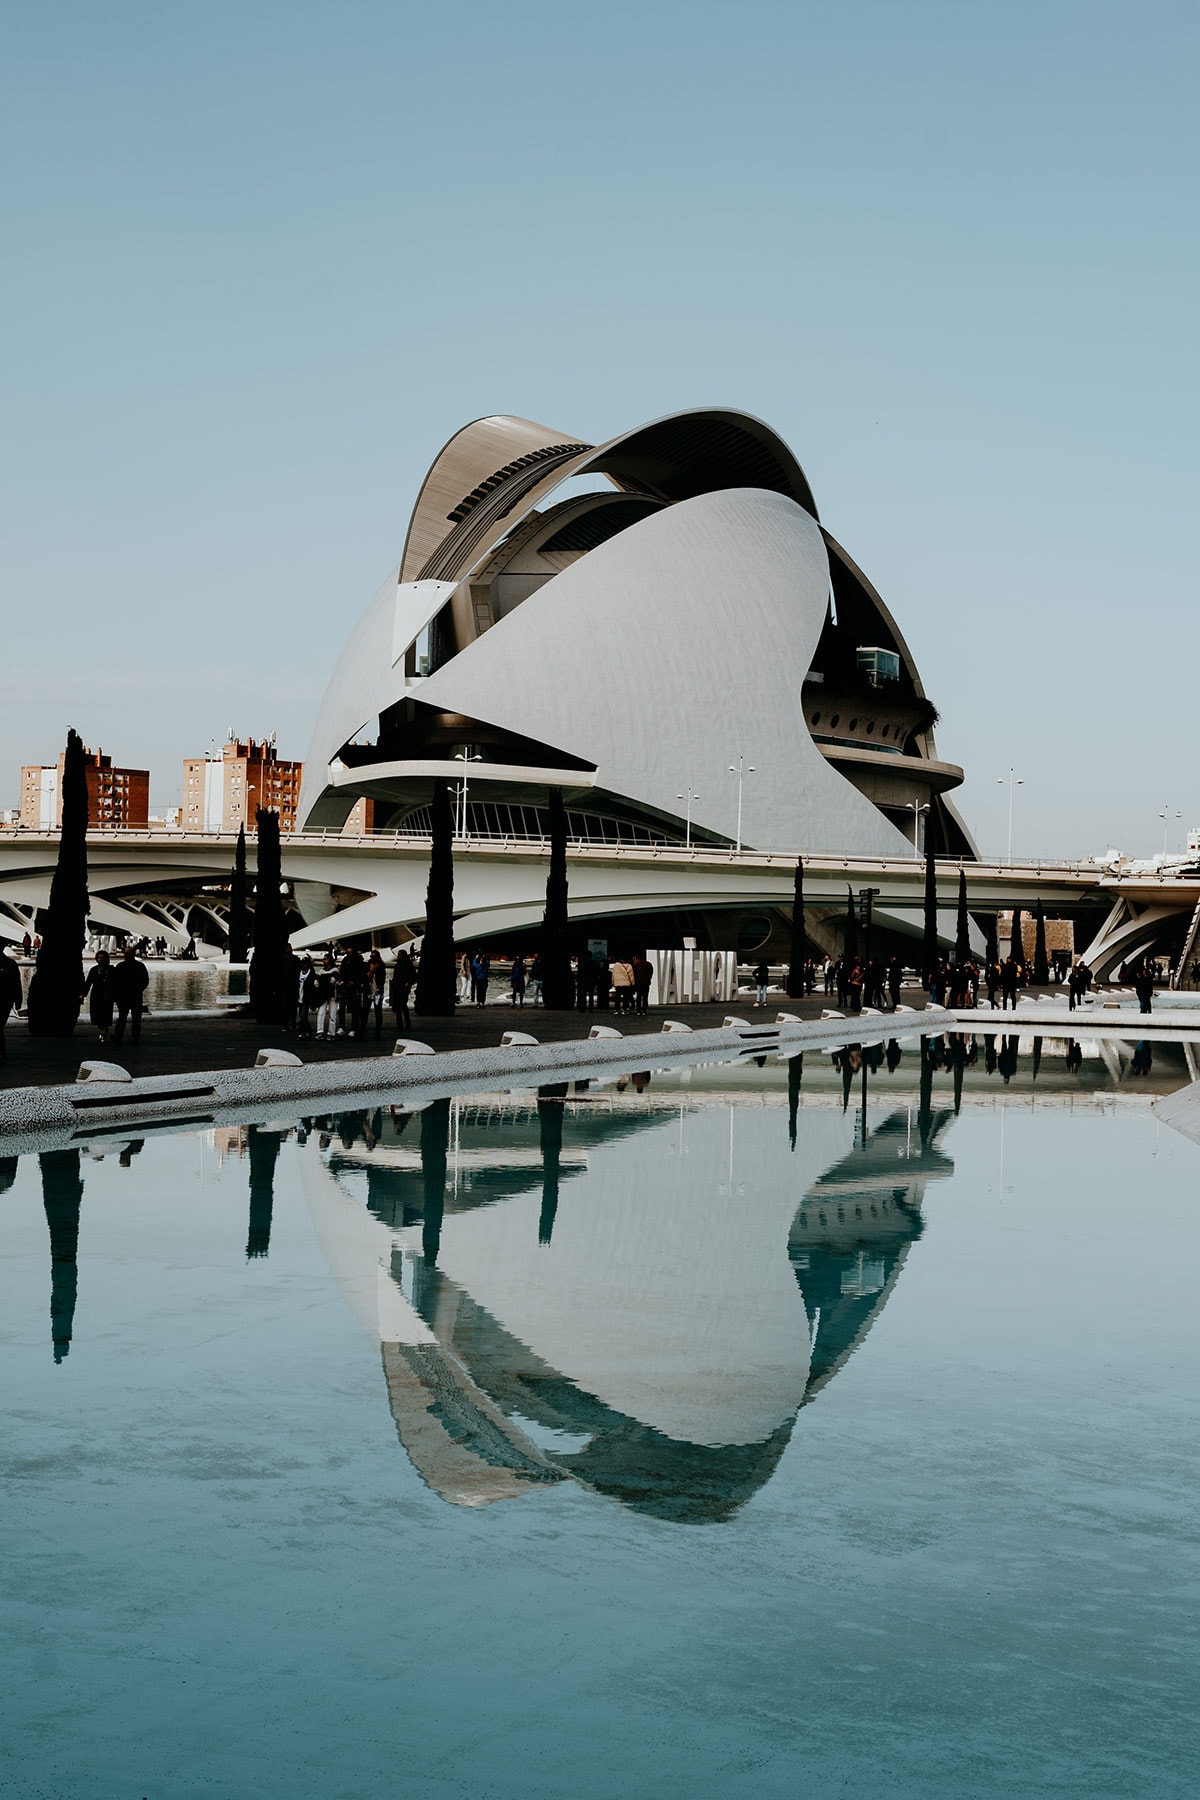
1. Marvel at the Ciudad de las Artes y las Ciencias
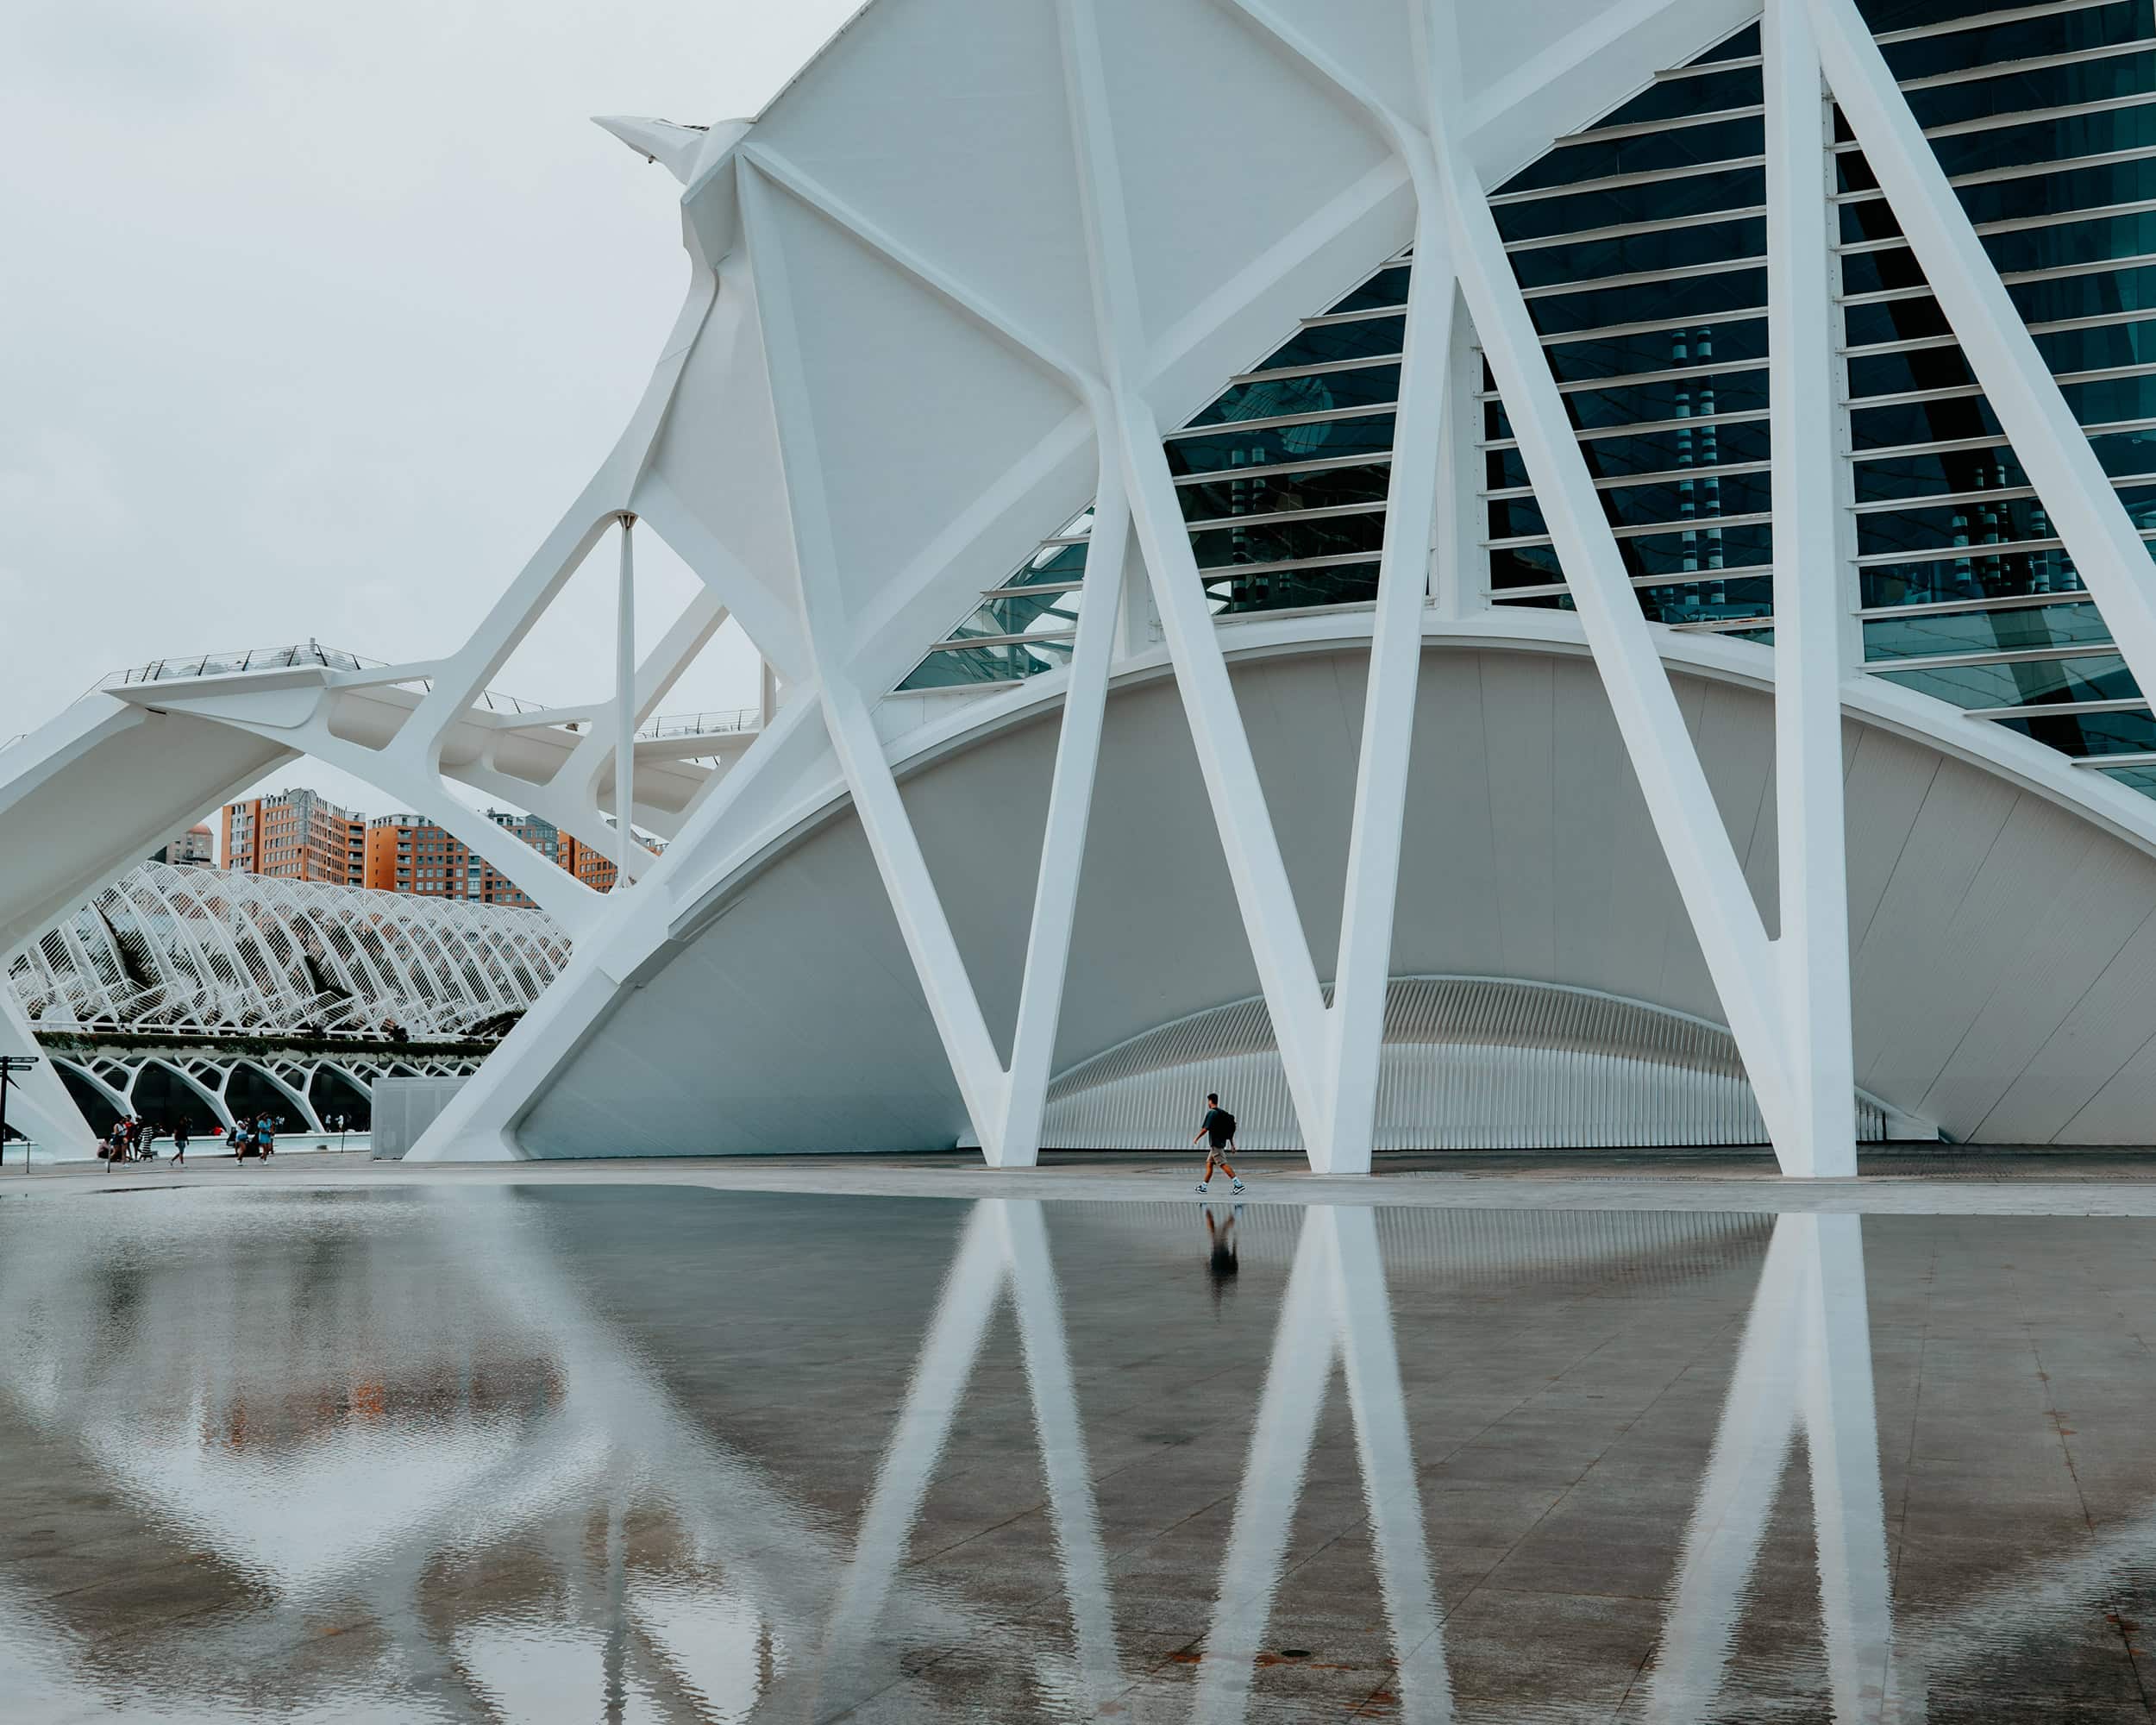
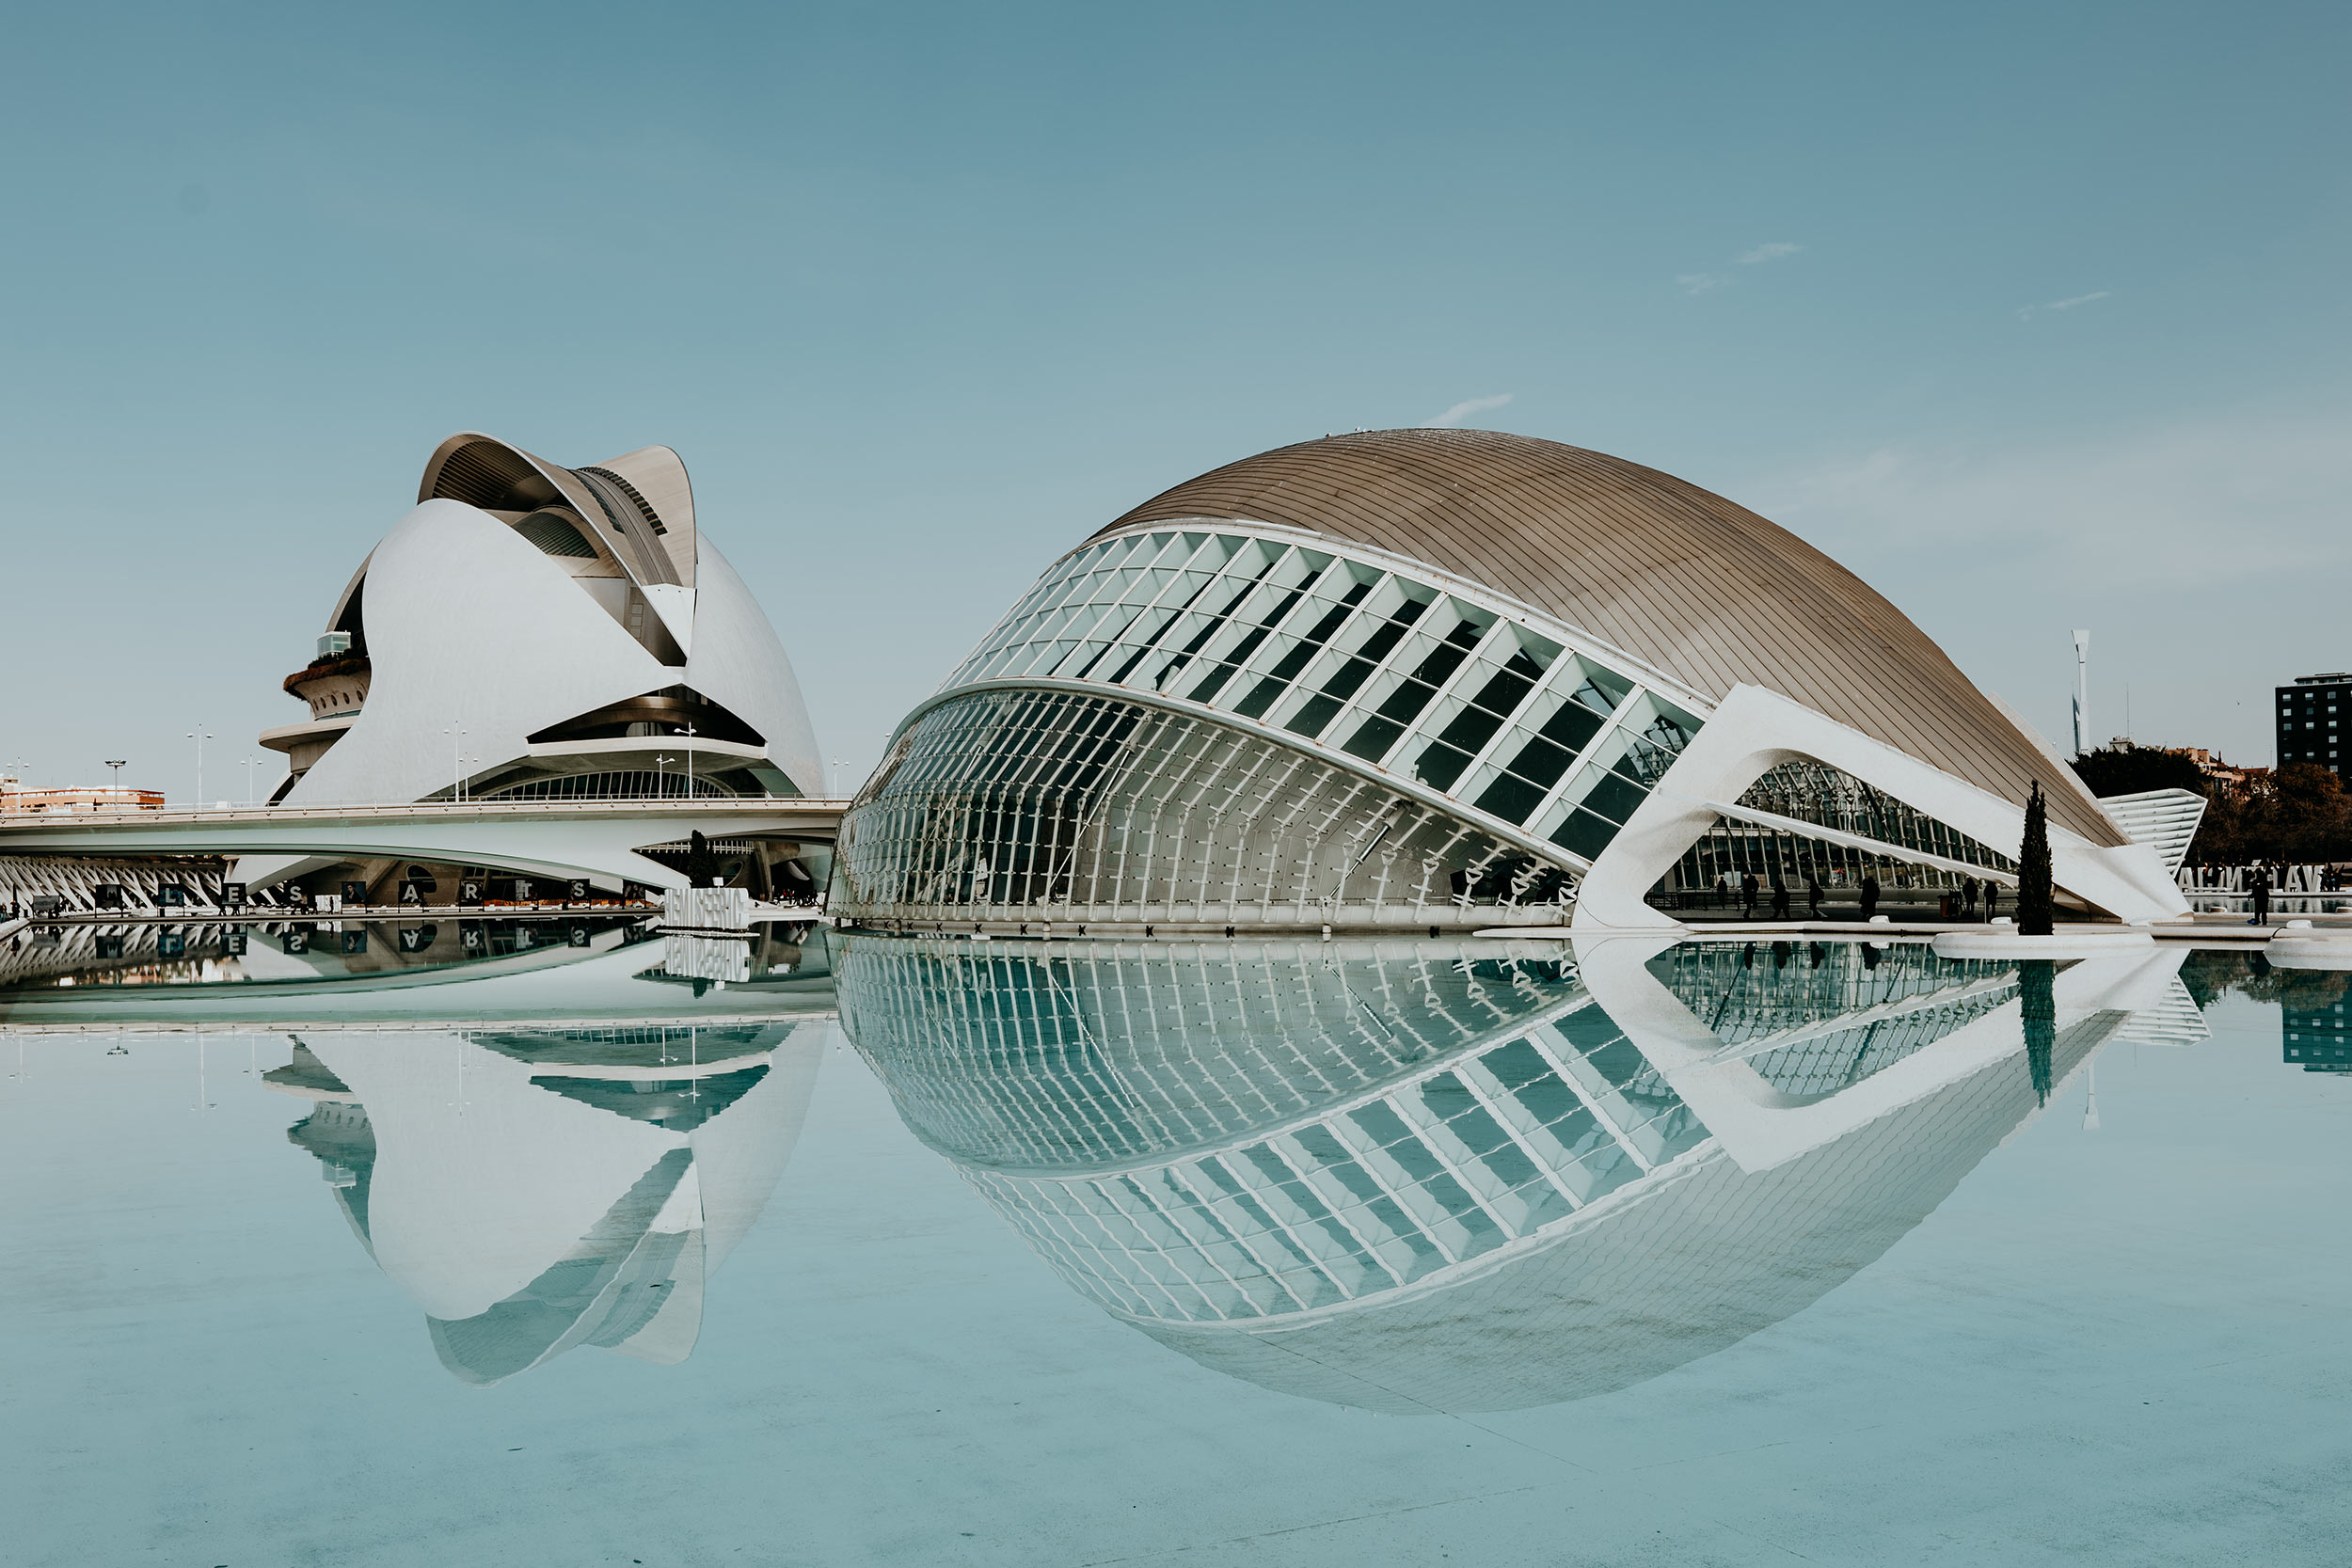
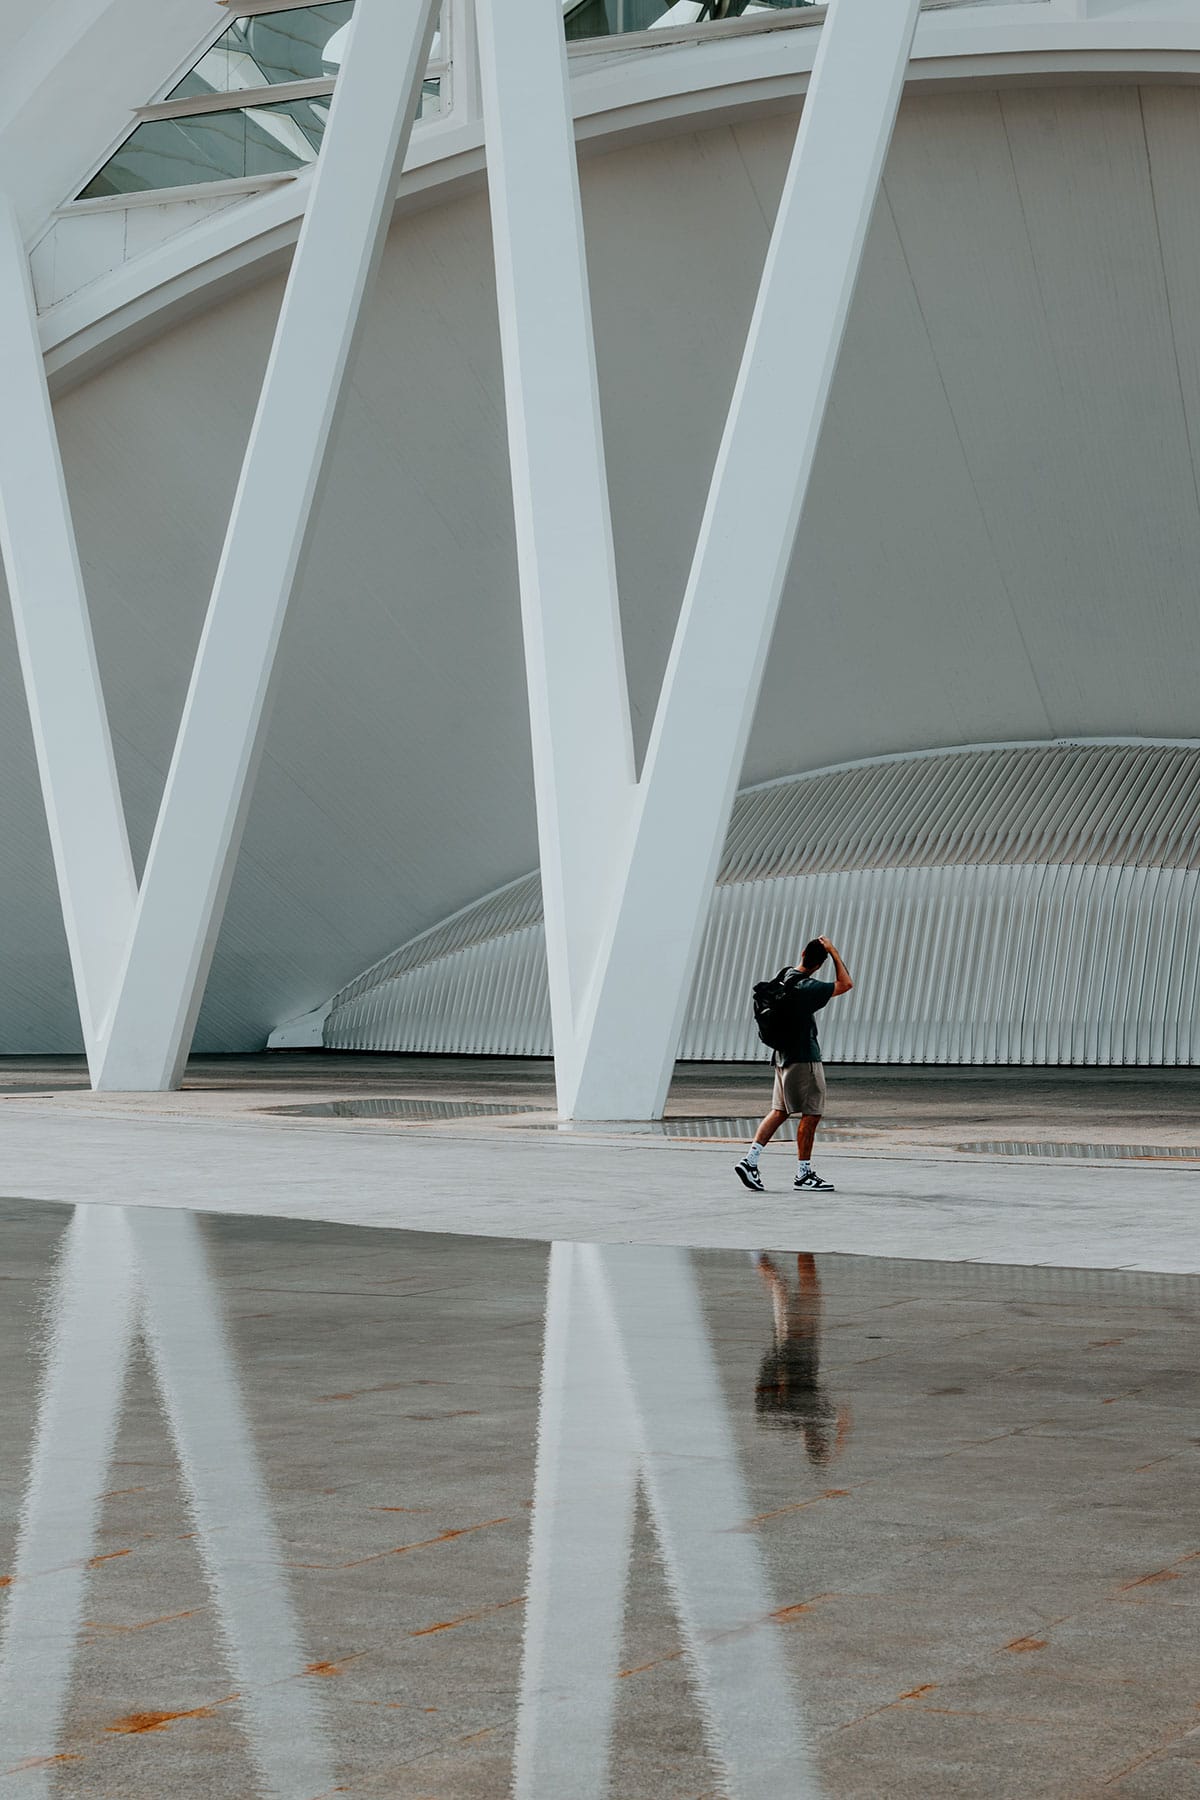
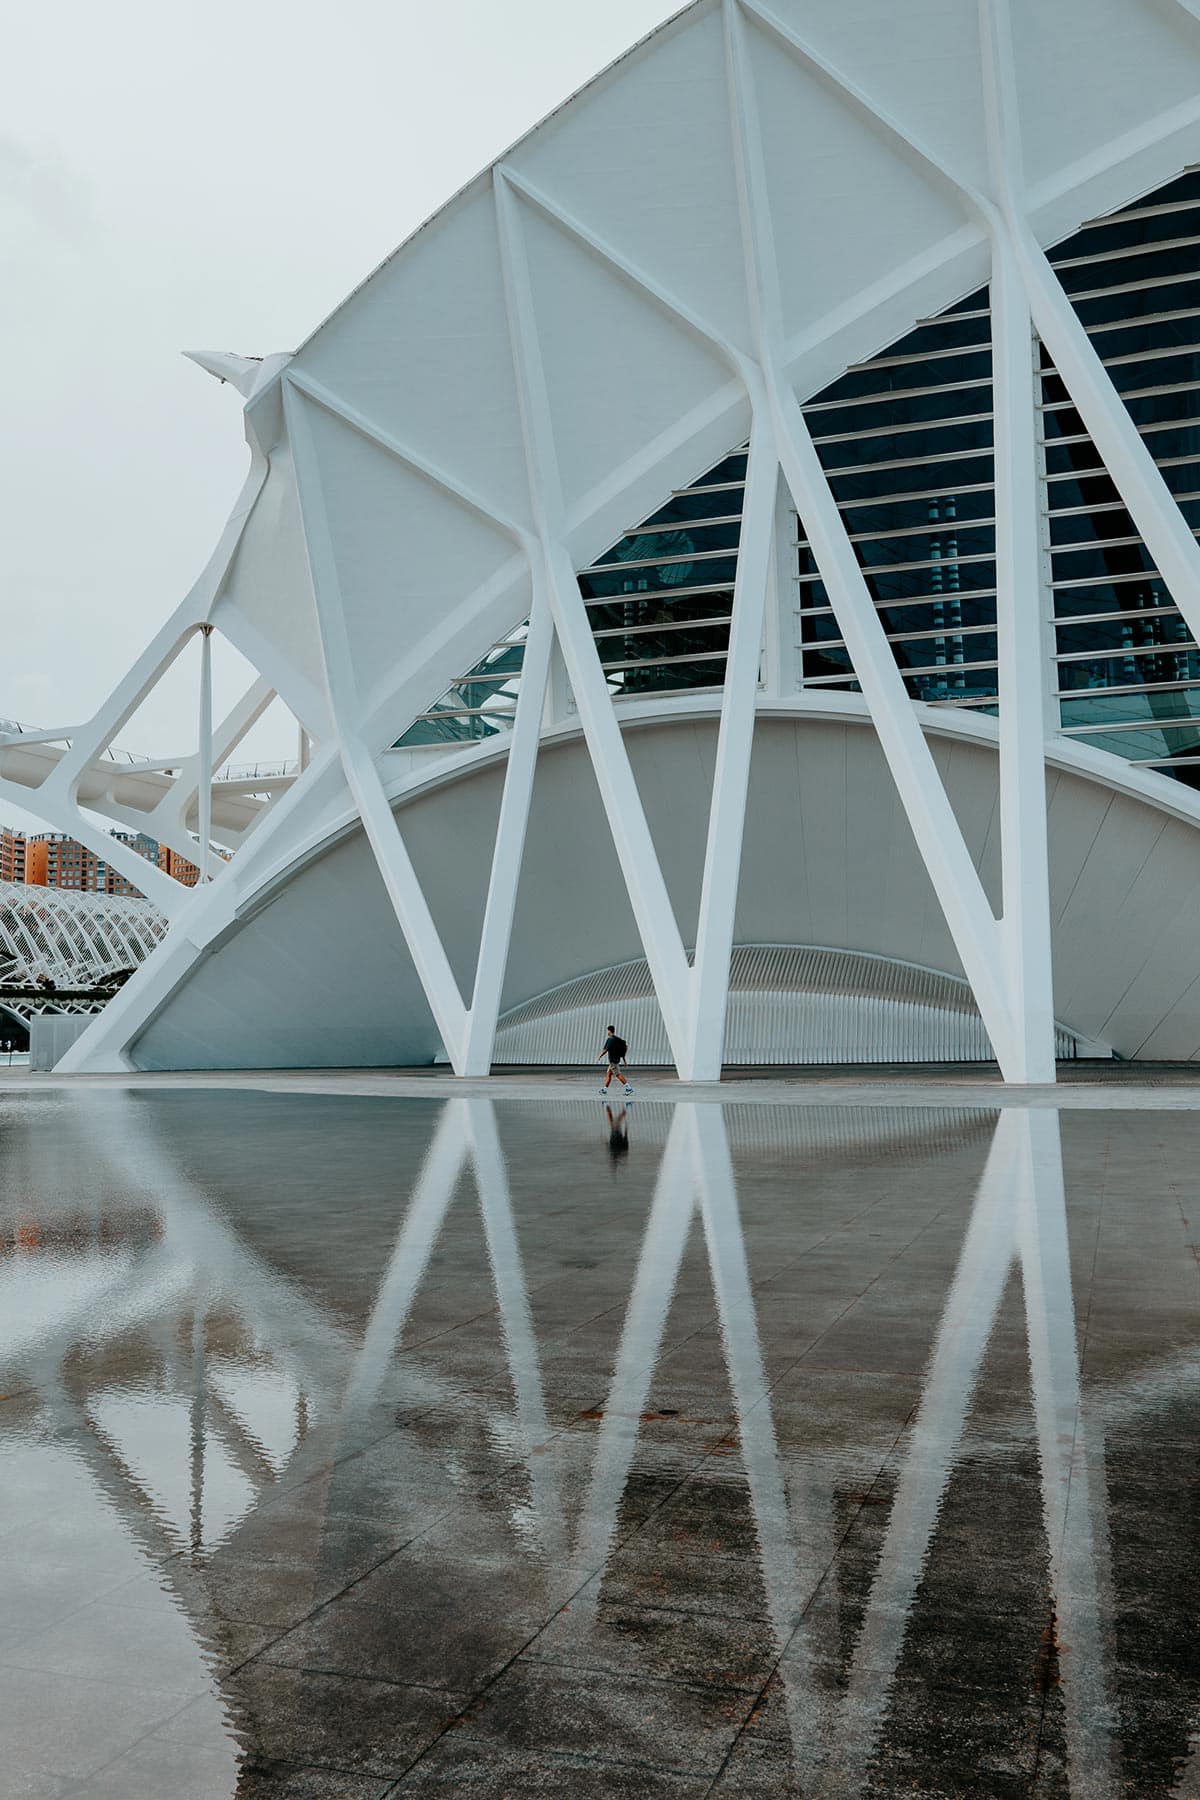
It is fair to say that no visit to Valencia is complete without marvelling at the futuristic architecture of Ciudad de las Artes y las Ciencias, also known as the City of Arts and Sciences.
Set within the picturesque Jardín del Túria, the Ciudad de las Artes y las Ciencias was designed by Valencian-born architect Santiago Calatrava and is defined as a modern architectural masterpiece by many – I totally agree with that statement.
At first, the construction of the complex was estimated to cost around 308 million euros, which is quite a price tag. However, the budget couldn’t be more off in the end, since the project eventually cost the government a whopping 1282 million euros to complete.
Despite its astronomically high price tag, it’s an utterly stunning place that looks and feels way ahead of its time. Fortunately, tourism in Valencia benefits enormously from the construction and it rapidly became one of the most popular things to do in Valencia.
I wander around the complex quite often (still not quite as much as I would like though), and the futuristic features are blowing my mind time and time again.
To give you an overview, the Ciudad de las Artes y las Ciencias consists of the following buildings:
- Palau de les Arts Reina Sofía
- Oceanogràfic
- Hemisfèric
- Museo de las Ciencias
- Umbracle
- Agora
+ Read more | For a more in-depth read, make sure you check out my guide to the Ciudad de las Artes y las Ciencias (coming soon) for photography inspiration, travel advice and all the essentials.
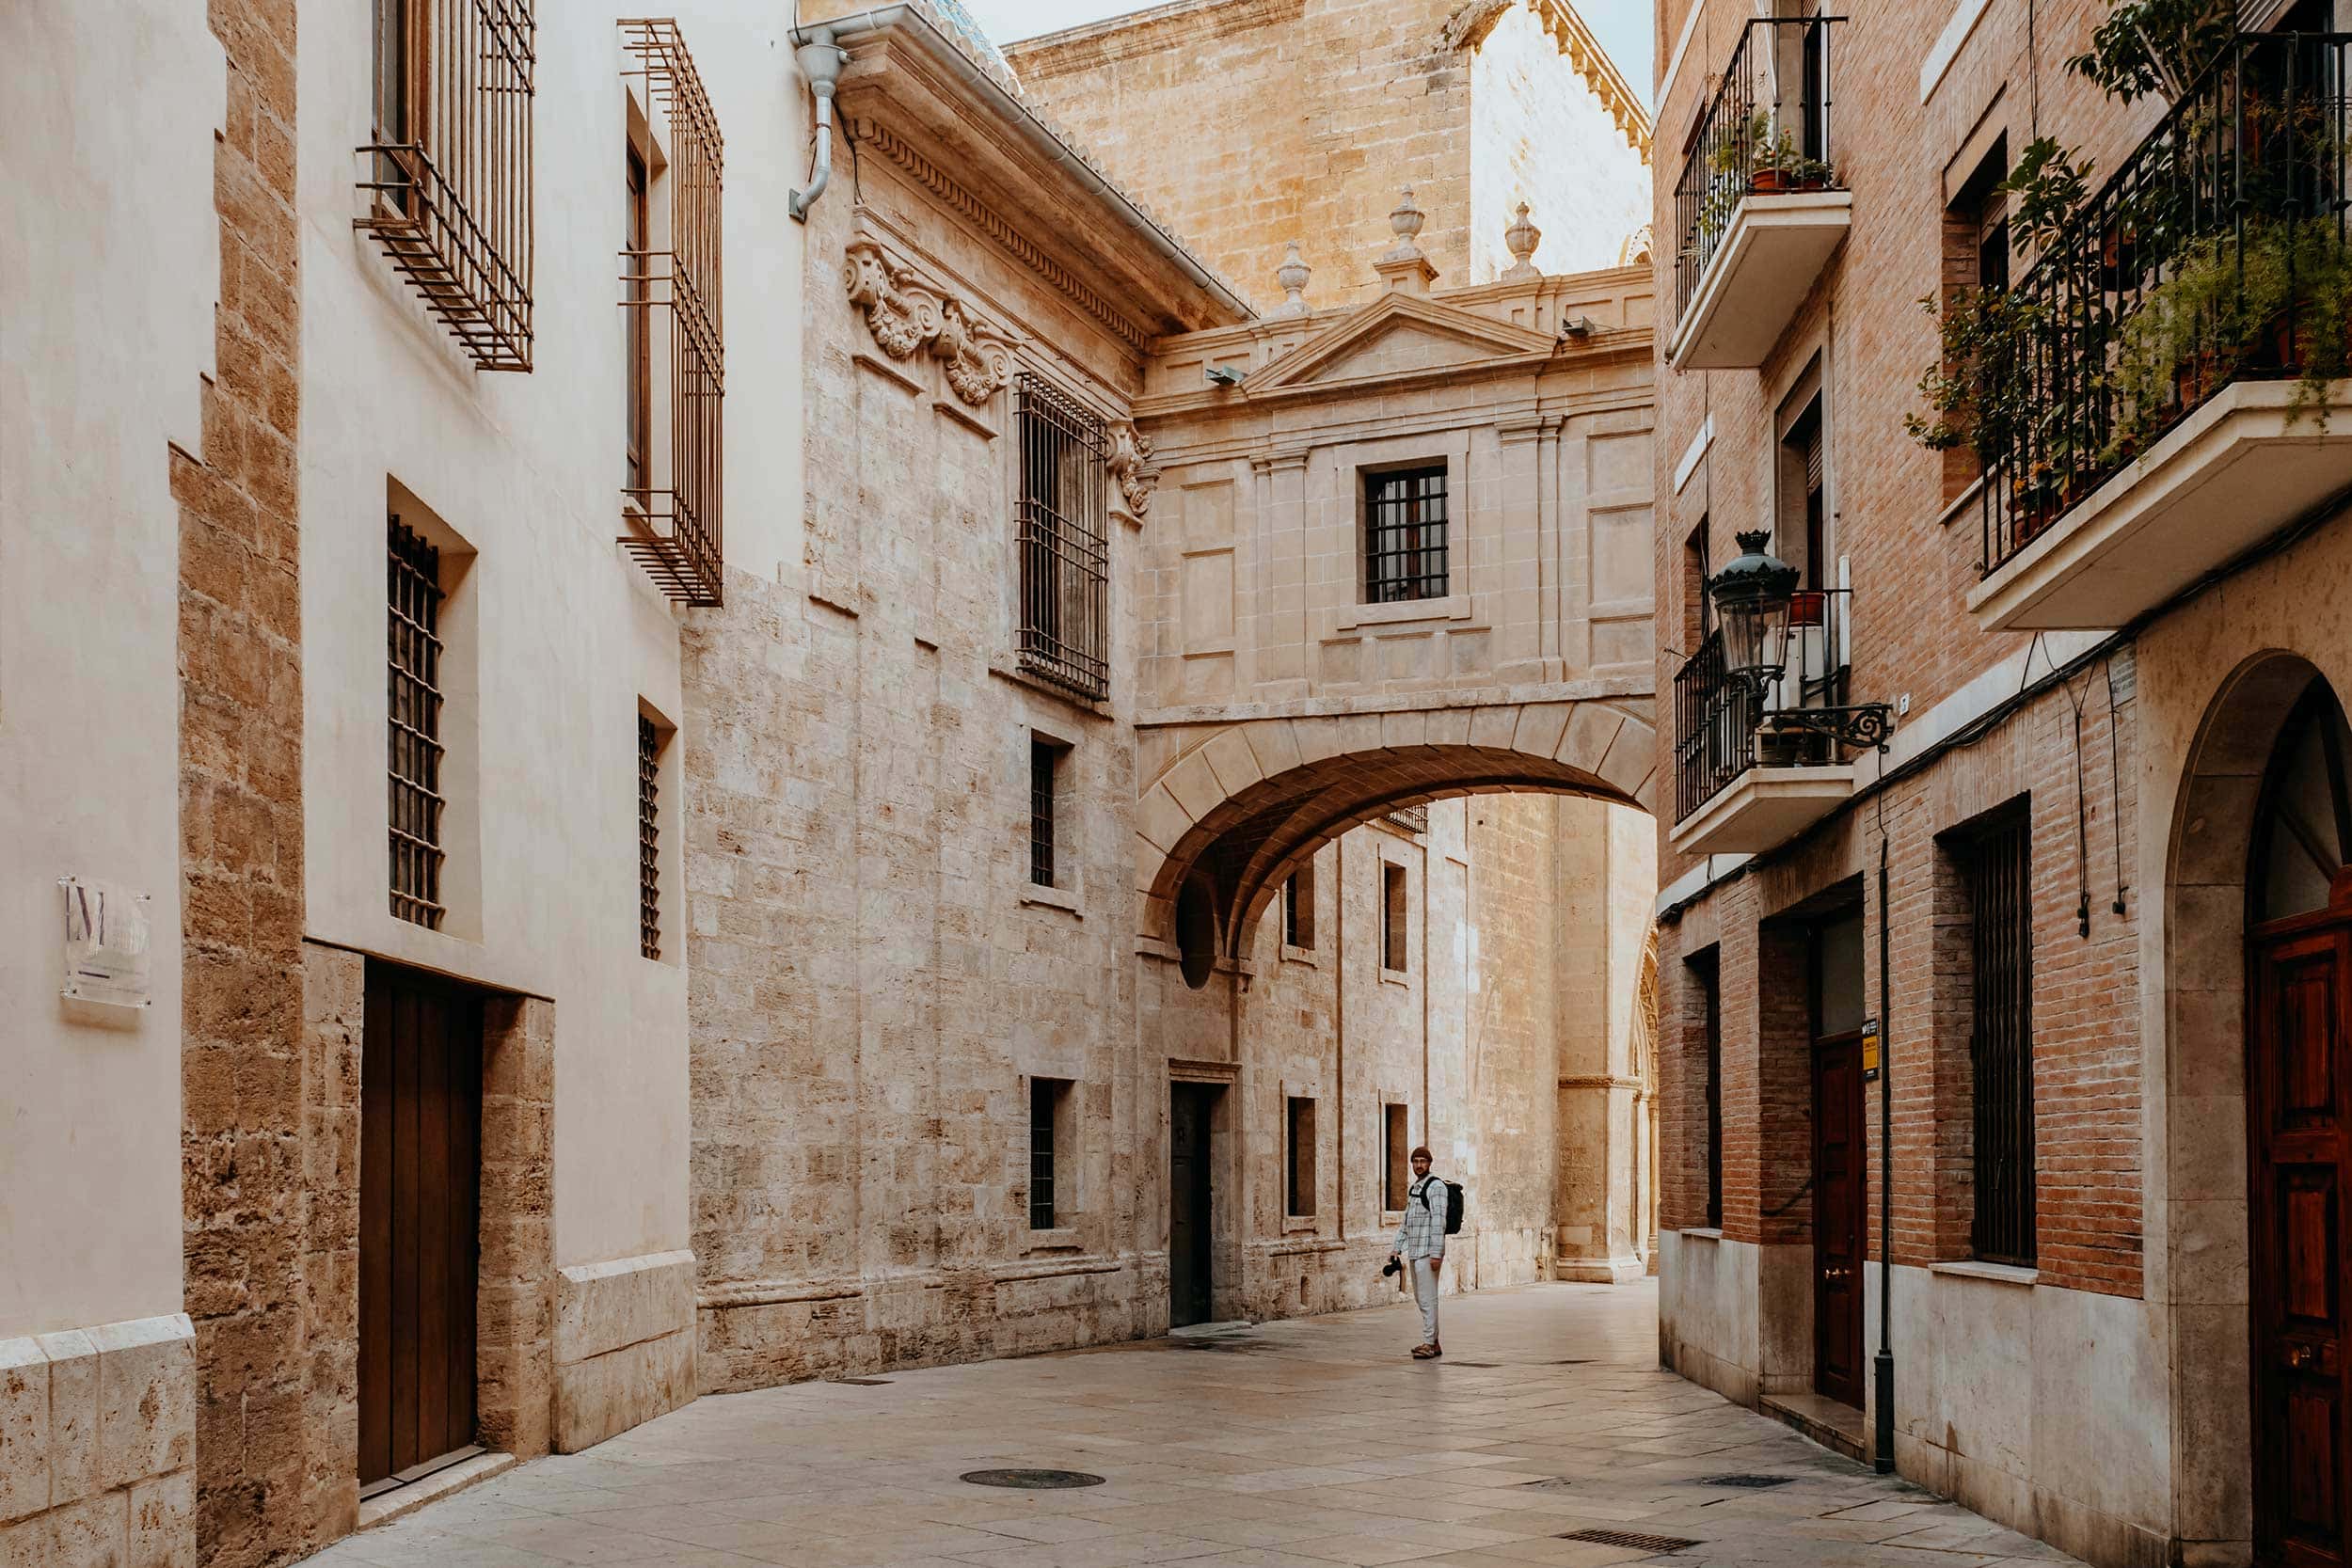
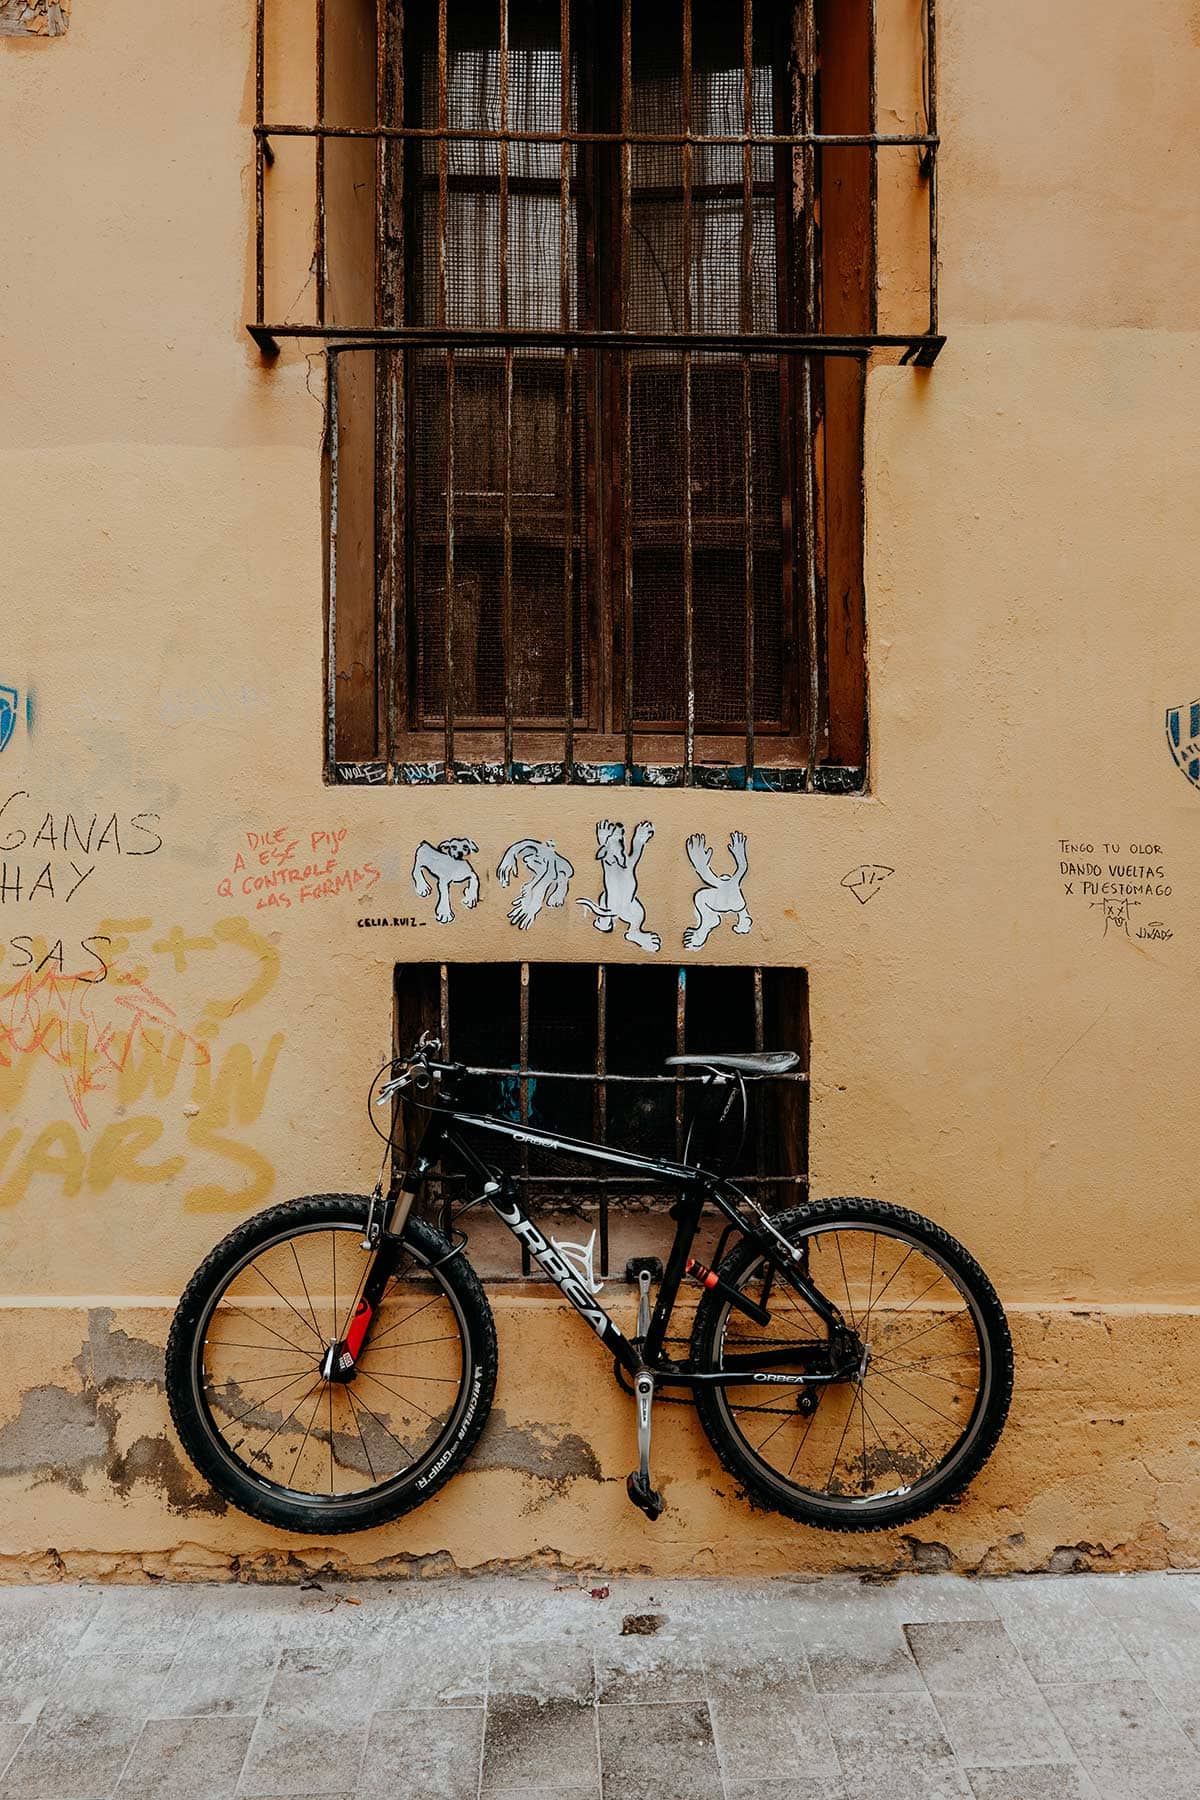
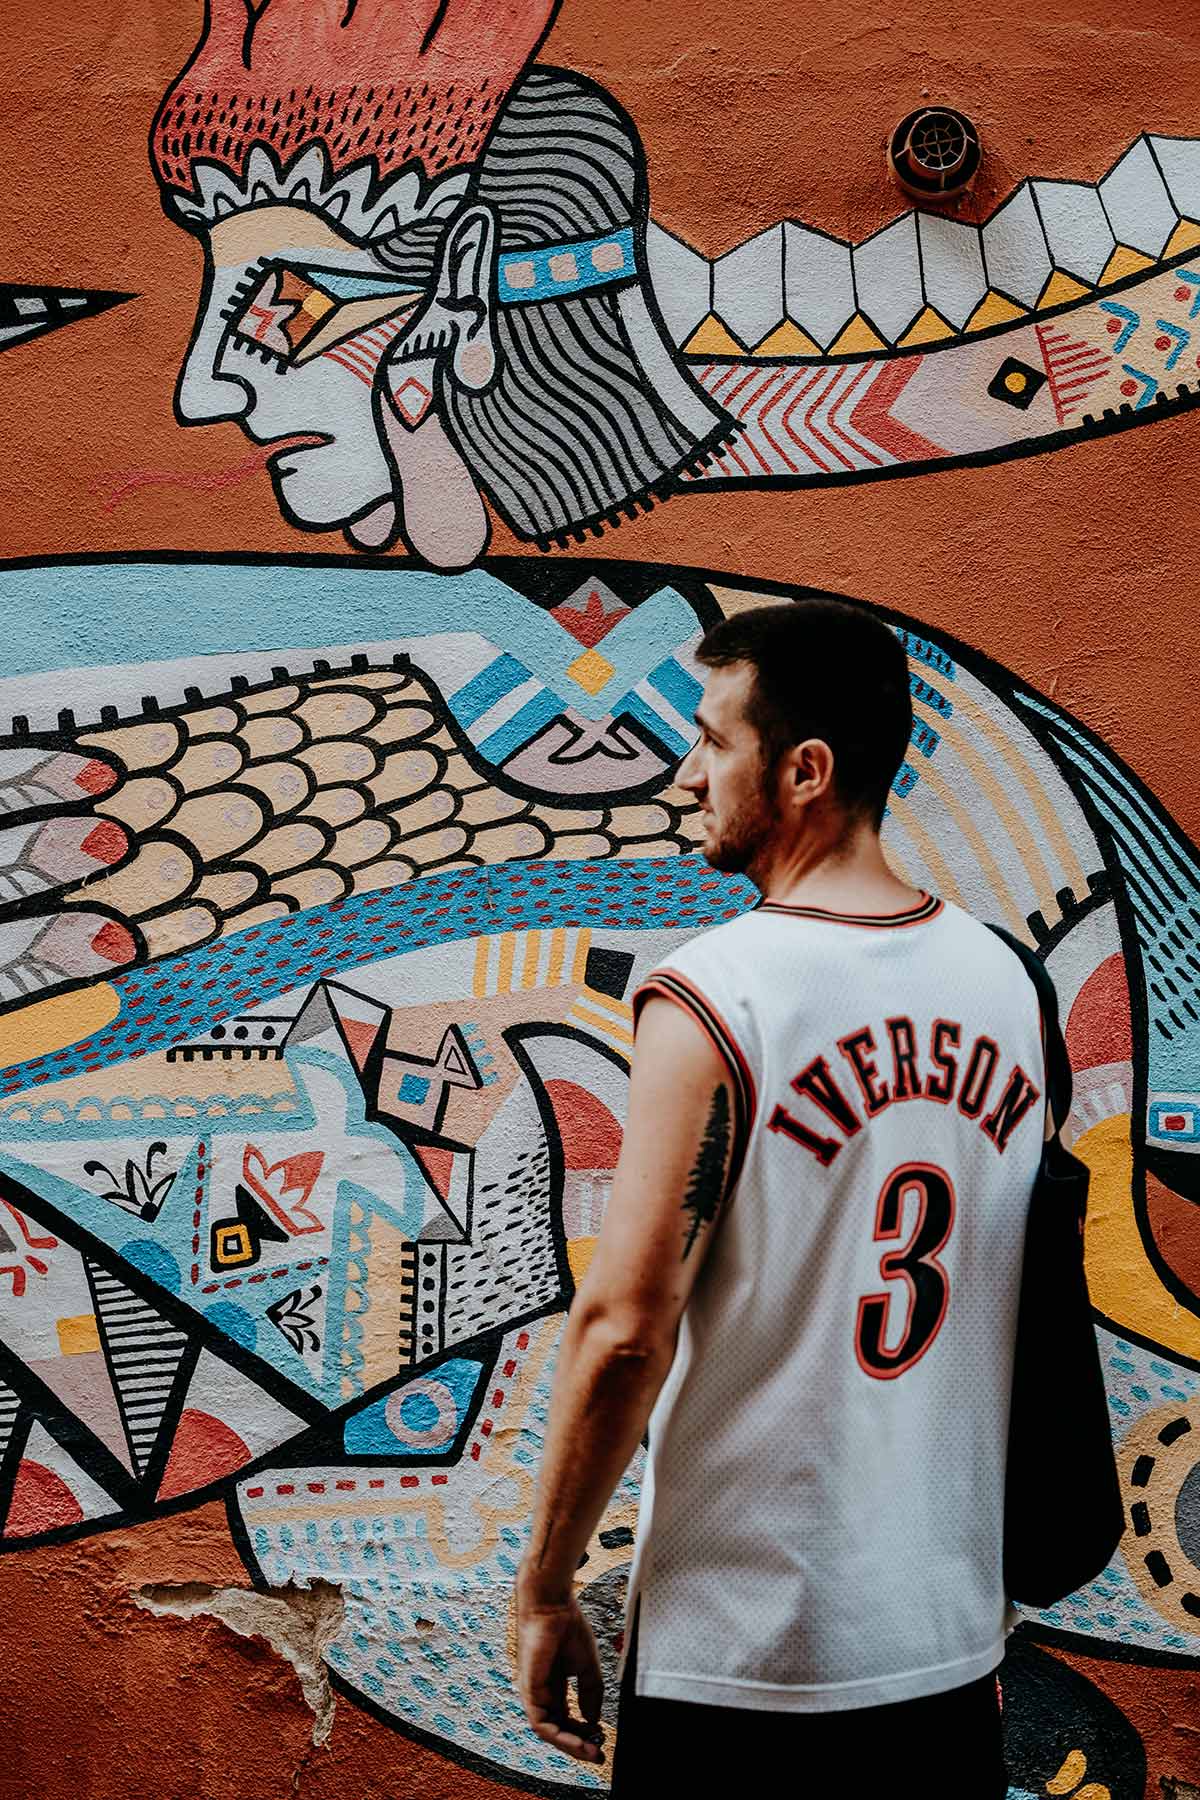
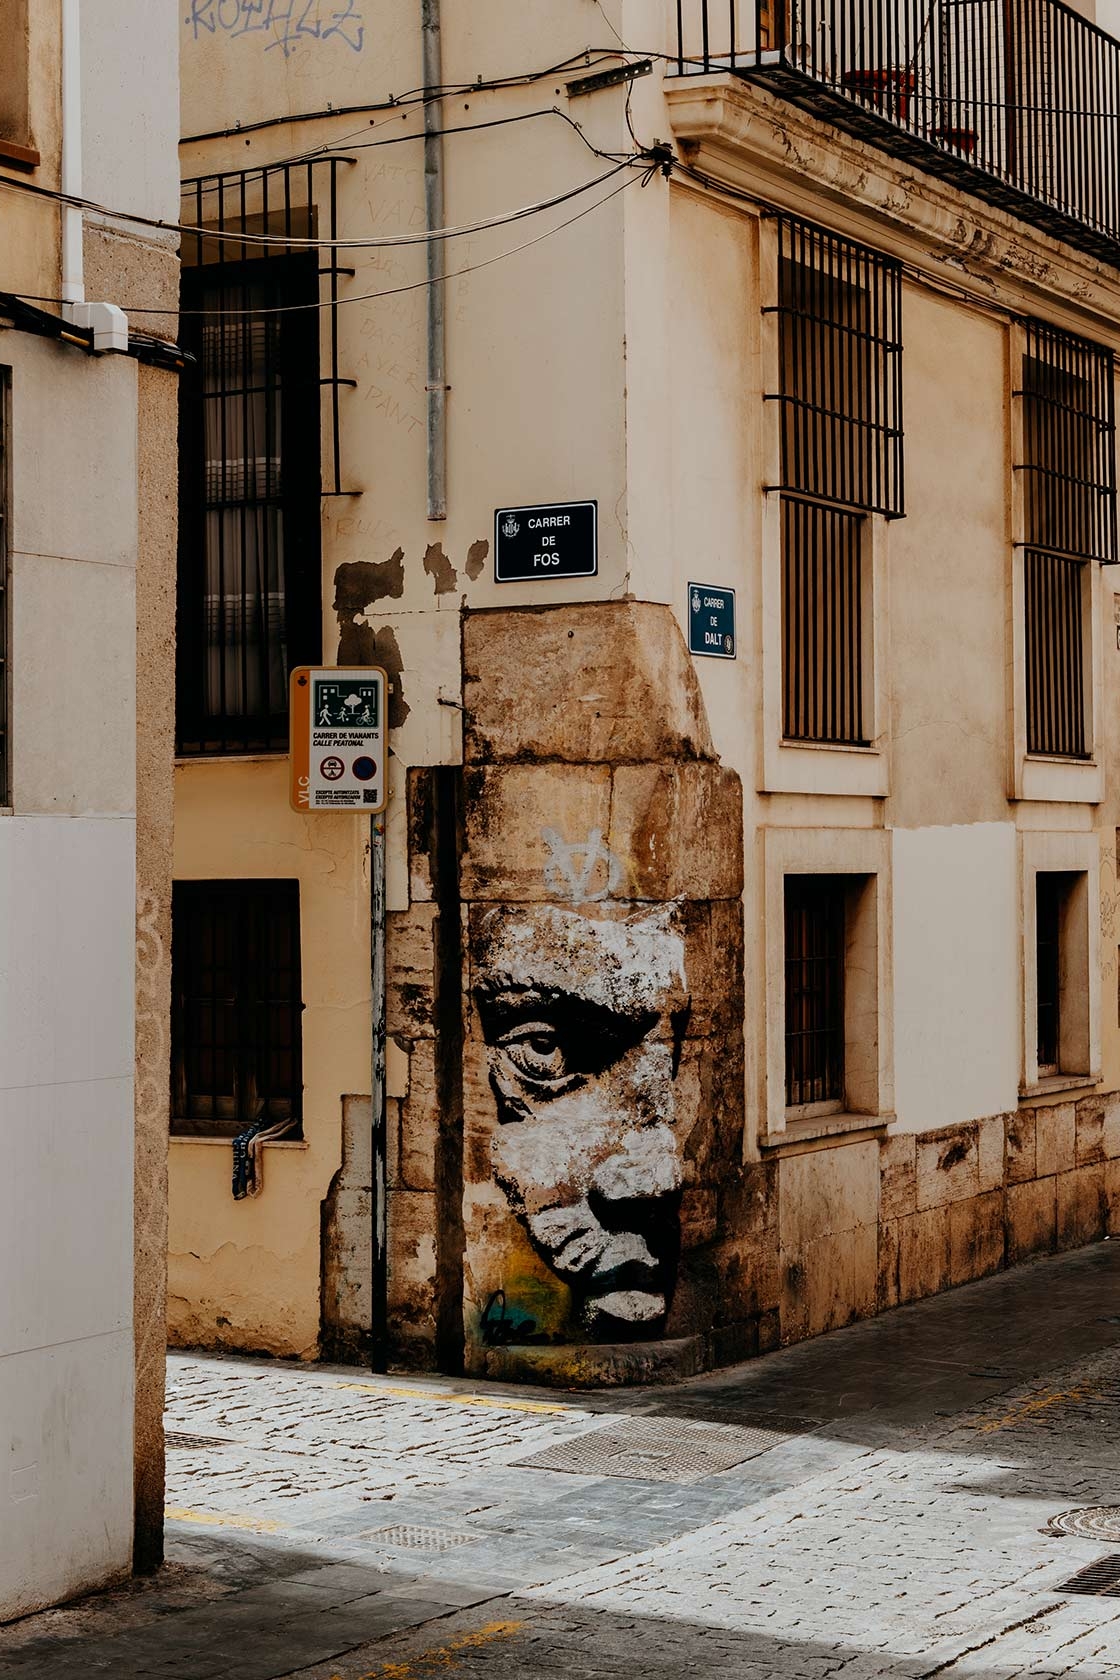
2. Stroll through the streets of El Carmen
The heart of all things historic, Barrio del Carmen is one of the oldest districts in Valencia and has recently acquired new interest as one of the hippest areas in the city.
During the 11th century, Valencia was under Moorish rule and this Northern African influence is still very much present in the streets of El Carmen, with quite a few impressive Medieval remains dotted throughout the trendy neighbourhood.
It is in fact, still possible to see the remains of the Muralla Arabe (Arab Walls) if you stumble through the maze-like alleyways of El Carmen – which is pretty rad if you ask me.
While I could easily write a complete guide to El Carmen (which I might eventually do), these are some of the best things to see while there:
- Torres de Serranos | This age-old defence tower provides stunning views of Valencia
- Galeria del Tossal | An exhibition area featuring remnants of the ancient Islamic city walls
- Paráis Store | A trendy store to find unique streetwear pieces
- Portal Valldigna | A picturesque archway that used to be an entrance to the medieval city
- Calle Roteros | Here you’ll find the remains of the Muralla Arabe
- The Quart Towers | Played a vital part in stopping Napoleon’s battalions in 1808
- Carrer d’en Borràs | Torre del Ángel; the remains of an 11th-century semicircular tower
On top of that, the cobblestone streets of El Carmen are known for their thriving food and nightlife scene too, with plenty of authentic bars, excellent eateries – both local and international, and a few clubs too.
Where | Bario El Carmen
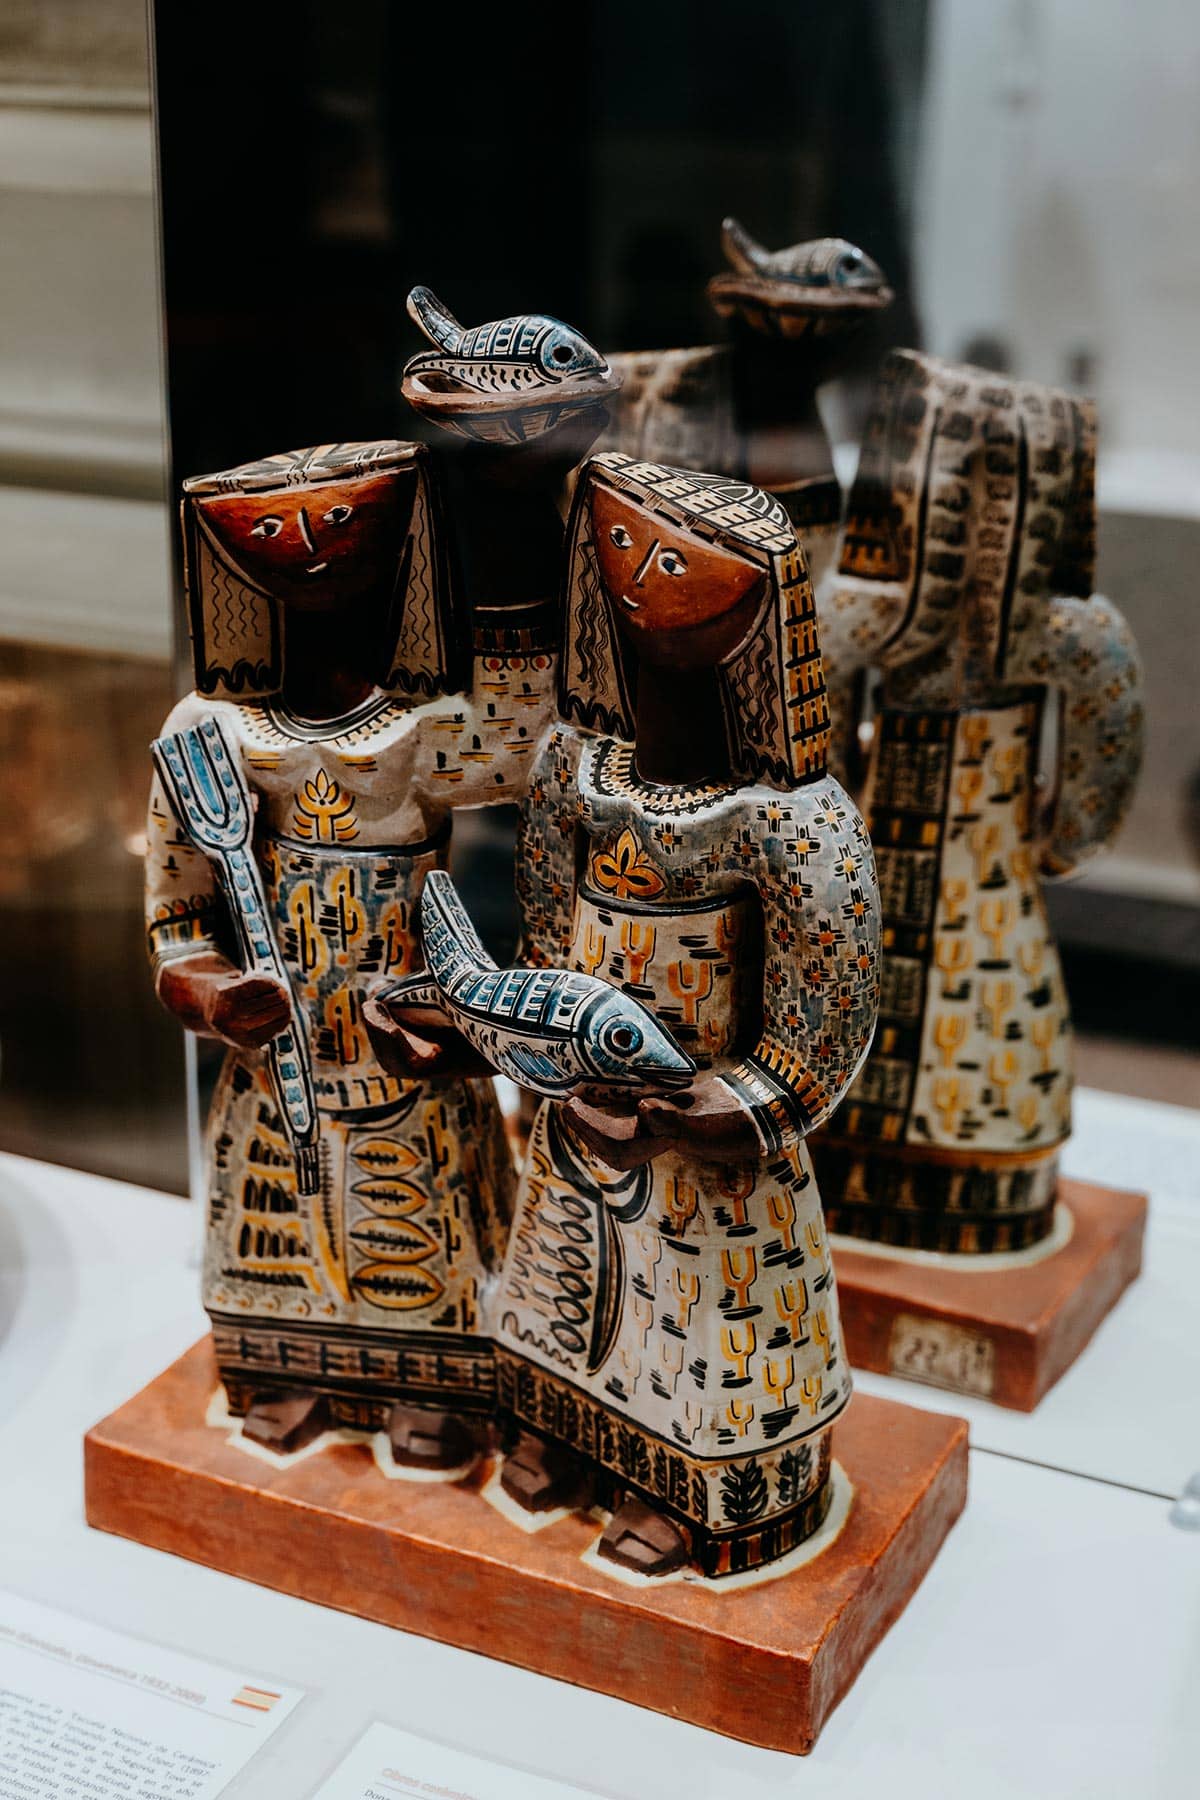
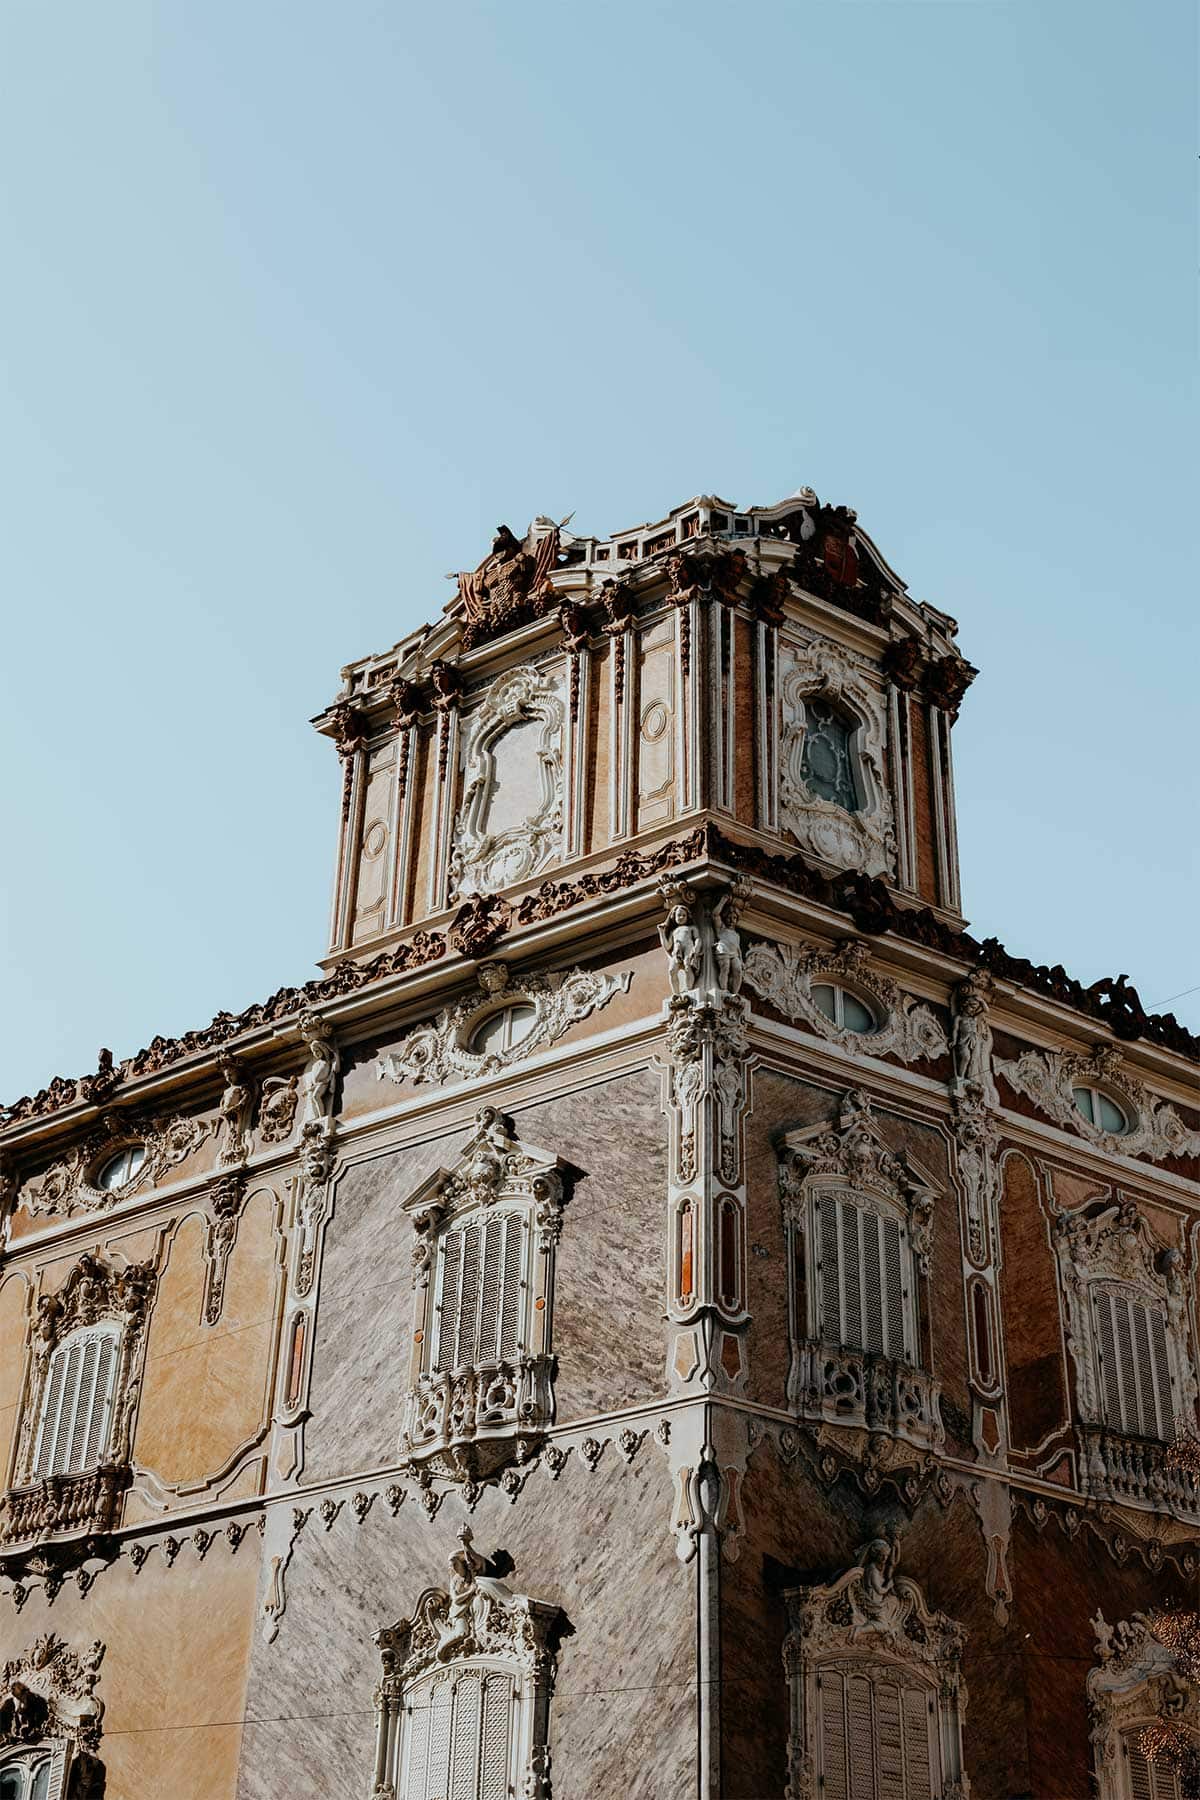
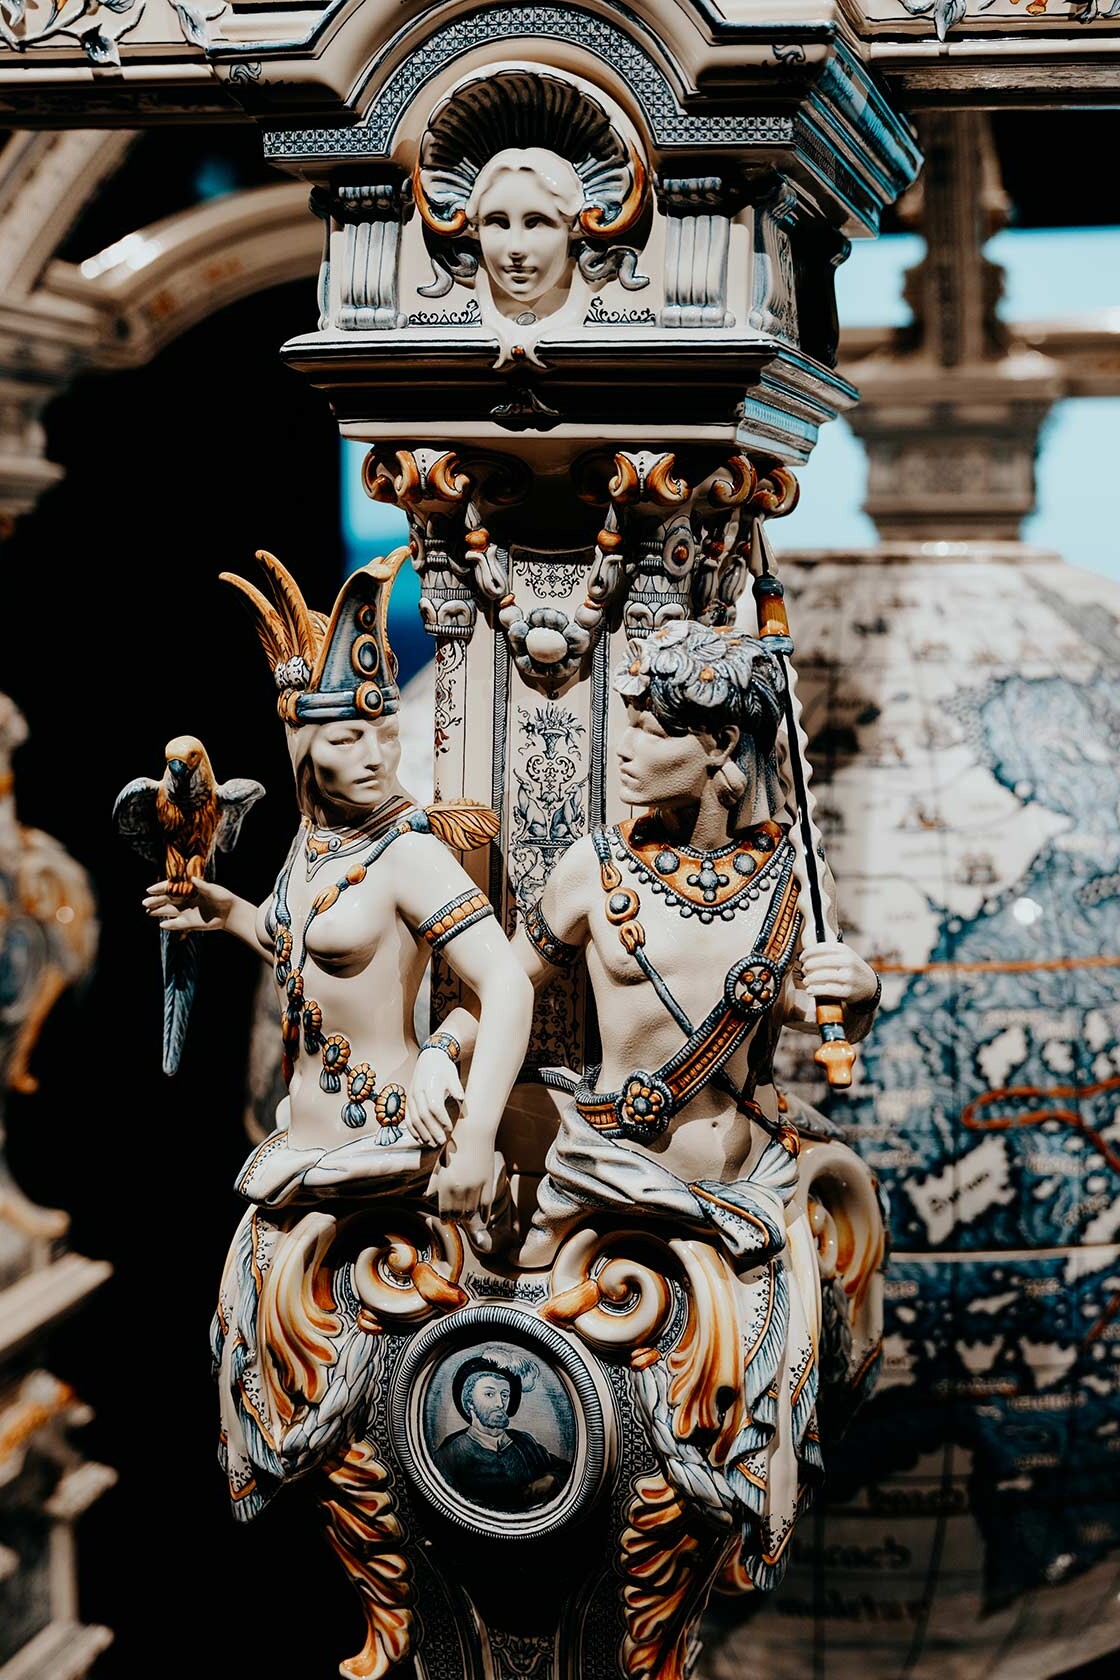
3. Visit Palacio del Marqués de Dos Aguas – Ceramics Museum
Easily one of the most fascinating buildings in Valencia, the Palacio del Marqués de Dos Aguas is the former home of the Rabassa de Perellós family and dates back to the 18th century.
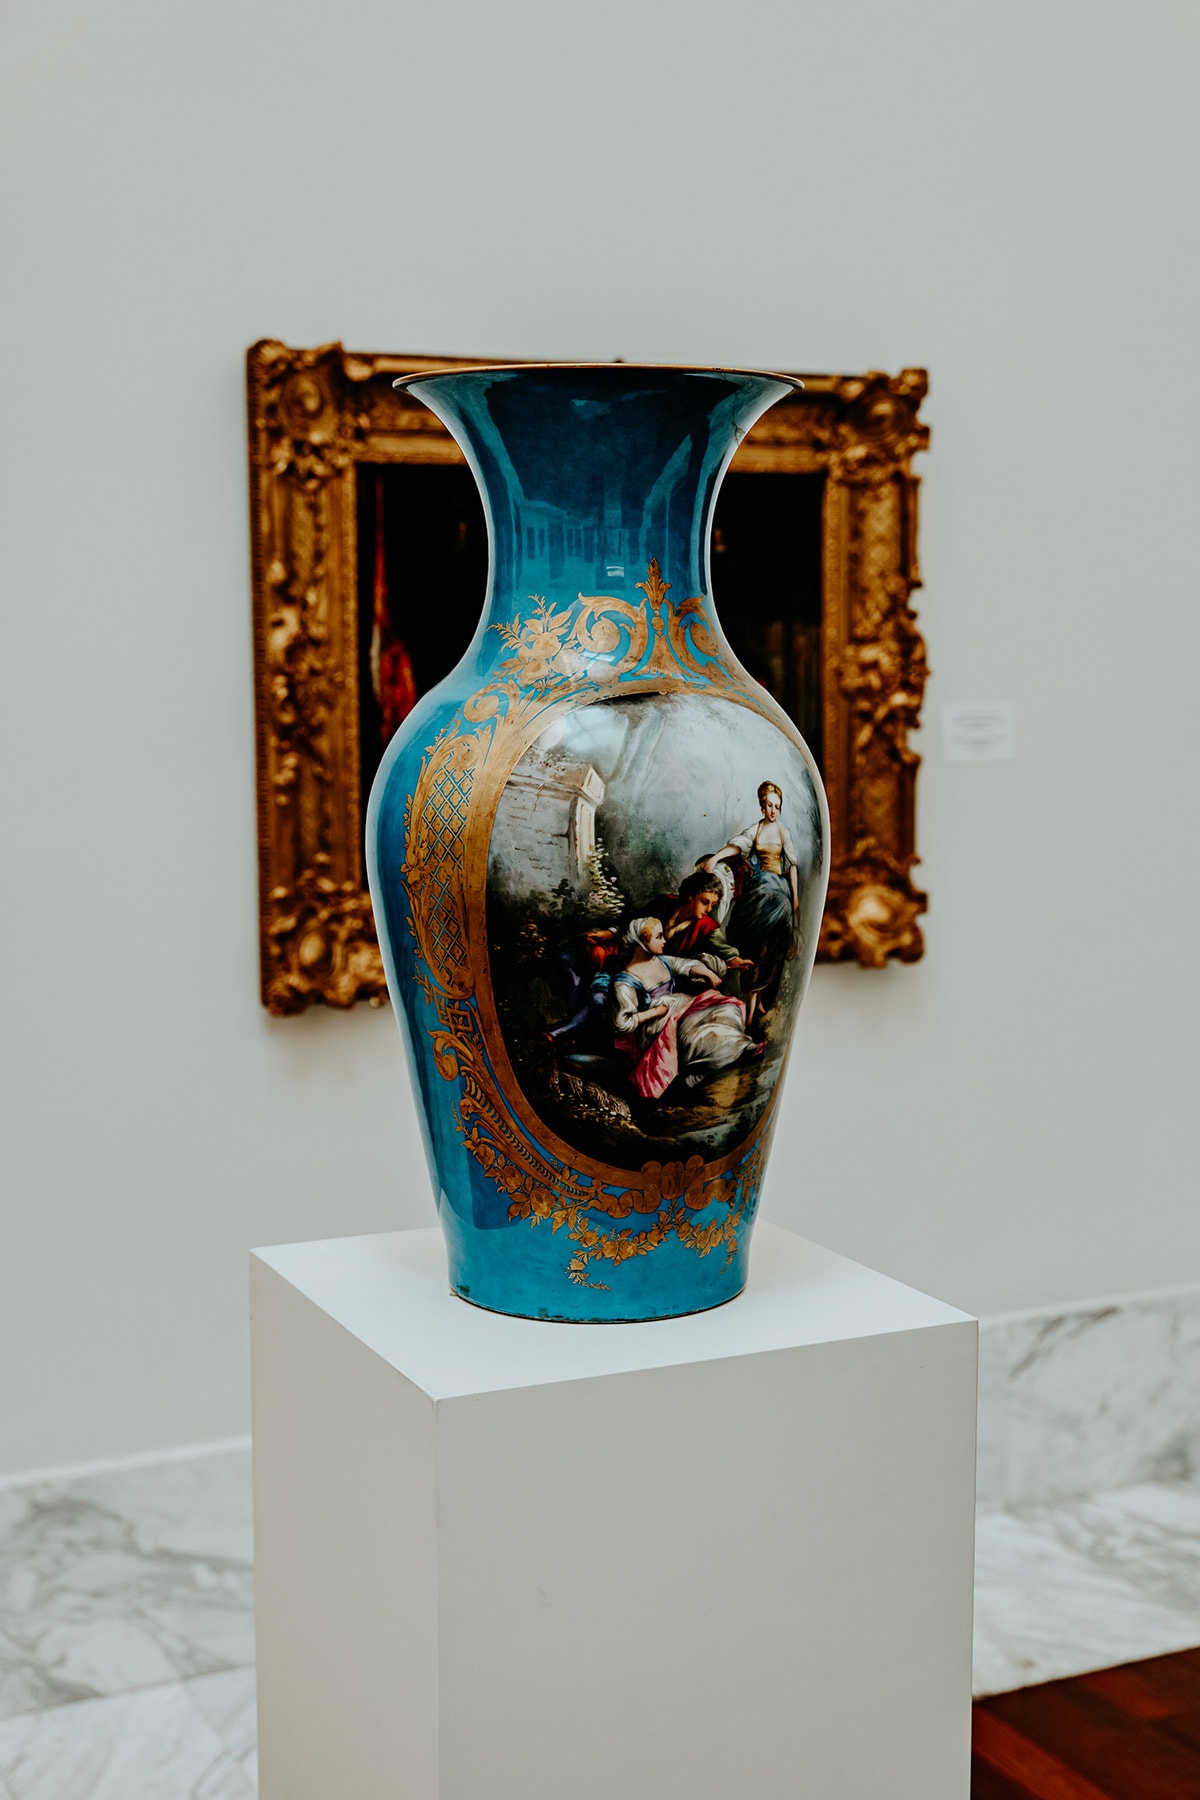
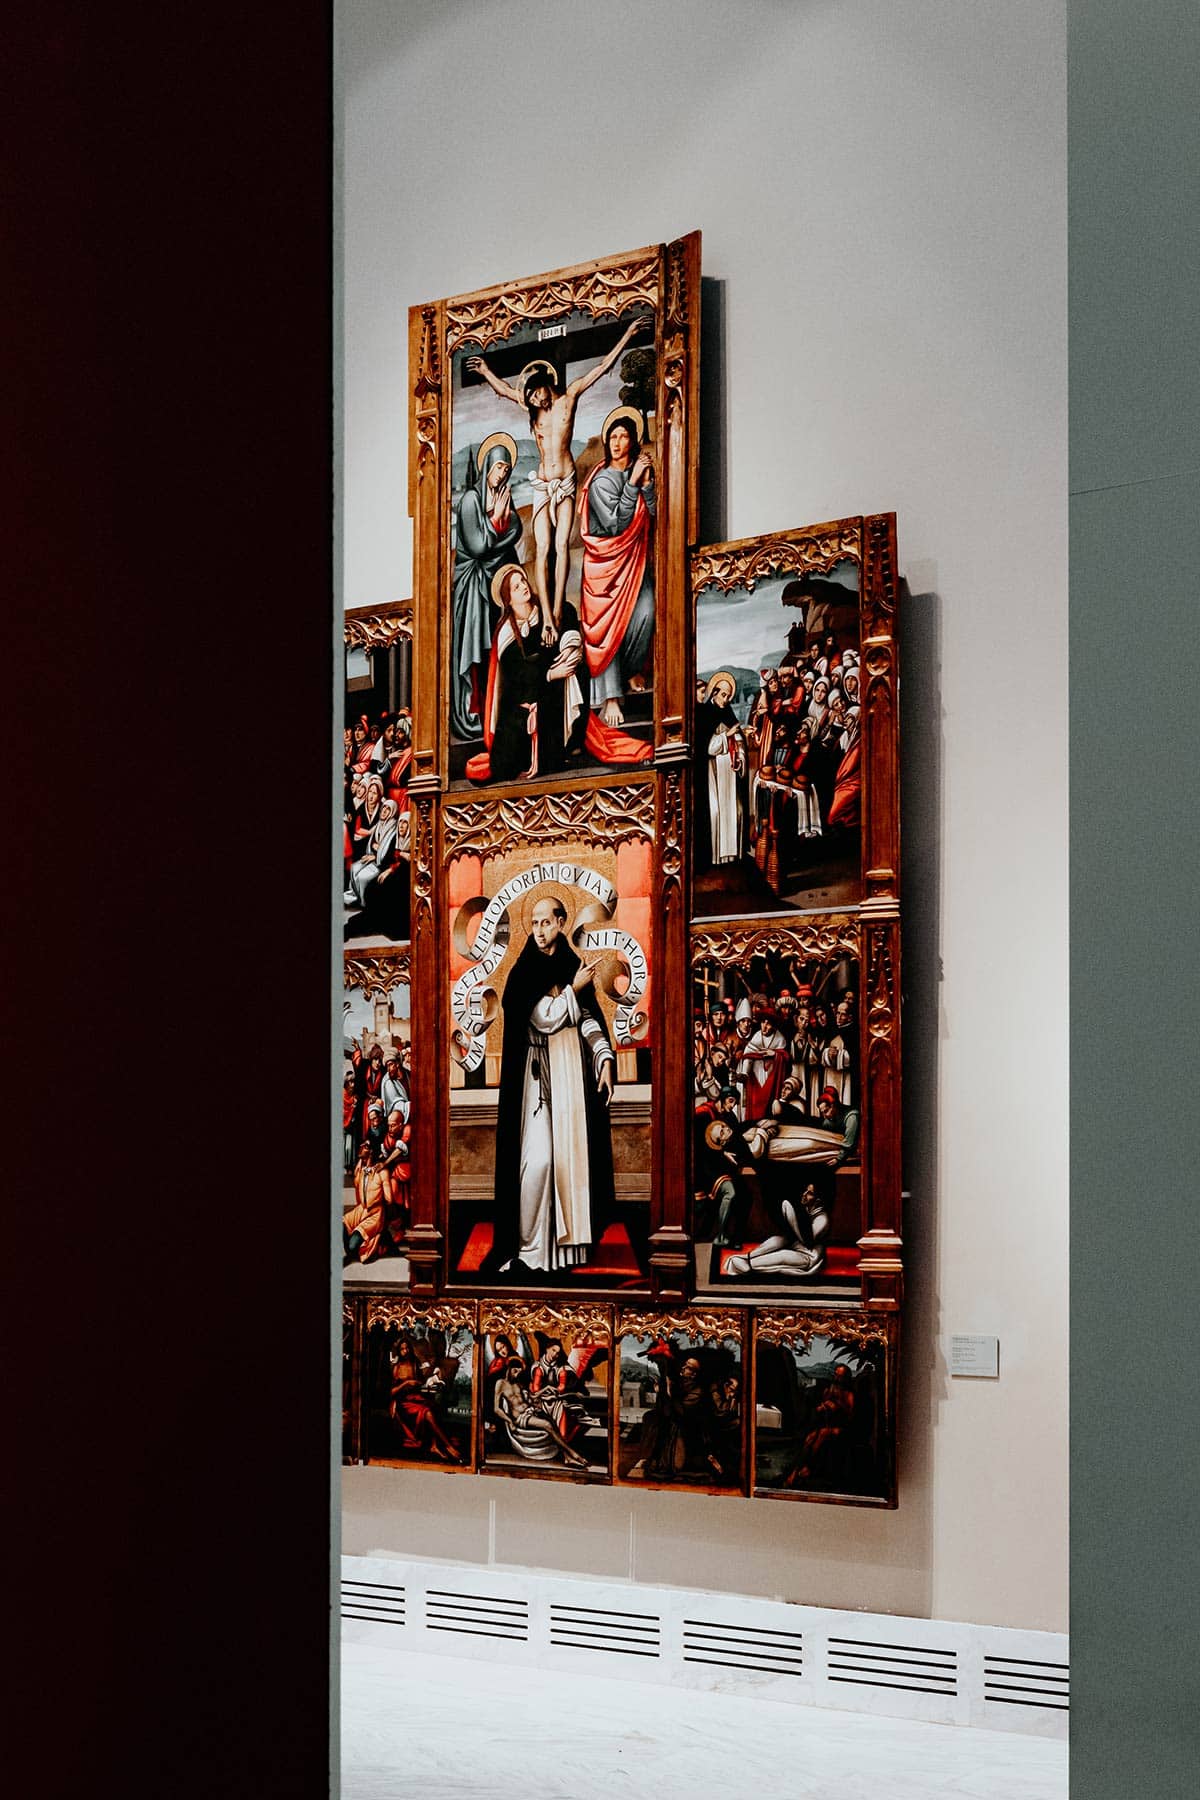
Characterized by arguably the finest example of Baroque architecture in the whole of Spain, the opulent palace has been restored several times throughout its history and now houses the National Museum of Ceramics – which, on its own, is equally as impressive as the palace’s interior and exterior.
The González Martí National Museum of Ceramics holds an extensive collection of ceramics, porcelain, furniture, clothing and paintings, reflecting the rich ceramics traditions in Valencia, which was strongly influenced by Hispano-Muslim culture.
The museum consists of several different rooms distributed over the main and first floor, including the Medieval Architectural Pottery Room, Mudéjar Pottery Room, Muslim World Room, Chinese Room, and the Porcelain Room to name but a few.
The works found here differ from the 18th century all the way to present times. They even have the work of renowned artist Picasso on display.
If you’re visiting Valencia during the peak summer months, I’d highly recommend visiting around noon, given it’s a great activity to escape the sizzling heat for a few moments.
Additionally, you will have free entrance on Sundays, which is the case with lots of things to do in Valencia. Do keep in mind that you will share your experience with heaps of people during the weekends.
Where | Palacio del Marqués de Dos Aguas
Opening hours | Tuesday to Saturday 1000 – 1400 and 1600 – 1800, Sunday 1000 – 1400
Cost | Entrance fee is €3,- per person, free entrance on Sundays
4. Explore trendy Ruzafa
Home to a plethora of outstanding tapas joints, lively bars, hipster-ish coffee shops, and trendy restaurants, Ruzafa is easily one of the hippest districts in town and one where you should obviously spend a fair amount of your time.
It’s a place well-known among Valencia’s creatives, hipsters and art-minded people, and a neighbourhood where you’ll experience a more intimate and unique vibe, one that could easily be compared to District VII in Budapest, Amsterdam North in Amsterdam, or Kreuzberg in Berlin.
But it’s not just the thriving cafe scene and creative ambience that makes Russafa so special.
No, it actually has much more to offer, as it’s home to the extensive Russafa market, some of Valencia’s best underground clubs, and plenty of trendy accommodation options – plus it has a rich and captivating history too.
It’s the perfect place to fix your morning coffee, embark on a flâneur walk, hang out on a hot summer’s afternoon, or simply grab a few sundowners while the city slowly cools down.
Some places I recommend visiting in Russafa include:
Russafa Market | Much of Russafa’s lively atmosphere is happening right here in and around the extensive covered Russafa Market, so make sure you check it out.
Bluebell Coffee | Those after a good cup of joe, look no further, Bluebell Coffee is one of the best cafes in Russafa, if not the whole of Valencia. Keen to uncover the best coffee joints in Valencia, make sure you read my guide to the best speciality coffee in Valencia.
Oven Club | If you’re anything like me, and love a good techno party from time to time, Oven Club should be your weapon of choice when looking for a night of funky beats and dancing.
Ubik Café | Somewhat of a fixture within Russafa, and one of the pioneers of the neighbourhood’s revival, Ubik Café is a versatile space where coffee, books, art and music come together in an authentic and inviting manner.
La Más Bonita | Another popular establishment in Russafa is La Más Bonita, a trendy breakfast, brunch and lunch joint that serves a mean smashed avocado toast, home-baked pastries, excellent coffee and plenty of other yum options.

5. Have a refreshing drink at Finca Bar Valencia
With great weather year-round, a daily life that takes place outside most of the time, and a strong cultural interest in small bite-sized snacks and accompanying drinks, you’d probably think that you will stumble upon modern open-air bars at just about every corner.
But despite Valencia’s thriving gastronomic scene, something was missing.
Amidst the plentiful traditional (and oftentimes passé) local bars and eateries, and set directly on a cosy plaza home to an authentic Catholic church is the redeemer: Finca Bar.
On the menu is Aqua de Valencia; a true Valencian icon, Tinto de Verano, and Aperol Spritz among others, besides a few tapas, that unfortunately, leaves quite a bit to be desired.
I am not ashamed to admit, that lately, lots of afternoons have been spent right here, with an Aperol Spritz in hand, while chitchatting all things life with my close friends.
Finca has somehow turned into our gathering point, which might not come as a surprise to those following along my Instagram stories.
With most travellers spending only a short amount of time in Valencia, and the fact that Finca serves up Valencia’s famous Aqua de Valencia in a to-go version, Finca makes for an excellent stop for those keen to take a short break from their explorations, before continuing on their pursuit to tick of the best things to do in Valencia.
While there’s no doubt that Finca Bar is the ‘place to be’ for a few refreshing drinks on a hot summer’s day, the bar recently gained quite some traction on Instagram too, as their (now) famous ‘Orange Wall’ with the sign Valencia mi Amor has become quite a hype on social media.
Where | Finca Bar Valencia
Opening hours | Daily 10:30 – 00:00


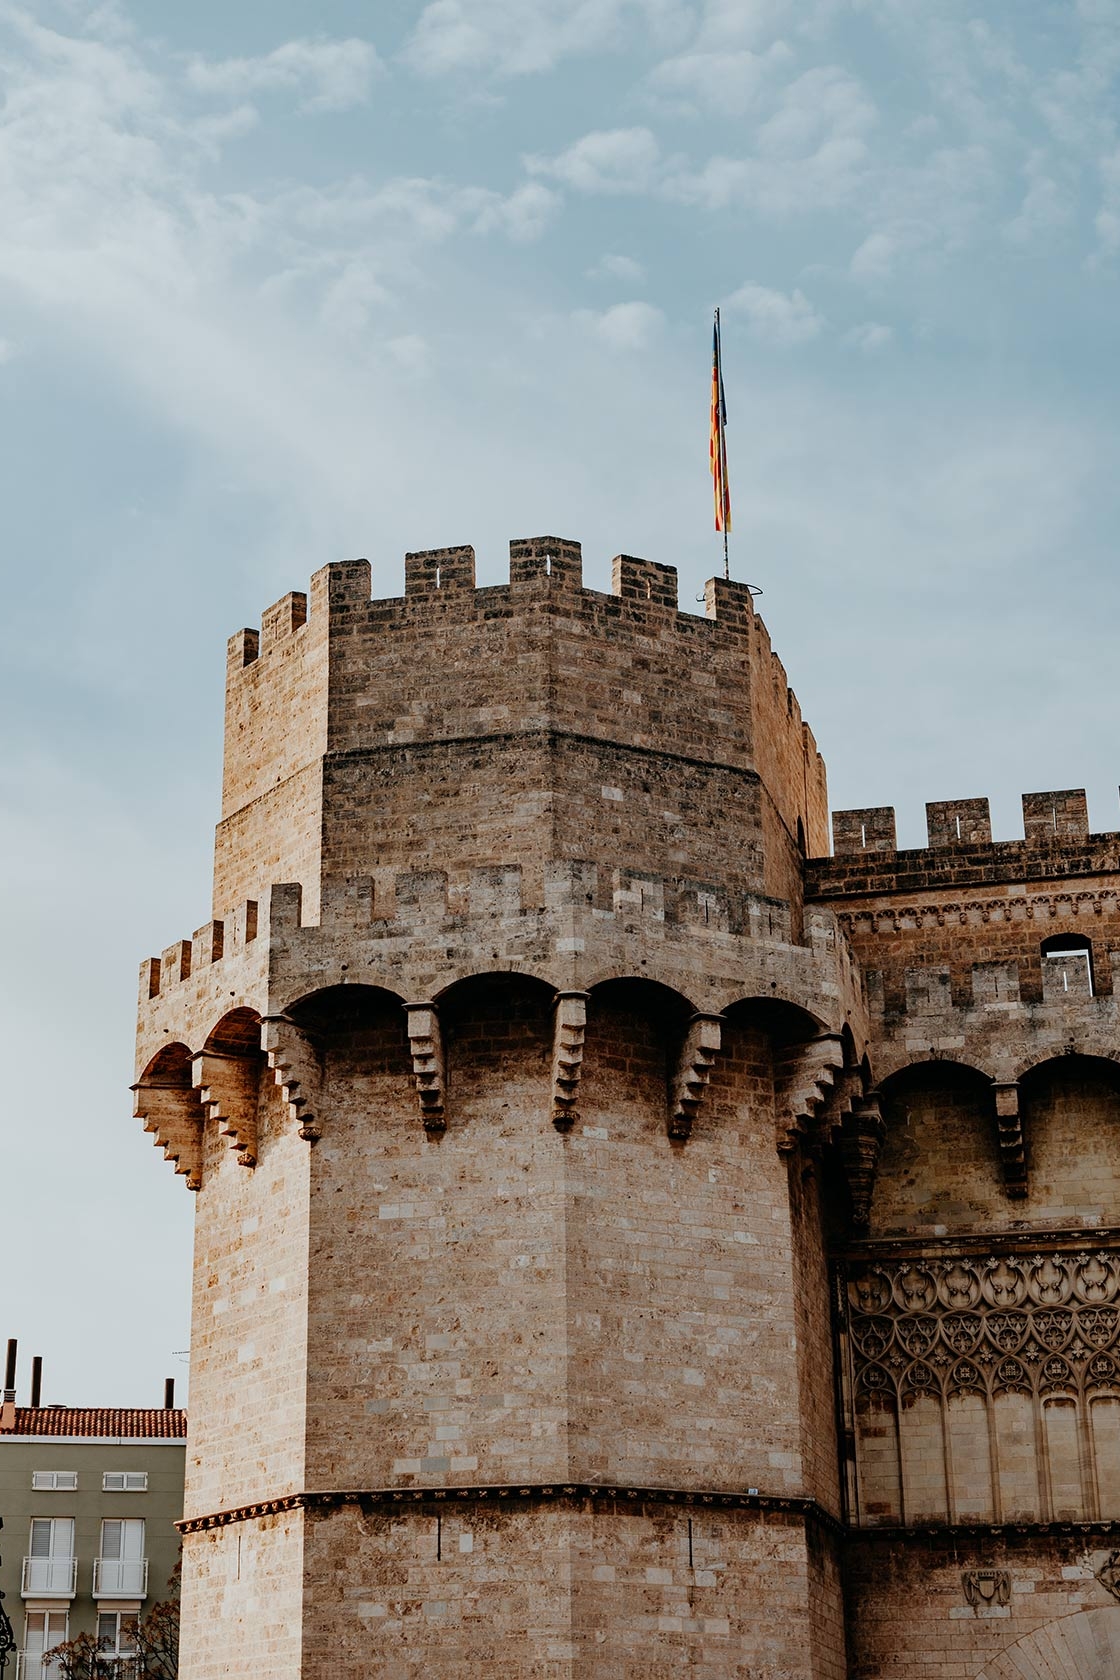
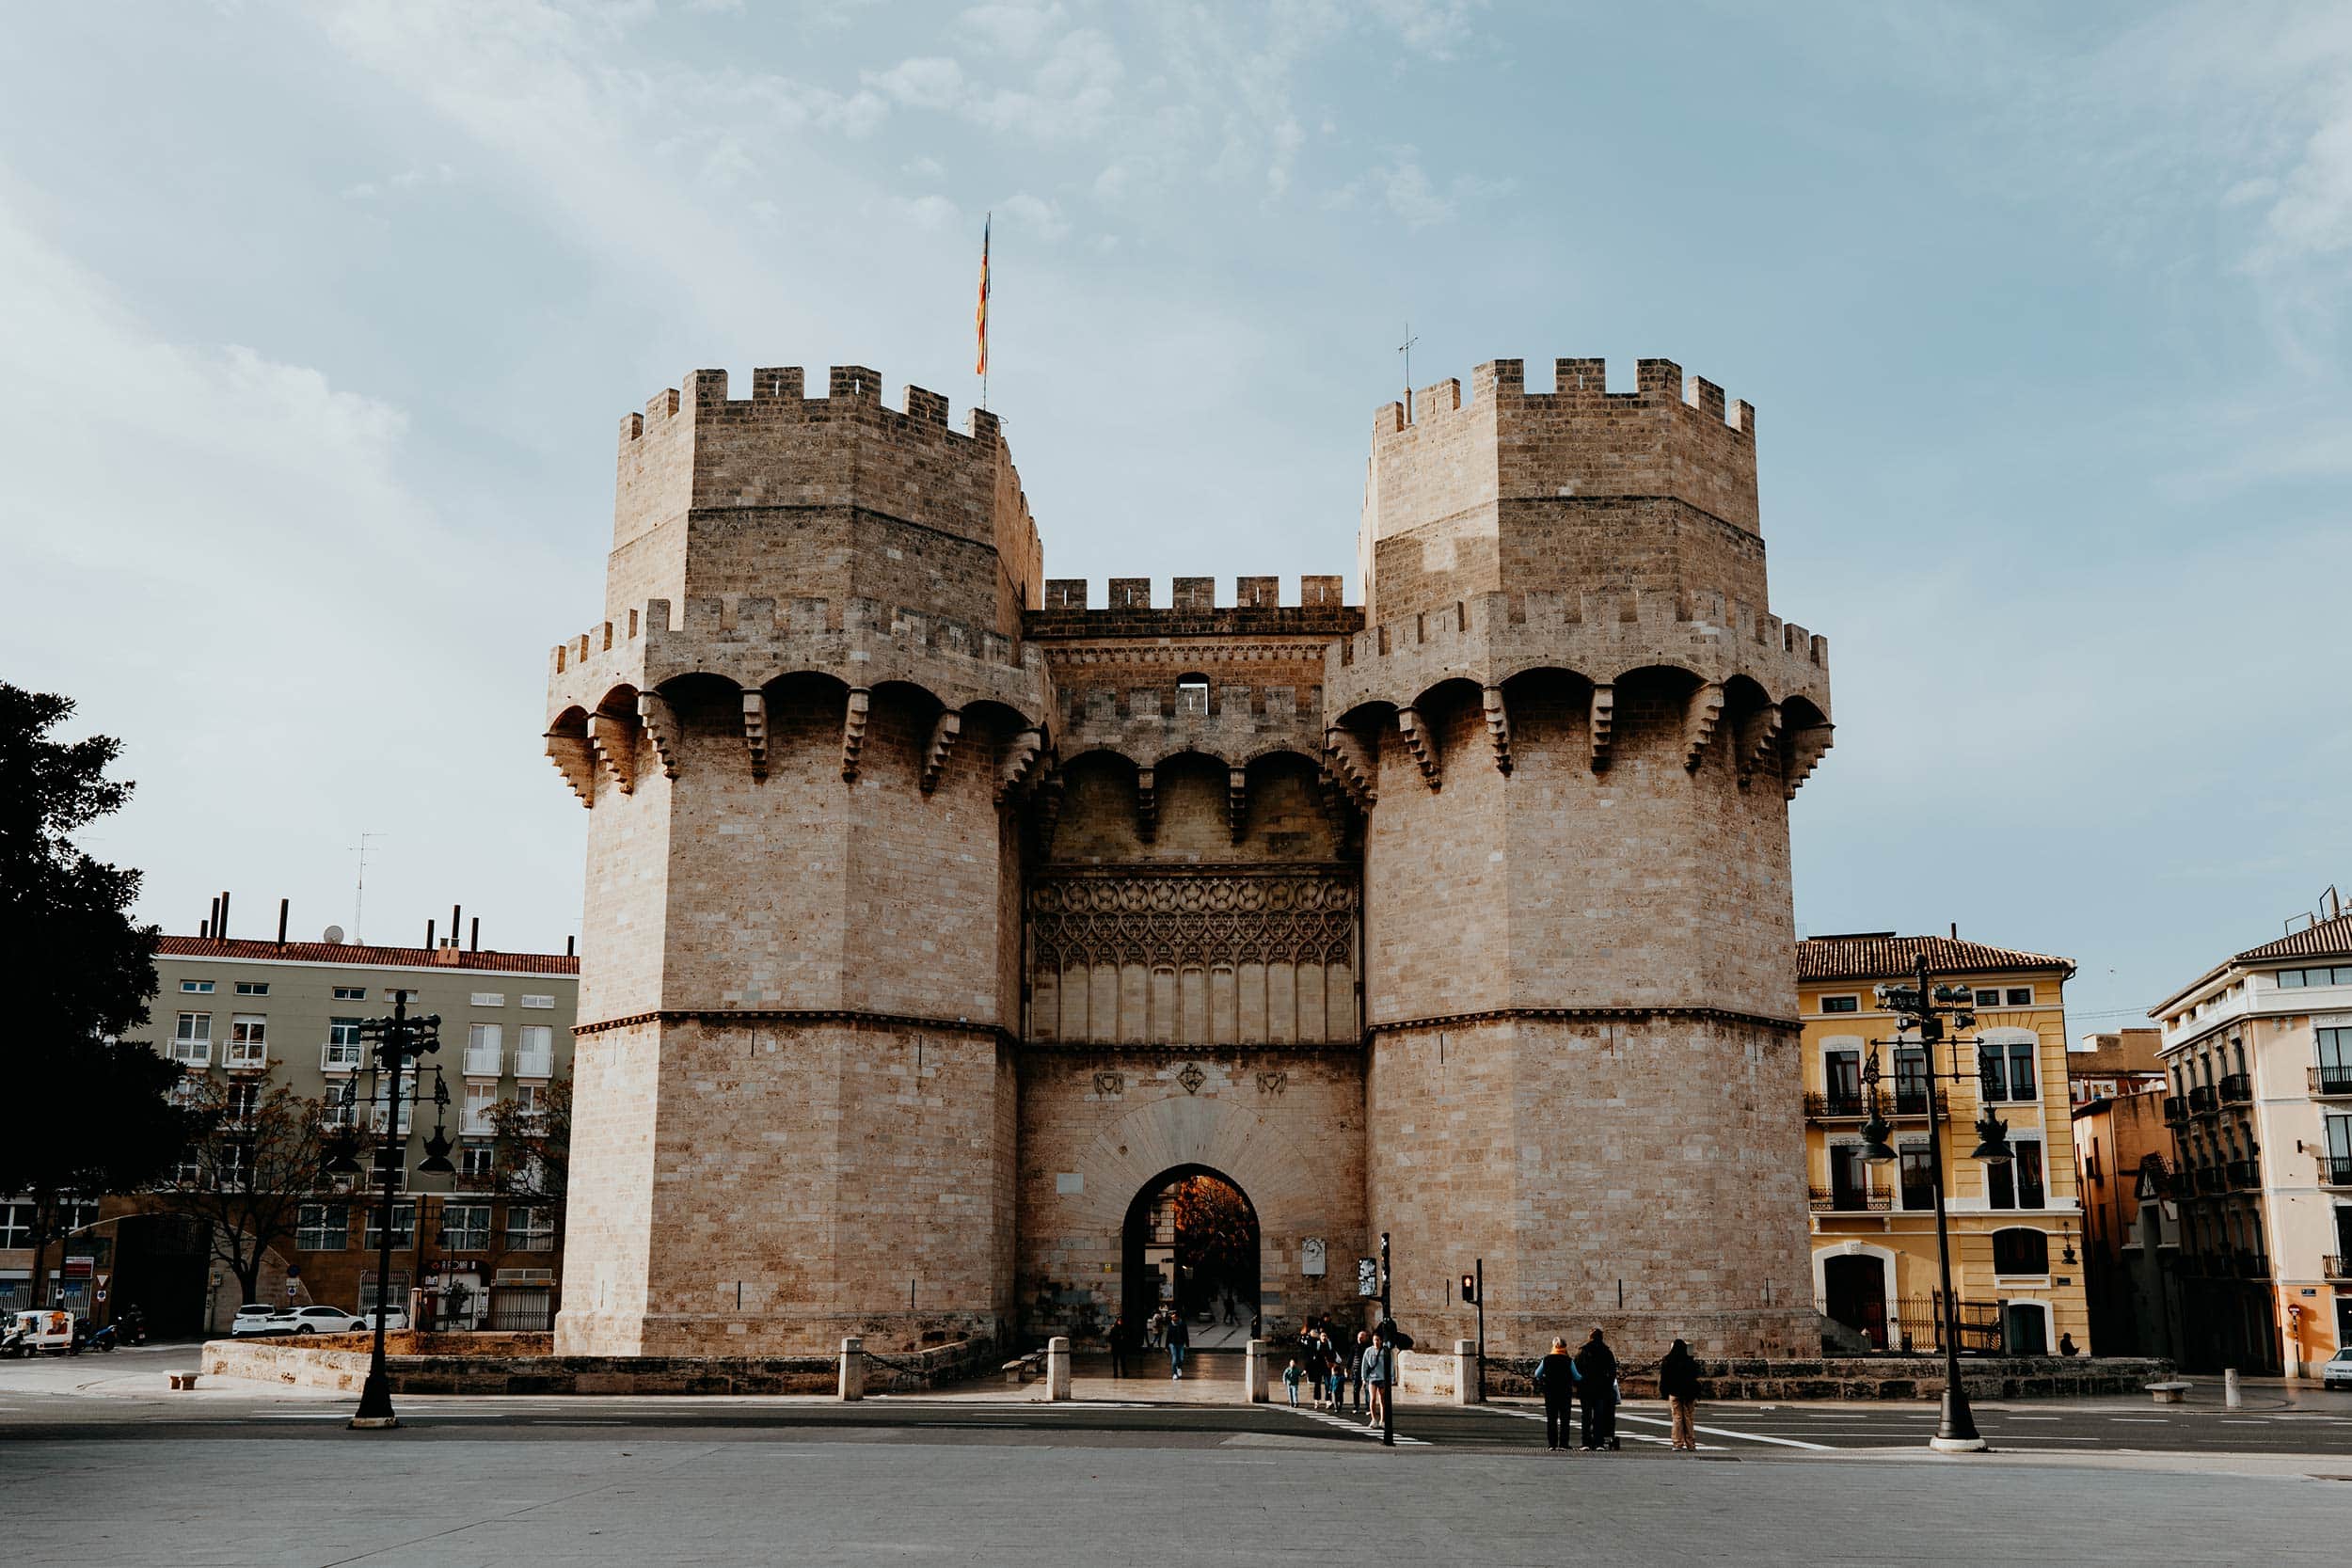
6. Marvel at the Torres de Serranos
Constructed in the 14th century under the supervision of architect Pere Balaguer, the Torres de Serranos, also known as the Serrano Gate, is a massive ancient city gate that was once part of the Christian Wall that encircled Valencia.
Located in the northeast of the old city centre, Torres de Serranos was built in Valencian Gothic style and served as the walled city’s main access point, connecting Valencia via the former royal road (camí ral) with the district of Els Serrans.
Today, Torres de Serranos is one of two remaining gates and climbing to the summit to overlook the picturesque Valencian alleyways down below is easily one of the best things to do in Valencia.
Though it’s relatively easy to climb, it is worth mentioning that some might find it a little steep and a total of 139 steps should be climbed to get to the top, which shouldn’t be a challenge for those used to moderate physical activity.
Those keen on seeing the city from above should note that there’s another impressive gate; Torres de Quart, which is also still very much in use, and happens to be free of entrance too.
Where | Torres de Serrano
Opening hours | Tuesday – Saturday 1000 to 1900, Sunday 1000 to 1400
Cost | Entrance fee €2,- per person, Sunday free

7. Visit one of the many Valencia Museums
As with most popular cities within Europe, Valencia is teeming with interesting art galleries, eclectic museums and fascinating cultural institutions, all awaiting to be explored by those who are captivated by art, history or culture.
Whether you’re keen to learn about Valencian history, wish to behold incredible modern art pieces of both Spanish and international artists, or simply want to immerse yourself in a world of Spanish heritage, culture, and traditions, rest assured, Valencia is home to over 40 museums, which makes it a paradise for art-minded people and history buffs alike.
Given there are heaps of incredible options, I chose to share some of my favourites more thoroughly in separate sections within this guide, so make sure you check those out too.
Since it’s simply impossible to curate them all, and a little too time-consuming to visit all of ’em, I’ve chosen to list merely a few out of the bunch which I believe are worth a visit too.
Museum of Fine Arts | Set within the stunning former Sant Pius V Seminary College at the edge of Jardins del Turia, the Museum of Fine Arts is considered one of the best museums in Valencia, with over 2.000 artworks, including that of Joaquín Sorolla and Francisco de Goya.
La Almoina Archaeological Museum | When I explore a new place, I always feel inclined to learn about its foundations and history. In Valencia, La Almoina will satisfy that, as the museum holds an outstanding collection of archaeological remains dating back to influential eras of Valencia’s rich historical timeline.
Museo Fallero de Valencia | Completely dedicated to Valencia’s famous Fallas Festival, Museo Fallero de Valencia gives its visitors an in-depth look into the traditional celebration of Las Fallas, and exhibits the ninots (smaller sculptures or monuments) that were saved from the flames from 1934 onward.

8. Spend the night at Caro Hotel Valencia
During my first trip to Valencia, I was fortunate enough to spend some time at the incredible Caro Hotel, which made my time in Valencia even better, making it a trip I will not easily forget.
Set within an authentic 19th-century palace, the 5-star Caro Hotel is an outstanding monumental hotel in the heart of Valencia’s historic Old Town.
With plenty of historical elements, a mesmerising blend of ancient and modern architecture, and a distinctive sophisticated character, Hotel Caro will not be your average hotel stay, but more of an unforgettable once-in-a-lifetime experience.
From the most friendly staff to extraordinary gastronomical offerings, from its intimate terrace with outdoor pool to its top-notch location near the best things to do in Valencia, this boutique hotel is simply too good to be true.
The interior of my room even had a piece of the ancient Arab Wall as decoration, which added a notable touch of history and authenticity to my stay.
On top of that, the staff will do everything in their power to make your stay even more memorable, think preparing your room for the night, leaving culinary surprises in your room while you’re out and exploring, as well as providing you with all the useful tips to uncover the city.
Do note that the Caro Hotel is one of the most popular boutique hotels in Valencia, so if you’re keen on staying there it’s wise to secure your room in advance.
Where | Carrer de l’Almirall, 14
Book | The highly-rated Caro Hotel can be booked via Booking.com
Cost | Doubles start at €180 a night, depending on the time of year

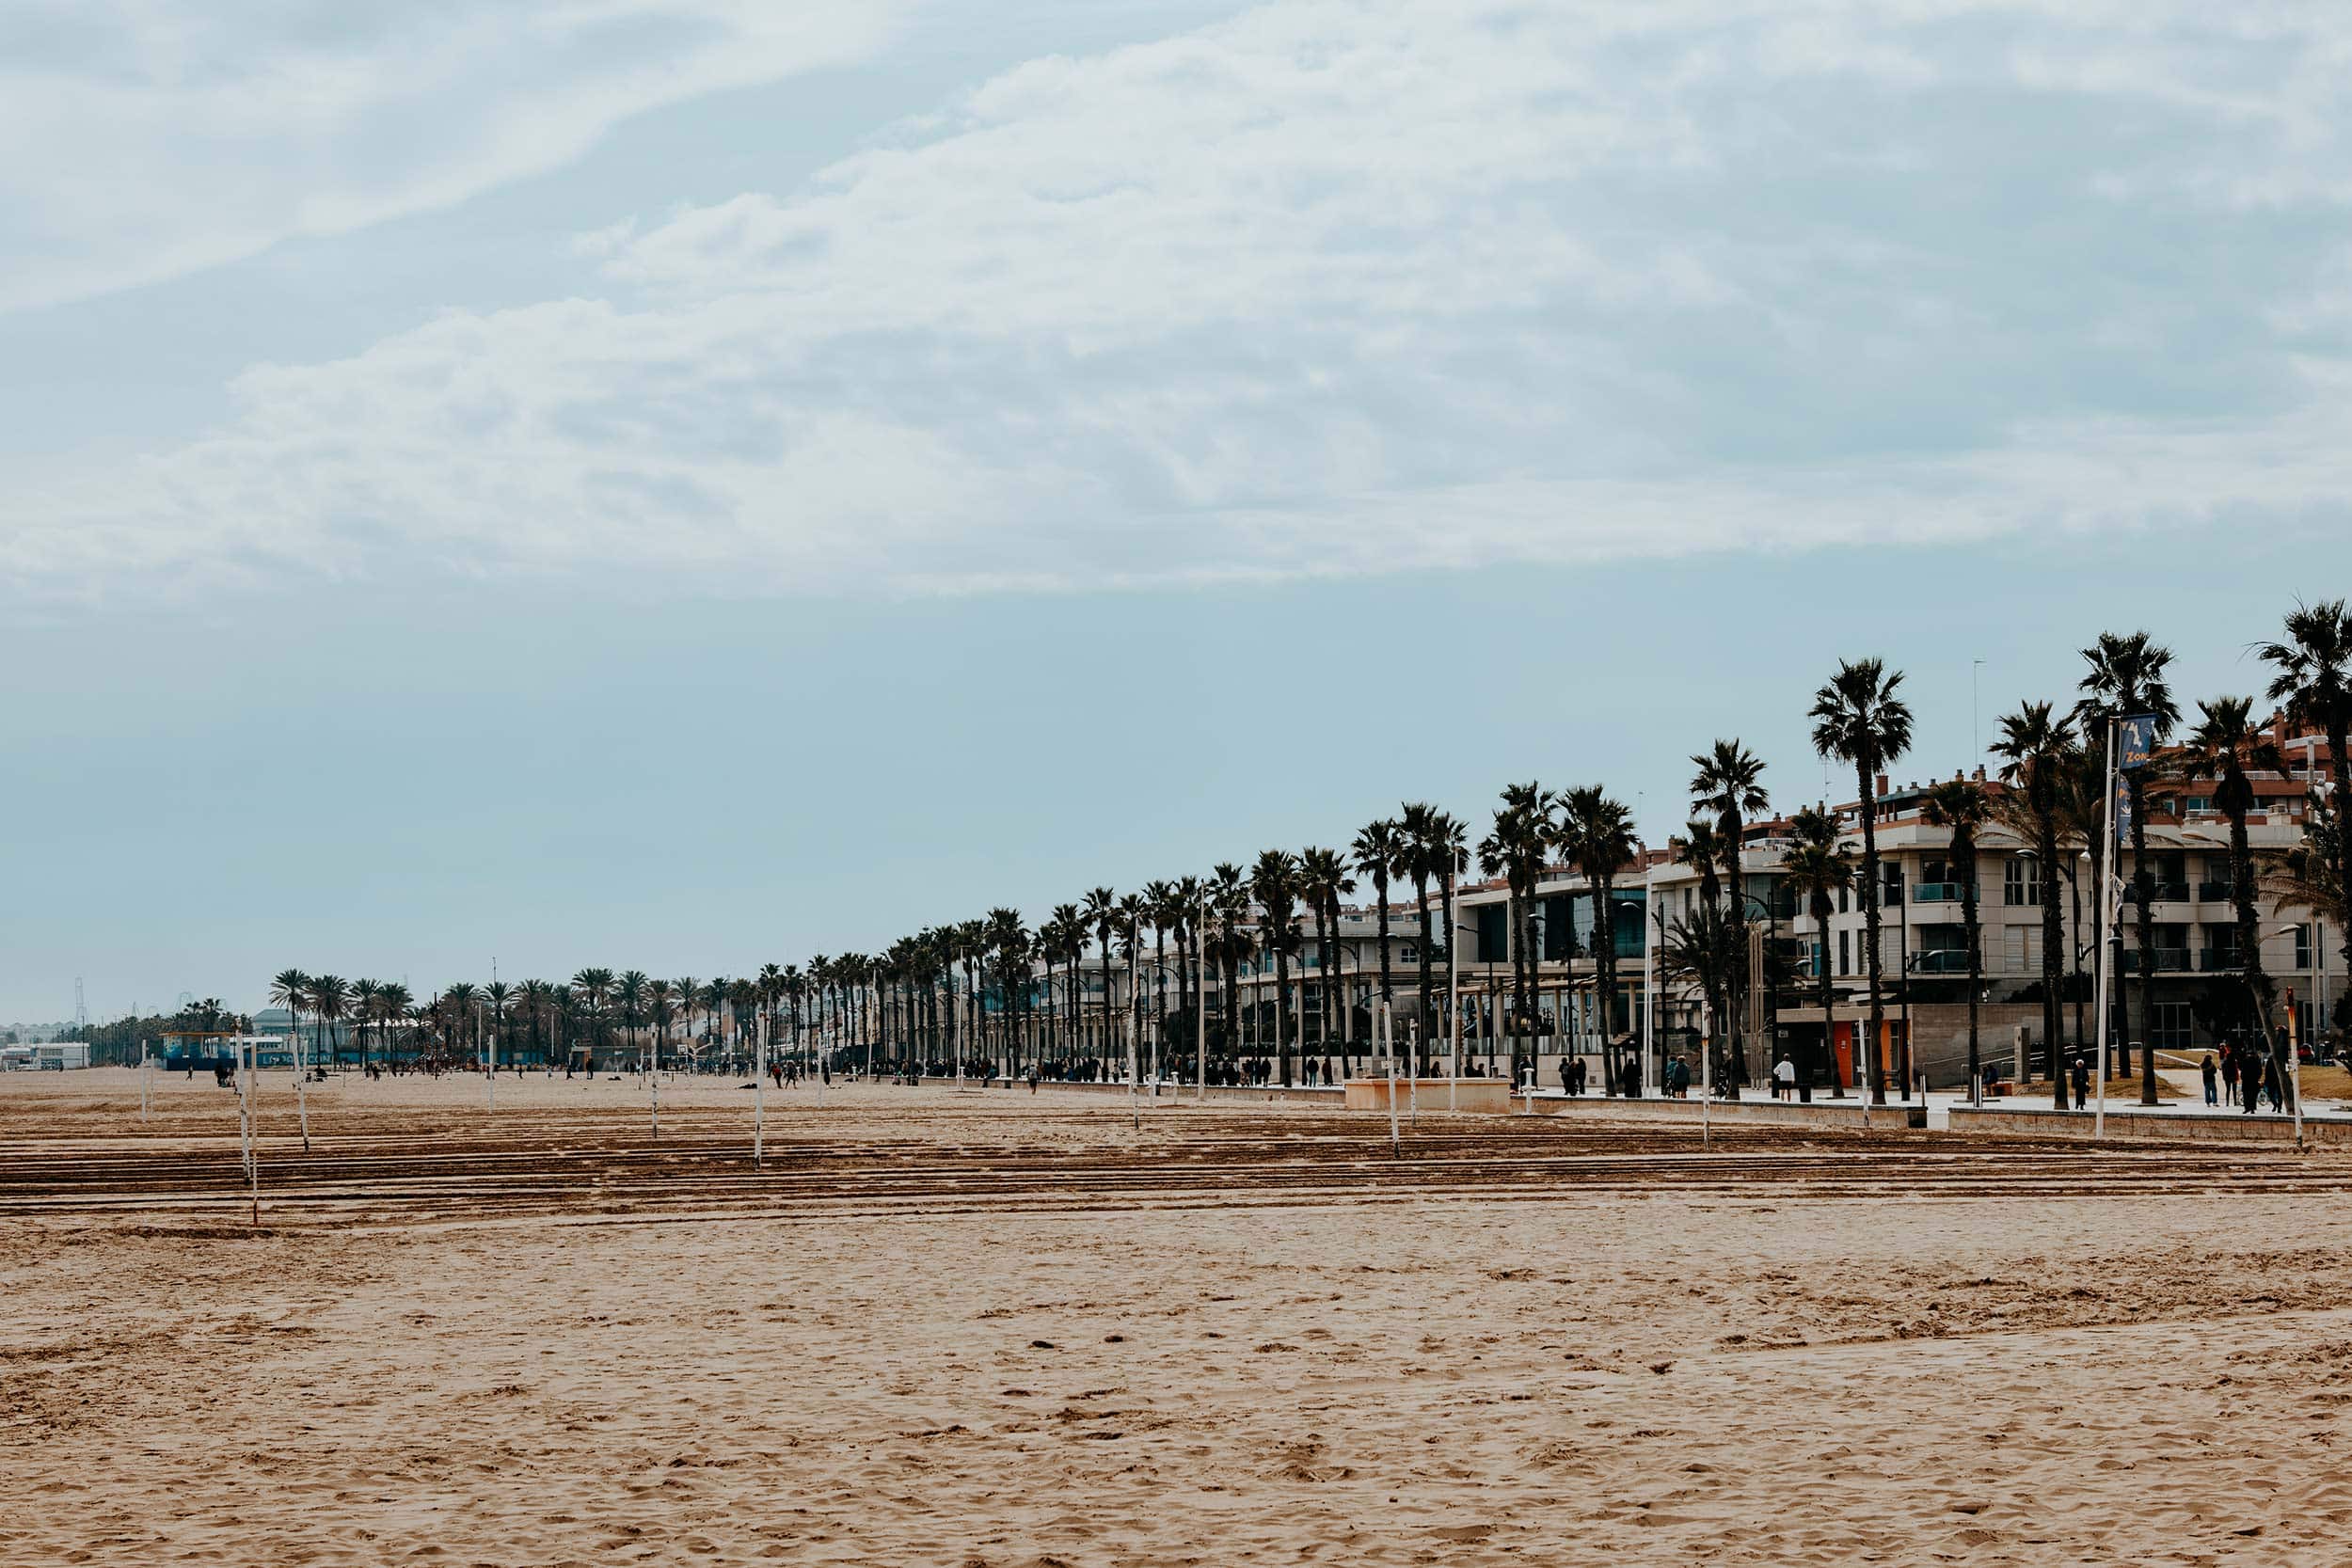
9. Unwind on Valencia’s best beaches
What’s better than a lively city rich in history and culture that is also packed with an abundance of trendy coffee shops, top-notch restaurants, and a buzzing nightlife scene?
It’s pretty simple: a city that also happens to have a plethora of wonderful beaches dotted around its coastline.
Luckily for you, Valencia is such a city.
It is for this exact reason that Valencia has become one of the best city trip destinations in Europe.
With the beach only a stone’s throw away from the historical centre, a trip to Valencia will provide its visitors with an ideal combination of leisure and exploration.
Some of my favourite beaches in Valencia include:
Malvarrosa Beach | Lined with palm trees and accompanied by a lively boulevard, Malvarrosa is an energetic beach and an absolute favourite among the Valencian locals. With over 2 kilometres of coastline, this beach has plenty of options for those looking for some fun beachside activities, think volleyball nets, football goals, fitness equipment and playgrounds for the kids.
Playa de Las Arenas | The first stretch of beach you’ll encounter when arriving at the coast from the city centre, Playa de Las Arenas is easily the most popular beach in Valencia. While it is not necessarily my favourite given the larger crowds, this beach is teeming with locals and tourists alike. It’s also home to Marina Beach Club, a trendy luxurious beach club that boasts an infinity pool, sunbeds, cocktails and funky beats.
Playa de la Patacona | Saving the best for last, Playa de la Patacona is by far my favourite beach in Valencia, as it’s a little more secluded and therefore significantly less busy. On top of that, it is home to La Mas Bonita, a quaint little beach bar that provides an inviting and laid-back flair.
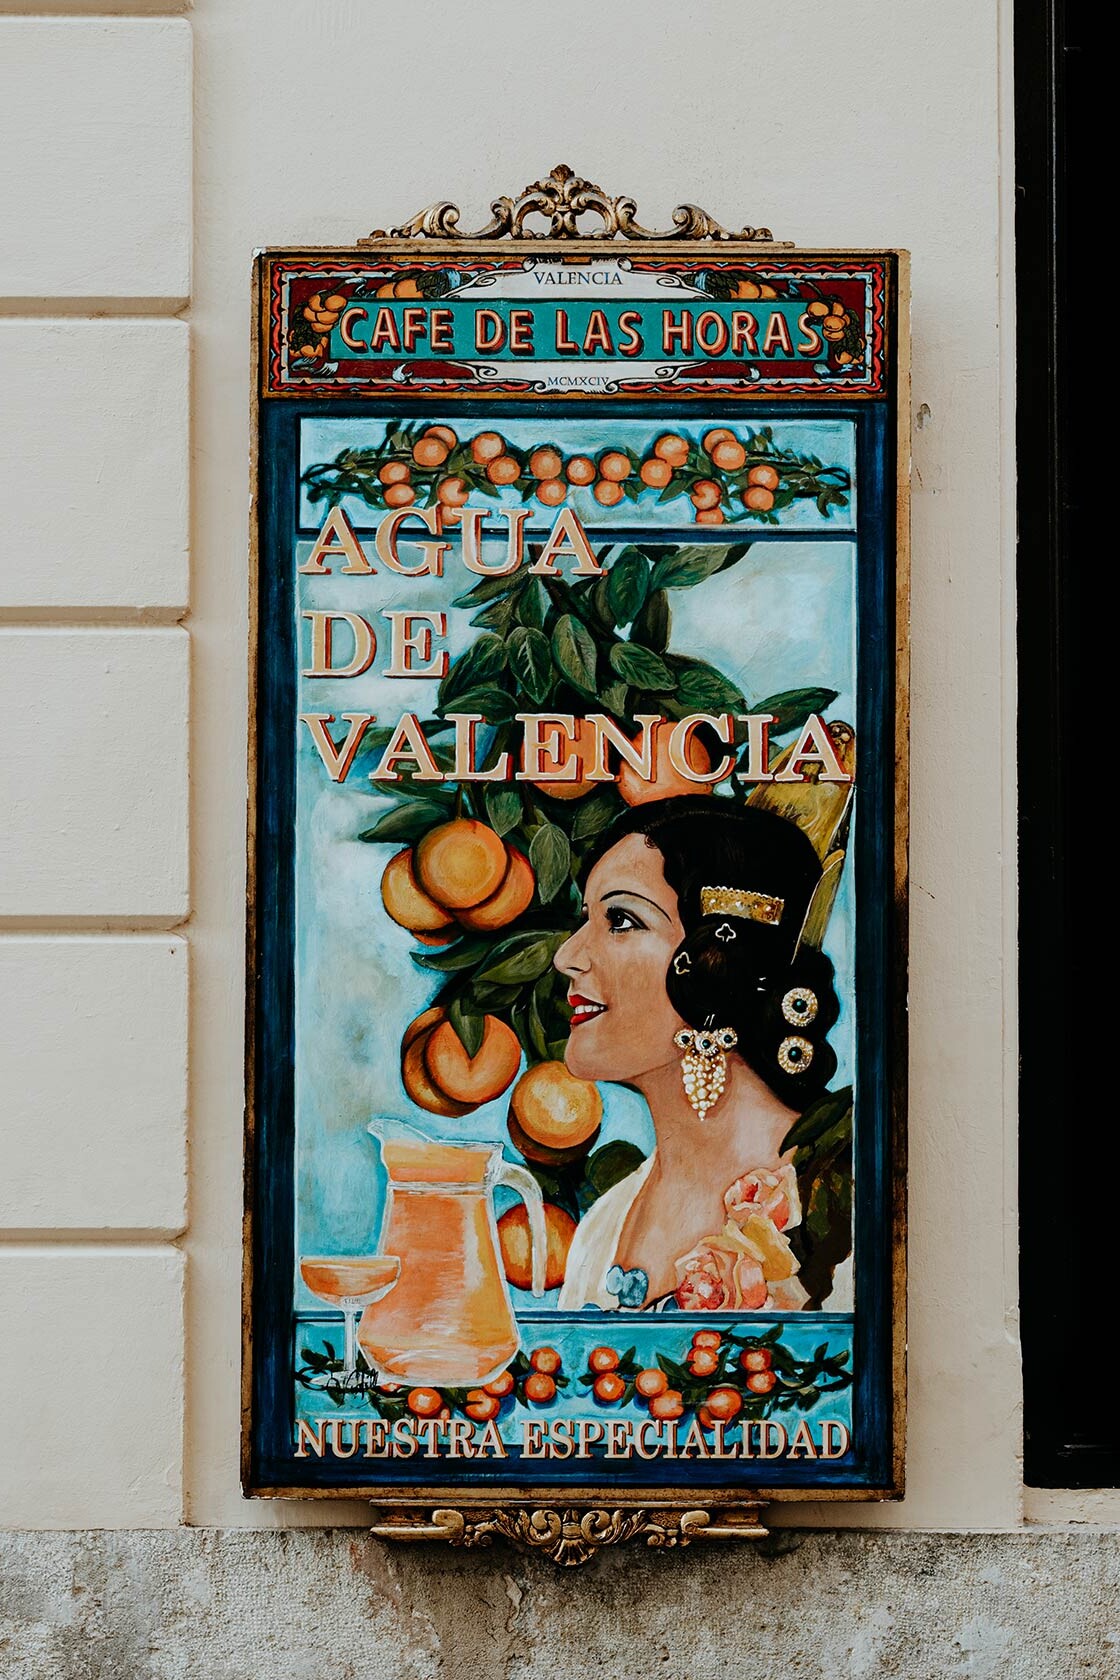
10. Taste Agua de Valencia at Cafe de las Horas
Given oranges are an iconic symbol to Valencia and its people, it’s little wonder that a cocktail was crafted around the flavours of this beloved citrus fruit.
Named Agua de Valencia, this refreshing cocktail is made with either cava or champagne, vodka, gin, perhaps some secret ingredients, and of course, freshly squeezed local orange juice.
But to me, Agua de Valencia is somewhat of a Troyan horse, if you get what I’m saying here.
See, drinking this elixir tends to give you the impression that you’re drinking an alcohol-free fruity drink, yet it’s equally intoxicating as cocktails that do have a boozy taste to it, so keep that in mind while savouring many of this delectable drink.
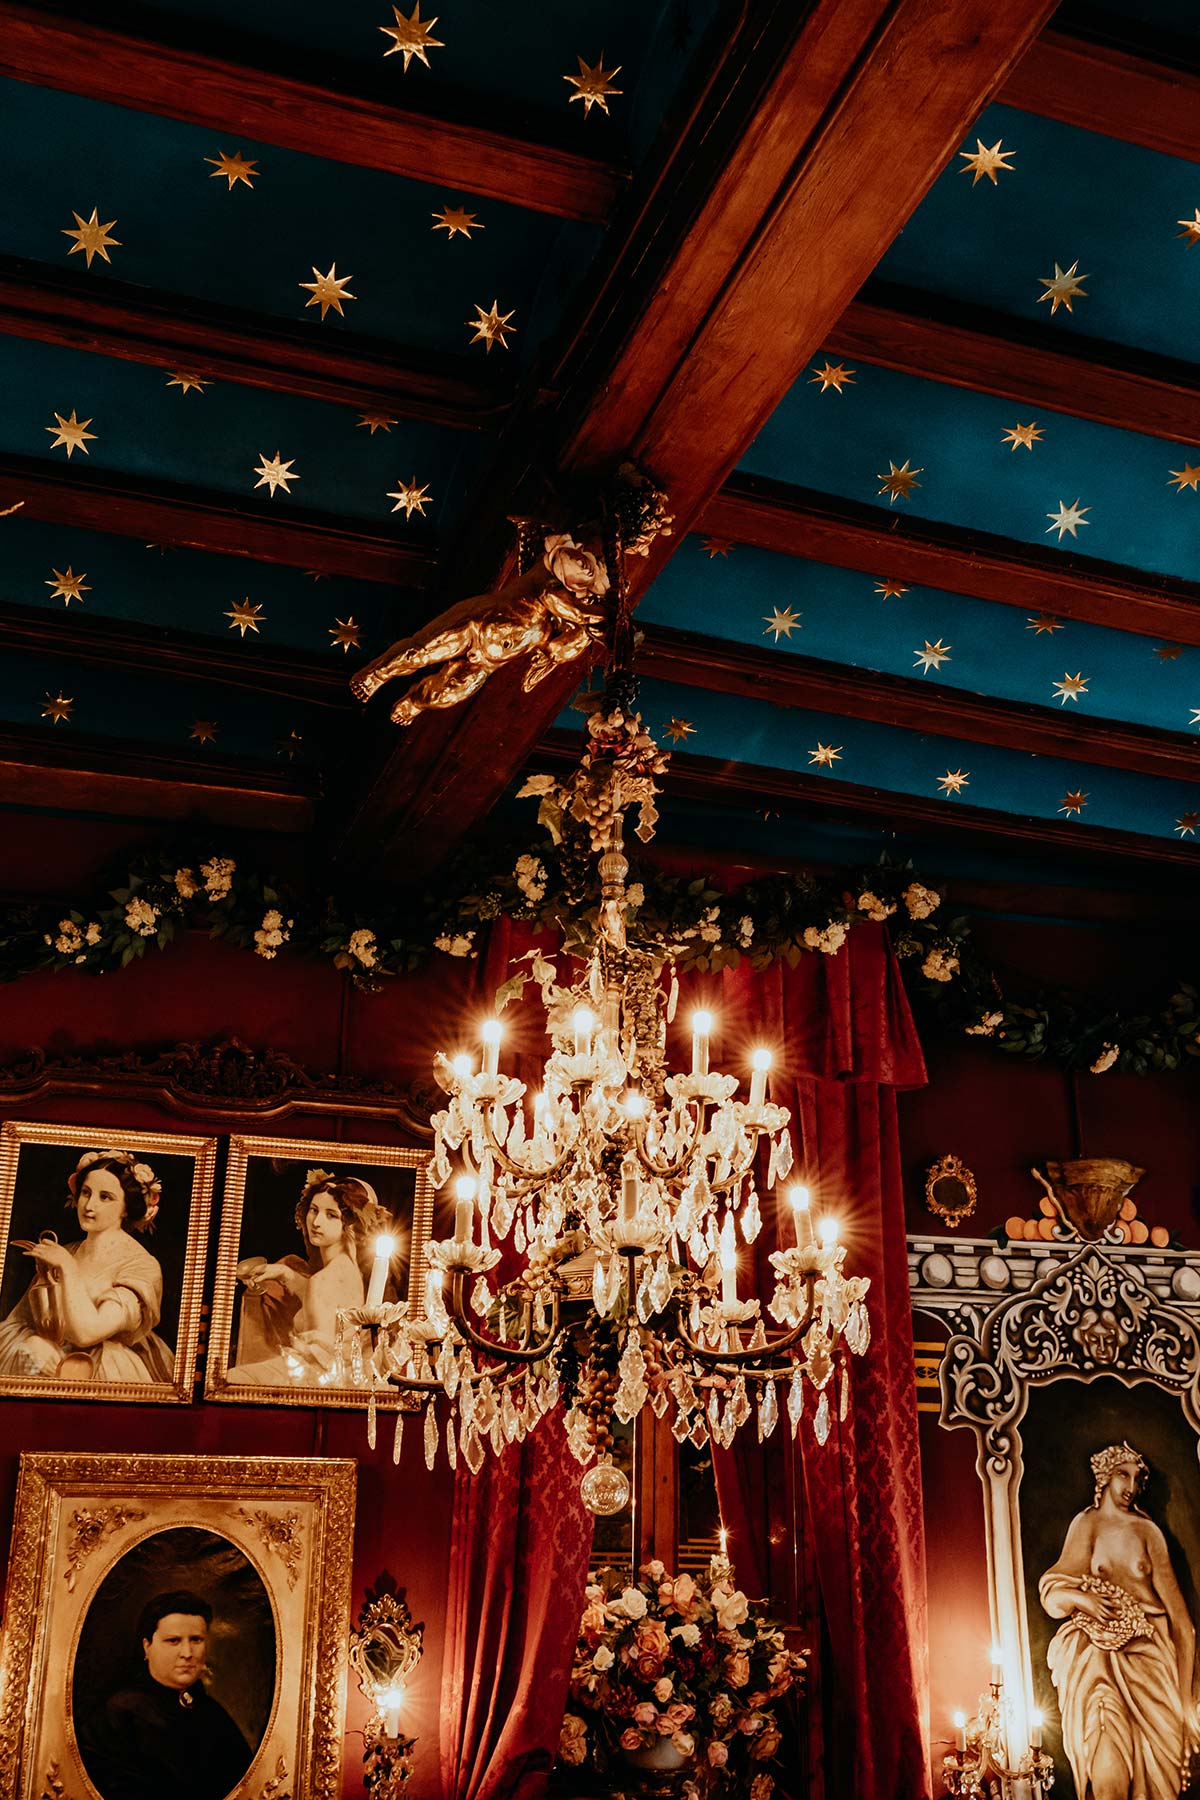
While this iconic drink can be found just about anywhere in Valencia, I believe the best version of Agua de Valencia is served at Café de las Horas, a lively café known for its ornate bohemian interior and authentic Victorian ambience.
But this eclectic café isn’t just a place to stop by for a jug (or two) of Agua de Valencia. No, it has actually become a cultural and recreational establishment within the city, where both locals and travellers come to mingle while enjoying a drink.
However, its popularity and prime location in the heart of Valencia’s lively Ciudad ensures that Café de las Horas gets extremely busy throughout the day, so make sure you make a reservation before heading that way, especially if you’re visiting during the summer months.
Where | Cafe de las Horas
Opening hours | Daily 1000 – 0130
11. Roam around Mercado Central de Valencia
Name one thing that offers a better glimpse into a new destination and its customs other than roaming around the many stalls of an authentic local market, I’ll wait.
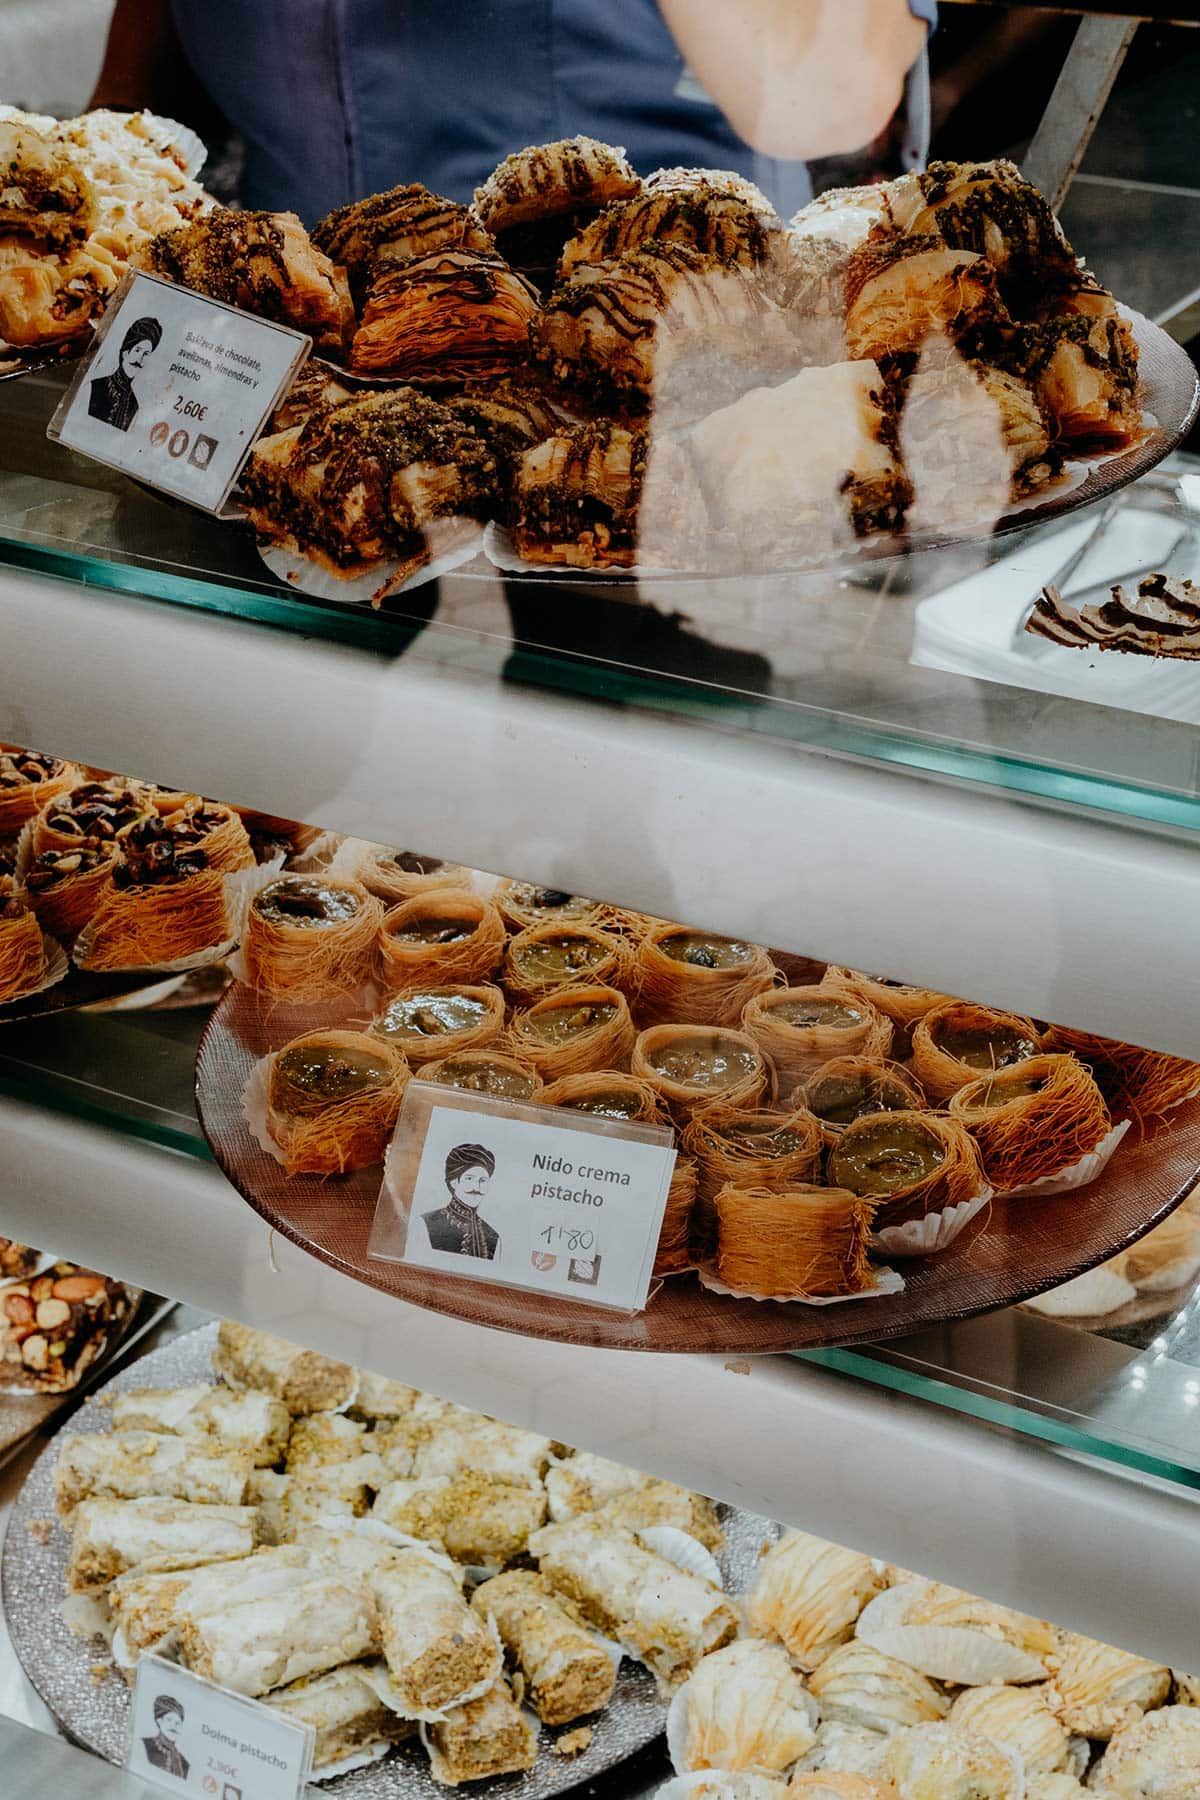
Deemed the largest fresh produce market in Europe, the Central Market of Valencia is an extensive 8,000 m2 covered market known for its variation of traditional local produce, mouth-watering tapas and pintxos, and lots of great vino too.
The Valencian agora breaths Mediterranean life, and houses more than 300 stalls, selling everything; from fresh fruits and vegetables to nuts, cheeses & spices, and from the freshest catches of the day to the best locally sourced cuts, there’s just something yummy for everyone.
But as with most popular markets around the world, Mercado Central, is, as you should expect, slightly more expensive than other markets in Valencia, so for that reason, I’d recommend visiting solely to take a roam and experience the hustle and bustle of Valencian daily life.
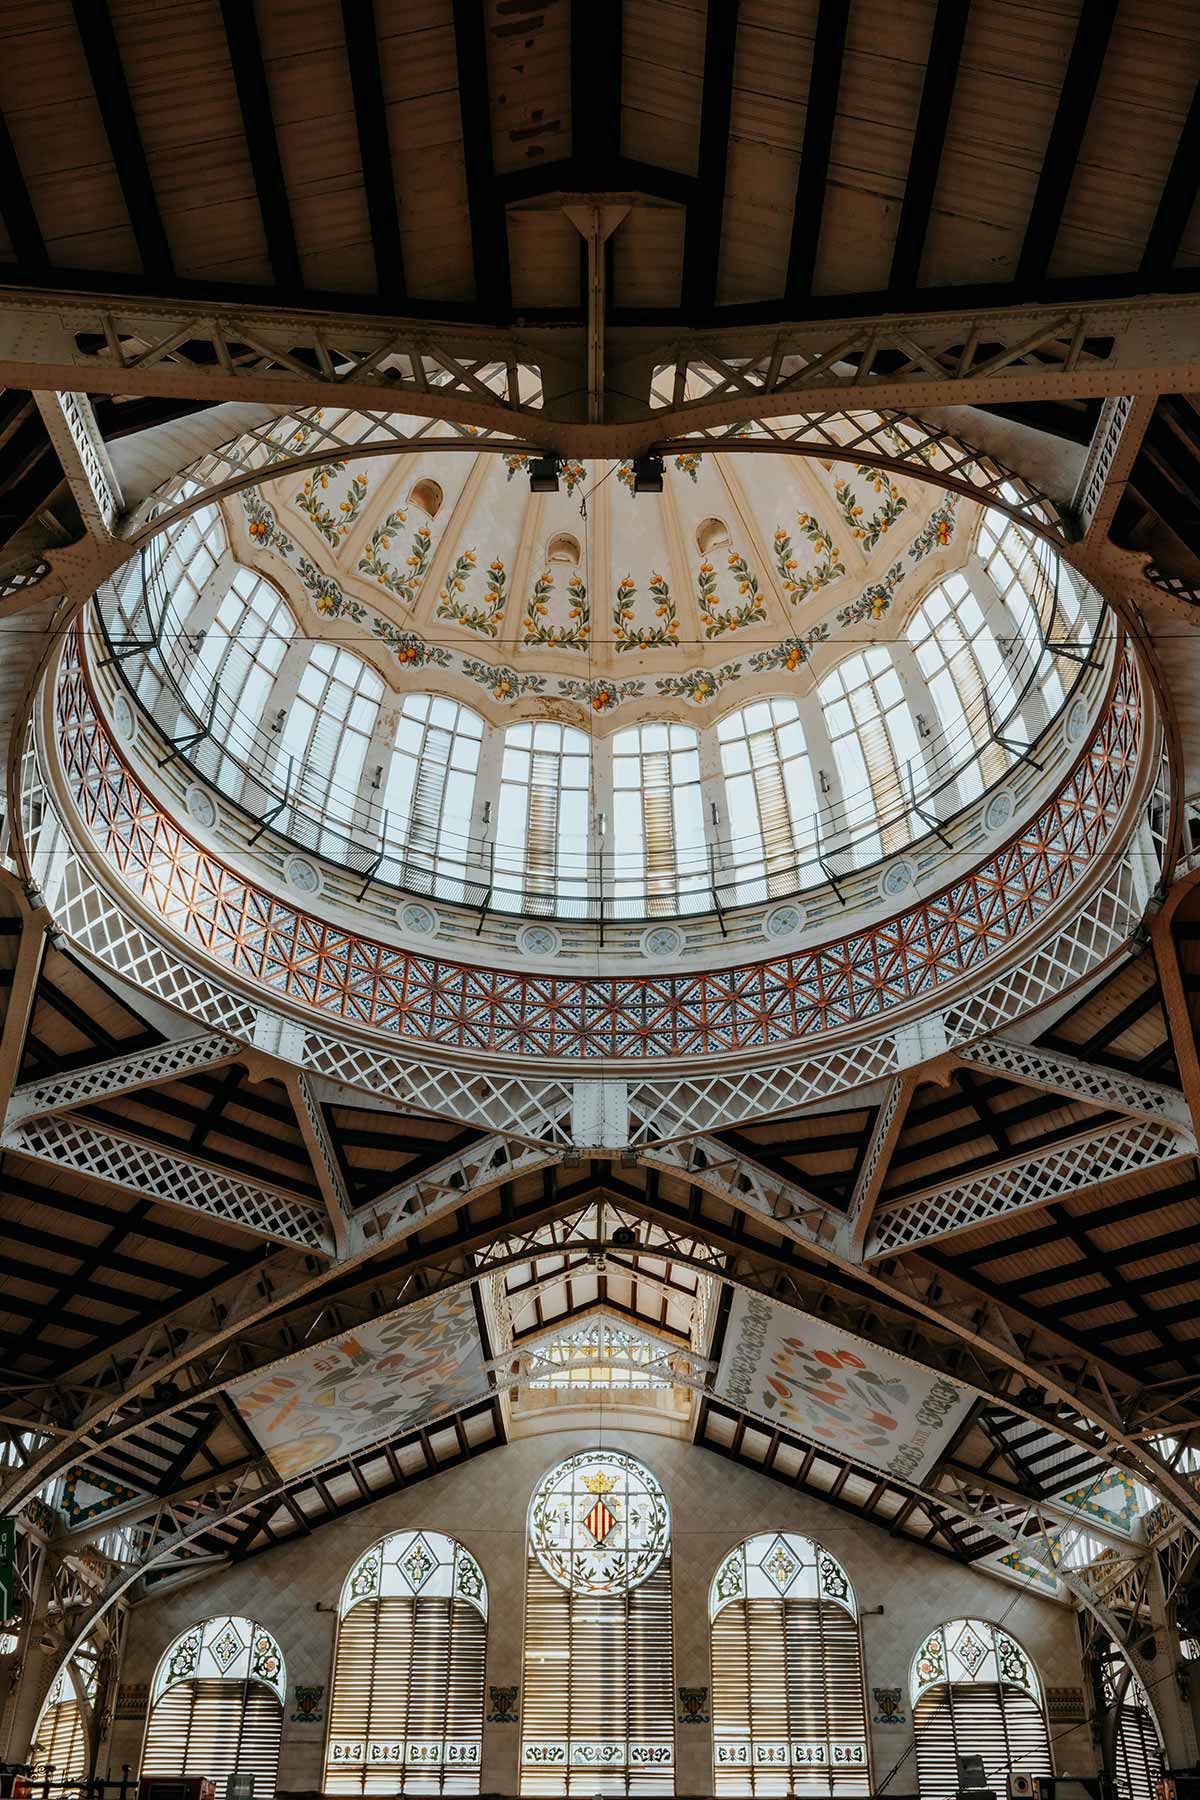
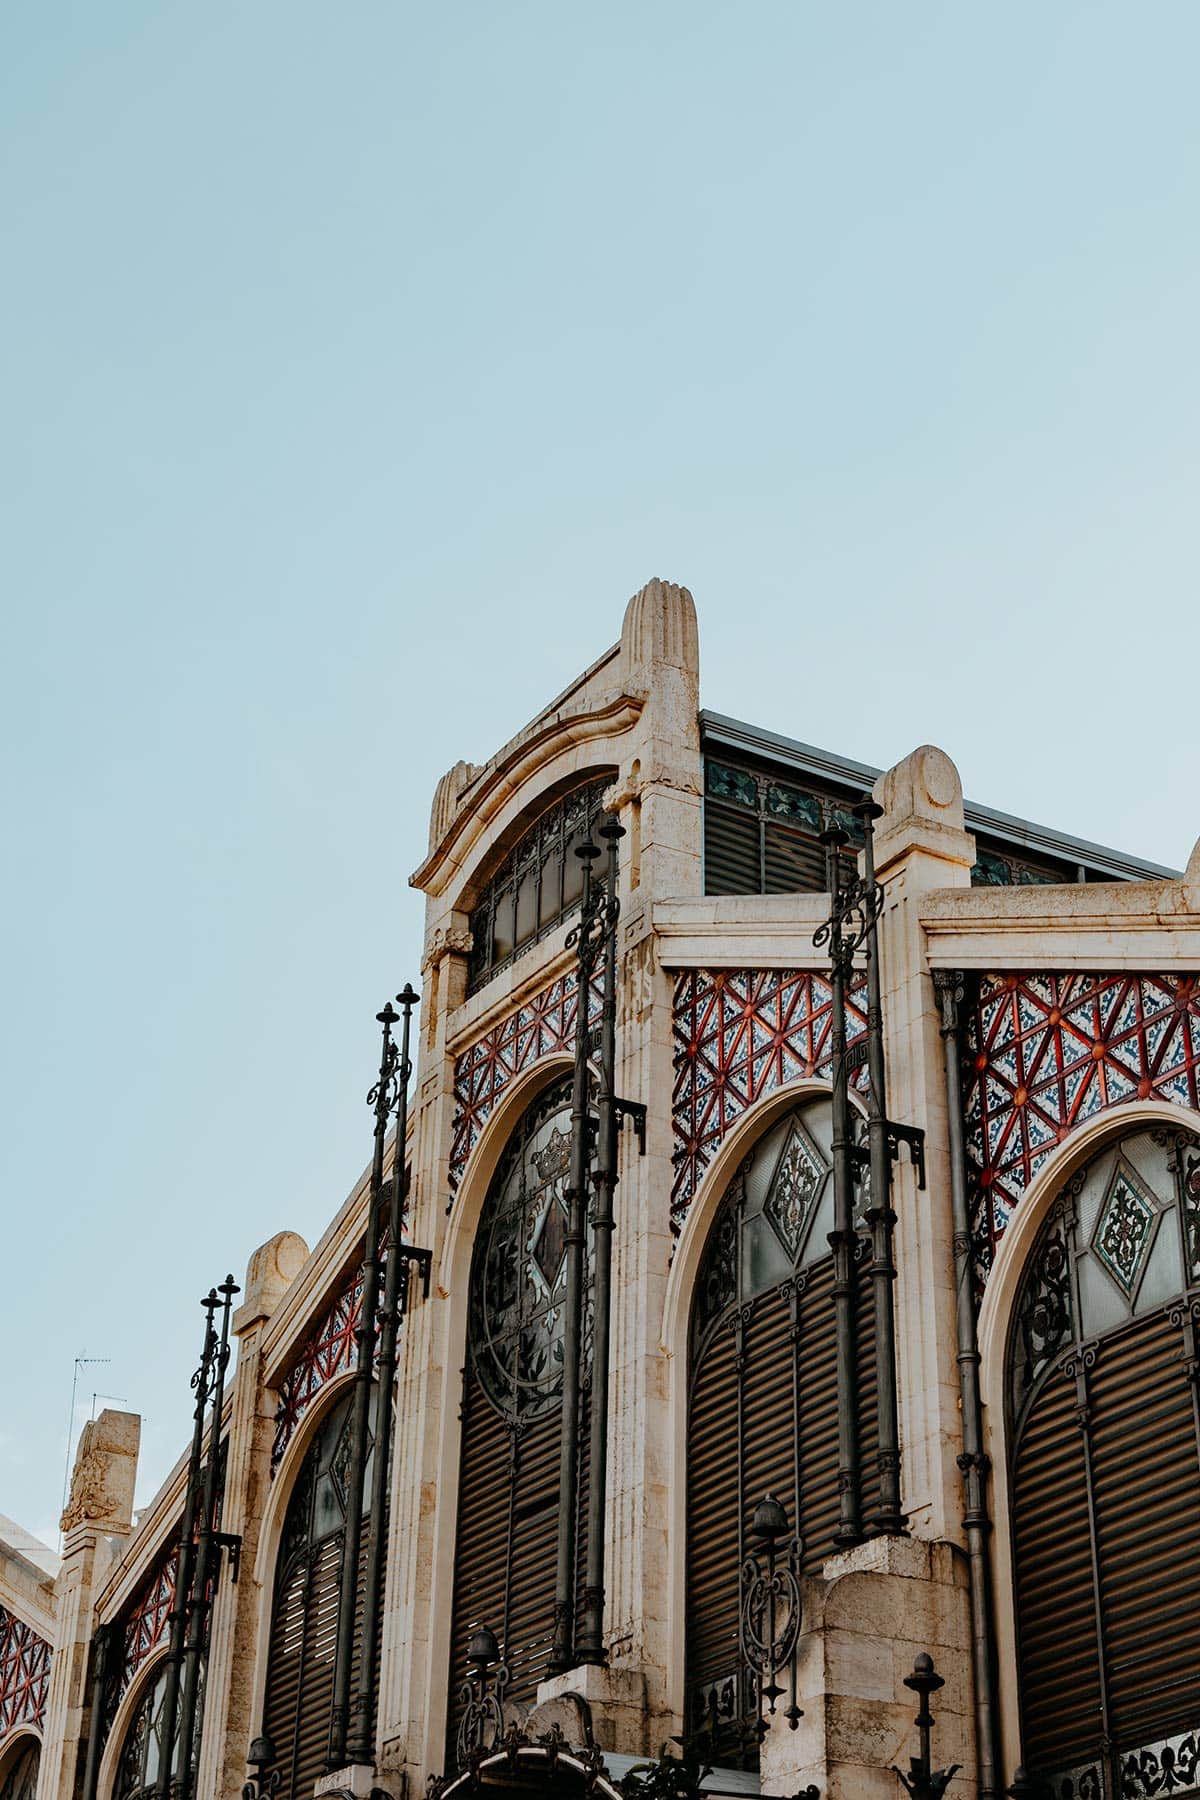
Ooh, and of course, to marvel at the incredible architectural feats, which are truly in a league of their own and are marked by a huge stained glass dome decorated with painted oranges (Valencia’s signature fruit), solid iron columns and frames, and colourful tiles throughout.
Where | Mercado Central de Valencia
Opening hours | Monday to Friday 0730 – 1500, Sunday closed
12. Behold Valencia’s magical plazas
When roaming through the picturesque streets of the lively historic centre, you’ll stumble upon one of Valencia’s many plazas time and time again.
Those plazas are the heart of all things social in Valencia, and often teeming with locals and tourists alike, making an early morning stroll here one of my favourite things to do in Valencia.
Though they’re absolutely stunning at any time of day, they’re best enjoyed from the moment the sun starts to set, and these charming squares gradually come to life.
Some of Valencia’s best plazas include:
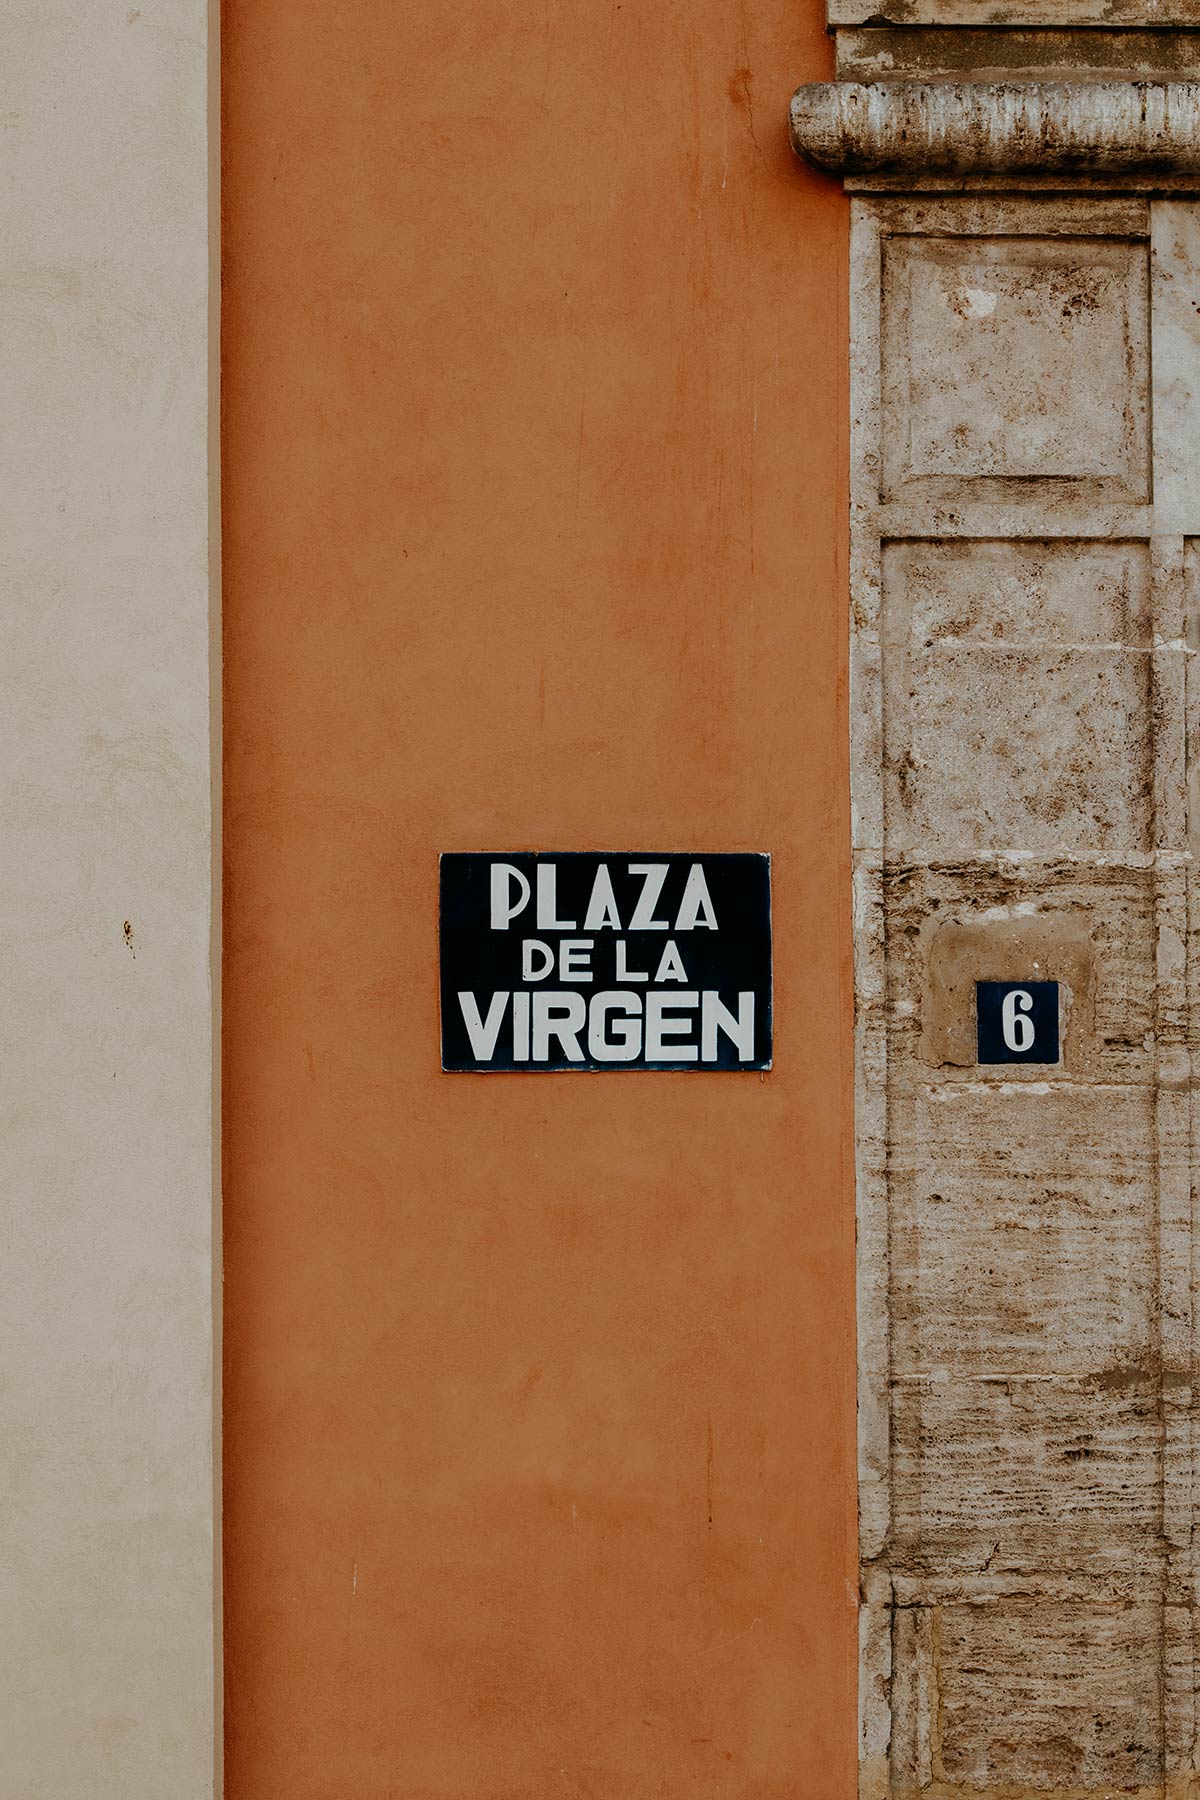
Plaza de la Virgen | Easily the most popular plaza among tourists, offering great views of both the Turia fountain and the Valencia cathedral.
Plaza del Ayuntamiento | By far the largest square in Valencia, Plaza del Ayuntamiento can be seen as the political and financial heart of Valencia, as well as a gathering place for local festivities, including the popular Las Fallas festival.
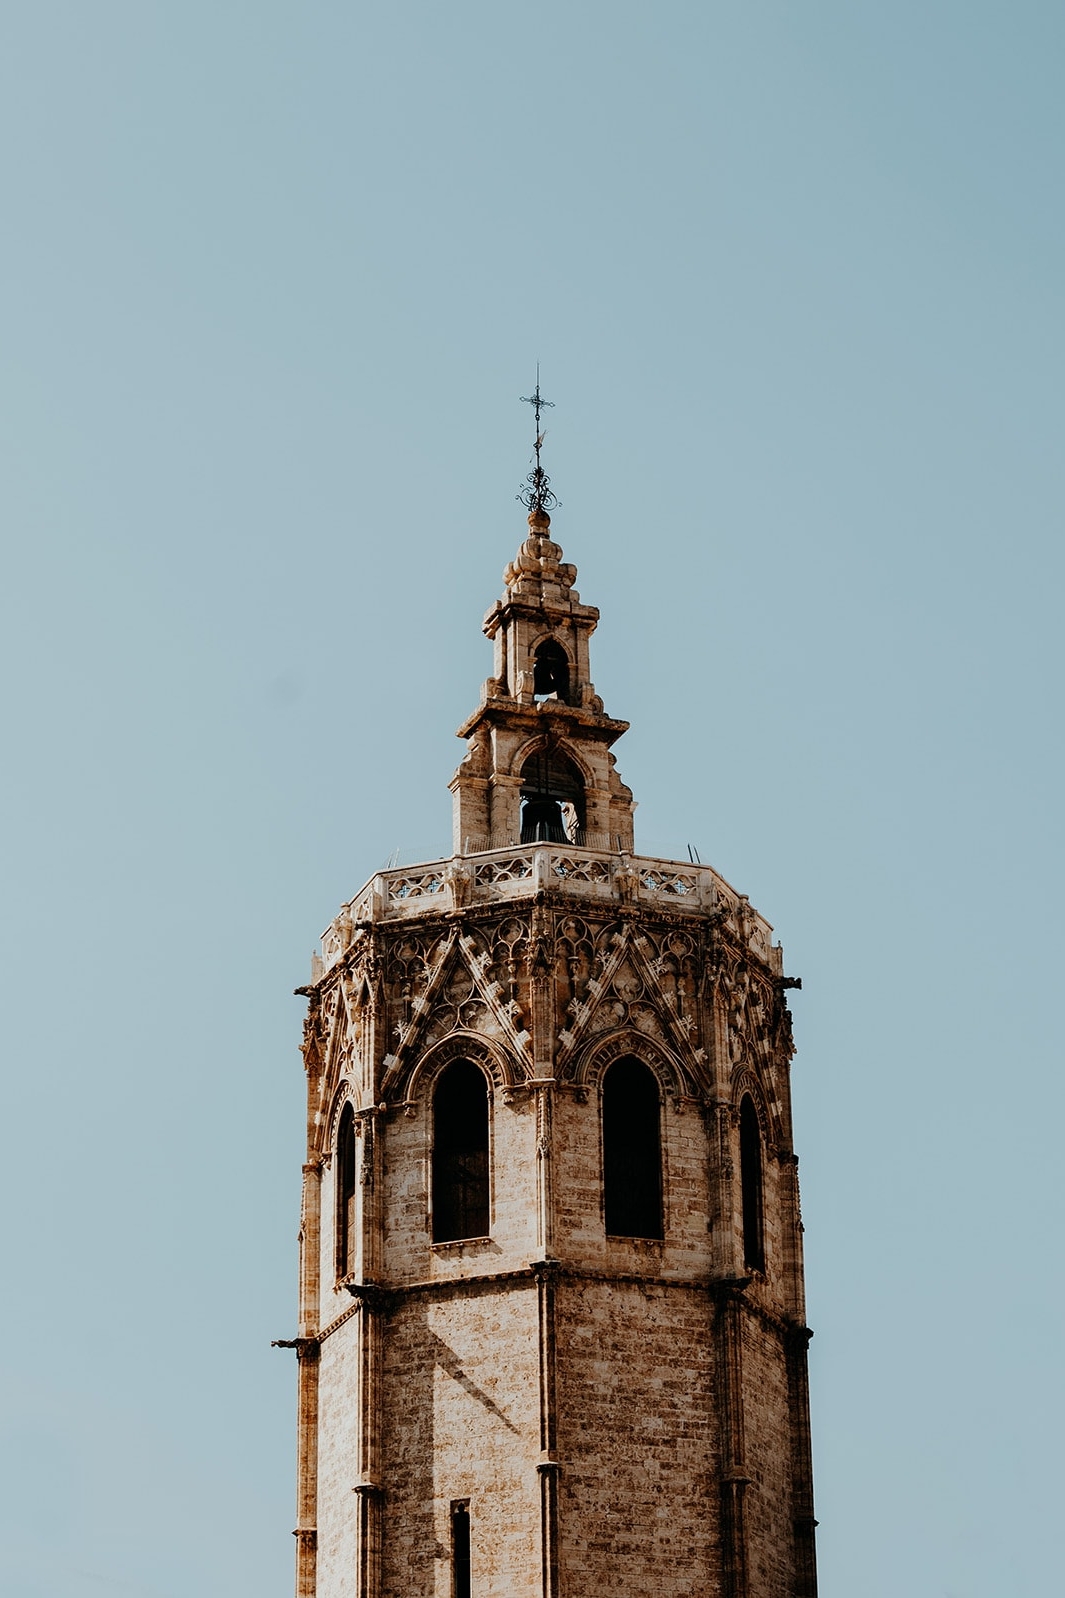
Plaza de la Reina | Home to the fascinating El Miguel Bell tower (which you can and should climb), this plaza is without question among the most iconic places in the city.
Plaza Redonda | Enclosed by the encircling buildings, this urban space is a unique piece of Valencian architecture and houses several highly-rated restaurants.
Plaza Negrito | My absolute favourite and one where you’ll find a more authentic, intimate atmosphere.
Plaza del Colegio del Patriarca | Lined with Valencia’s iconic orange trees, this quiet, yet stunning plaza is the perfect place to unwind after an afternoon of exploring.
While those squares are a great place to hang out on a hot summer’s night, it is worth mentioning that prices are often higher than elsewhere in the city. I’ve noticed that this is primarily the case at Plaza de la Virgen, Plaza de la Reina, and Plaza del Ayuntamiento
I personally absolutely love Plaza Negrito, a more intimate square that’s home to a handful of authentic bars that are favourite among the Valencian locals.
13. Devour all the tacos at TKO Tacos
With a profound love for tacos and a 3-week Mexico trip under my belt, I recognize a good taquería when I see one.
Believe me, if I say this, TKO Tacos sure as hell is one.
Situated in the heart of Valencia, this authentic Mexican taquería has rapidly become a fixture in the city, offering a wide variety of mouthwatering tacos that will be a fiesta for your taste buds.
The best part, the tacos at TKO come in bite-size and will set you back only €1,- a piece, meaning you can sample most of the flavours in one sit (just kidding, they have 16 tacos on offer).
Filled with fresh ingredients and authentic flavours, my tacos of choice are Al Pastor, Cochinita Pibil, Suadero, and my absolute favourite; Tinga de Pollo, a spicy pulled chicken-style taco that is simply too good to be true.
Additionally, they also serve a mean guacamole with nachos, several quesadillas and traditional Mexican beverages to complement the flavours.
For me, having a quick bite at TKO Tacos is easily one of my favourite things to do in Valencia, so if you’re reading this, make sure you give it a try too. It is a refreshing alternative to Paella, Pintxos and tapas (which you should obviously eat a lot during your time in Valencia).
Where | TKO Tacos now has three restaurants in the centre and is currently opening a fourth one.
Opening hours | Daily 1300 to 0100

14. Watch a game at Mestalla – or do a stadium tour instead
First opened in 1923, Valencia’s Mestalla Stadium is one of the oldest football grounds in Spain, and watching a game here is quite an exhilarating experience.
Home to Valencia CF, the 55,000-capacity stadium has been the stage to some of football’s most memorable nights, both in the Spanish and European competitions, where great players as Mario Kempes, David Villa, Rubén Baraja, David Silva and many more stepped on the pitch to showcase their talent to the fans.
Even though Valencia CF won the Copa del Rey in the 18/19 season, the club has been going through some seriously challenging times in the last decade, both on and off the pitch.
Yet despite poor performances and financial complications, the fans remain extremely loyal and will produce an amazing electric ambience during home games time and time again.
But it’s not just the fans that make a game at Mestalla a unique and exhilarating experience, nope, due to the incredibly steep stands, you will sit unusually close to the pitch, which isn’t something you will quickly experience in today’s newer football stadiums.
If you can’t get your hands on tickets, you’re in town when Valencia is playing away, or you’re just not in the mood to attend a game, you can opt for a Valencia CF stadium tour instead, where you’ll visit the most interesting areas of the stadium while learning about the impressive history of the club.
Where | Mestalla Football Stadium
Tickets | Tickets for the games and the Mestella Forever Tour can be found here.


14 Things to do in Valencia | The essentials
The best time to visit Valencia
Given Valencia is nestled on the southeastern coast of Spain, La capital del Turia is considered a year-round destination, where temperatures rarely drop below the 15°C mark.
But first things first, summertime in Valencia is clearly not for the faint of heart, as it will be sweltering hot on most days during this period, with temperatures commonly rising above 40 degrees in the months of July and August.
Those who prefer to combine sightseeing with days at the beach will have a good time visiting Valencia in the summer, but I have to say this; it’s not suited for everyone.
You see, travelling during the off-season (April to June and September to October) is an excellent way to combat the heat, which to me, makes exploring and navigating around town a lot more enjoyable, while you still have a solid temperature of around 25°C to enjoy.
Additionally, you could also opt to visit during the winter months, when over-tourism is out of the way, and temperatures still allow for comfortable explorations.

How to get to Valencia
I am text block. Click edit button to change this text. Lorem ipsum dolor sit amet, consectetur adipiscing elit. Ut elit tellus, luctus nec ullamcorper mattis, pulvinar dapibus leo.
How to get around Valencia
I am text block. Click edit button to change this text. Lorem ipsum dolor sit amet, consectetur adipiscing elit. Ut elit tellus, luctus nec ullamcorper mattis, pulvinar dapibus leo.
Stay safe in Valencia | Travel insurance
Even though Valencia is completely safe, I always advise everyone to sort out good travel insurance before setting out on their adventure.
While I believe that it’s unlikely to experience any troubles when following the advice in this guide, something unfortunate can happen at any time, whether it’s an injury, a stolen camera, or an accident on the road.
For travel insurance, I use Heymondo, as they offer full COVID-19 coverage, as well as a handy app with 24-hour medical assistance. Make sure you check it out – readers of WTSW receive 5% off any insurance policy too.
Cheers!
I’ve been on this travel blogging journey since 2019.
If you appreciate what I do here, these are some ways you can support me.
My 2-week Uzbekistan itinerary: Uncover the best of the ancient Silk Road
In today’s day and age, there remain only a few destinations in the world that evoke the feeling that you’re about to explore an entirely unknown world – Uzbekistan is absolutely one of them.
It’s a mesmerizing country that is still relatively unexplored by the masses, offering travellers an authentic off-the-beaten-path travel experience – one they will not easily forget.
Once the heart and soul of the ancient Silk Road that connected the East and the West, Uzbekistan is a place like nowhere else in the world, and one I’d so eagerly wanted to witness with my own eyes for many years.
This year, I finally packed my bags and ventured to this hidden gem within the increasingly popular Central Asia region, where ancient cities filled with towering minarets, awe-inspiring domes, and intricate tilework laid the foundation for one of my most memorable trips in 2023.
In just two weeks, I stepped into the footsteps of renowned Italian explorer Marco Polo and uncovered the majestic Silk Road cities of Samarkand, Bukhara and Khiva, where I admired ancient architectural masterpieces, roamed around authentic Central Asian bazaars, and sampled some of the most delicious Uzbek dishes – this trip was a true blessing.
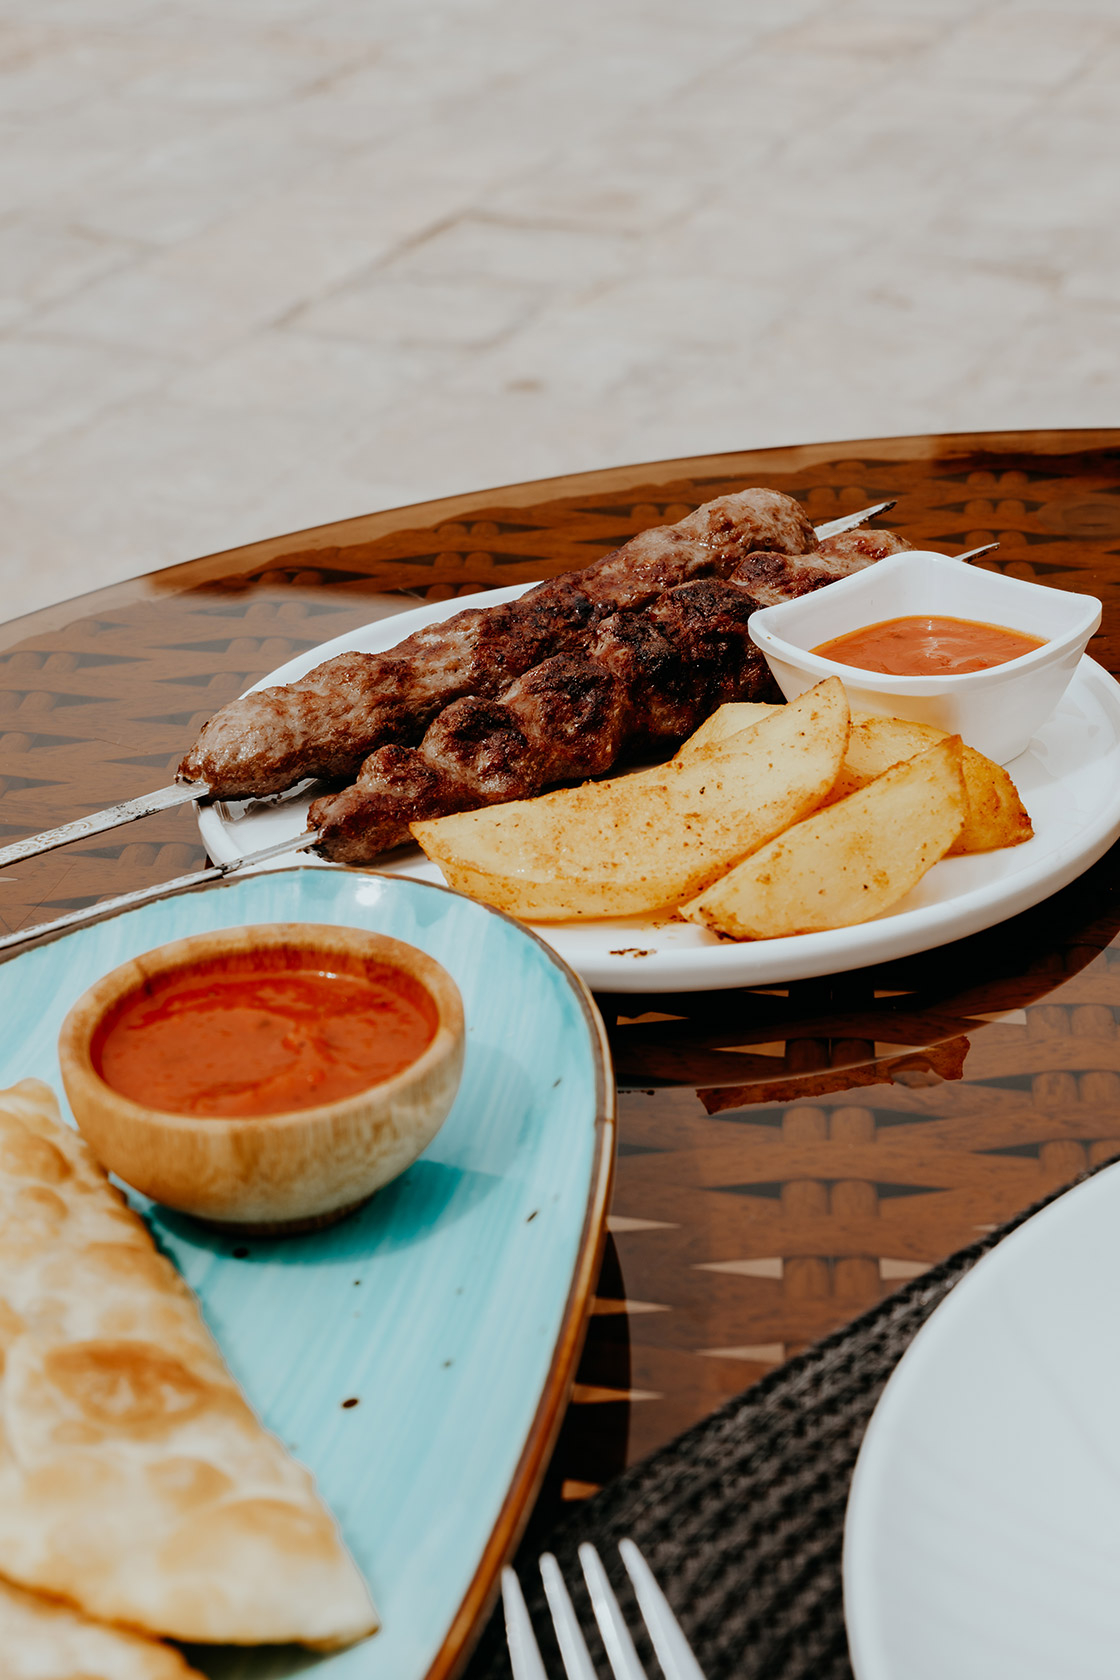
I also took an authentic sleeper train that dated back to Soviet times, watched artisanal craftsmen practise their arts and skills, explored the vibrant capital city of Tahskent, and ate a few too many Ljulja Kebabs here and there – you can’t blame me (those who know, know).
In this in-depth Uzbekistan itinerary, I share my day-to-day itinerary overviews, as well as my first-hand travel advice on where to stay, when to visit, how to get around and more.
Here’s my 2-week itinerary for Uzbekistan, a charming country that will effortlessly awaken the adventurer within you – enjoy this unique once-in-a-lifetime journey.
If you choose to use any of the links on this page, I receive a small commission at no extra cost to you. By using these links, you’ll have a direct impact on WTSW and support me to continue to create free insightful travel content for you. If you find any of my tips useful, you can support me by buying a virtual coffee here.
Where is Uzbekistan
Uzbekistan is a fascinating country in the heart of Central Asia and is bordered by five of the ‘Seven Stans’, including Kazakhstan, Kyrgyzstan, Tajikistan, Afghanistan and Turkmenistan.
Once one of the most important places along the ancient Silk Road due to its exceptional strategic position, Uzbekistan is an intriguing melting pot where world cultures intertwine, as it connects civilizations from the East and West.
Where to stay in Uzbekistan
Even though Uzbekistan is relatively new to tourism, accommodation to suit any travel style and budget can be found here.
Whether you’re after a budget-friendly hostel, a boutique-style luxury hotel, or something in between, Uzbekistan has no shortage of excellent accommodation options waiting for your visit.
One of the first things I noticed, was that the standard of accommodation in Uzbekistan is very good, yet exceptionally cheap in comparison to equivalent options found in the Western world.
Those travelling on a budget could find accommodation for as cheap as €20,- per night, while those keen to splurge have tons of options to choose from in the €50 – €200 range.
Hotels & Guesthouses | Find the best hotels and guesthouses in Uzbekistan on Booking.com
Hostels | Find your hostel in Uzbekistan here
I’ve also listed the accommodation where I stayed during my time in Uzbekistan, which can be found at the end of every destination within this itinerary.
My 2-week Uzbekistan itinerary | Day-by-day
Day 1 – 3 | Tashkent
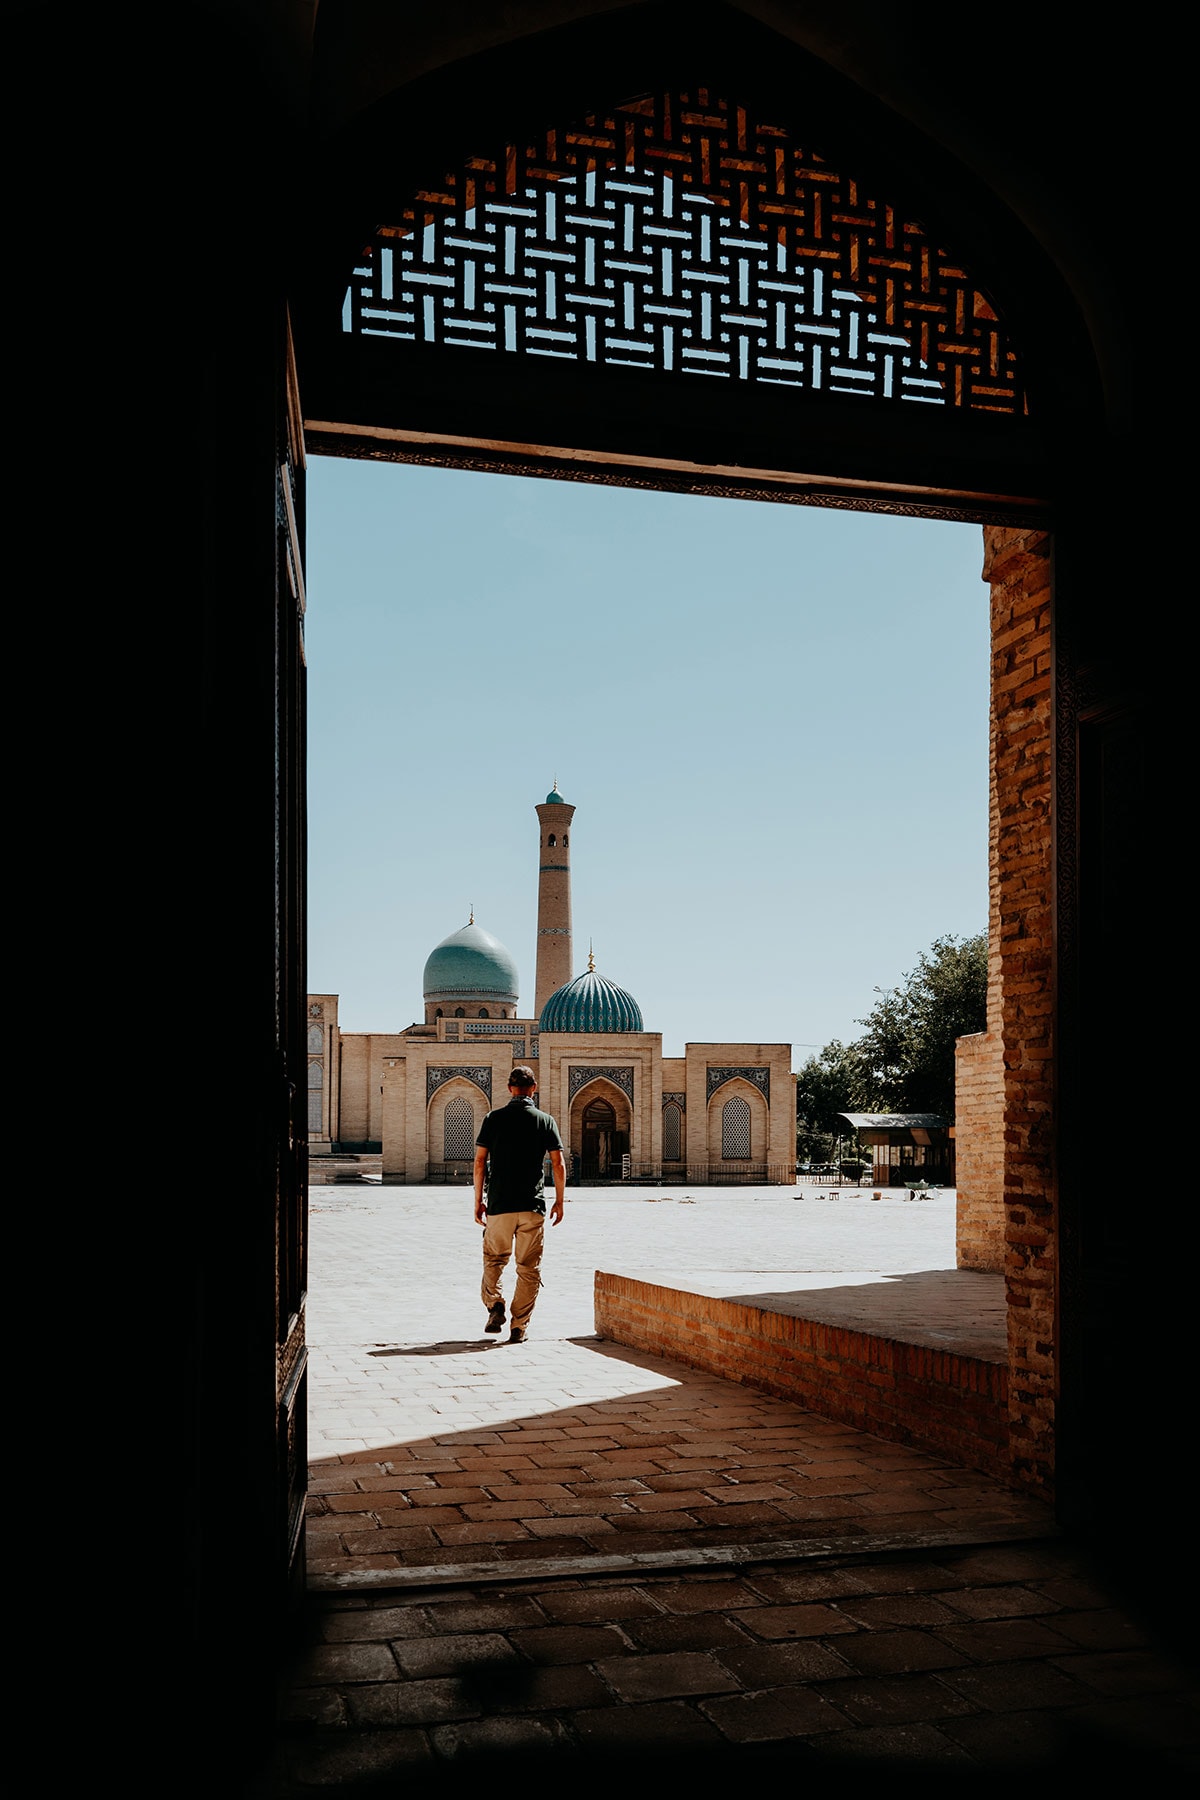
In most cases, your first point of call on your Uzbekistan itinerary will be Tashkent, the country’s lively capital, where you’ll find the international airport and most likely enter the country.
Known as the largest city in Central Asia, Tashkent is in my opinion a little undervalued compared to other more famous Silk Road cities in Uzbekistan, and therefore often used only as a stepping stone to Samarkand, Bukhara and Khiva.
I, on the other hand, absolutely loved Tashkent and what it had to offer and would clearly recommend spending at least two days here to get one’s bearings and enjoy the many fascinating historical sights.
It’s a city that marches to the beat of its own drum, with a plethora of cultural and historical heritage, enchanting architecture, both modern and old, while having no shortage of excellent restaurant options too.
Though I hope you’ve read my guide to Tashkent (coming soon), here are some suggestions to get a better understanding of Tashkent:
- Roam around the Chorsu Bazar, and experience the hustle and bustle of local life
- Explore the Hazrat Imam Complex – and admire the Samarkand Kufic Quran, which is widely considered the oldest Quran in the world
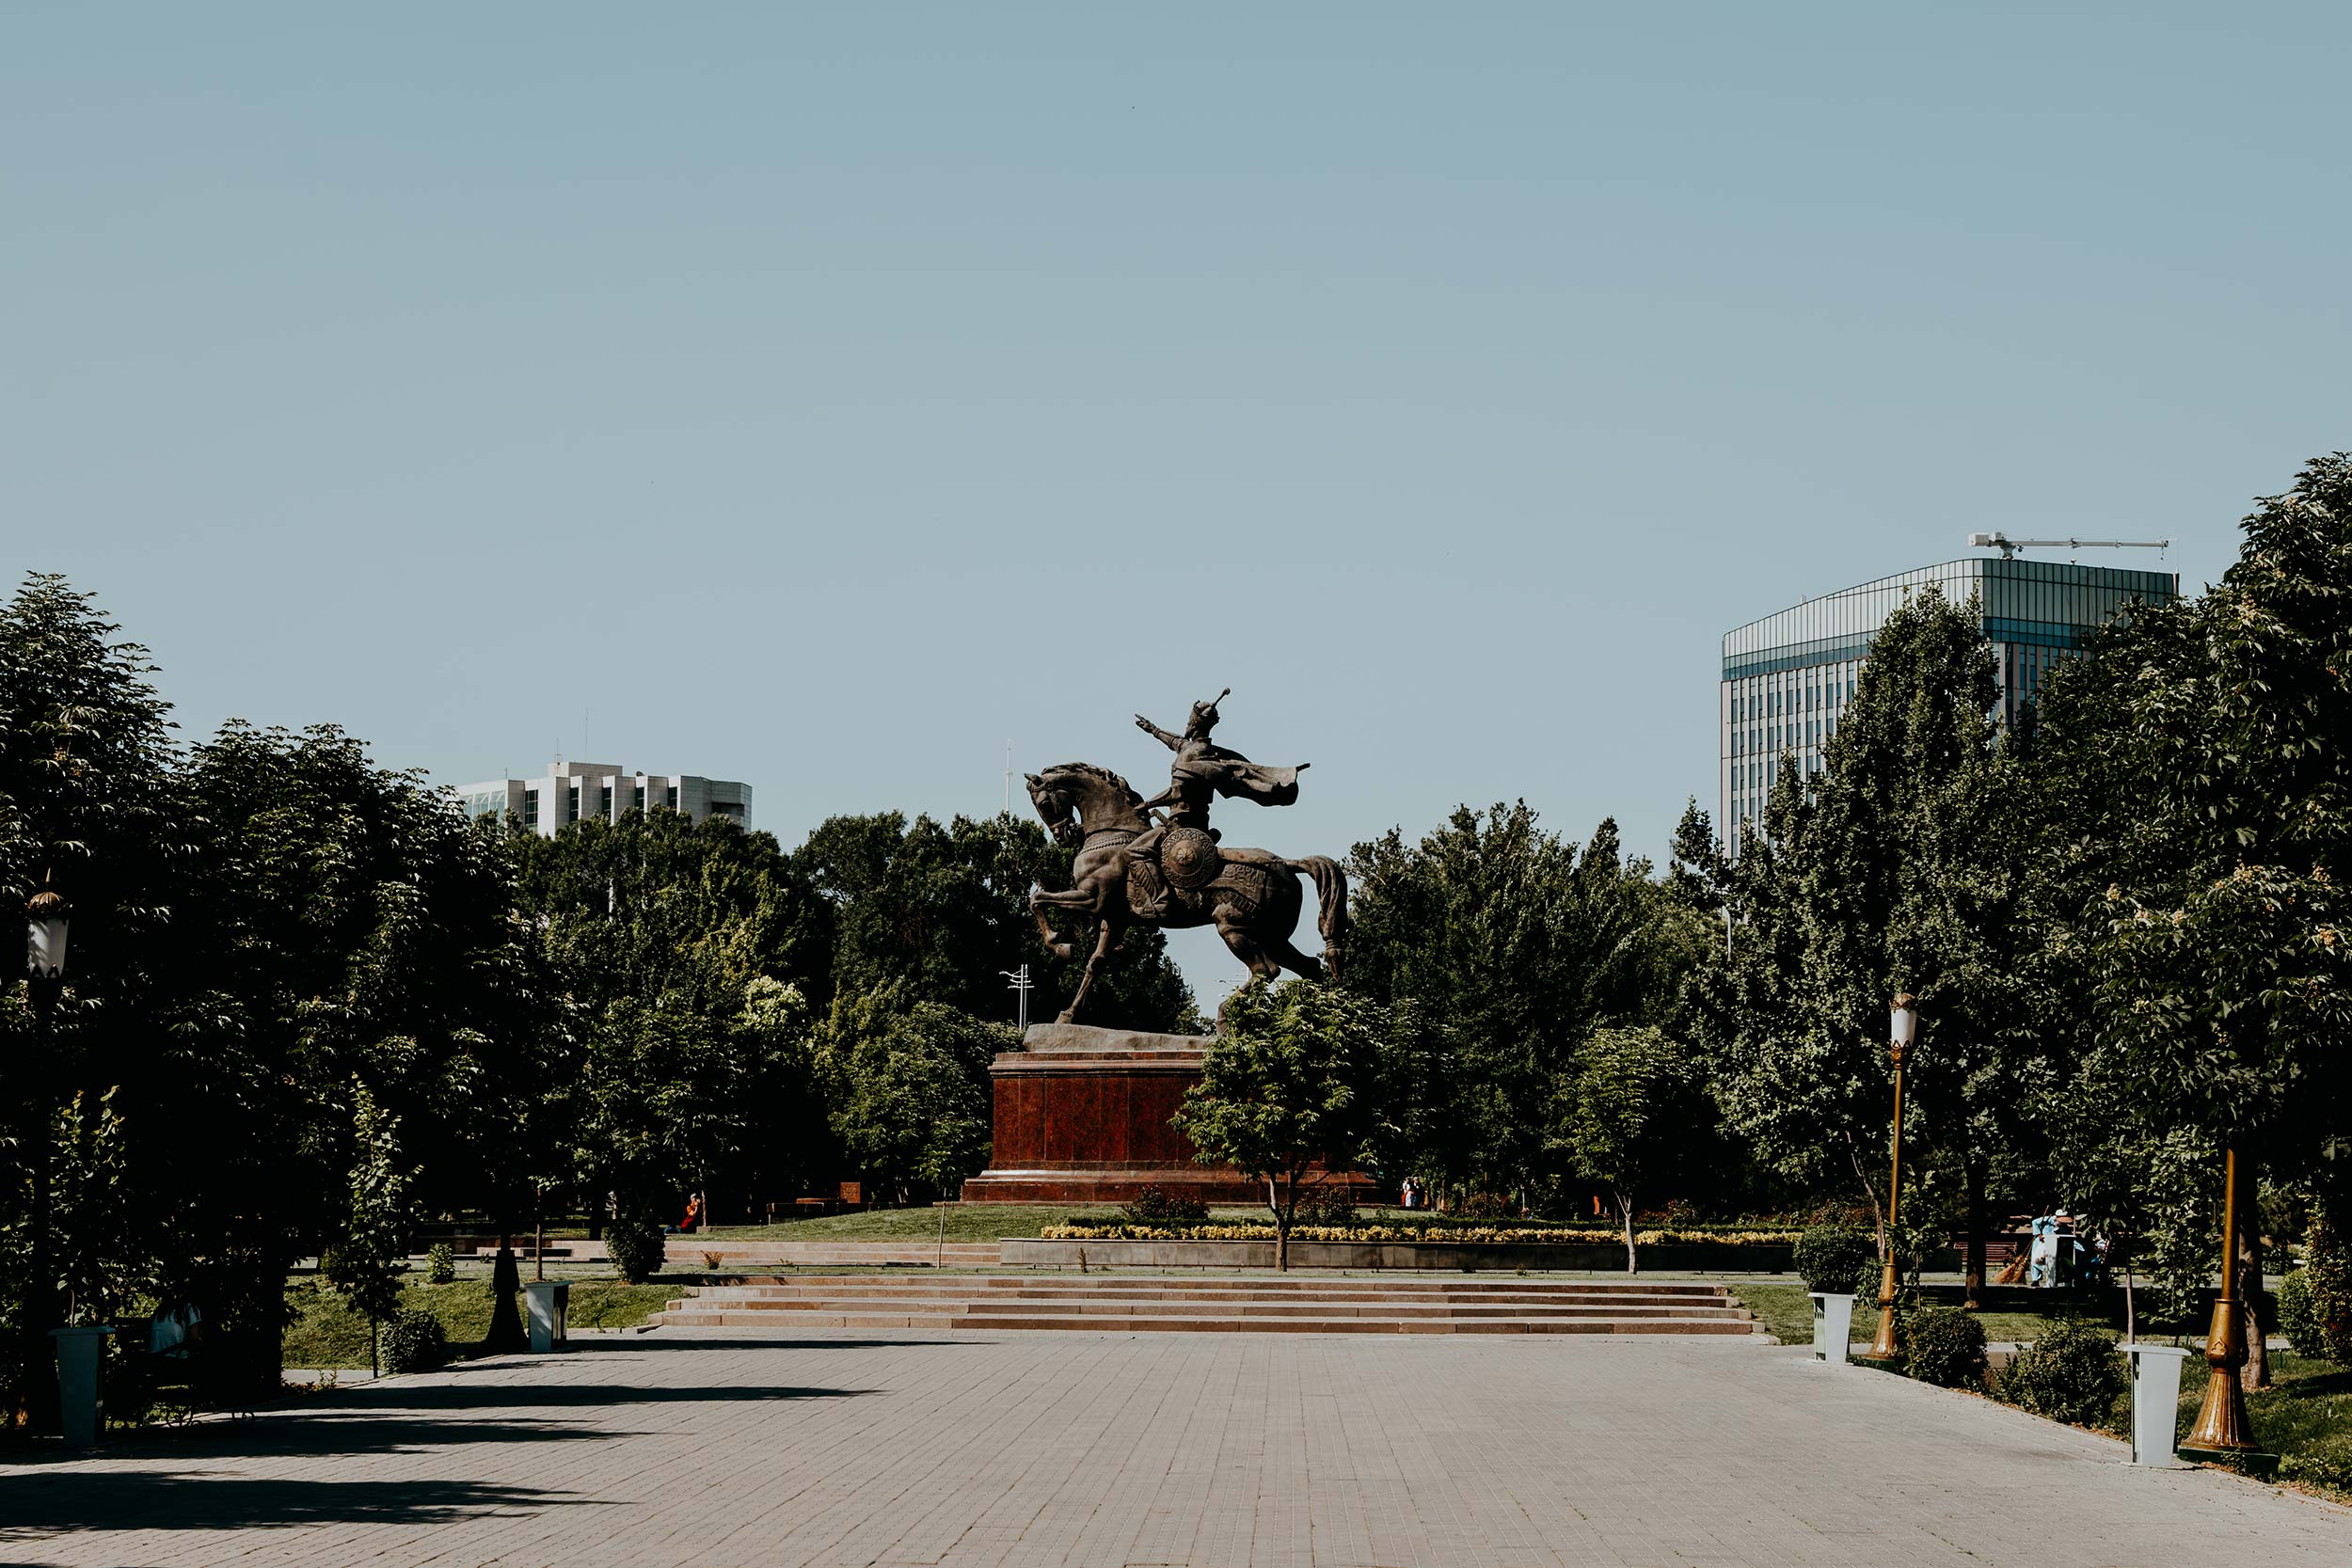
- Take a look around Tashkent’s impressive Amir Temur Square and enjoy the many surrounding sights
- Visit the Memorial to the Victims of Repression – an impressive memorial dedicated to the people who fought for the independence of Uzbekistan during the times of the Soviet Union
- Sample exceptional Central Asian food – some of my favourite restaurants include Plov City and Na Nebe
Where | Tashkent
Where to stay in Tashkent | I stayed in the stylish Hyatt Regency Tashkent, which was such a comfortable experience after a long flight. Prices and availability here.
You can find alternative accommodation options in Tashkent here.
Read more | For all the best things to see and do in Tashkent, check out my guide here.

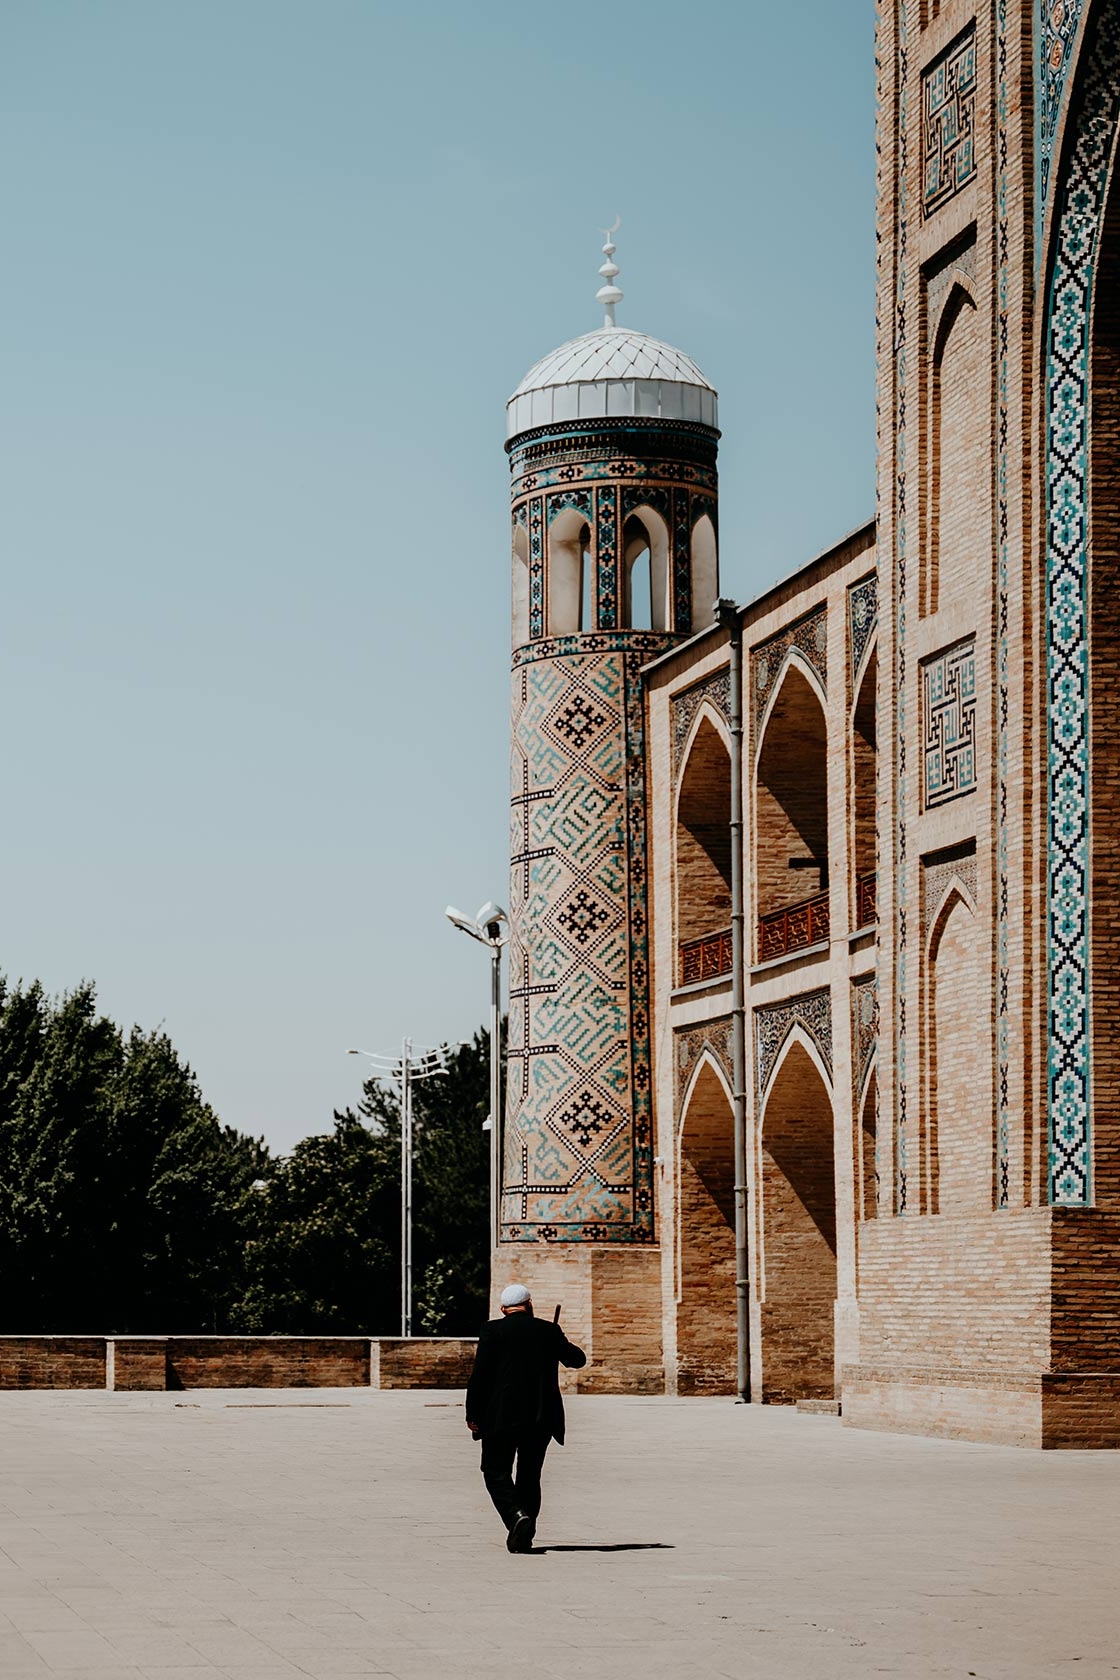
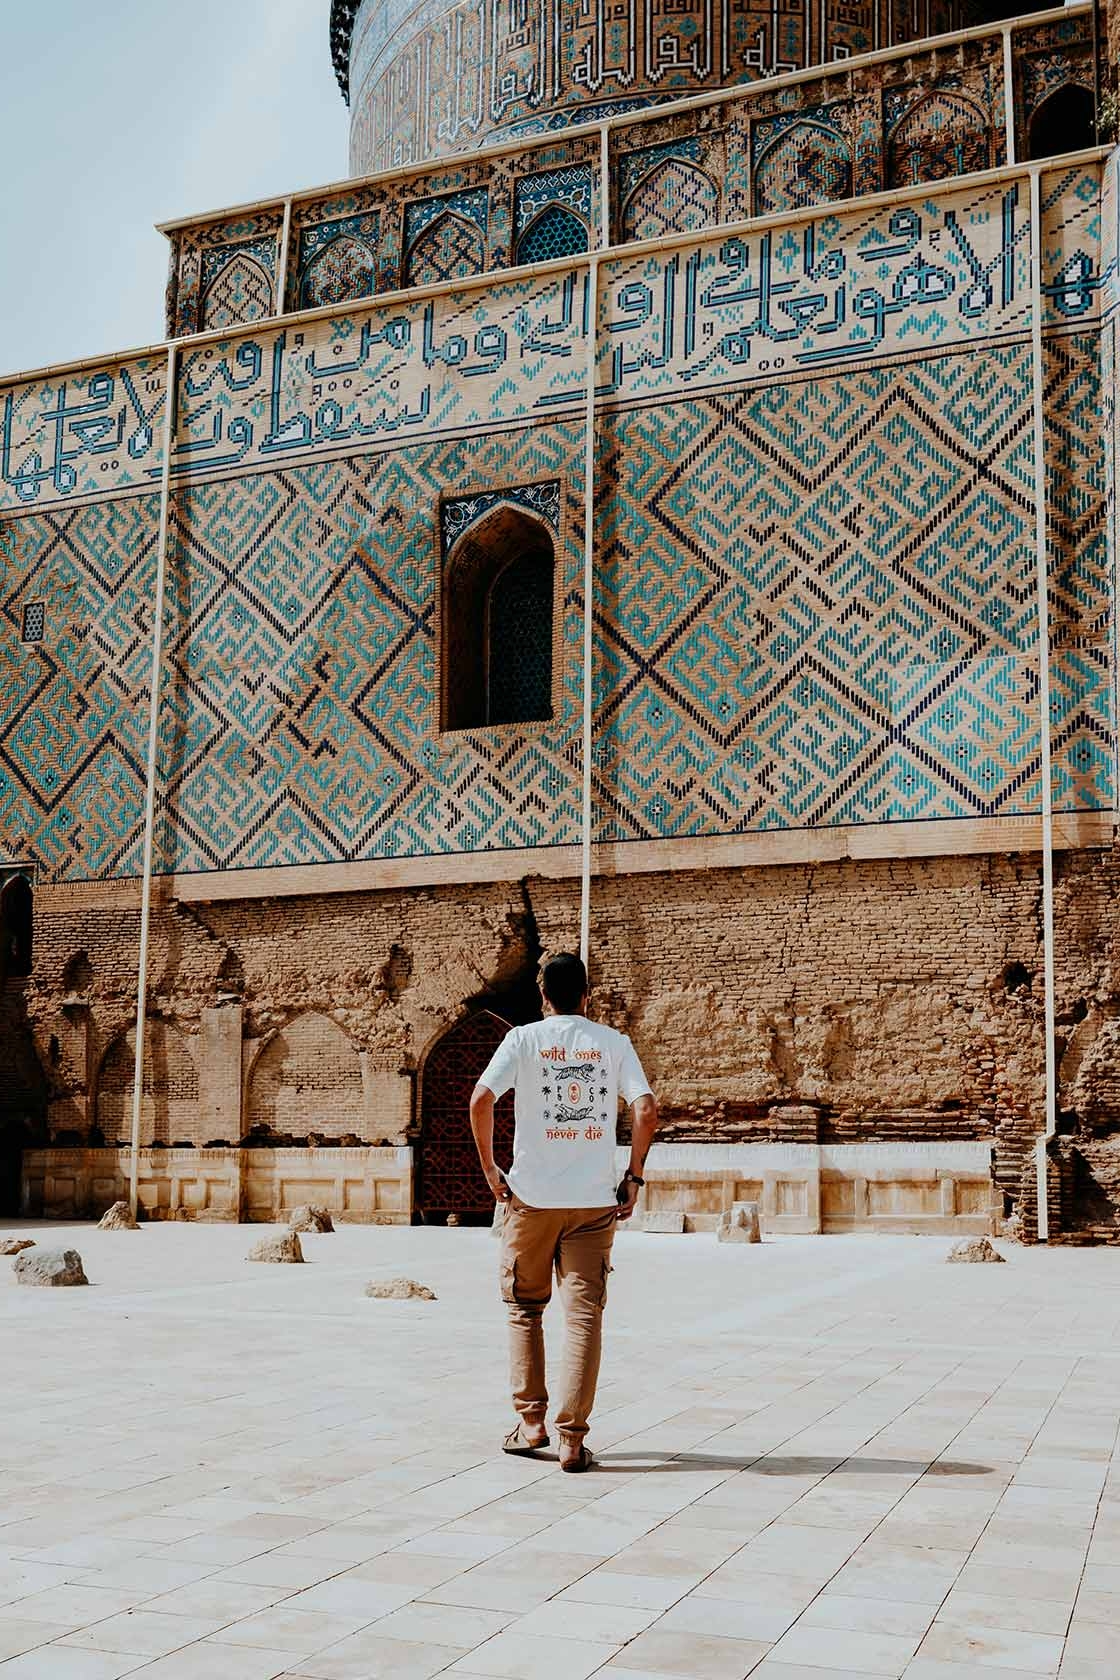
Day 3 – 6 | Samarkand
After a few days exploring Tashkent, it’s time to jump aboard the high-speed train to Samarkand, one of the oldest cities in the world and easily one of the most appealing destinations on this two-week Uzbekistan itinerary.
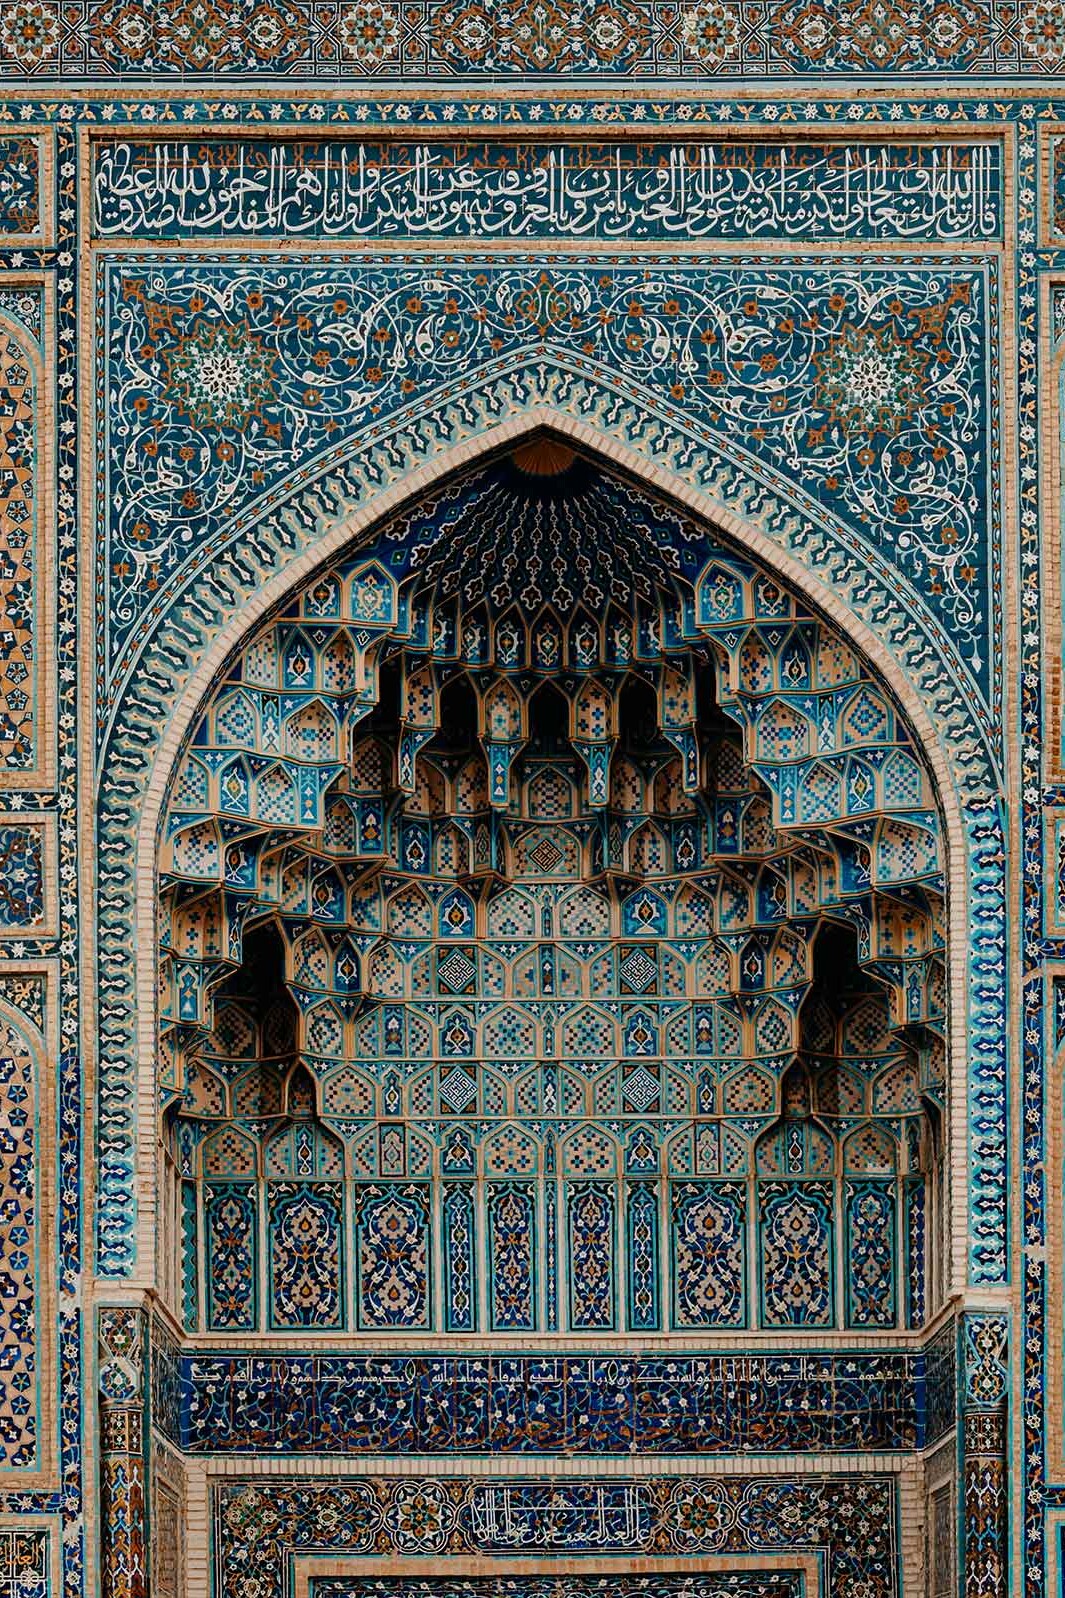
Often nicknamed the crossroads of world cultures, Samarkand was once one of the most important settlements along the Silk Road, which is still very much noticeable at present, given the many breathtaking architectural masterpieces that were left behind.
Due to its exceptional strategical position, Samarkand has always been of great significance, and therefore the city has attracted the attention of many famous conquerors throughout its 2500 years of history, including the likes of Alexander the Great, Genghis Khan and Timur (Tamerlane) to mention but a few.
Samarkand also sparked the interest of renowned world traveller Marco Polo, who is widely known for his travels along the ancient Silk Road.
Following his footsteps to this stunning UNESCO World Heritage sight is truly something out of this world and an absolute highlight on any Uzbekistan itinerary.
Given Samarkand is Uzbekistan’s most famous stop, it does get super busy here, especially when visiting during the peak of high season.
Here are some of my favourite places to visit in Samarkand:
- Visit Gur-e-Amir and discover the resting place of the great conqueror Tamerlane
- Discover amazing local art at the Happy Bird art gallery
- Explore the extensive Registan Square, by far the best-known place in Uzbekistan
- Behold the intricate architecture of the Samarkand school at the Hazrat Khizr Mosque
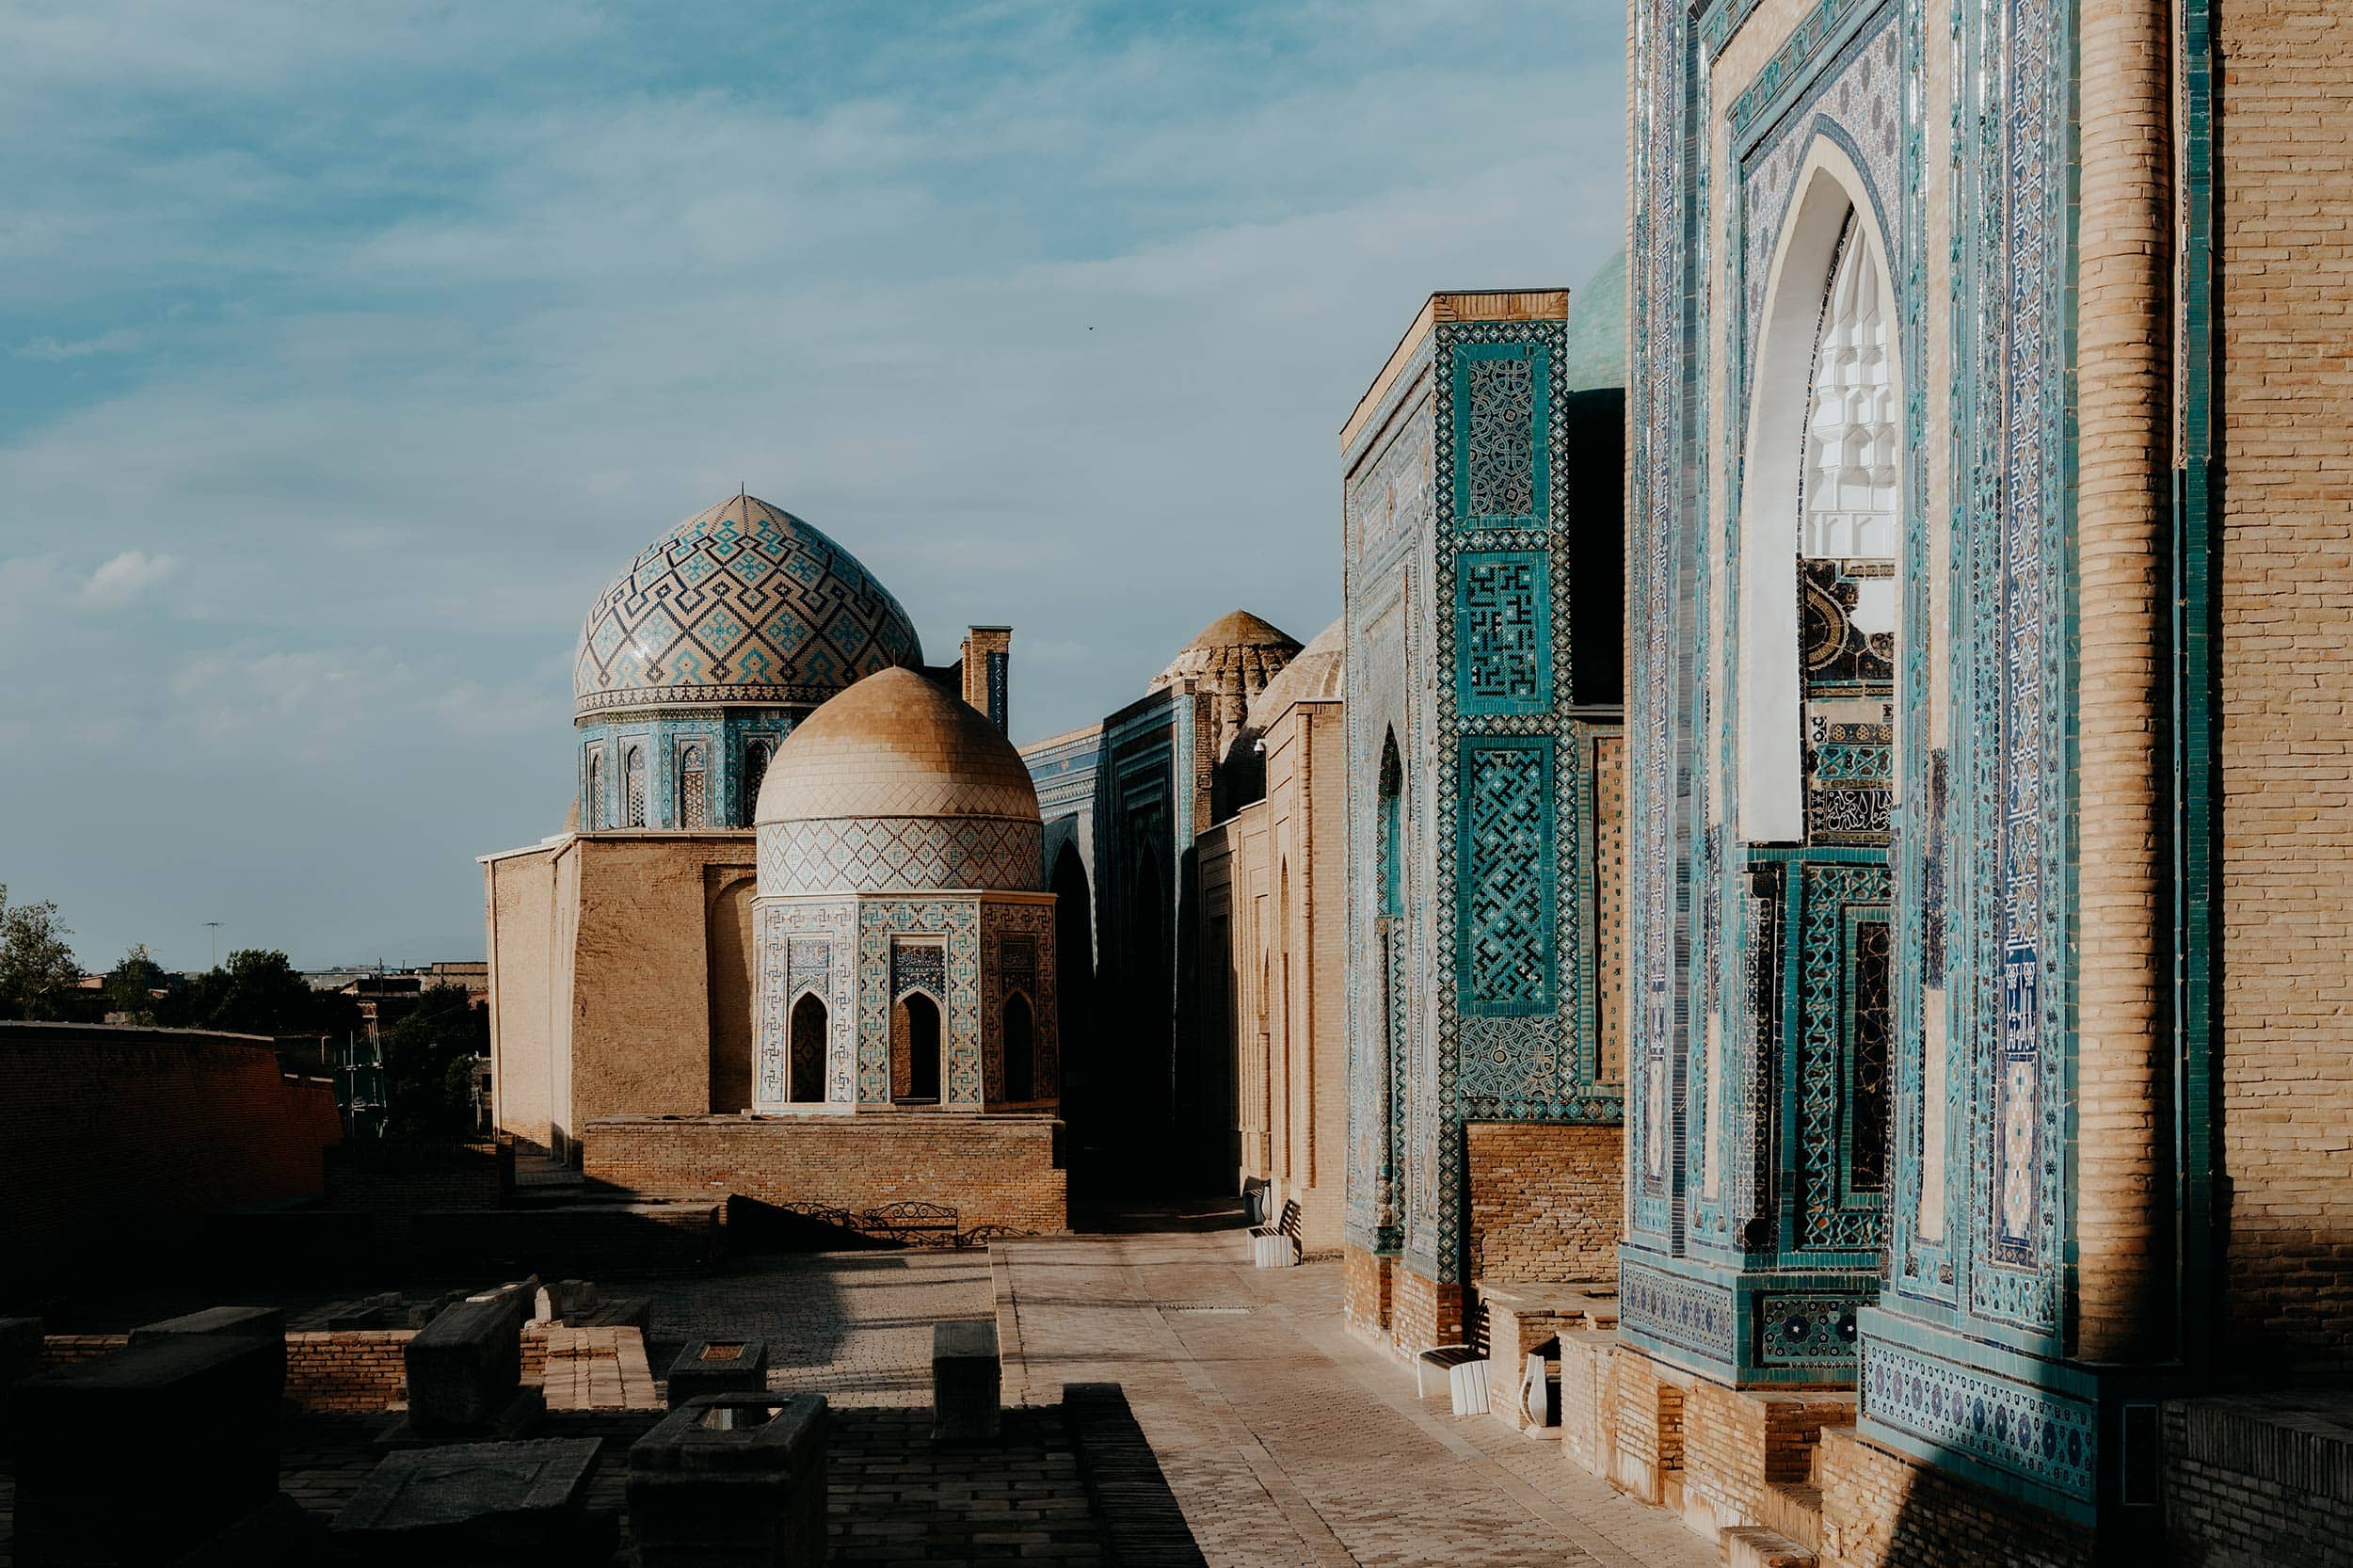
- Explore the opulent mausoleums of Shakhi-Zinda – my favourite place in Samarkand
- Visit the Bibi Khanum Mosque and explore the extensive courtyard
- Take a wander around the Siab Bazaar, and mingle with the locals
+ Read more | For a more thorough approach, make sure you check out my in-depth guide to Samarkand for inspiration, travel advice and the essentials.

Where | Samarkand
Where to stay in Samarkand | Malika Prime Hotel is a semi-luxury option and a great bang for your buck. Prices and availability here.
Search alternative accommodation options in Samarkand here.
How to get from Tashkent to Samarkand | The journey is best done by the Afrosiyob high-speed train, and takes about 2 hours. It’s scenic, relaxed and pretty straightforward. The high-speed train departs 5 times a day, for up-to-date information, see here.
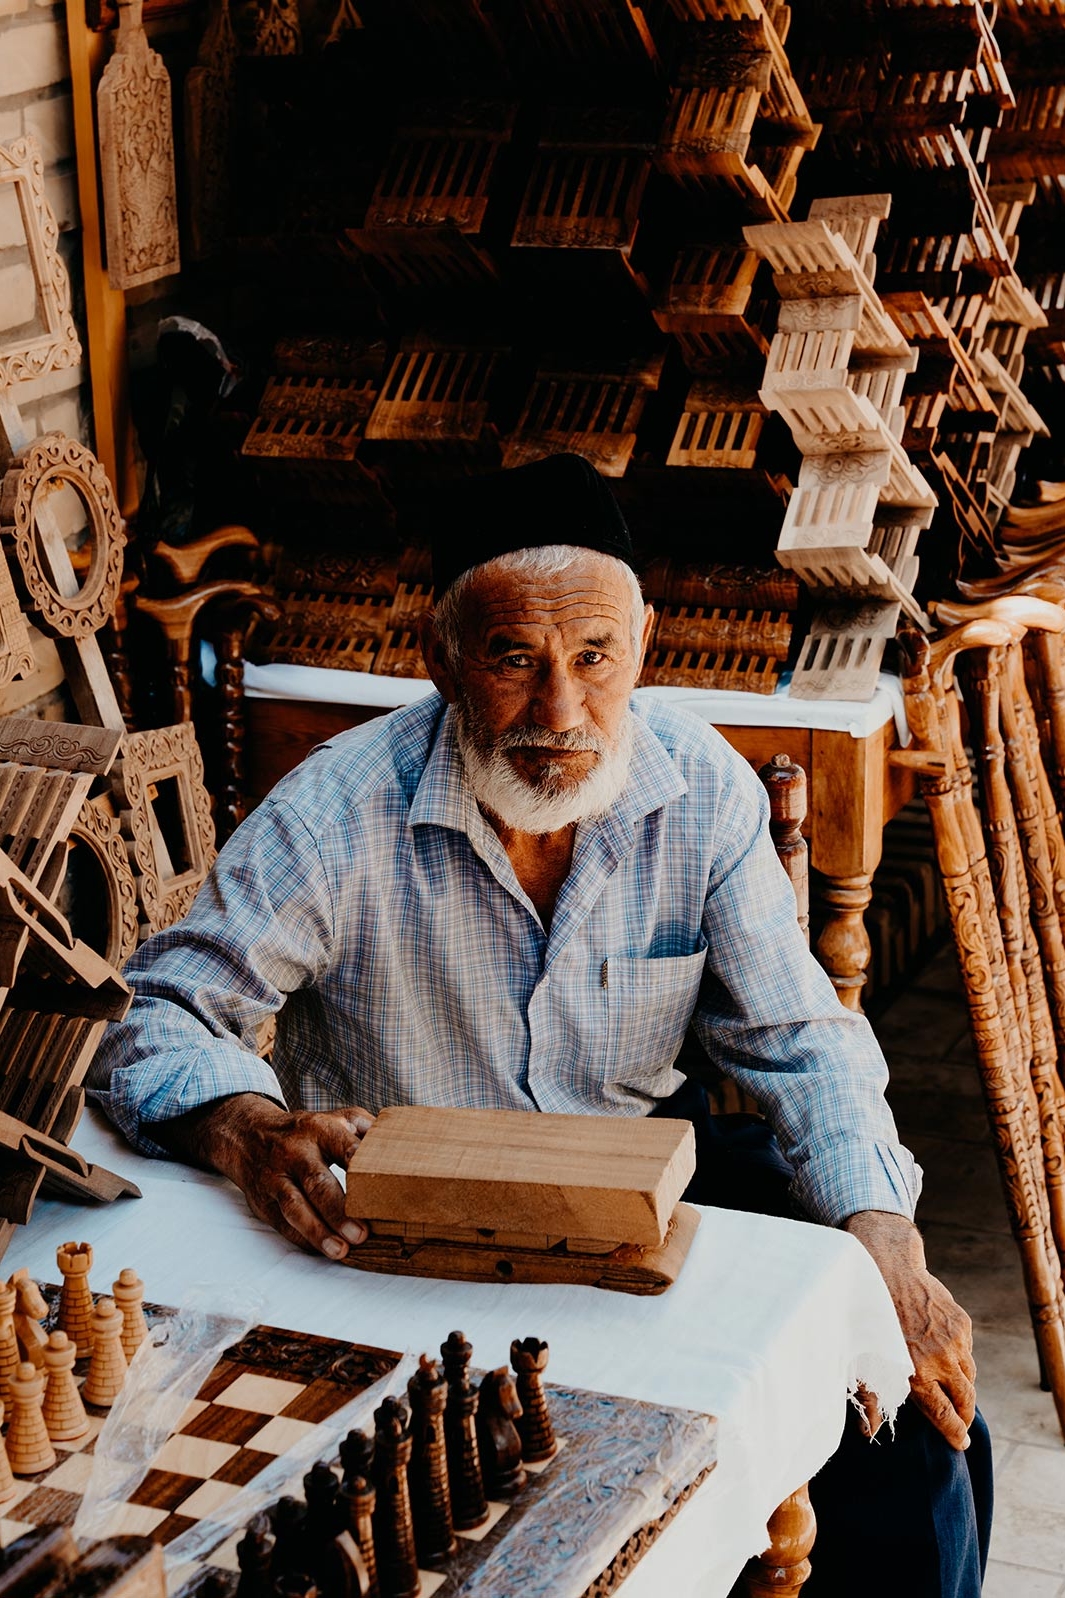
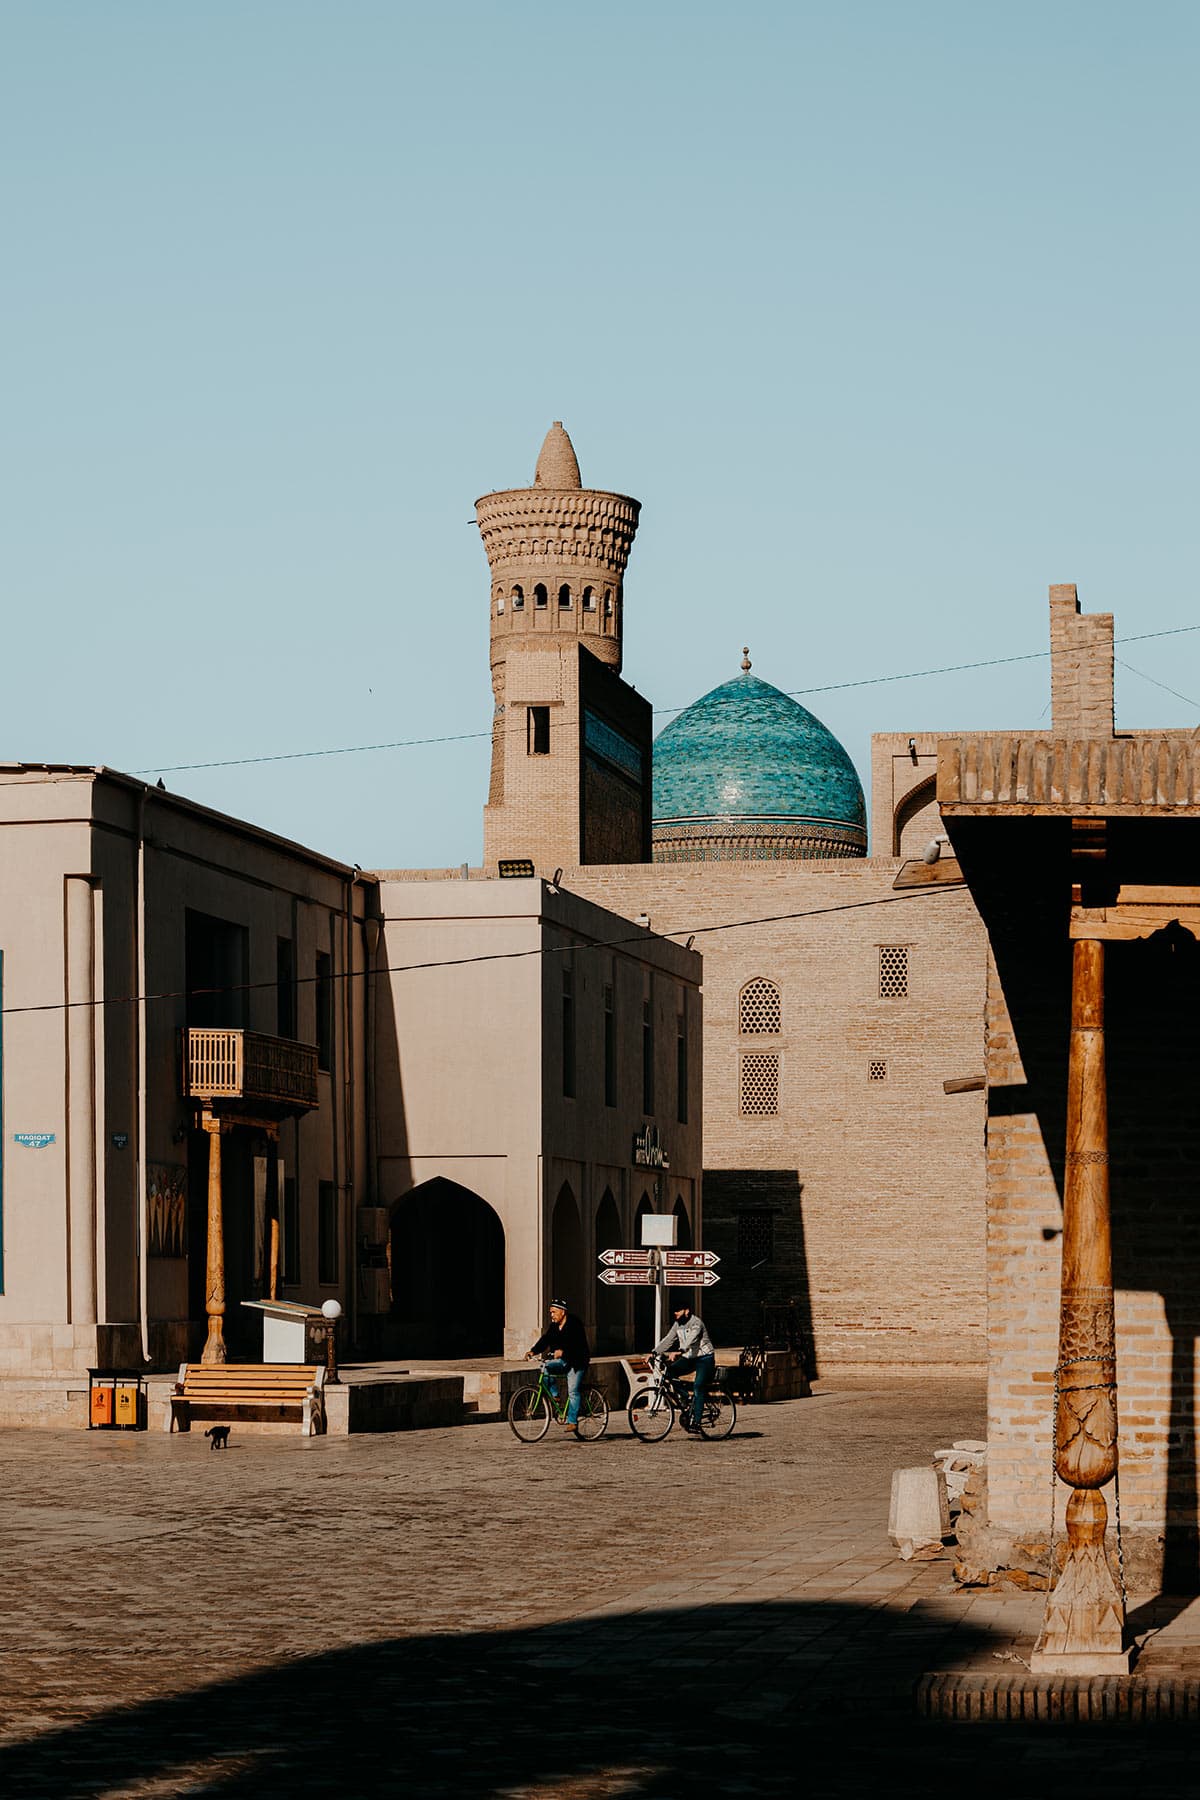
Day 6 – 9 | Bukhara
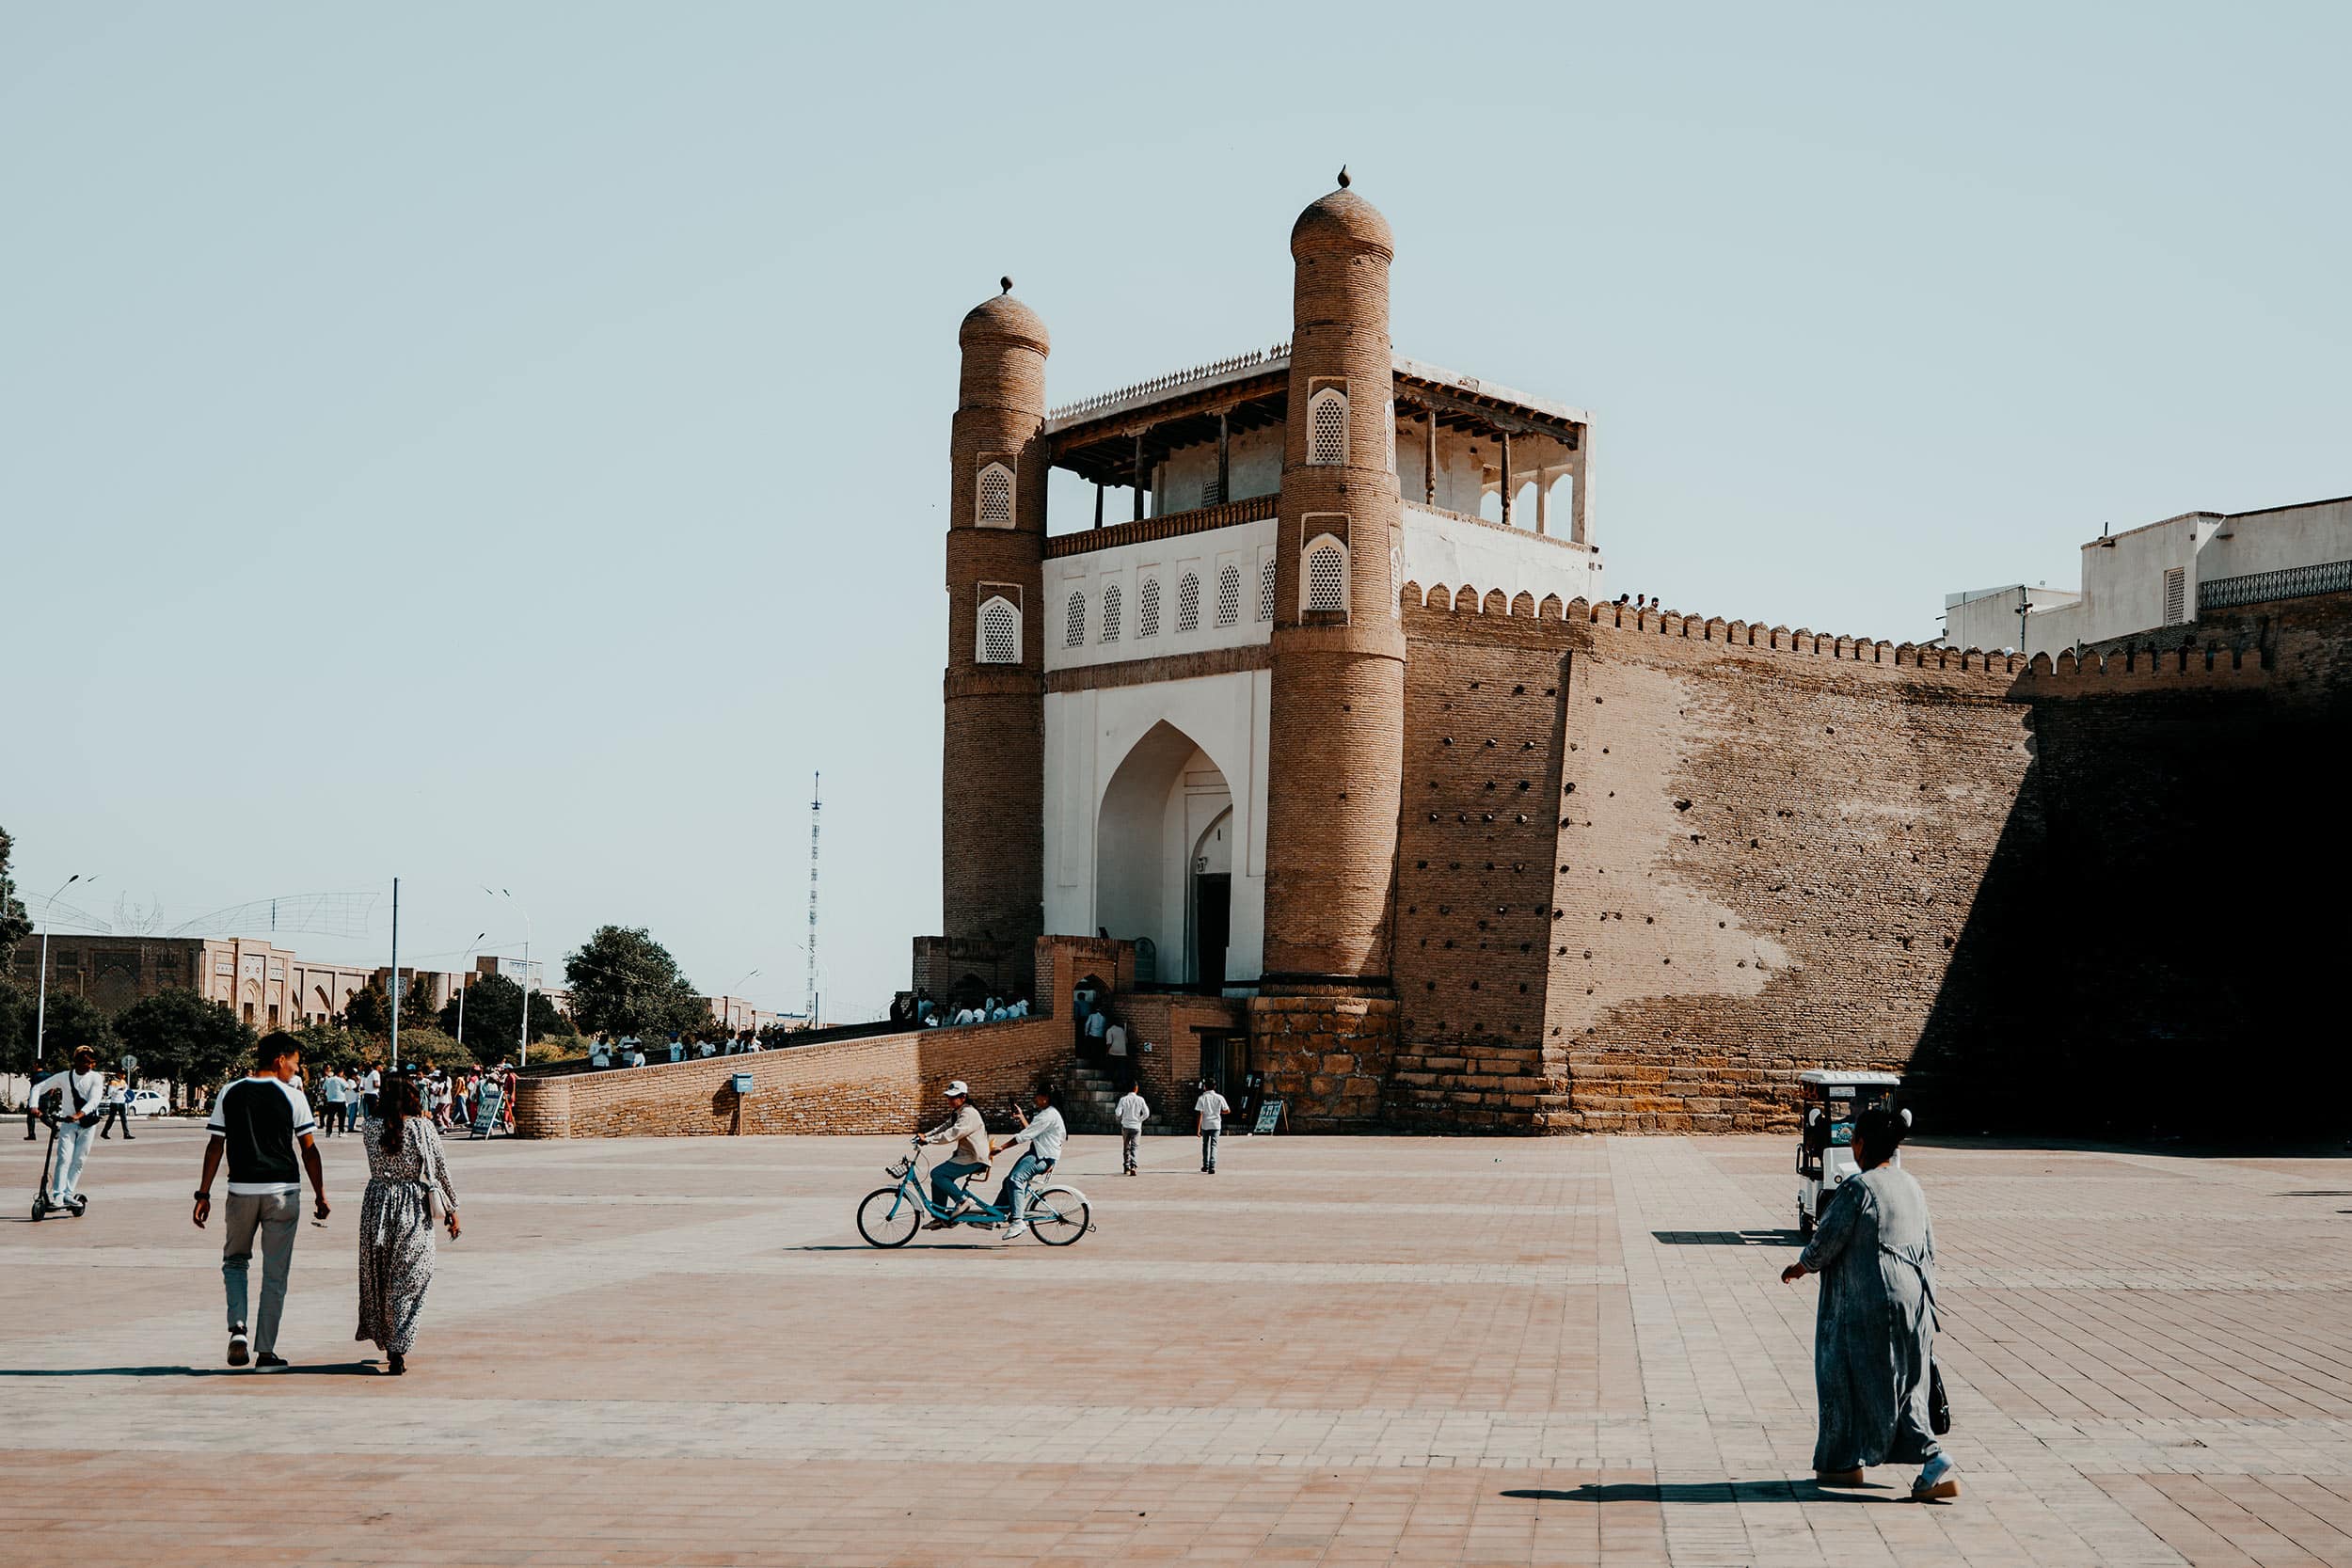
Next up on this Uzbekistan itinerary is Bukhara, one of Central Asia’s greatest trading cities during the Silk Road era, and nowadays recognised as a UNESCO World Heritage Site.
And that’s for an excellent reason.
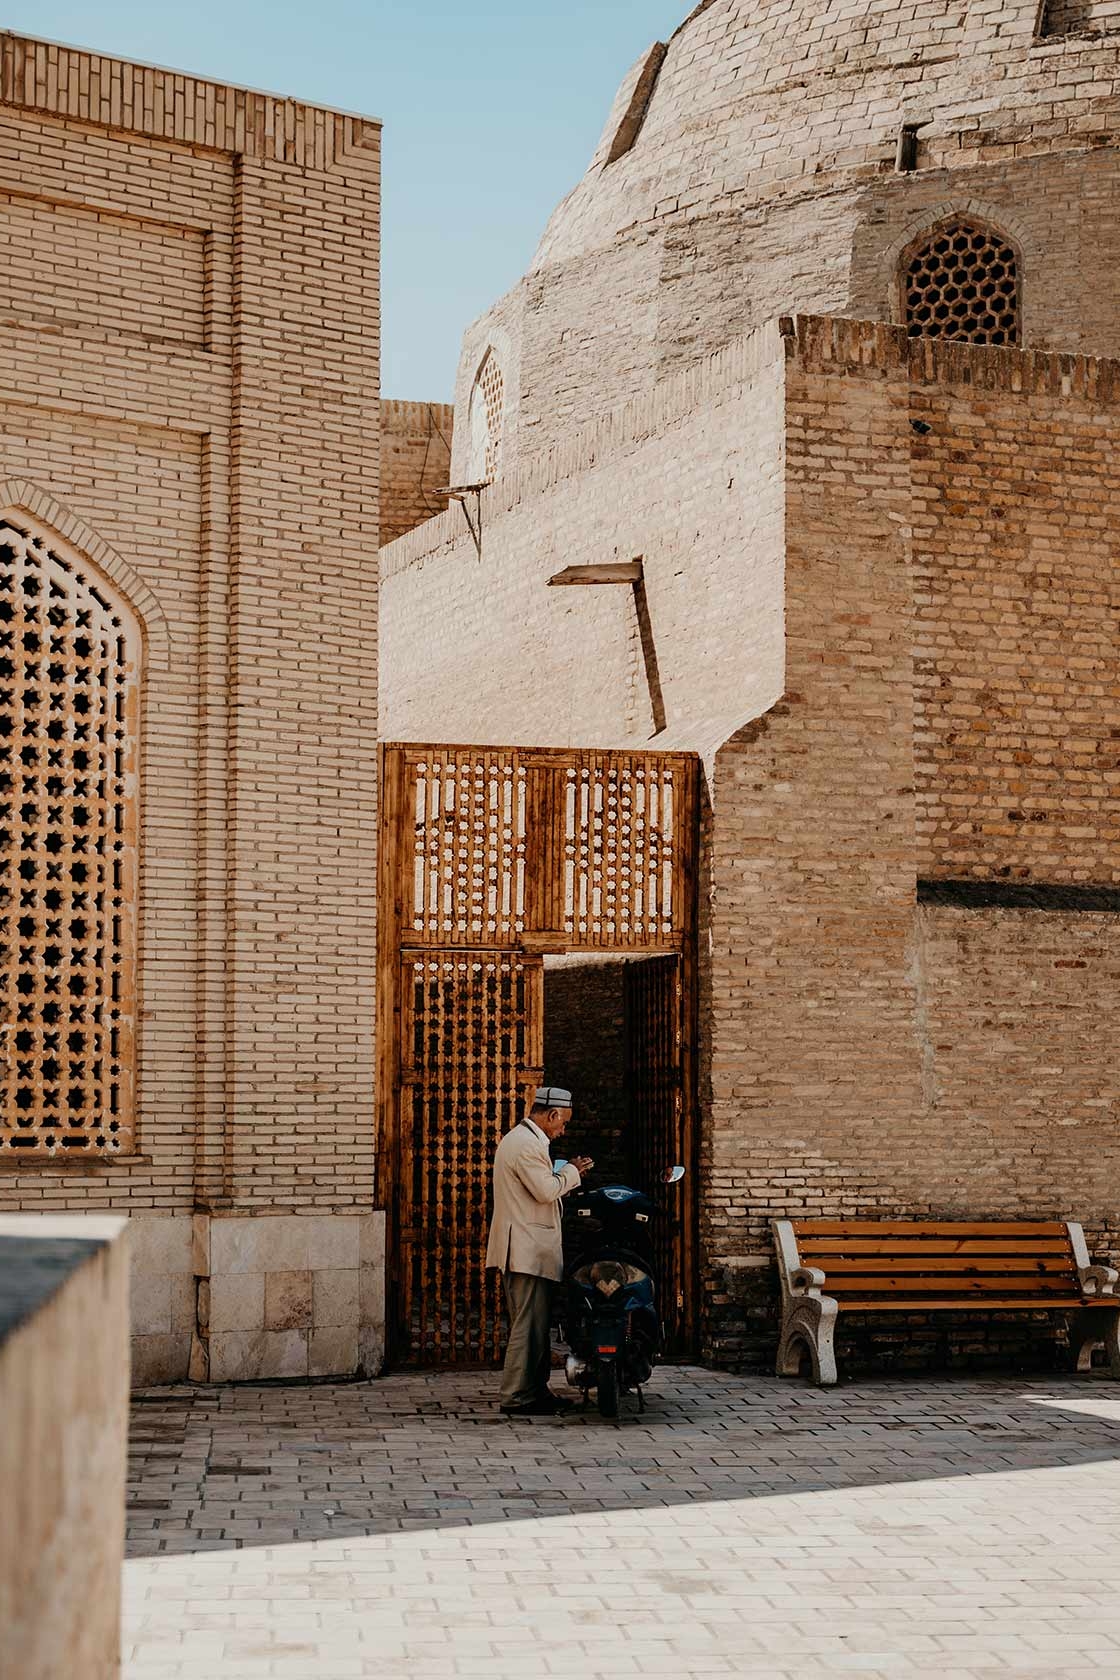
Tucked away in the heart of Uzbekistan, Bukhara is one of the finest examples of ancient Islamic cities in Central Asia, with a wealth of architectural wonders and cultural treasures.
Today, a great deal of Bukhara’s urban layout dates back to the Sheibanid period (1500-1601) and has remained largely untouched, with mesmerizing remnants of the great past to be found in just about every nook or cranny of this mesmerizing city – it is said that Bukhara is home to more than 140 architectural monuments.
All in all, there’s just something special about Bukhara, and while there are plenty of must-see sights, I firmly believe this charming city is best enjoyed on a wander without a plan.
Having said that, some of the best things to see and do include:
- Take an early morning stroll through the historic centre of Bukhara
- Visit the charming Chor Minor mosque, a Bukhara hidden gem
- Admire the intricate Bolo Hauz Mosque
- Wander around the 11th-century Po-i Kalyan Complex
- Shop some souvenirs at the Toqi Telpak Furushon
- Walk along the Ark of Bukhara – and skip entering the fortress itself
- Sample flavourful local cuisine at Minzifa Restaurant
+ Read more | For all the best things to see and do in Bukhara, check out my guide here.

Where | Bukhara
Where to stay in Bukhara | I stayed in the authentic As-Salam Hotel, a lovely budget-friendly hotel in the heart of Bukhara Old Town. I also spent a night in the Wyndham Hotel before taking the night train to Khiva, which was super comfortable.
Search alternative accommodation options in Bukhara here.
How to get from Samarkand to Bukhara | Jump aboard the high-speed train, which takes you to Bukhara in around 2 hours. The high-speed train departs 3 times a day, and a ticket will cost you between 90,000 SOM (€7,-) and 155,000 SOM (€12,-). For up-to-date information, see here.
Day 9 – 10 | Board the night train from Bukhara to Khiva
Although it’s not a destination by itself, I truly believe that the journey from Bukhara to Khiva deserves a separate section in this itinerary, as this authentic train ride will most likely be one of the most memorable moments of your two-week trip through Uzbekistan.
A wise man once said; ‘It’s Not the Destination, but the Journey That Matters’.
These are the words of renowned poet Thomas Stearns Eliot, and I couldn’t agree more.
As you board the train in Bukhara at midnight, you’re up for an intense, yet truly authentic adventure, and believe me, not one you’ll easily forget.
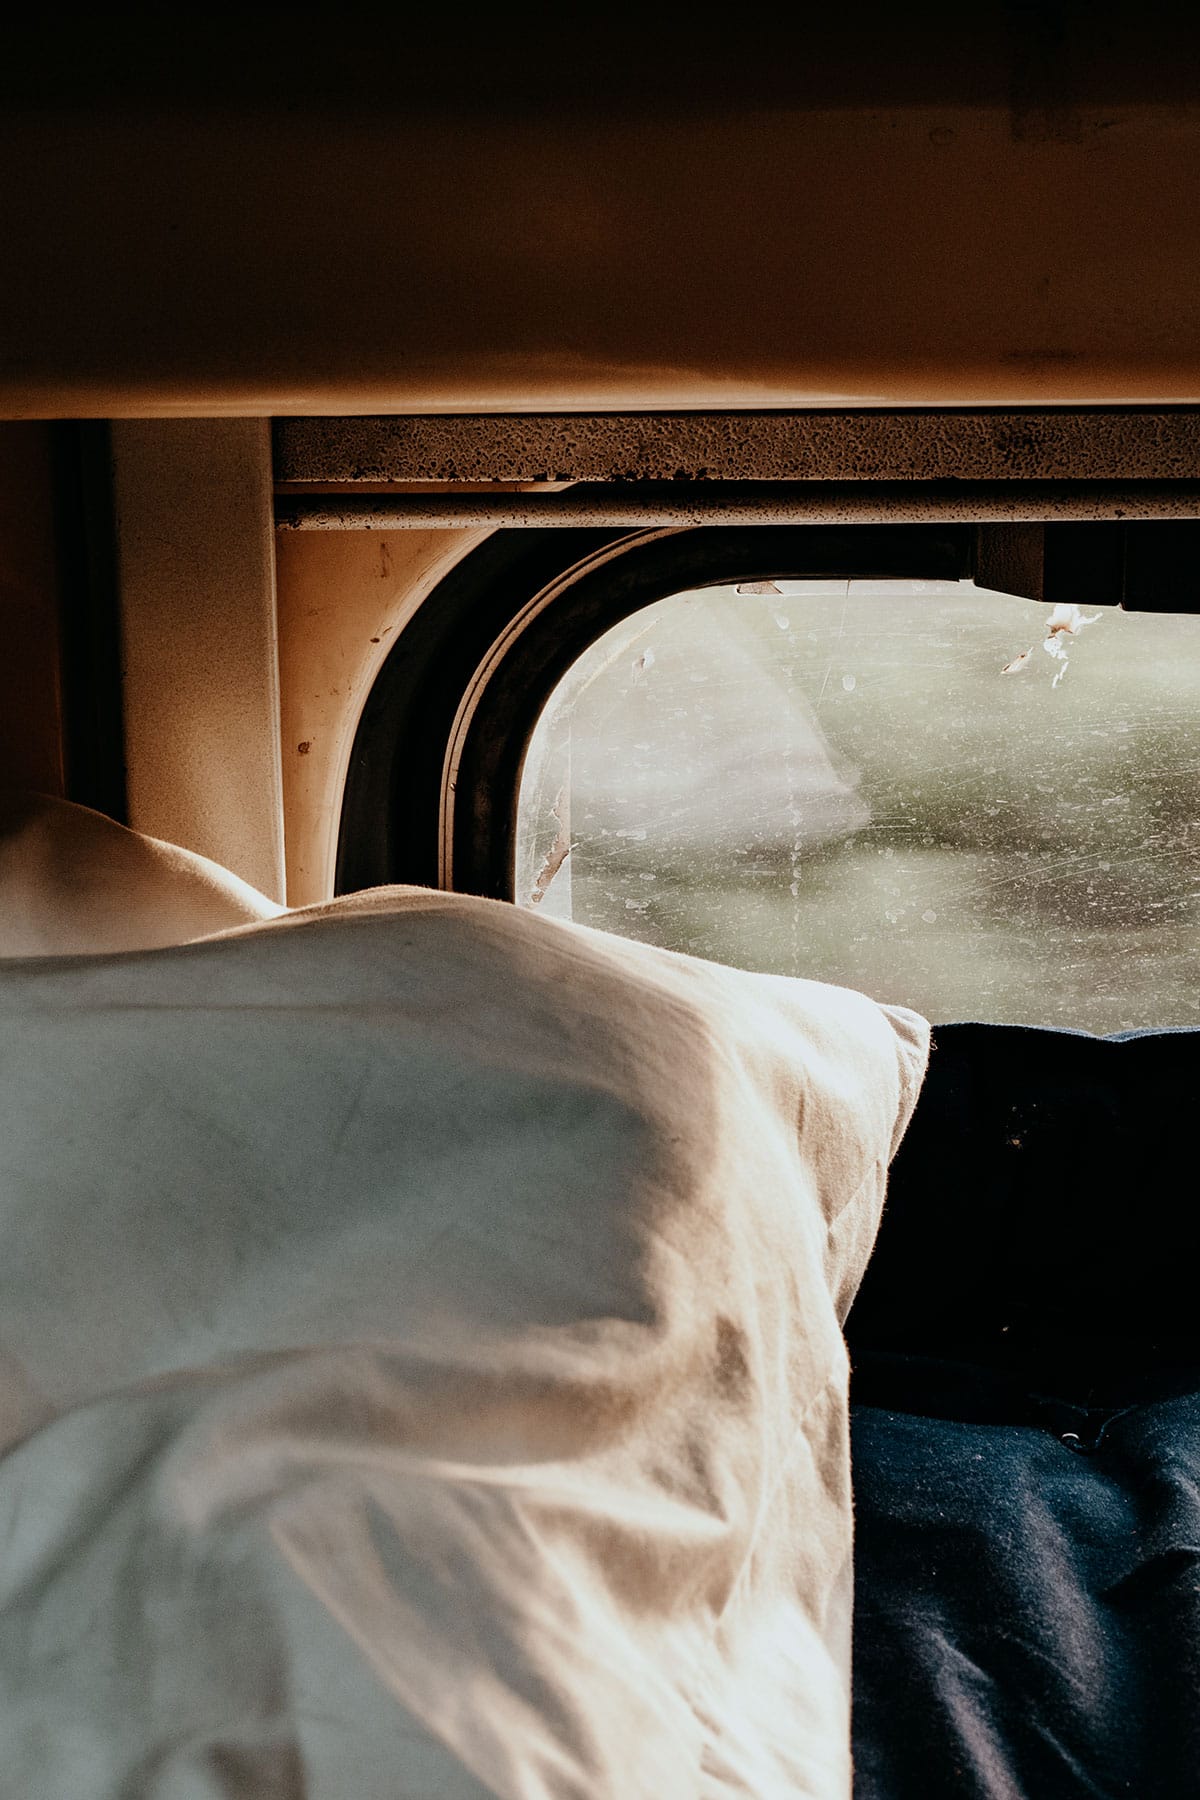
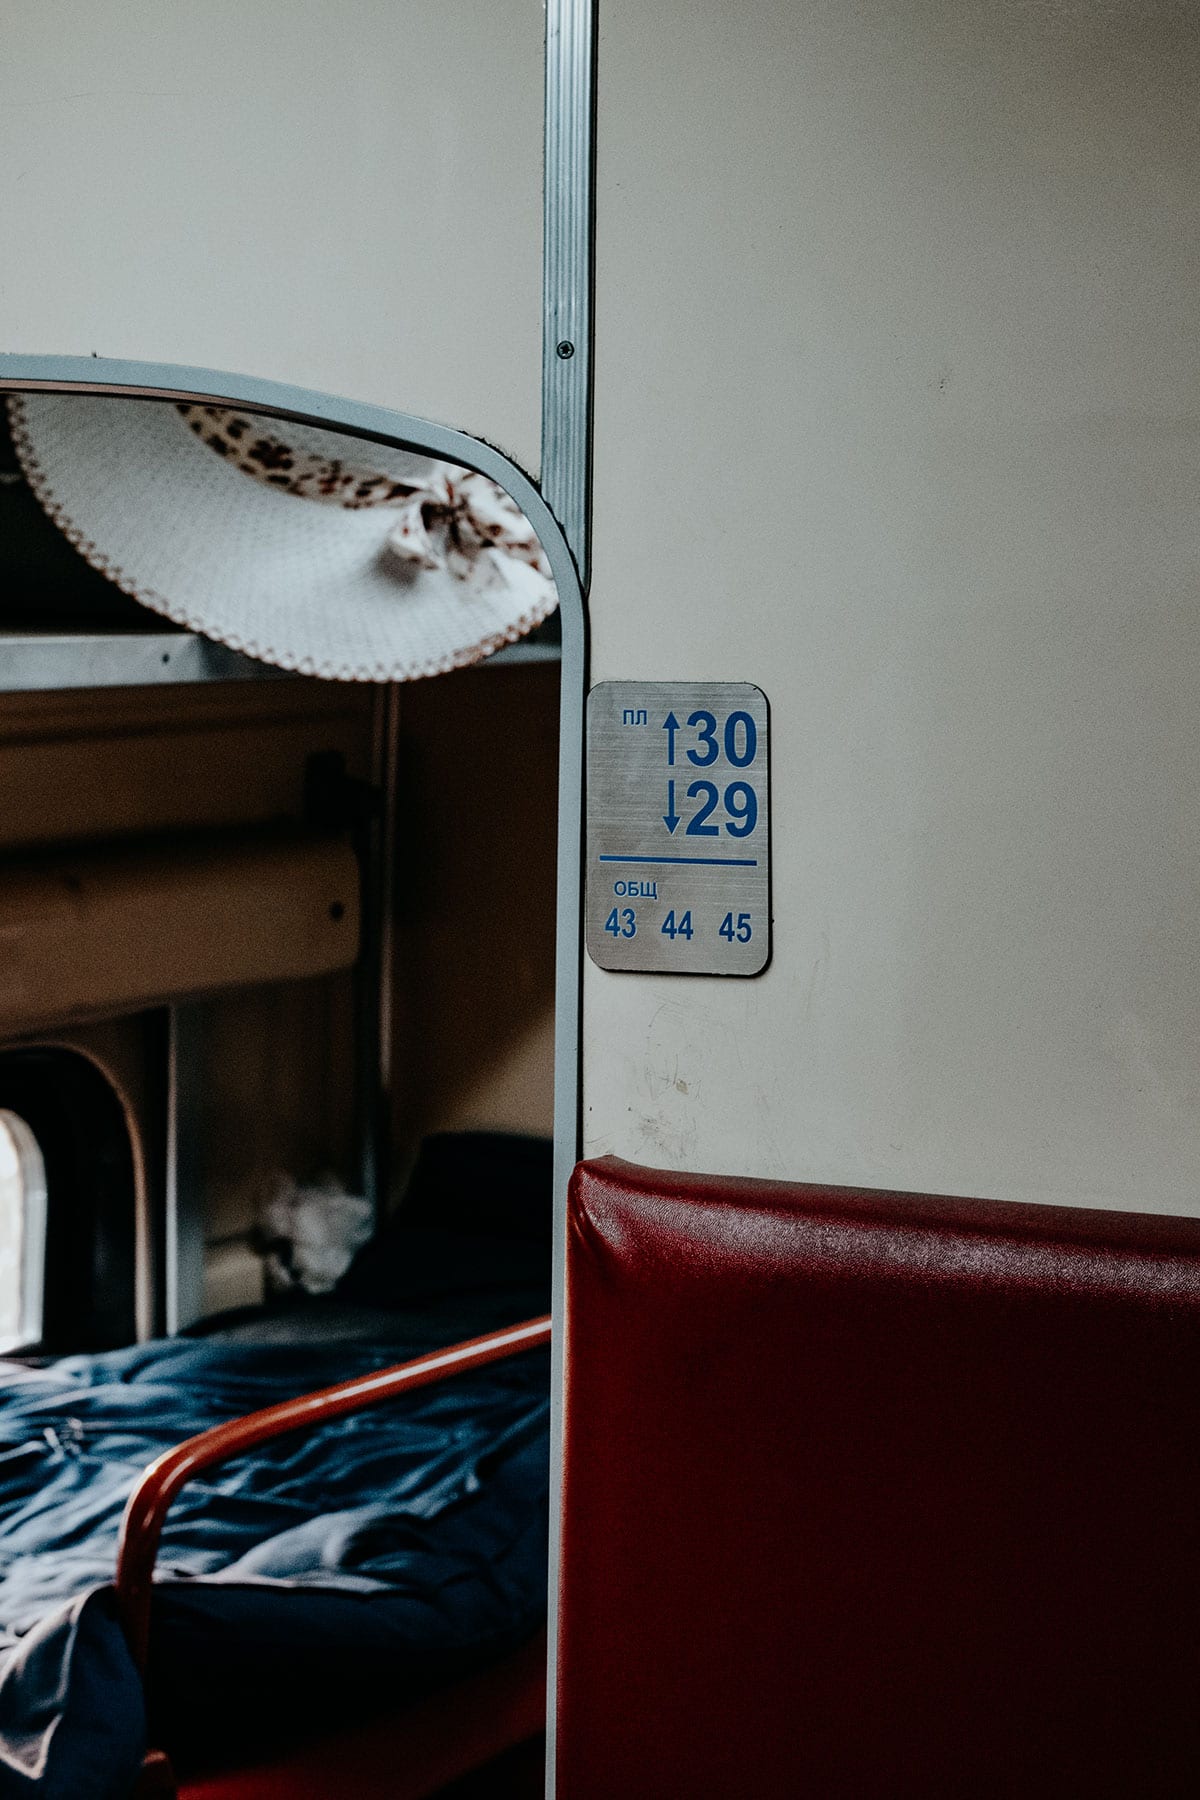
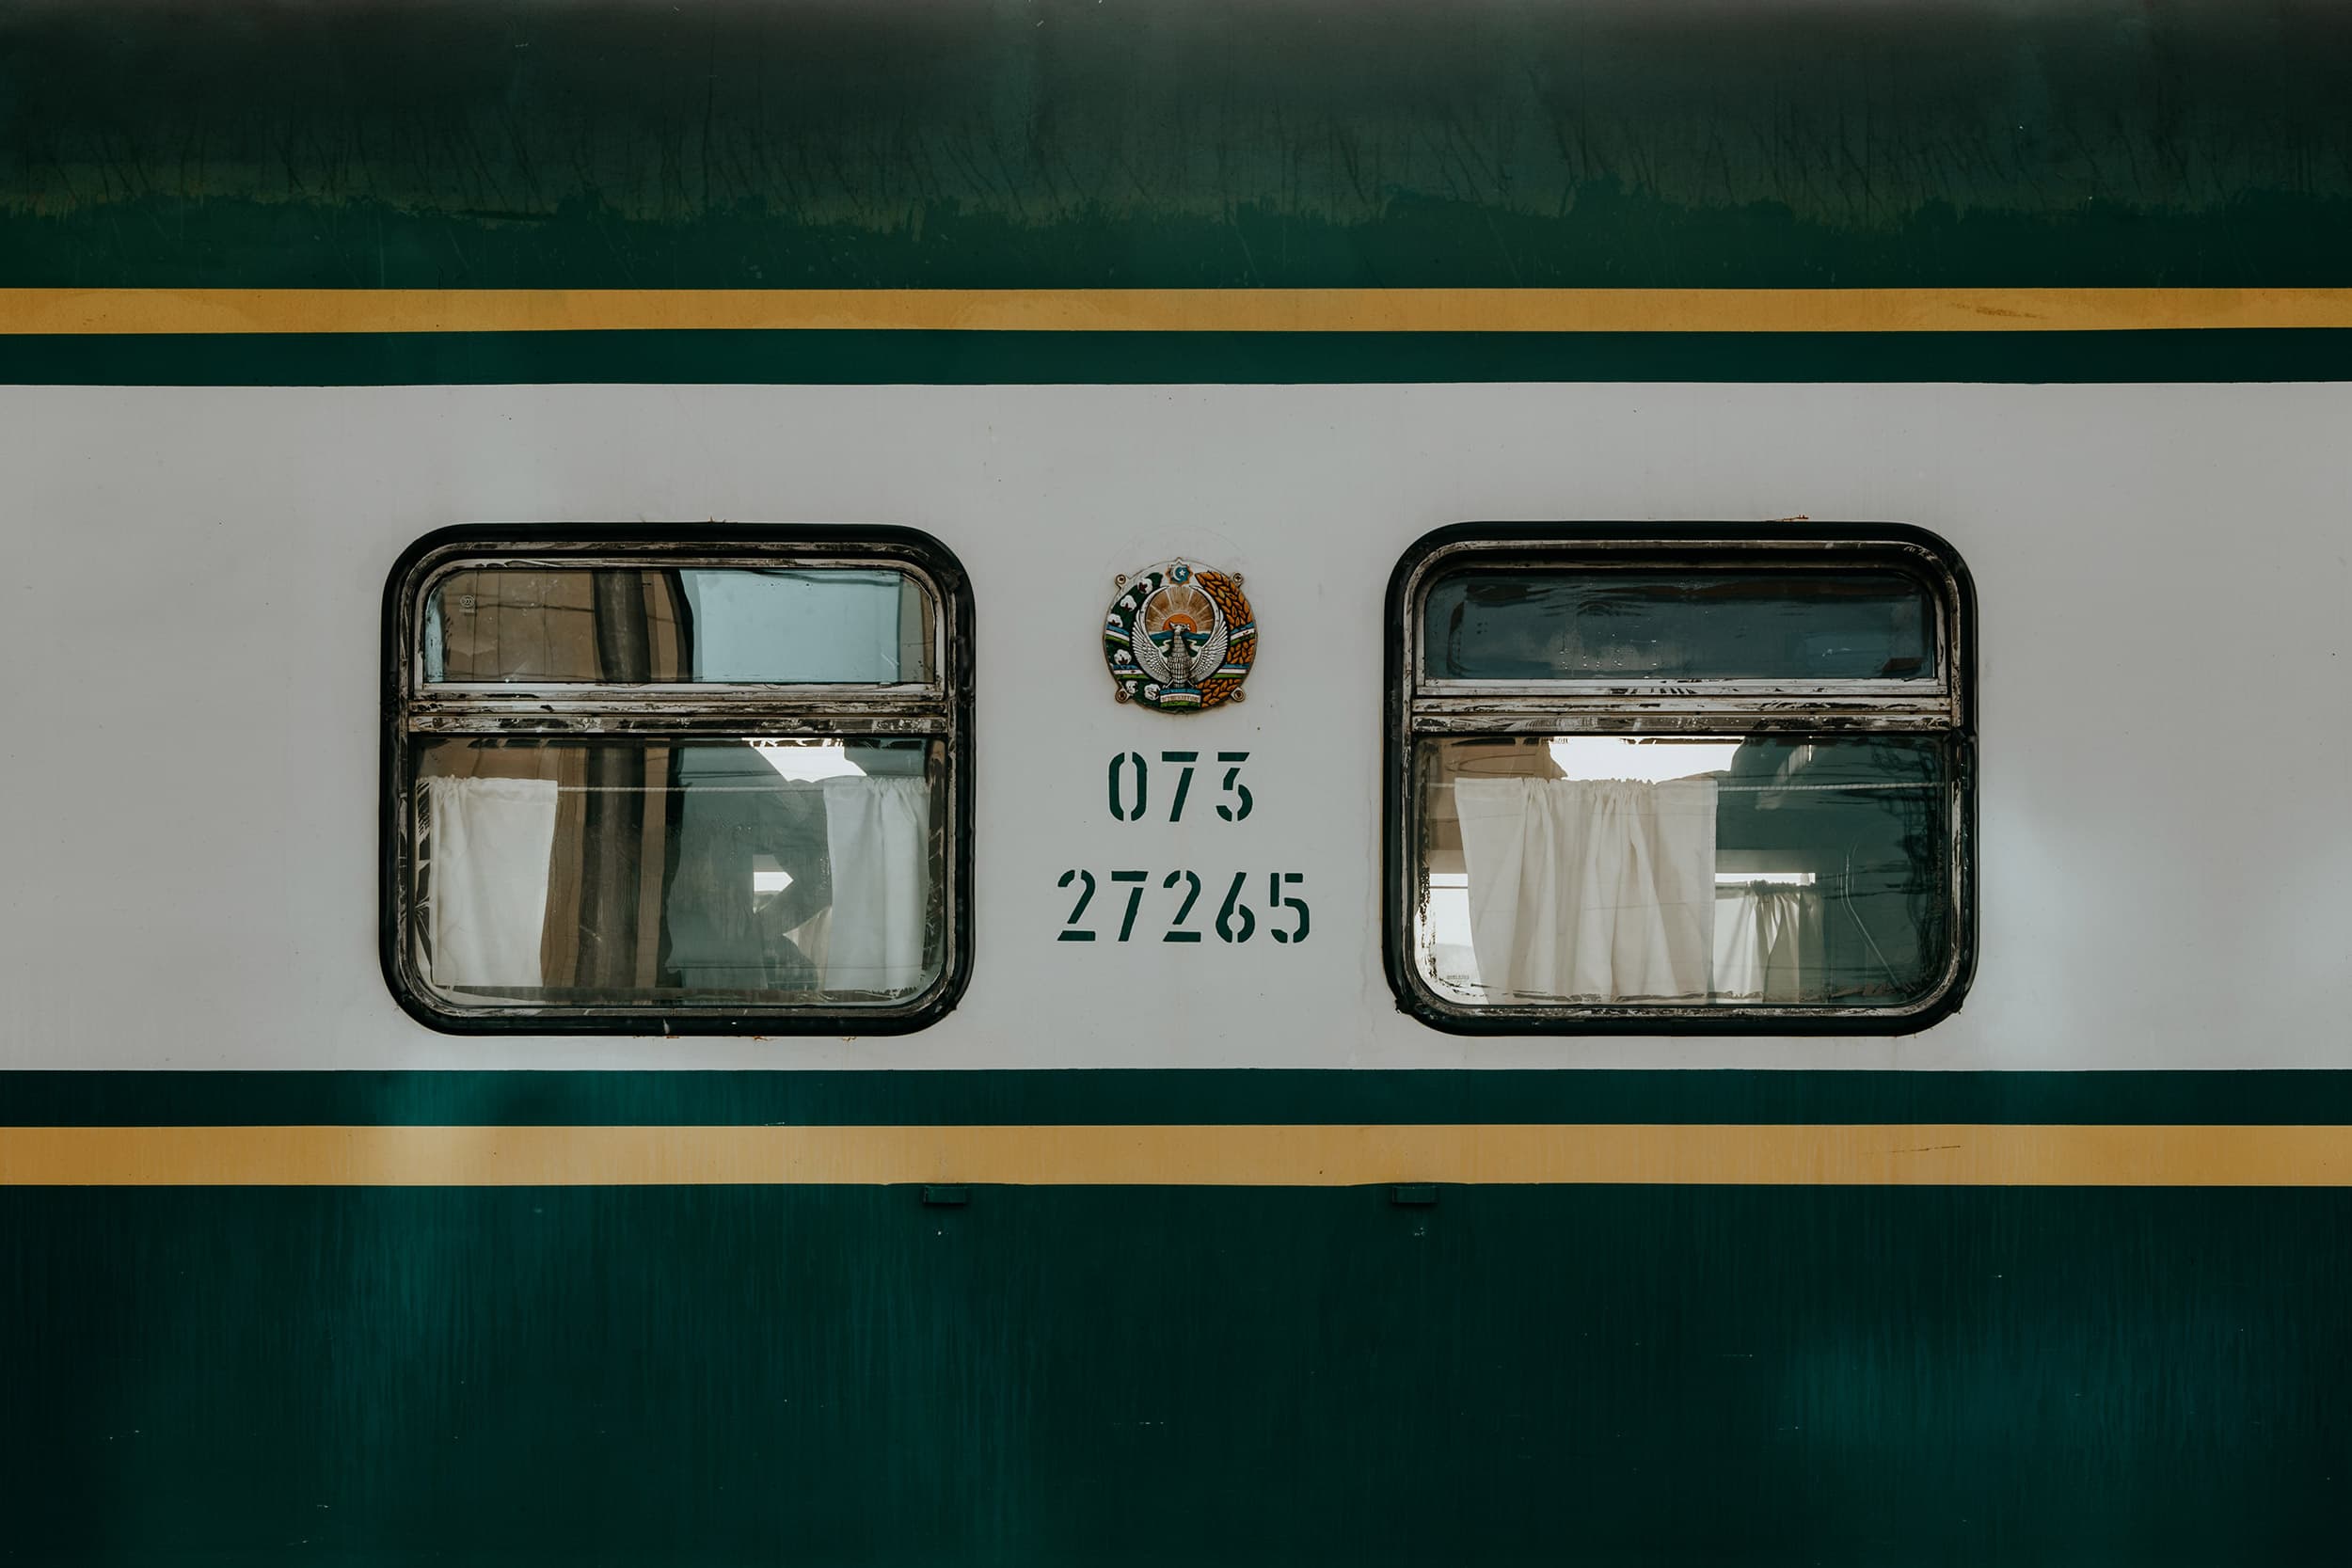
Winding through the rugged Uzbekistan landscape, the overnight train from Bukhara to Khiva is certainly not your everyday train journey and will add a substantial touch of adventure to your travels here.
Warm, intoxicating, and rather cramped, the Platzkartny (shared sleeper) was the option of my choice, and despite a poor night’s sleep, the wagon here was the perfect environment to soak up the distinctive atmosphere that prevailed in the time-worn Soviet-style train.
After a journey of roughly 7 hours – and hopefully some shuteye – you will arrive in Khiva.
Since you’ll arrive in Khiva in the early morning, I’d highly recommend arranging an early check-in at your hotel of choice to get some well-deserved rest.
Where | Bukhara 1 train station
Where to stay in Bukhara | As mentioned above, I spent my last night in Bukhara at the Wyndham Hotel and booked a late checkout to have some rest and extra comfort before embarking on the train journey to Khiva. Prices and availability here.
Where to stay in Khiva | I stayed in Orient Star Khiva, and arranged an early check-in for my first day, and I would highly recommend you do the same. Prices and availability here.
How to get from Bukhara to Khiva | The Bukhara to Khiva train departs daily at 0025 and will set you back around 140.000 SOM (€11,-) per person. Tickets can be booked through 12go.Asia.
Plan | Take a look at my guide to travelling by train in Uzbekistan for all the essentials.
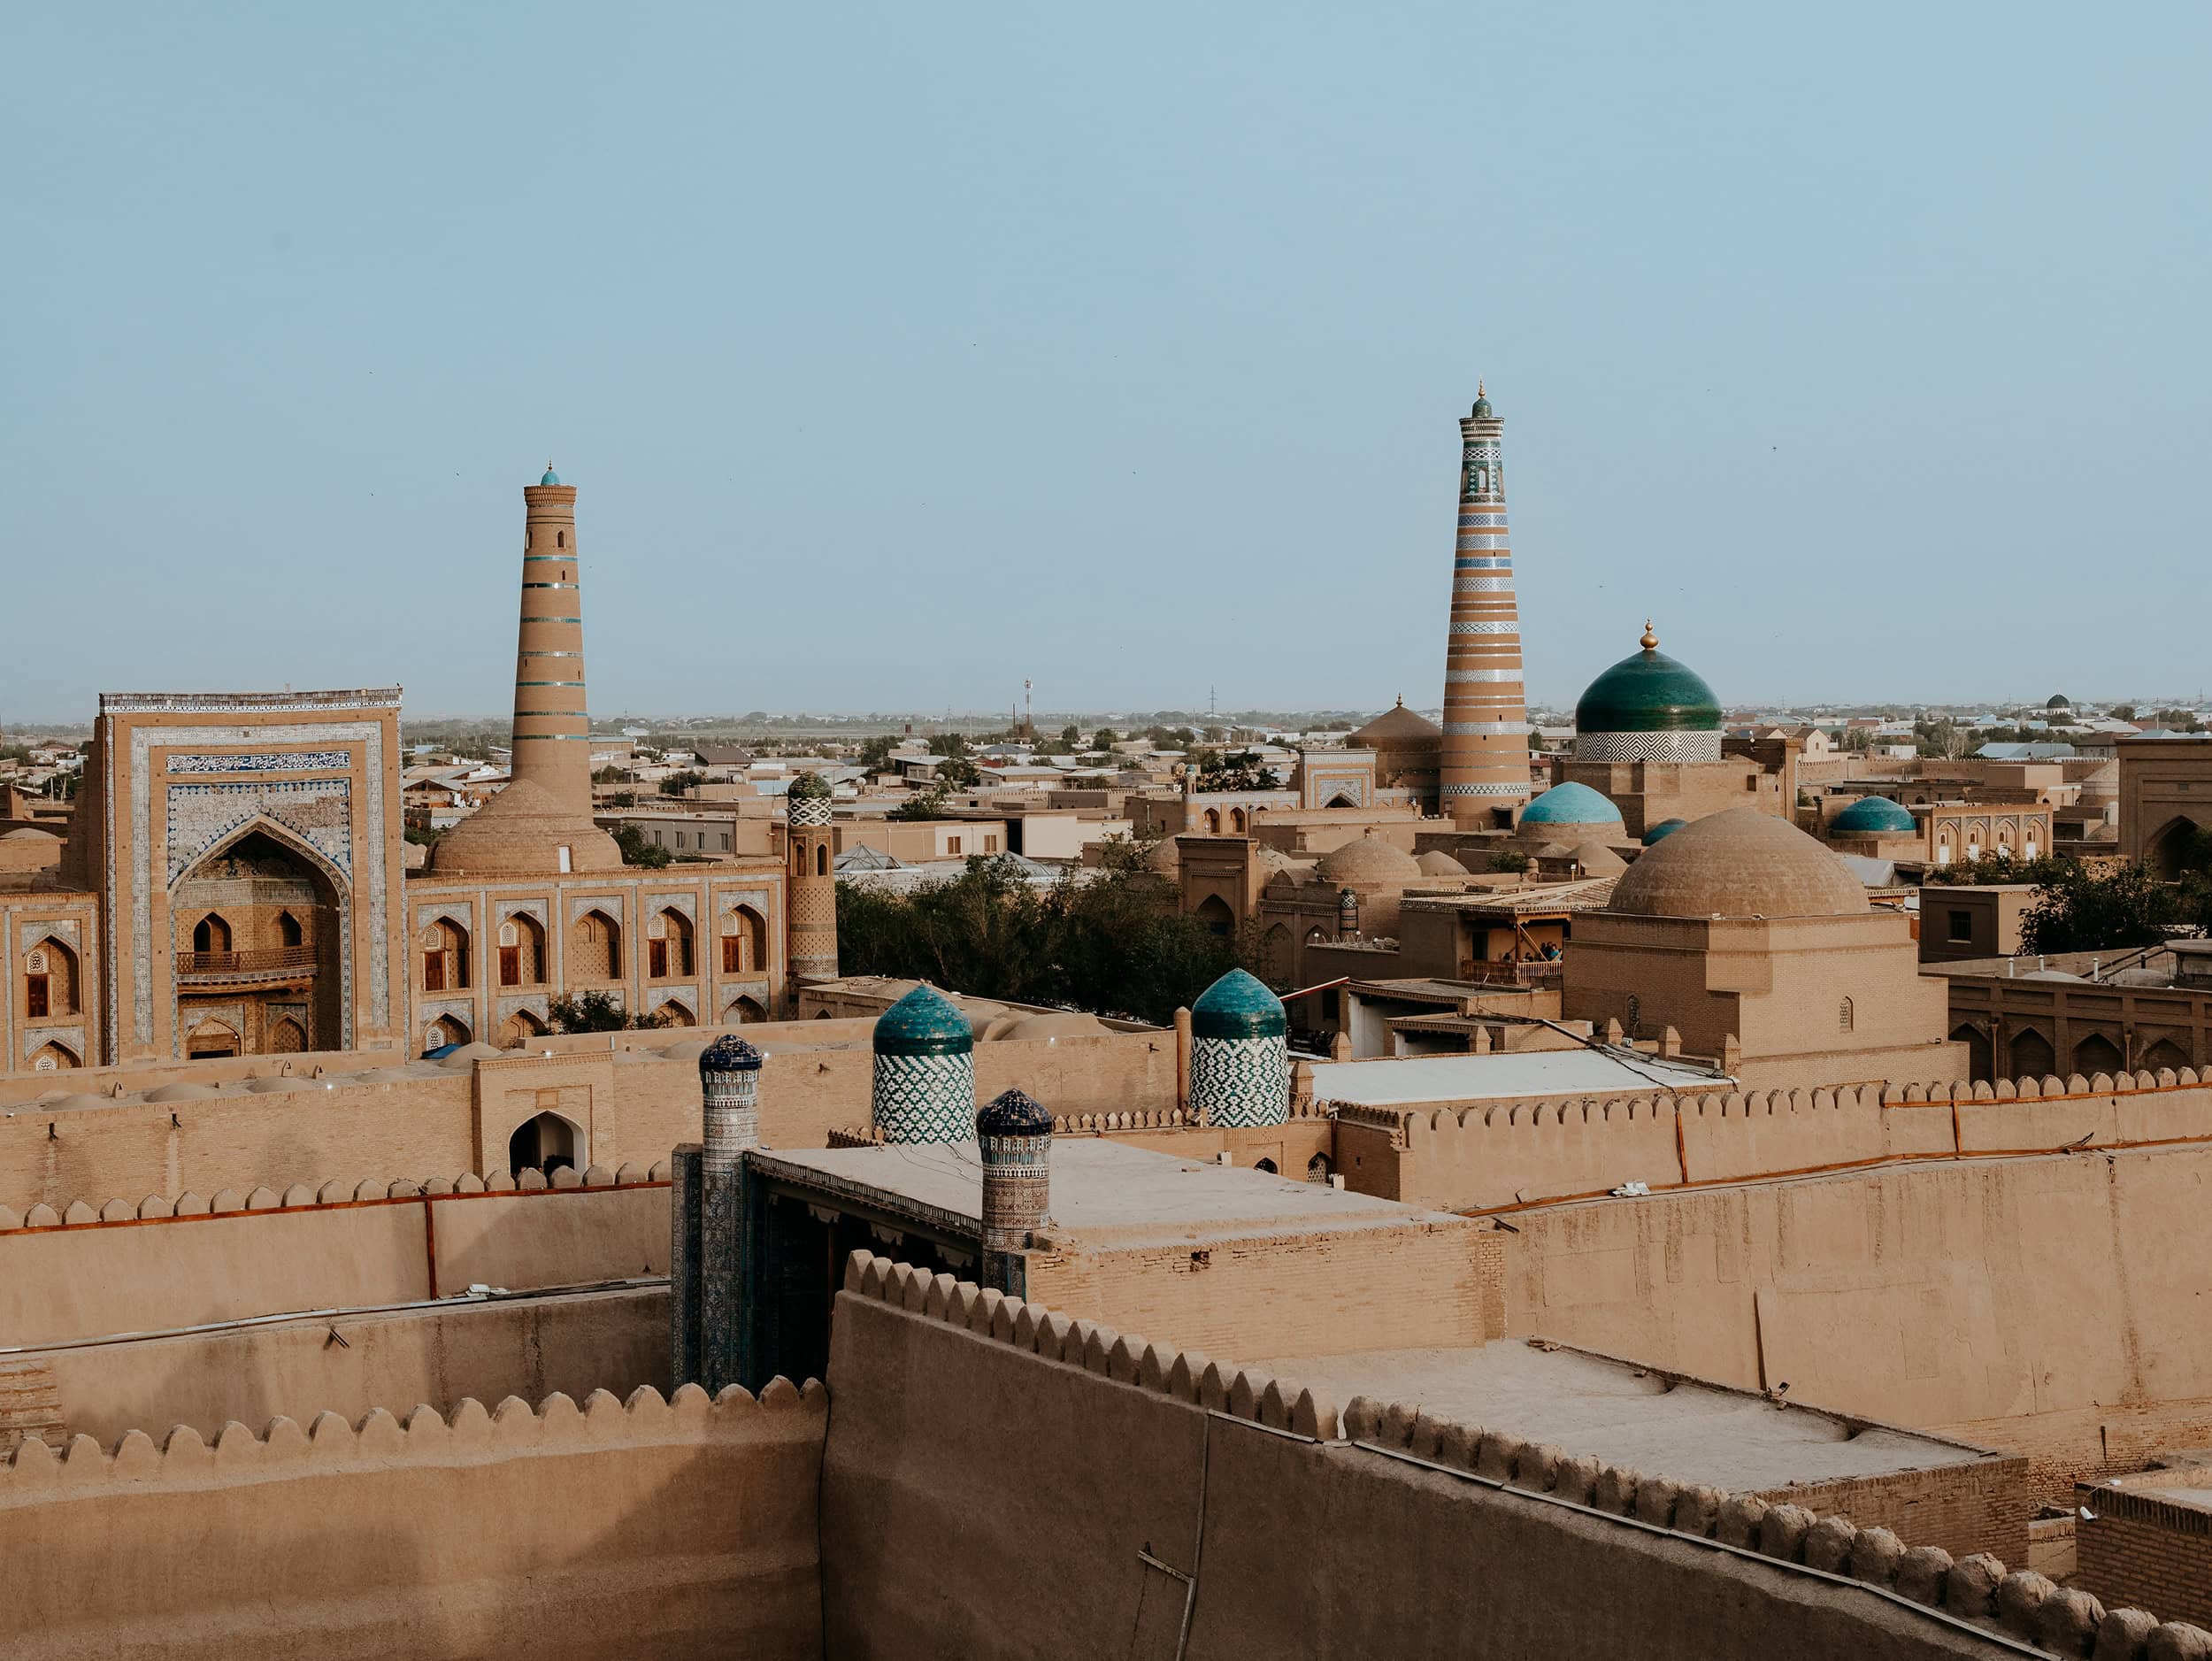
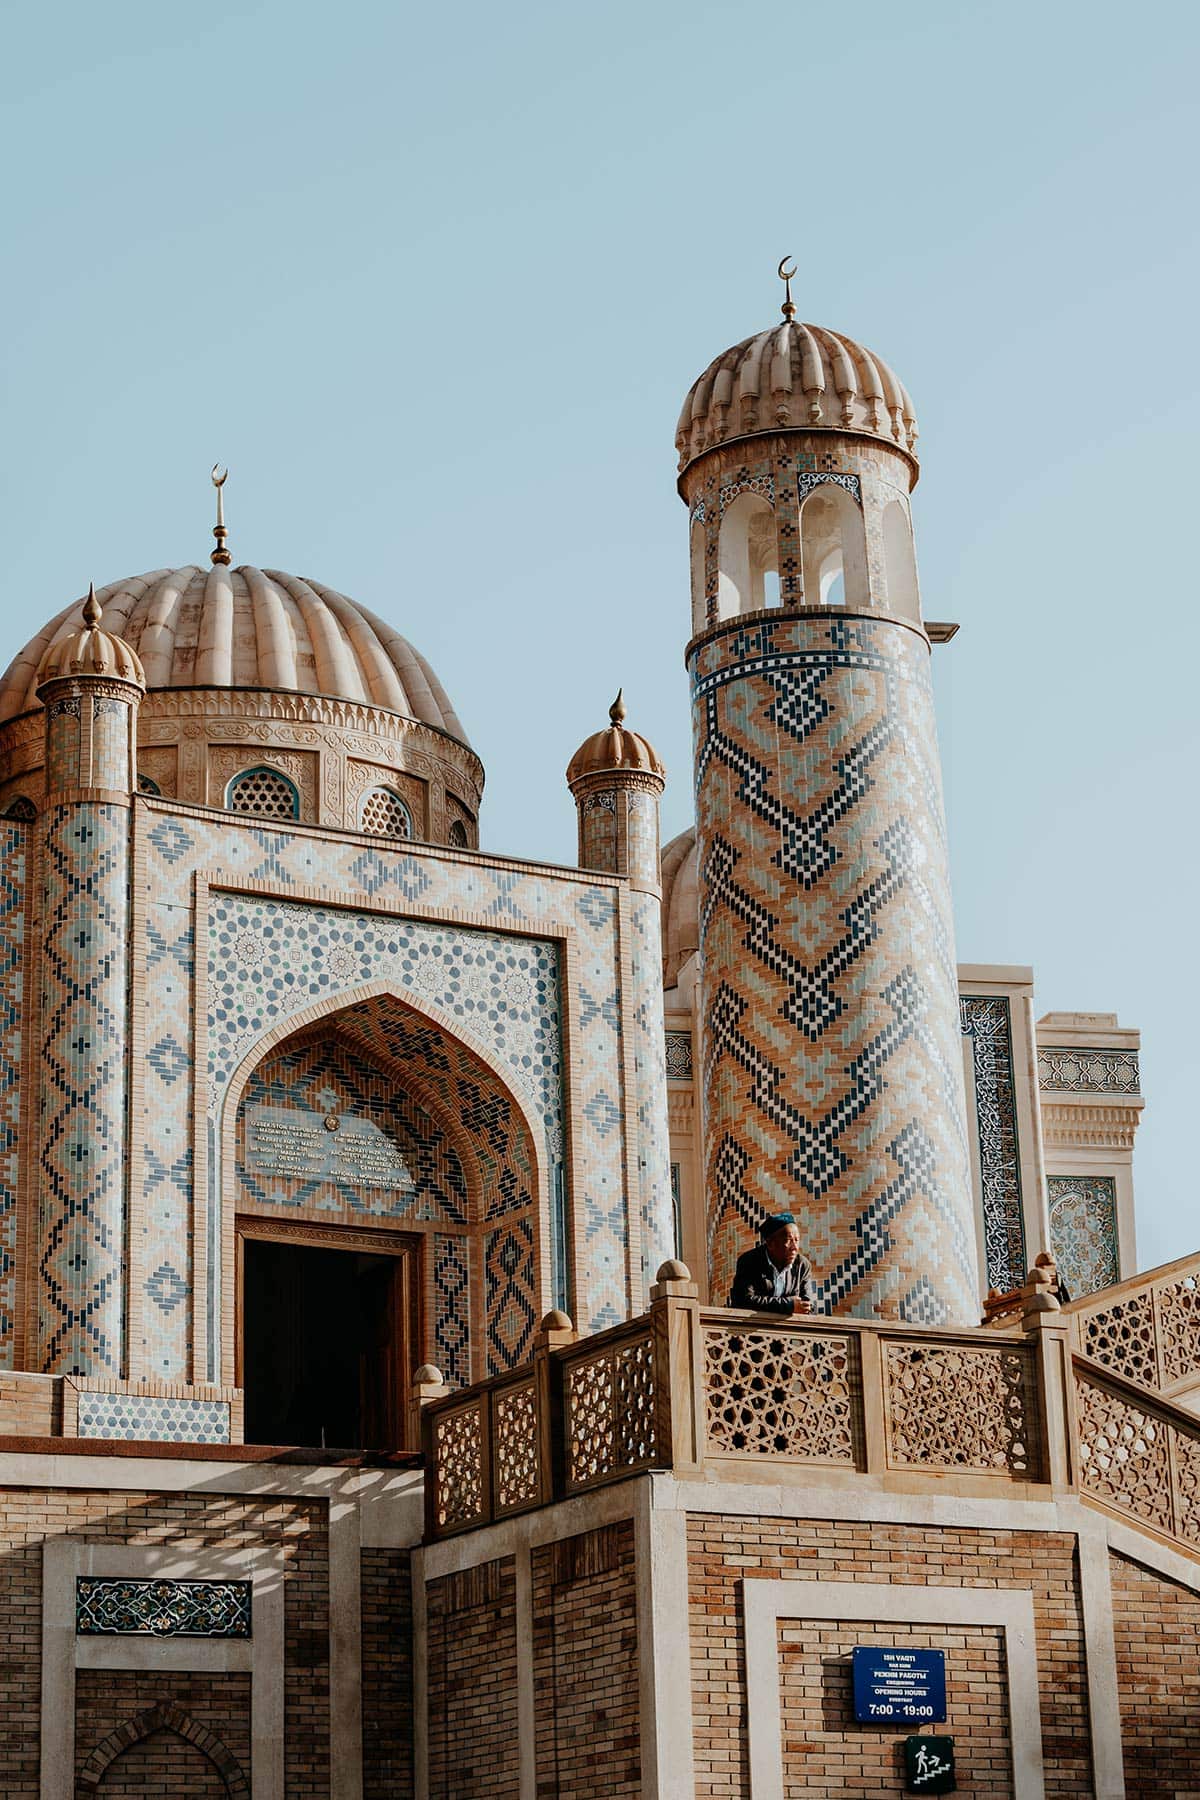
Day 10 – 13 | Khiva
With a slightly intense train journey under your belt, and most likely only a little amount of sleep, you will arrive in the beautiful city of Khiva, where I’d suggest you first take some well-deserved rest, before exploring the town’s many architectural wonders.
While Samarkand and Bukhara may be the most popular of cities in Uzbekistan, I firmly believe that Khiva provides the most accurate representation of how the Silk Road must have been during its heydays.
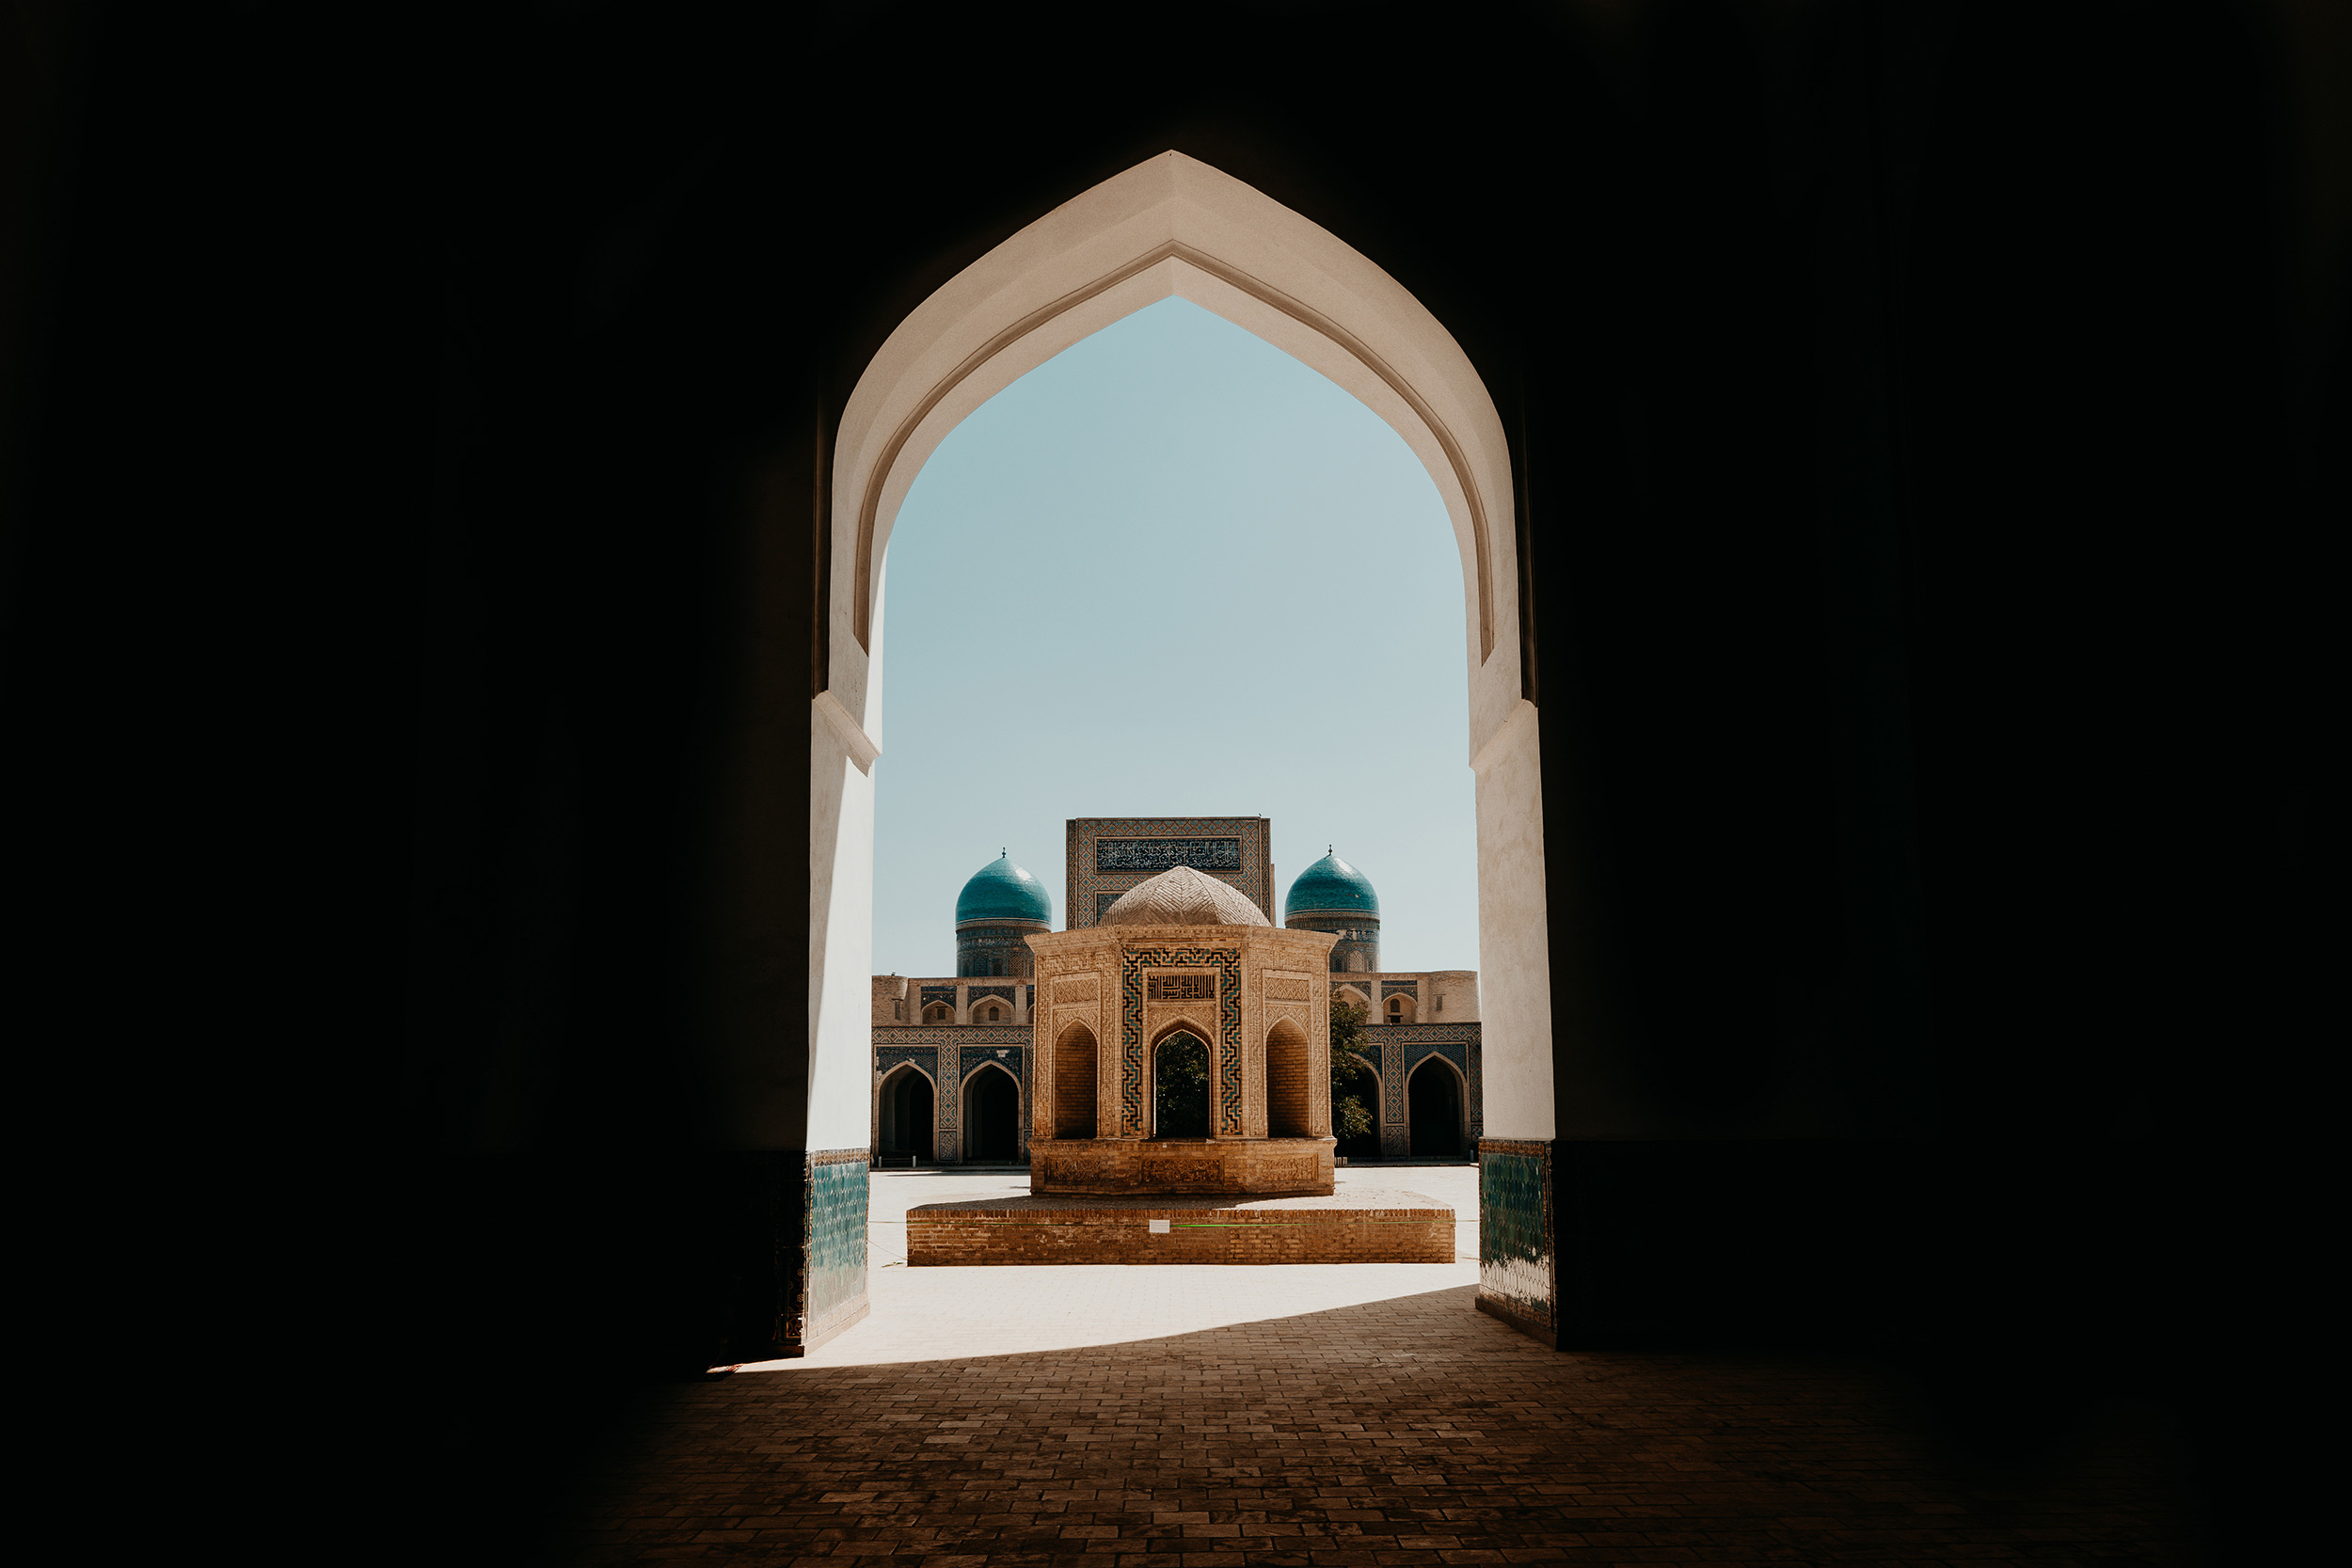
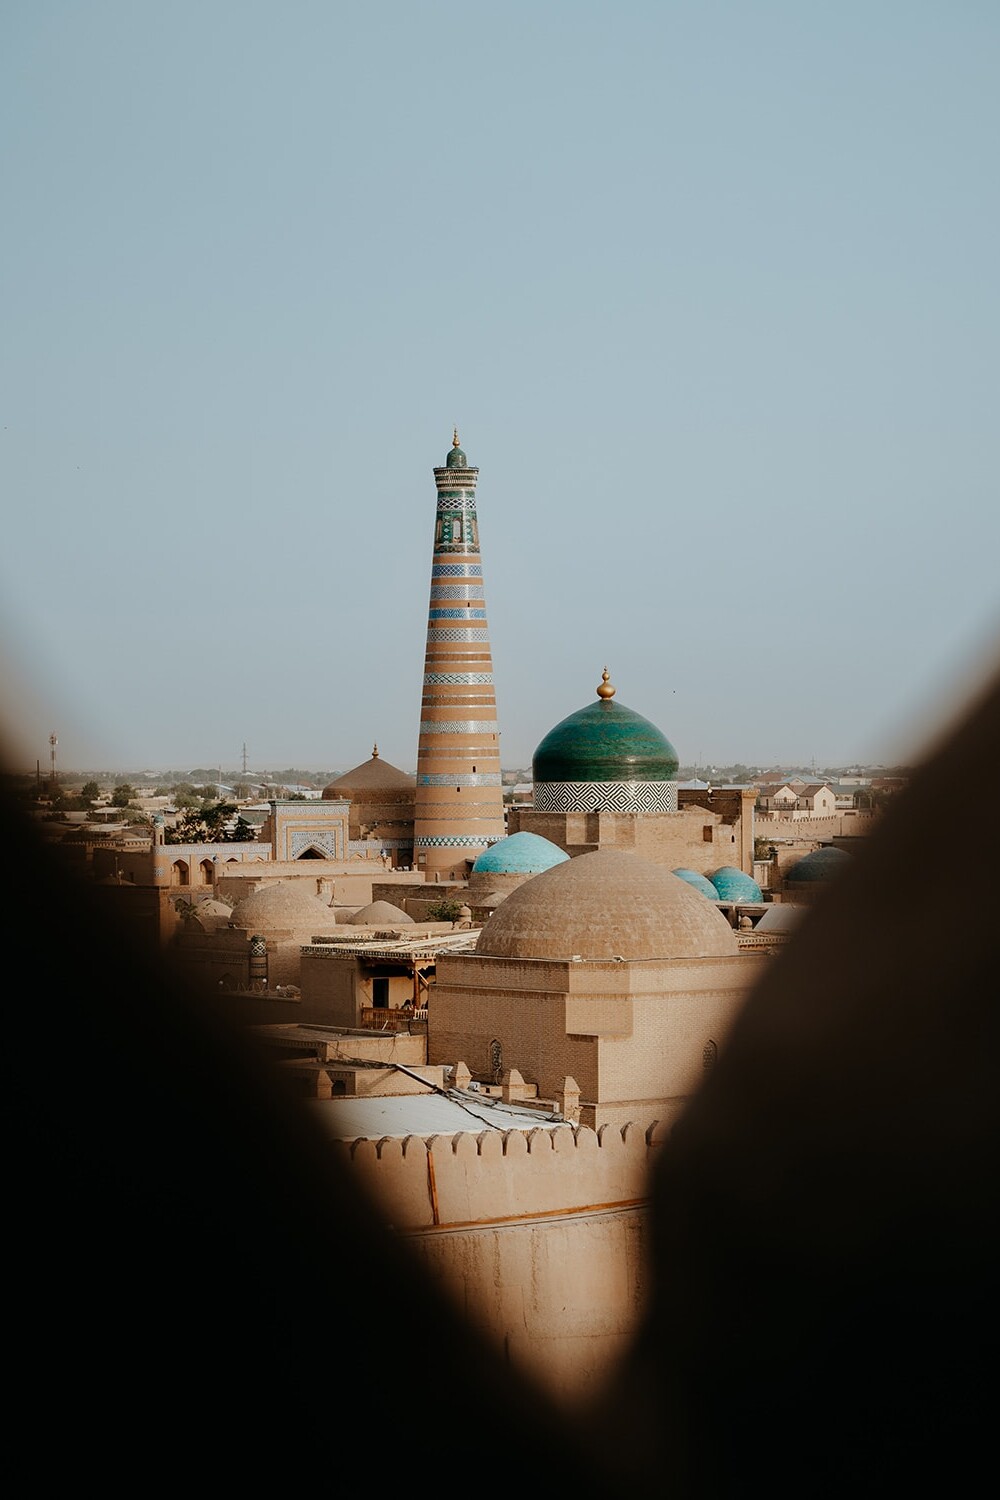
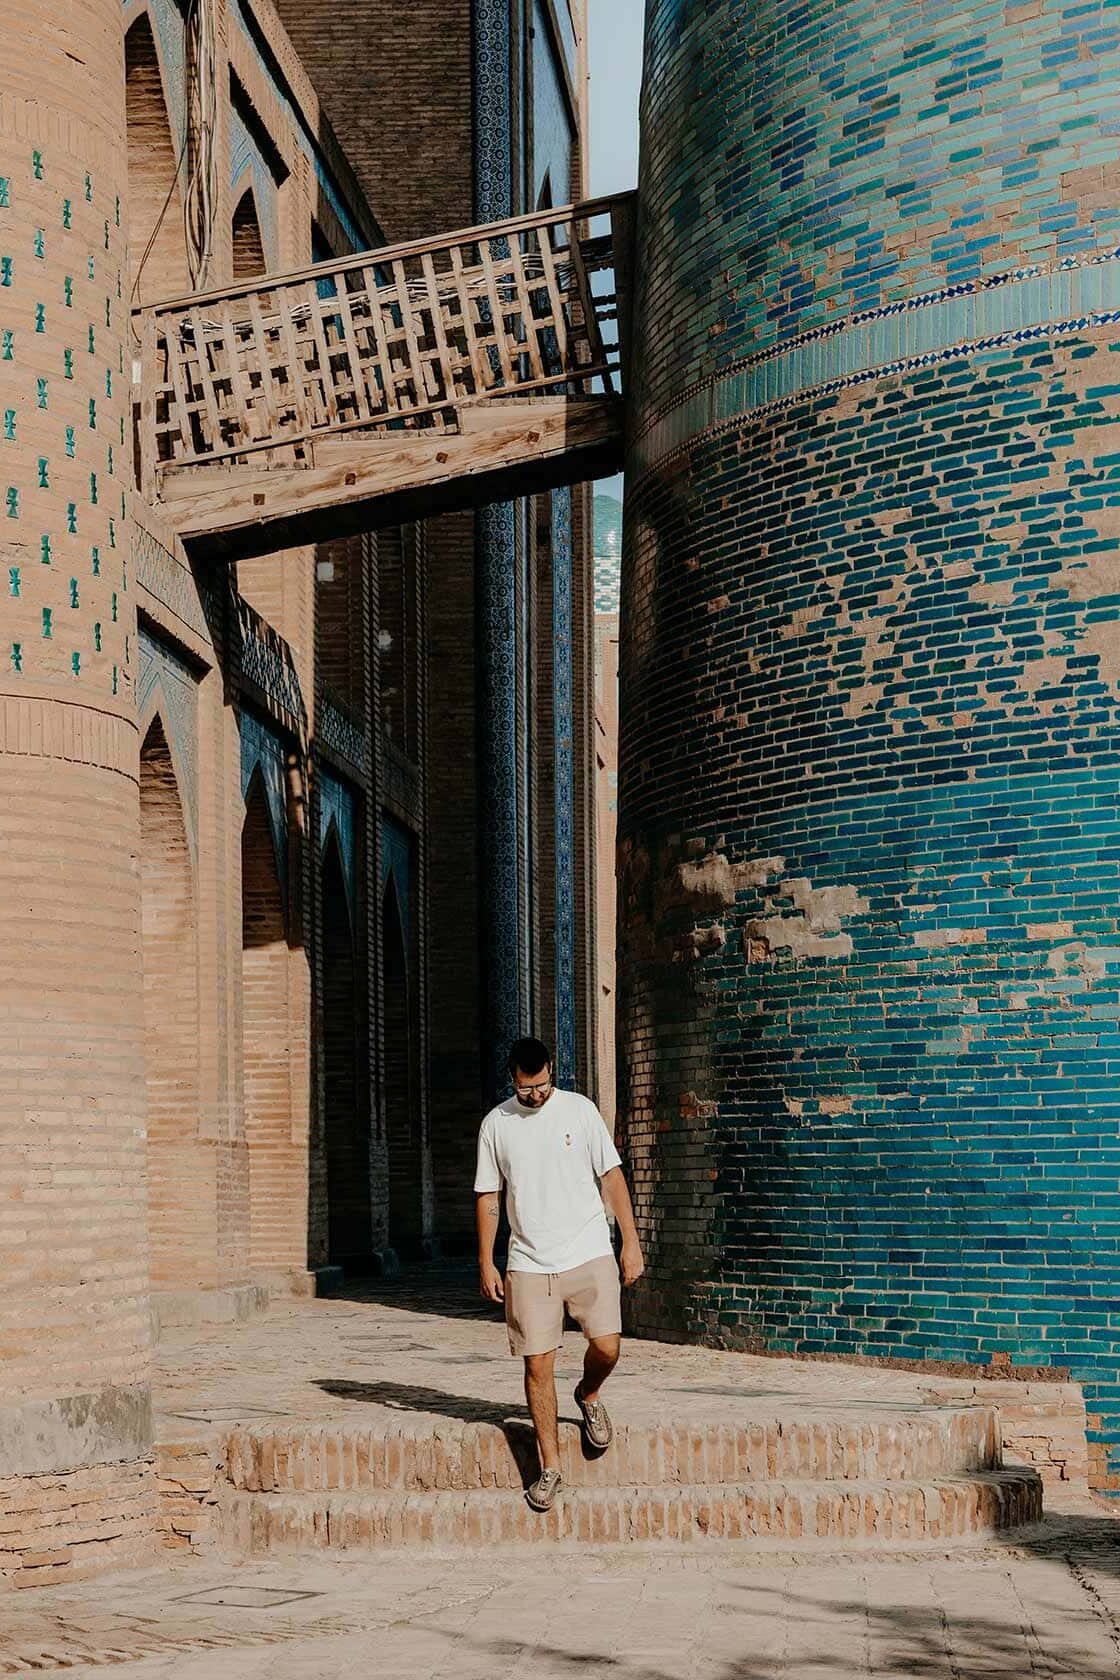
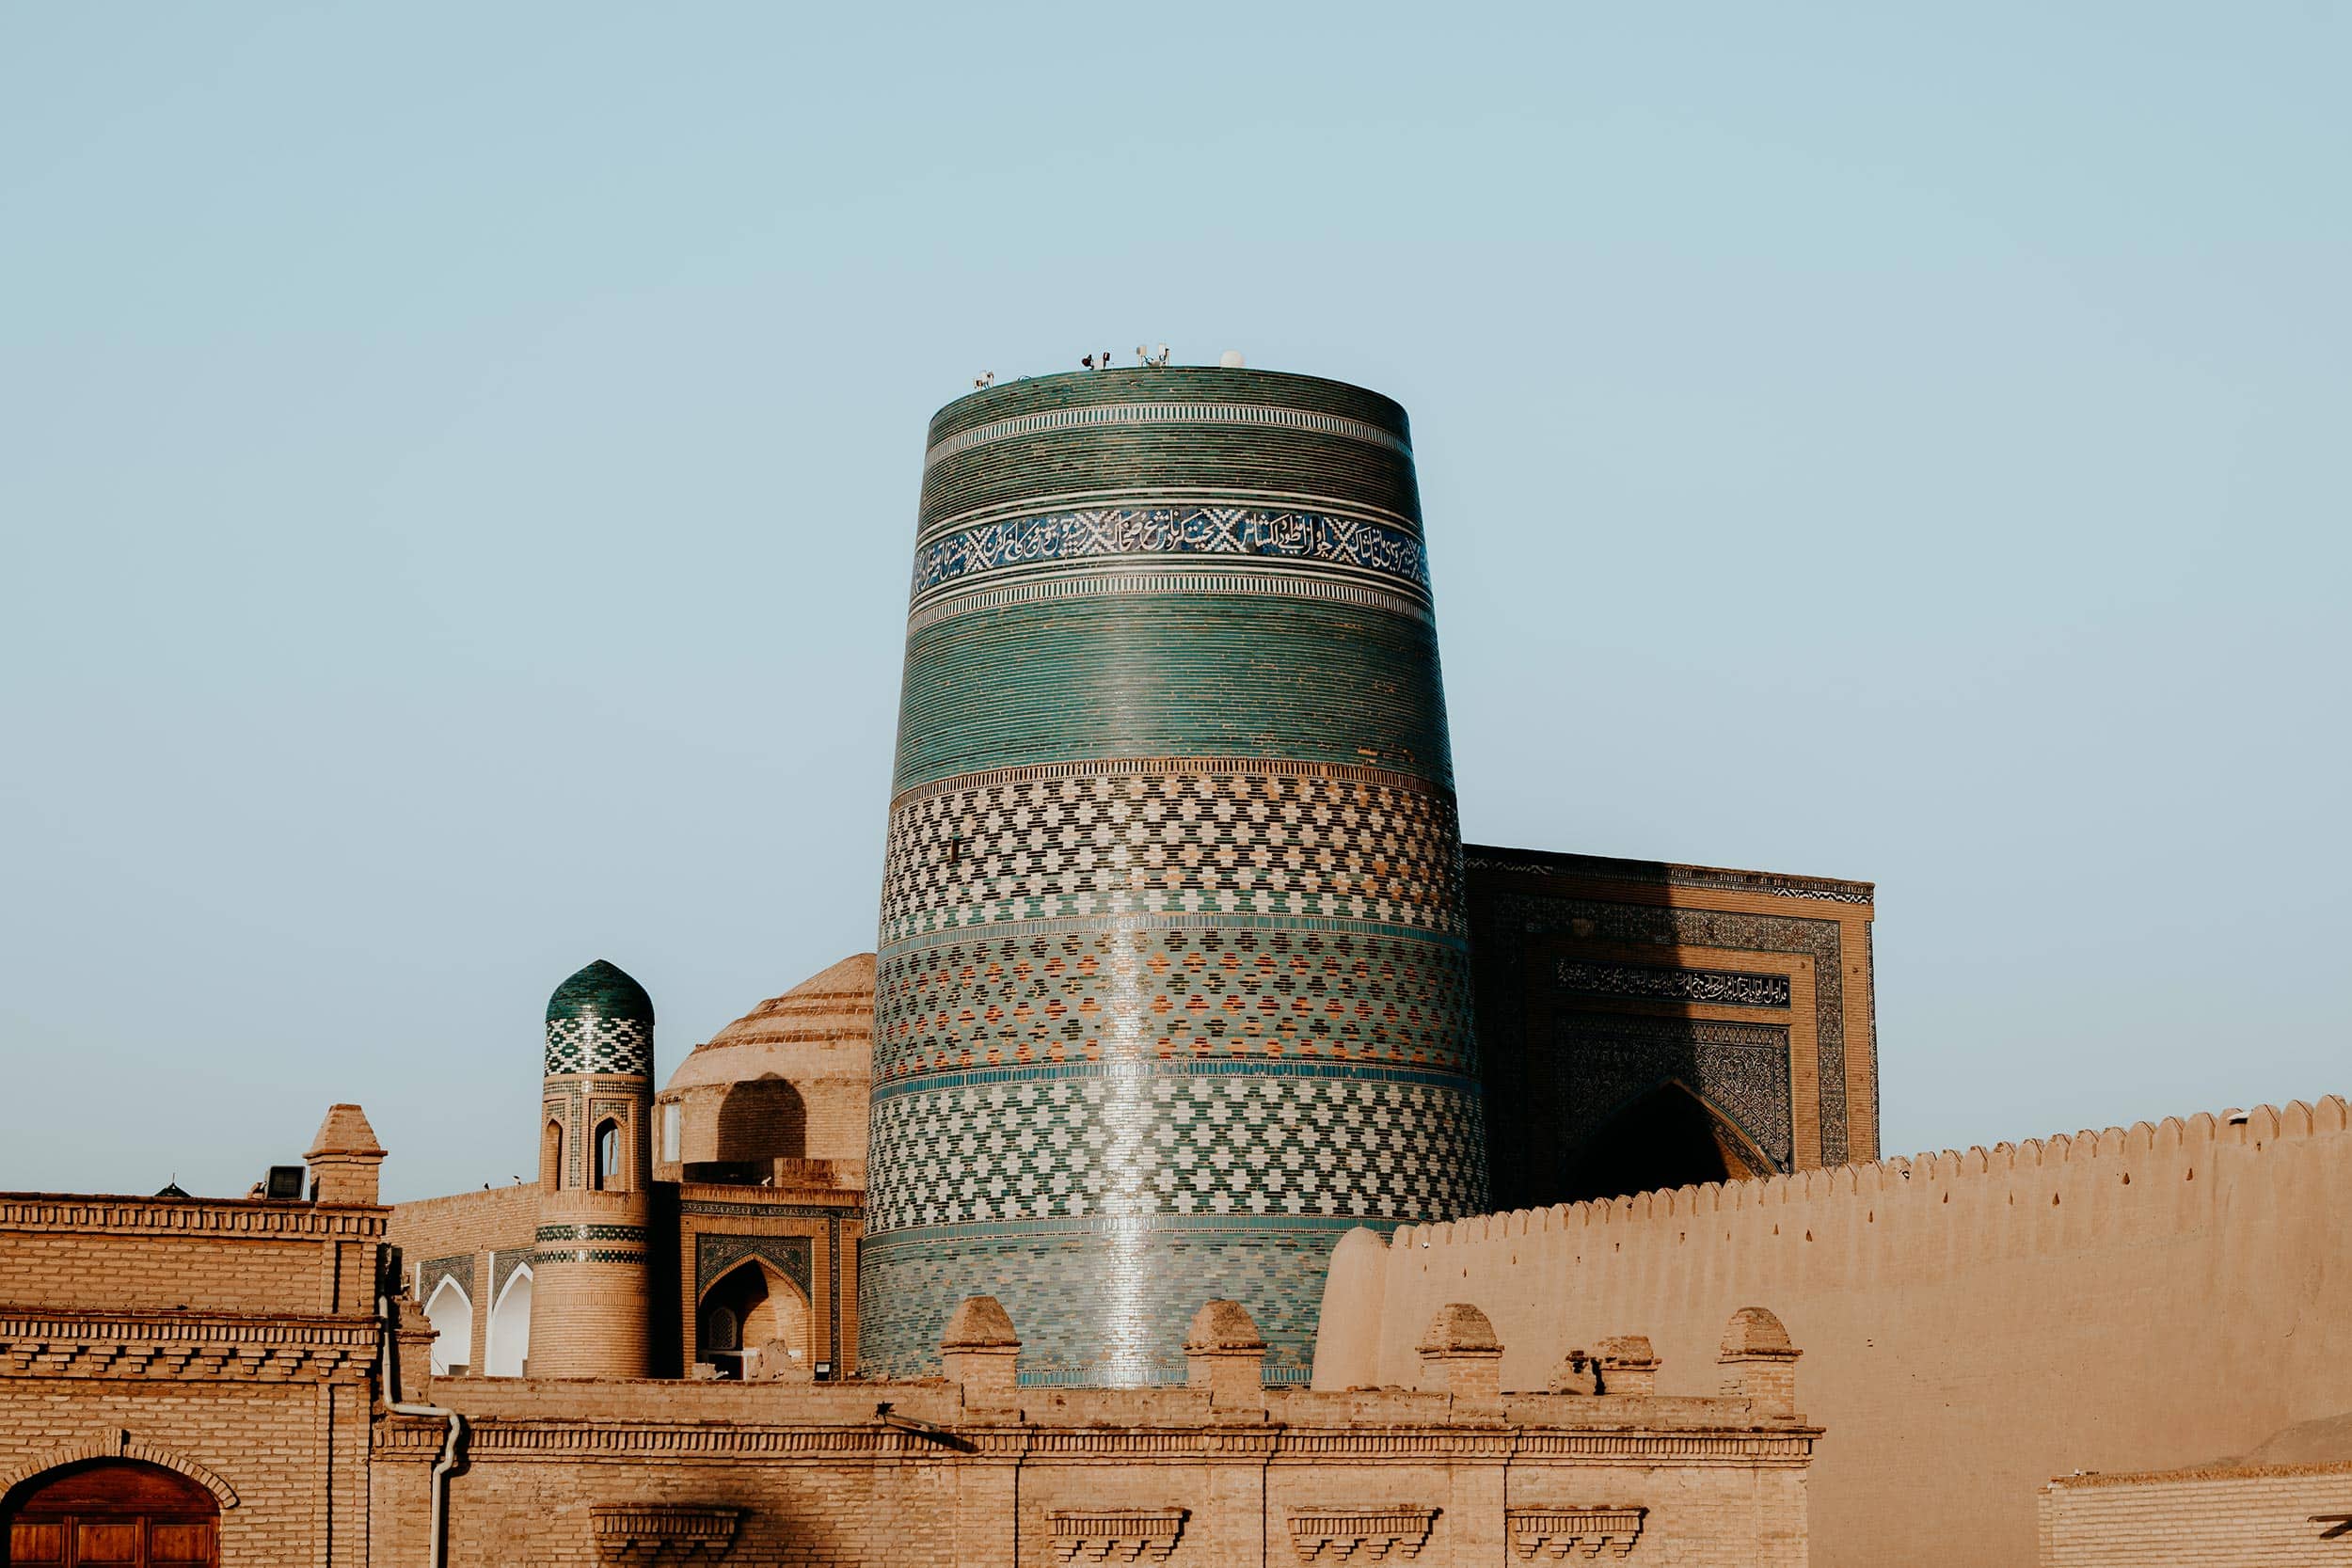
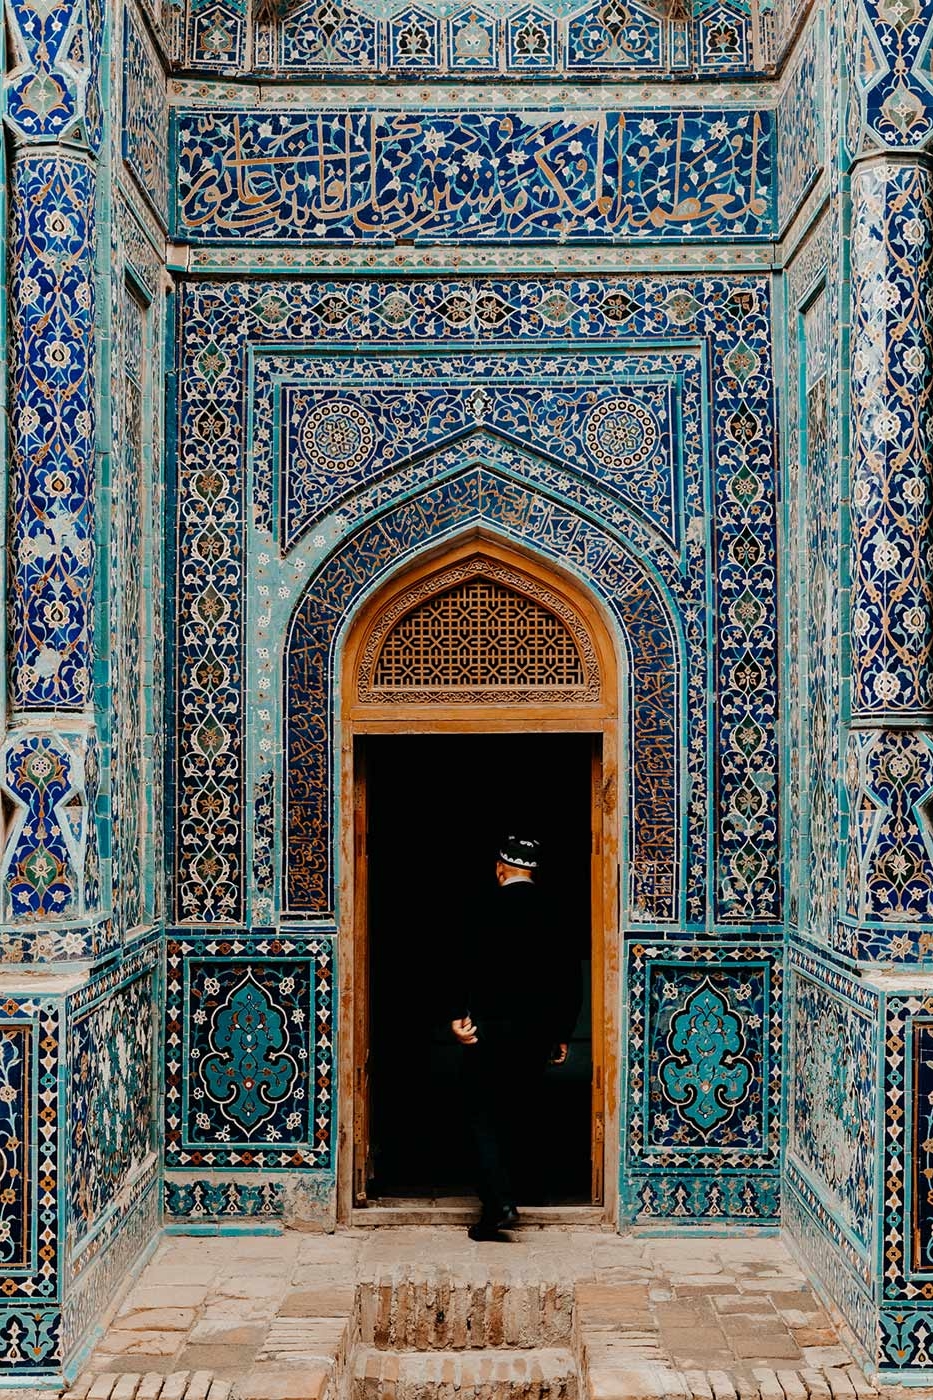
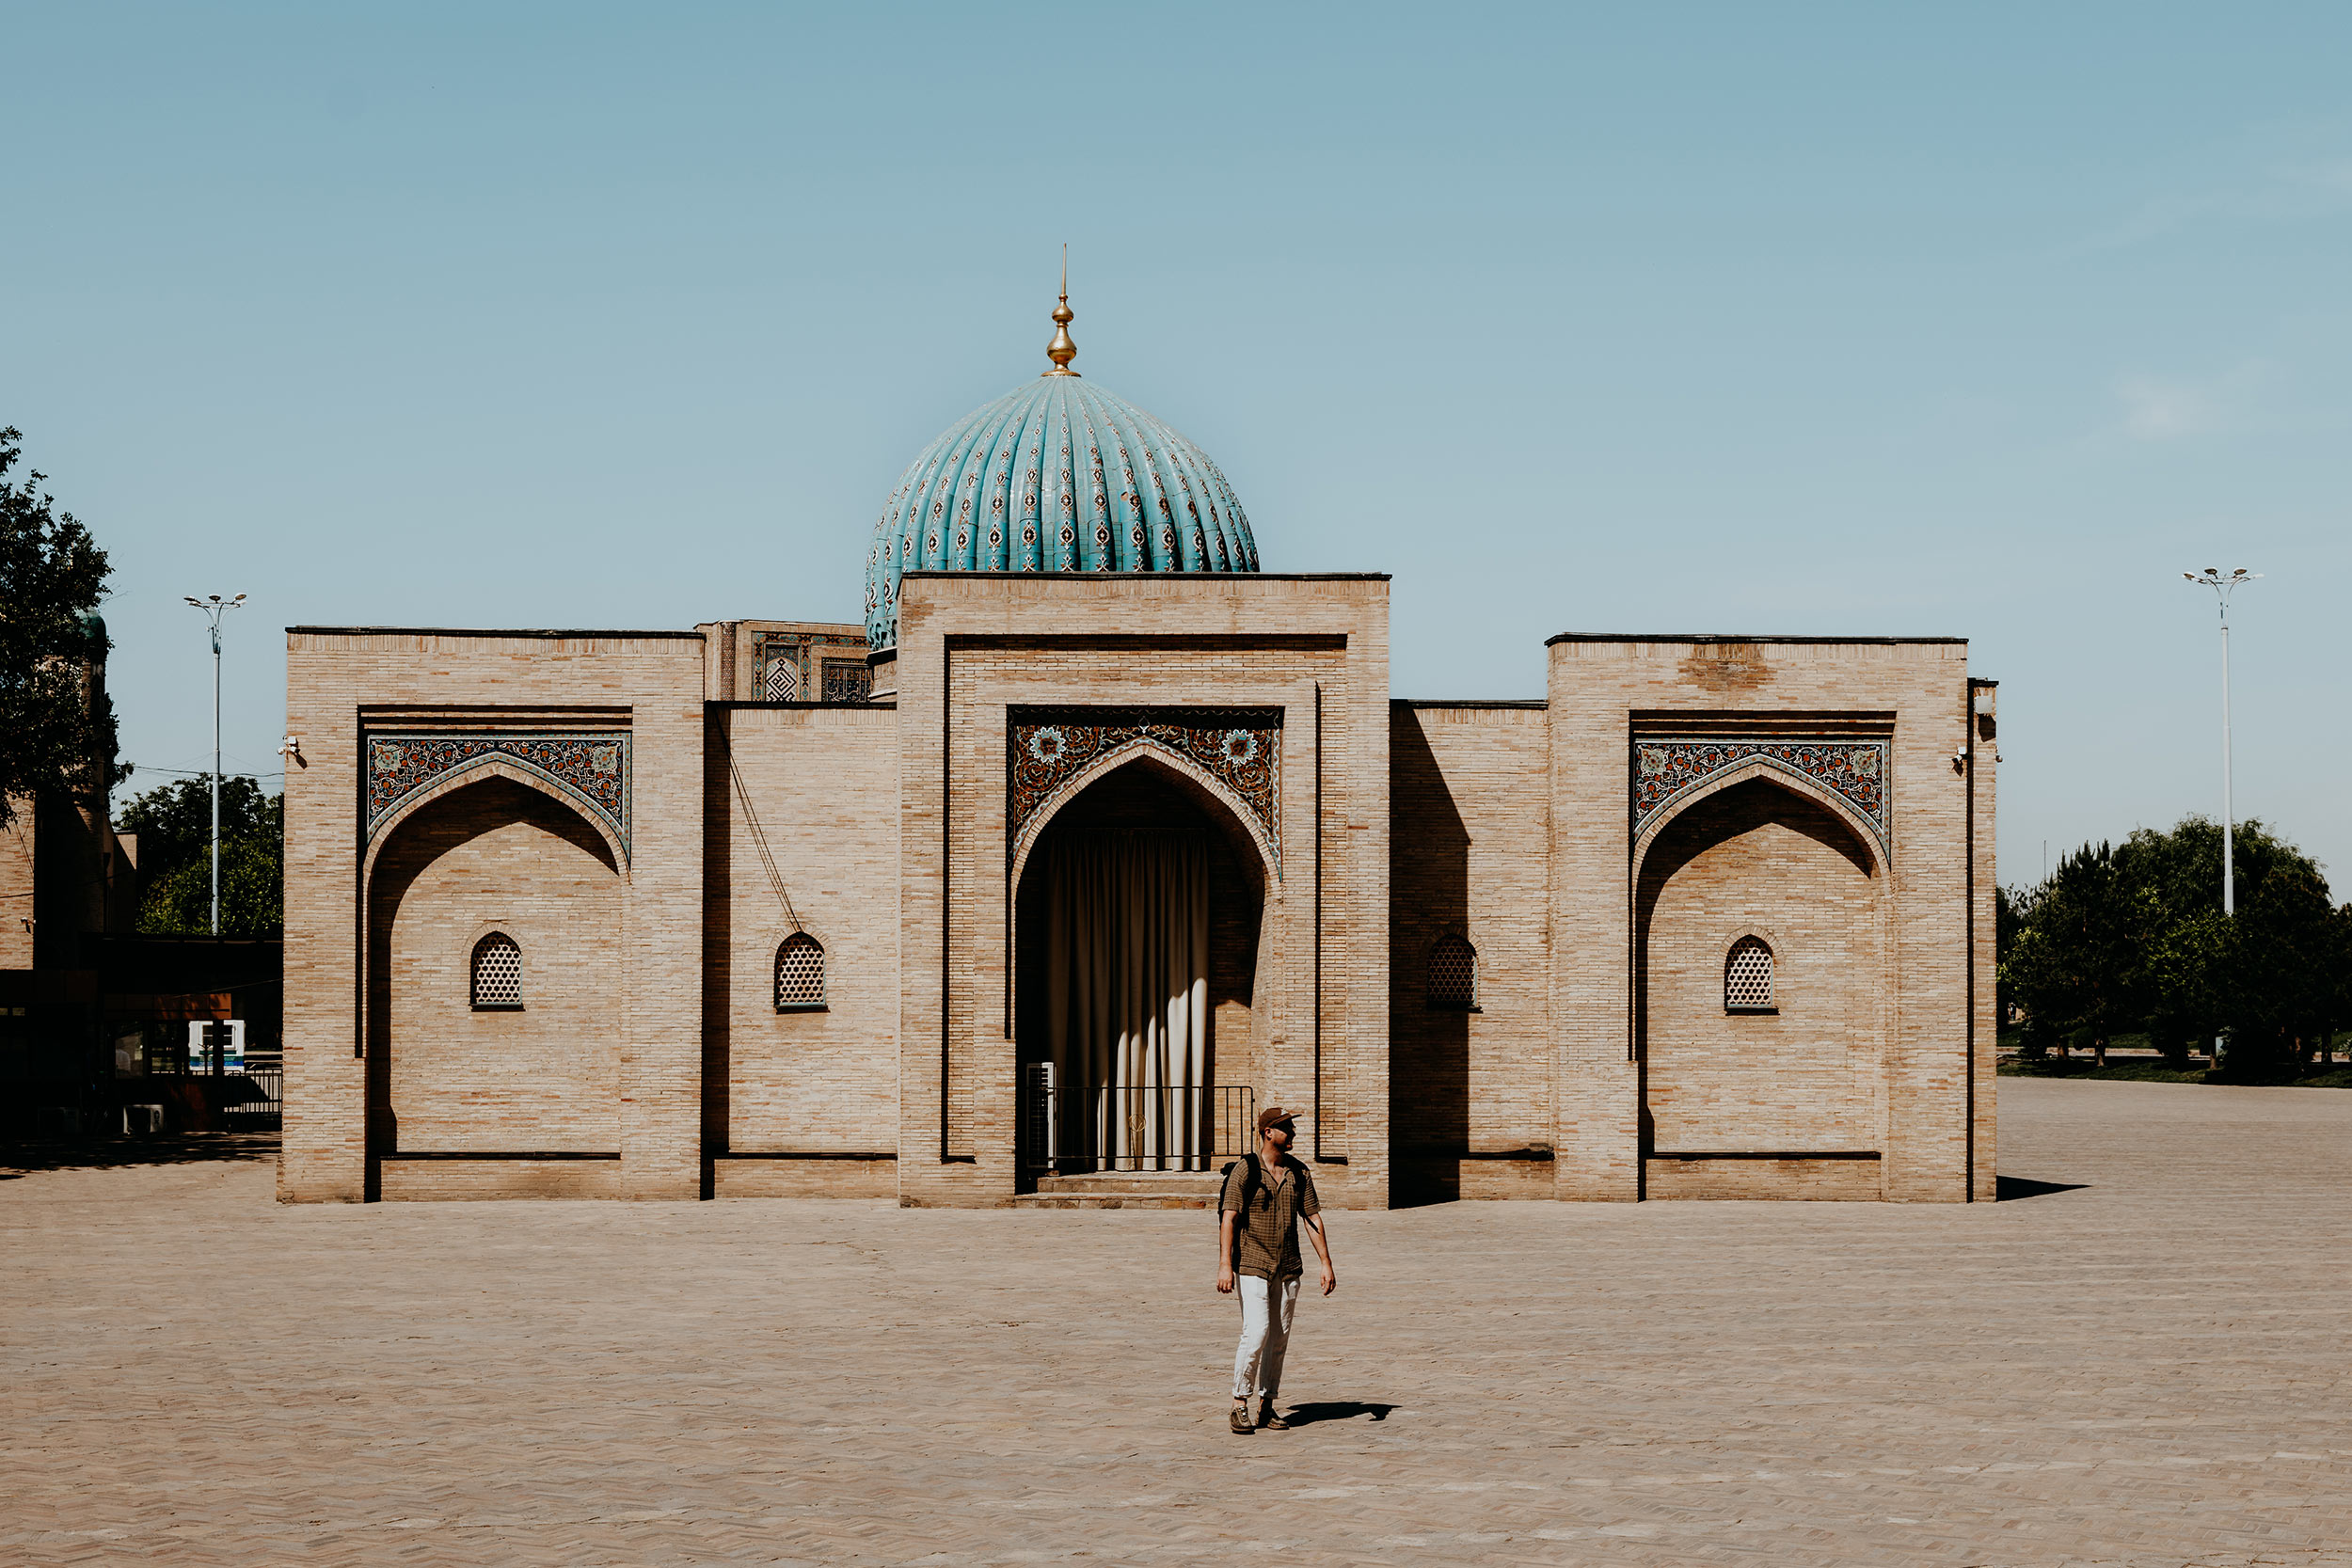
Giving you the impression as though you’ve been transported to a completely different era, Khiva’s Itchan Kala (Khiva old town) could easily be described as a large open-air museum, with plentiful intricate azure domes, towering minarets, unique clay buildings and ornate mausoleums.
It’s a living example of the legacy and grandeur of the ancient Silk Road, and the first place in Uzbekistan to be inscribed as a UNESCO heritage site.
However, since Khiva is also one of the most remote places to visit in Uzbekistan, travellers often make the mistake of leaving it completely out of their Uzbekistan itinerary.
With over 50 historical sites dotted throughout Itchan Kala’s time-worn laneways, I believe skipping this extraordinary city along the legendary trade route is an absolute mistake, and everyone travelling to Uzbekistan should spend at least 2 full days here.
Since Khiva is rather compact and easy to navigate, it’s completely possible to explore it on a roam without a plan – however, having some sort of structure is always handy.
Some of my favourite things to see and do in Khiva include:
- Stroll through the picture-perfect streets of Itchan Kala – Khiva Old Town
- Watch over Itchan Kala from the Khuna Ark
- Sample all the Lula Kebabs
- Admire intricate wood carvings and painted ceilings at the Tash Hauli Palace
- Climb the towering Khoja Minaret and admire the stunning views over Khiva
- Visit the Jumaa Mosque – and admire the 212 wooden columns
+ Read more | Make sure you check out my in-depth guide to Khiva for inspiration, travel advice and all the essentials.
Where | Khiva
Where to stay in Khiva | I opted for Orient Star Khiva, an authentic hotel set within the ancient Madrasah Muhammad Aminkhan. Prices and availability here
You can find alternative accommodation in Khiva here.
How to get from Khiva to Tashkent | Catch a 1.5-hour domestic flight from Urgench to Khiva. Tickets should cost around 1,000,000 SOM €75,- and can be purchased on Booking.com.
Day 13 – 14 | Tashkent + fly home
After some exciting days in Khiva, it’s time to catch a domestic flight from Urgench to Tashkent – which will save you a lot of time and will allow you one additional day to explore or relax in Uzbekistan’s lively capital city.
Whether you book a luxurious hotel to enjoy some comfort before your journey home, go in search of your last bits of exceptional Central Asian cuisine, or wish to visit some of the places you didn’t make it to on your first few days in the city, your last day in Uzbekistan is all about wrapping up your incredible Uzbekistan trip in a relaxing and convenient manner.
If you’re looking for some final inspiration for your last explorations around Tashkent, make sure you give my guide to the best things to do in Tashkent (coming soon) one more read here.
Where | Tashkent
Where to stay in Tashkent | I chose to enjoy the comfort of Hyatt Regency Tashkent for one more night, before catching my international flight back home. Prices and availability here
Uzbekistan itinerary | The essentials
The best time to visit Uzbekistan
While Uzbekistan is gifted with the most incredible architectural masterpieces that could be visited year-round, this doesn’t imply that it’s a pleasant destination at any time of year.
In reality, Uzbekistan will be scorching hot in summer, when temperatures soar well over 40 degrees Celsius, while during the winter months, the temperature could dip far below freezing.
For that reason, I believe the absolute best time to visit Uzbekistan is either in spring (April to June) or autumn (late August to October), when the temperature is warm and pleasant, yet not too extreme.
Timing your visit for the shoulder seasons means that you’re more likely to enjoy the many sights without having to find cover from the burning sun all the time.
I visited Uzbekistan in May and couldn’t have wished for better circumstances to discover this incredible country and its many historical sights.

How to get to Uzbekistan
Though Uzbekistan is a relatively offbeat destination, it’s quite well-connected to the rest of the world, with the Tashkent International Airport as the primary gateway to the country.
While it’s reasonably small, the airport is well-kept and hosts a great variety of international flights, including those from major hubs in Europe, North Africa, North America, the Middle East, and Asia.
If you’re looking to find a flight to Uzbekistan, I would advise using Booking.com, a super easy-to-use website that lets you compare a large selection of airlines and travel companies, allowing you to find the best possible rates.
From the airport, it takes about 30 minutes to reach the city centre by taxi, which is best booked through the app Yandex Go and should cost no more than 25,000 SOM (€2,-).
Transport | How to get around Uzbekistan
Due to Uzbekistan’s extensive geography (Uzbekistan stretches over roughly 1,400 kilometres from west to east), you will notice that you’ll have quite a lot of ground to cover when travelling through the country.
Luckily for you, getting around the country is super convenient, affordable and relatively fast.
By train
A name such as the Silk Road might imply that travelling here runs smoothly, which is, in fact, quite true thanks to Uzbekistan’s exceptional rail network.
Rivalling the neatness and comfort found in European trains, the Afrosiyob train is a 210km/h high-speed train that runs daily between Uzebkistan’s major destinations, including Tashkent, Samarkand and Bukhara.
With comfortable spacious seats, USB and power plugs, and the most friendly crew members, travelling through Uzbekistan by train is, in my opinion far more comfortable than taking the plane.
However, when you’re planning to travel to Khiva (which you should), things are a little different.
Those venturing to Khiva will notice that you could only get there by taking the Soviet-style sleeper train, which to me is an authentic experience, if not a little time-consuming.
Since tourism in Uzbekistan is still growing at a rapid pace, acquiring train tickets online can be quite a challenging task.
If you want to learn more, I have an in-depth guide on travelling by train in Uzbekistan (coming soon) which can be found here.
By plane
While I would pick travelling by train over travelling by plane in most cases, I would highly recommend taking a flight from Khiva to Tahskent, or the other way around depending on your itinerary.
The reason for this is that the train connection between Tashkent, Samarkand and Bukhara is by far the most convenient option. You also don’t have to be at the airport at least 2 hours early, and it’s the world’s most sustainable mode of transport, which is great too.
If you do prefer travelling the country by plane, you could also opt for domestic flights between all of the major cities in Uzbekistan, although I can’t stress it enough to make use of the excellent high-speed trains instead.
The domestic flights within Uzbekistan are operated by Uzbekistan Airways, and while you shouldn’t have the highest expectations, it’s actually quite affordable and convenient to fly with.

Uzbekistan travel essentials
While Uzbekistan is extremely convenient for travellers, travelling here will come with a unique set of needs, meaning you have to prepare a little before embarking on your journey.
Some items I recommend include:
Uzbekistan SIM card | First things first. Upon arrival in Uzbekistan, I highly recommend buying yourself a local SIM card with a data plan, given it will make anyone’s travels here significantly more convenient. Curious about the details? Read my guide to a Uzbekistan SIM card here.
Reusable water bottle | One travel essential that I carry with me at all times is the Grayl Geopress. This reusable water purification bottle allows me to fill up water from nearly every water source, making it one of my best investments to date.
Sun protection | Since Uzbekistan will most likely be fiery hot during the peak travel months, I’d highly recommend bringing quality sunscreen with at least 30SPF and a hat to cover your head.
A Powerbank | When travelling through Uzbekistan, you don’t want to risk being in an uncharted area with an empty device in your hands. For that reason, I believe it’s crucial to carry a power bank with you at all times.
Earpods or headphones | If you’re following this itinerary, I can’t stress it enough to bring some high-end earpods or headphones, given the journey from Bukhara to Khiva by night train can be quite hectic happening.
Camera gear | Like most places in Uzbekistan, Khiva is truly stunning, meaning loads of incredible photography opportunities will arise when exploring. For that reason, I’d highly recommend bringing your camera gear, so you can capture loads of photos while there. If you’re curious to learn about my photography gear, make sure you give my ‘What’s in my Camera Bag’ guide a read too.
Leave no footprints | During my travels in Uzbekistan, I noticed that the cities and their people are really neat when it comes to cleanliness and littering. It’s up to us to respect the locations we’re visiting and keep it that way.
Safety in Uzbekistan | Travel Insurance
When travelling this big wide world, I never go on an adventure without my essential travel insurance sorted out, and though I never felt unsafe in Uzbekistan, I advise anyone travelling here to do the same.
While I believe it’s unlikely to experience any problems when following the suggestions in this itinerary, something unfortunate could happen at any given time, whether it’s an injury, a stolen camera, or an unforeseen cancellation.
For travel insurance, I use Heymondo, as they offer full COVID-19 coverage, as well as a handy app with 24-hour medical assistance. Make sure you check it out – readers of WTSW receive 5% off any insurance policy too.
Cheers!
I’ve been on this travel blogging journey since 2019.
If you appreciate what I do here, these are some ways you can support me.
Riad Kheirredine review | Experience an oasis of calm in chaotic Marrakech
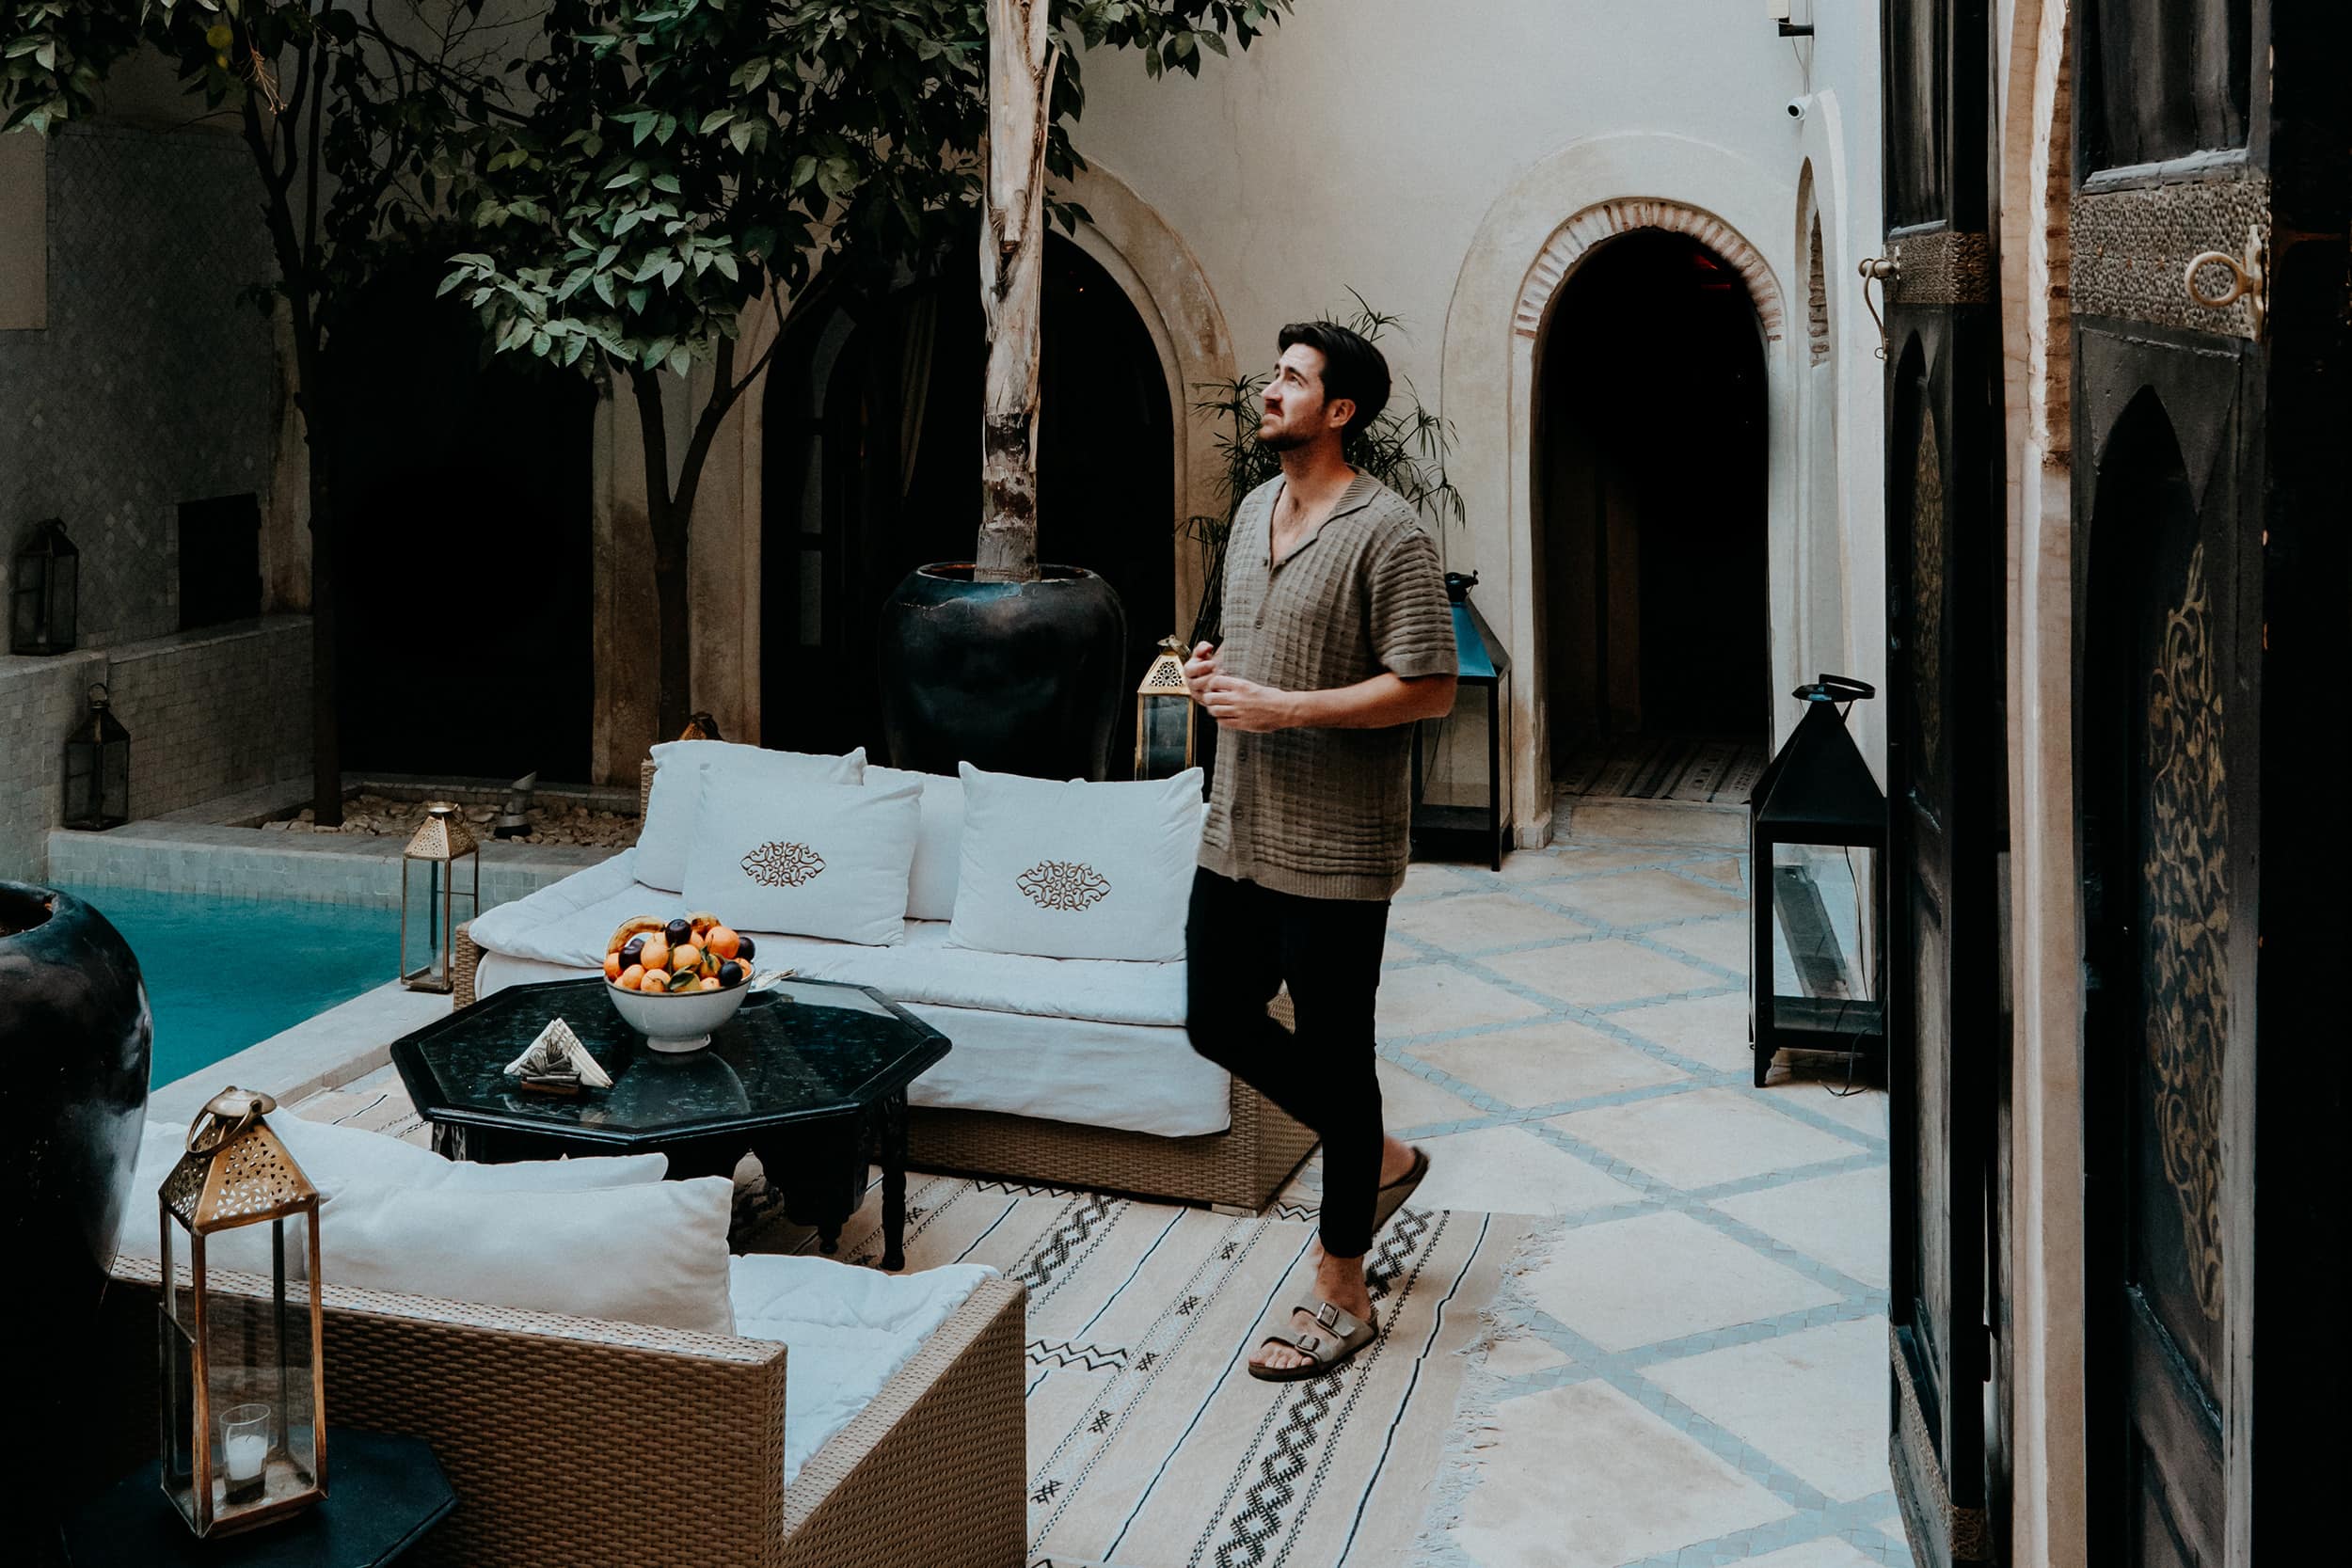
Somewhere tucked away in the hectic alleyways of the Marrakech medina, an utterly stunning oasis of calm exists, carefully hidden behind a massive wooden door, and disguised by the intoxicating noises, smells and chaos that prevail in the always bustling streets of Marrakech.
Slightly overwhelmed, a tad hot and a little tired from the journey, we were waited for and greeted by one of the riad’s staff members, who slowly guided us through the narrow streets of a charming residential quarter, in search of our own temporary oasis of calm.
The oasis of calm we were looking for was Riad Kheirredine.
After about 10 minutes, dodging a few too many mopeds Mario-karting through the streets, determined street merchants trying to sell their goods, and a few lost donkeys roaming around, we finally arrived at the wooden door that promised us our slice of paradise.
From the moment we left the chaos of the medina behind, and stepped through Riad Kheirredine’s massive door, a whole new world unfolded in front of our eyes, recovering our sense of inner calm within merely a few seconds.
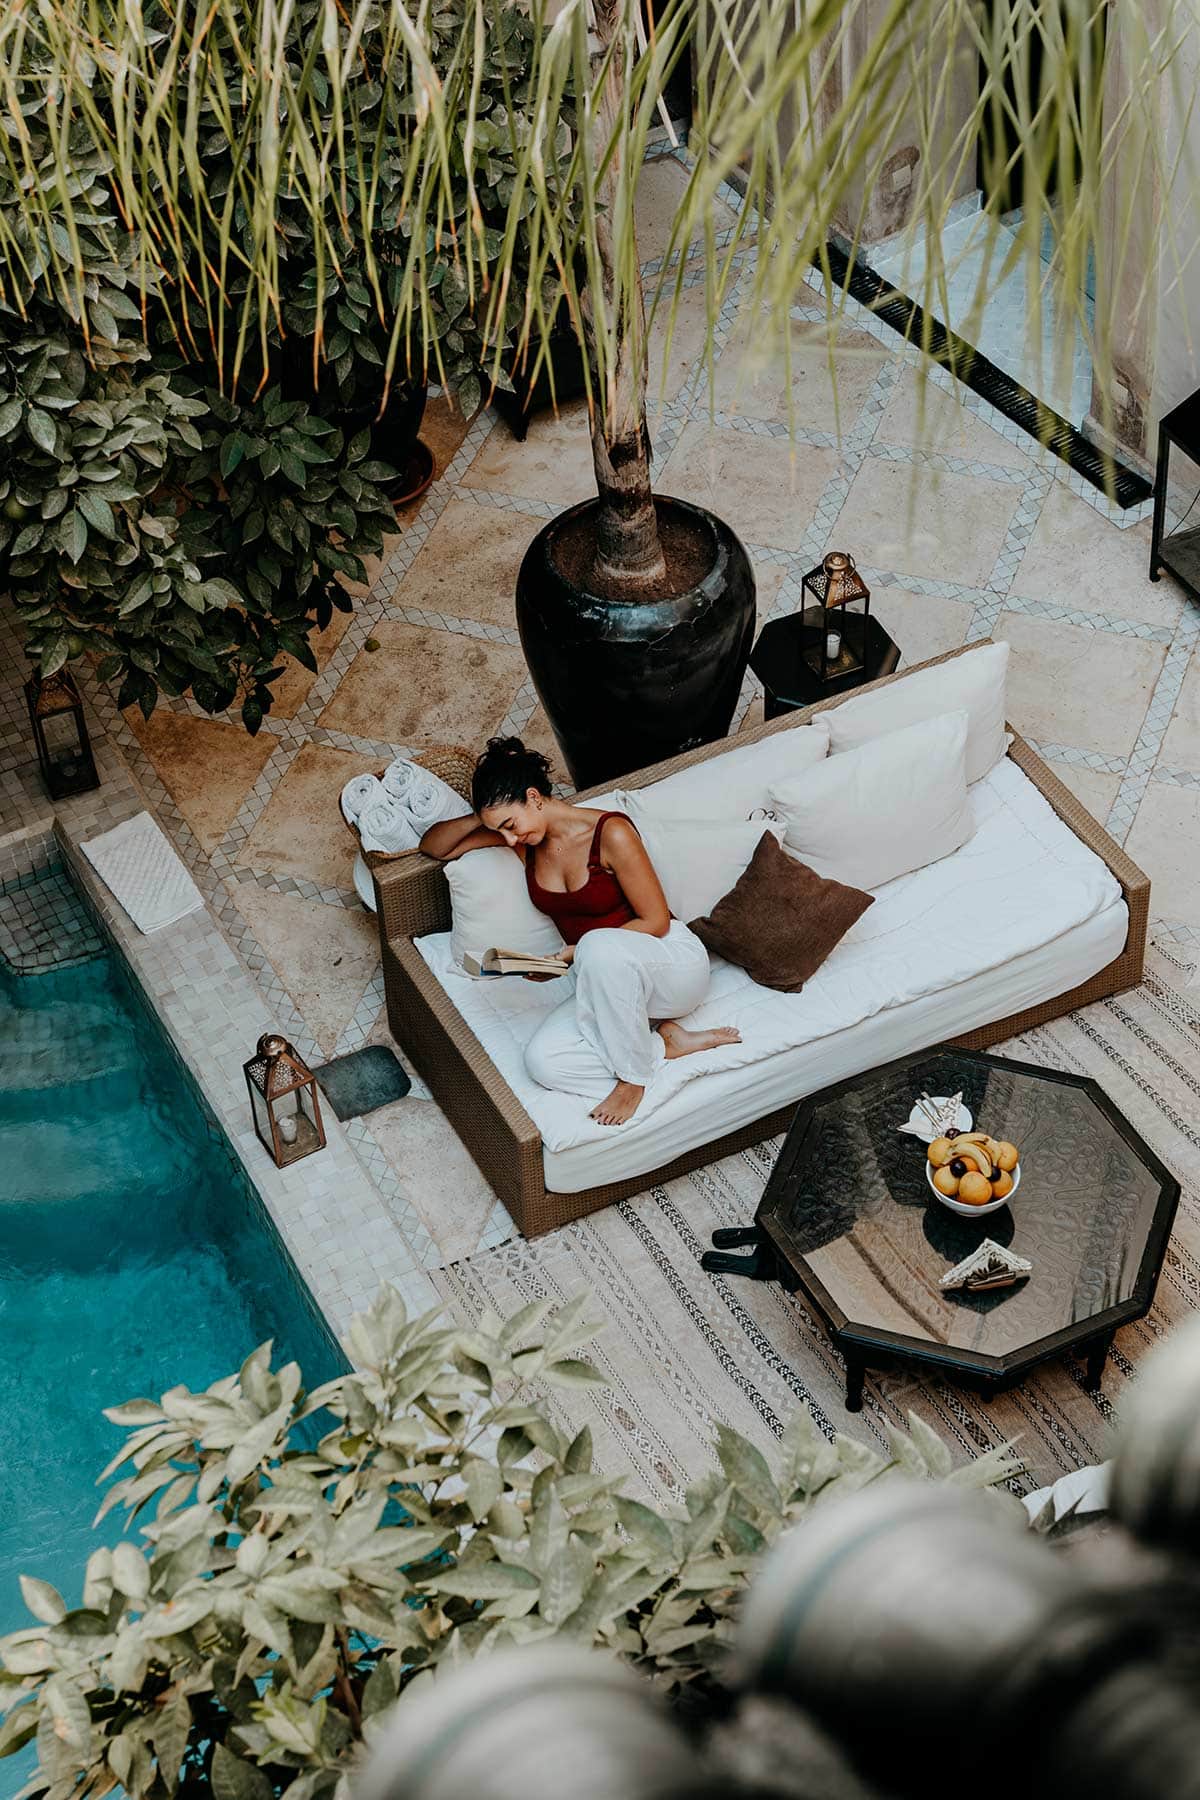
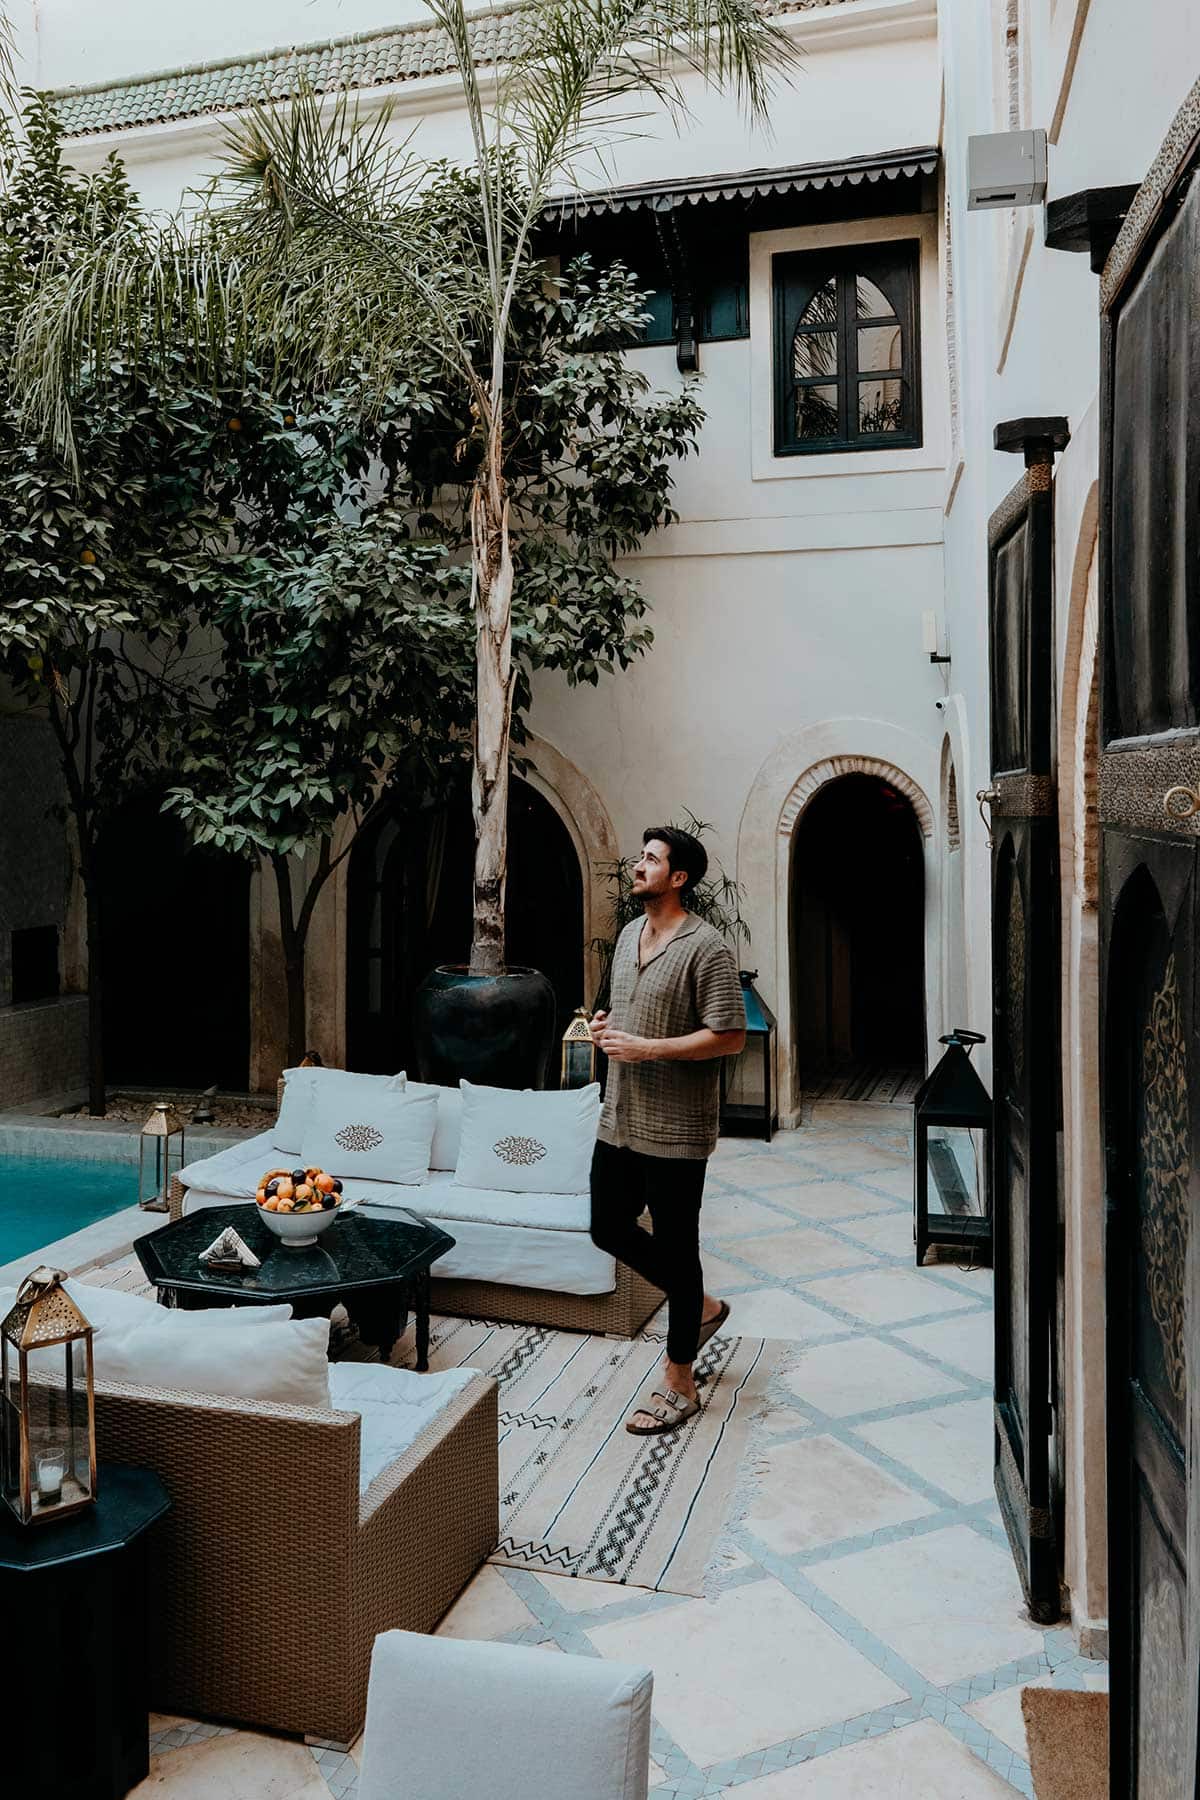
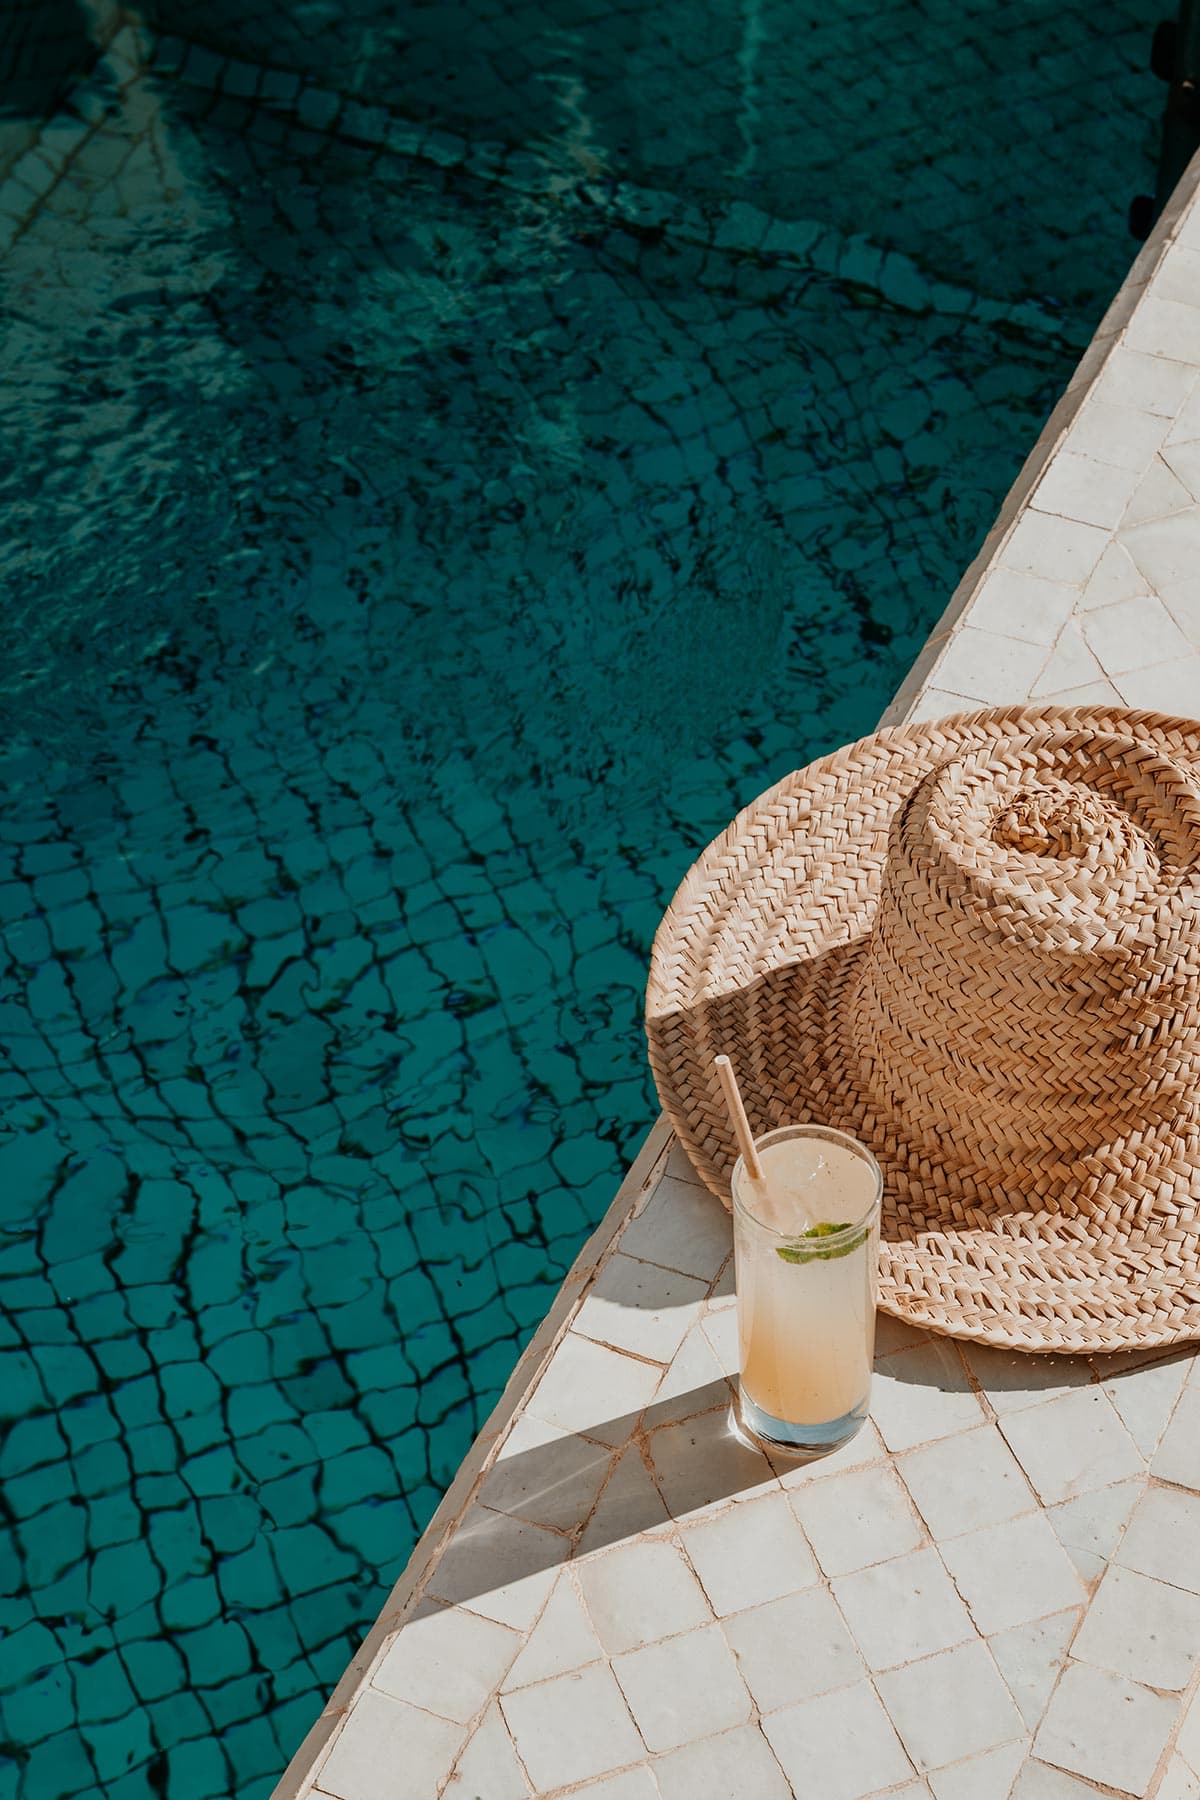
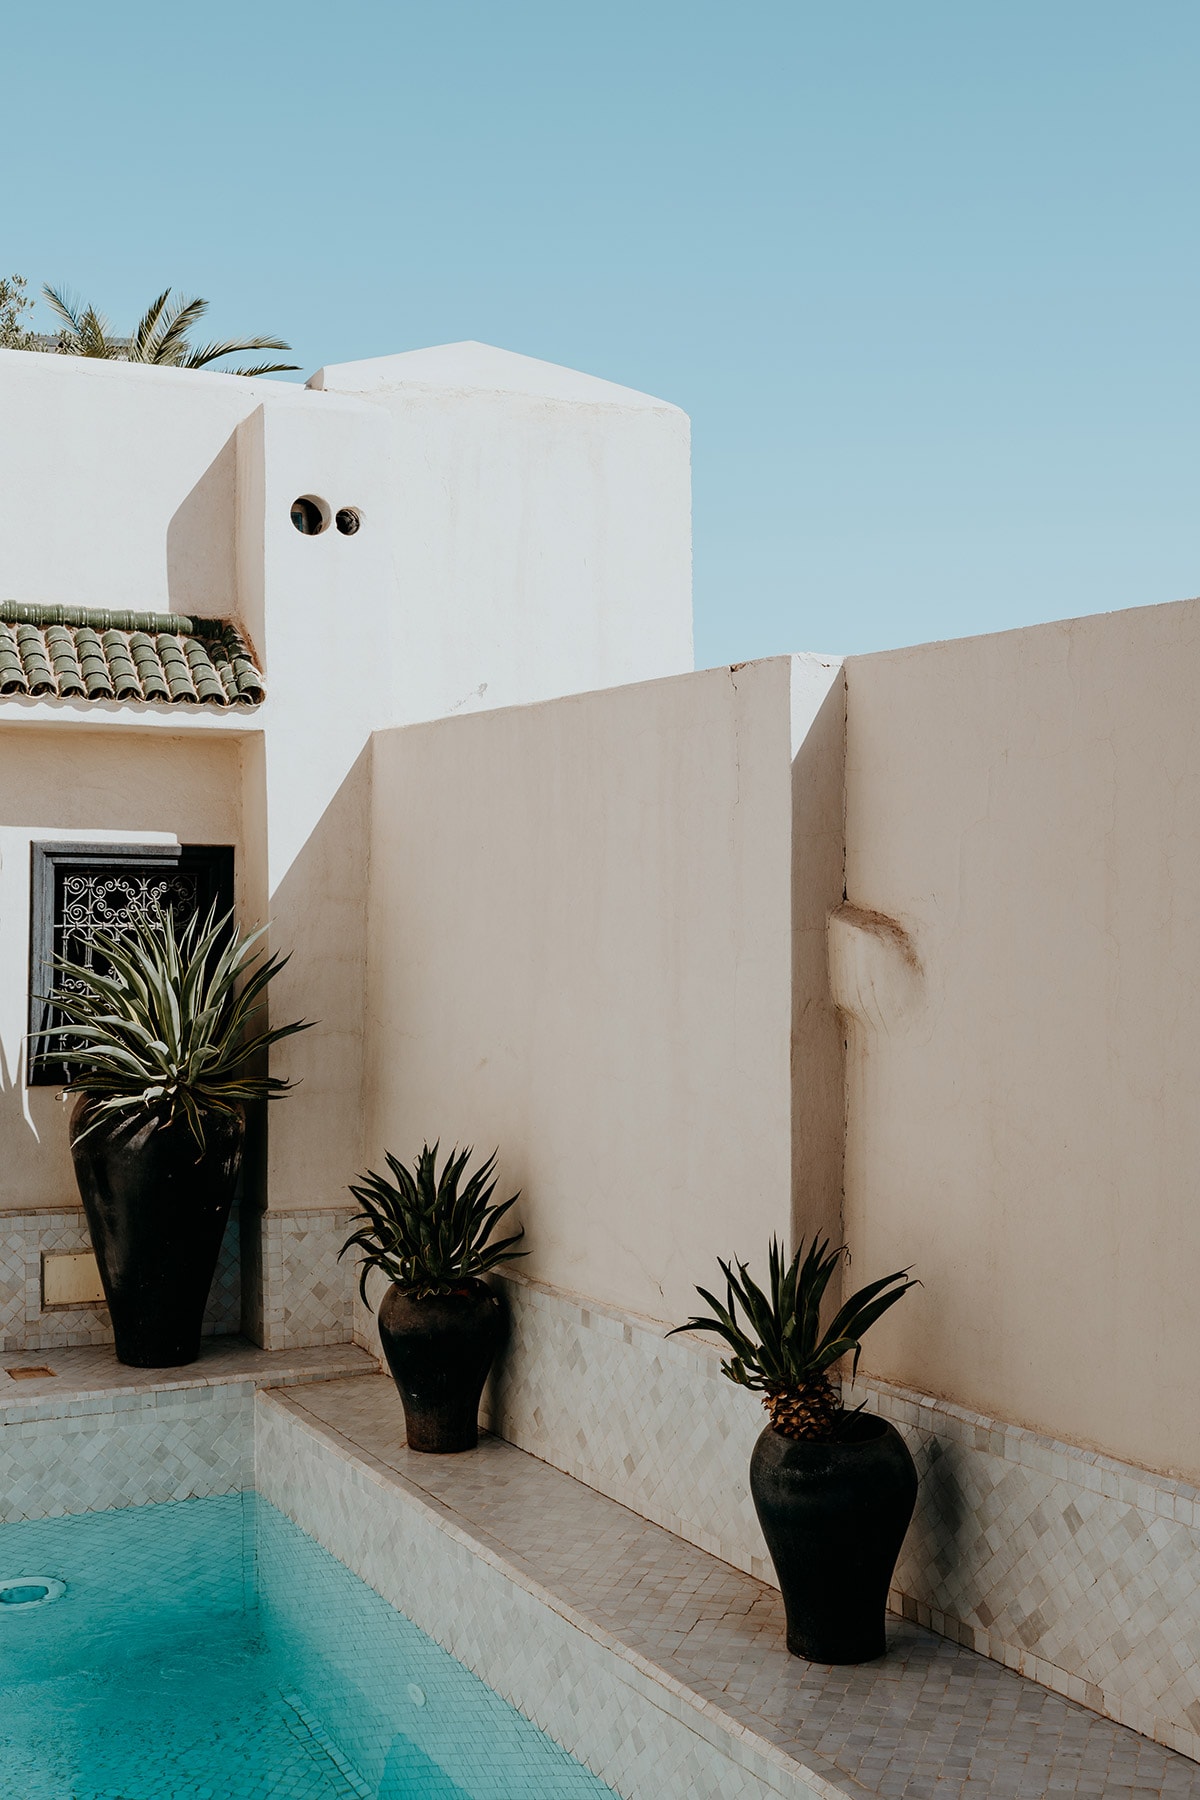
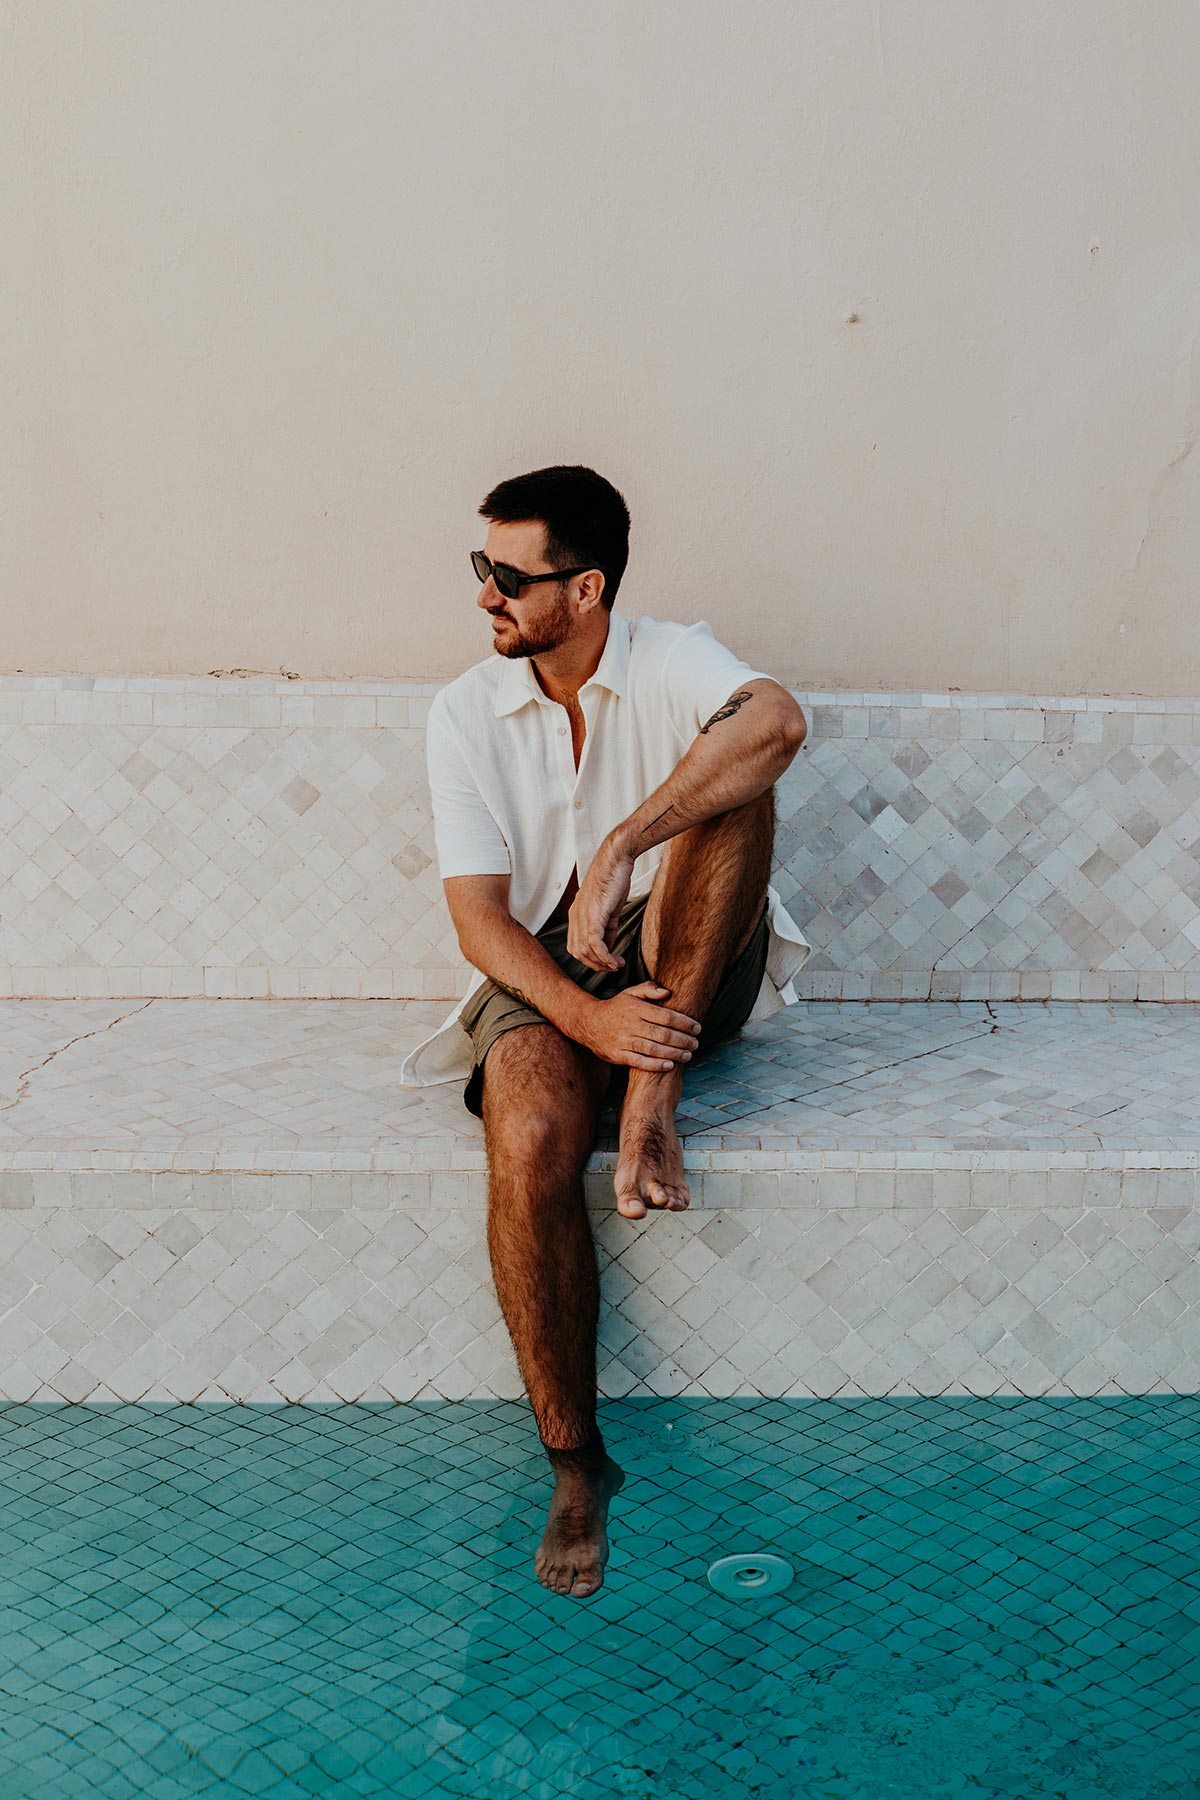
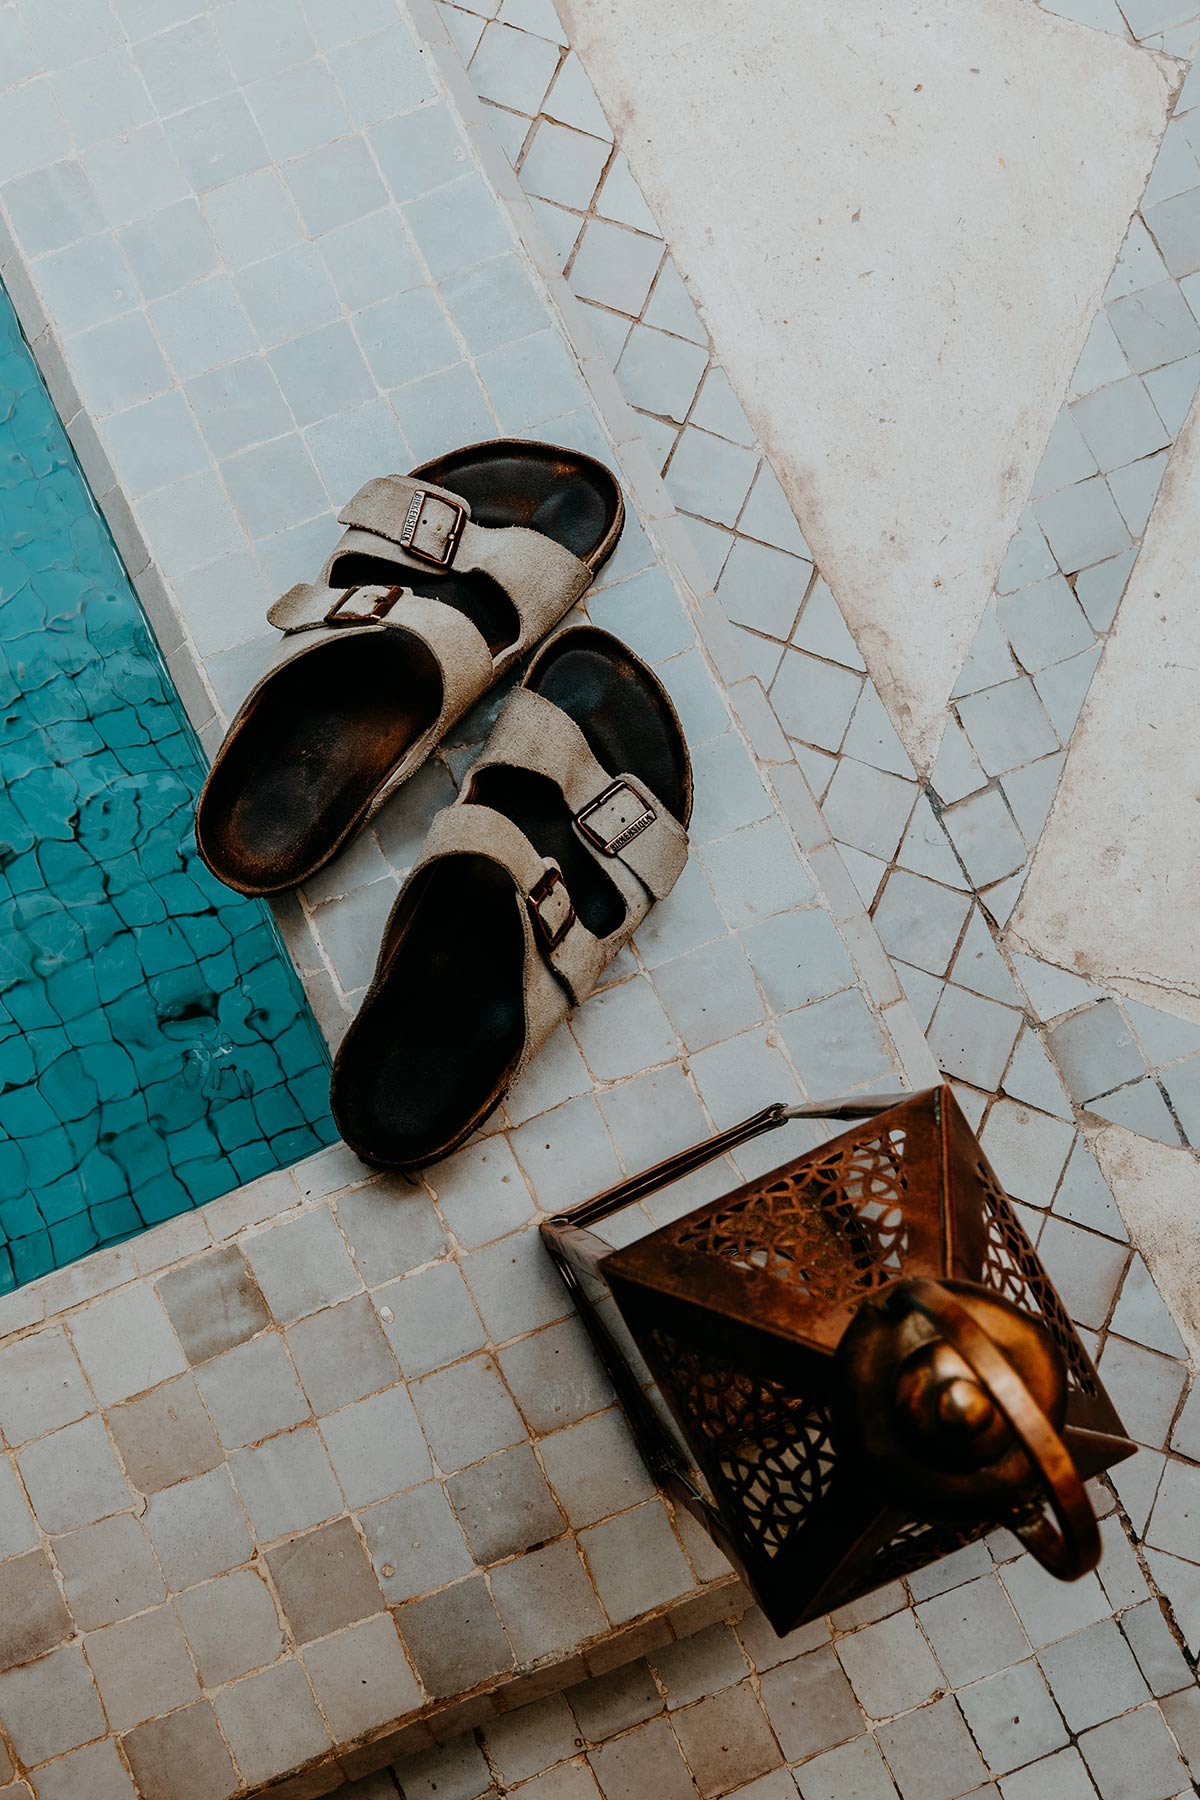
This was our home for the next 4 days, complete with intimate courtyards with fountains and lush greenery, utterly stylish seating corners, two intimate outdoor pools to refrain from the Moroccan heat, and last but not least, a spacious terrace lined with palms offering stunning views over both Marrakech and the Atlas Mountains.
Honestly, we couldn’t have hoped for a better base from which to explore Marrakech, and not just because of the luxury and comfort, but more so thanks to the incredibly friendly staff, who did everything in their power to make our time in Marrakech as exceptional as it was.
Riad Kheirredine truly made our time in Morocco’s “Red City” one to remember!
If you choose to use any of the links on this page, I may receive a small commission at no extra cost to you. By using these links, you’ll have a direct impact on WTSW and my ability to continue to create free insightful travel content for you. If you find any of my tips useful, you can support me by buying a virtual coffee here.

Where is Riad Kheirredine | Riad Kheirredine’s location
As with all riads in Marrakech, Riad Kheirredine is nestled in the bustling streets of the medina.
To be exact, Riad Kheirredine is situated in a charming residential quarter on the outskirts of the medina, roughly 20 minutes away from the famous Djemaa el-Fna square.
Since it’s quite easy to get lost in the medina, Riad Kheirredine will have a staff member ready to guide you to and from the riad at all times. Upon leaving the riad, you’ll receive a local mobile phone, so you can easily contact the staff when you need guidance.
Riad Kheirredine | The Design
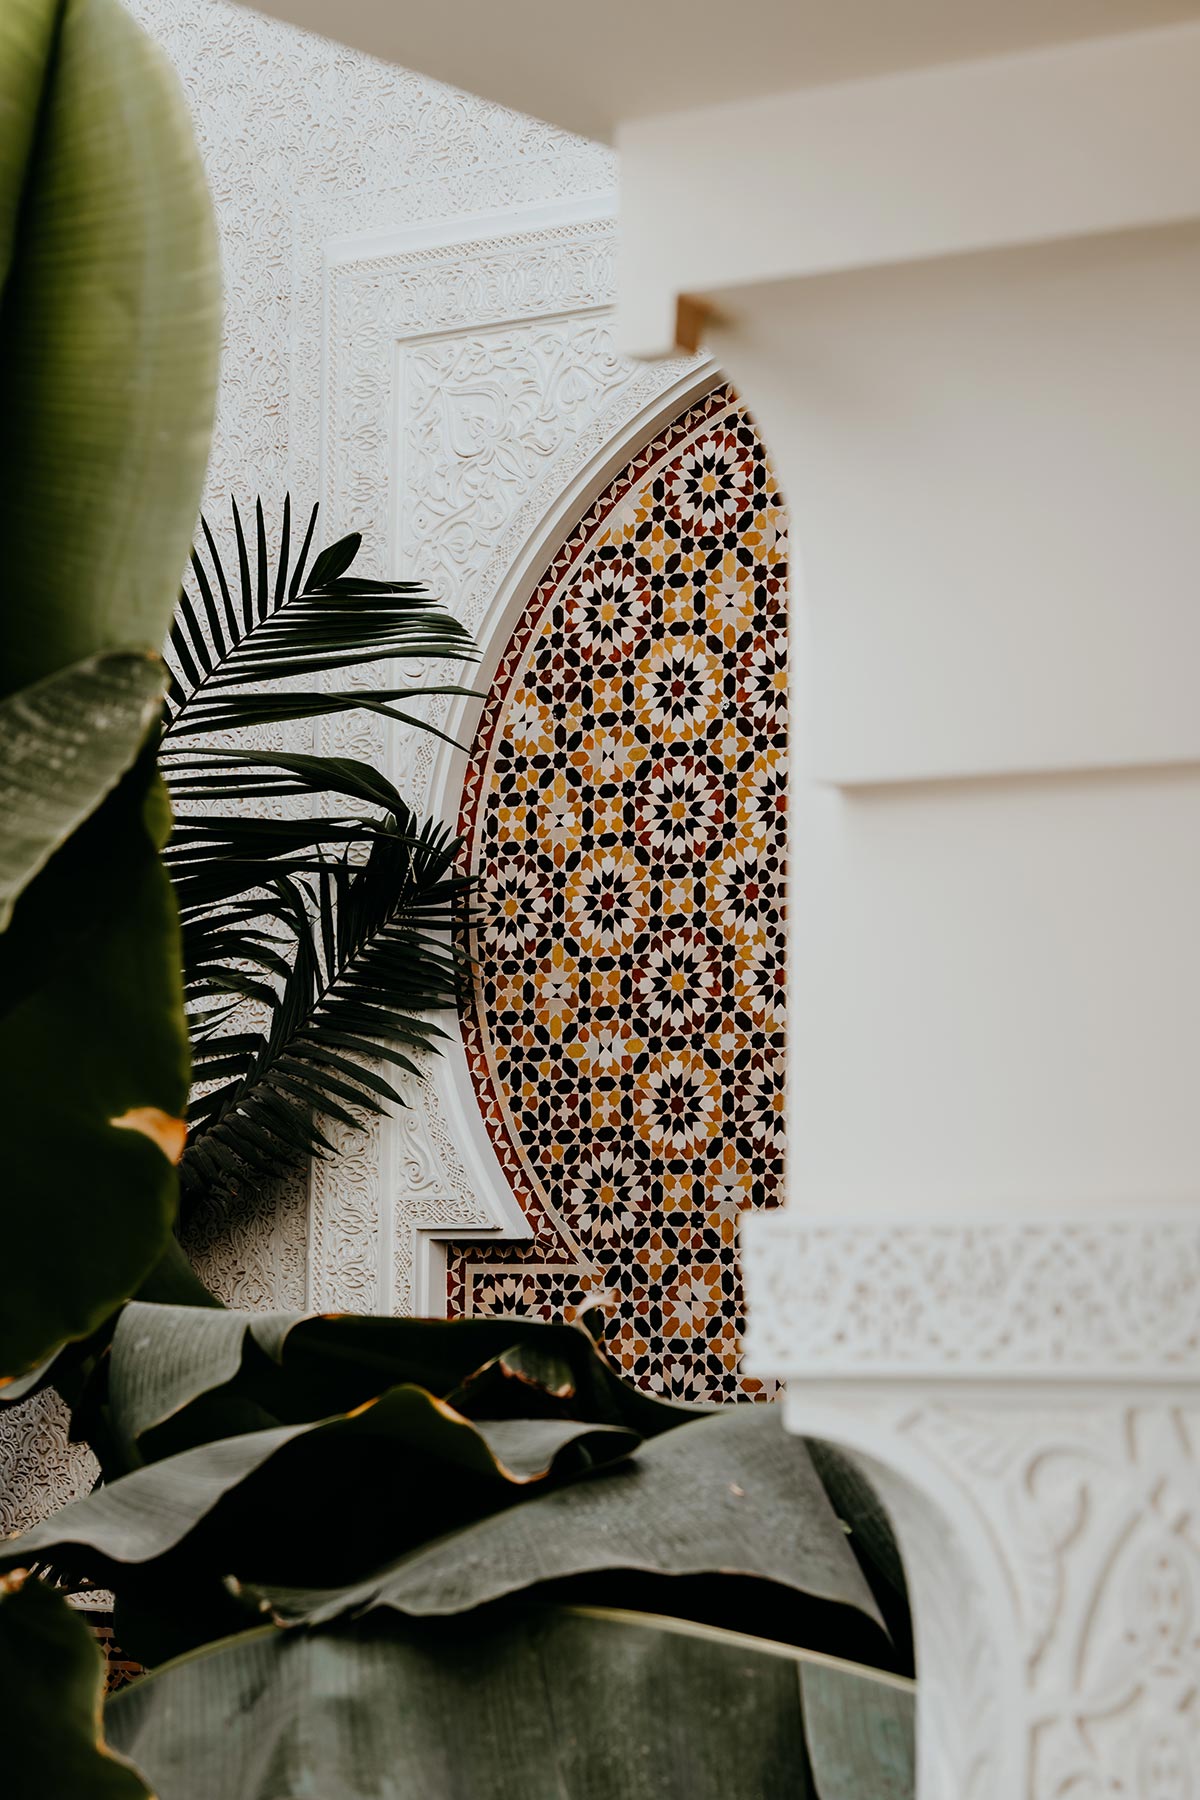
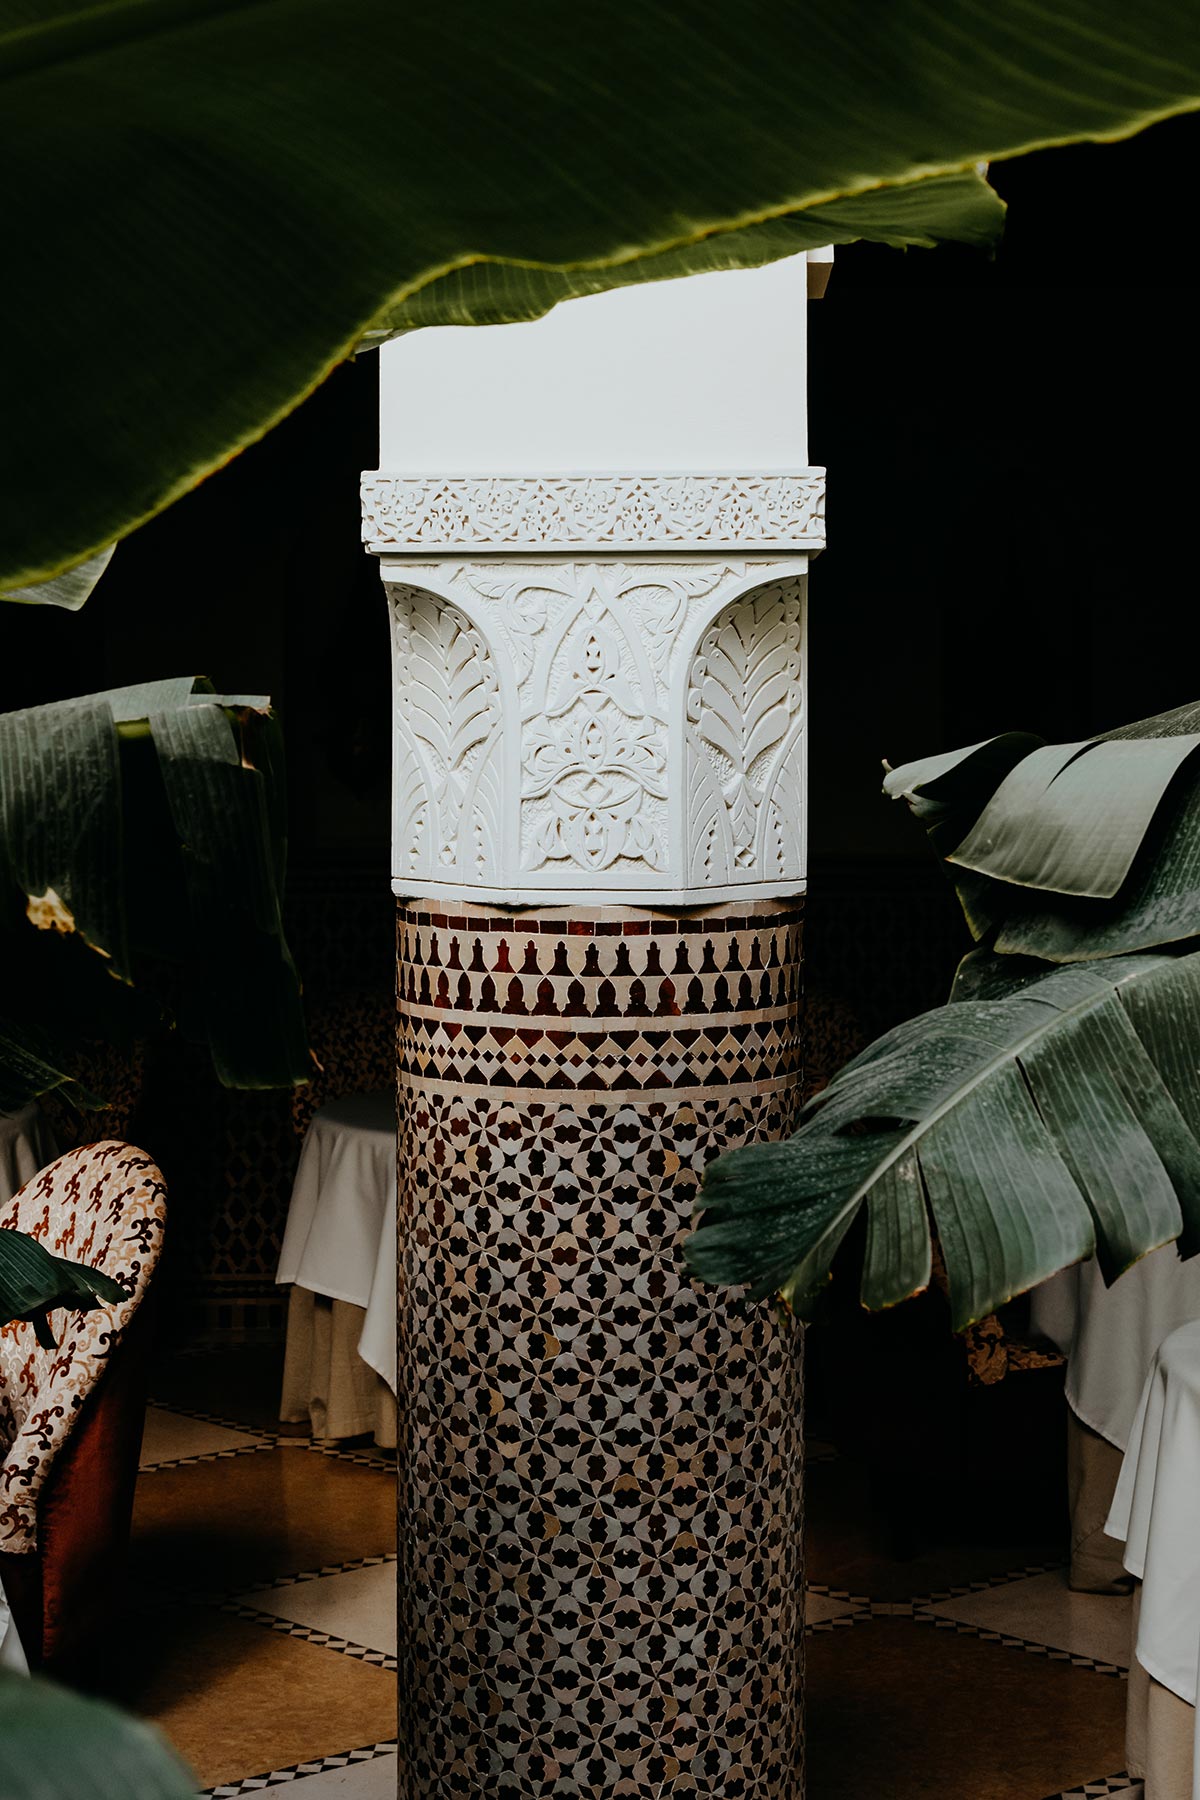
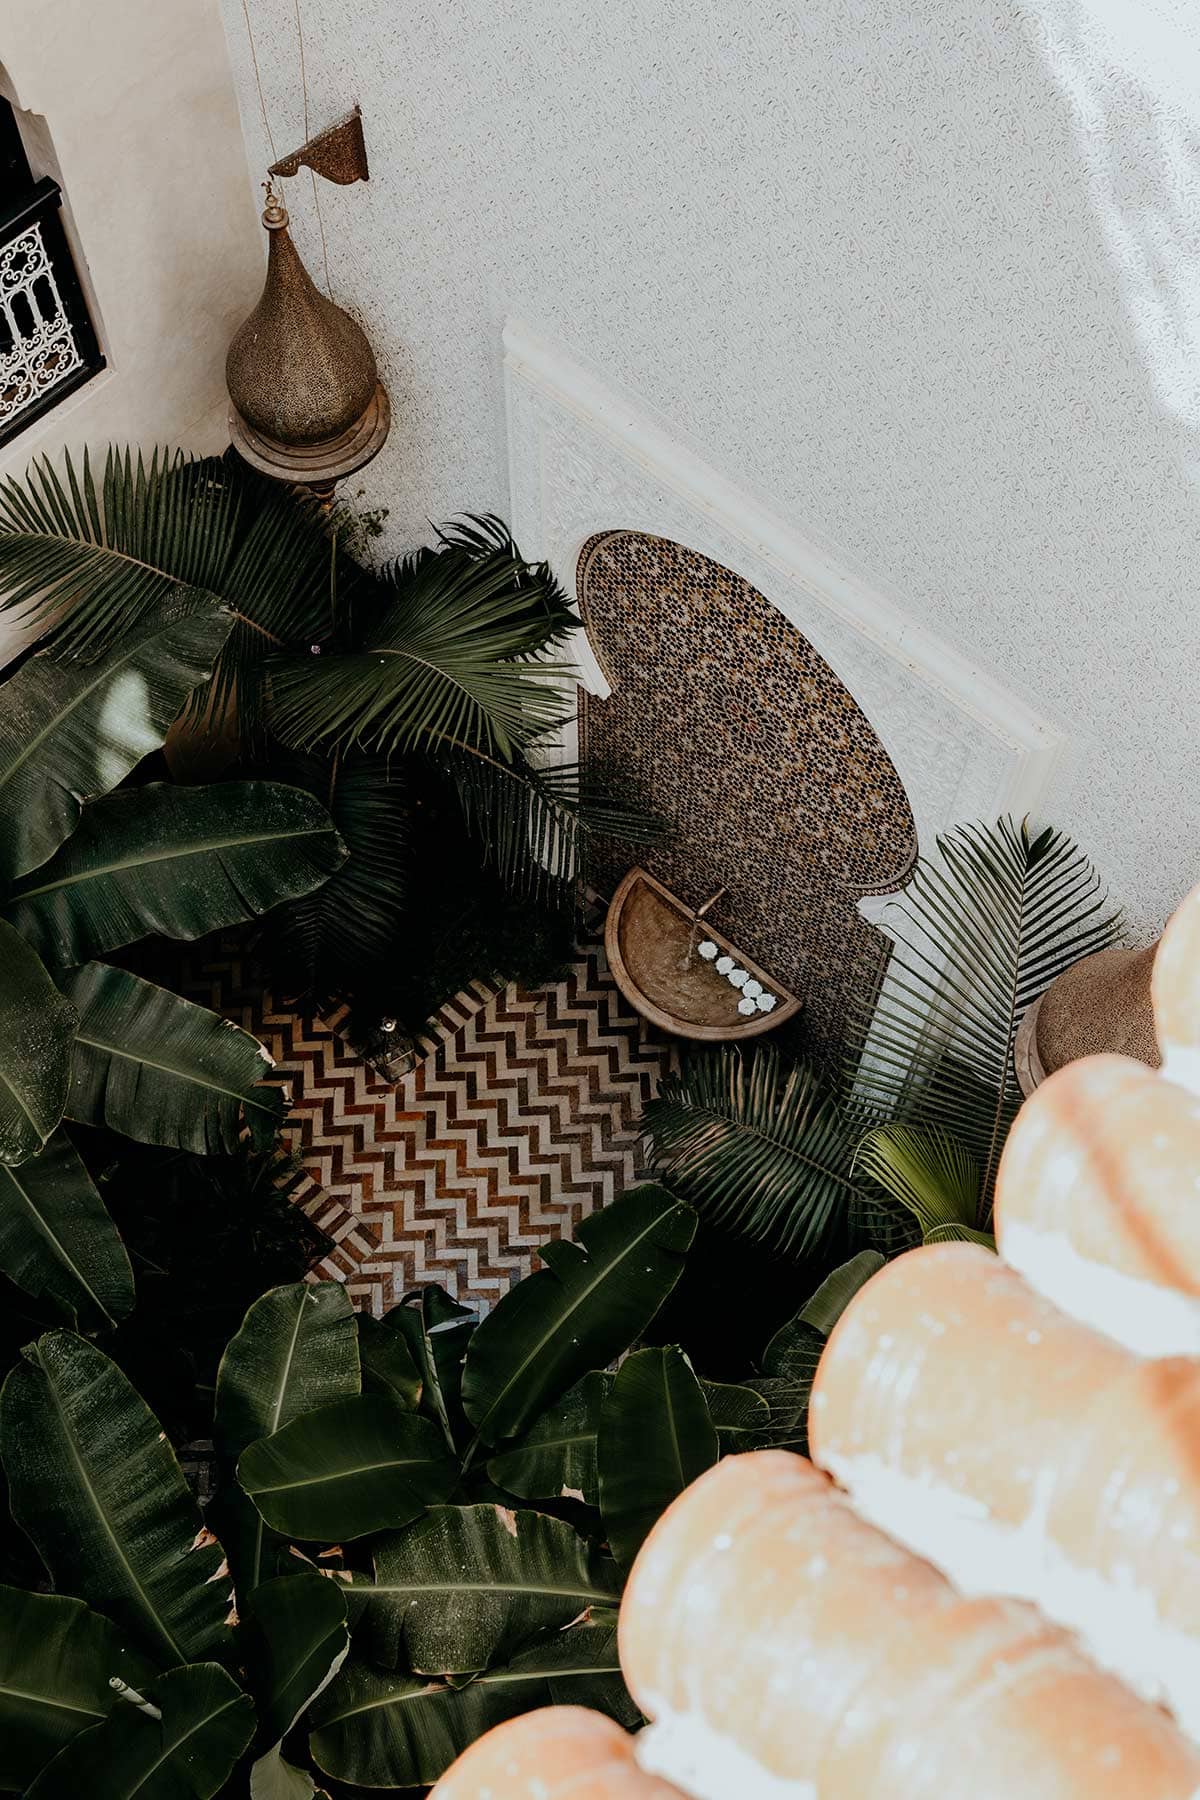
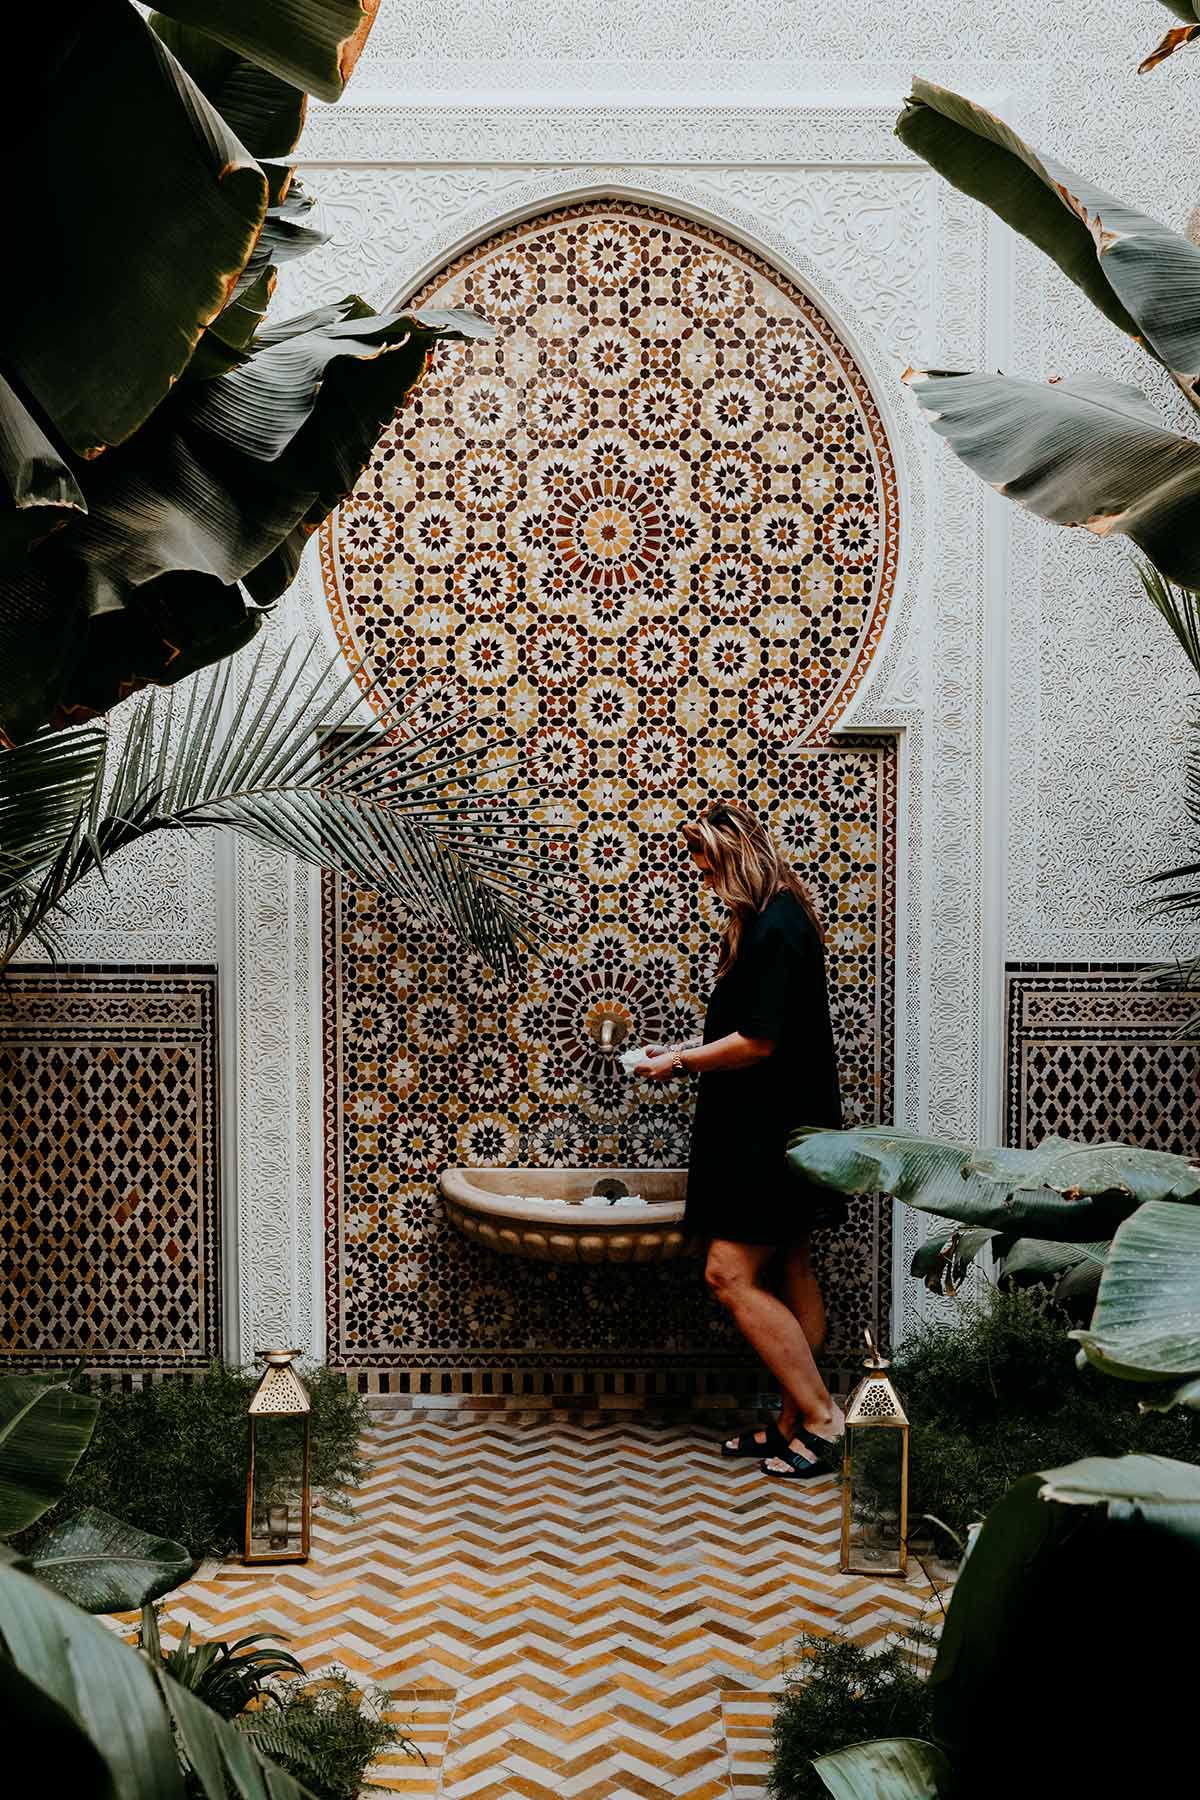
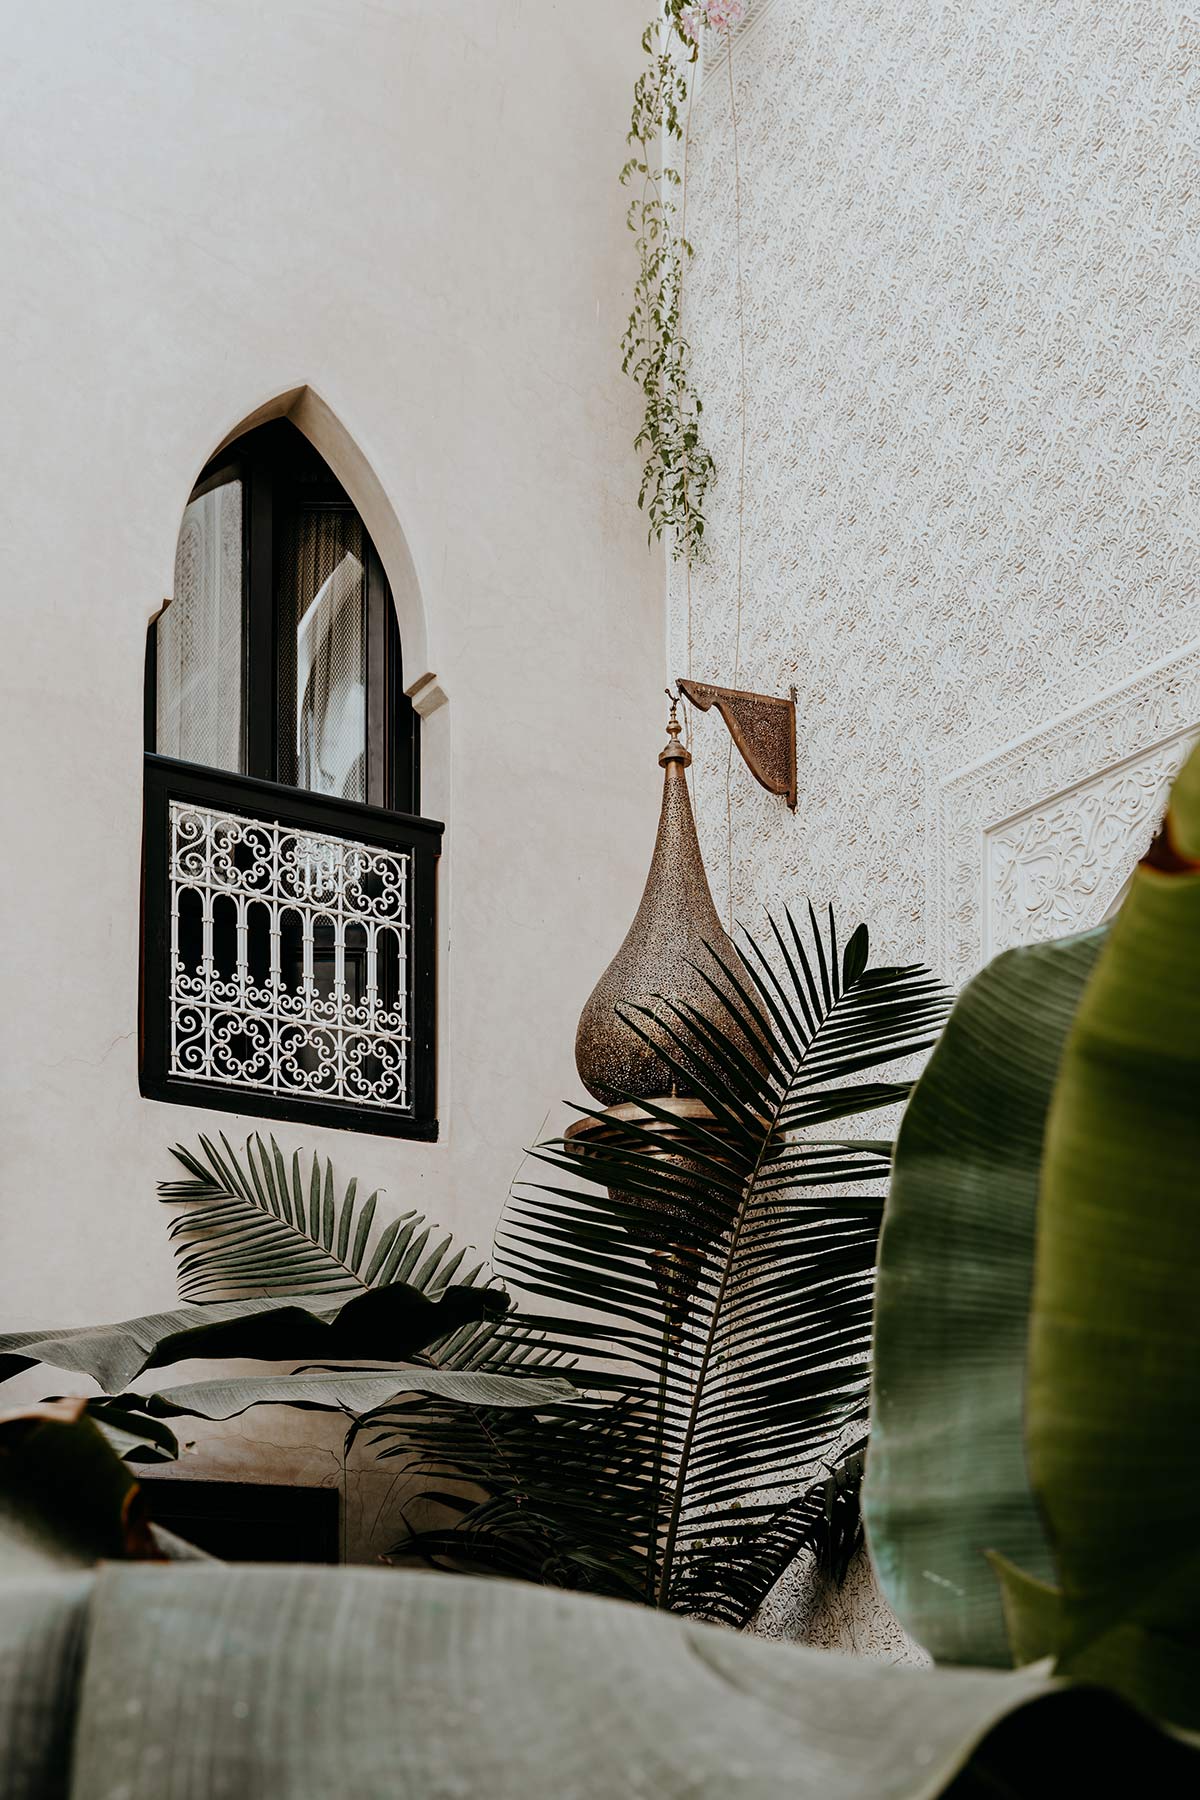
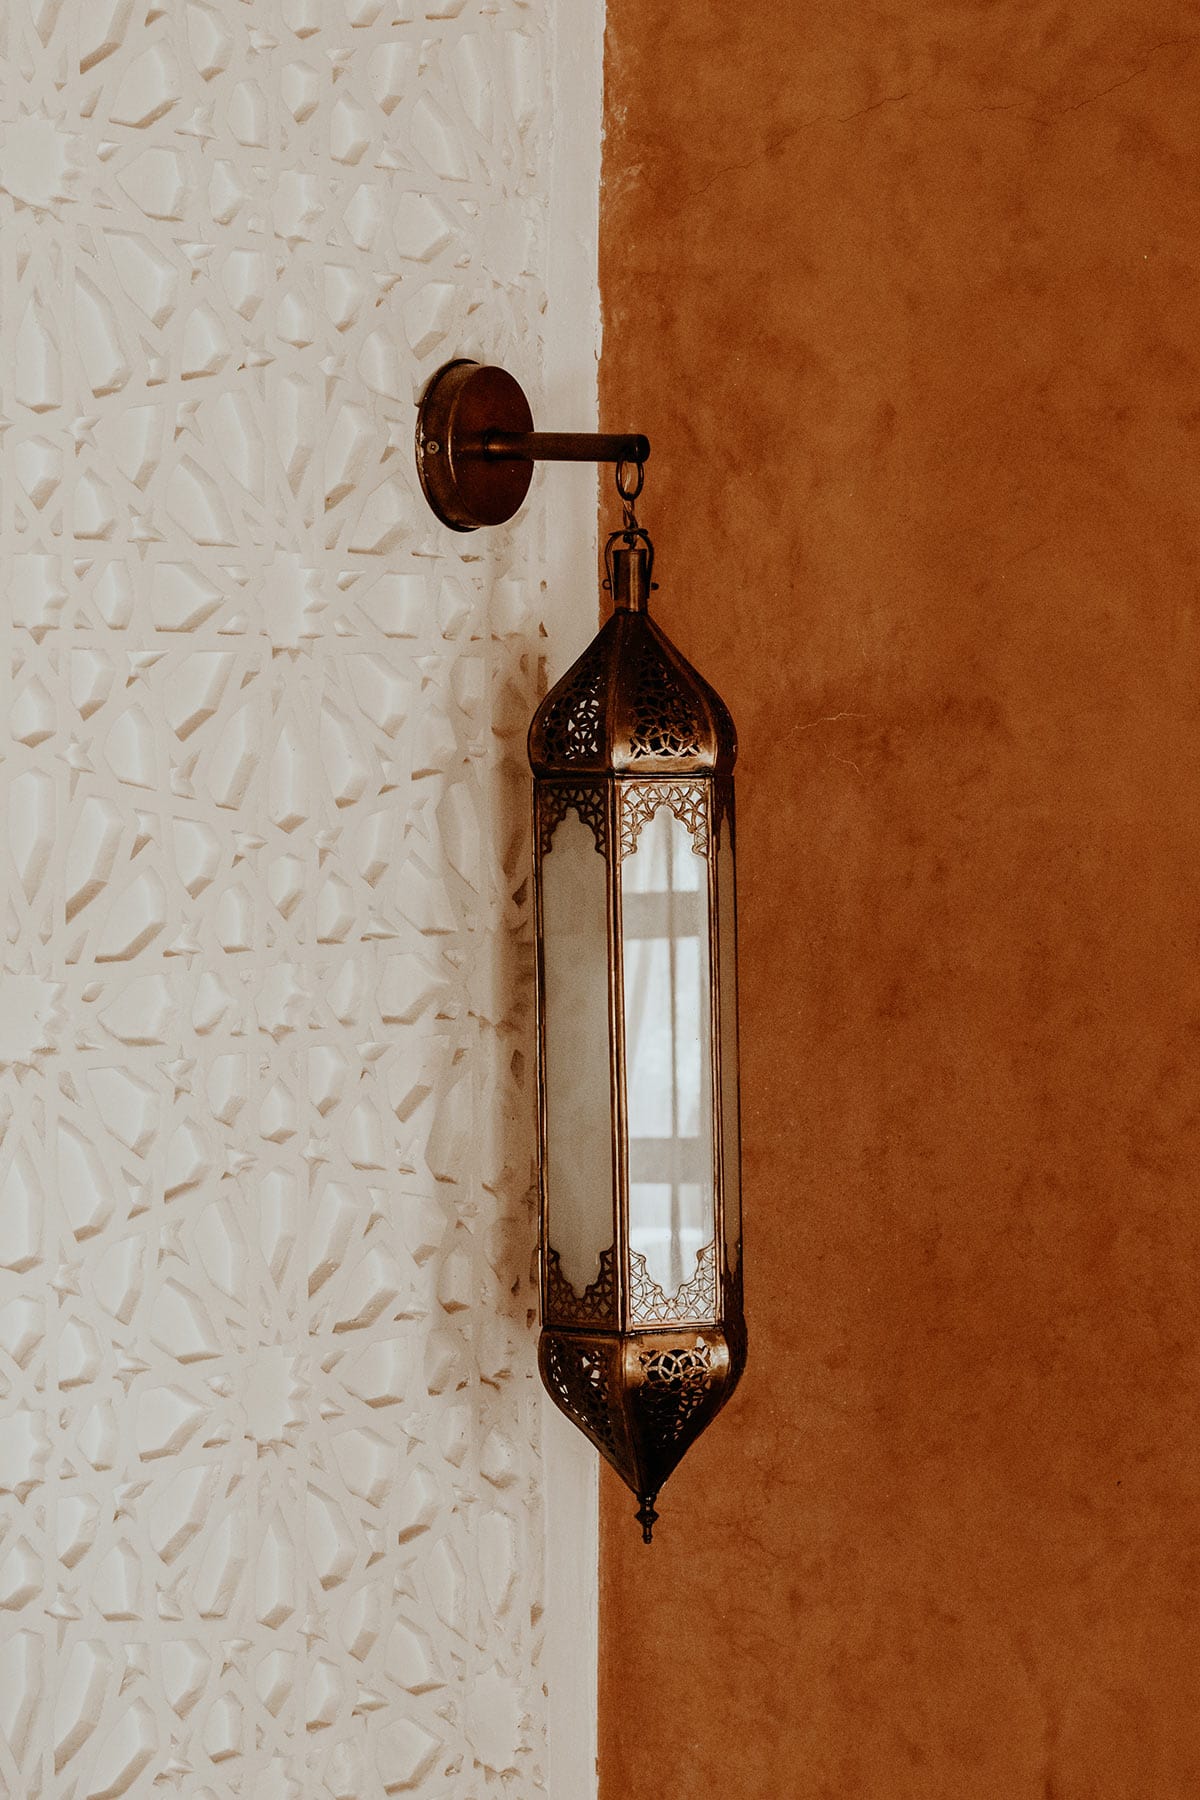
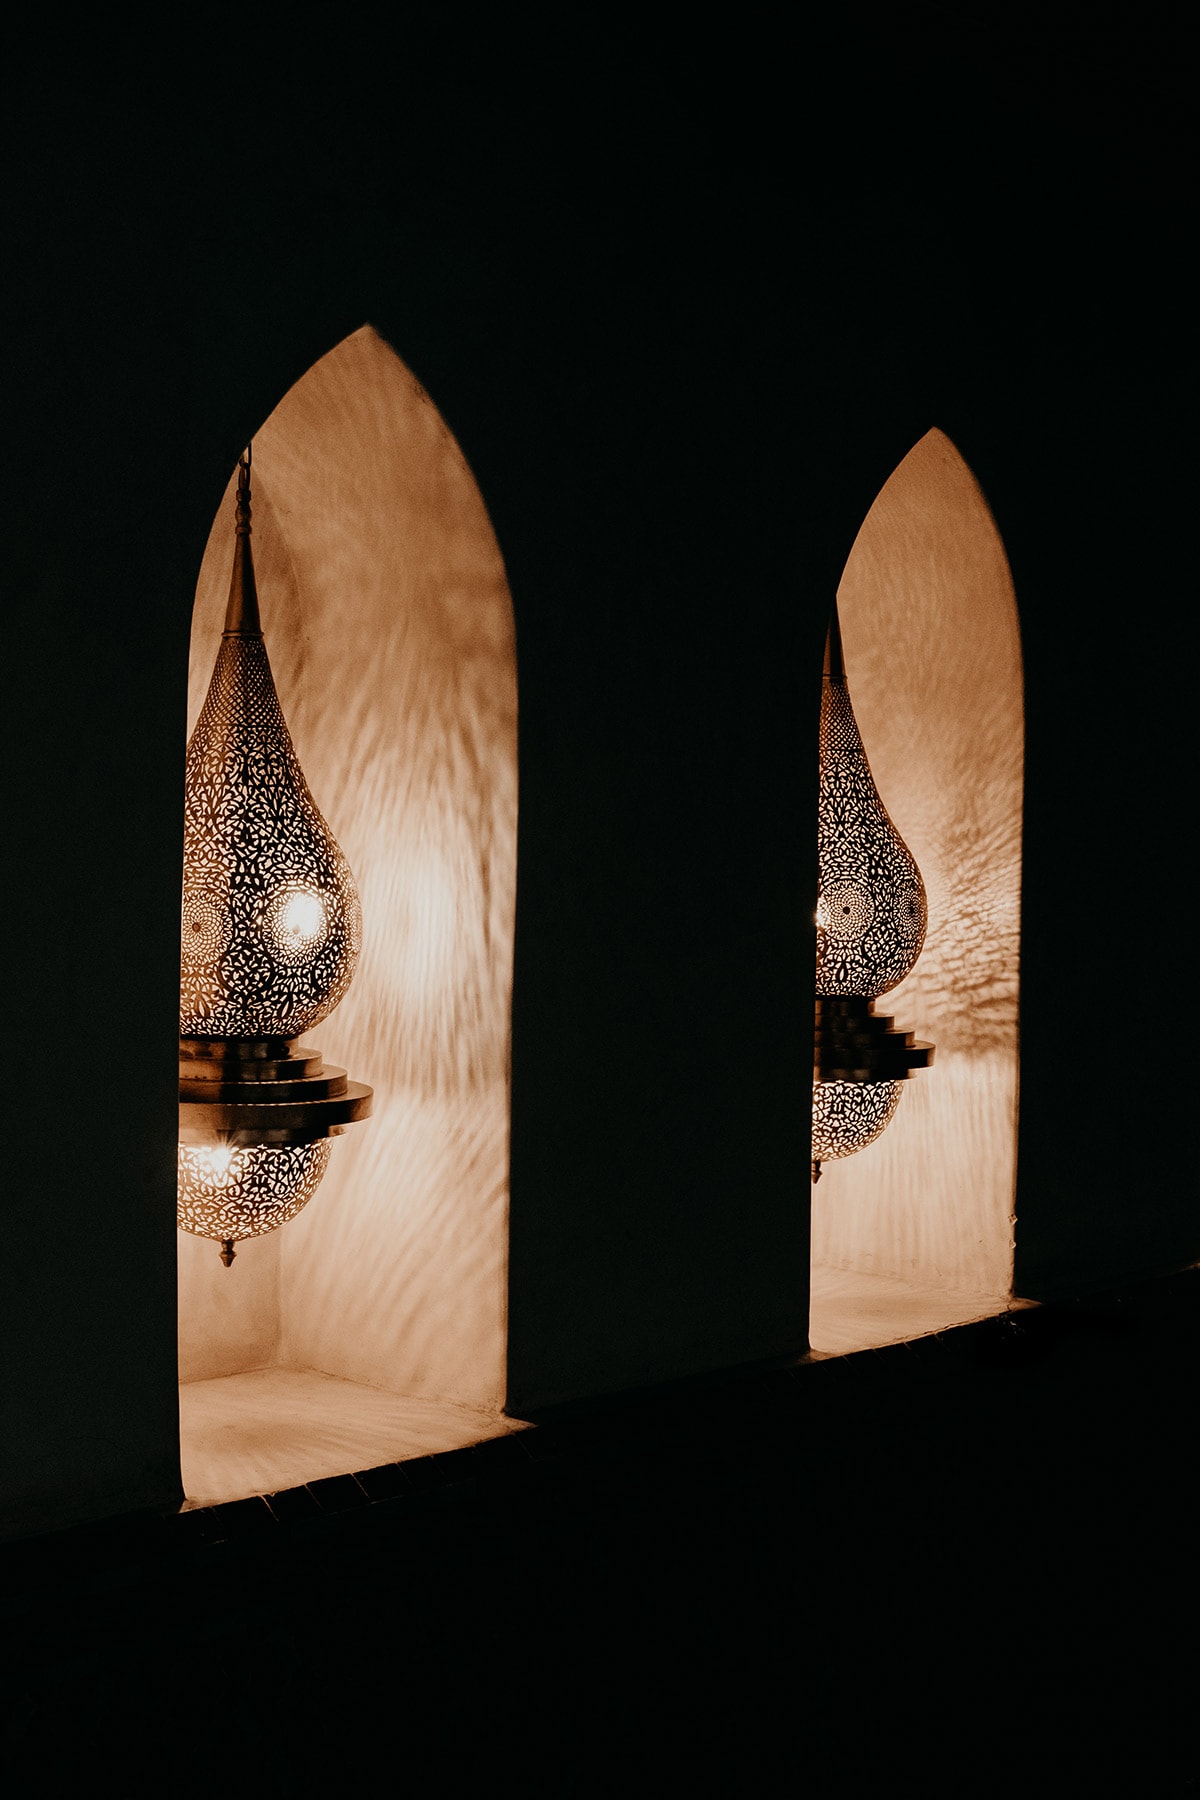
Tucked away in the streets of the medina, Riad Kheirredine combines the intricate patterns, colours and spirit of Morocco, with elegant contemporary Italian design elements and all the modern comfort one could wish for.
Centered around a lush and intimate garden patio (riad meaning garden in Arabic), Riad Kheirredine’s design and layout could easily be described as Morocco’s version of Feng shui, as everything feels as though it’s completely in harmony, which gives the space one of the most aesthetically pleasing appearances I’ve ever seen during my travels.
From the moment you leave the bustling medina and step through the massive wooden door, a whole new world unfolds in front of you, with courtyards complete with fountains and verdant greenery, the most stylish seating nooks, two intimate outdoor pools to refrain from the Moroccan heat, and a spacious terrace lined with palms, and last but not least, stunning views over both Marrakech and the Atlas Mountains in the distance.
Then there is the in-house restaurant, which provides a charming, intimate ambience, adding a subtle touch of magic to the fine dining experience – more on that later.
All things considered, it’s impossible not to see how much thought and effort has been put into the design, it’s simply put, an exceptional space that feels like a home away from home.
I even dare to say that Riad Kheirredine is one of the most inspiring hotels I’ve ever stayed in.
Riad Kheirredine | The rooms
With 14 thoroughly designed rooms and suites, Riad Kheirredine has plenty of incredible options, each with its own unique look and feel.
One thing, however, is that all rooms live up to an incredibly high standard, whether you’re choosing a Deluxe Double Room, Junior Suite, Classic Suite, or Imperial Suite – they all offer design, comfort and amenities that are of the highest level.
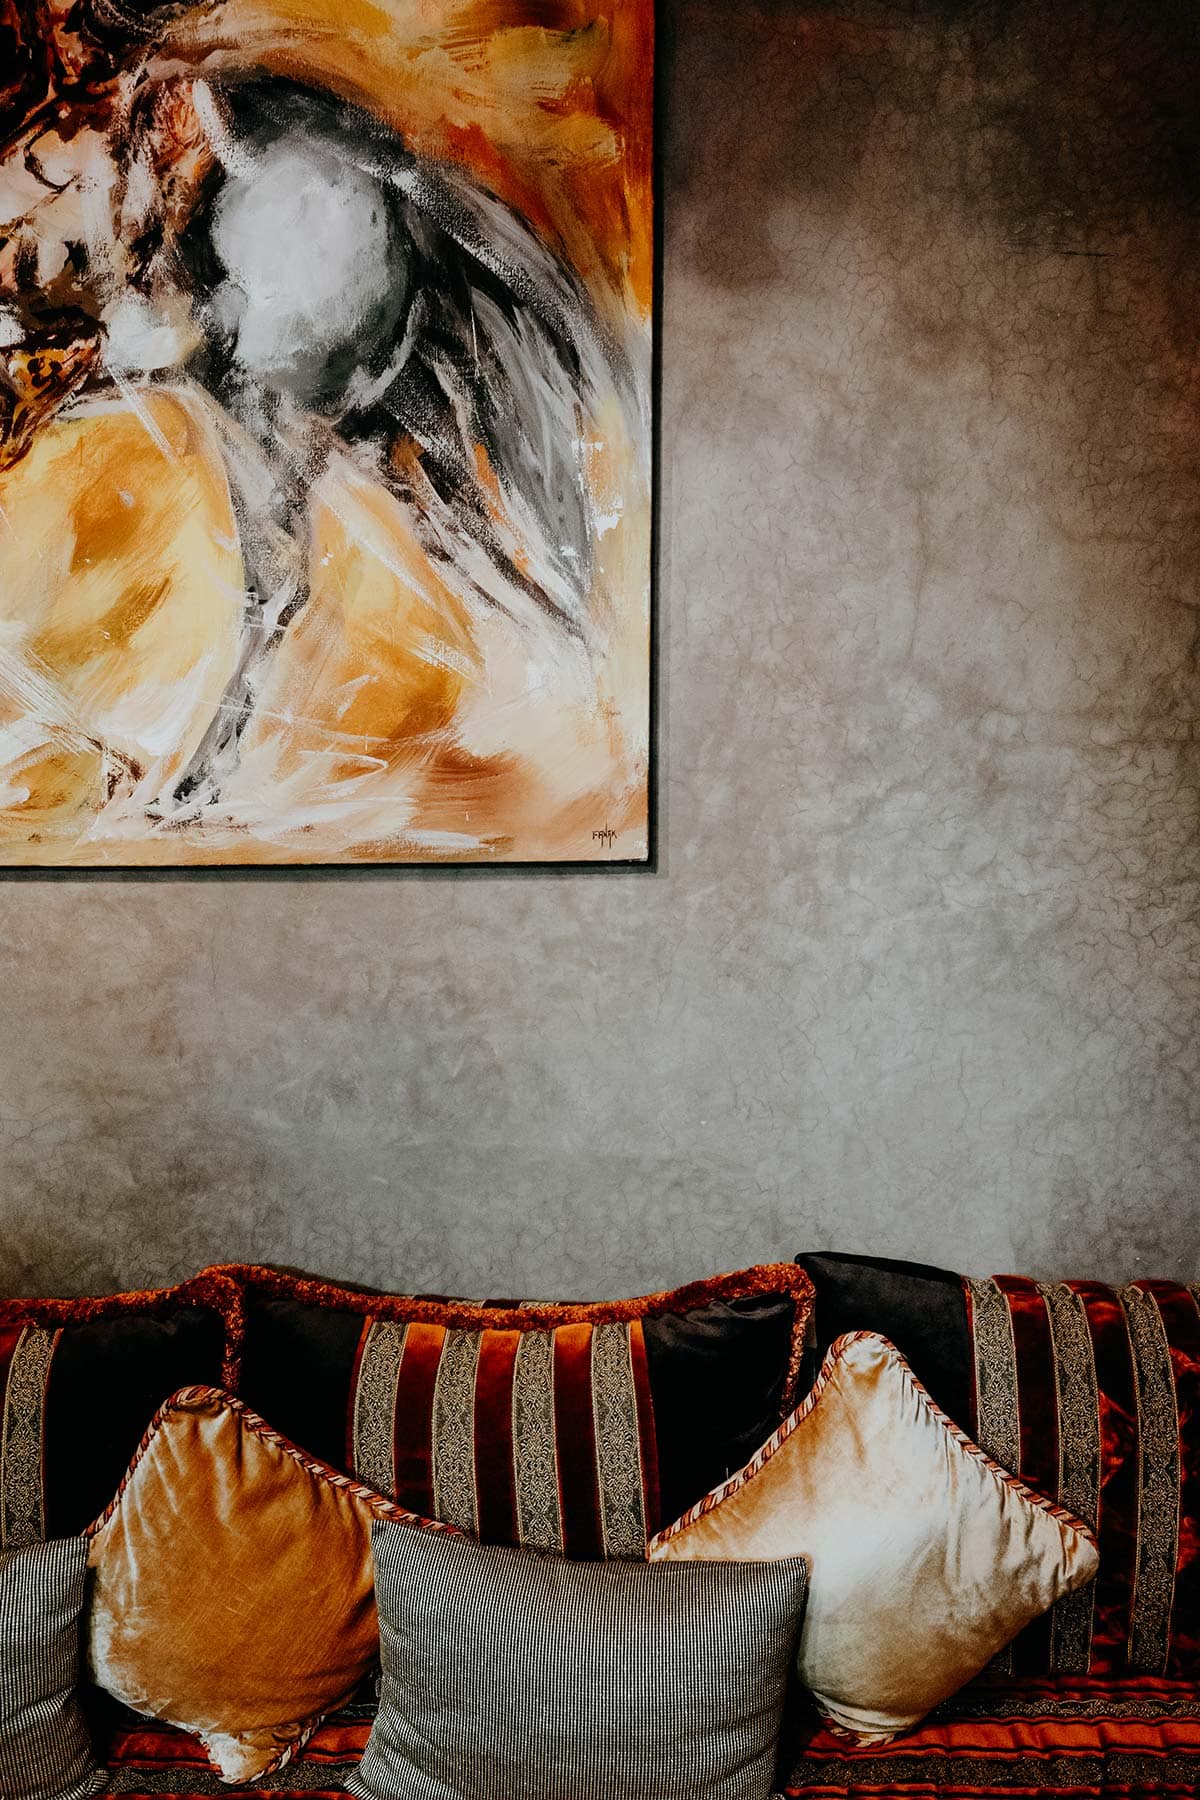
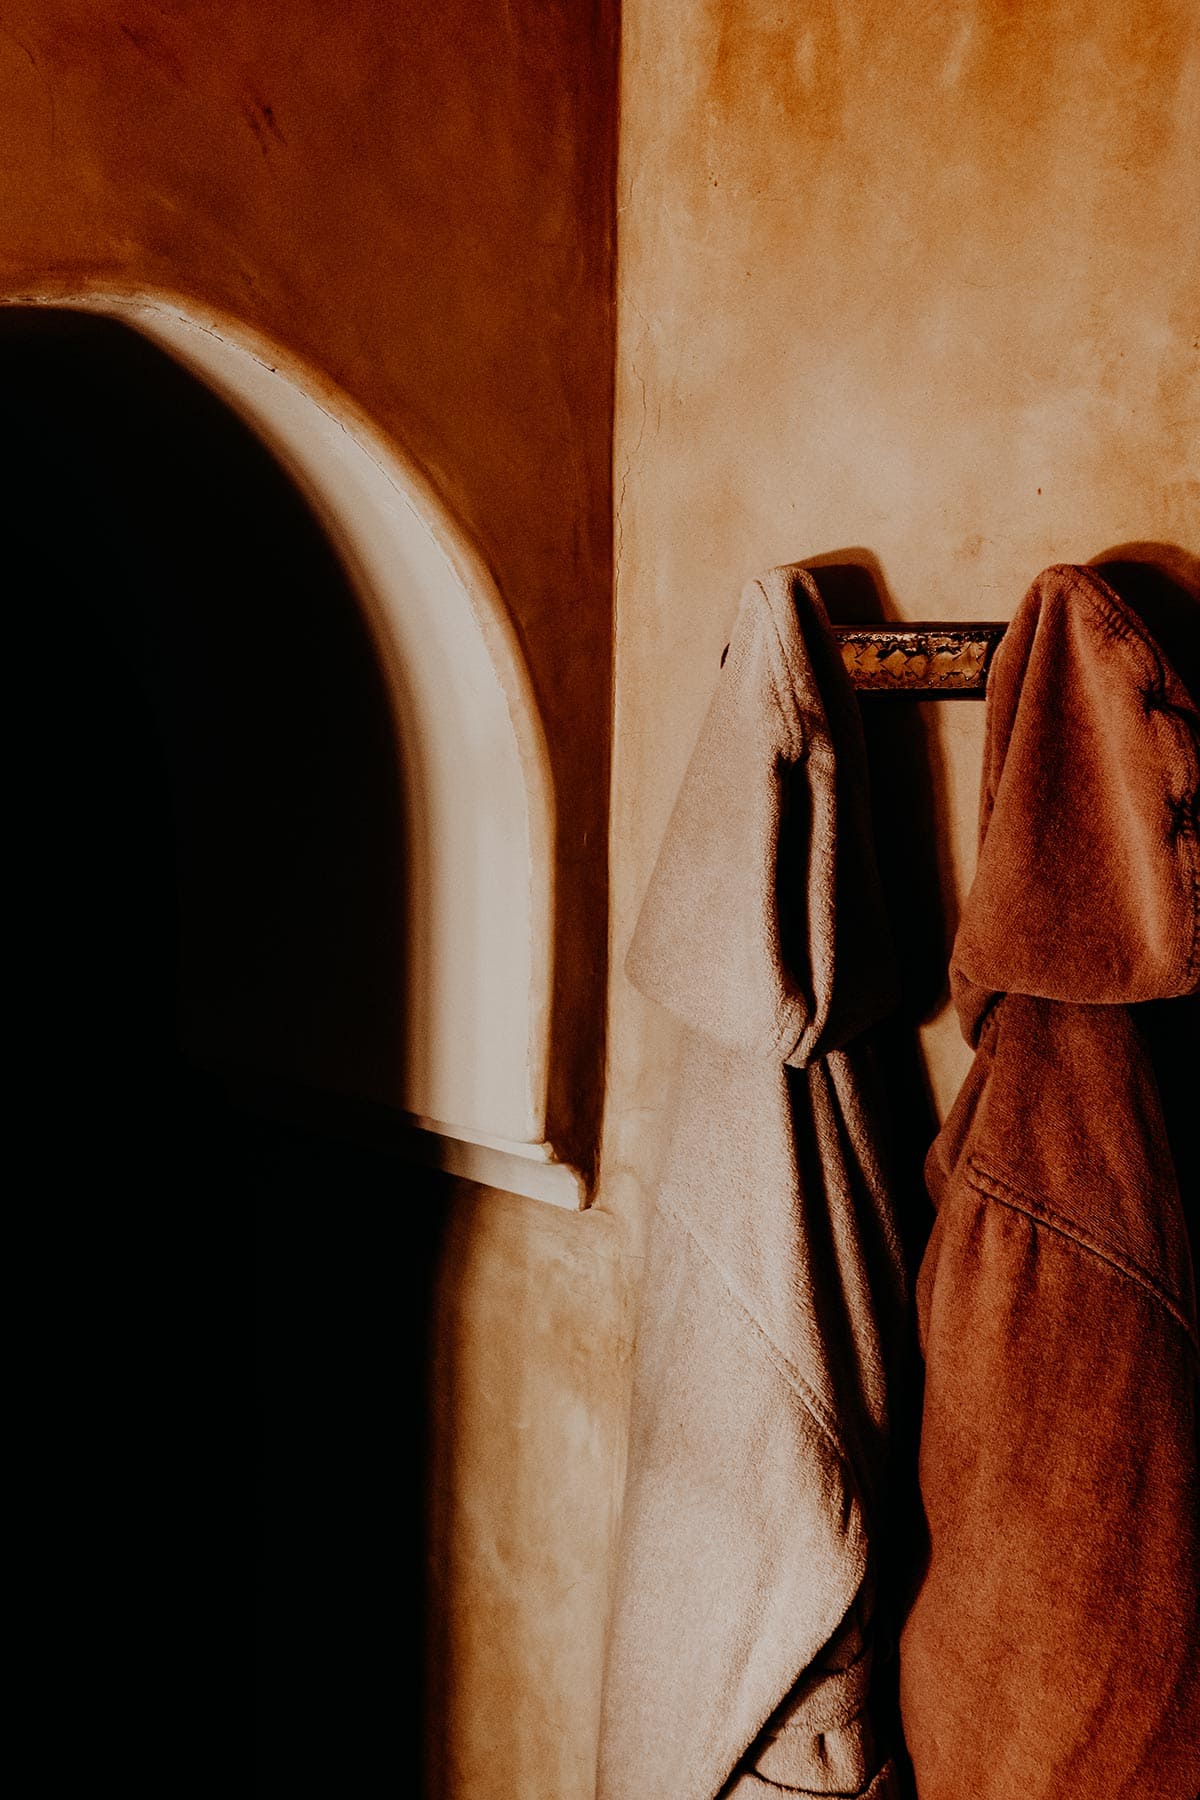
During my time in Marrakech, I had the fortune to stay in Riad Kheirredine’s Ambra room, a spacious deluxe room equipped with authentic hand-crafted furniture, a traditional ensuite bathroom with a rain shower (one such bathroom that could perfectly fit into my future house), and plenty of modern amenities to make you feel comfortable and at home, think air-conditioning, a Bluetooth music system, and a comfy seating area.
Then there is the huge bed, covered with fancy cushions and silk bedspreads made from top-notch materials, which also happened to be extremely comfortable to sleep on – winner!
Though you probably wouldn’t spend much of your time in your room given Marrakech has a lot to offer, and the common areas of the riad will most likely tempt you to chill there, the rooms at Riad Kheirredine are the perfect place to retreat and regain some energy.
Especially if you consider that you could request fresh mint tea, coffee and freshly squeezed juices at any given time.
I’ve recently also stayed in the Canella room, which was equally as impressive as the above-mentioned Ambra room. Having said that, I fairly think all rooms are stunning, meaning you simply can’t pick wrong here.

Riad Kheirredine | The food and drinks
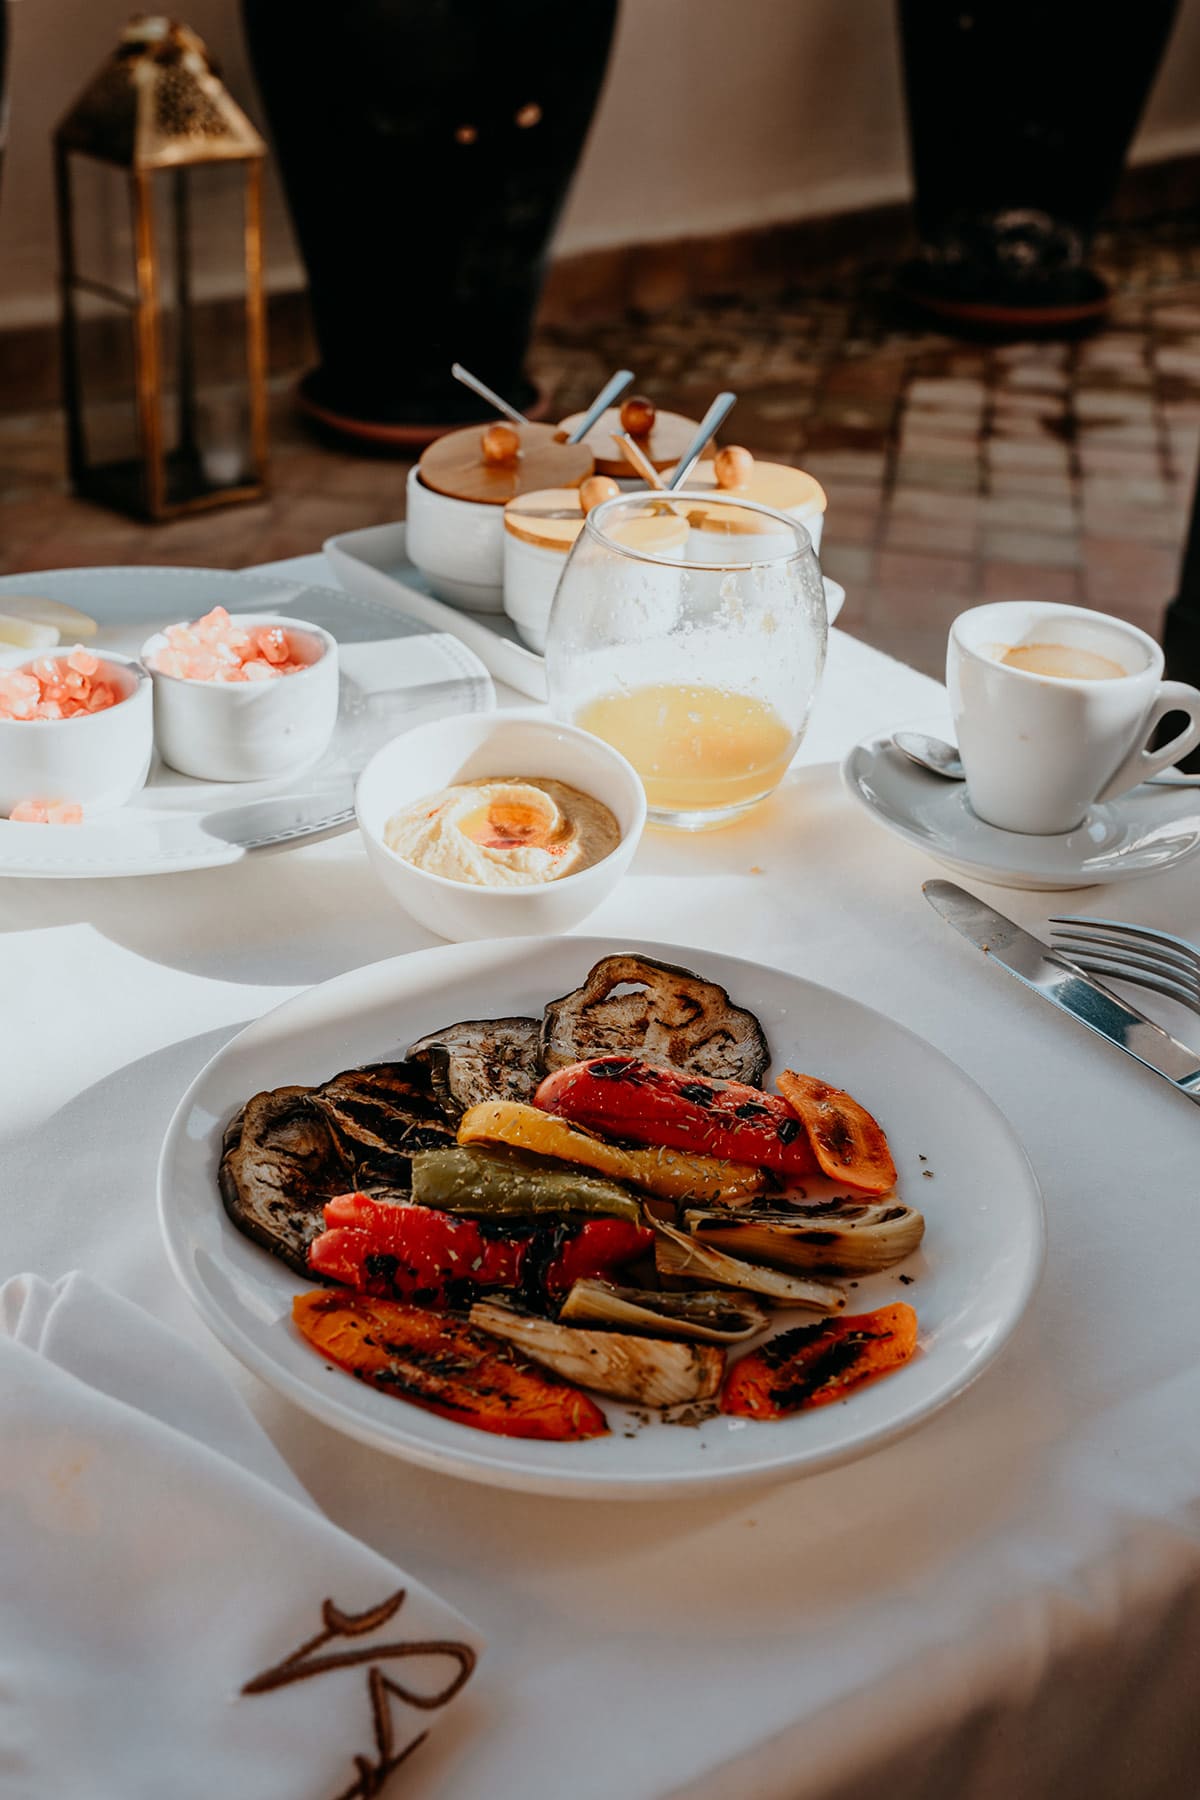
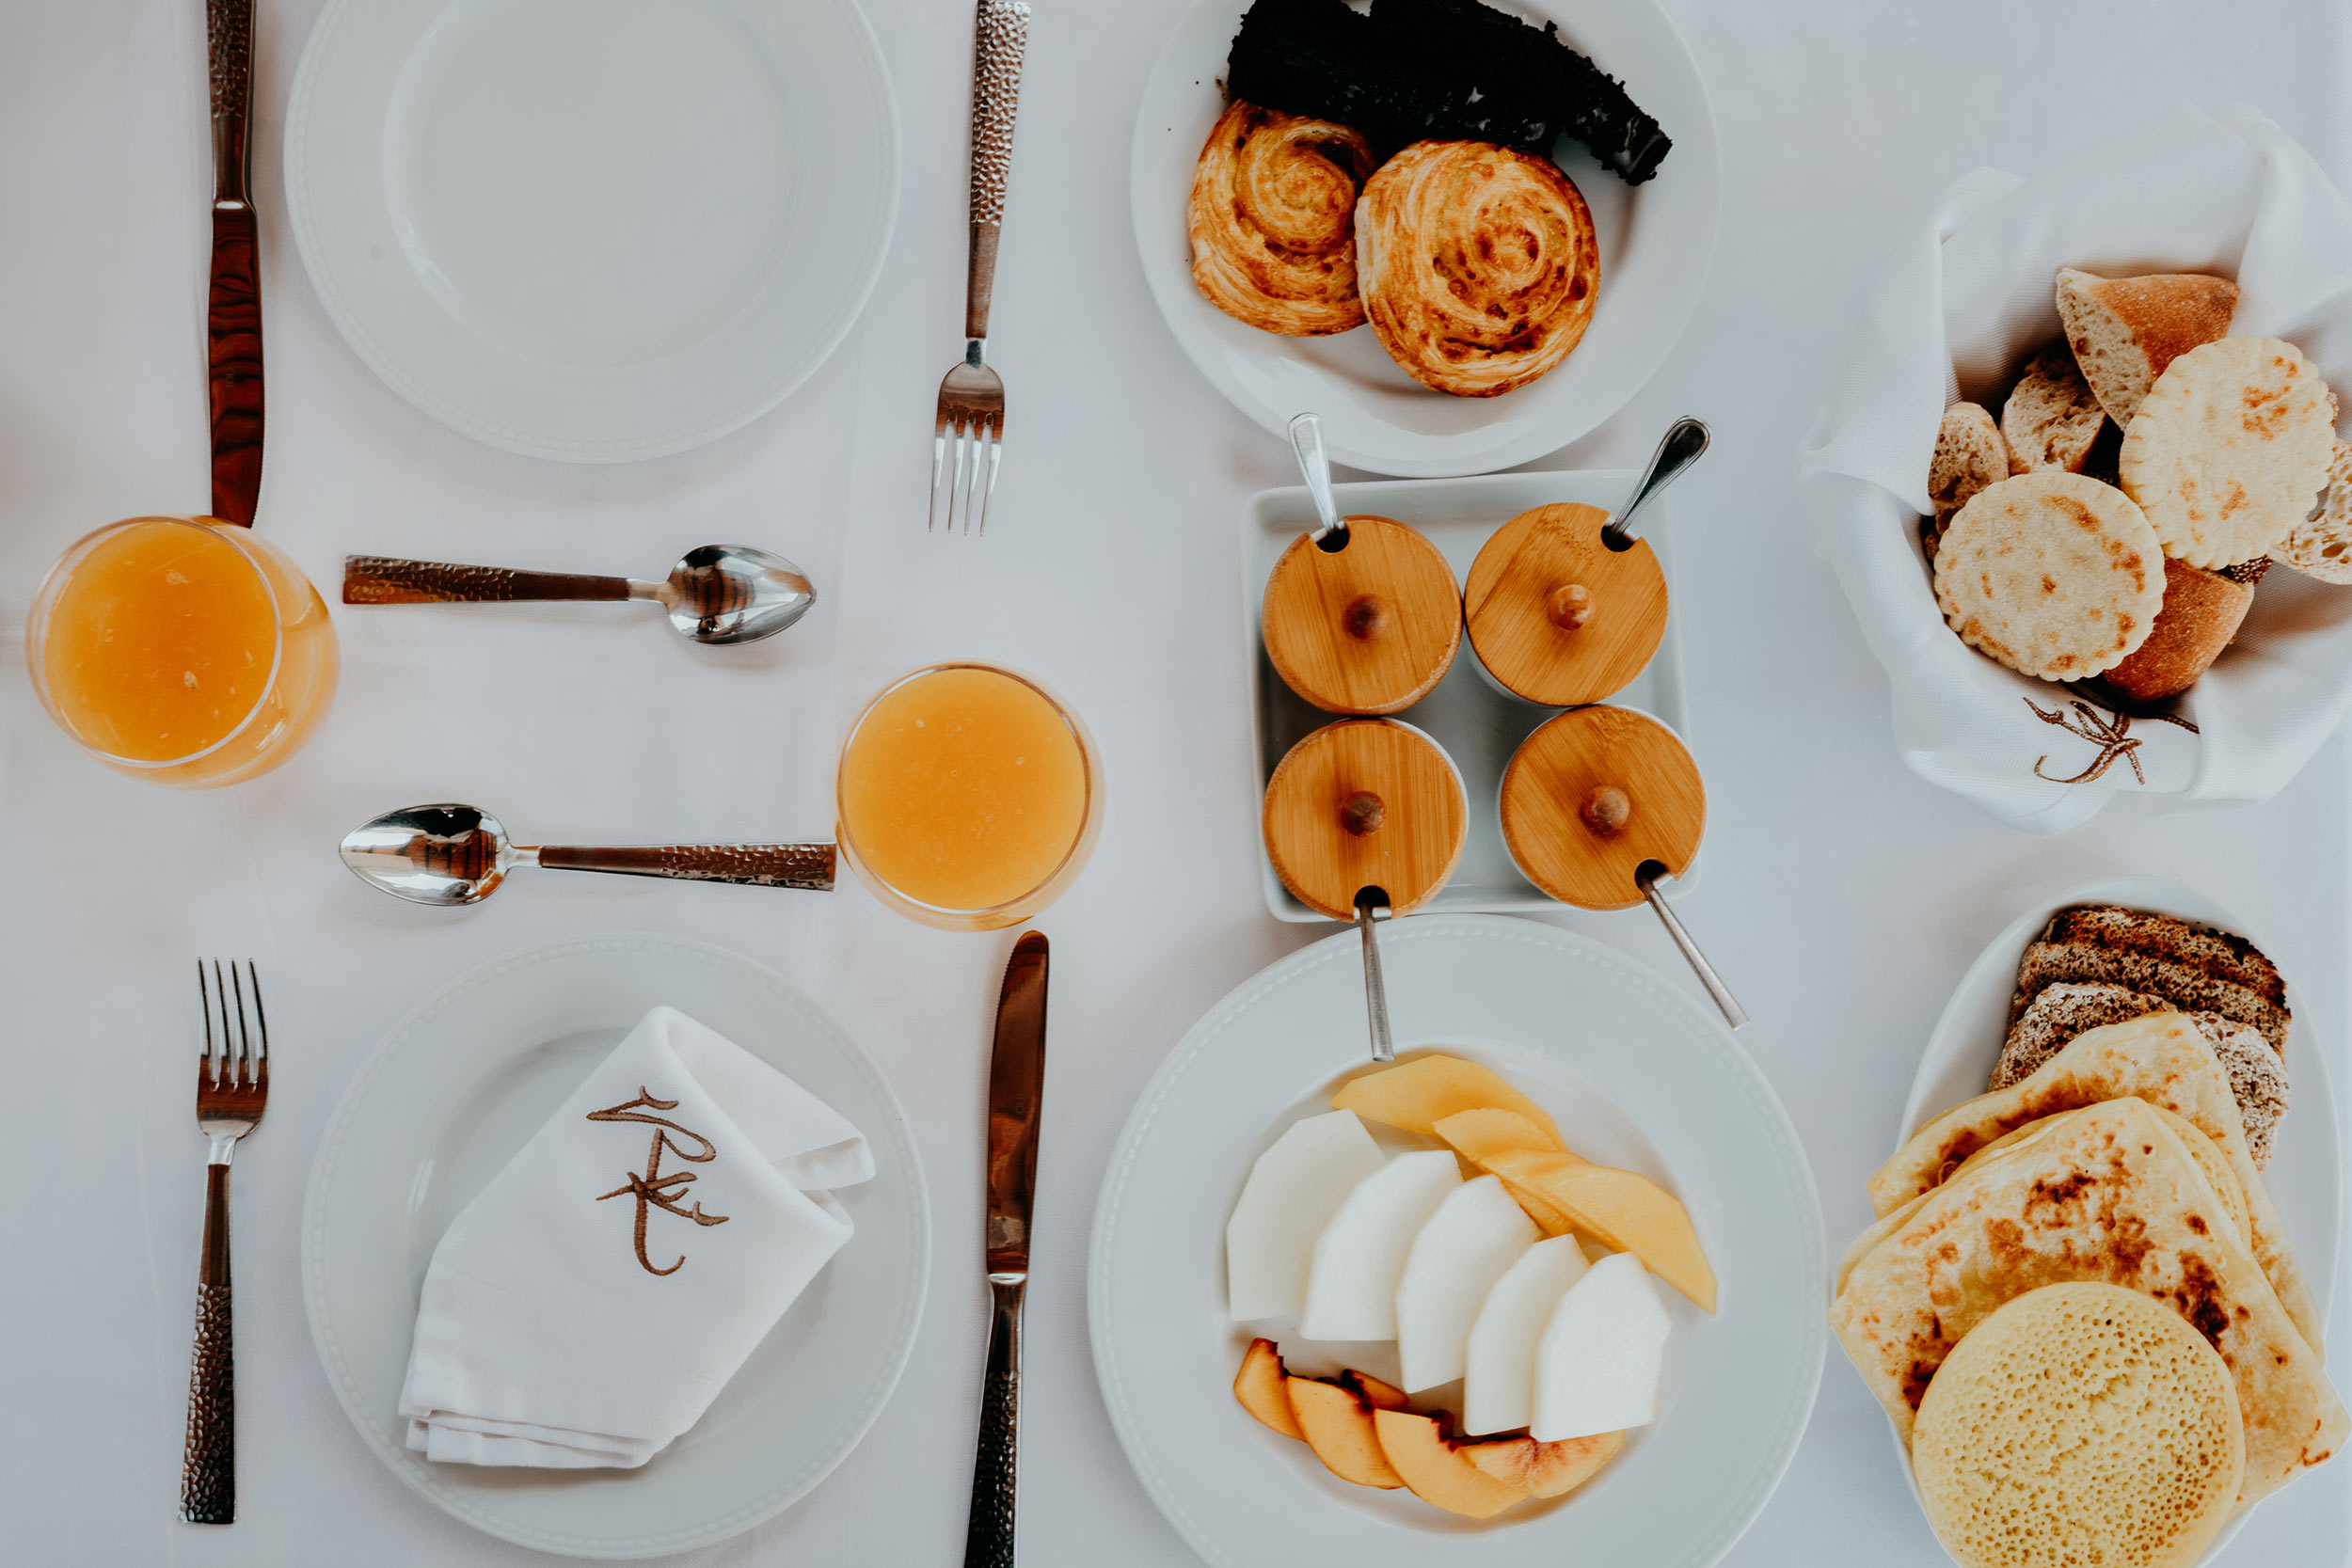
Let’s get straight to it, breakfast at Riad Kheirredine’s incredible terrace, with its stunning views of both Marrakech and the towering Atlas Mountains in the distance, will, indisputably be one of the absolute highlights of your stay here.
As with everything Riad Kheirredine touches, the breakfast spread here is truly exceptional, with plentiful options to choose from – think freshly-baked bread, croissants and sweet pastries, hummus with grilled vegetables, a wide array of fresh fruits, and eggs in any style on order.
Even though I practice intermittent fasting and normally start eating around noon, I actually decided to deviate from my normal routine and join the feast at Riad Kheirredine.
However, since my body isn’t used to eating a big breakfast, I opted for a light breakfast instead, consisting of fruits, pancakes, a cup of coffee, freshly squeezed orange juice (I love a good OJ), and a sweet pastry on the side – which was quite satisfying.
If you’re in for a fresh mint tea, a cup of coffee, orange juice, or a quick bite, the riad also offers great room service, which can be ordered at any time, whether you’re in your room or in one of the common areas.
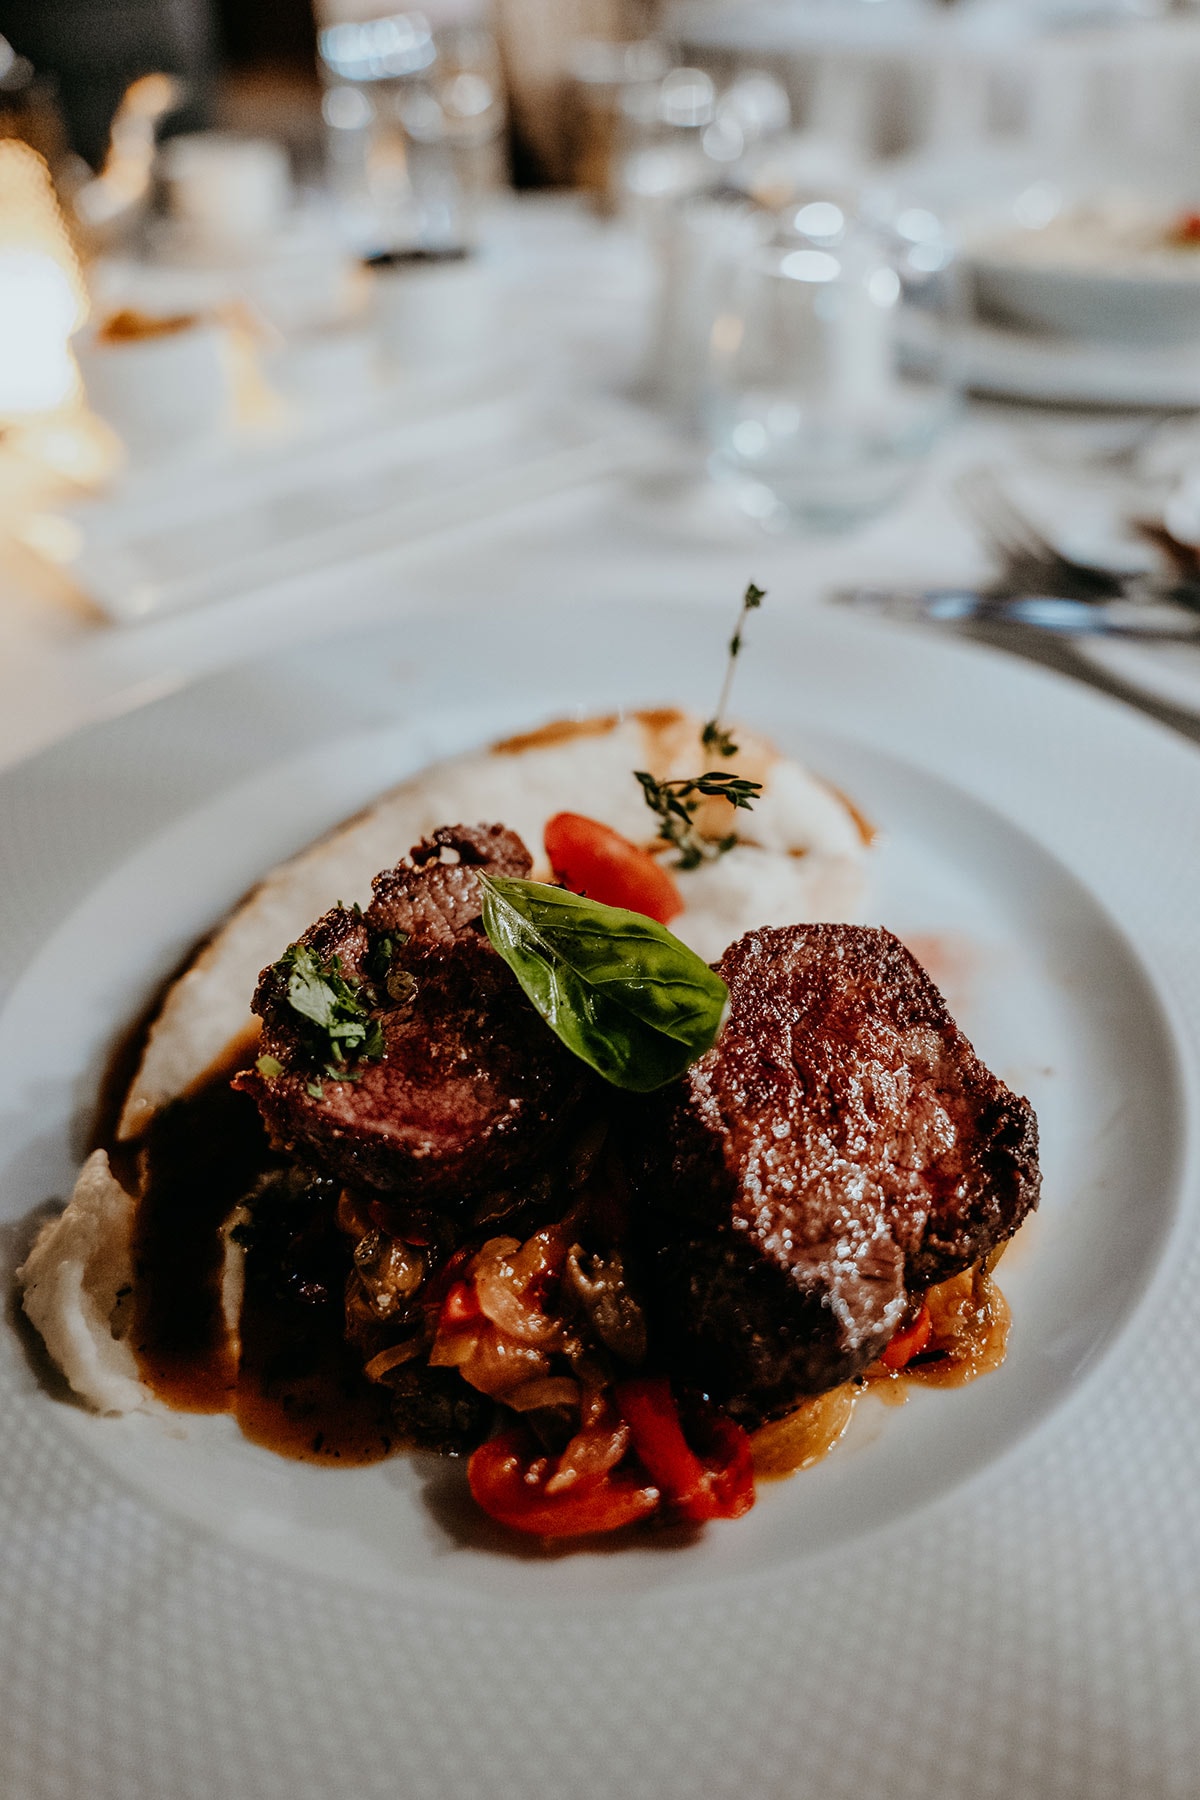
Then there’s the full-service restaurant, which serves the most amazing dishes, which you can devour on either the riad’s exceptional rooftop or their carefully hidden patio complete with lush greenery, both extremely elegant and offering an intimate and lavish atmosphere.
Here you can venture into a culinary journey, with an extensive menu offering a delightful array of Moroccan, Mediterranean, and fusion dishes, all prepared with the finest locally sourced ingredients.
In addition, Riad Kheirredine is one of the few accommodations in Marrakech that obtained an exclusive alcohol license from the Moroccan authorities, which gives guests the opportunity to complement their meal with a chilled glass of wine or a beer, adding an extra touch to the overall fine dining experience.
It is worth noting that no reservation is needed for the restaurant, and you can walk in whenever you feel like it, which is quite convenient and overall a pleasant experience.
Riad Kheirredine | The Hammam and Spa
While you will surely find inner calm at Riad Kheirredine itself, booking a rejuvenating experience in the Riad’s traditional Hammam and Spa will bring your overall well-being to a whole new level.
Often referred to as the oldest surviving bathing tradition in the world, the hammam is a traditional Moroccan ritual that has been around for ages, and so it become a key component of Morocco’s rich and captivating culture.
As one of the 5 traditional elements in Moroccan culture (bakery, fountain, Hamman, mosque, and school), visiting a Hammam is not only rejuvenating for body and mind but also a great way to experience this side of Morocco’s fascinating traditions.
If you’re keen on trying a hammam, I’m pretty sure you would love a pampering session here; Riad Kheirredine’s in-house luxurious hammam is known for the most skilled therapists and masseuses, using only the finest techniques and natural ingredients; think black soap, rose-based clay masks, argan oil, orange blossom and salts.
It’s the best possible gift you could give to both your body and mind and somewhat of a crime if you skip it (which I sadly did, given I was too busy finding the best things to do in Marrakech).
Book your stay at Riad Kheirredine
Riad Kheirredine has 14 luxury rooms and suites on offer, which can be booked effortlessly online via their website, or through Booking.com and Hotels.com.
Each room or suite is distinguished by traditional Moroccan design, yet they’ve managed to give a completely unique look and feel to every single one of them.
The options include;
Deluxe Rooms | €170,- per night
The best option for solo travellers, couples and close friends.
Junior Suites | €205,- per night
Perfect if you’re looking for a slightly more spacious room than the above Deluxe Room.
Classic Suites | €265,- per night
At only €265 per night, this might be the best value for your money.
Imperial Suites | Starting at €360,- per night
Perfect for those on a honeymoon or wishing to splurge.
It is worth noting that there’s high demand for a stay at Riad Kheirredine, so I’d recommend sorting out your room sooner rather than later.
Please also note that a stay of at least 3 nights is required at Riad Kheirredine.

The best time to stay at Riad Kheirredine
Given Riad Kheirredine is based in Marrakech, which is basically situated in the heart of Morocco, your best travel time is during the off-season months of March to May and September to November, when it’s significantly less hot in comparison to the peak summer months.
I stayed at Riad Kheirredine in mid-September and had the most comfortable weather, as well as fairly lengthy days, which was brilliant for both explorations around the medina and relaxing moments within Riad Kheirredine itself.
However, these periods are obviously also the most popular, so if you’re keen to dodge the masses, I’d recommend opting for a visit in November, when the weather is still good, yet the crowds significantly thinner.
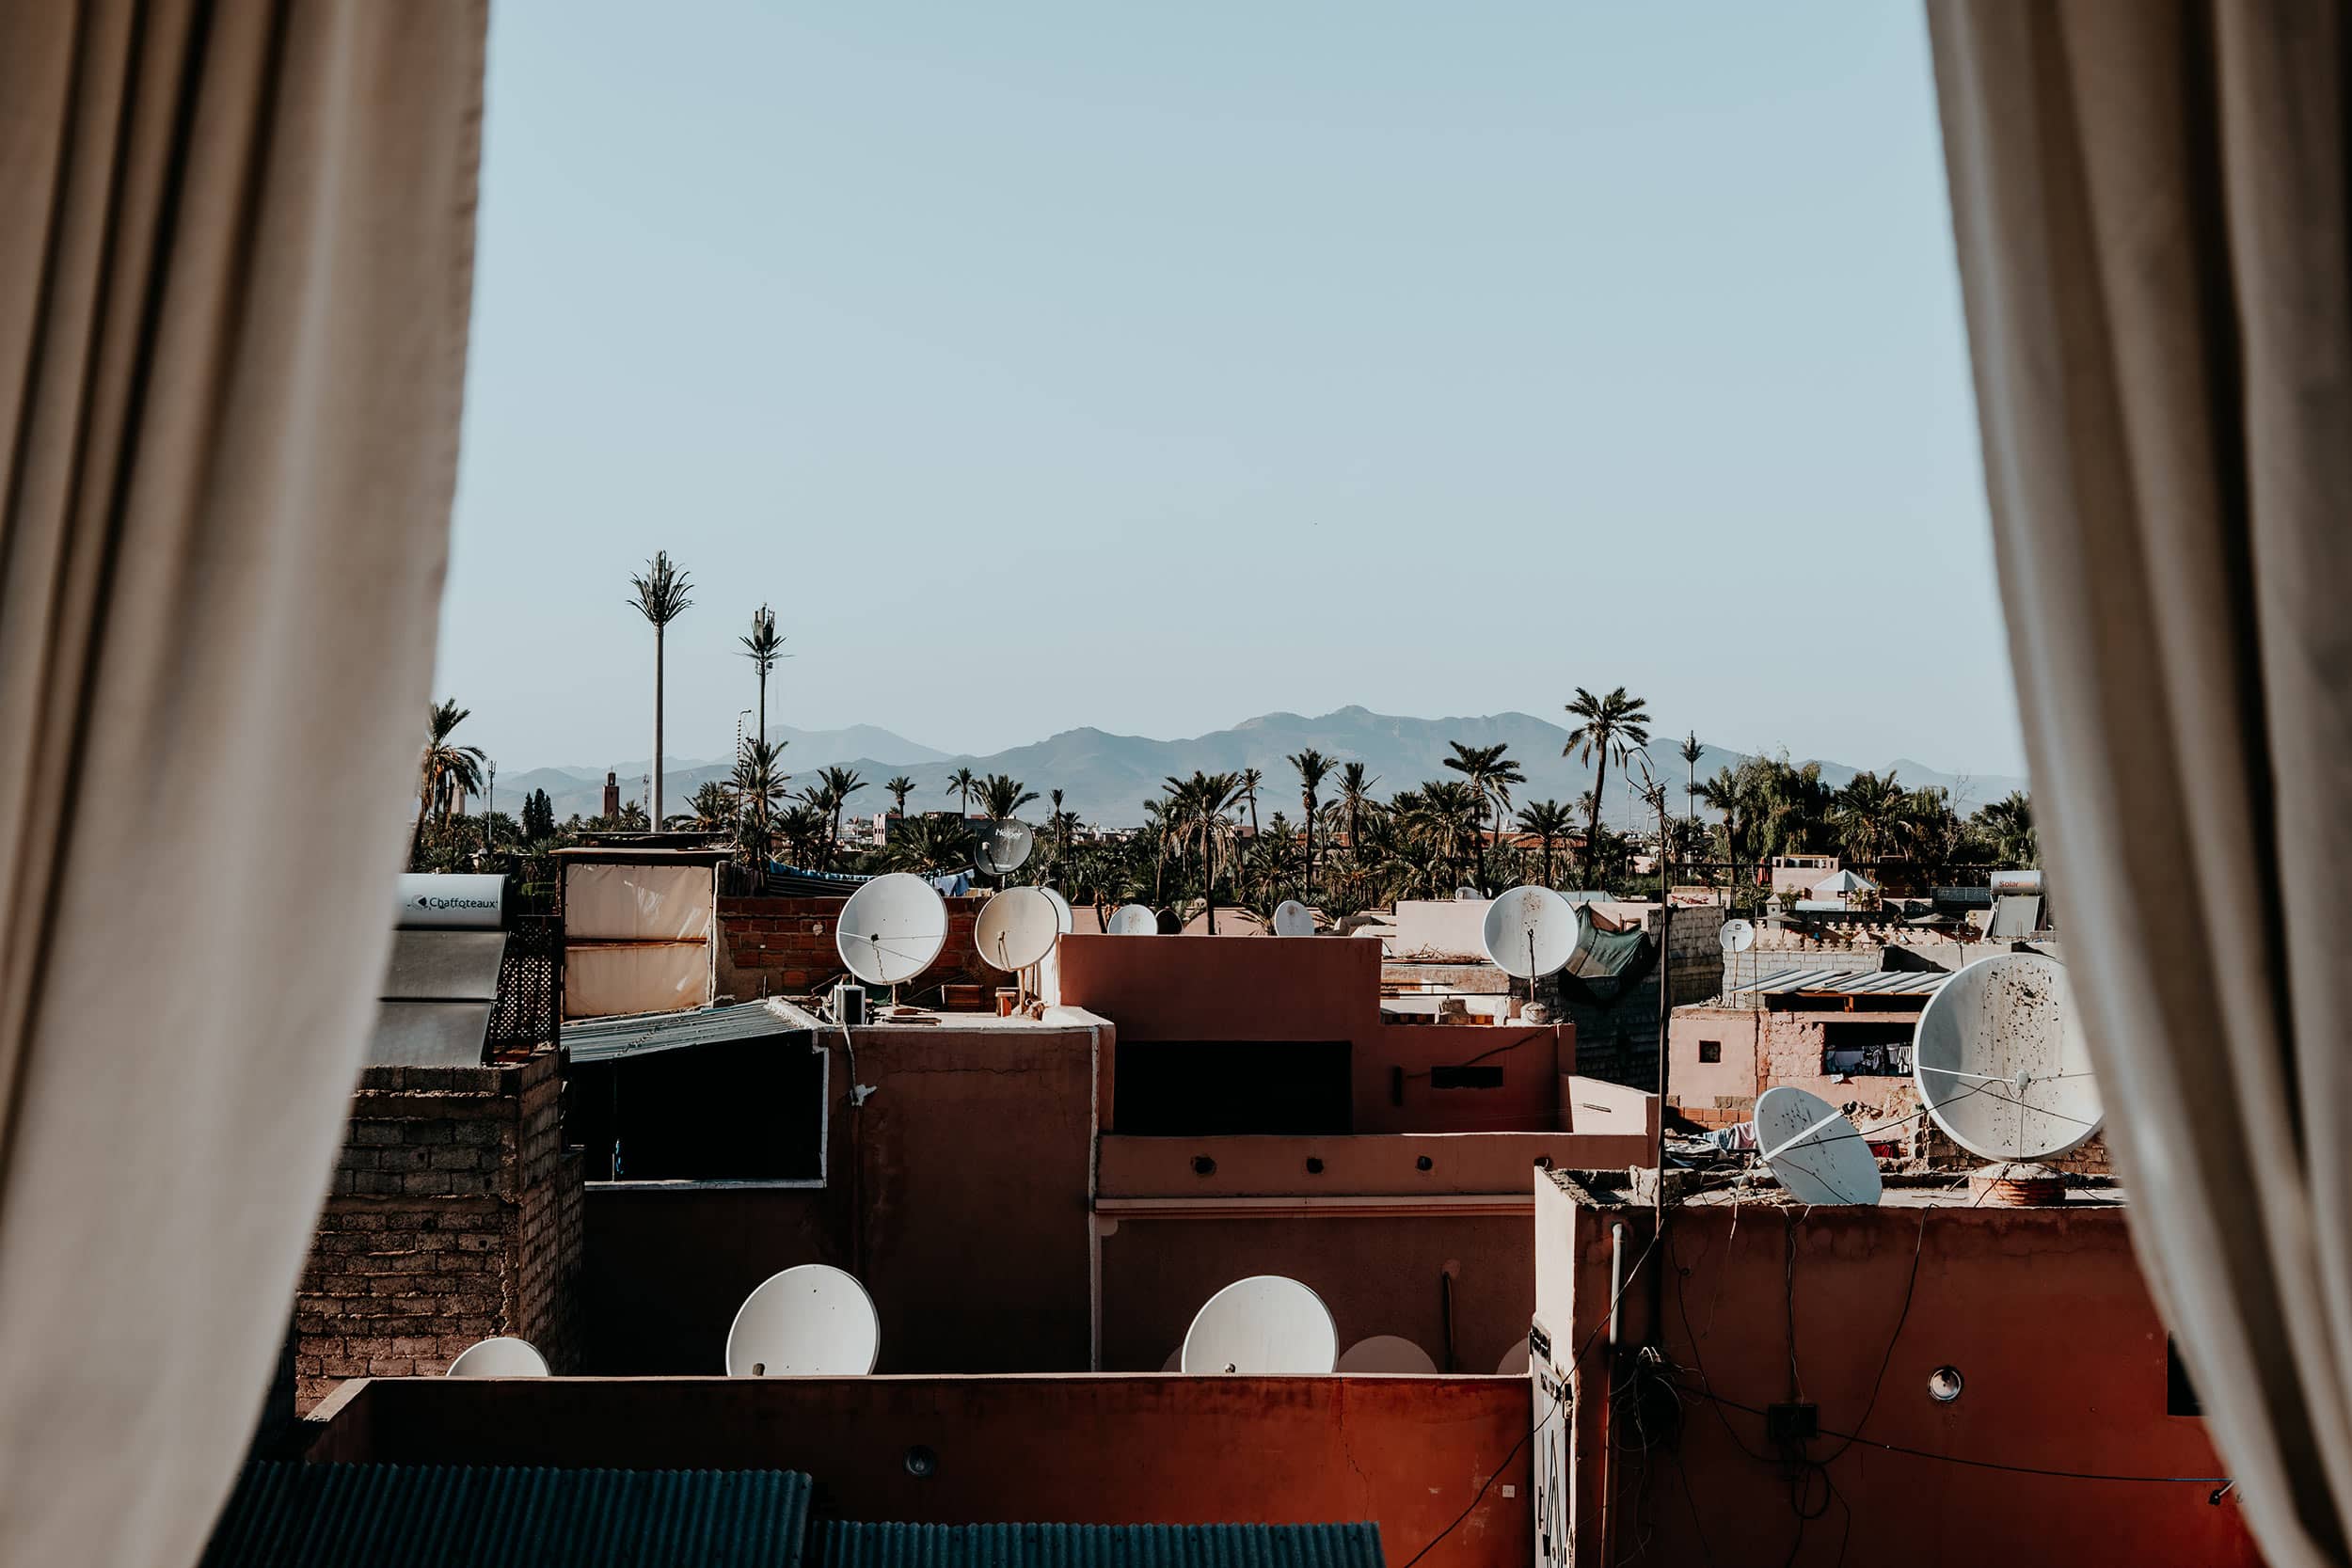
How to get to Riad Kheirredine
Despite being tucked away in the bustling alleyways of the Marrakech medina, Riad Kheirredine is actually quite easy to get to – you just have to know the right options.
There are a few ways to get to the riad, which include:
Transfer by Riad Kheirredine
One of the best things about staying at Riad Kheirredine is the fact that they will do everything in their power to make your experience as comfortable as possible.
This is also the case when we’re talking about your arrival in Morocco.
Riad Kheirredine offers airport transfers from and to the Marrakech International Airport, which is easily the most relaxing way to start off your adventures in Morocco.
Upon leaving the airport lobby, someone from the riad will be waiting for you with a sign and will bring you as close to the riad as possible, where another guide awaits you and will handle your luggage, before guiding you to the riad – it doesn’t get any easier than that.
The airport transfer will cost you around 220 MAD (€20,-) one-way, but is worth every penny.
Since Marrakech (and Morocco in general) can be quite hectic for first-time travellers, their airport transfer is actually one of the most convenient ways to get your bearings in Marrakech.
By Taxi
If you did not arrange an airport transfer in advance, and feel a bit overwhelmed when you first set foot out of the airport (which is common in this part of the world), make sure you don’t feel tempted to jump into the first taxi you see, as they will most likely lift way more money out of your pockets than they initially should.
While it is totally possible to find a taxi driver offering fair prices, it’s actually pretty common to negotiate the prices in Morocco. A one-way taxi journey from the Marrakech Menara Airport to the Medina should cost you between 100 to 150 MAD (€9,- to €13,50).
Having said that, make sure you always agree on the price before entering the taxi itself.
By Car
Those who plan to do an adventurous road trip through Morocco will probably think that the best way to get to Riad Kheirredine is by car, and while it is surely an option, I believe it’s far from ideal.
There are actually a few reasons for this.
First, there is the fact that you’re not using your rental car during your time in Marrakech, which is basically a waste of your well-earned money if you ask me.
Secondly, Riad Kheirredine is situated in the midst of the bustling medina, which means that you can not get close to the riad by car, as driving here is simply not an option.
Last but not least, almost every public parking option is situated outside the medina – plus you will add to your expenses. Though the parking in Marrakech will not break the bank, it’s still unnecessary in my opinion.
For that reason, I’d highly recommend sorting out your rental at rentalcars.com with a pick-up date right after your time in Marrakech. For more tips on driving a car in Morocco, make sure you check out my in-depth guide here (coming soon).
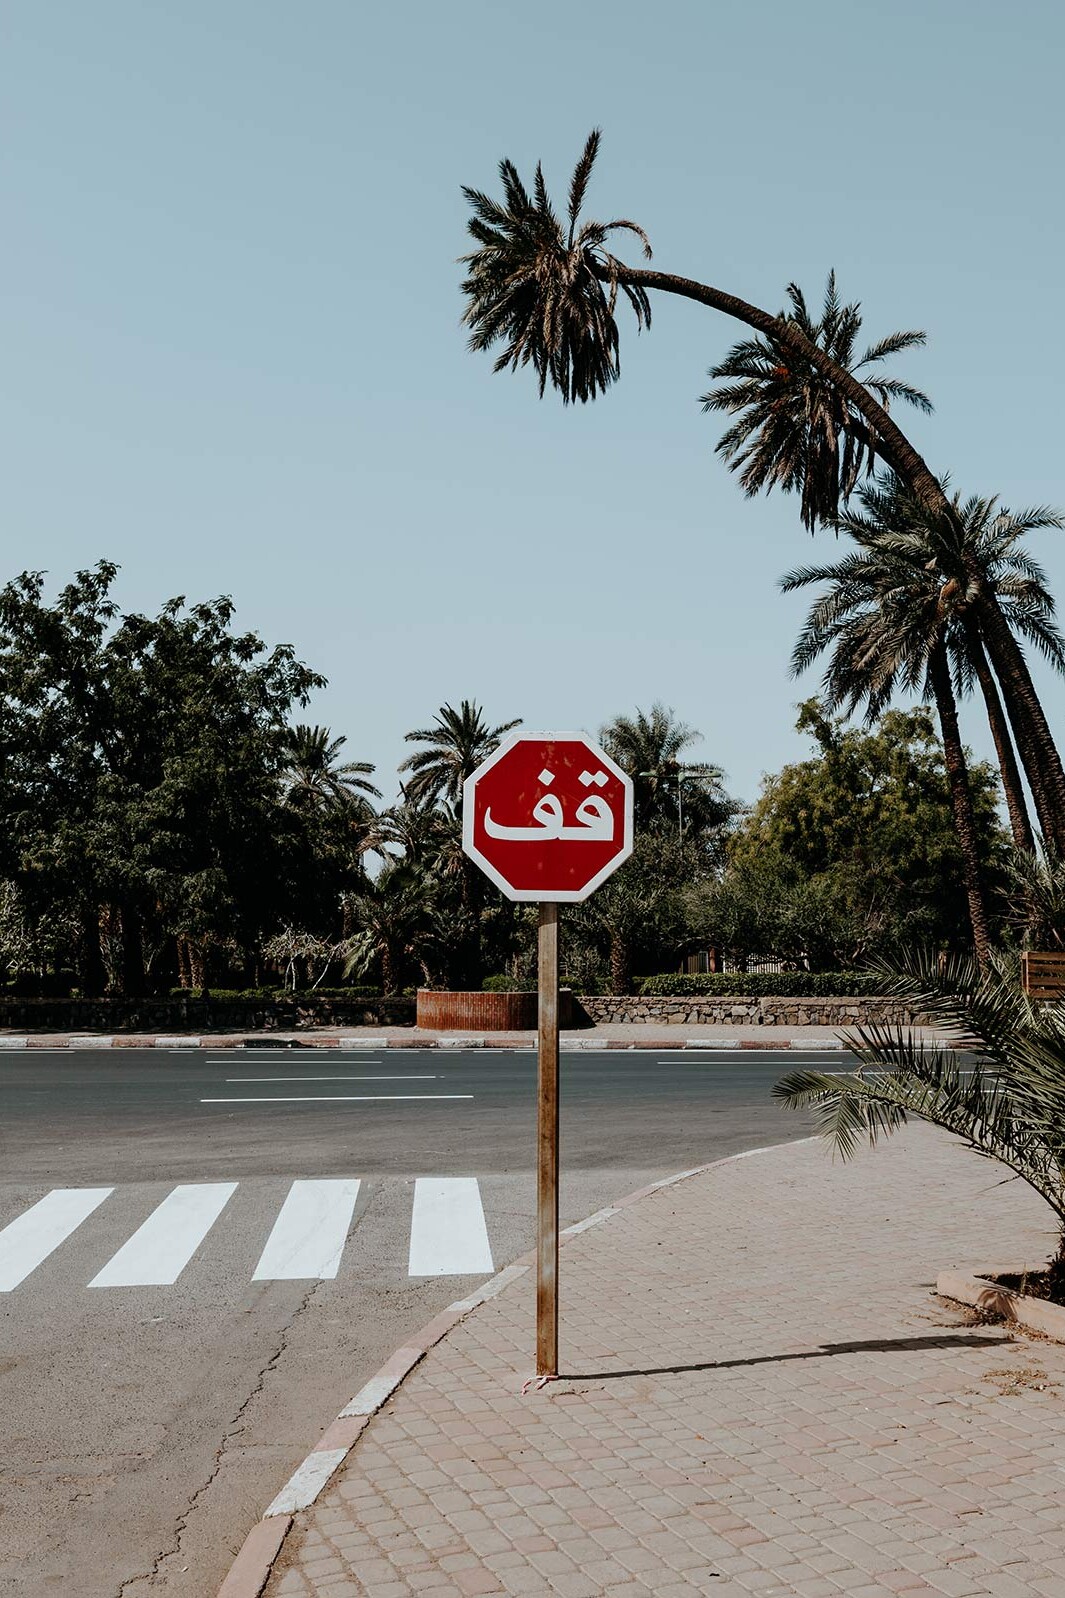
What to do in Marrakech
One of the best things about a stay at Riad Kheirredine is that it will be the perfect retreat from which to explore the incredible city of Marrakech, with most of the best things to do at only a stone’s throw away from your front door.
From the intoxicating medina to the serenity found at the lush gardens of Le Jardin Majorelle, the intricate architecture at the Ben Youssef Madrasa to the abundance of trendy restaurants & cafes, there’s simply no shortage of enchanting things waiting for you to uncover.
If you’re looking for unforgettable experiences in Morocco’s fascinating ‘Red City’, make sure you give my in-depth guide on the best things to do in Marrakech a read too.
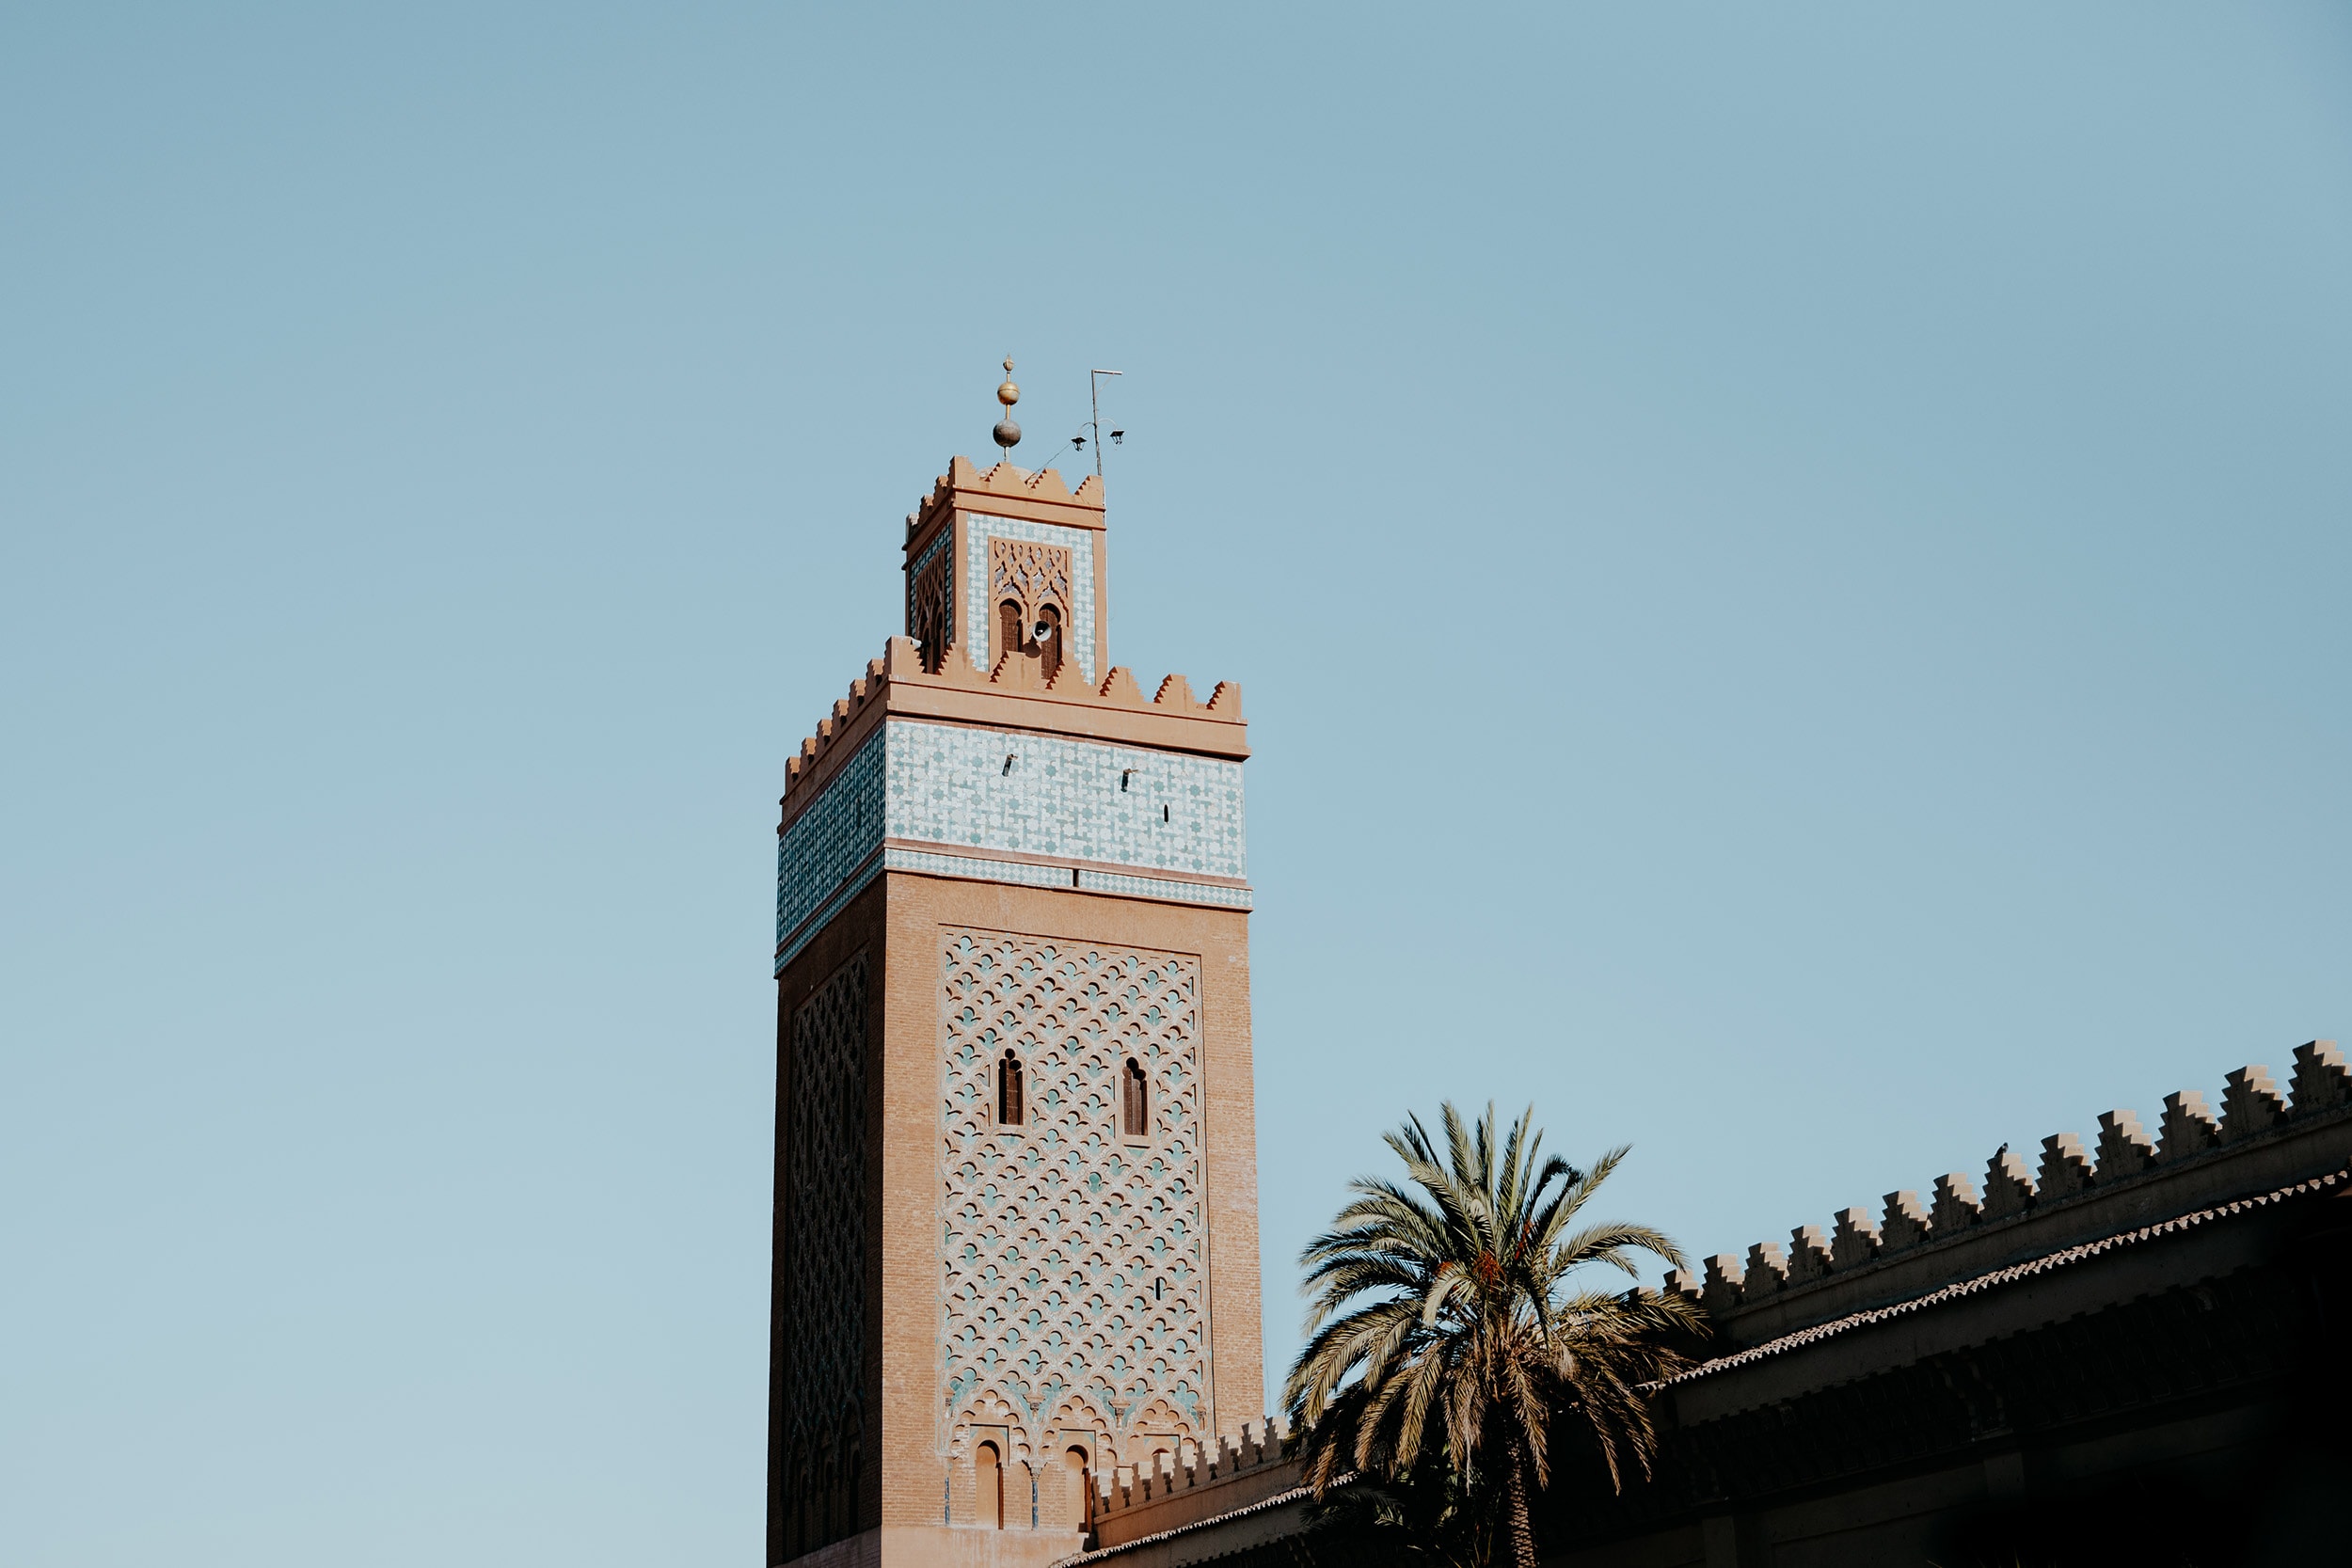
Stay safe in Morocco
When travelling this big wide world, I never leave home before I’ve sorted out my travel insurance, and while I felt completely safe during my time in Morocco, I recommend anyone travelling here to do the same.
Though I think it’s unlikely to experience any troubles when following the advice in this guide, something unfortunate can happen at any time, whether it’s an injury, a stolen camera, or an accident on the road (yes, we had one).
For travel insurance, I always use Heymondo, as they offer full COVID-19 coverage, as well as a handy app with 24-hour medical assistance. Make sure you check it out – readers of WTSW receive 5% off any insurance policy too.
Cheers!
I’ve been on this travel blogging journey since 2019.
If you appreciate what I do here, these are some ways you can support me.
A quick guide to Slap Kozjak, Slovenia
You will probably have seen numerous pictures of Slap Kozjak on Instagram by now, which clearly indicates that you should visit this amazing waterfall too.
Tucked away in a mysterious gorge in the Kobarid Forest, Slap Kozjak is a mesmerizing waterfall, if not the most scenic one within Slovenia, which to me, makes the hike up there an essential activity on any Slovenia itinerary (coming soon).
The main waterfall – which also goes by Kozjak Waterfall or Mali Kozjak – has gained tremendous popularity over the last couple of years, yet it still feels like a hidden gem that has been discovered by only few, thanks to its mystical ambience.
But it’s not just the waterfall at the end of the hike that is worthy of your time, no, the hike itself is absolutely stunning too and will lead you along the crystal-clear Soca River, over several picturesque stone bridges, and along heaps of little scenic creeks.
A true paradise for nature lovers and waterfall chasers alike.
In this guide, I’ve covered everything you need to know before starting the hike to Slap Kozjak, including the entrance fee, how to get there, the best time to visit, what to pack and more.
If you choose to use any of the links on this page, I may receive a small commission at no extra cost to you. By using these links, you’ll have a direct impact on WTSW and support my ability to continue to create free insightful travel content for you. If you find any of my tips useful, you can support me by buying me a virtual coffee here.
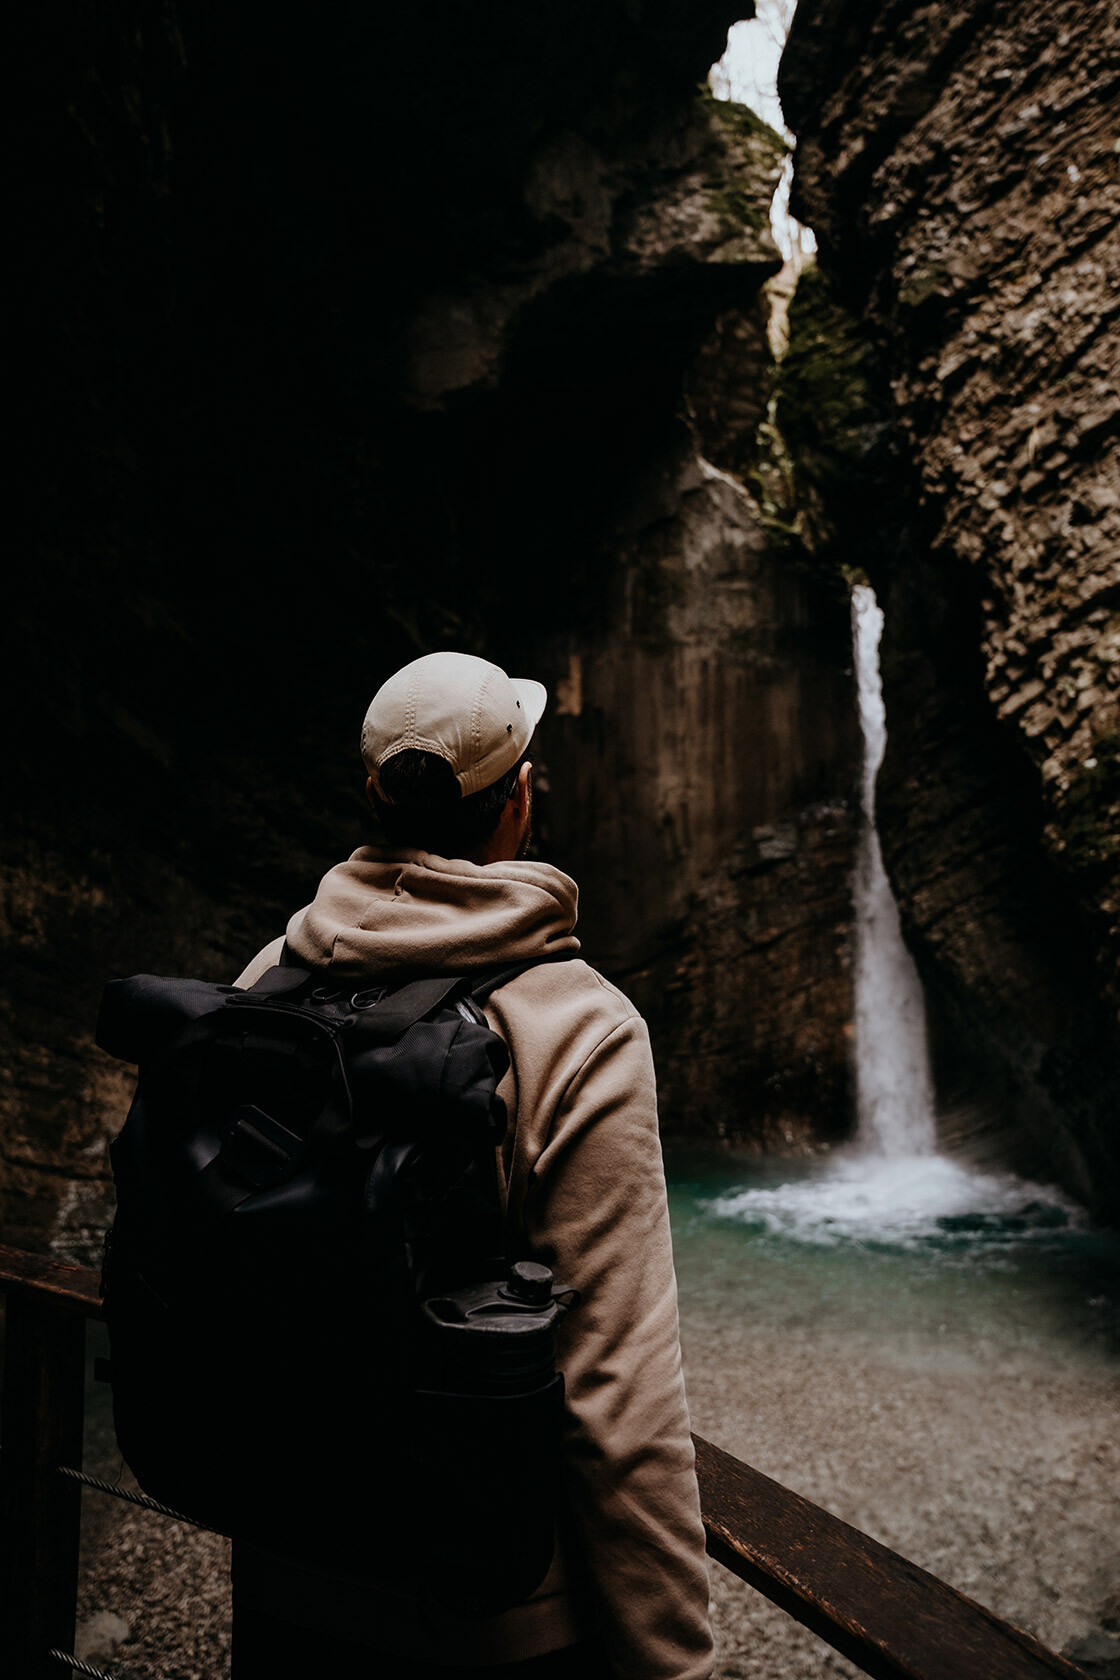
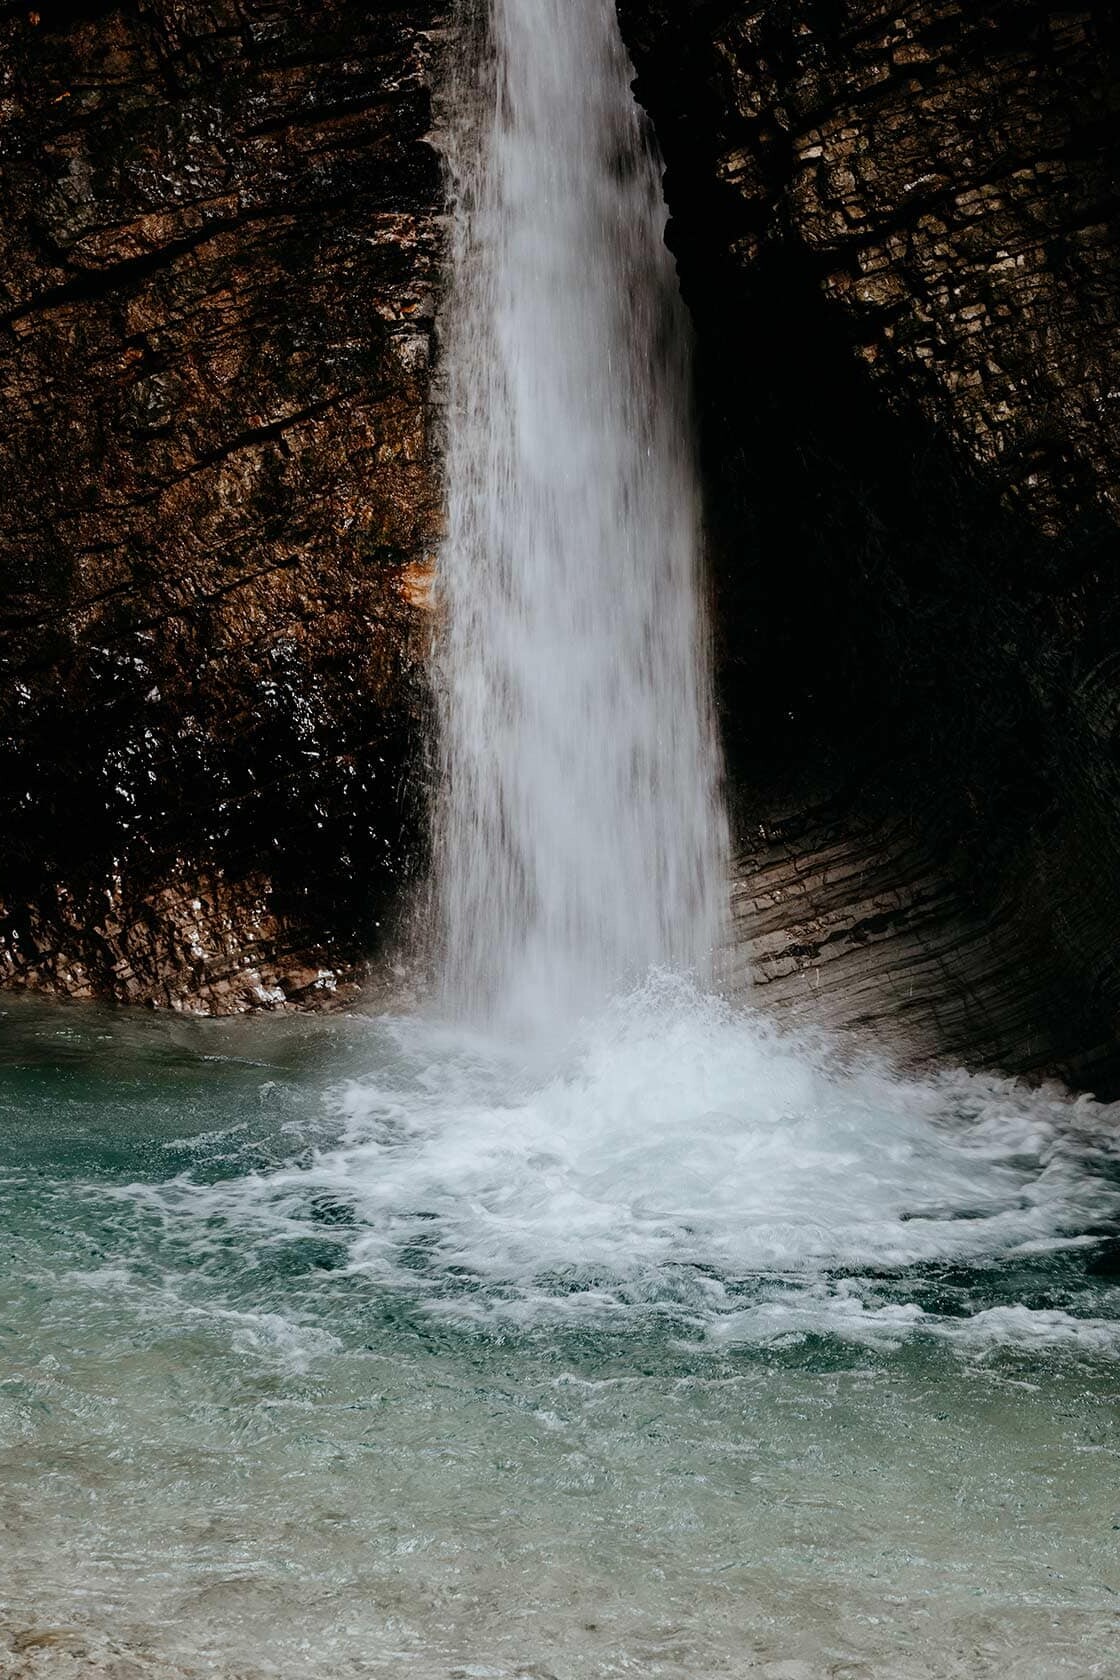
Where is Slap Kozjak
Slap Kozjak is a 15-metre-high waterfall that wouldn’t fall out of place in the midst of the lush jungles of Bali, yet it is situated only just outside of Kobarid, a lively town in the Goriska-Tolmin region of Slovenia.
Part of the famous Triglav National Park and only about a 30-minute drive away from Kobarid, the astonishing Kozjak Waterfall is a must-see for anyone travelling to Slovenia.
The hike itself starts from the parking lot of Kamp Koren, only just off the 203 main road between Kobarid and Bovec.
Slap Kozjak hike details
Hike difficulty | Easy
Hike duration | 1 to 2 hours out and back
Hike distance | 3 kilometres
Elevation gain | 142 metres
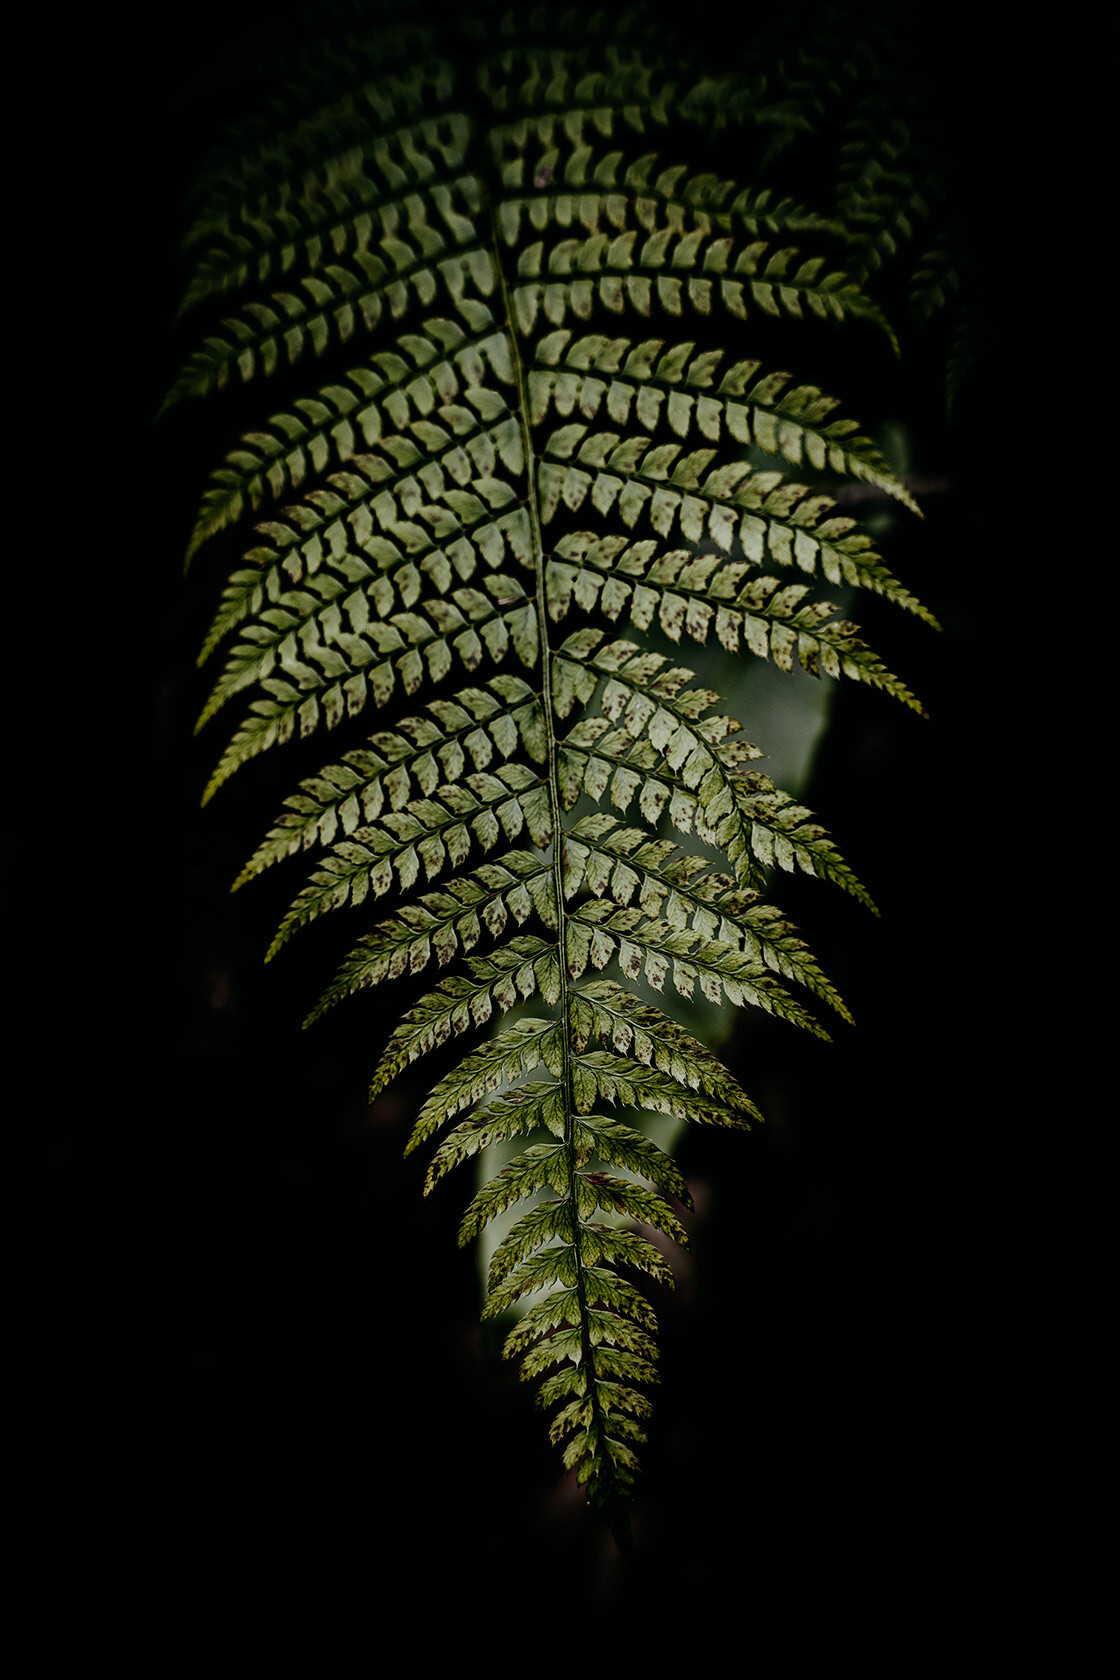
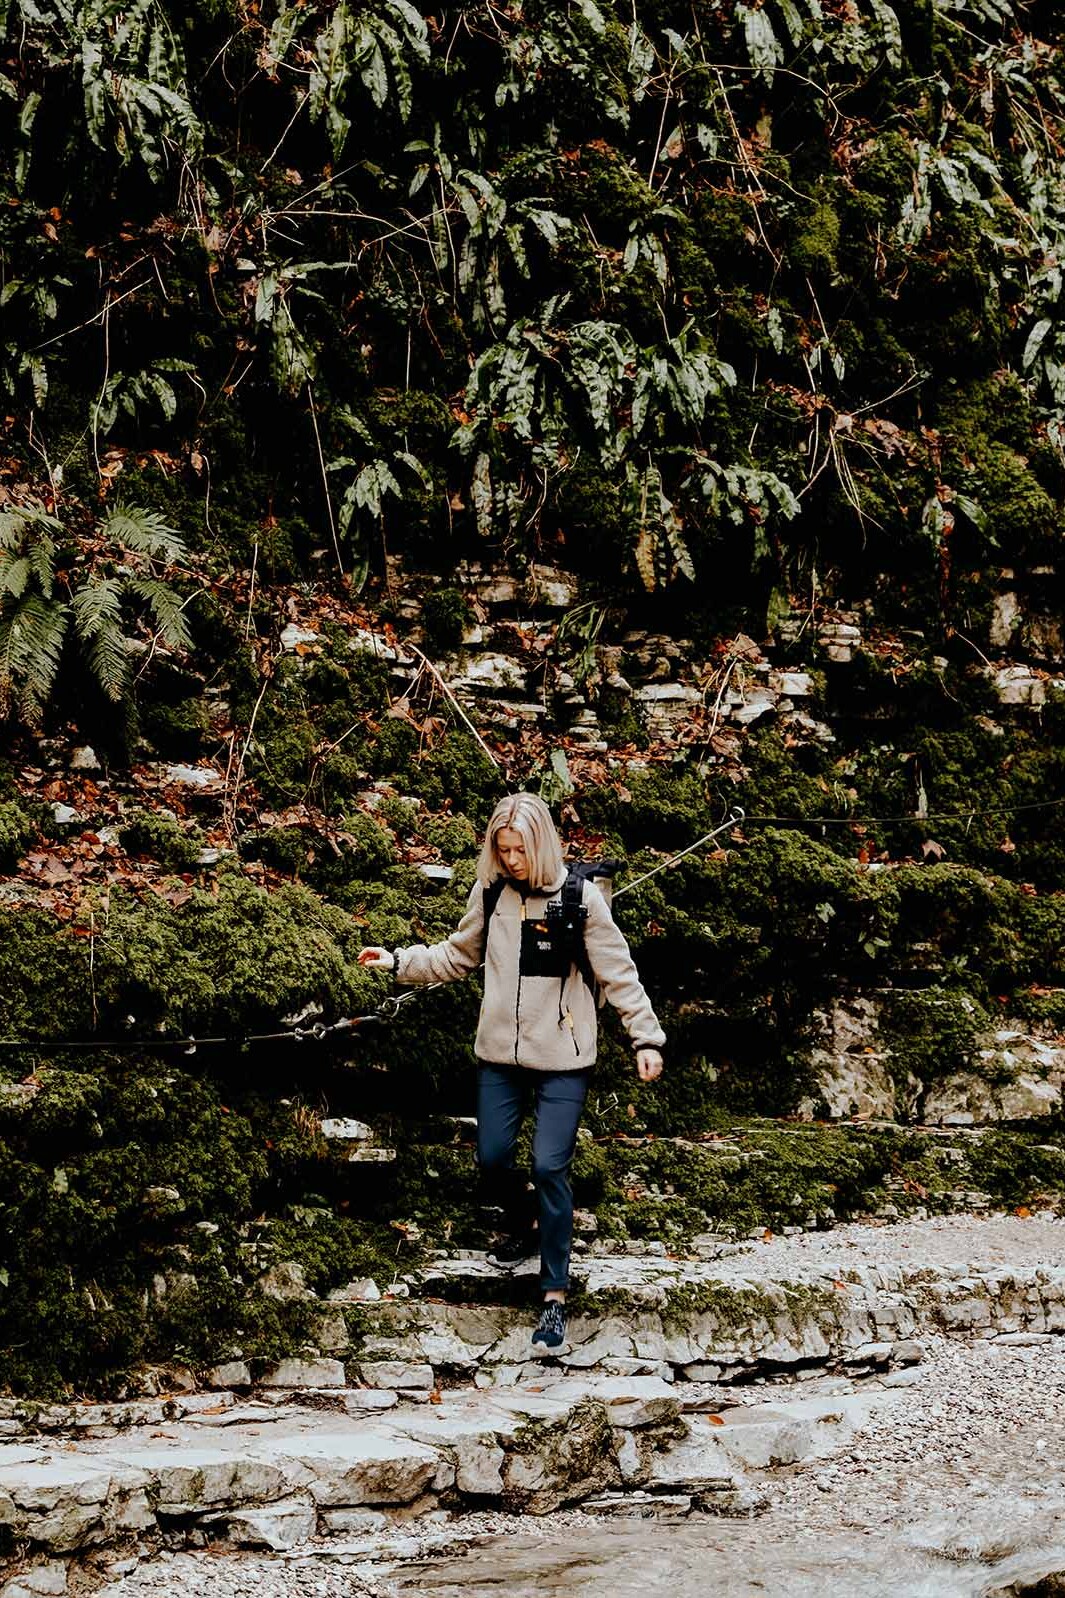
Slap Kozjak entrance fee 2024
As of 2024, the entrance fee to Slap Kozjak is set at €5,- per person.
However, it is worth noting that the price for children under the age of 15 is reduced to €3,- per person. Additionally, students, seniors, and groups of 10 or more can enter for only €4,- per person.
For relevant prices, additional information, and opening hours, make sure you see the official Soca Valley website here.
During my visit in early January, the official ticket kiosk of Slap Kozjak was closed, which meant that I had the fortune to have free entrance to the waterfall.
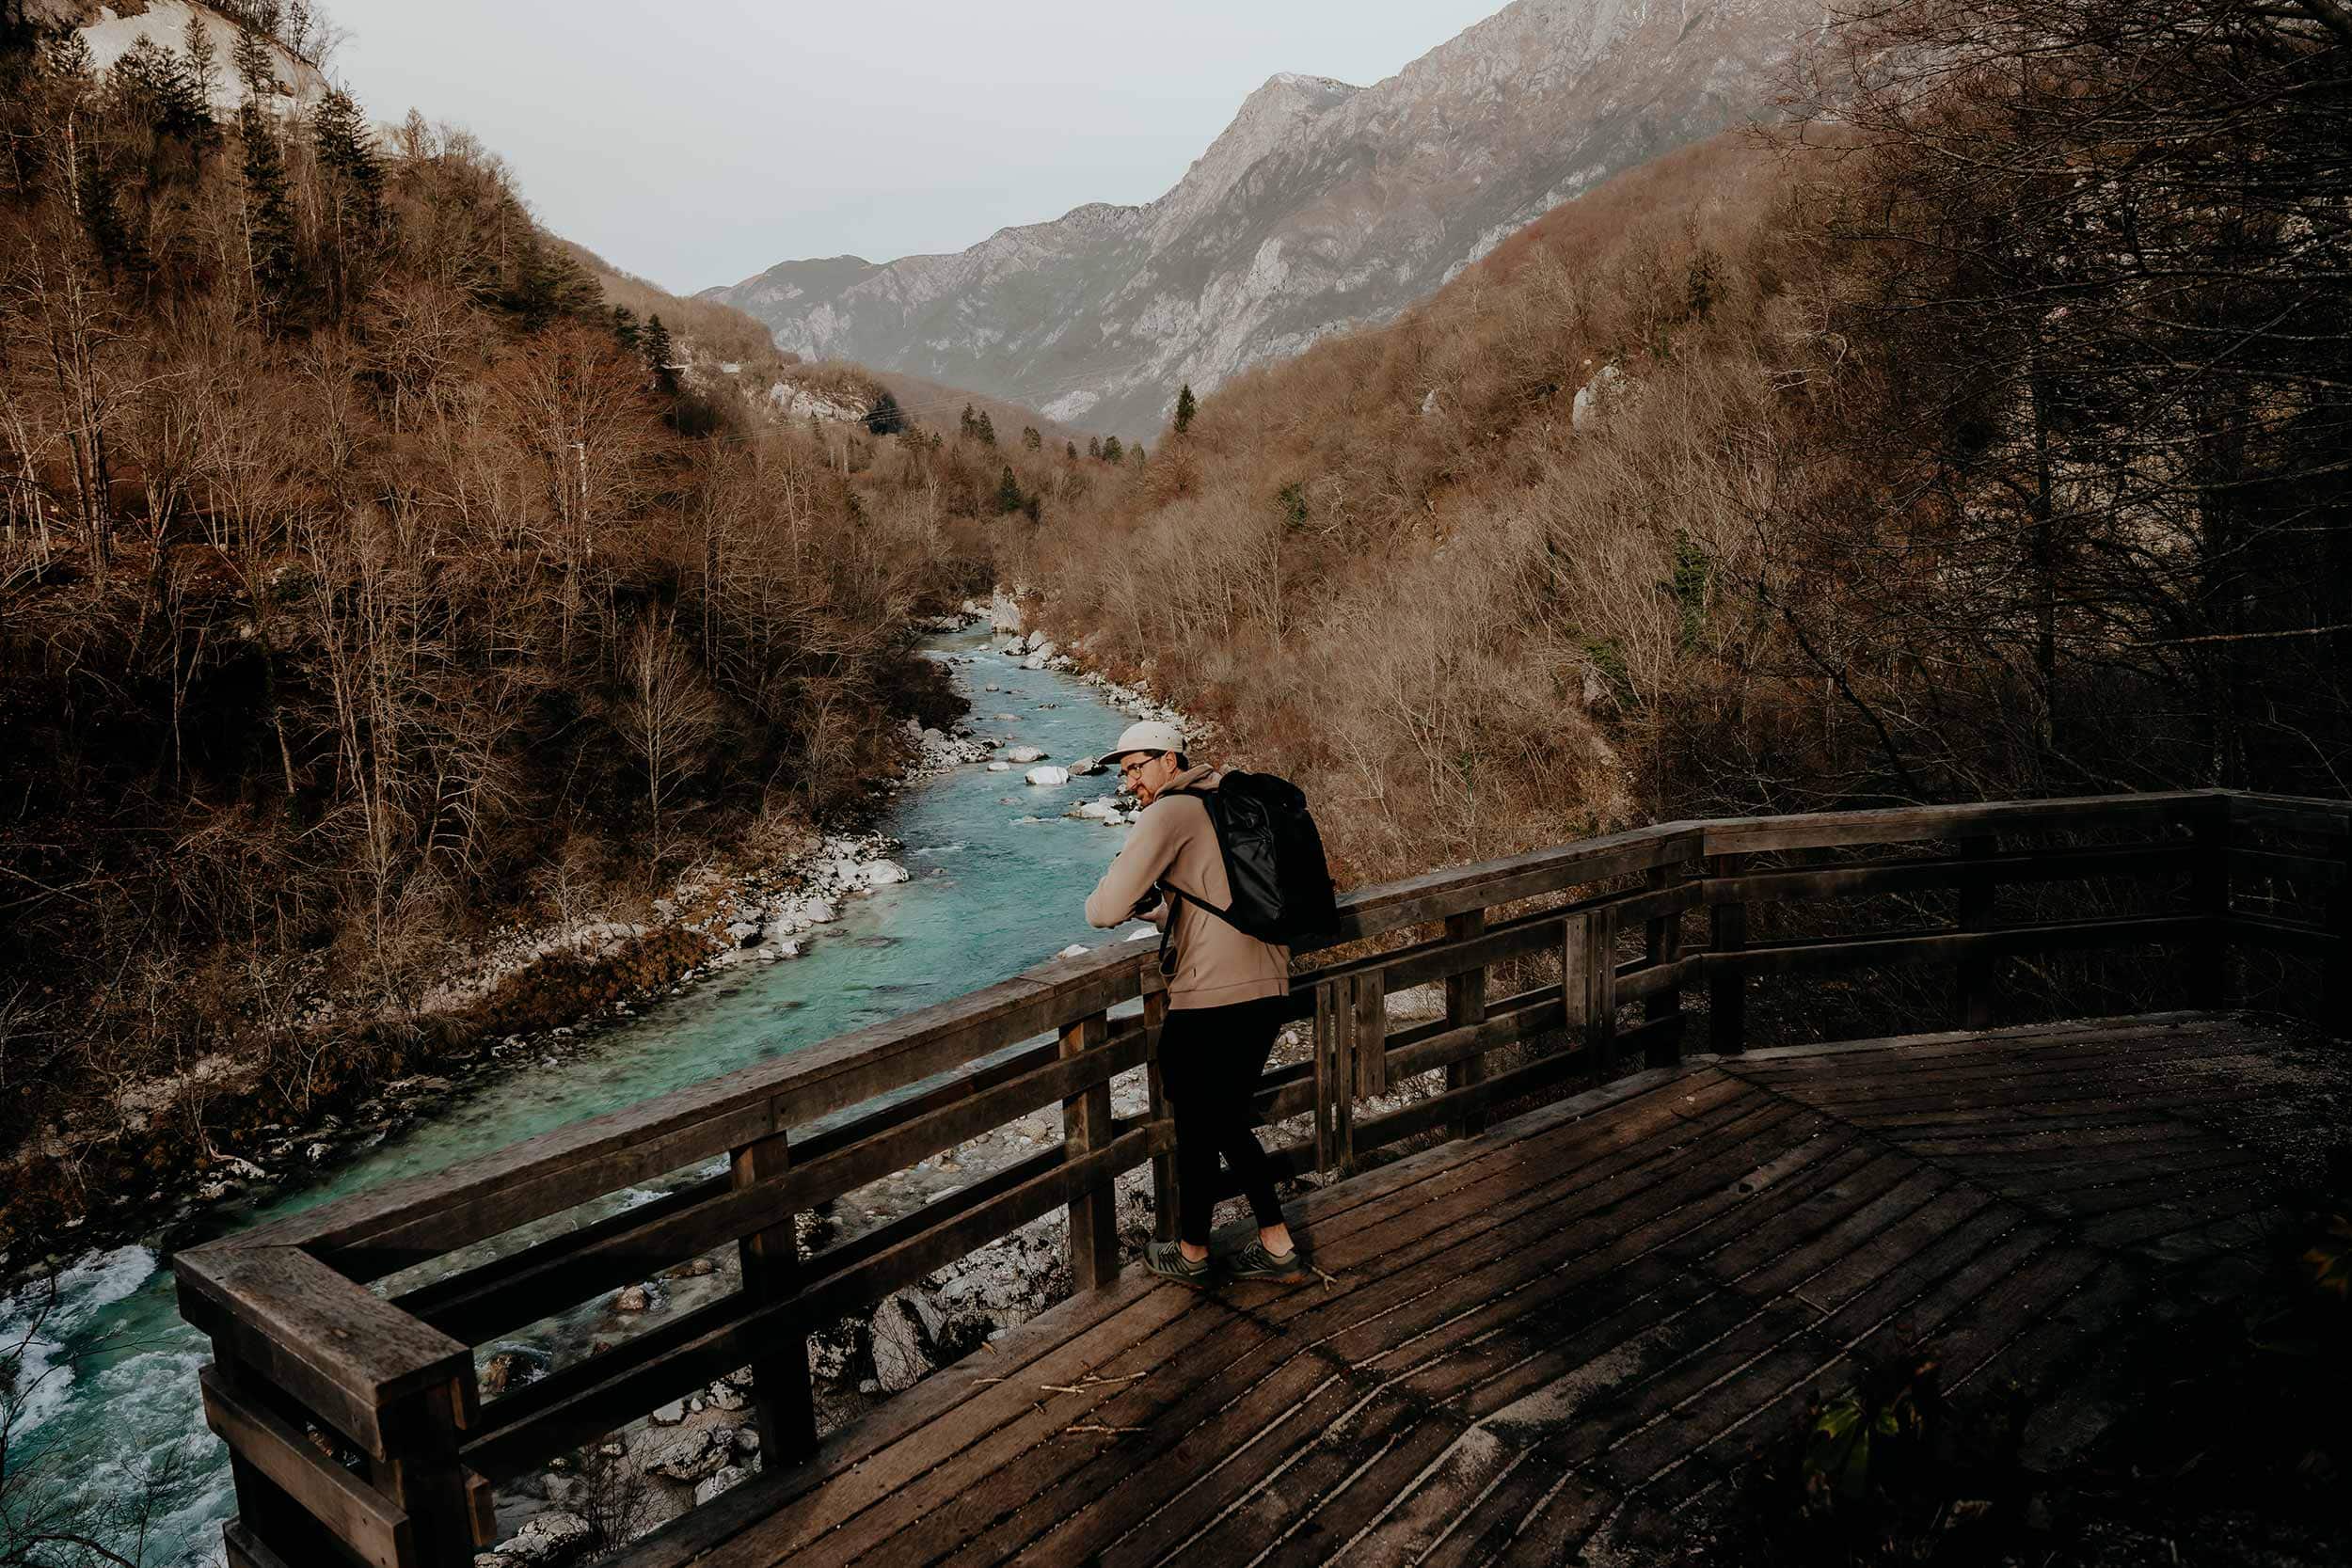
How to get to Slap Kozjak
Slap Kozjak is situated in the Goriska – Tolmin region, which is pretty remote in comparison to other parts of Slovenia, meaning you’ll find very limited public transportation options here.
For the above reason, your best option is to rent your own car for the duration of your trip in Slovenia – this will also give you the flexibility to explore more of the area on a road trip through the country.
When it comes to car rental, my absolute favourite option is Rentalcars.com, as they work with the leading car rental companies, and offer incredible service and additional insurance options – plus it’s pretty easy to find exciting deals.
Once you’ve rented a car, it’s actually quite easy to get to Slap Kozjak, with manageable driving distances from some of Slovenia’s absolute highlights.
Below I’ve listed a few common driving routes:
- Lake Bled to Slap Kozjak: 2 hours
- Bohinj to Slap Kozjak: 1,5 hours
- Ljubljana to Slap Kozak: 2 hours
- Bovec to Slap Kozjak: 30 minutes
If you’re curious about how to include the Kozjak waterfall in your own itinerary, make sure you read my 10-day Slovenia itinerary (coming soon) too.
Parking at Slap Kozjak
When arriving at the starting point of the hike to Slap Kozjak, you’ll soon notice Parking Kozjak, which is located on the grounds of Kamp Koren.
The cost of parking is €1,50 per hour or €10,- for the entire day, and payments can be made with both cash and EasyPark.
The parking itself has plenty of space and is well-kept – plus there’s a toilet on the terrain too.
Although the parking gives the impression that it is free during the offseason, I’ve read that the local police drives around the area to hand out parking tickets multiple times now, which will set you back about €70,-

The hike to Slap Kozjak
Start of the hike
First things first, the starting point of the hike to Slap Kozjak is rather easy to find, as it’s located right next to the parking lot of Kamp Koren.
Easy walk along the Soca River
The first part of the trail starts off completely flat, yet it takes only a few moments before you begin to wind along the emerald-blue waters of the Soca River – which in itself, is already quite the highlight.
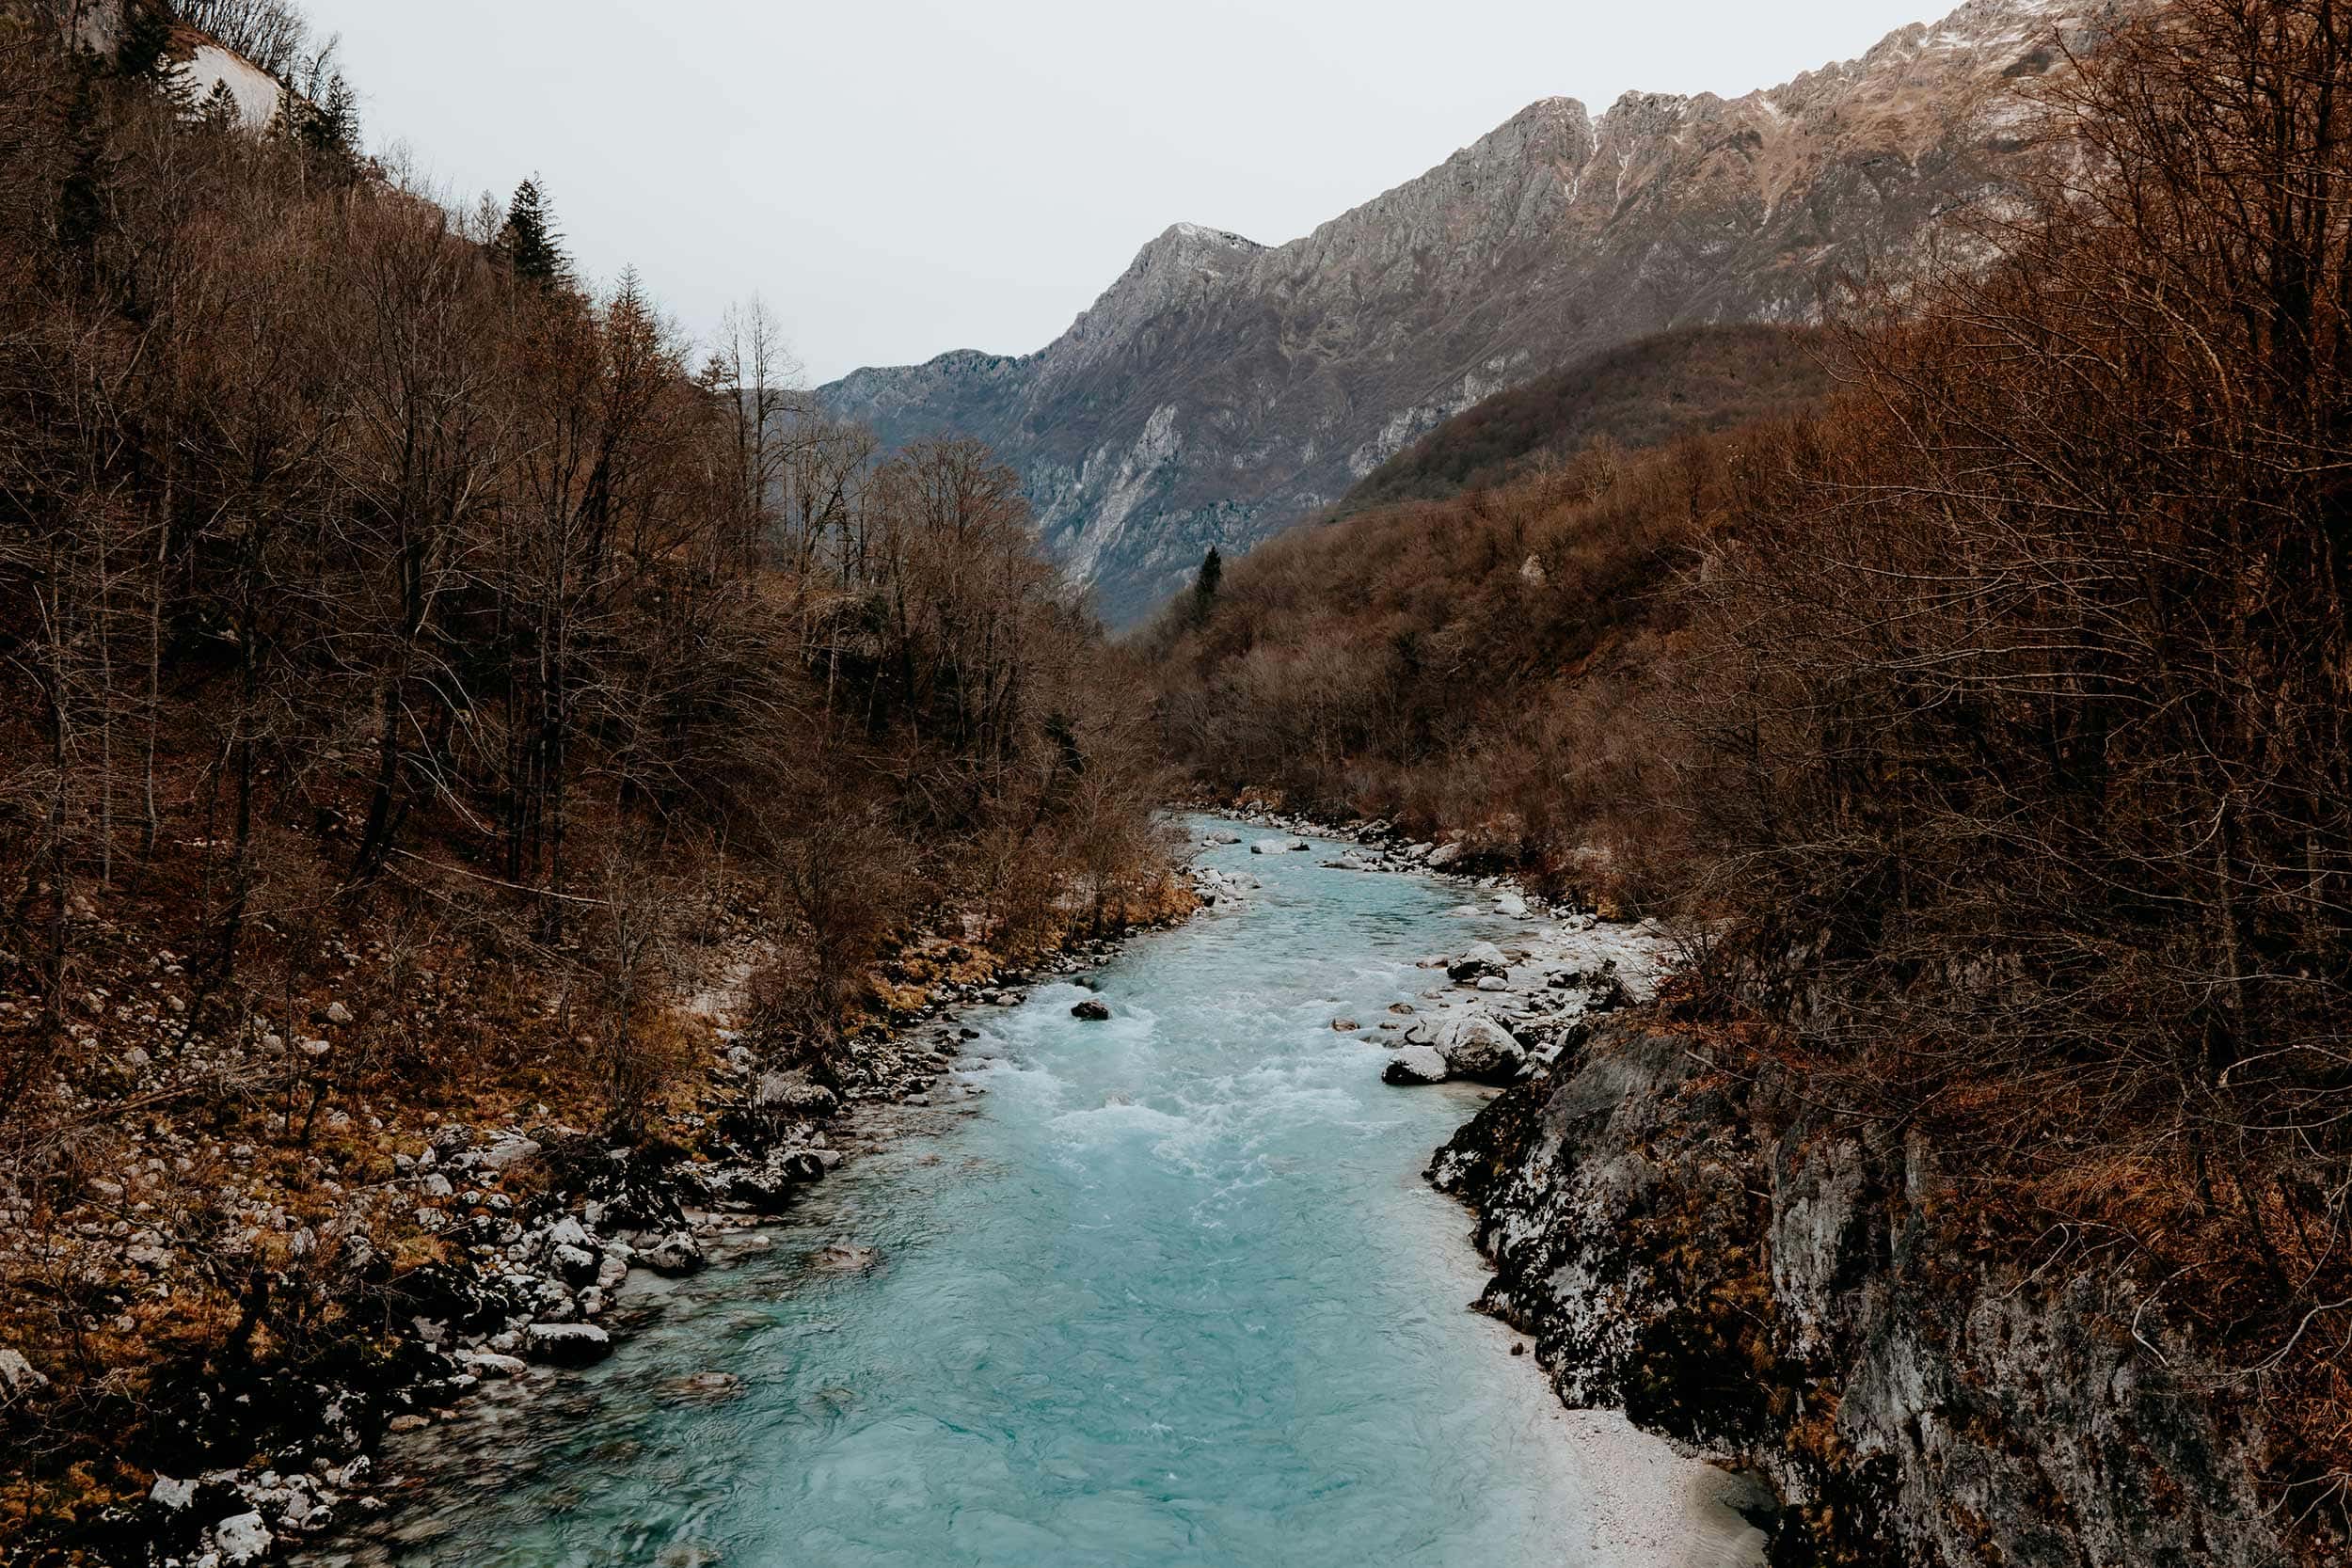
The suspension bridge
After roughly 15 minutes, you’ll stumble upon the first real highlight; an extensive suspension bridge on the left-hand side that provides some epic views of the surrounding Triglav National Park as well as the Soca River that flows underneath.
On top of that, you also have Reka Soča Razgledna točka, a small observation point offering an even better view of the impressive Soca Valley.
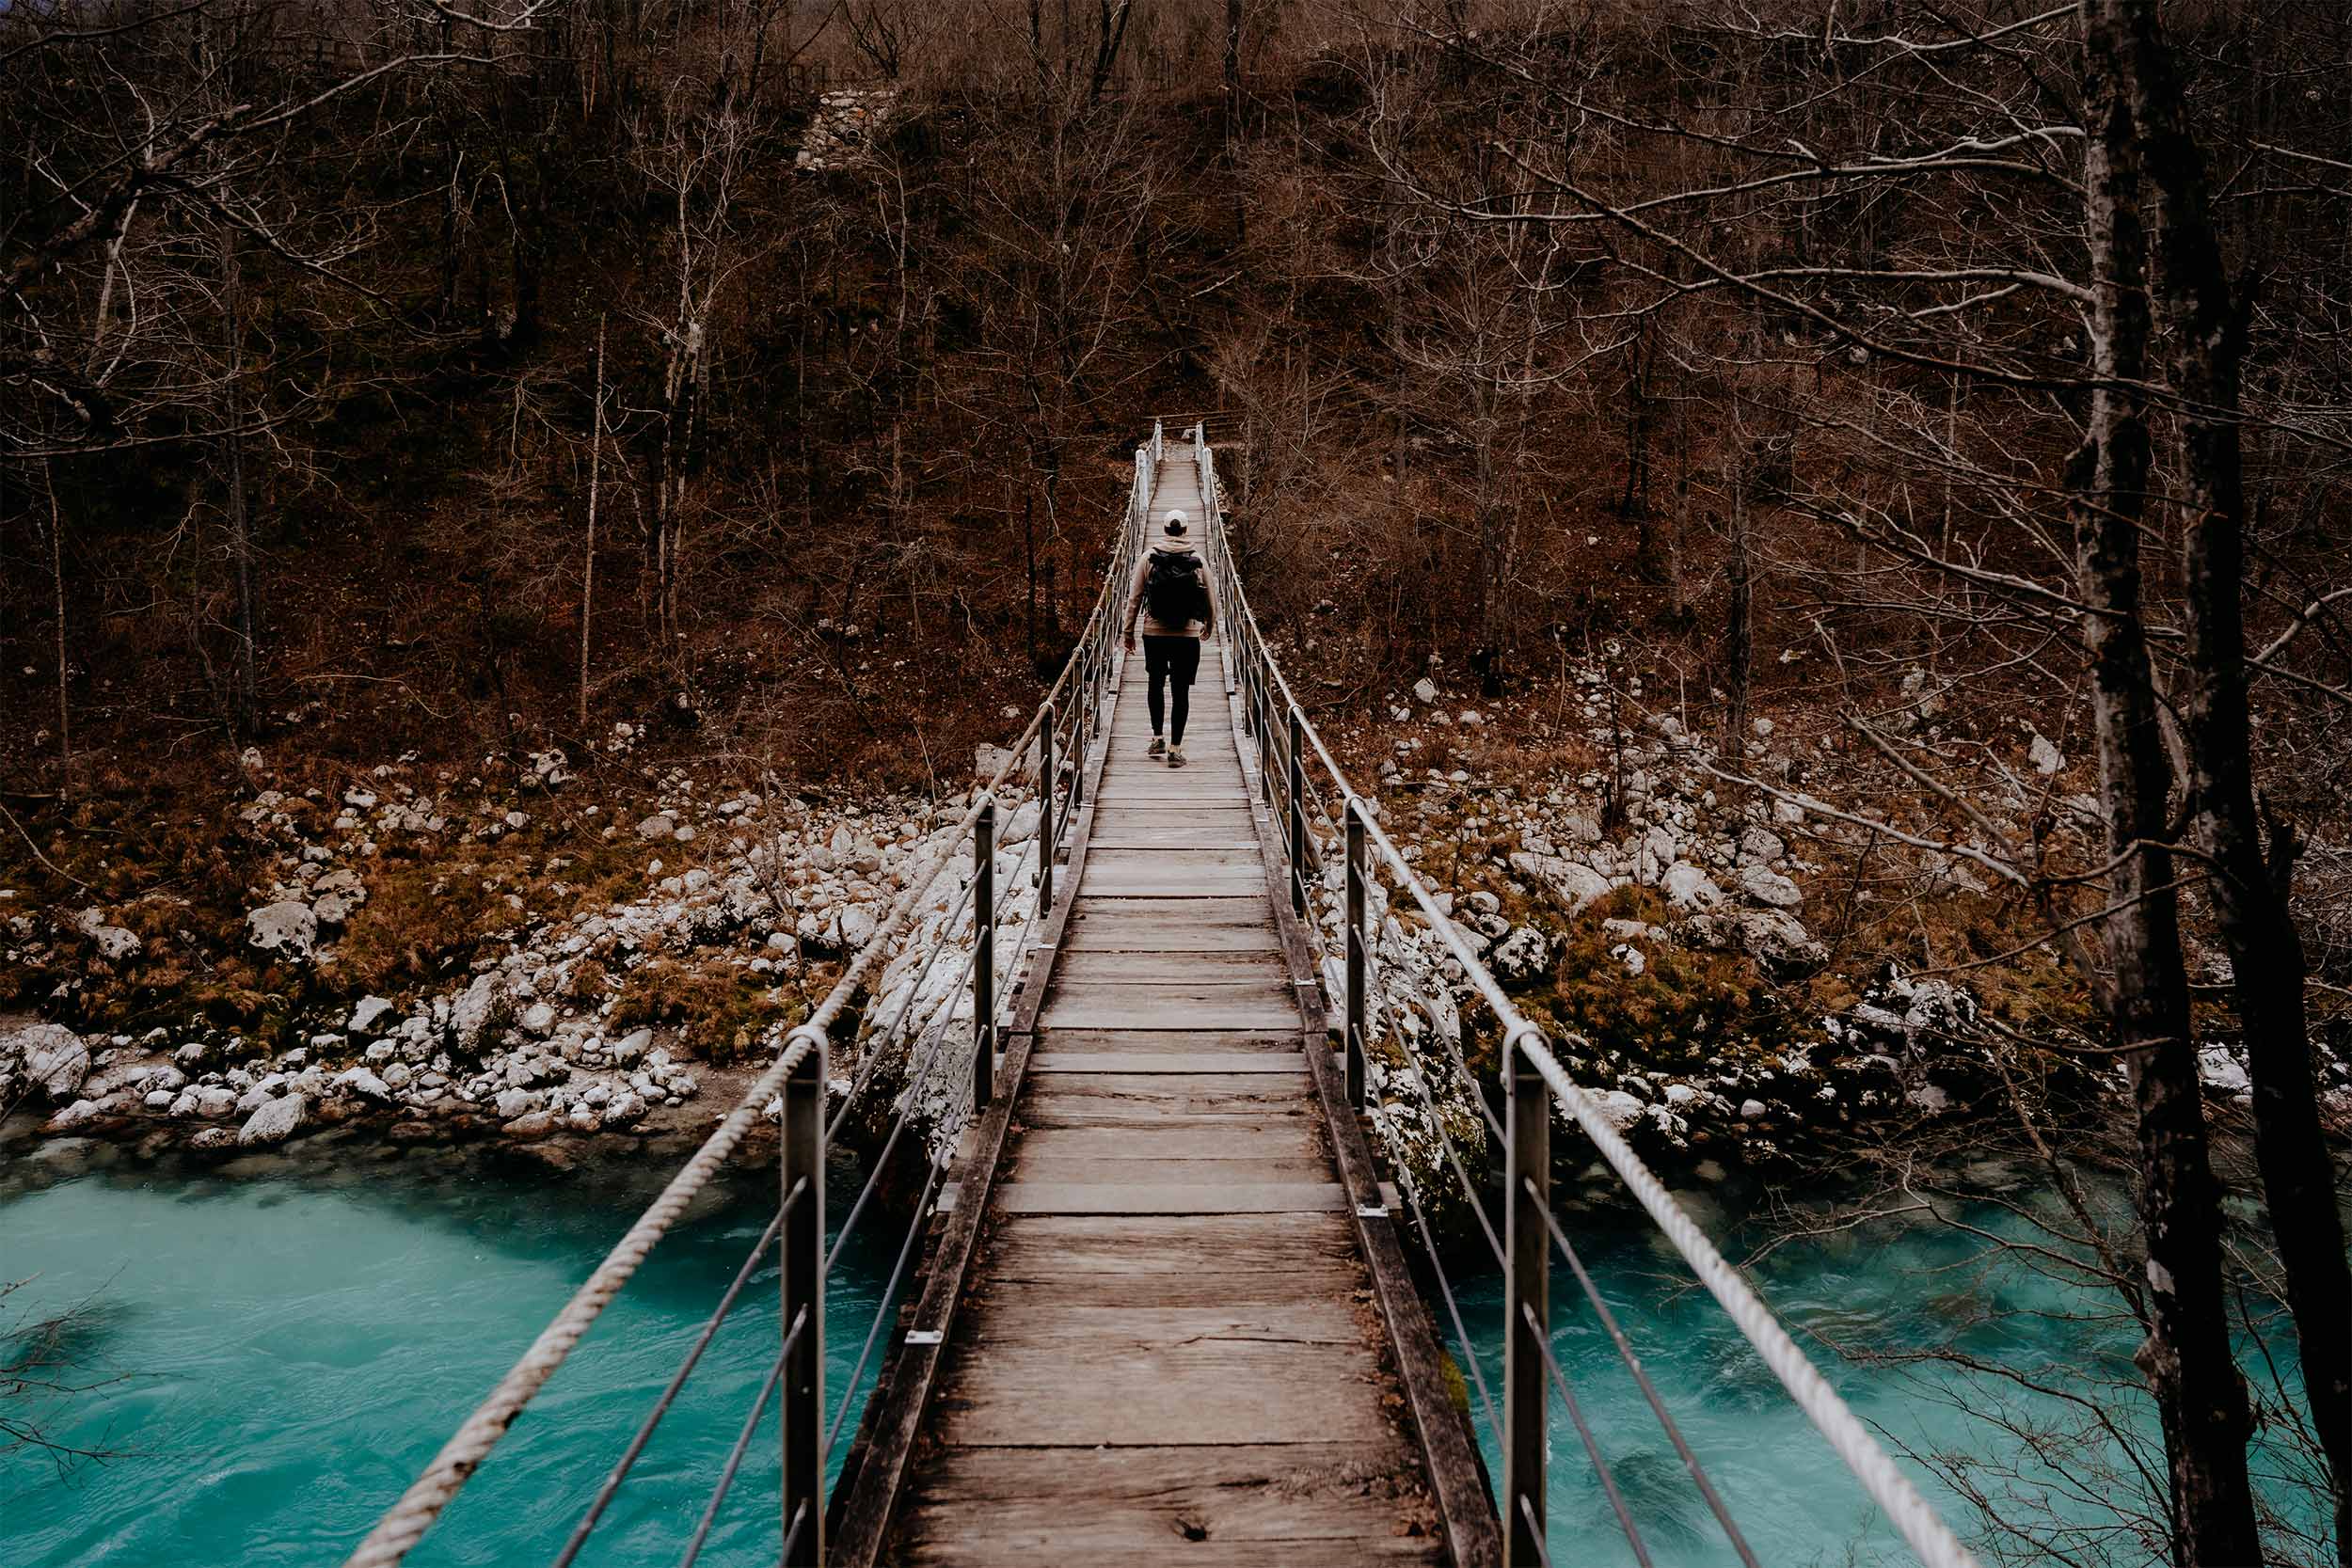
Hike through the forest
After taking in the incredible views, make sure you turn right and continue to follow the trail, which will now slowly lead you into the lush and somewhat mystical Kobarid Forest.
Though it’s still relatively easy, you will now gradually start to gain some elevation and will soon pass the official ticket office of Slap Kozjak, where you can buy your ticket for €5,- per person.
However, since I was there in the offseason, the ticket office was closed, meaning I had free entrance to the waterfall.
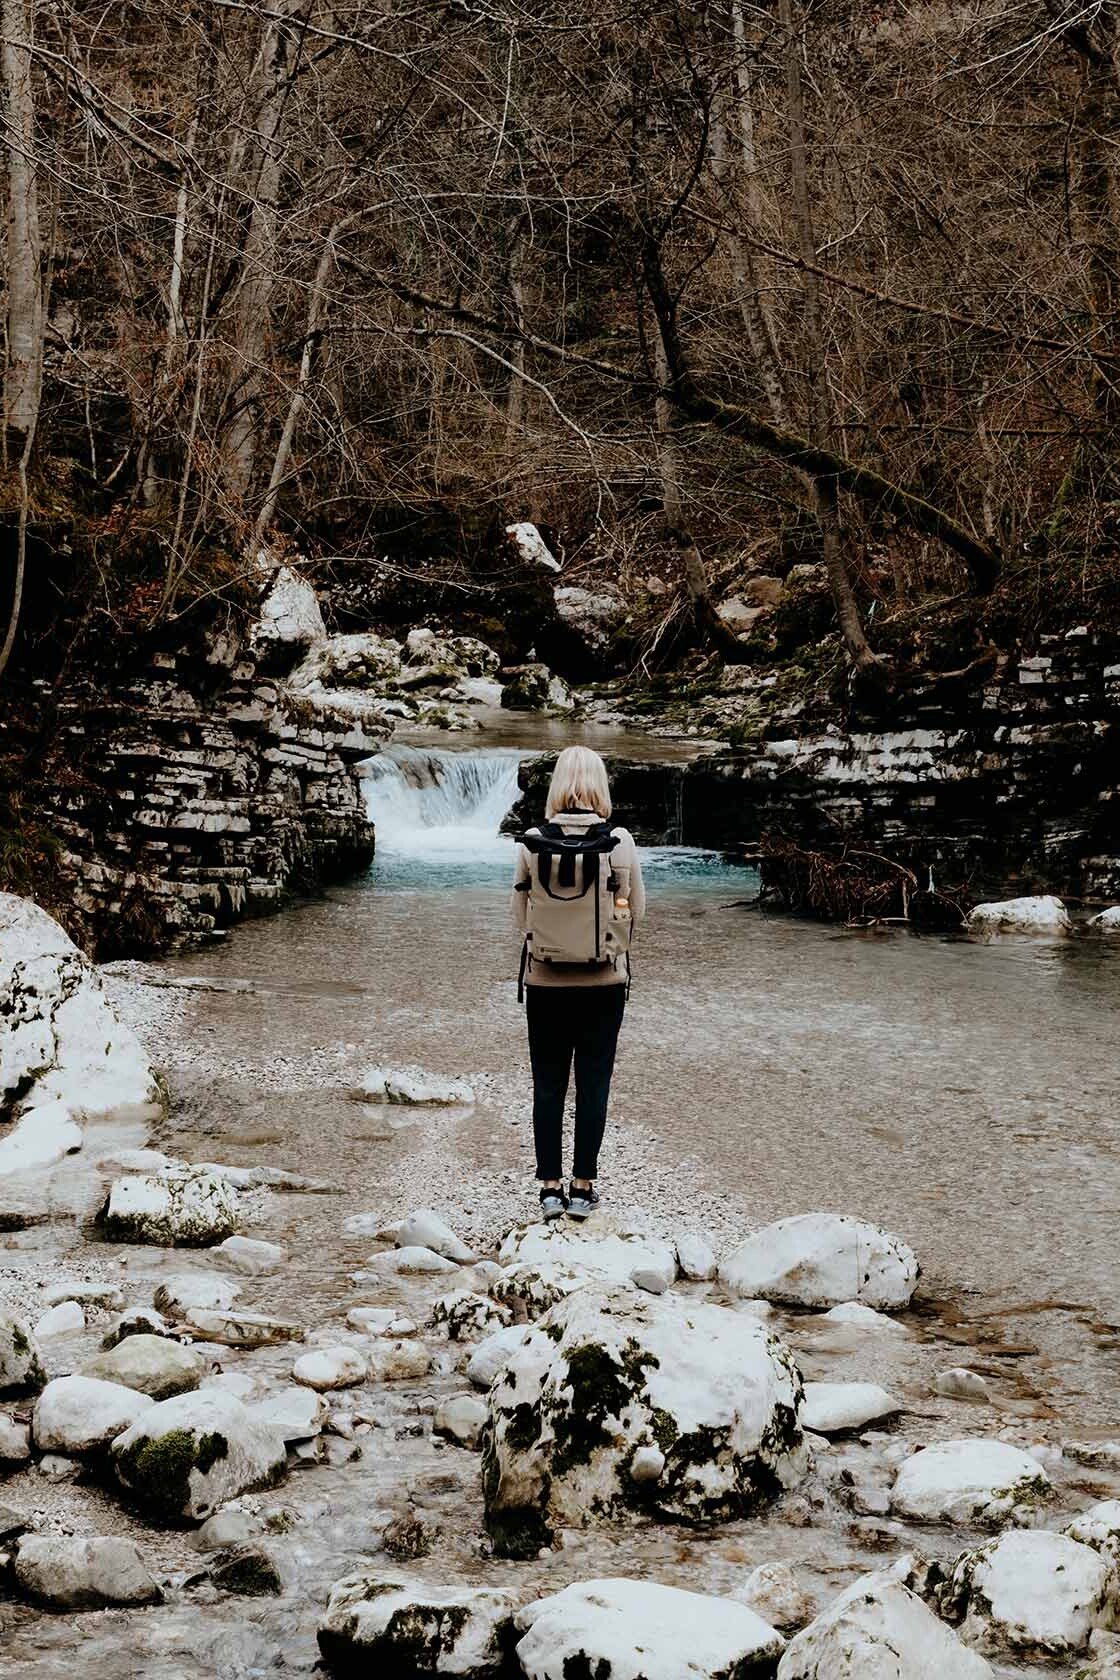
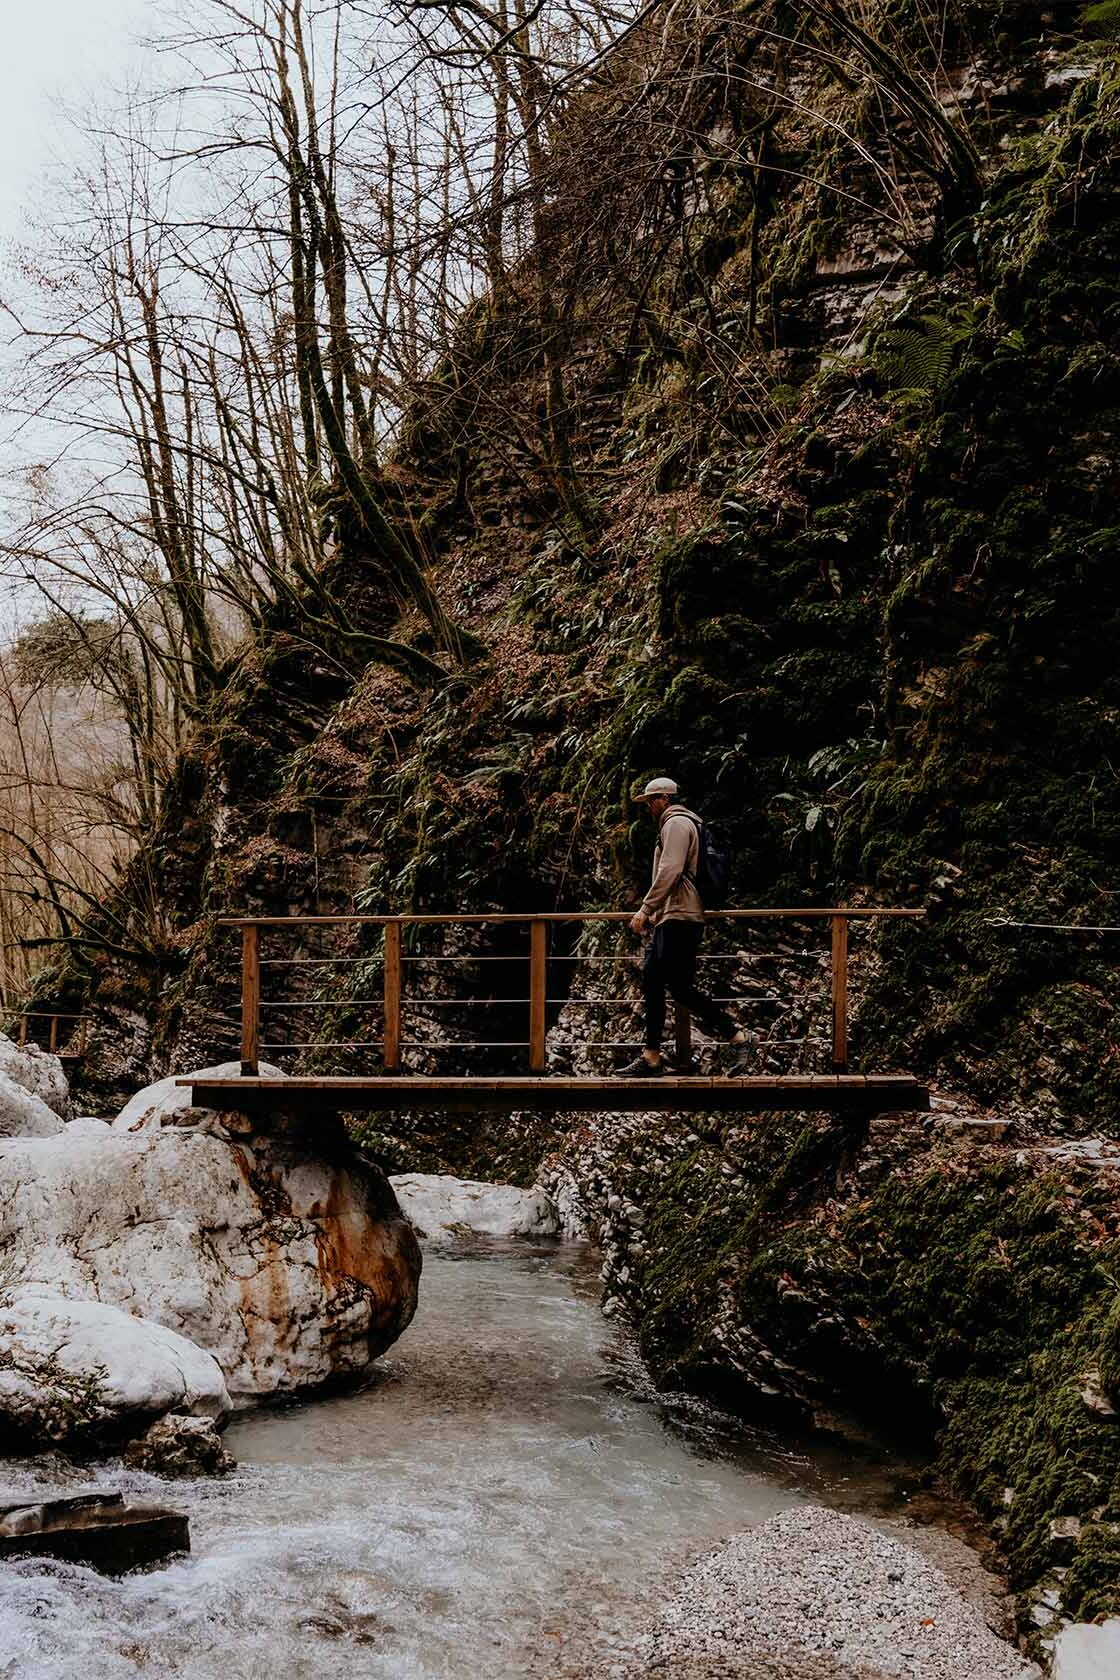
Little Kozjak
From here, you’ll venture deeper into the Kobarid forest, and after a short while, you will stumble upon Little Koziak, an impressive 8-metre-high waterfall that flows underneath the stone bridge that you’ll have to cross to reach the main waterfall.
Though it’s named Little Koziak, it is actually quite an impressive waterfall, which could be observed from various interesting angles, so make sure you take some time to admire it before moving on to the main attraction.
Ariving at Slap Kozjak
After taking in Little Koziak, it’s time to move on to Slap Kozjak by crossing several stony bridges and a wooden walkway attached to the steep moss-covered rock walls of the gorge that leads to the waterfall and its natural pool.
Only a few moments later, you’ll arrive at the foot of the stunningly beautiful Slap Kozjak waterfall, which is slightly hidden between towering cave walls, creating a mystical ambience which makes it feel as if lifted straight out of a fairytale world somewhere far, far away.
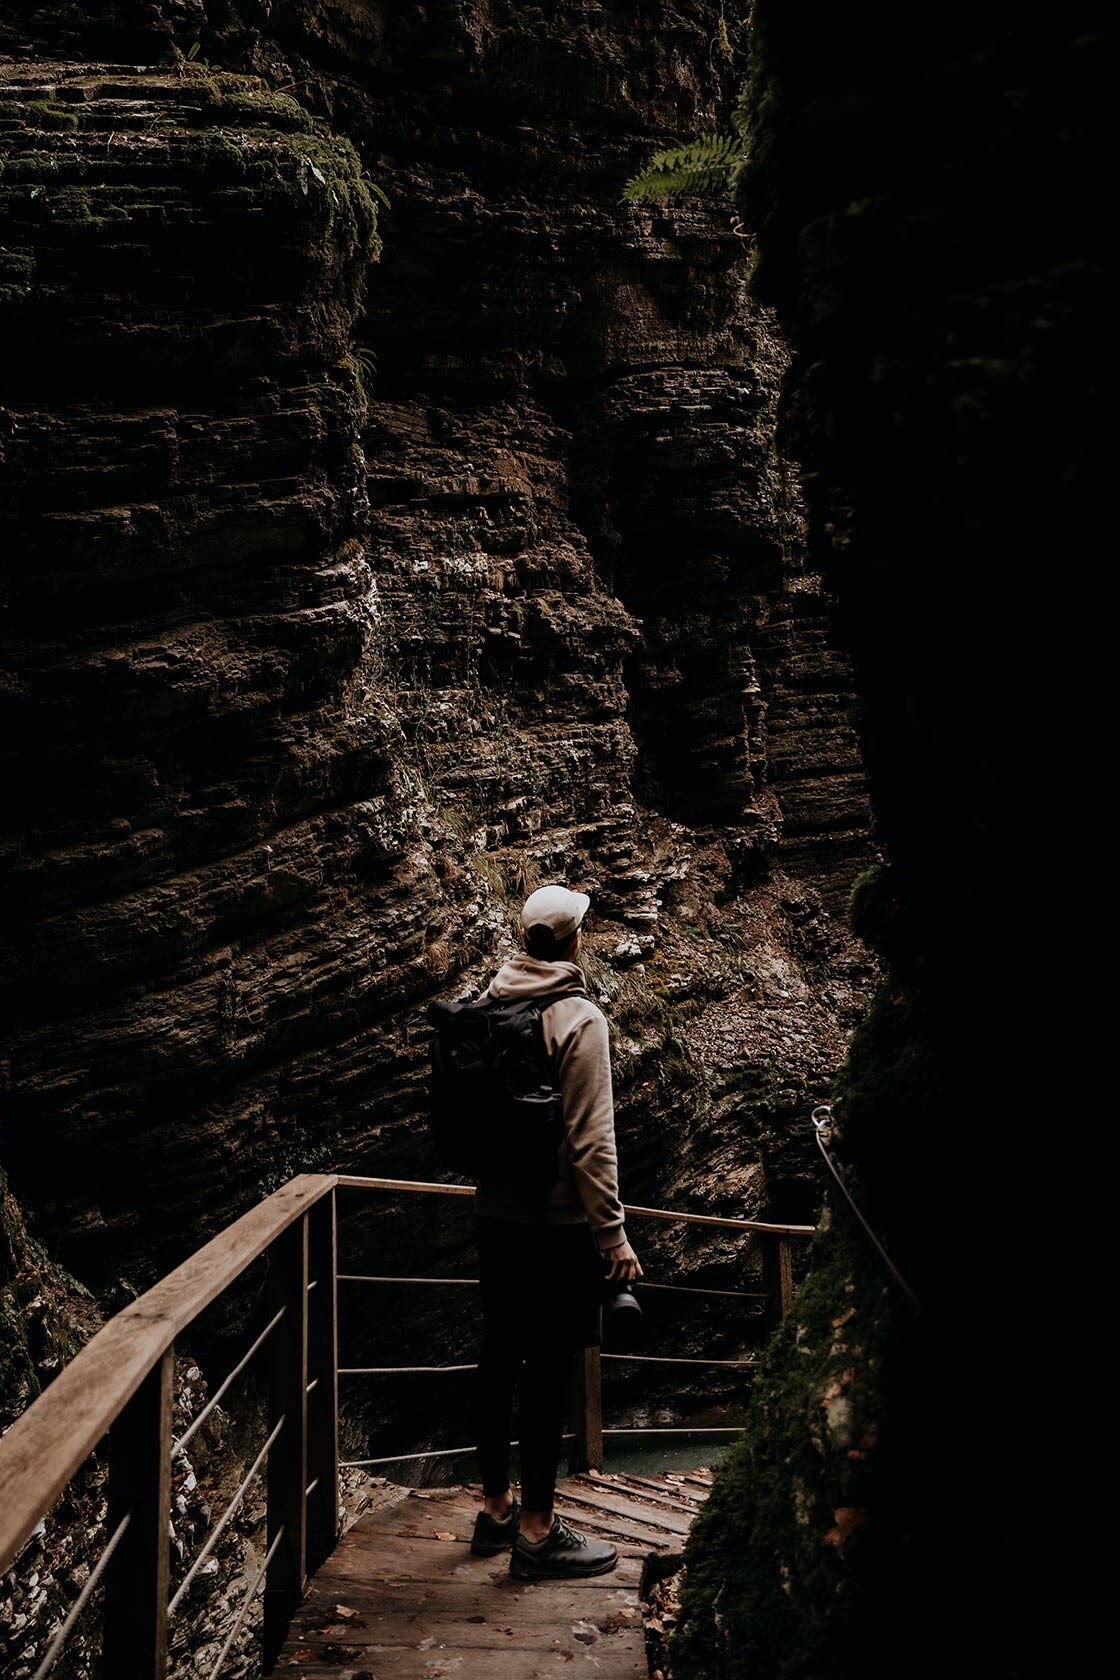
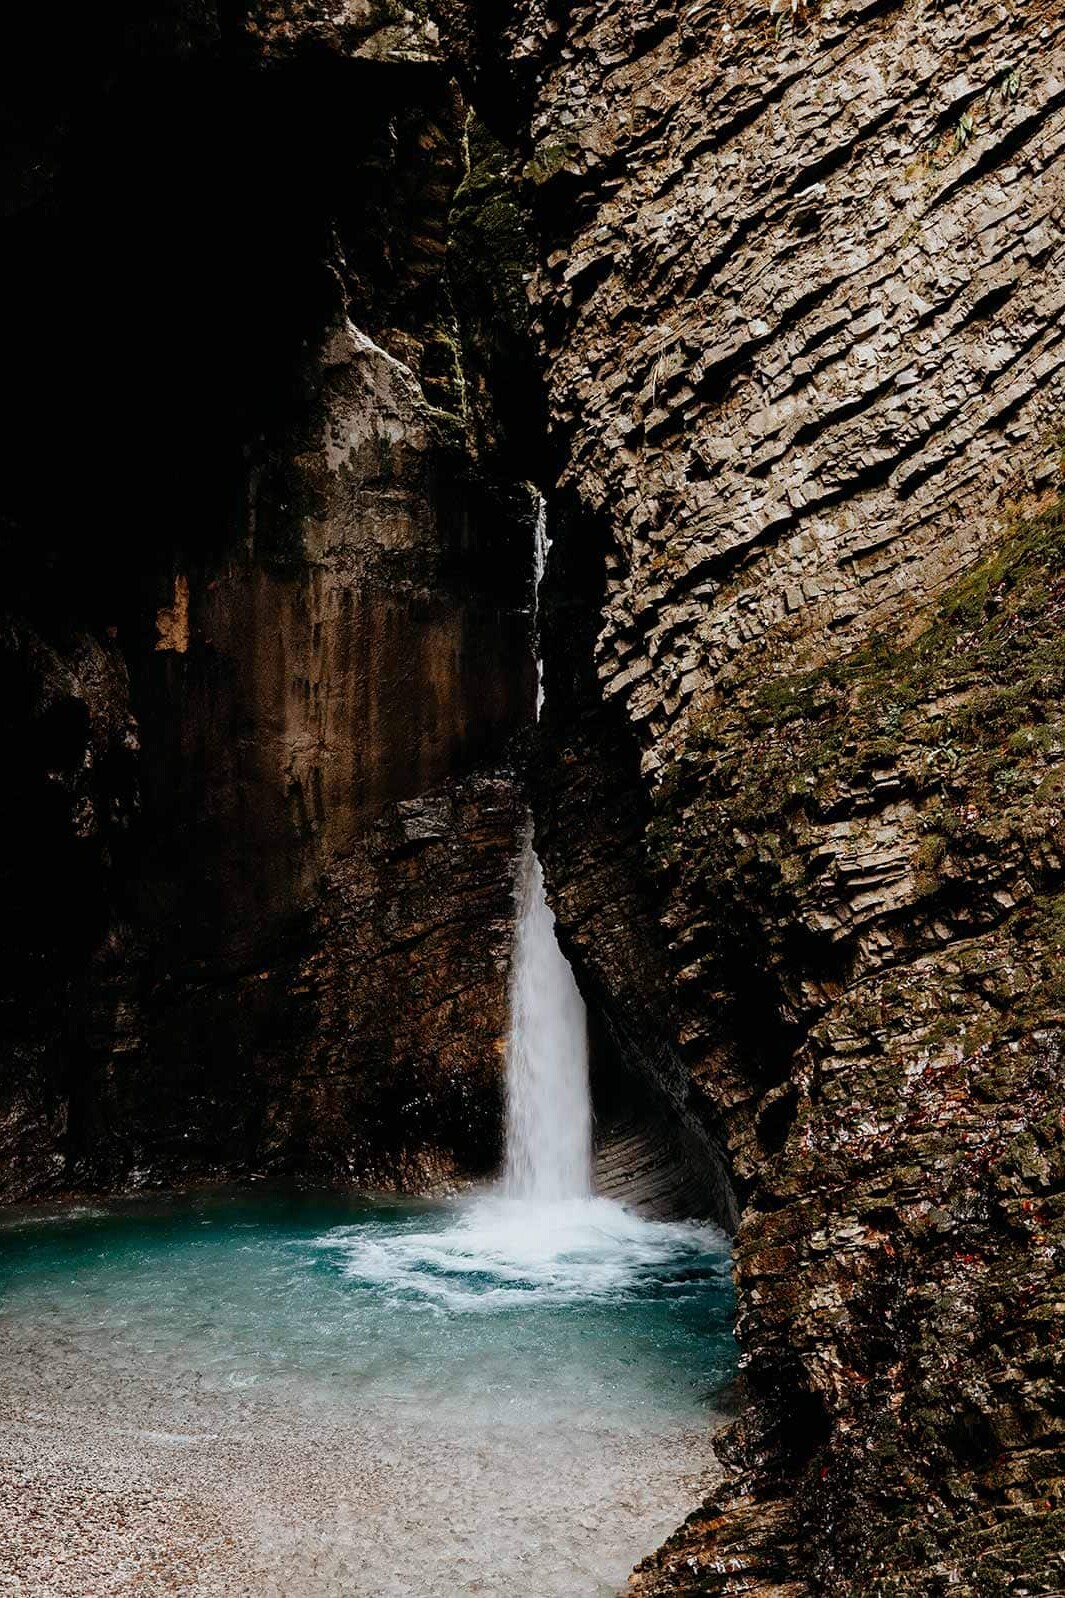
Wrapping up the hike
Once you’re done taking in Slap Kozjak, and of course, snapping lots of photos (trust me, you will take loads as it’s truly breathtaking here), it’s time to retrace your steps back down the trail.
The trail back is exactly the same, and you shouldn’t experience any problems getting back to the parking, besides a few additional stops, to take in the amazing scenery one last time.
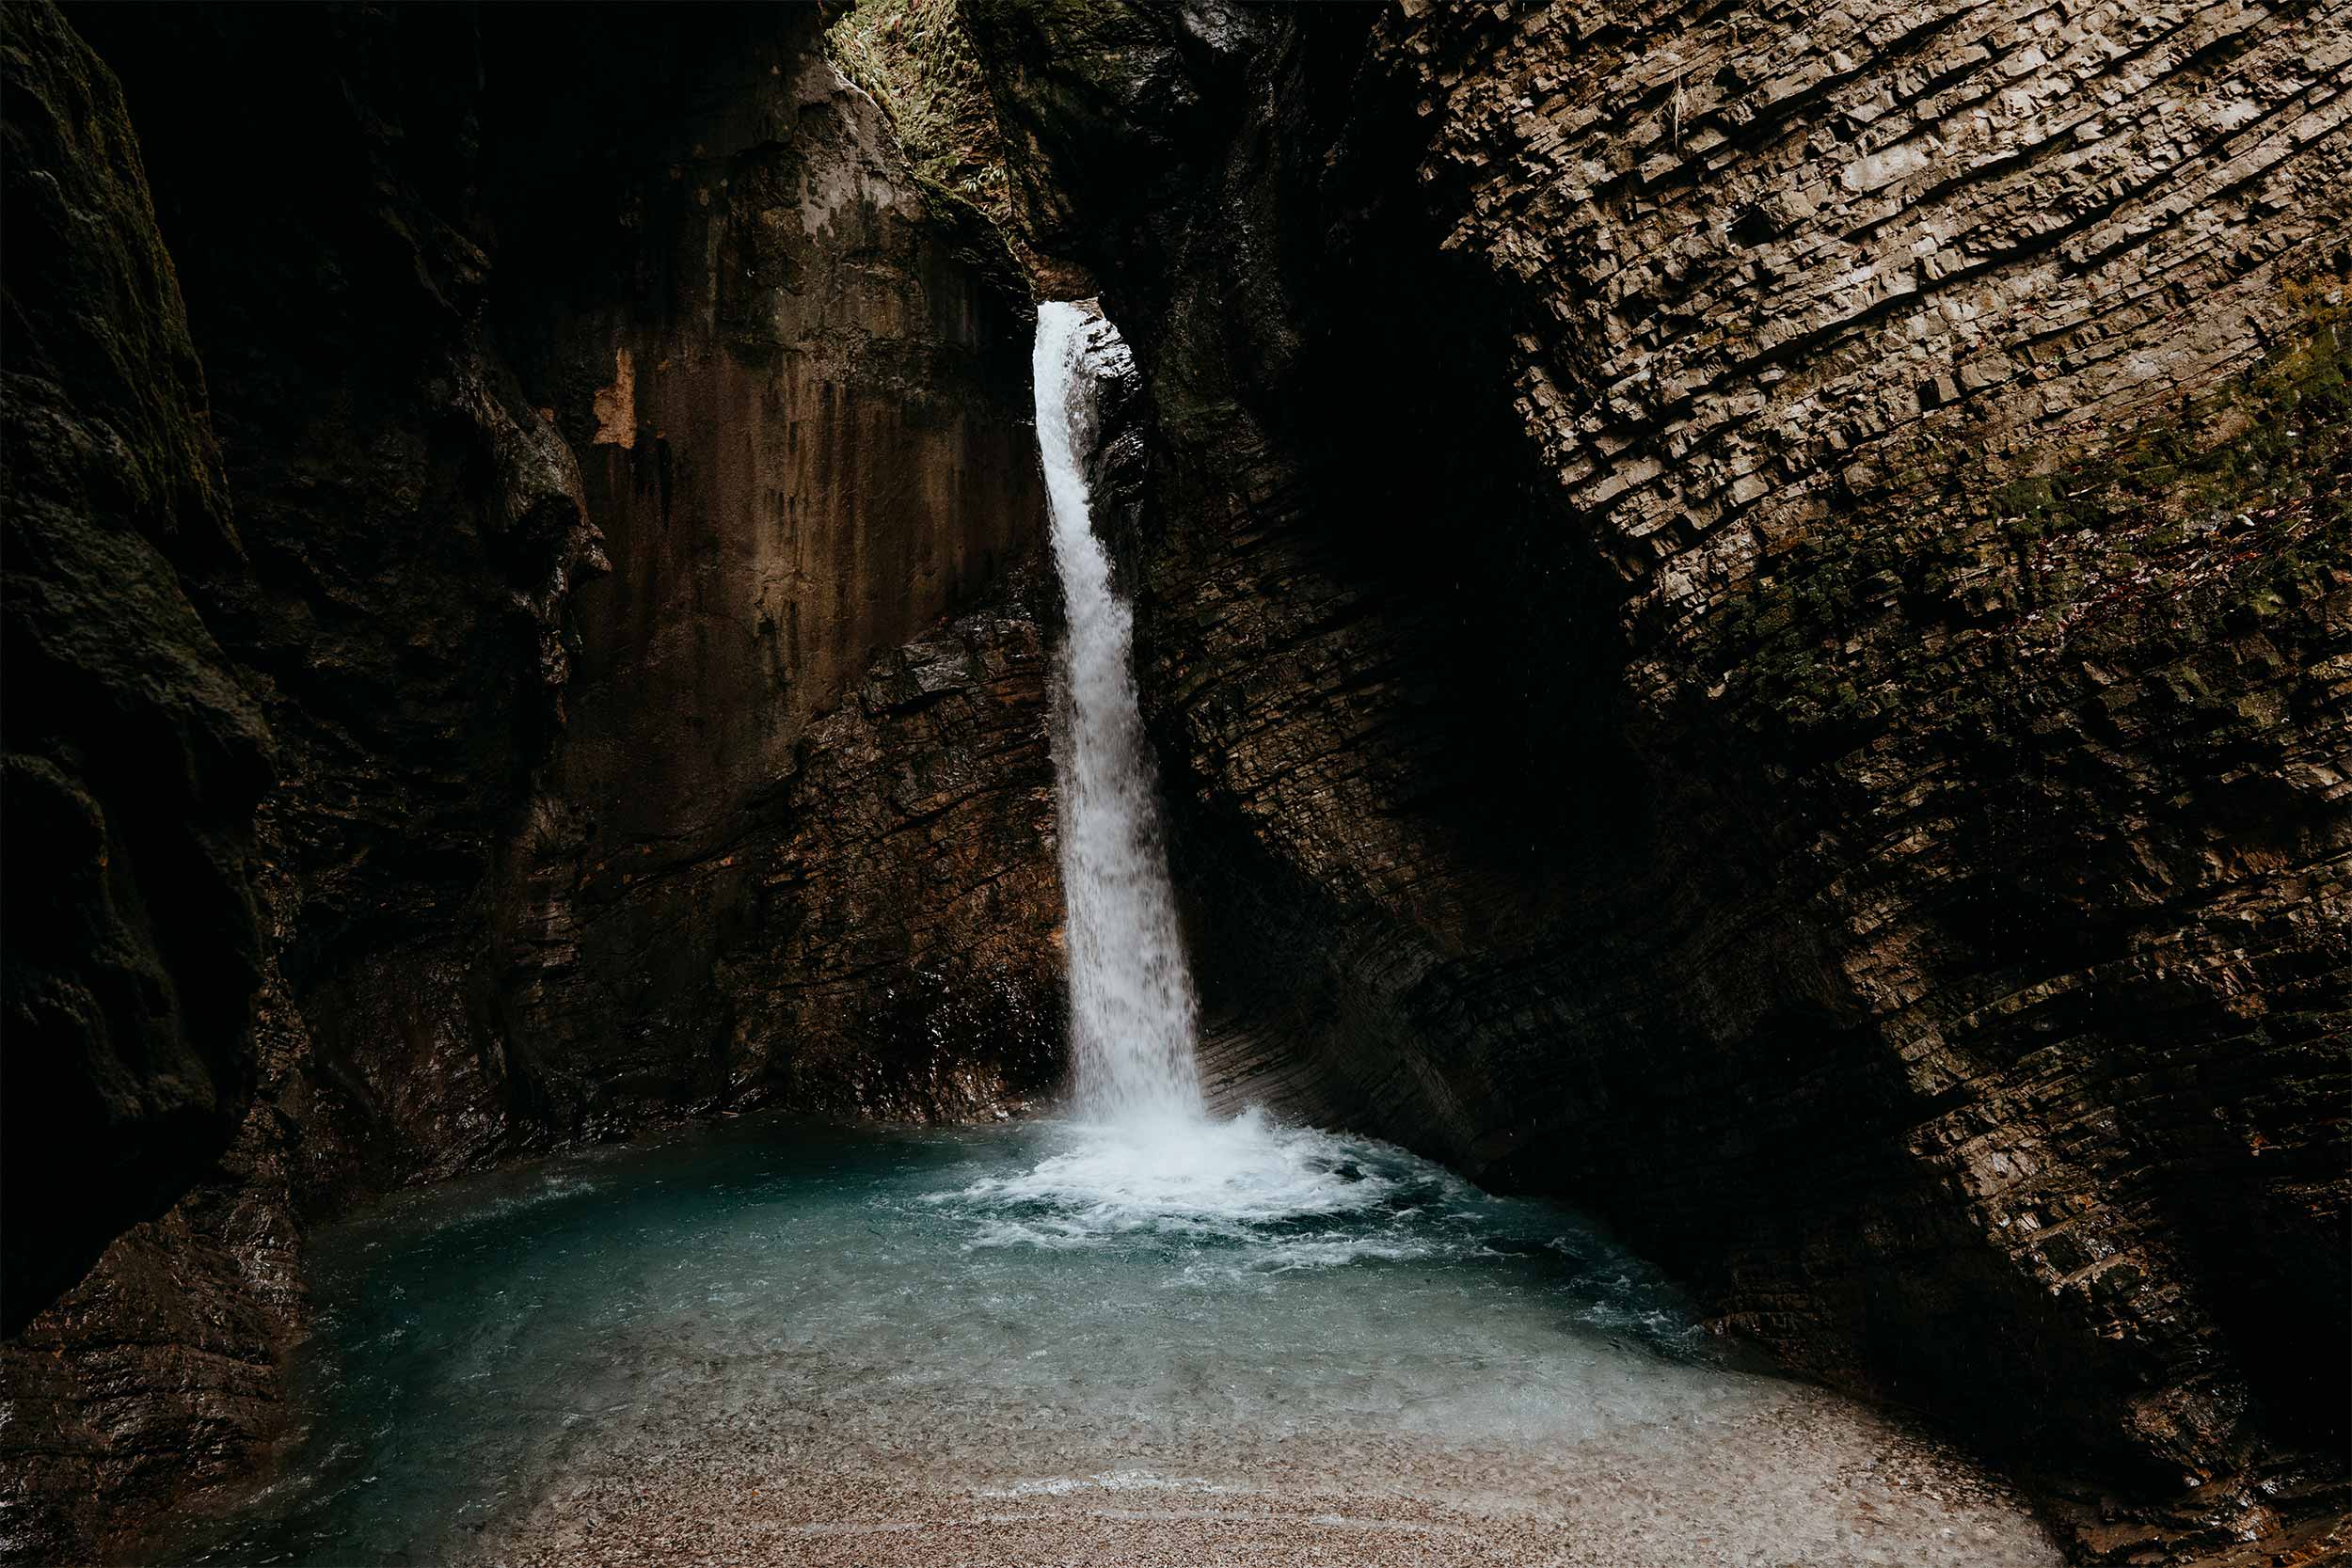
Slap Kozjak hike | The essentials
How long does the hike to Slap Kozjak take
From the parking lot at Kamp Koren, it shouldn’t take longer than 30 minutes to reach Slap Kozjak.
This is obviously without the essential stops you should make to take in the amazing surroundings that you hike through. With that in mind, the hike will take at least 2 to 3 hours to complete, especially if you’re into photography too.
You could also do the Slap Kozjak hike in combination with other hikes in the area – which will add some extra time to your overall hiking itinerary.
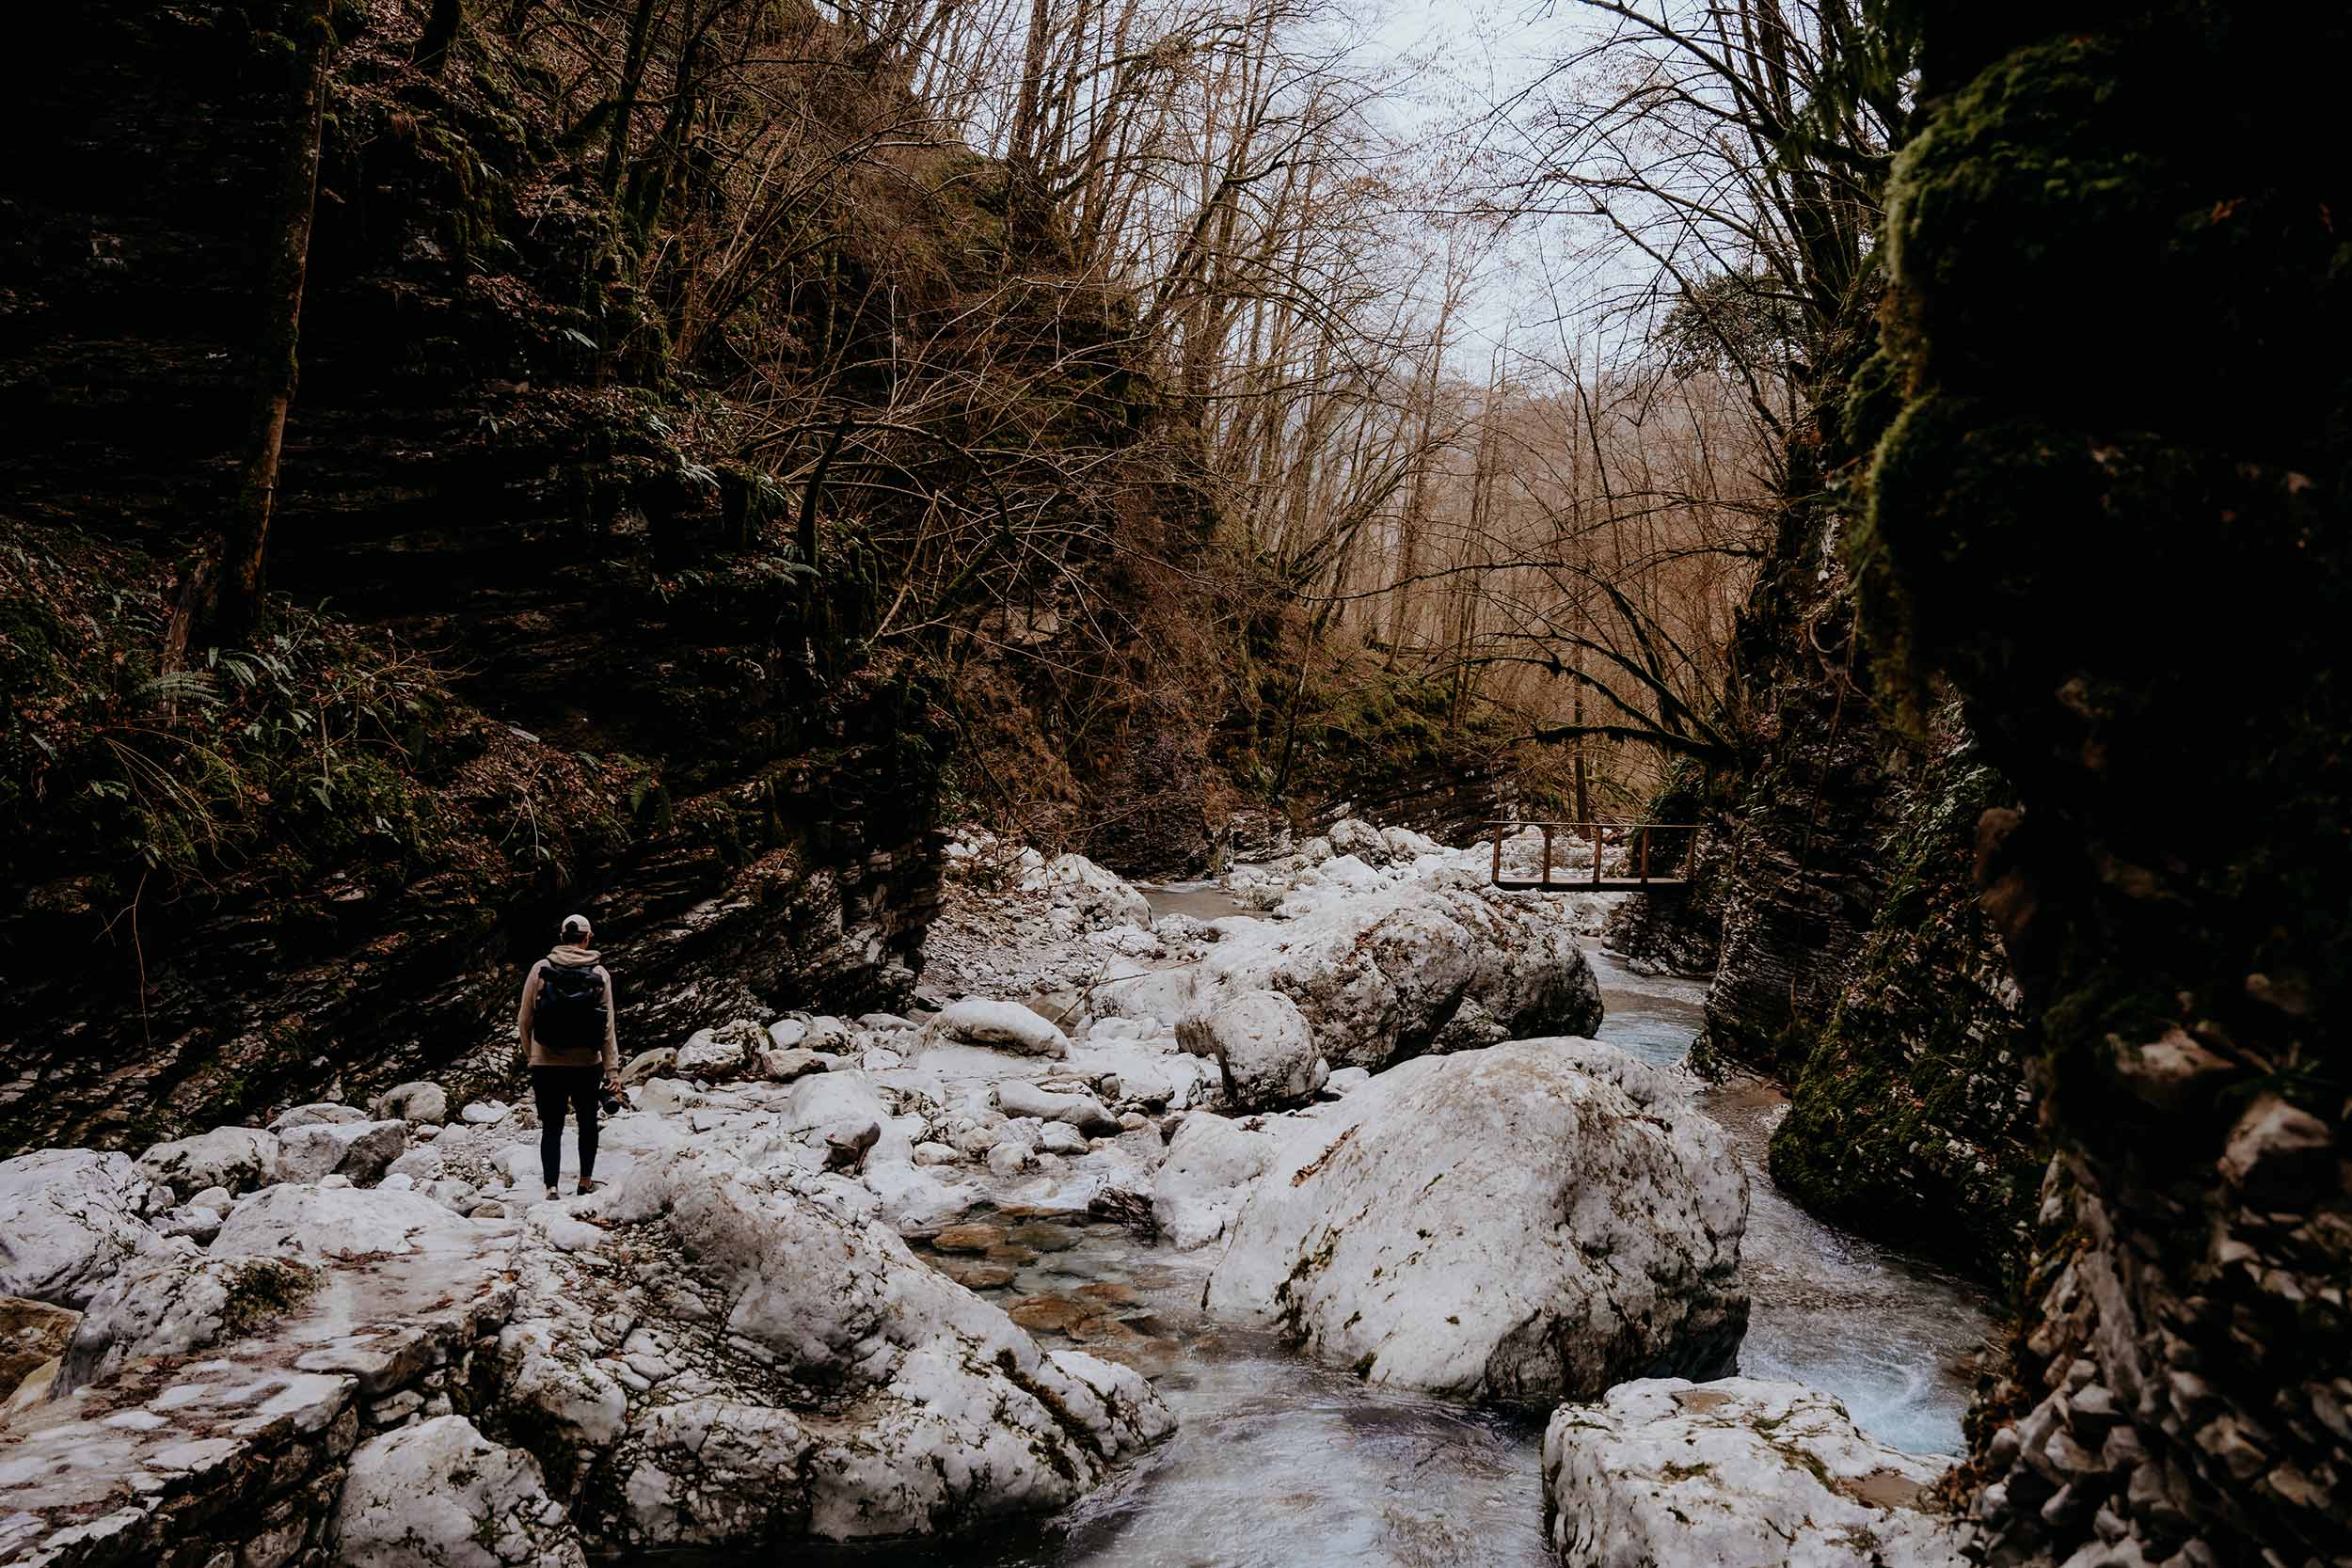
The best time of year to visit Slap Kozjak
If you ask me, the Kozjak waterfall is best visited between early April and late October, when the weather conditions are comfortable and the days long.
This is also the time when the Slap Kozjak trail is officially open to the public, as the entrance point to the waterfall is open from the 2nd of April until the 31st of October.
Depending on the severity of winter, the waterfall is also a great option for those visiting Slovenia during the colder winter months.
I visited Slap Kozjak in early January, and was fortunate enough to have excellent weather conditions, while also enjoying free access to the hiking trail and the waterfall – winner!
The best time of day to visit Slap Kozjak
Whether you’re a photographer like me, or just looking to have a more serene experience, I’d highly suggest visiting Slap Kozjak first thing in the morning, when it’s still fairly quiet on the trail.
Starting from mid-morning, it begins to get pretty busy at Slap Kozjak and continues to get even busier as the day progresses – mostly because it’s a Slovenian road trip favourite, as well as a popular day trip from Bovec, Bohinj and Lake Bled.
If you’re not an early bird or planned other activities for the morning, the late afternoon is also a great time to do the Slap Kozjak hike.
Also, I highly recommend avoiding a visit during noon, as it’s by far the most crowded time of day. So unless you want to share your experience with a bunch of other people, I would not opt for this timeframe unless it’s your only option.
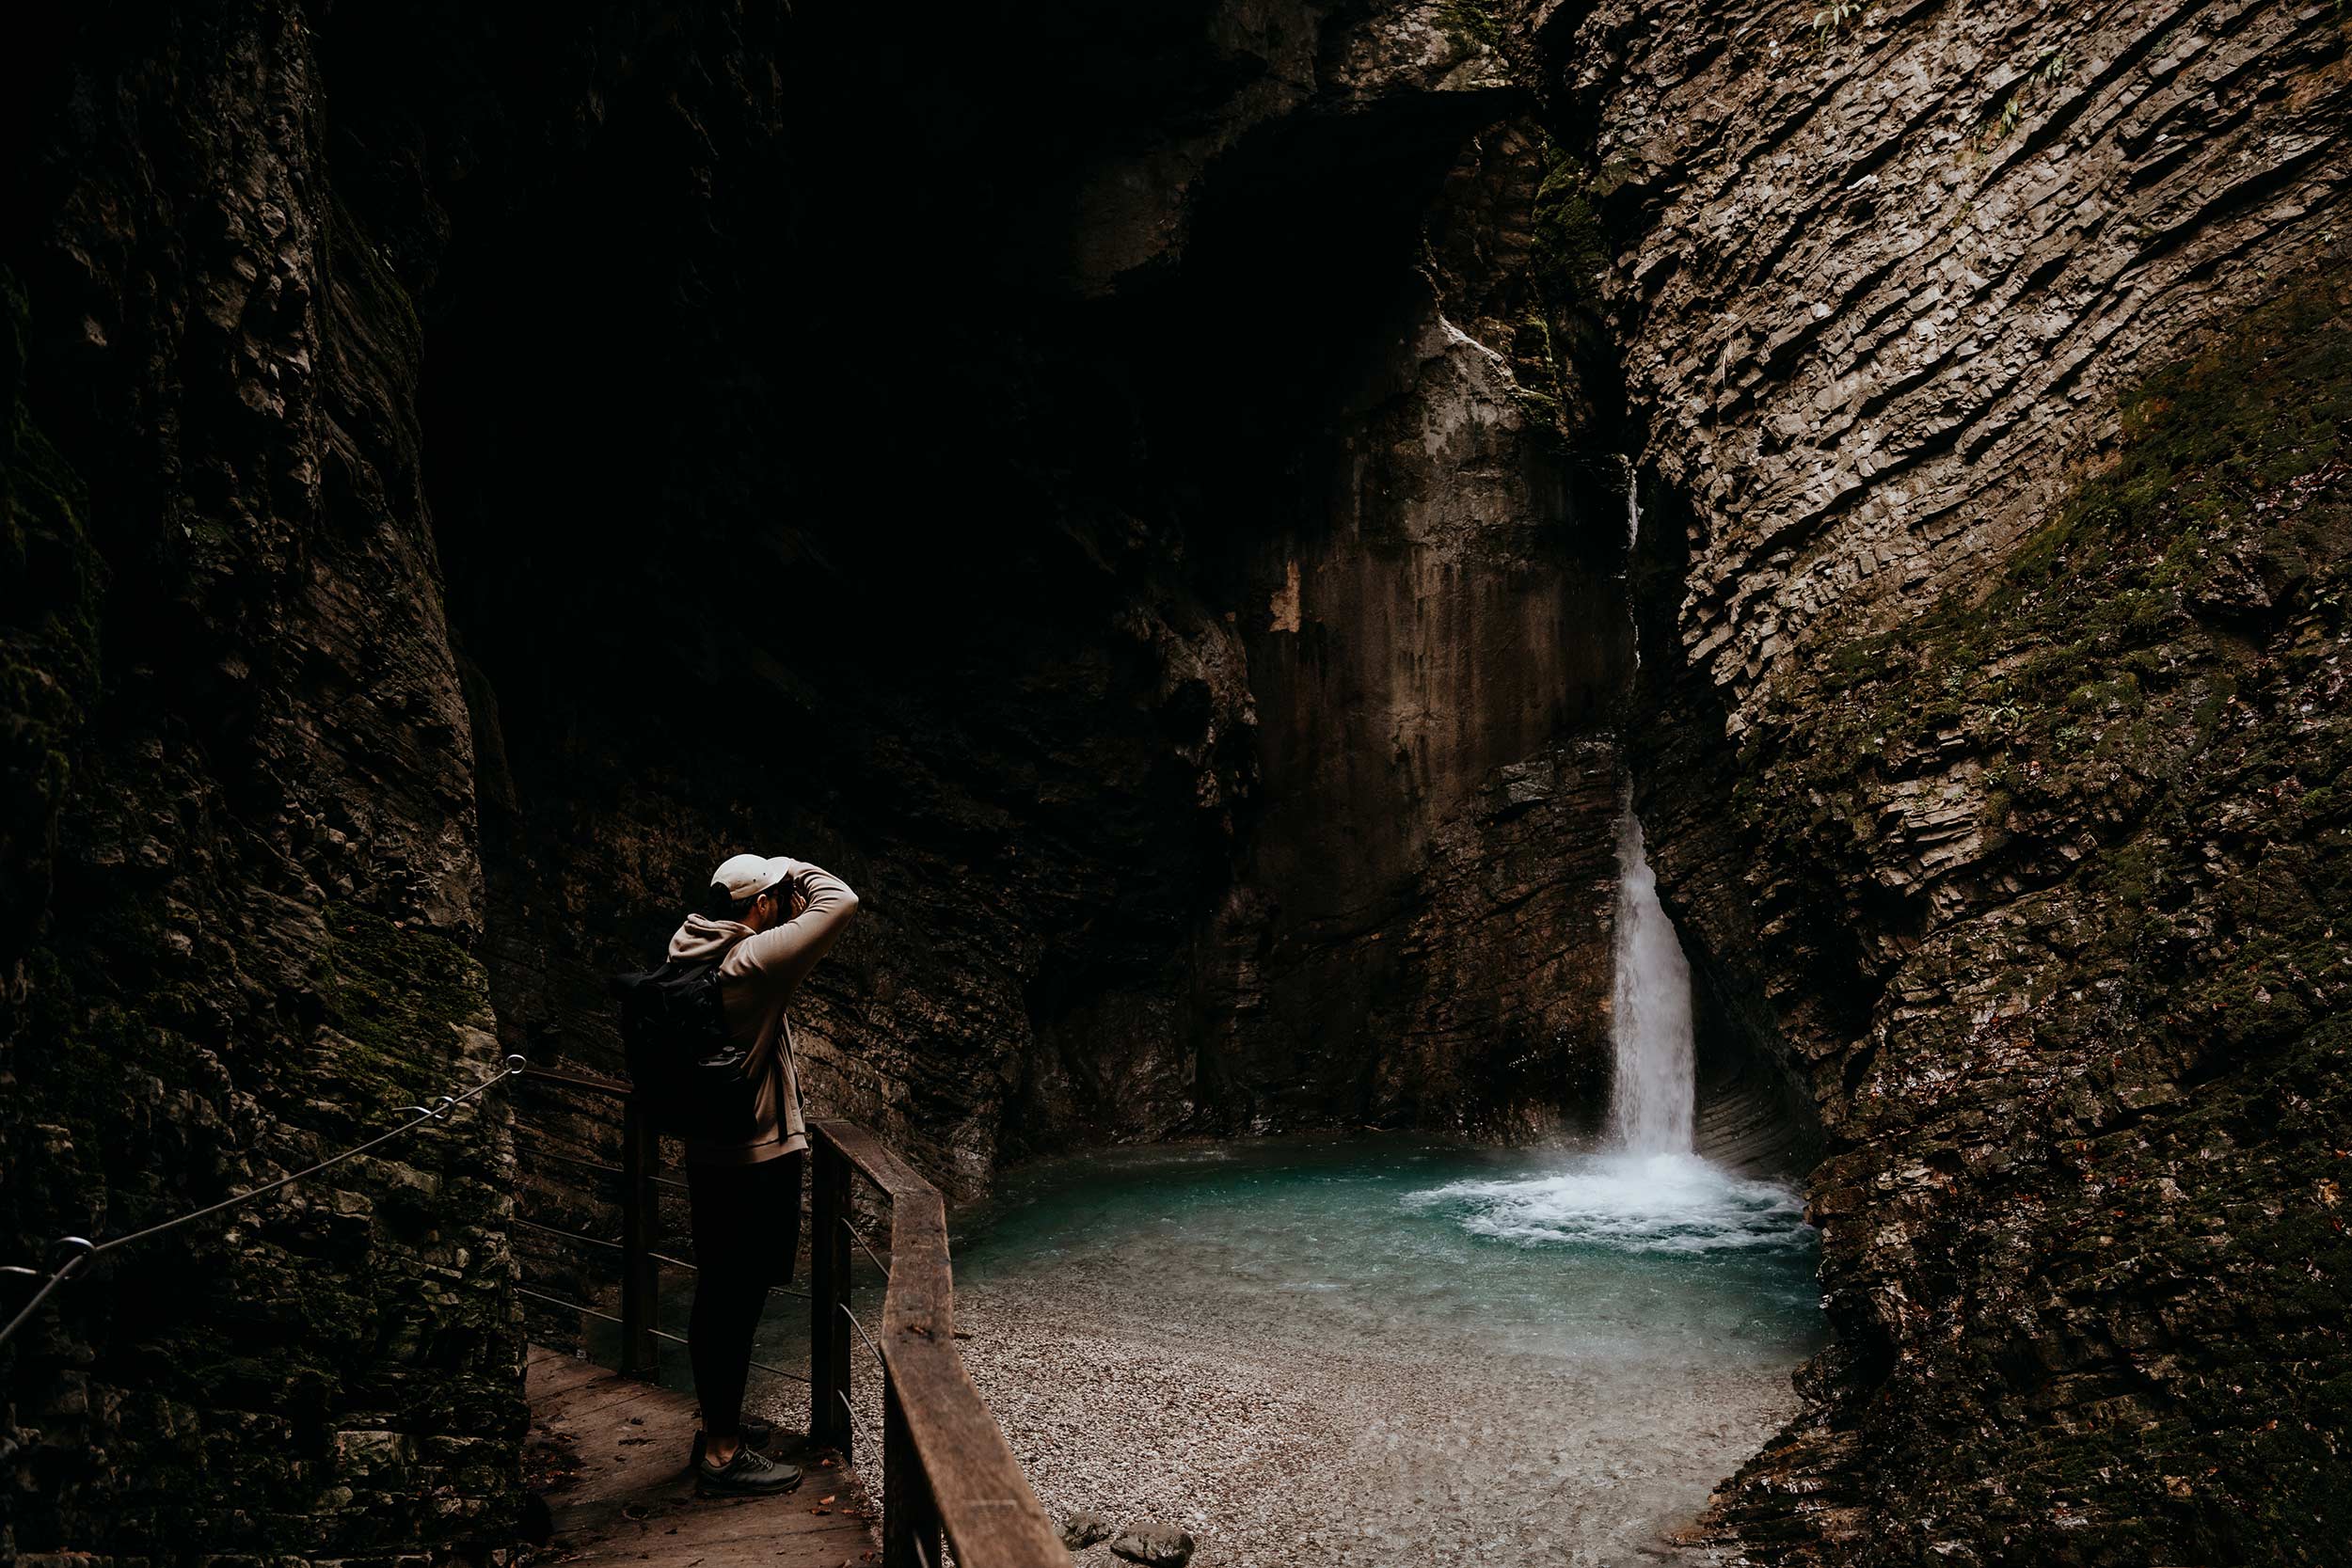
What to pack for the Slap Kozjak hike
As with most outdoor adventures, hiking Slap Kozjak comes with a unique set of needs.
To help you have a comfortable time here, I’d suggest bringing the following items:
A reusable water bottle | One travel essential that I carry with me at all times is the Grayl Geopress. This reusable water purification bottle allows me to fill up water from almost every water source, making it one of my best investments to date.
A hoodie | Given you’ll walk in the shadows of a moss-covered gorge for a fair amount of the hike, I’d highly recommend bringing an extra layer to keep you warm if needed.
A sturdy pair of sneakers | Though the hike to Slap Kozjak is relatively easy, it’s not a bad idea to wear a pair of sturdy trail runners. I’ve recently bought the New Balance Hierro V7, and I’m quite happy with the grip and comfort they provide me with when I’m on the trail.
Snacks | During my visit to Slap Kozjak in January, I noticed little to no restaurants and cafes near the trail. For that reason, I’d suggest bringing a lunchbox with some fruits, sandwiches, nuts, and a protein bar, in case you need to refuel yourself during the hike.
A camera | Slap Kozjak is truly a stunning sight to behold, so I’d advise bringing your camera, so you can click plenty of photos while you’re there. Curious about my photography gear, make sure you see what’s in my camera bag.
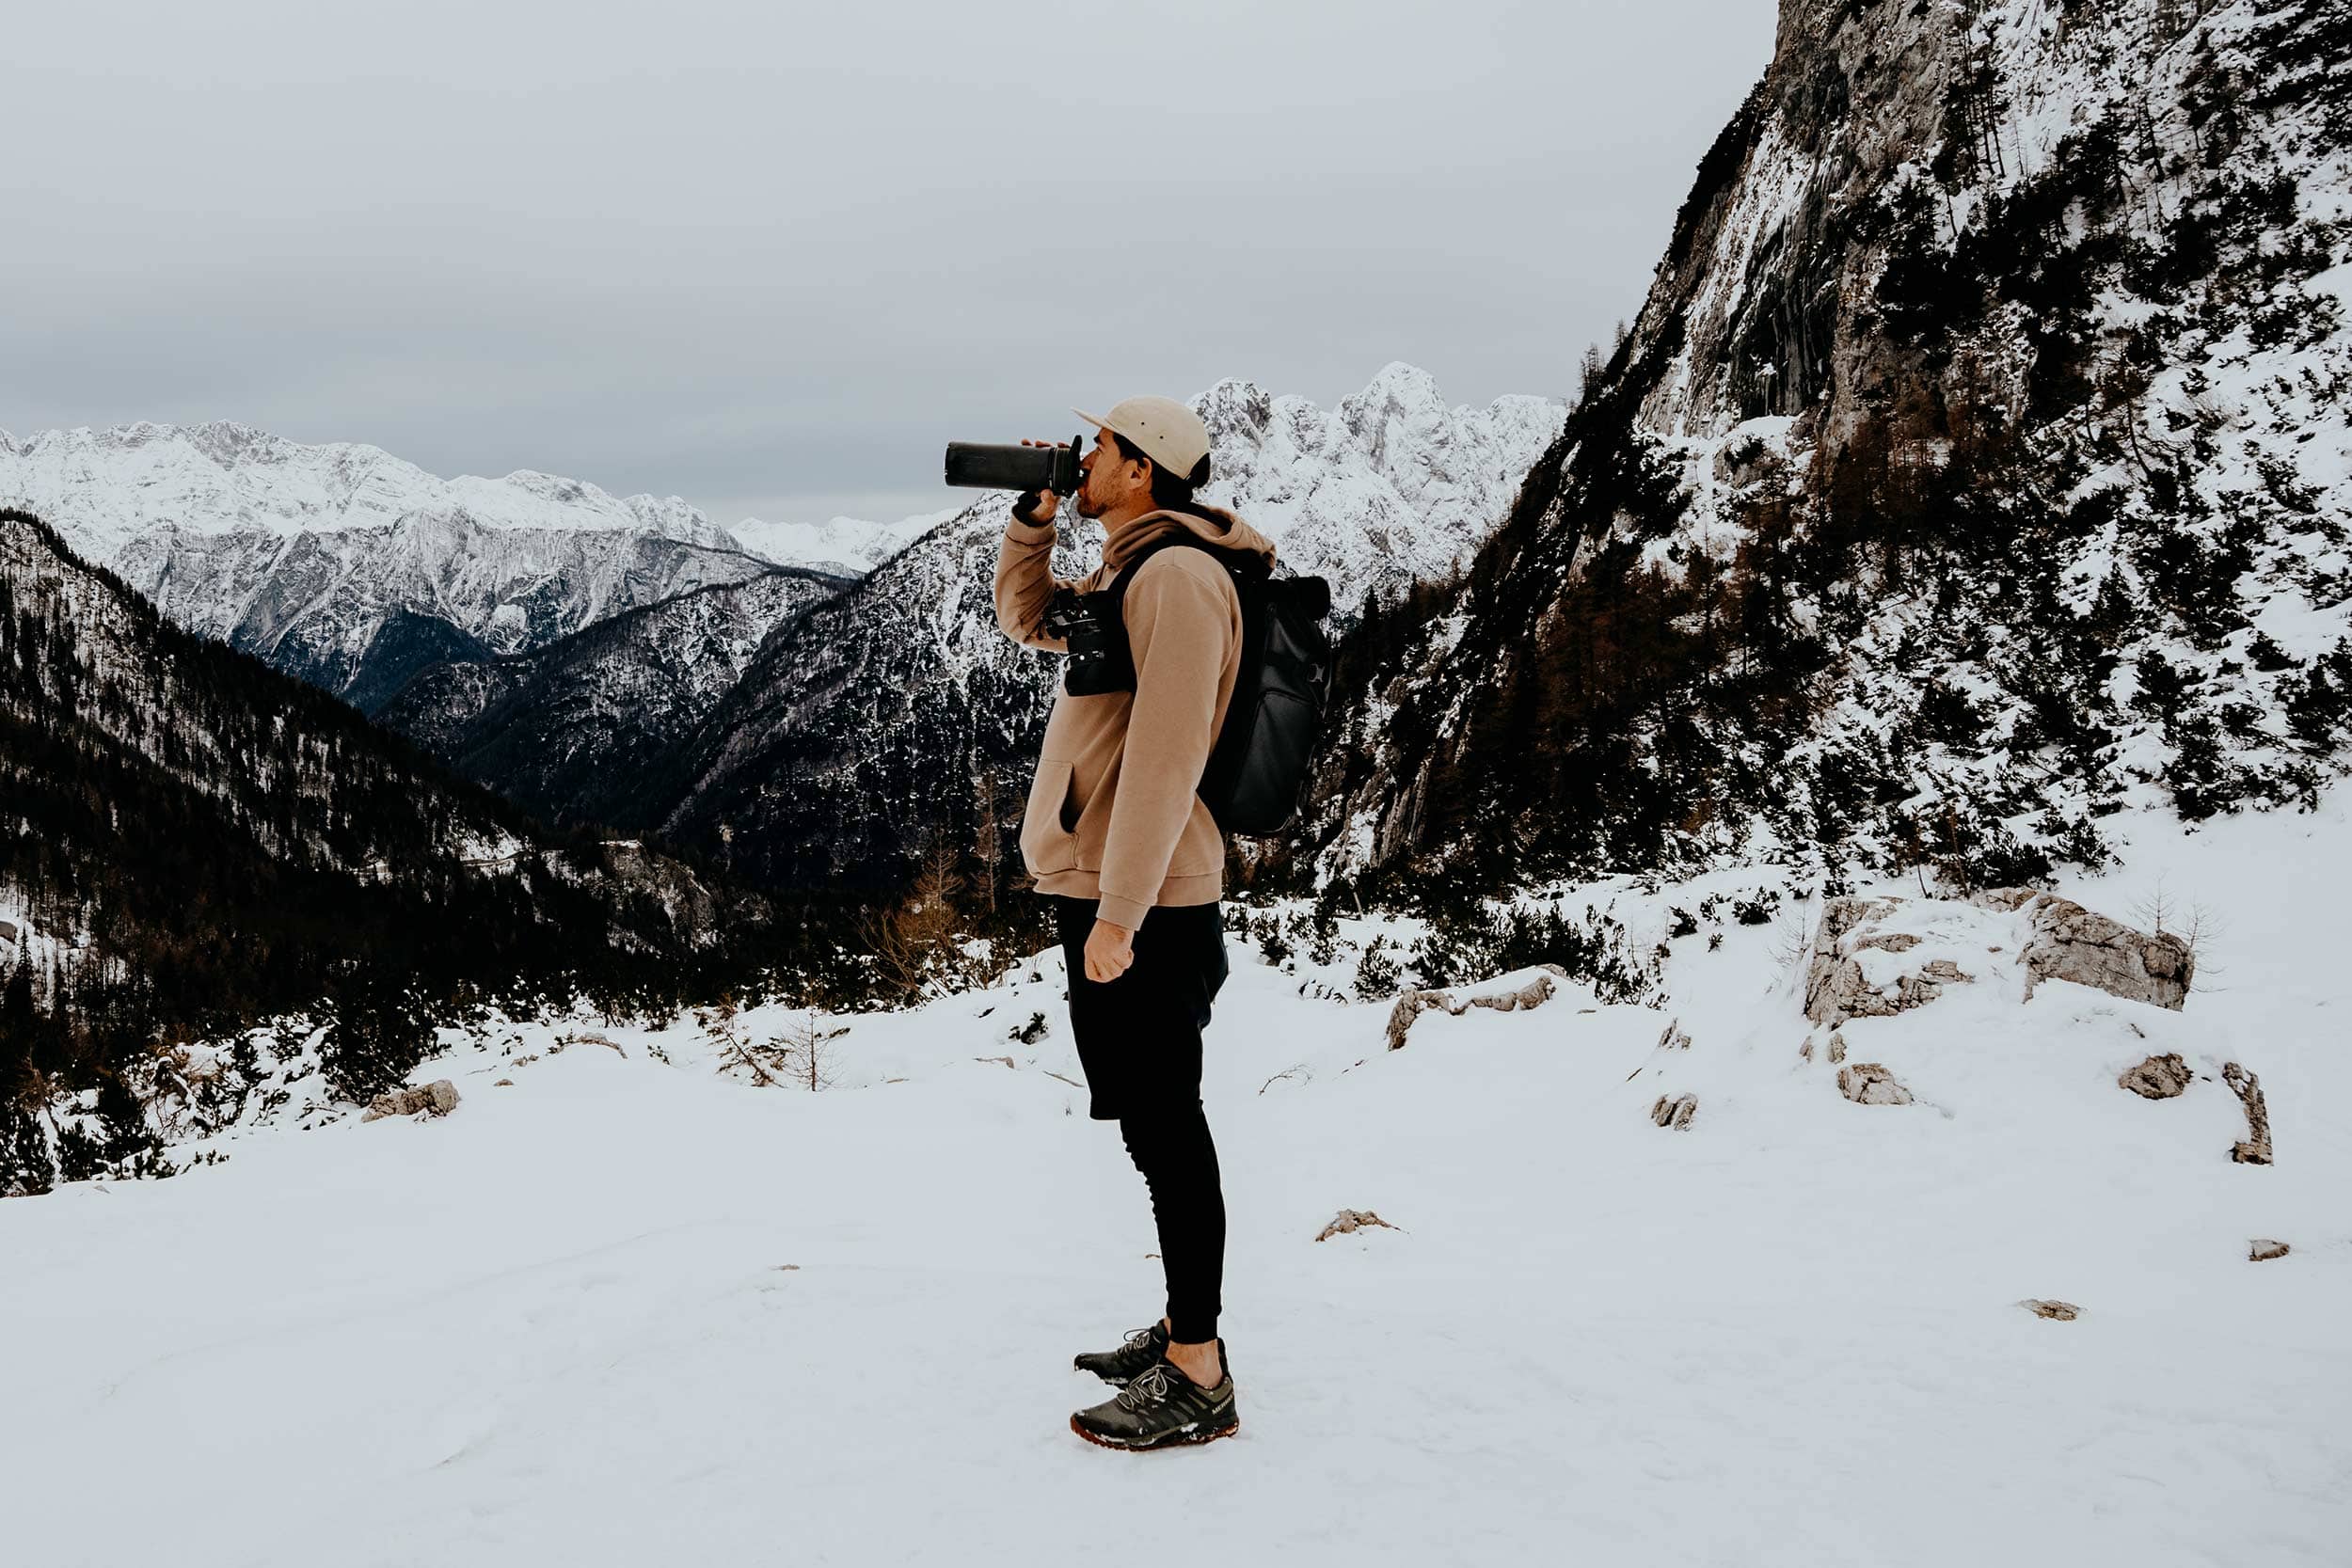
Stay safe in Slovenia | Travel insurance
Since Slovenia has plenty of adventurous activities on offer, I advise everyone to sort out good travel insurance before setting out on their own adventure.
While I believe that it’s unlikely to experience any troubles when following the advice in this guide, something unfortunate can happen at any time, whether it’s an injury, a stolen camera, or an accident on the road.
For travel insurance, I use Heymondo, as they offer full covid-19 coverage, as well as a handy app with 24-hour medical assistance. Make sure you check it out – readers of WTSW receive 5% off any insurance policy too.
Cheers!
I’ve been on this travel blogging journey since 2019.
If you appreciate what I do here, these are some ways you can support me.
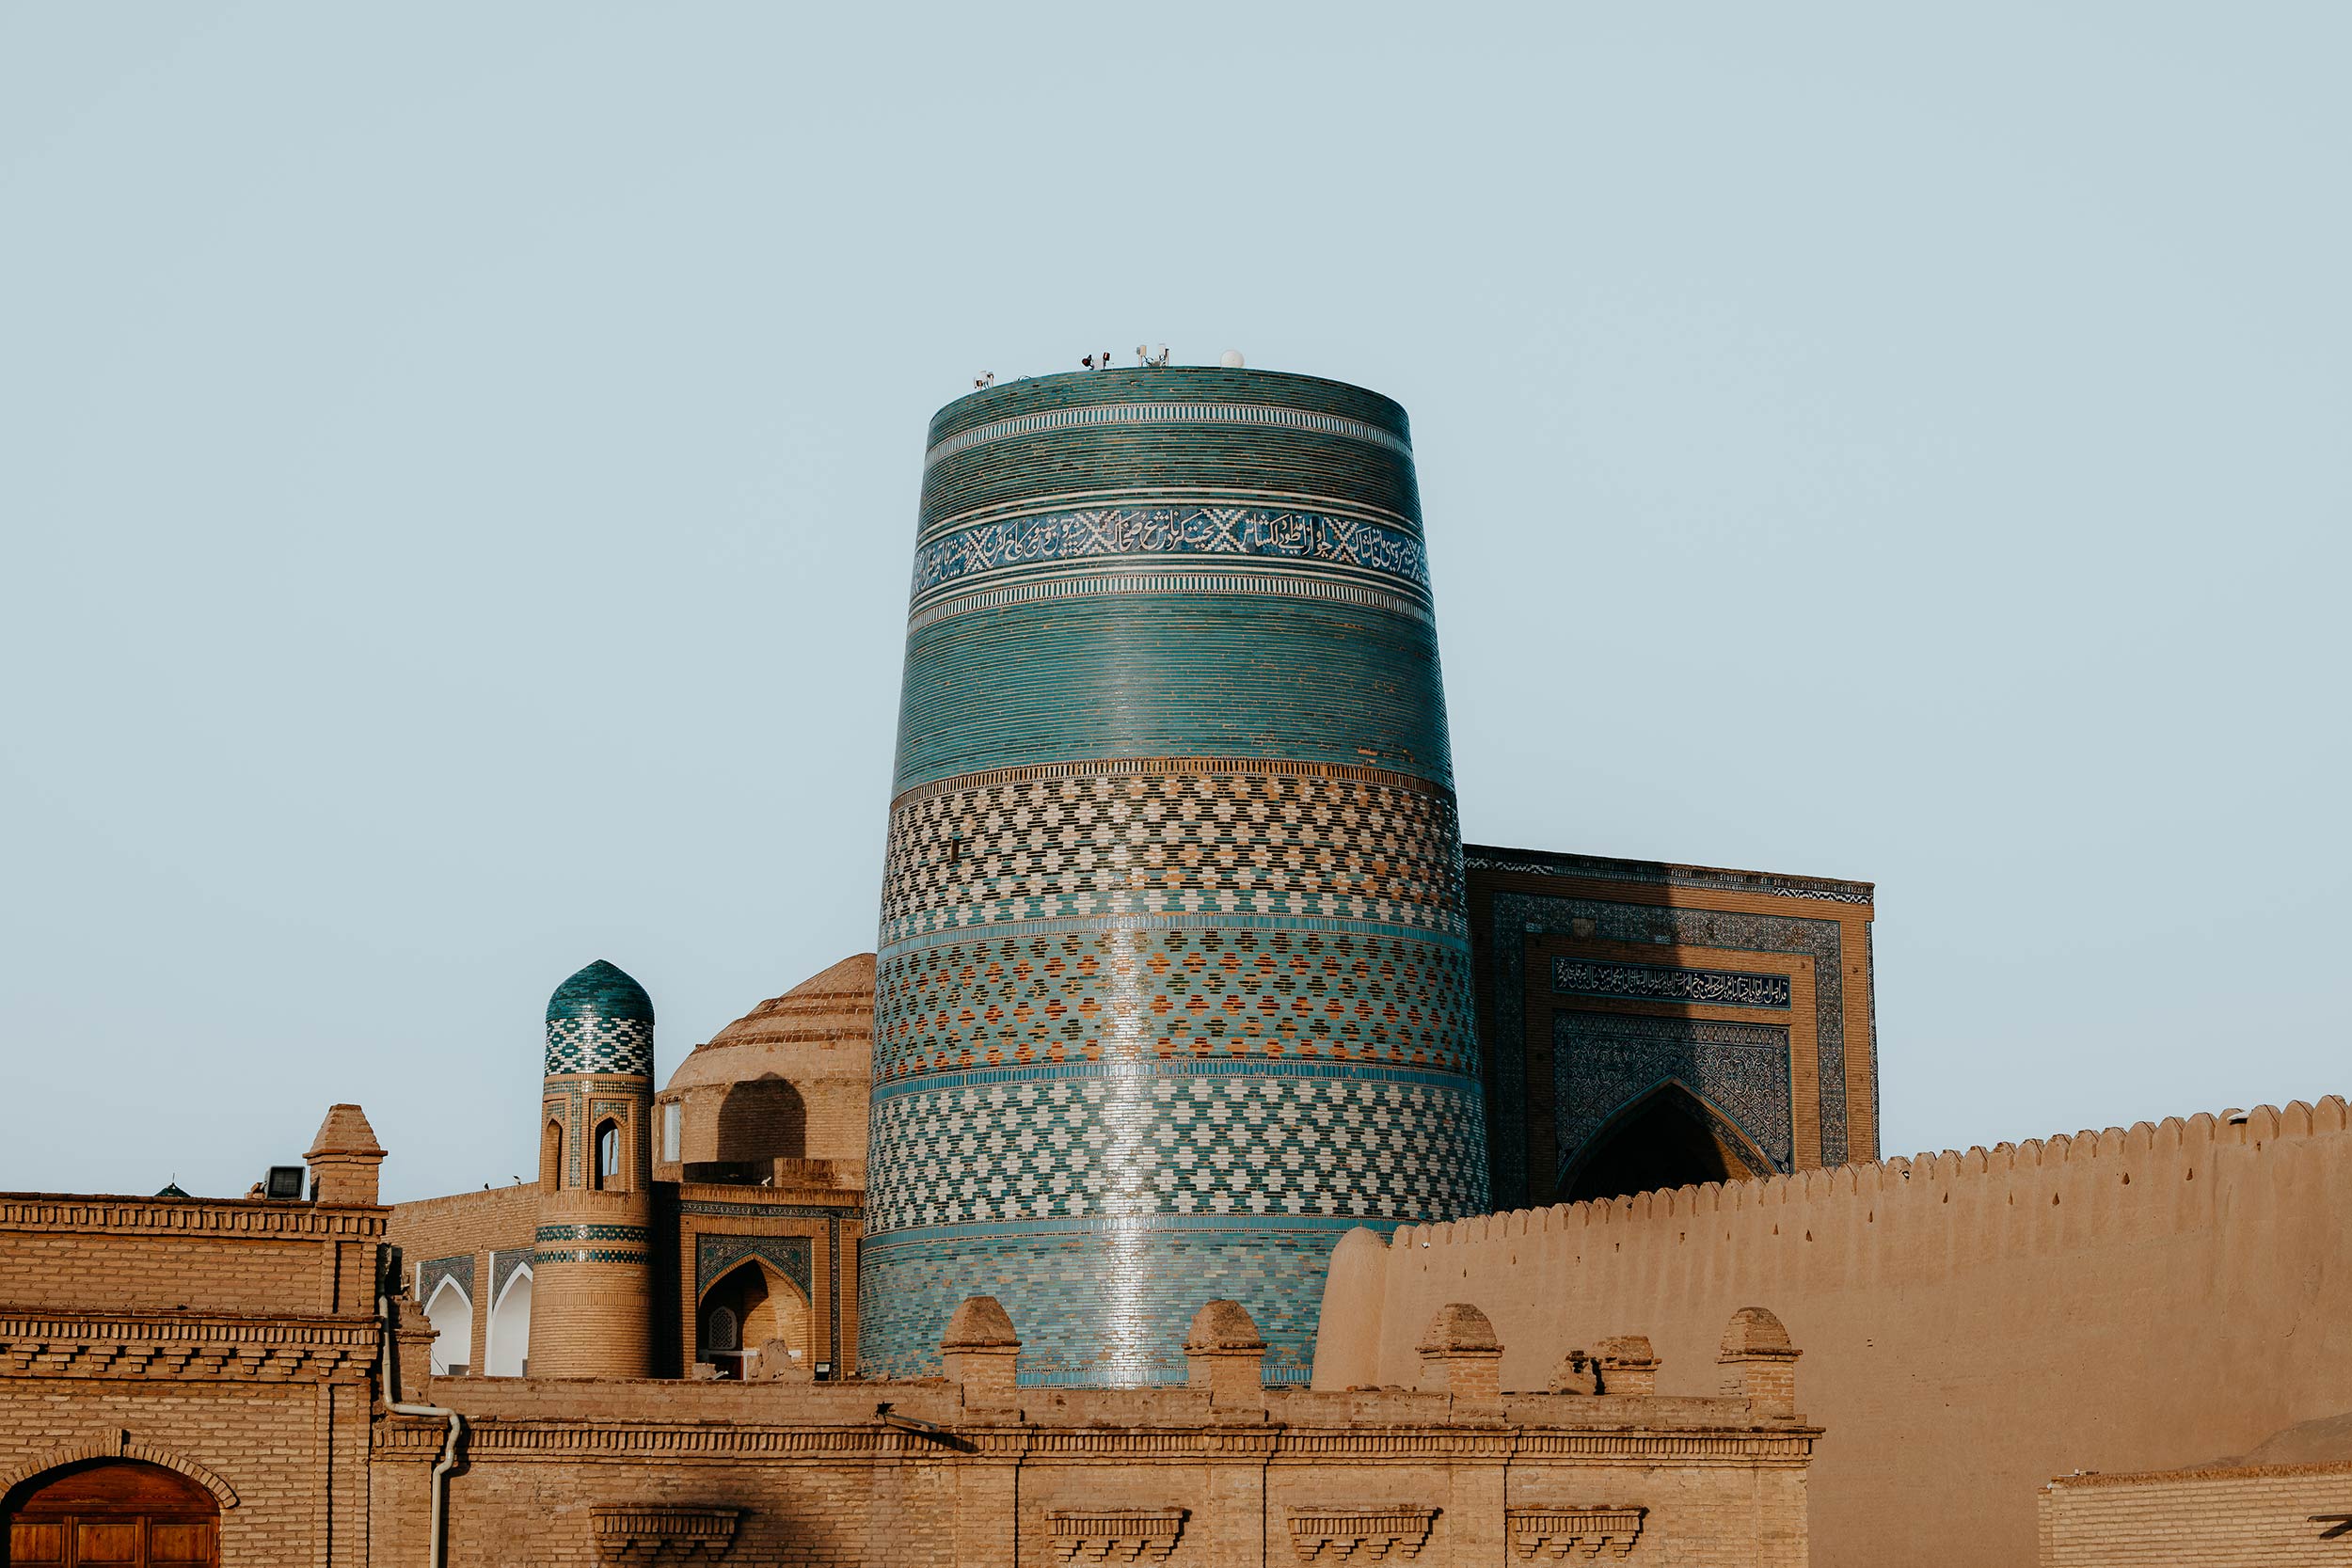
Buying an Uzbekistan sim card in 2026: Everything you need to know
In today’s digital age, staying connected to the online world has quickly become the new standard, even more so if you’re working remotely or in the online field.
However, buying an Uzbekistan SIM card isn’t something that only remote workers should consider.
No, having a SIM with data connectivity in Uzbekistan will make anyone’s travels here significantly more convenient – not to mention cheaper, given you can use services such as Yandex.
As with most off-the-beaten-path travel destinations, Uzbekistan can be rather challenging to navigate at times, so picking up a SIM card with a data connection is an absolute game changer that makes travelling here so much more accessible.
From finding directions on Google Maps to obtaining the latest information on your train journeys, to keeping in touch with the homefront and booking last-minute accommodation, there are simply too many benefits of having a reliable internet connection in Uzbekistan.
Add to that, that it’s super easy to find a reliable mobile provider and a SIM with a data plan will set you back just a few bucks, and you realize why you came to this article in the first place.
In this in-depth guide, I’ve covered everything you need to know about buying a SIM card in Uzbekistan, including where to buy one, the best providers, the cost, plus advice based on my first-hand experiences.
If you choose to use any of the links on this page, I may receive a small commission at no extra cost to you. By using these links, you’ll have a direct impact on WTSW and my ability to continue to create free insightful travel content for you. If you find any of my tips useful, you can support me by buying a virtual coffee here.
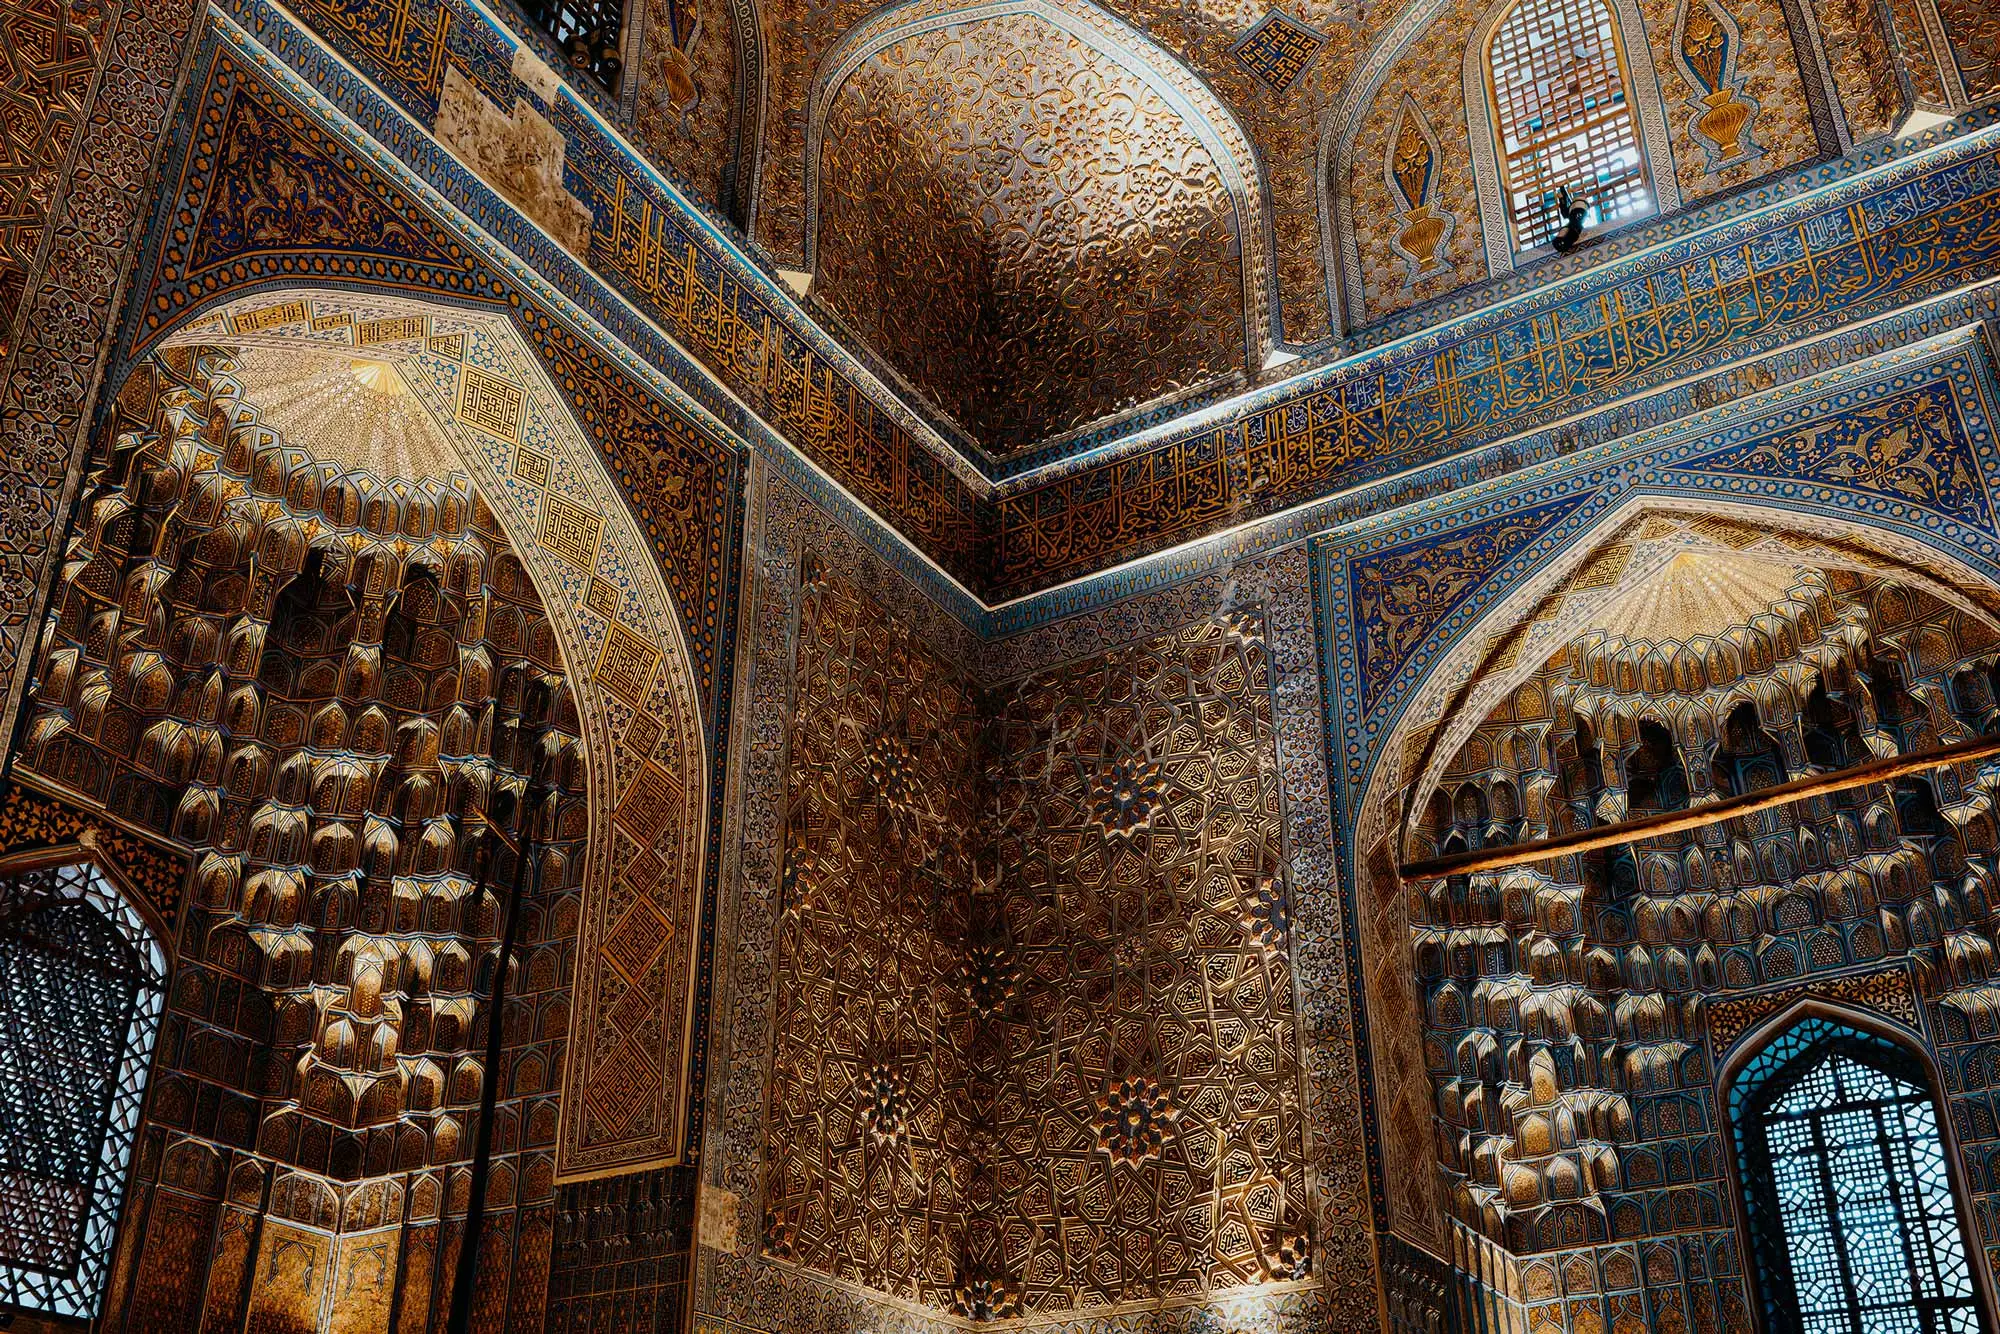
Why buy a sim card in Uzbekistan
With everything that’s going on in the online space today, it has somewhat become the norm to stay connected to the World Wide Web at all times; this is clearly also the case when travelling around the world.
From finding directions on Google Maps to collecting inspiration from your favourite blog or Instagram page, to checking the time schedule of your train and keeping in touch with family and friends, there are simply too many reasons why you should buy a SIM card in Uzbekistan.
Add to that that an Uzbekistan SIM card will set you back only a few bucks, and you simply can’t go around the fact that you should buy one yourself.
Though I noticed that most places have public WIFI in Uzbekistan, it isn’t the most reliable in terms of connectivity, and it’s pretty common that those networks are unsecured too. For that reason, I’d prefer a data connection from a trustworthy provider.
If you do intend to use public WiFI abroad, make sure you use a VPN to keep your data secure, such as NordVPN.
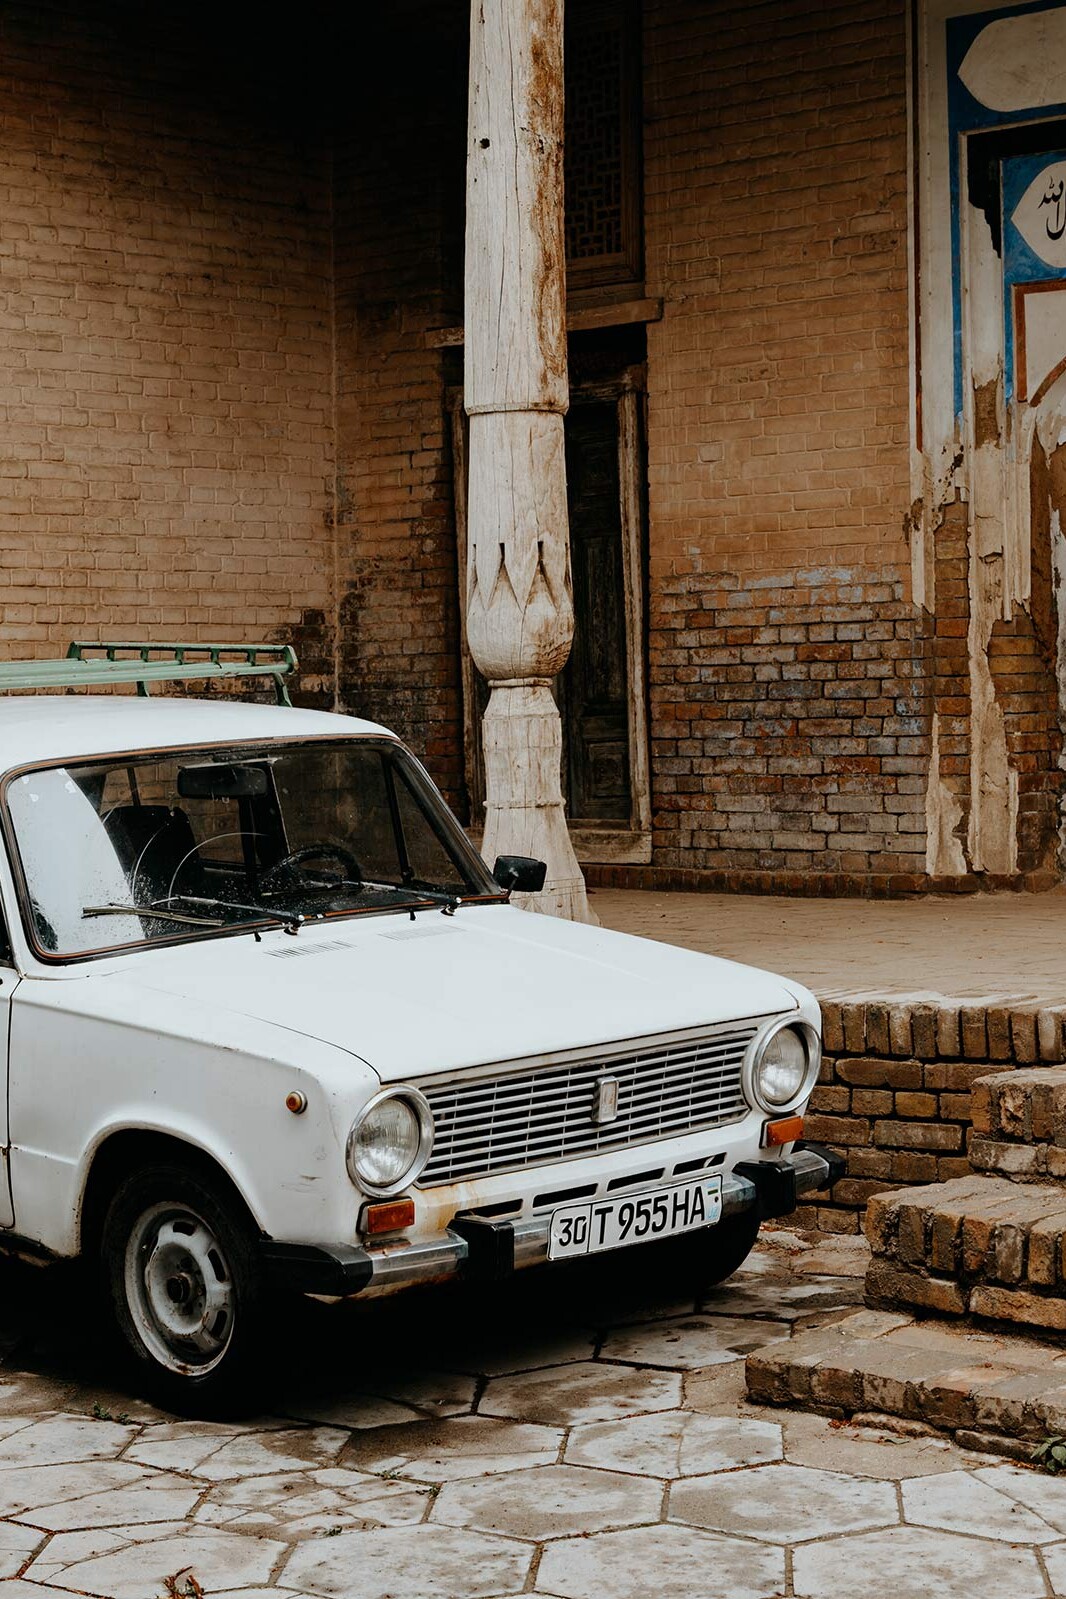
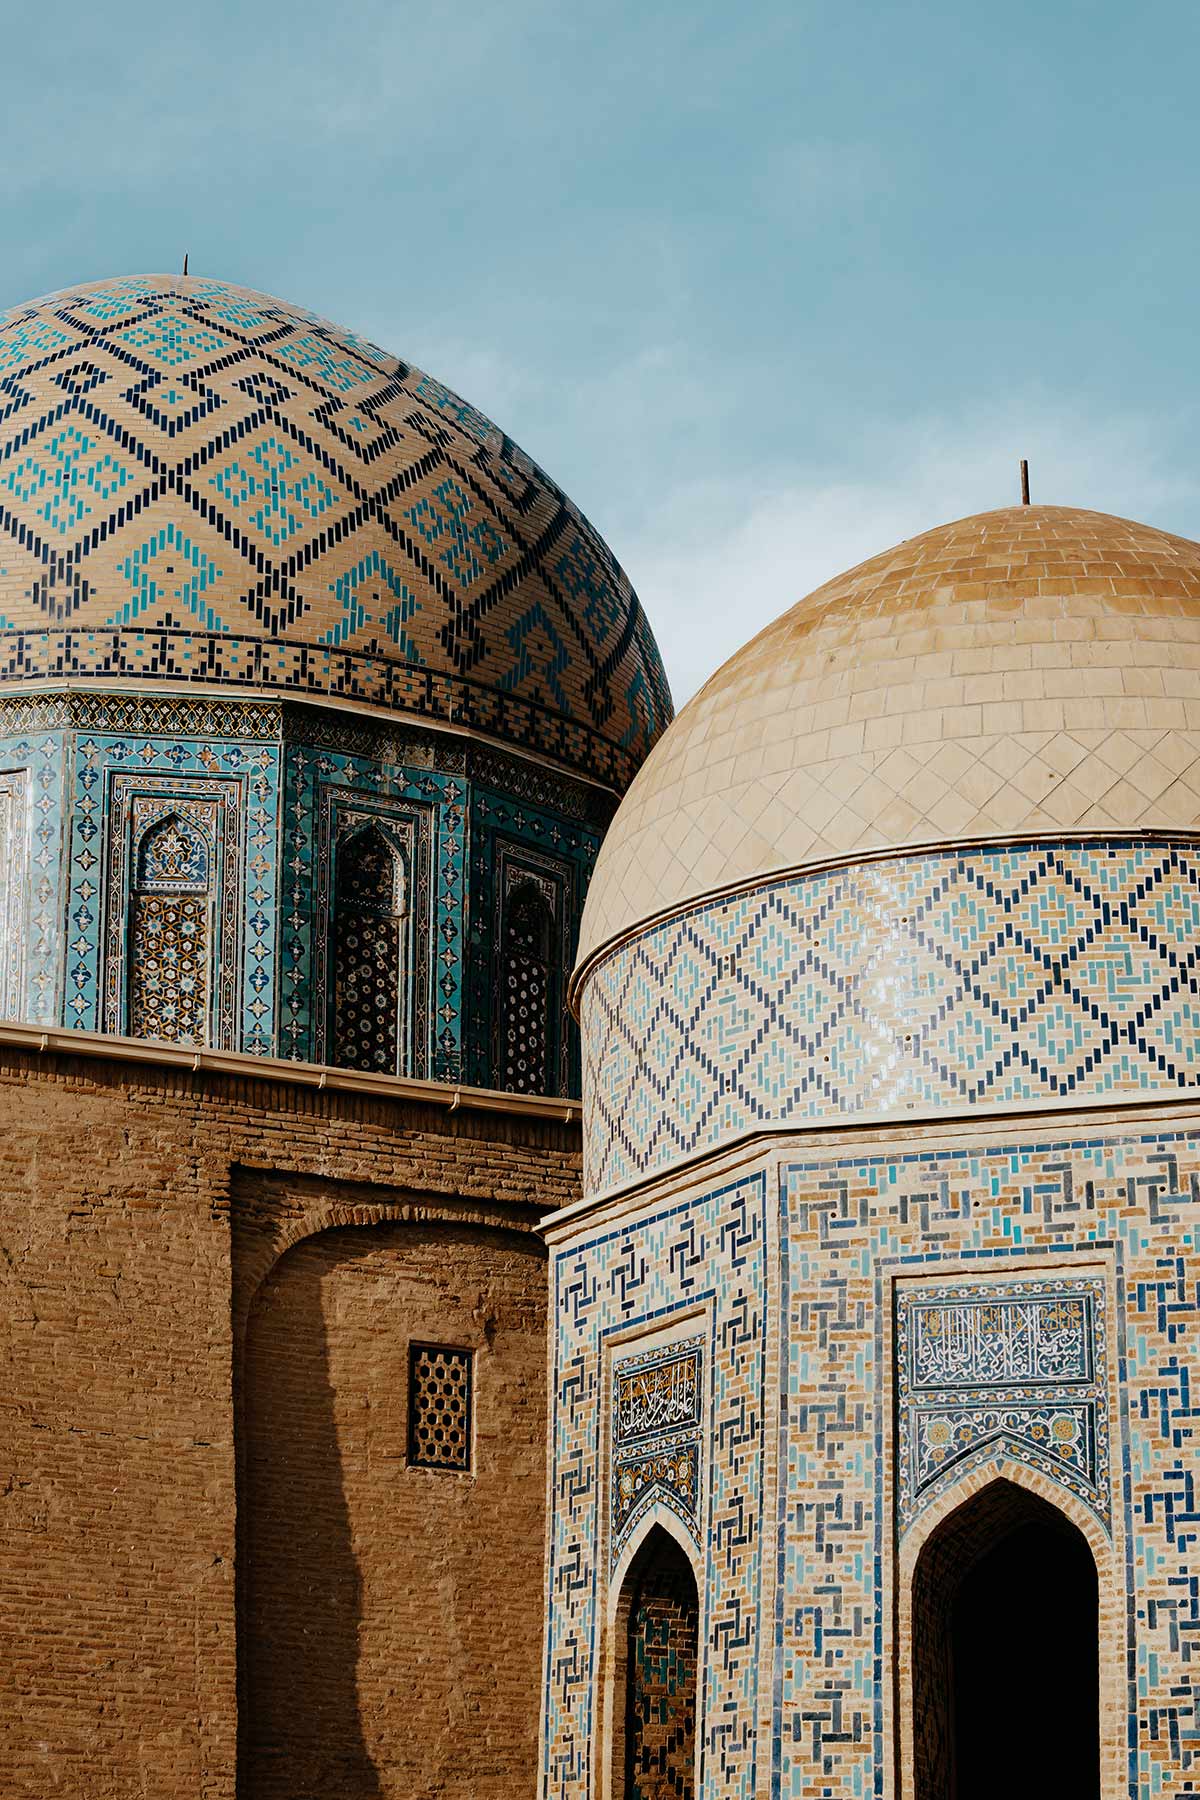
Can I use my existing phone number while using WhatsApp?
One of the benefits of buying a local SIM card in Uzbekistan is that you’ll use this SIM solely for your data connection, meaning you can still use your own phone number while using Whatsapp.
The reason for this is that your WhatsApp account is linked to your existing number, so swapping sim cards has no impact on your existing account, as long as you don’t change the number in your WhatsApp settings.
Though I understand that it’s a tad confusing, your WhatsApp will continue to work as usual, yet now with the data plan that is active on your newly acquired local sim card – winner!
I’ve had my fair share of experiences regarding local SIM cards while travelling, so I’m pretty sure you won’t stumble upon any difficulties.
Also, if you purchase your Uzbekistan SIM card at the Tashkent Airport like me, you will receive assistance with installing your SIM card on your phone from the vendor.
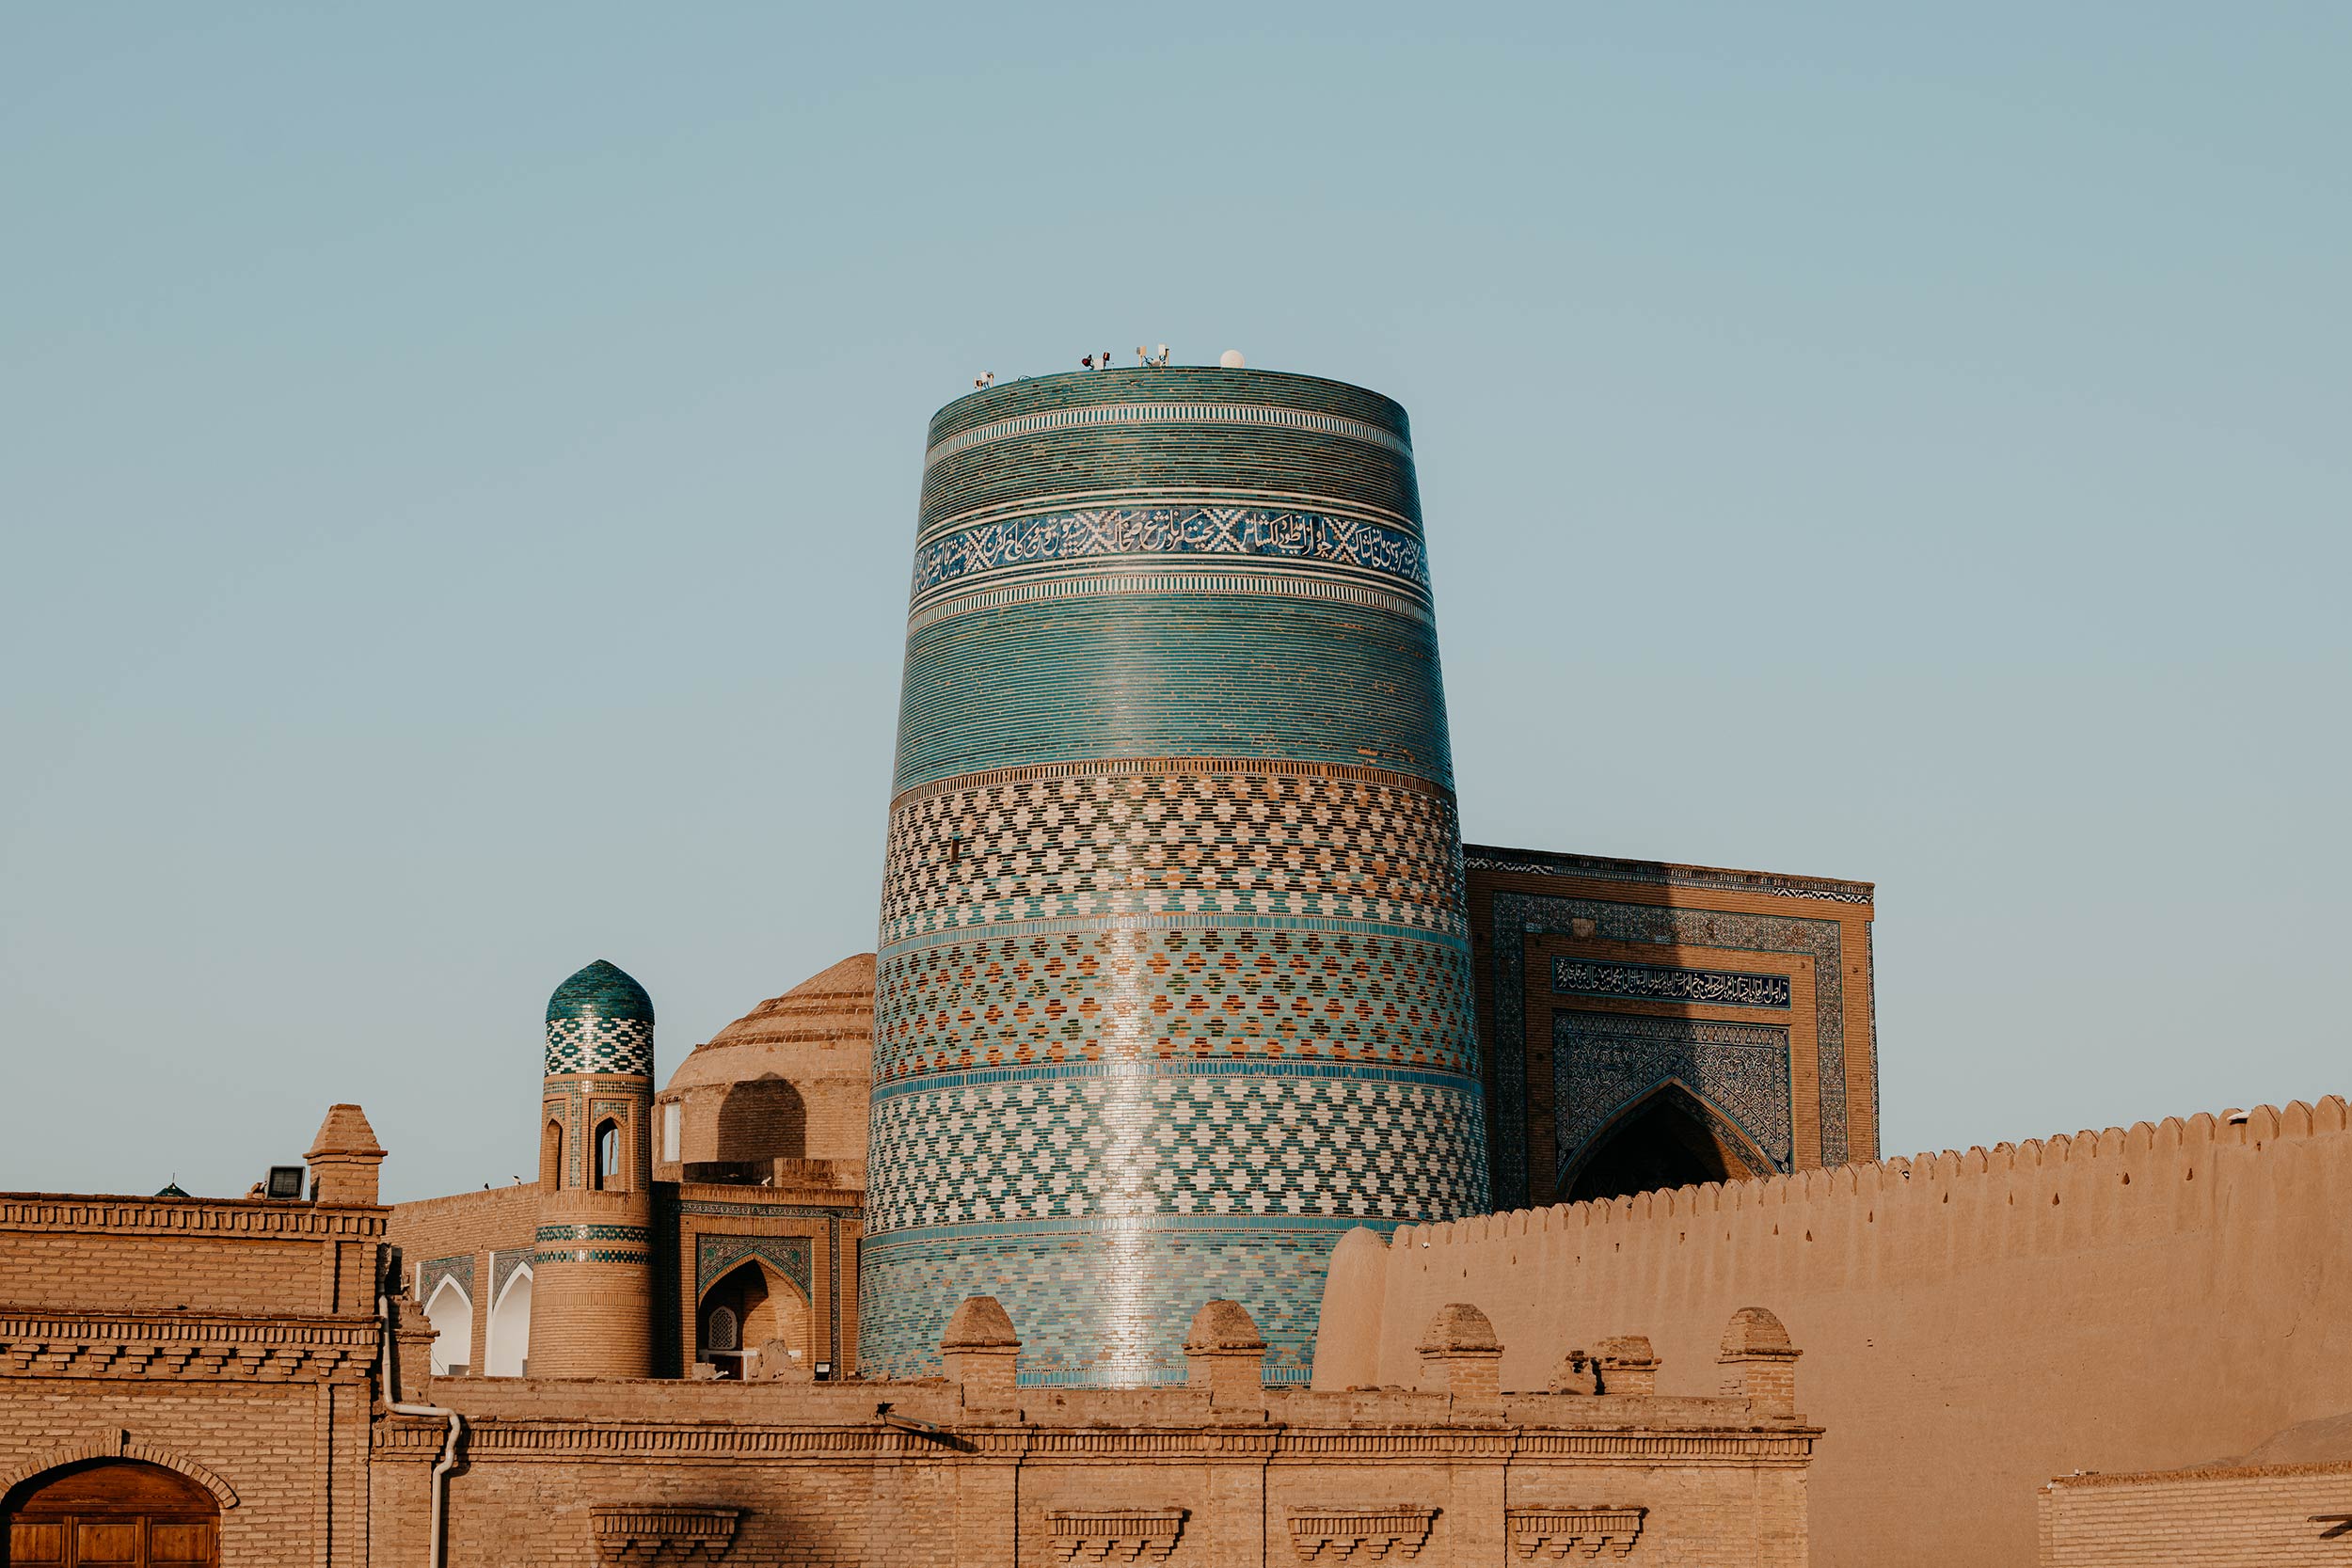
Where to buy a sim card in Uzbekistan
When it comes to buying a sim card in Uzbekistan, there are several excellent options available.
From buying one directly upon arrival at the airport to grabbing one from a mobile provider store to getting an eSIM online and in advance from services such as Airola.
To help you find the right option, I’ve listed the options down below:
Tashkent Airport
If you ask me, the best and cheapest option is to buy your SIM card at the Tashkent International Airport, directly after you’ve arrived in the country.
Once you arrive in the baggage claim zone of the airport, you’ll notice the stands of Uzbekistan’s leading mobile providers, including those of BeeLine and Ucell.
From what I’ve seen, these providers have a wide variety of data plan packages on offer, meaning it’s pretty clear to choose an option that suits your needs.
Since it’s not always possible to pay with credit or debit cards, it is good to acquire some local currencies from the ATM at the airport before going to the SIM card vendor.
One thing worth mentioning though is that these SIM card providers often require your passport, but that shouldn’t be a problem considering you just entered the country from abroad.
Mobile provider stores
If, for whatever reason, you didn’t buy a SIM card at the airport, rest assured – there are several mobile provider stores situated in the cities of Tashkent, Samarkand, Bukhara and Khiva.
From what I’ve heard, the prices and data packages at these stores are very similar to those bought at the airport.
For those keen to buy a SIM card from a mobile provider store, make sure you take your passport, as well as a copy of it, since they require it when registering a new SIM.
However, as with so many stores in Uzbekistan, you’ll most likely stumble upon an employee with limited English skills, which makes it a tad more challenging to buy one here.
eSIM card
If you’re anything like me and prefer to have everything sorted out before your trip starts, I’m pretty sure you’d like to read about how to buy an eSIM online and in advance.
The eSIM is a digital sim card that is easily activated on your mobile device by scanning the QR code that you receive in your mail after you purchase your eSIM online.
If you’re looking to buy an eSIM, it’s good to note that you are only able to buy one from a 3rd party.
I’ve recently stumbled upon Airalo, which has now become my go-to when it comes to eSIMs.
Airalo is the world’s first eSIM store and offers data packages for over 200 countries, making it super easy to connect to the internet from the moment you land.
More information on the Airola eSIM for Uzbekistan can be found here.
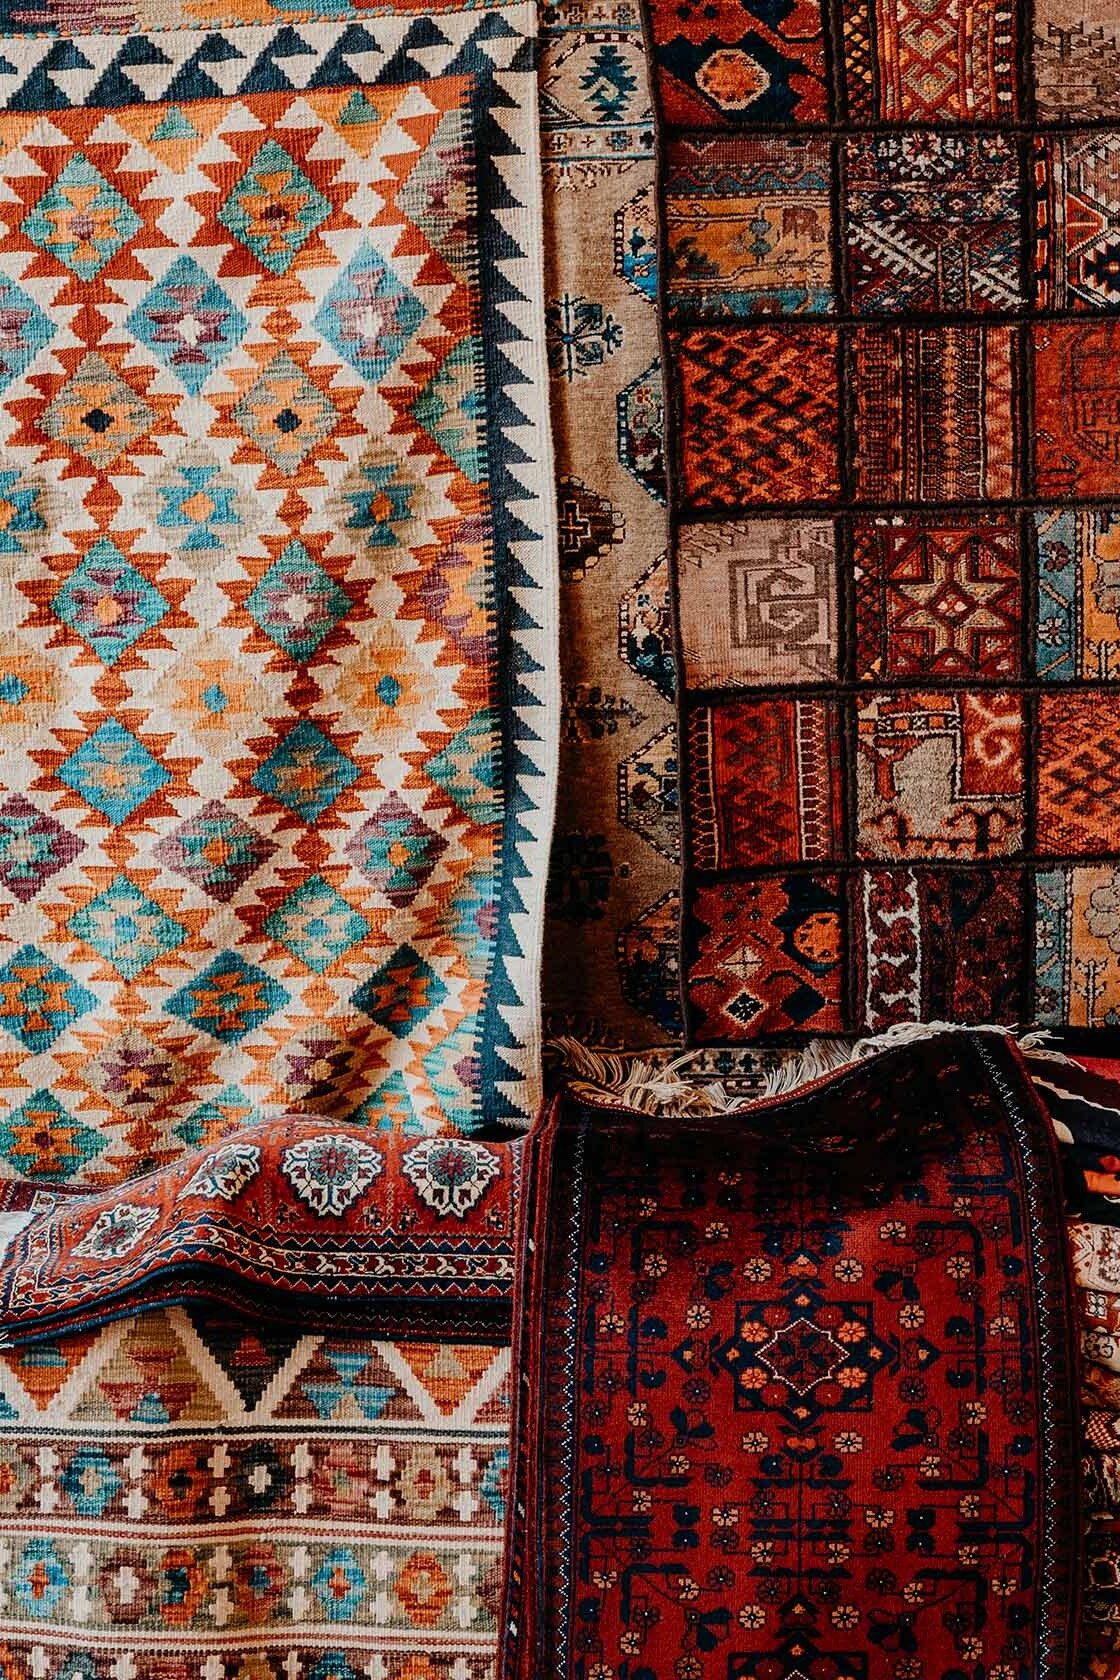
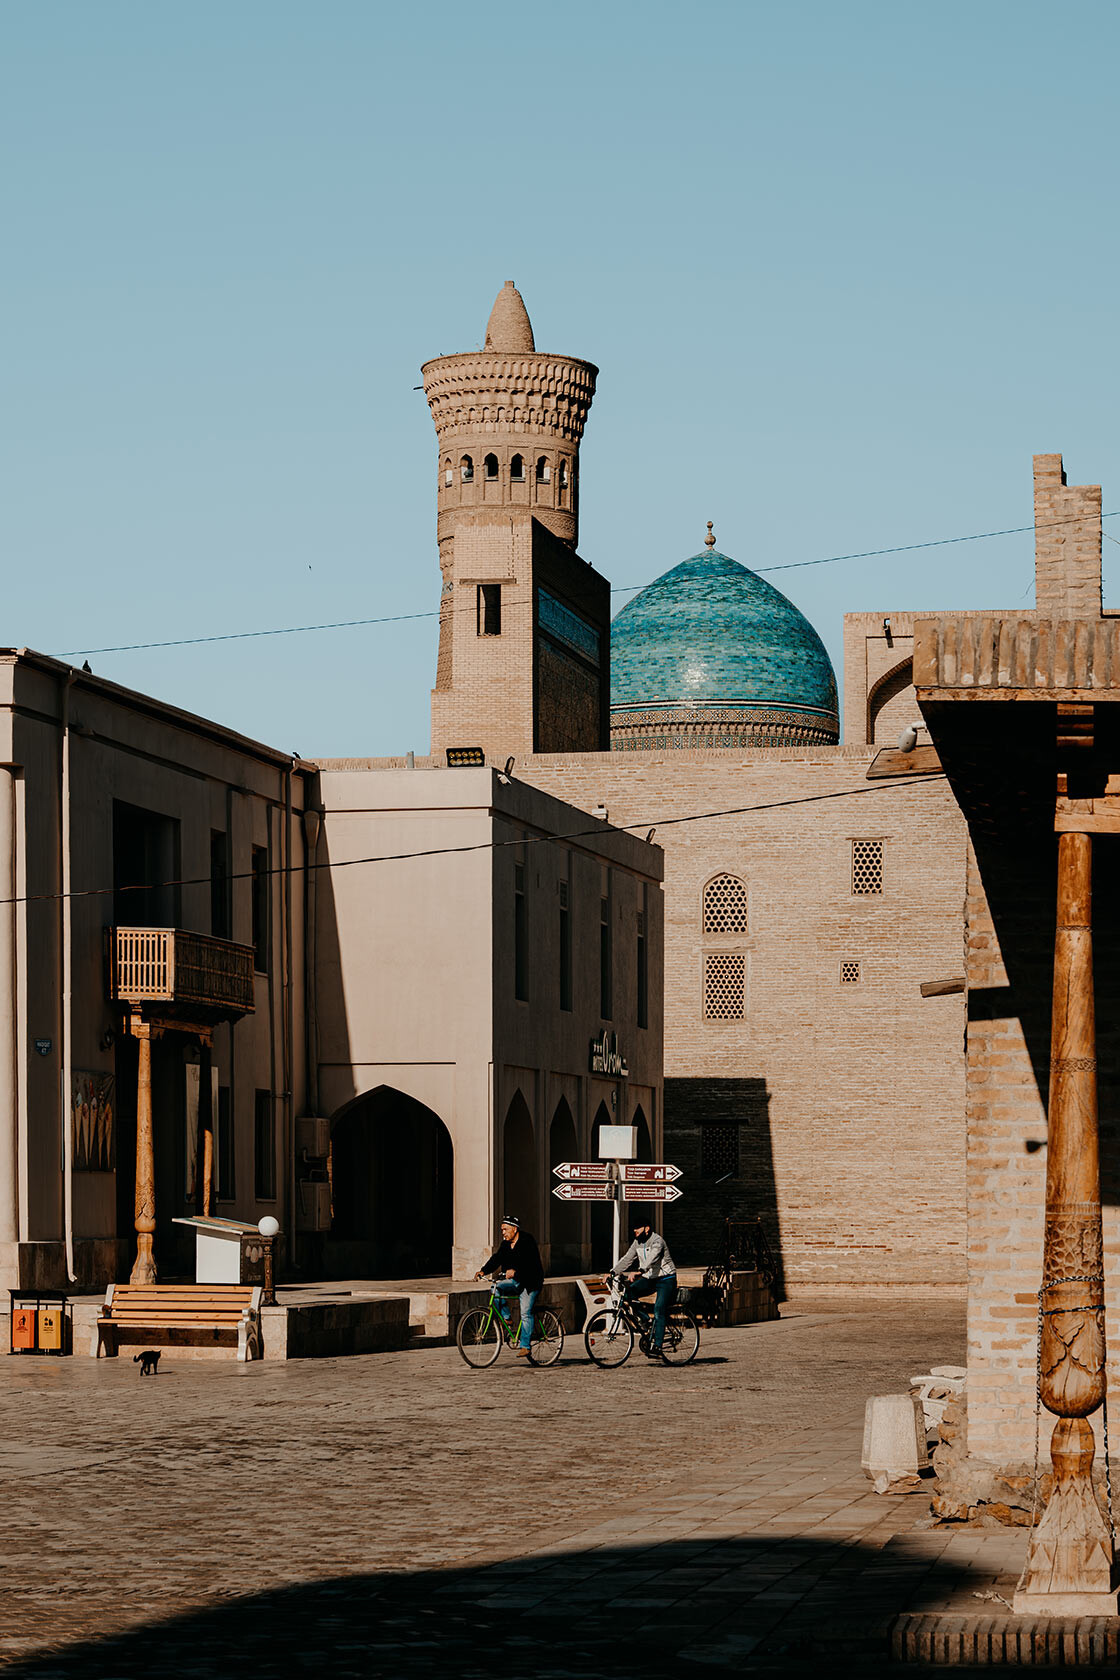
Uzbekistan sim card Providers
There’s no shortage of excellent mobile network providers in Uzbekistan, offering a wide range of data packages to travellers.
I’ve listed the best sim card Providers down below:
Ucell
One of the leading mobile network providers in Uzbekistan, Ucell is known for its extensive coverage and reliable services.
With a wide range of SIM card data packages on offer, it’s easily one of the best options, both for short-term and long-term visitors of the country.
The data packages at Ucell include:
– 20 GB data, unlimited minutes and 1500 SMS that are valid for 30 days | 50.000 SOM (€4,-)
– 35 GB data, unlimited minutes and 1500 SMS that are valid for 30 days | 70.000 SOM (€5,65)
– 50 GB data, unlimited minutes and 1500 SMS that are valid for 30 days | 100.000 SOM (€8,-)
– 200 GB data, unlimited minutes and 1500 SMS that are valid for 30 days | 150.000 SOM (€12,-)
There’s one downside though, Ucell doesn’t allow users to make a personal hotspot, which makes working remotely a tad more challenging at times.
BeeLine
With over 10 million active users, BeeLine is deemed Uzbekistan’s number-one mobile network provider and developed an excellent reputation in terms of network speed and signal strength.
Add to that, that they have knowledgeable English-speaking staff, a wide range of data plans to choose from, and pretty affordable prices, and you instantly understand why BeeLine has become the most popular provider in Uzbekistan.
At BeeLine, you can choose the following data packages:
– 10 GB data that is valid for 30 days | 50.000 SOM (€4,-)
– 20 GB data that is valid for 30 days | 65.000 SOM (€5,25)
– 30 GB data that is valid for 30 days | 75.000 (€6,-)
– 50 GB data that is valid for 30 days | 90.000 (€7,25)
– 75 GB data that is valid for 30 days | 110.000 (€8,90)
– 100 GB data that is valid for 30 days | 130.000 (€10,50)
– 150 GB data that is valid for 30 days | 150.000 (€12,-)
Mobiuz
Another great option is Mobiuz, a major mobile network provider that is considered BeeLine’s greatest competitor, and that’s for a good reason.
Known to have excellent coverage throughout the entire country, Mobiuz is easily one of the most reliable options, with a wide range of monthly Internet packages on offer.
The internet packages at Mobiuz include:
– 5 GB of data that is valid for 30 days | 33.000 SOM (€2,70)
– 10 GB of data that is valid for 30 days | 50.000 SOM (€4,-)
– 20 GB of data that is valid for 30 days | 55.000 SOM (€4,40)
– 30 GB of data that is valid for 30 days | 65.000 SOM (€5,30)
– 50 GB of data that is valid for 30 days | 75.000 SOM (€6,-)
Airalo
Ever since the now extremely popular eSIM came on the market, Airalo had established its position as the leading company in terms of this innovative digital alternative.
For Uzbekistan, Airalo released the Uzbeknet eSim, a data-only SIM card that operates on the popular network of Beeline and offers instant connectivity.
At Airalo, you can choose the following data packages:
– 1 GB of data that is valid for 7 days | 55.000 SOM (€4,50)
– 2 GB of data that is valid for 15 days | 90.000 SOM (€7,50)
– 3 GB of data that is valid for 30 days | 115.000 SOM (€9,50)
– 5 GB of data that is valid for 30 days | 165.000 SOM (€13,50)
– 10 GB of data that is valid for 30 days | 270.000 SOM (€22,-)
– 20 GB of data that is valid for 30 days | 415.000 SOM (€34,-)
Though Airalo is the priciest option on this list, I still believe that it could be an excellent pick, as you can easily arrange it upfront so you’ll have instant connectivity when you arrive in Uzbekistan.
On top of that, the Airalo eSIM allows users to make a personal hotspot too, which makes it perfect for those working remotely.
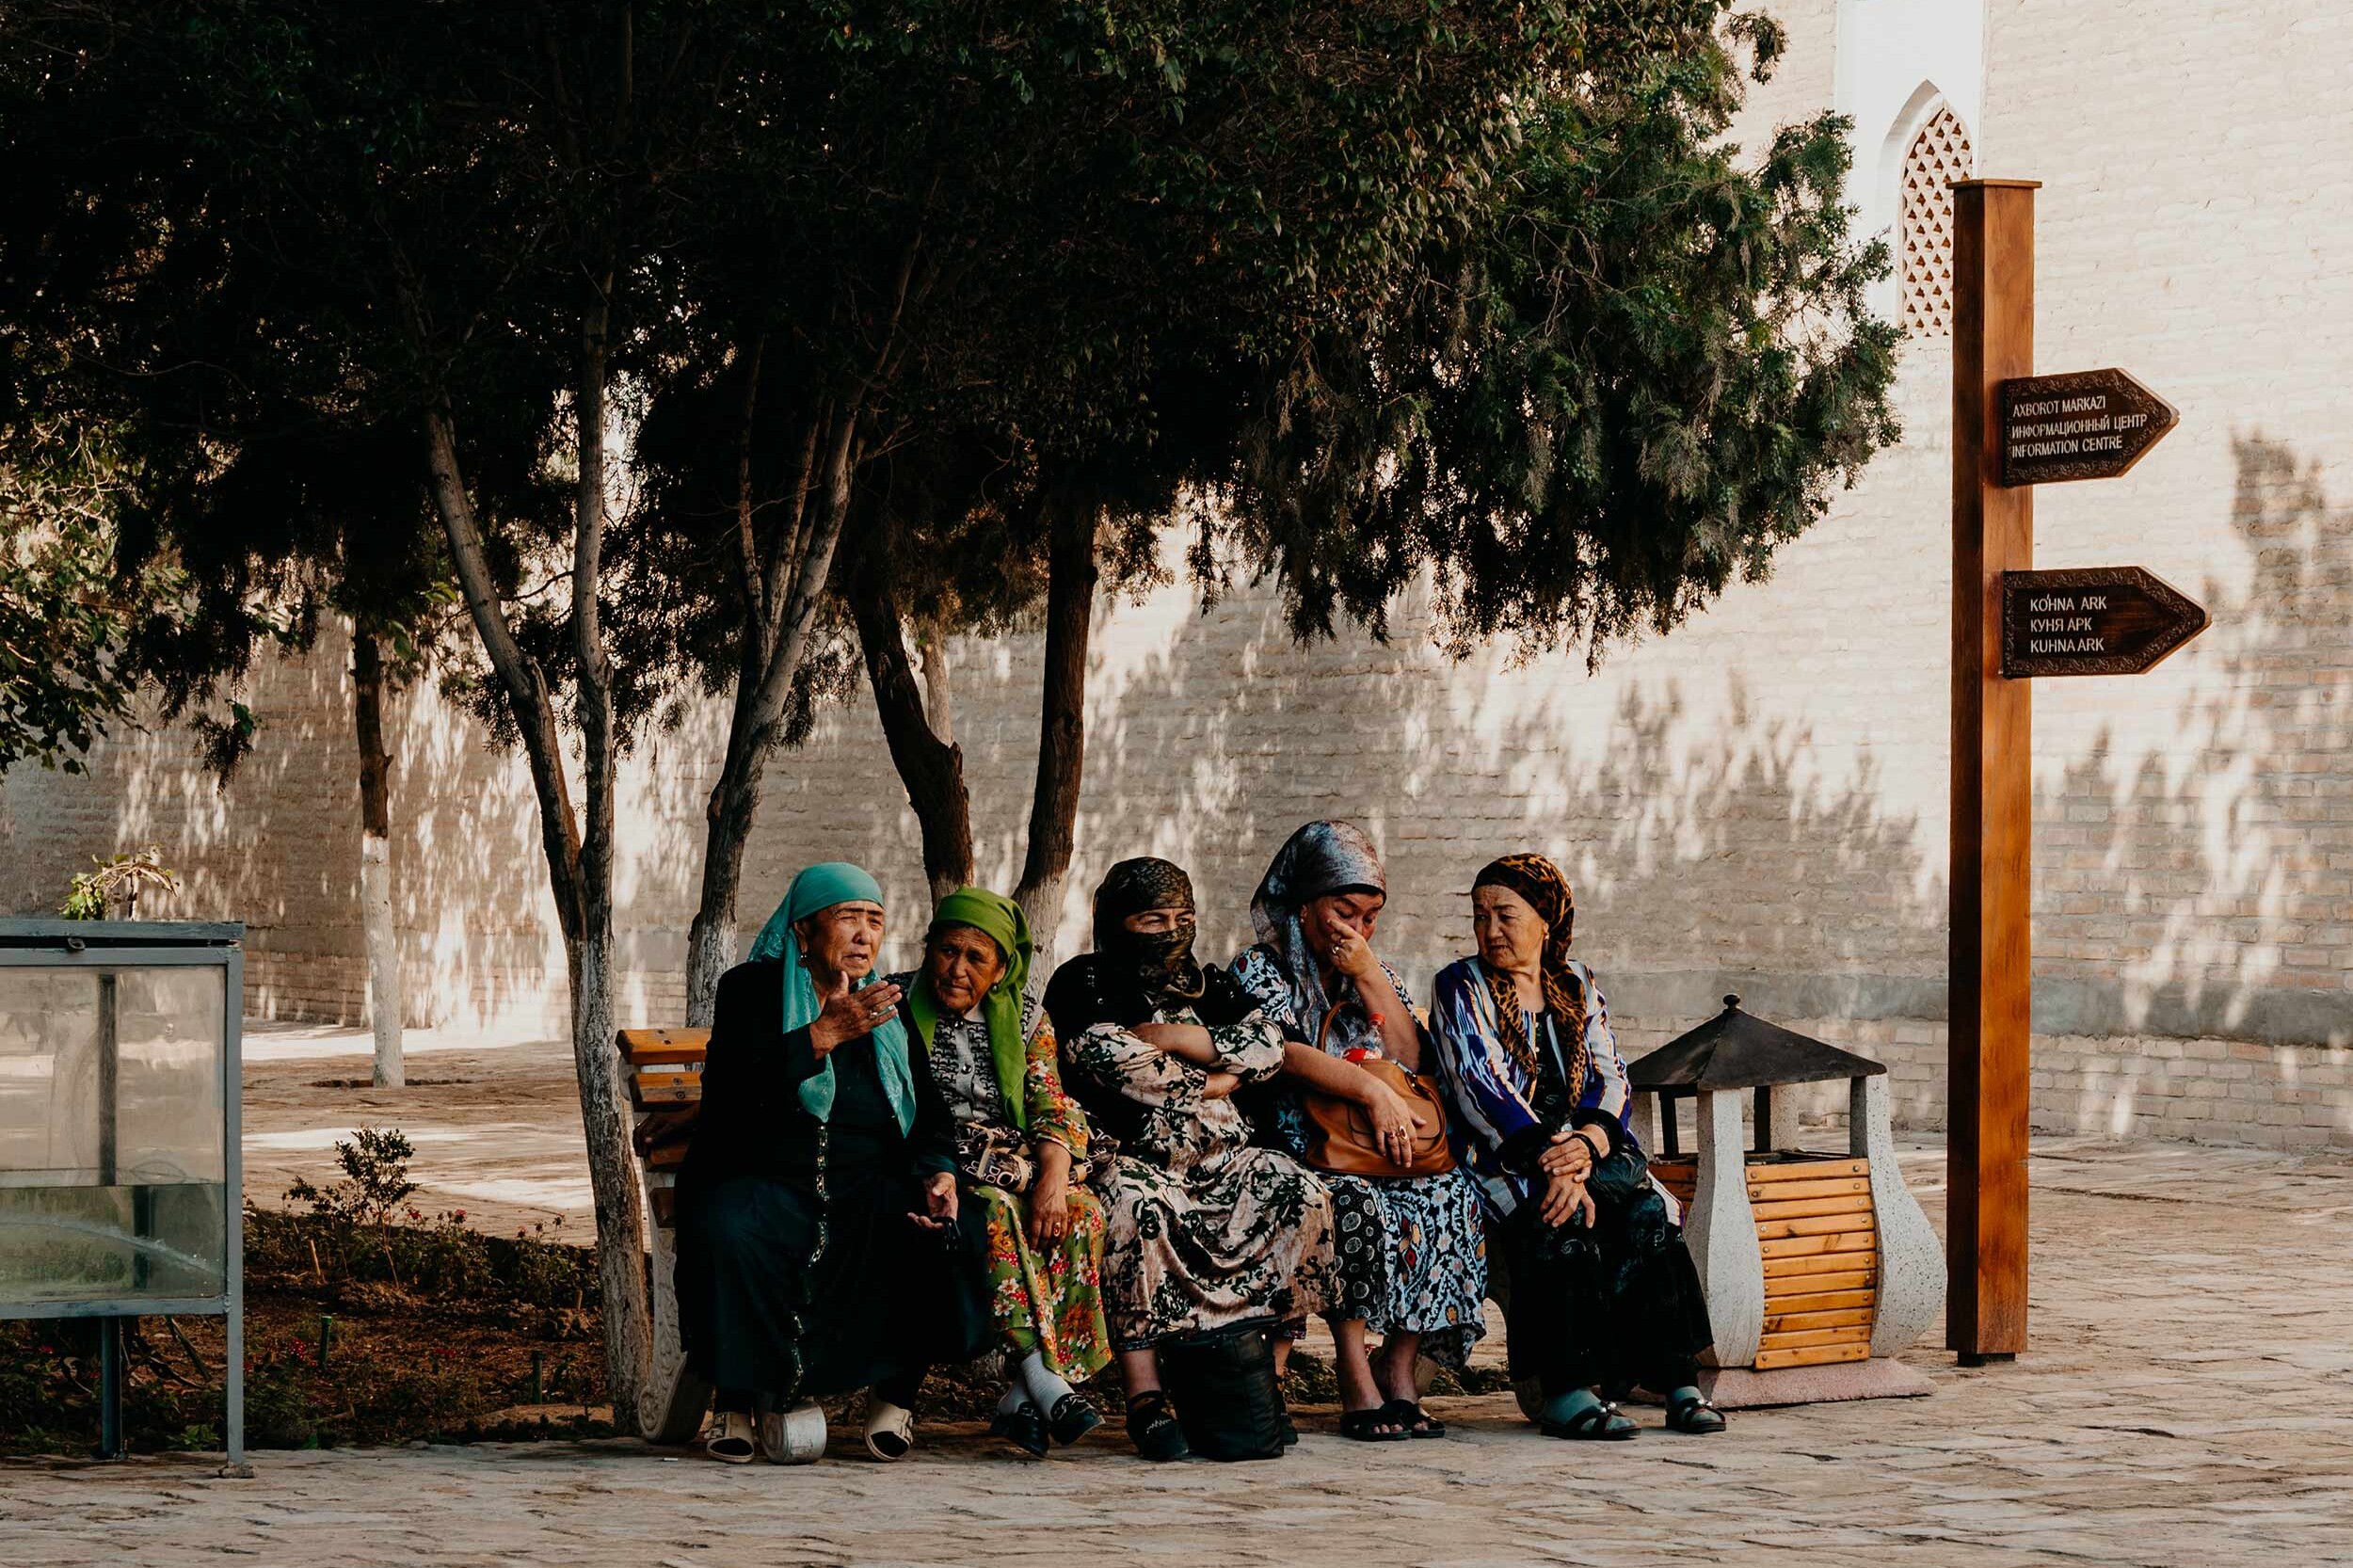
My advice
Given I bought my SIM card for Uzbekistan from Ucell upon arrival at the Tashkent International Airport and had a good experience, I’d highly recommend anyone to buy the same.
For 50.000 SOM (€4,-), you’ll receive a data package of 20 GB, unlimited minutes and 1500 SMS that you can use for 30 days after activation.
Additionally, you could also opt for 35GB for 70.000 SOM (€5,65), 50GB for 100.000 SOM (€8,-), or 200GB for 150.000 SOM (€12,-), perfect for large consumers or those that spent more time in Uzbekistan. Do note that these packages are also valid for 30 days.
I opted for the 20GB package, and had more than enough data for 14 days in Uzbekistan – plus the connection was stable for most of my trip, with the exception of the train journey from Bukhara to Khiva.
Additionally, If you like to have everything sorted out before your trip and need to use your SIM as a personal hotspot to work online, I’d highly recommend buying an eSIM from Airalo online.

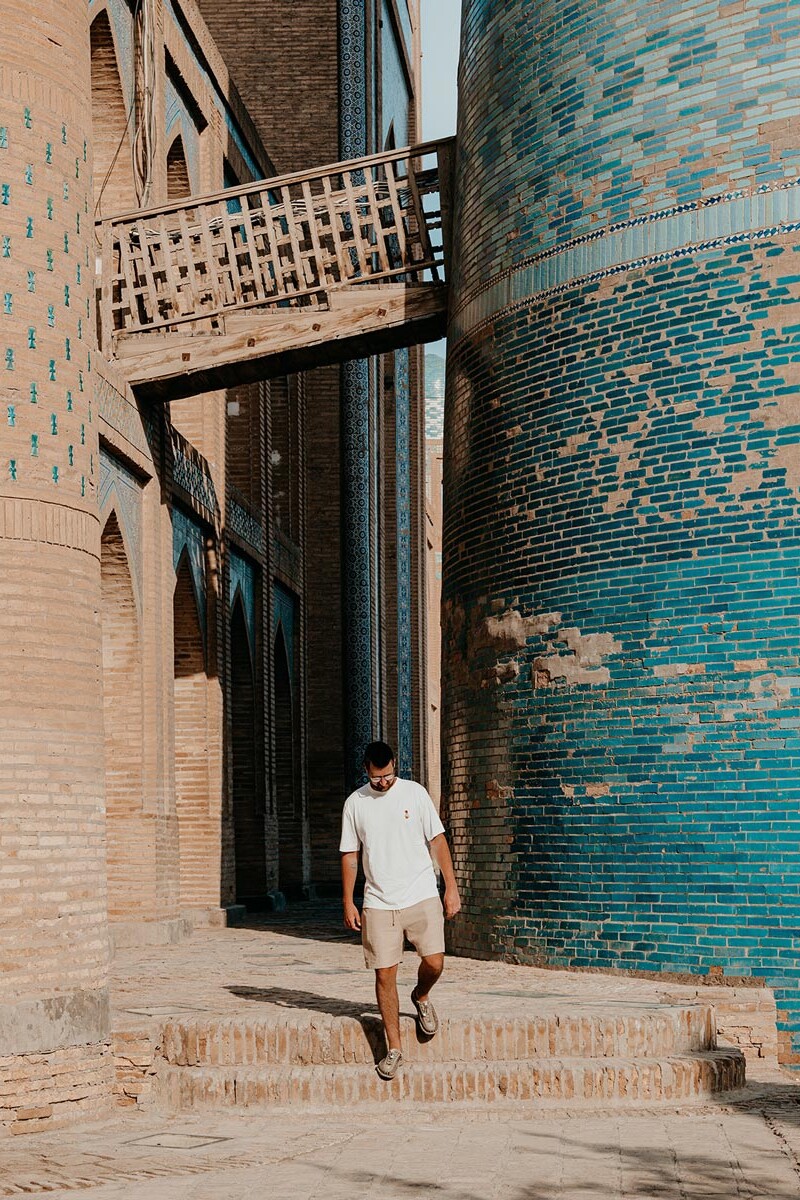
Travel Essentials for Uzbekistan
Where to stay in Uzbekistan
Even though Uzbekistan is relatively new to tourism, accommodation to suit any travel style or budget can be found here.
Whether you’re after a budget-friendly hostel, a boutique-style luxury hotel, or something in between, Uzbekistan has no shortage of excellent accommodation options waiting for your visit.
One of the first things I noticed, was that the standard of accommodation in Uzbekistan is very good, yet exceptionally cheap in comparison to equivalent options found in the Western world.
Those travelling on a budget could find accommodation for as cheap as €20 per day, while those keen to splurge have tons of options to choose from in the €50 – €200 per night range.
Hostels | Check hostels in Uzbekistan on Booking.com
Hotels & Guesthouses | Find the best hotels and guesthouses in Uzbekistan on Booking.com
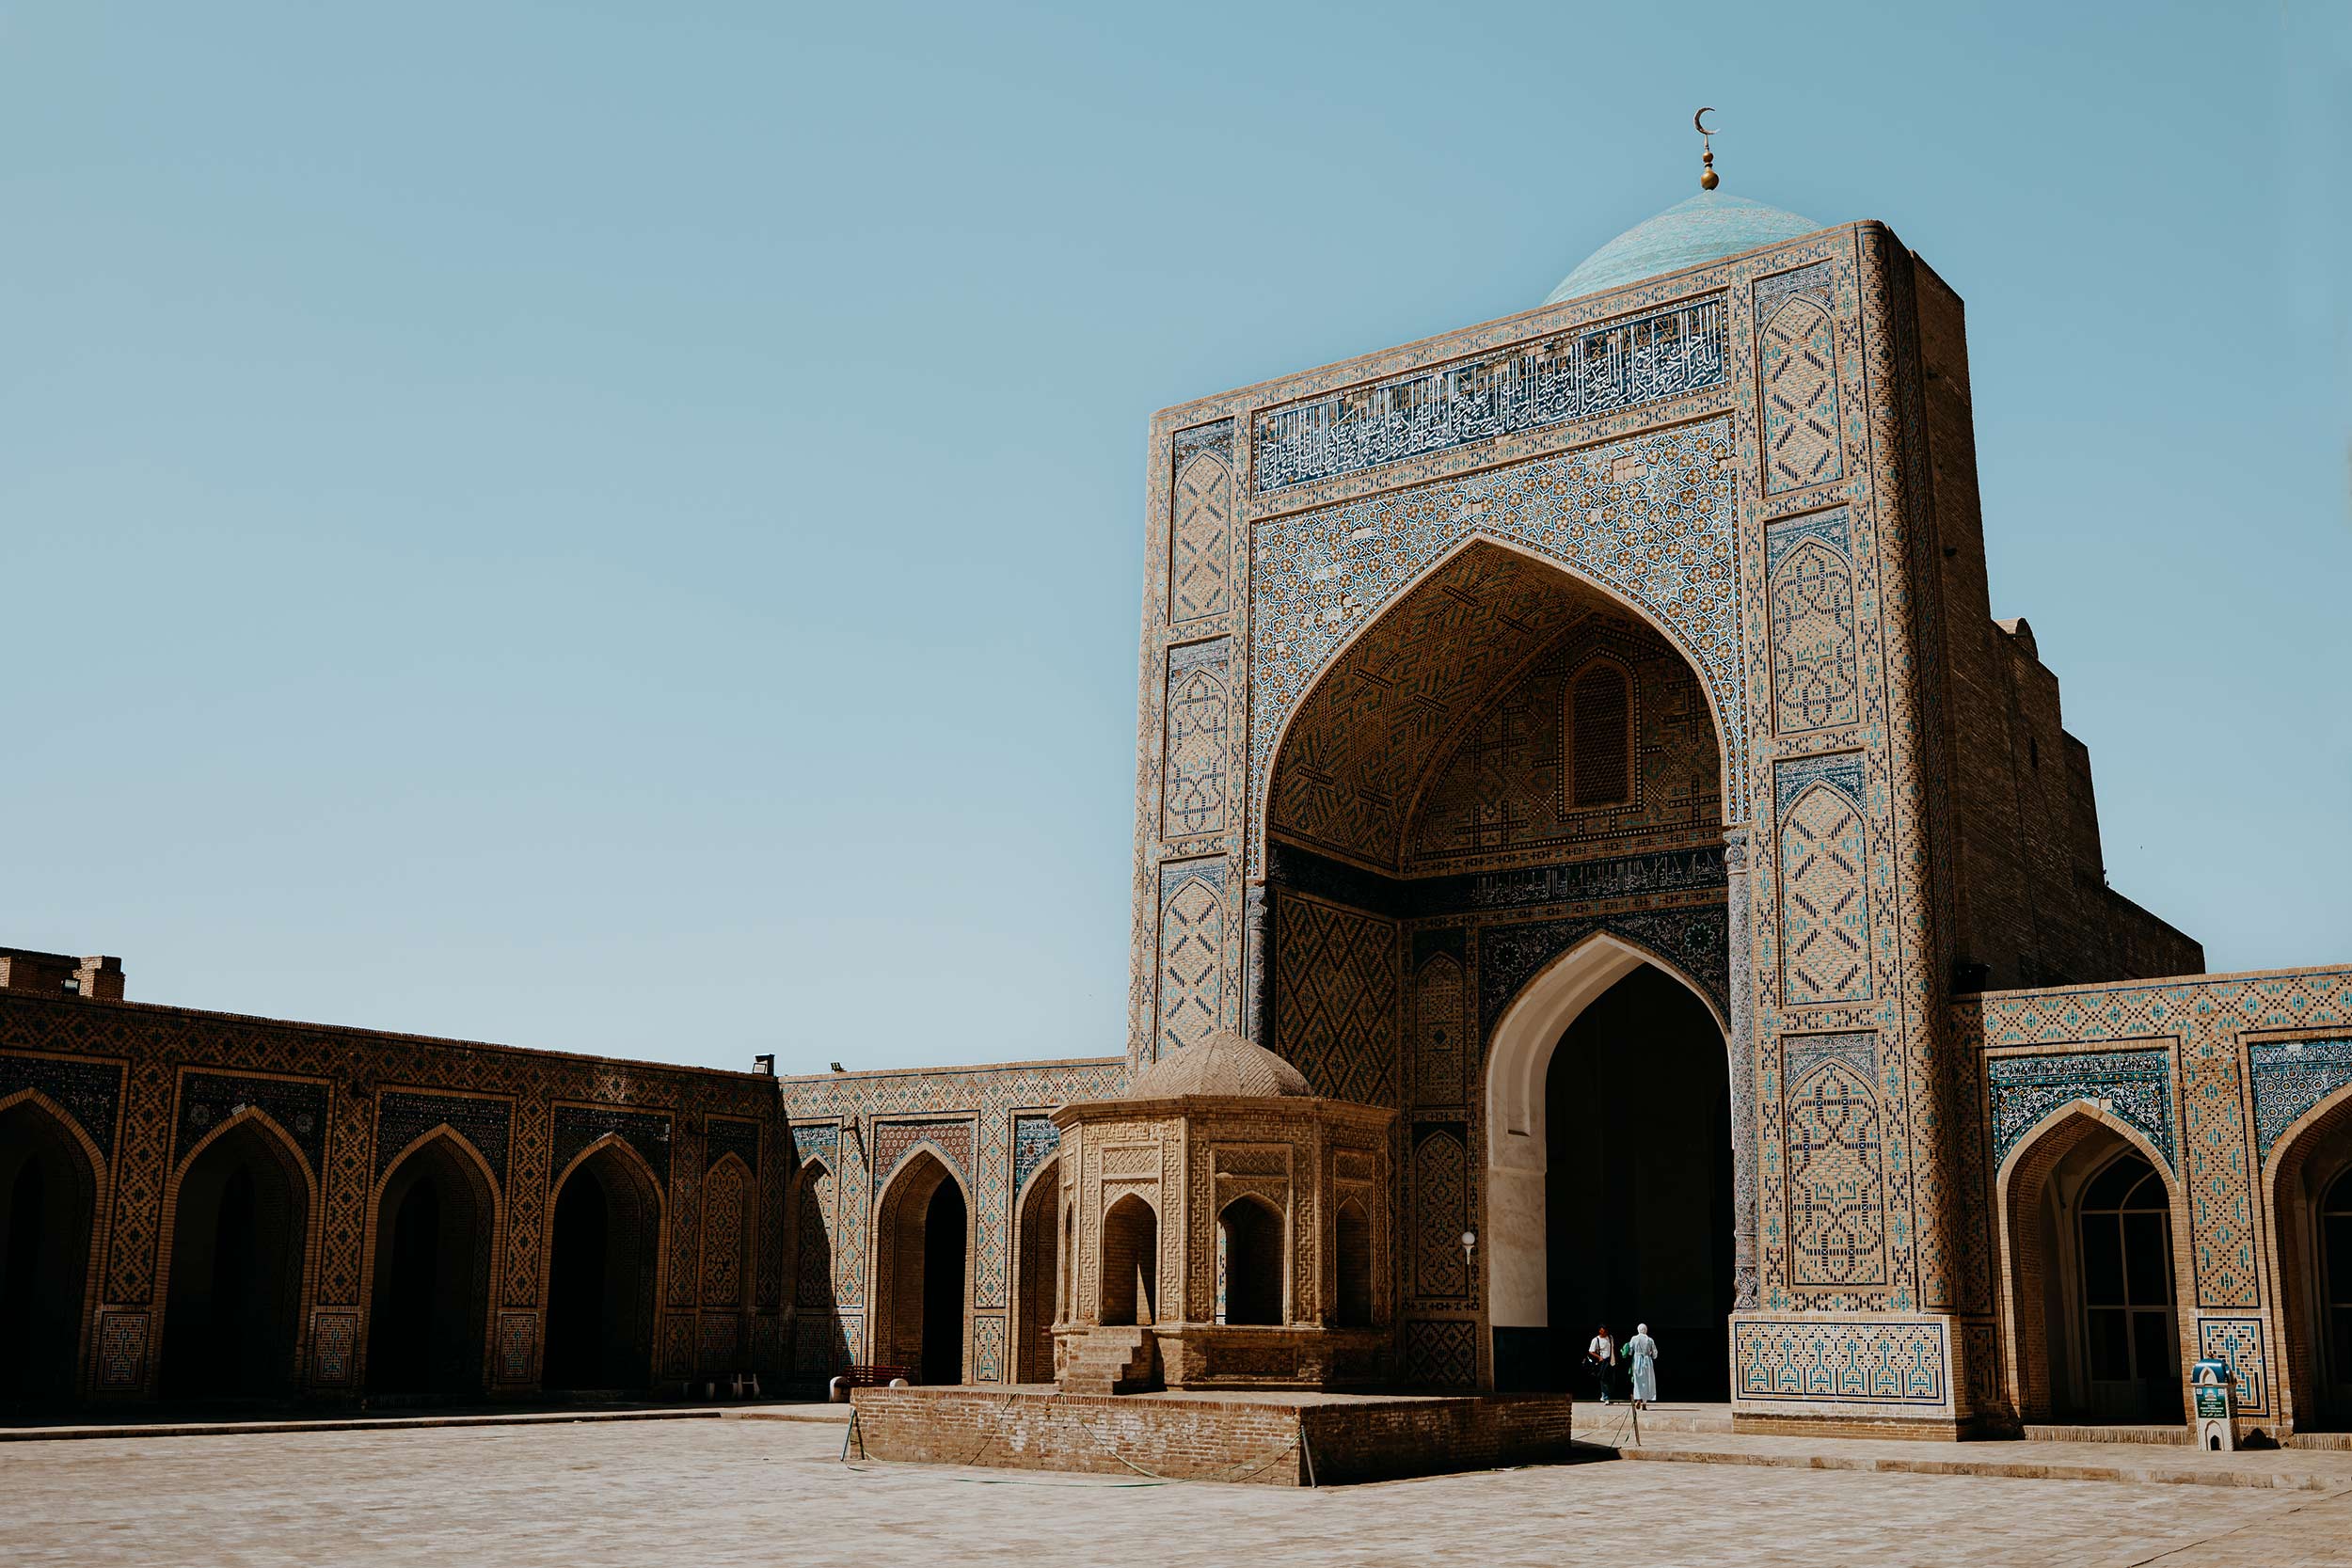
How to get around Uzbekistan
Due to Uzbekistan’s extensive geography (Uzbekistan stretches roughly 1,400 kilometres from west to east), you will notice that you’ll have quite a lot of ground to cover when travelling through the country.
Luckily for you, getting around the country is super convenient, affordable and relatively fast.
By train
A name like the Silk Road might imply that travelling here runs smoothly, which in fact, is true thanks to Uzbekistan’s exceptional rail network.
Rivalling the neatness and comfort found in European trains, the Afrosiyob train is a 210km/h high-speed train that runs daily between Uzebkistan’s major destinations, including Tashkent, Samarkand and Bukhara.
With comfortable spacious seats, USB and power plugs, and the most friendly crew members, travelling through Uzbekistan by train is far more comfortable than taking the plane.
However, when you’re planning to travel to Khiva (which you should), things are a little.
Those venturing to Khiva will notice that you could only get there by taking a Soviet-style sleeper train, which to me is an authentic experience, if not a little time-consuming.
Since tourism in Uzbekistan is still growing at a rapid pace, acquiring train tickets online can be quite a challenging task.
If you want to learn more, I have an in-depth guide on travelling by train in Uzbekistan (coming soon) which can be found here.
By plane
While I would pick travelling by train over travelling by plane in most cases, I would highly recommend taking a flight from Khiva to Tahskent, or the other way around depending on your itinerary.
The reason for this is that the train connection between Tashkent, Samarkand and Bukhara is easily the most convenient option since you don’t have to be at the airport at least 2 hours early – plus it’s the world’s most sustainable mode of transport, which is great too.
Additionally, you could also opt for domestic flights between all of the major cities in Uzbekistan, though I can’t stress enough to make use of the excellent high-speed trains instead.
The best time to visit Uzbekistan
While Uzbekistan is gifted with the most incredible architectural masterpieces that could be visited year-round, this doesn’t necessarily mean that it’s a pleasant destination at any time of year.
In reality, Uzbekistan will be scorching hot in summer, when temperatures soar well over 40 degrees Celsius, while during the winter months, the temperature could dip far below freezing.
For that reason, I believe the absolute best time to visit Uzbekistan is either in spring (April to June) or autumn (late August to October), when the temperature is warm and pleasant, yet not too extreme.
Timing your visit for the shoulder seasons means that you’re more likely to enjoy the many sights without having to find cover from the burning sun all the time.
I personally visited Uzbekistan in May and couldn’t have wished for better circumstances to discover this incredible country and its many historical sights.
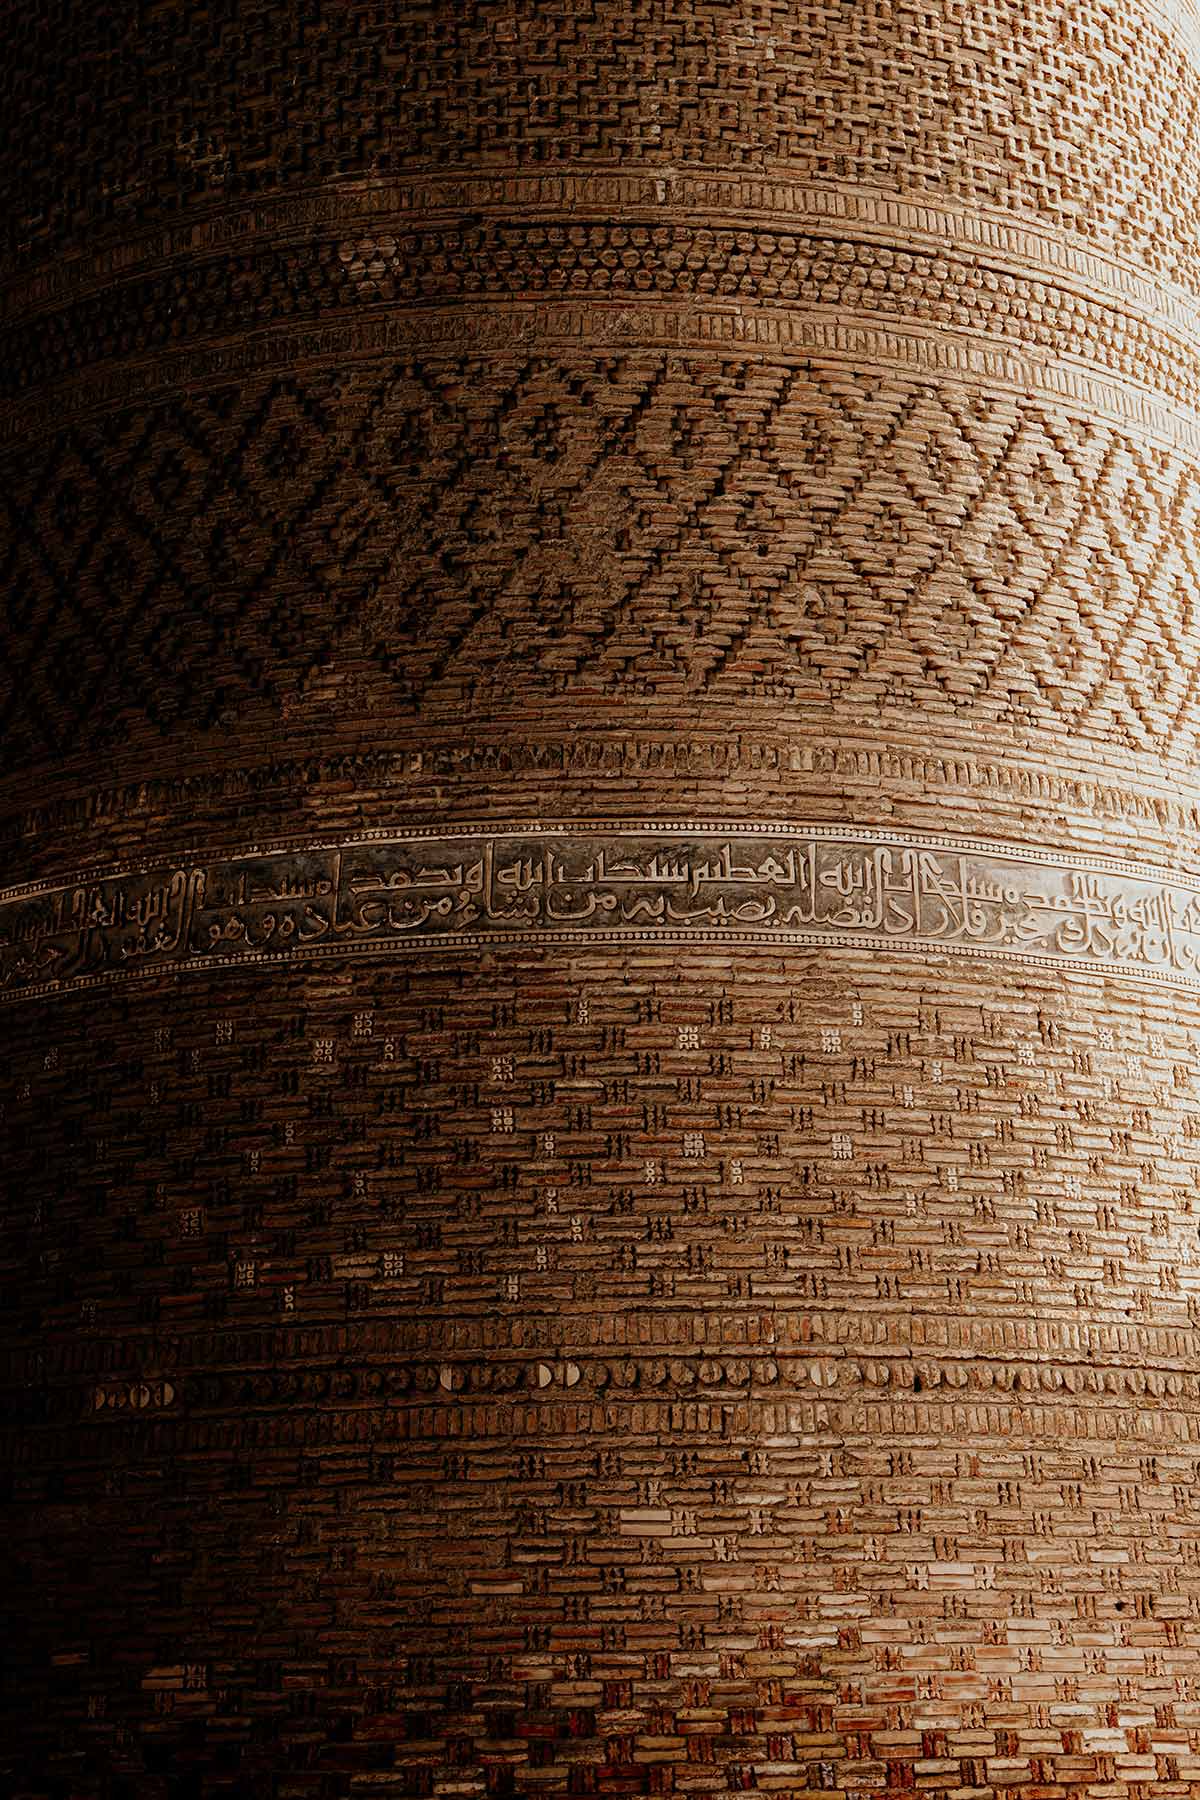
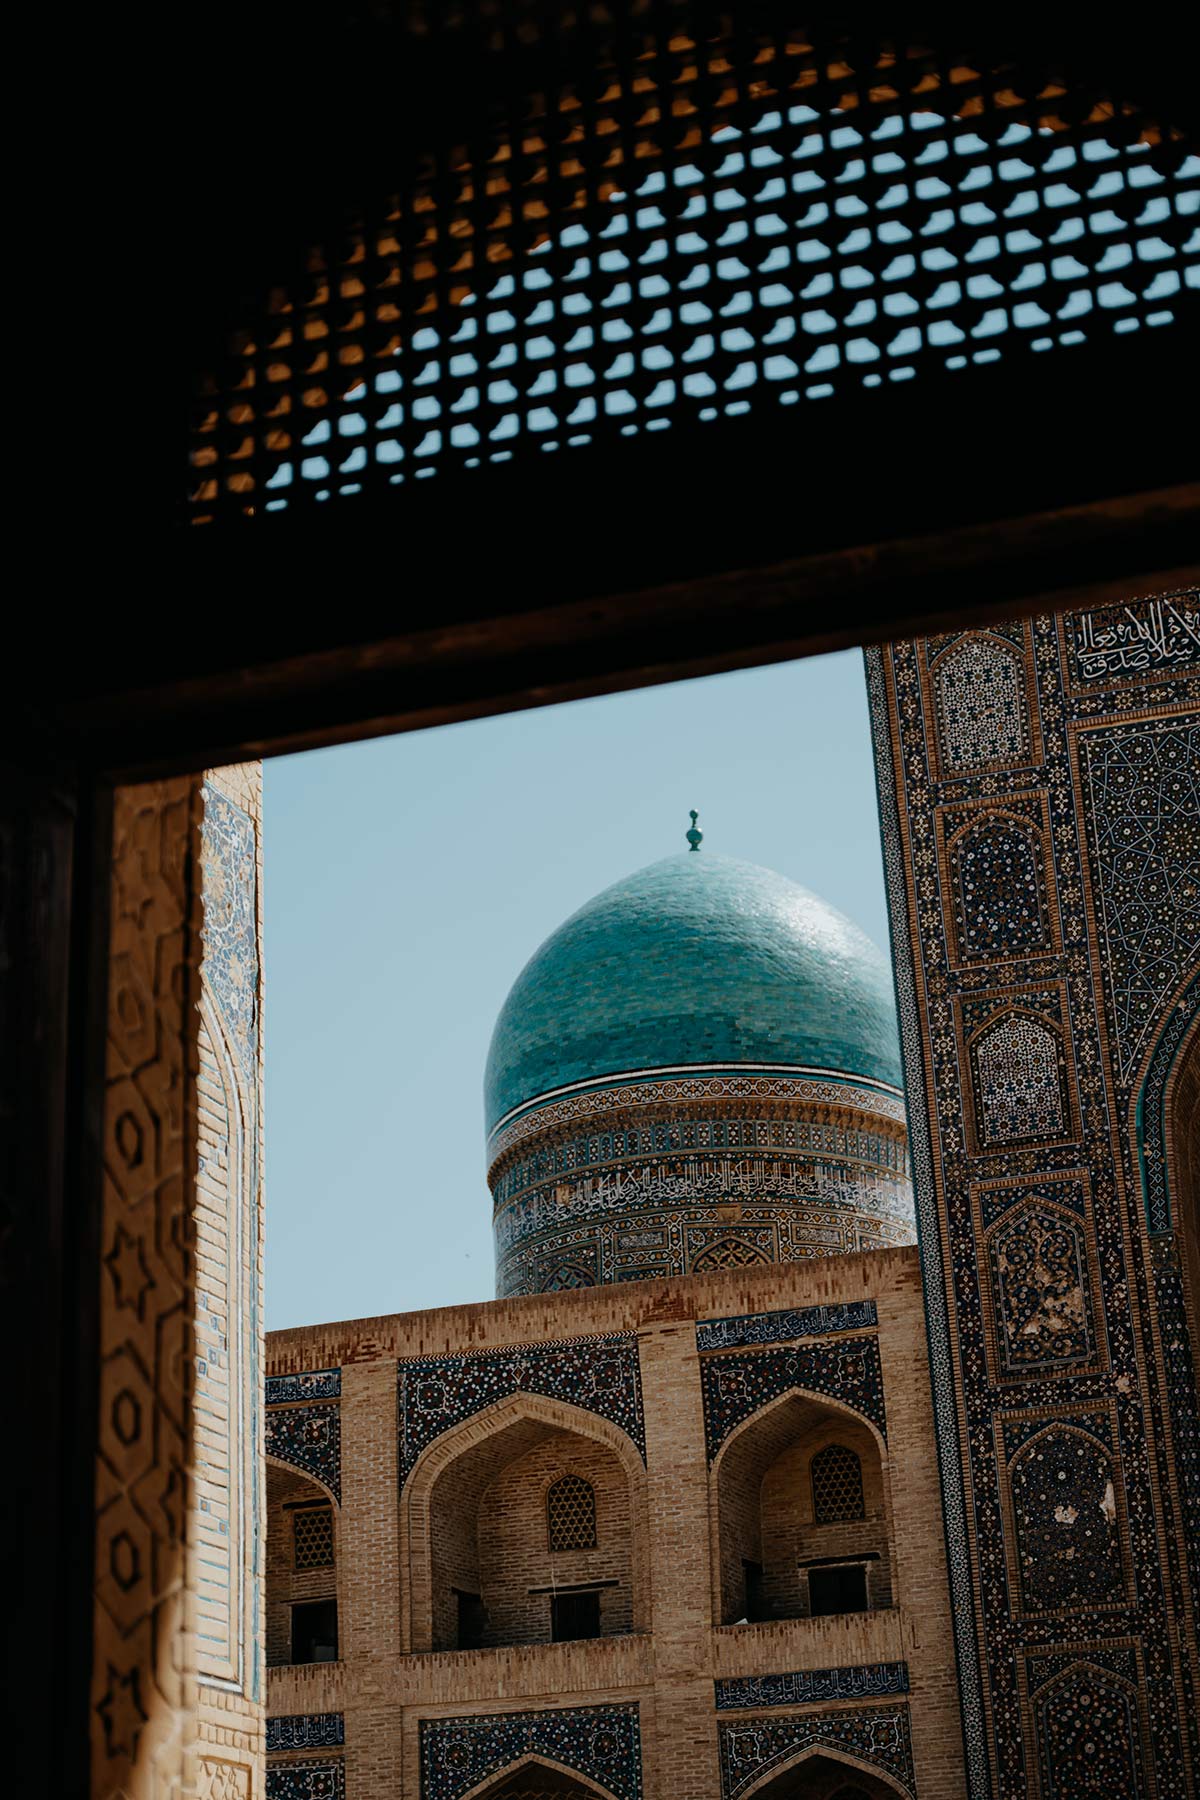
Safety in Uzbekistan | Travel Insurance
When travelling this big wide world, I never go on an adventure without my essential travel insurance sorted out, and though I never felt unsafe in Uzbekistan, I advise anyone travelling here to do the same.
While I believe it’s unlikely to experience any problems when following the suggestions in this guide, something unfortunate could happen at any given time, whether it’s an injury, a stolen camera, or an unforeseen cancellation.
I use Heymondo for travel insurance, as they offer full covid-19 coverage and a handy app with 24-hour medical assistance. So make sure you check it out – readers of WTSW will receive 5% off any insurance policy too.
Cheers!
I’ve been on this travel blogging journey since 2019.
If you appreciate what I do here, these are some ways you can support me.
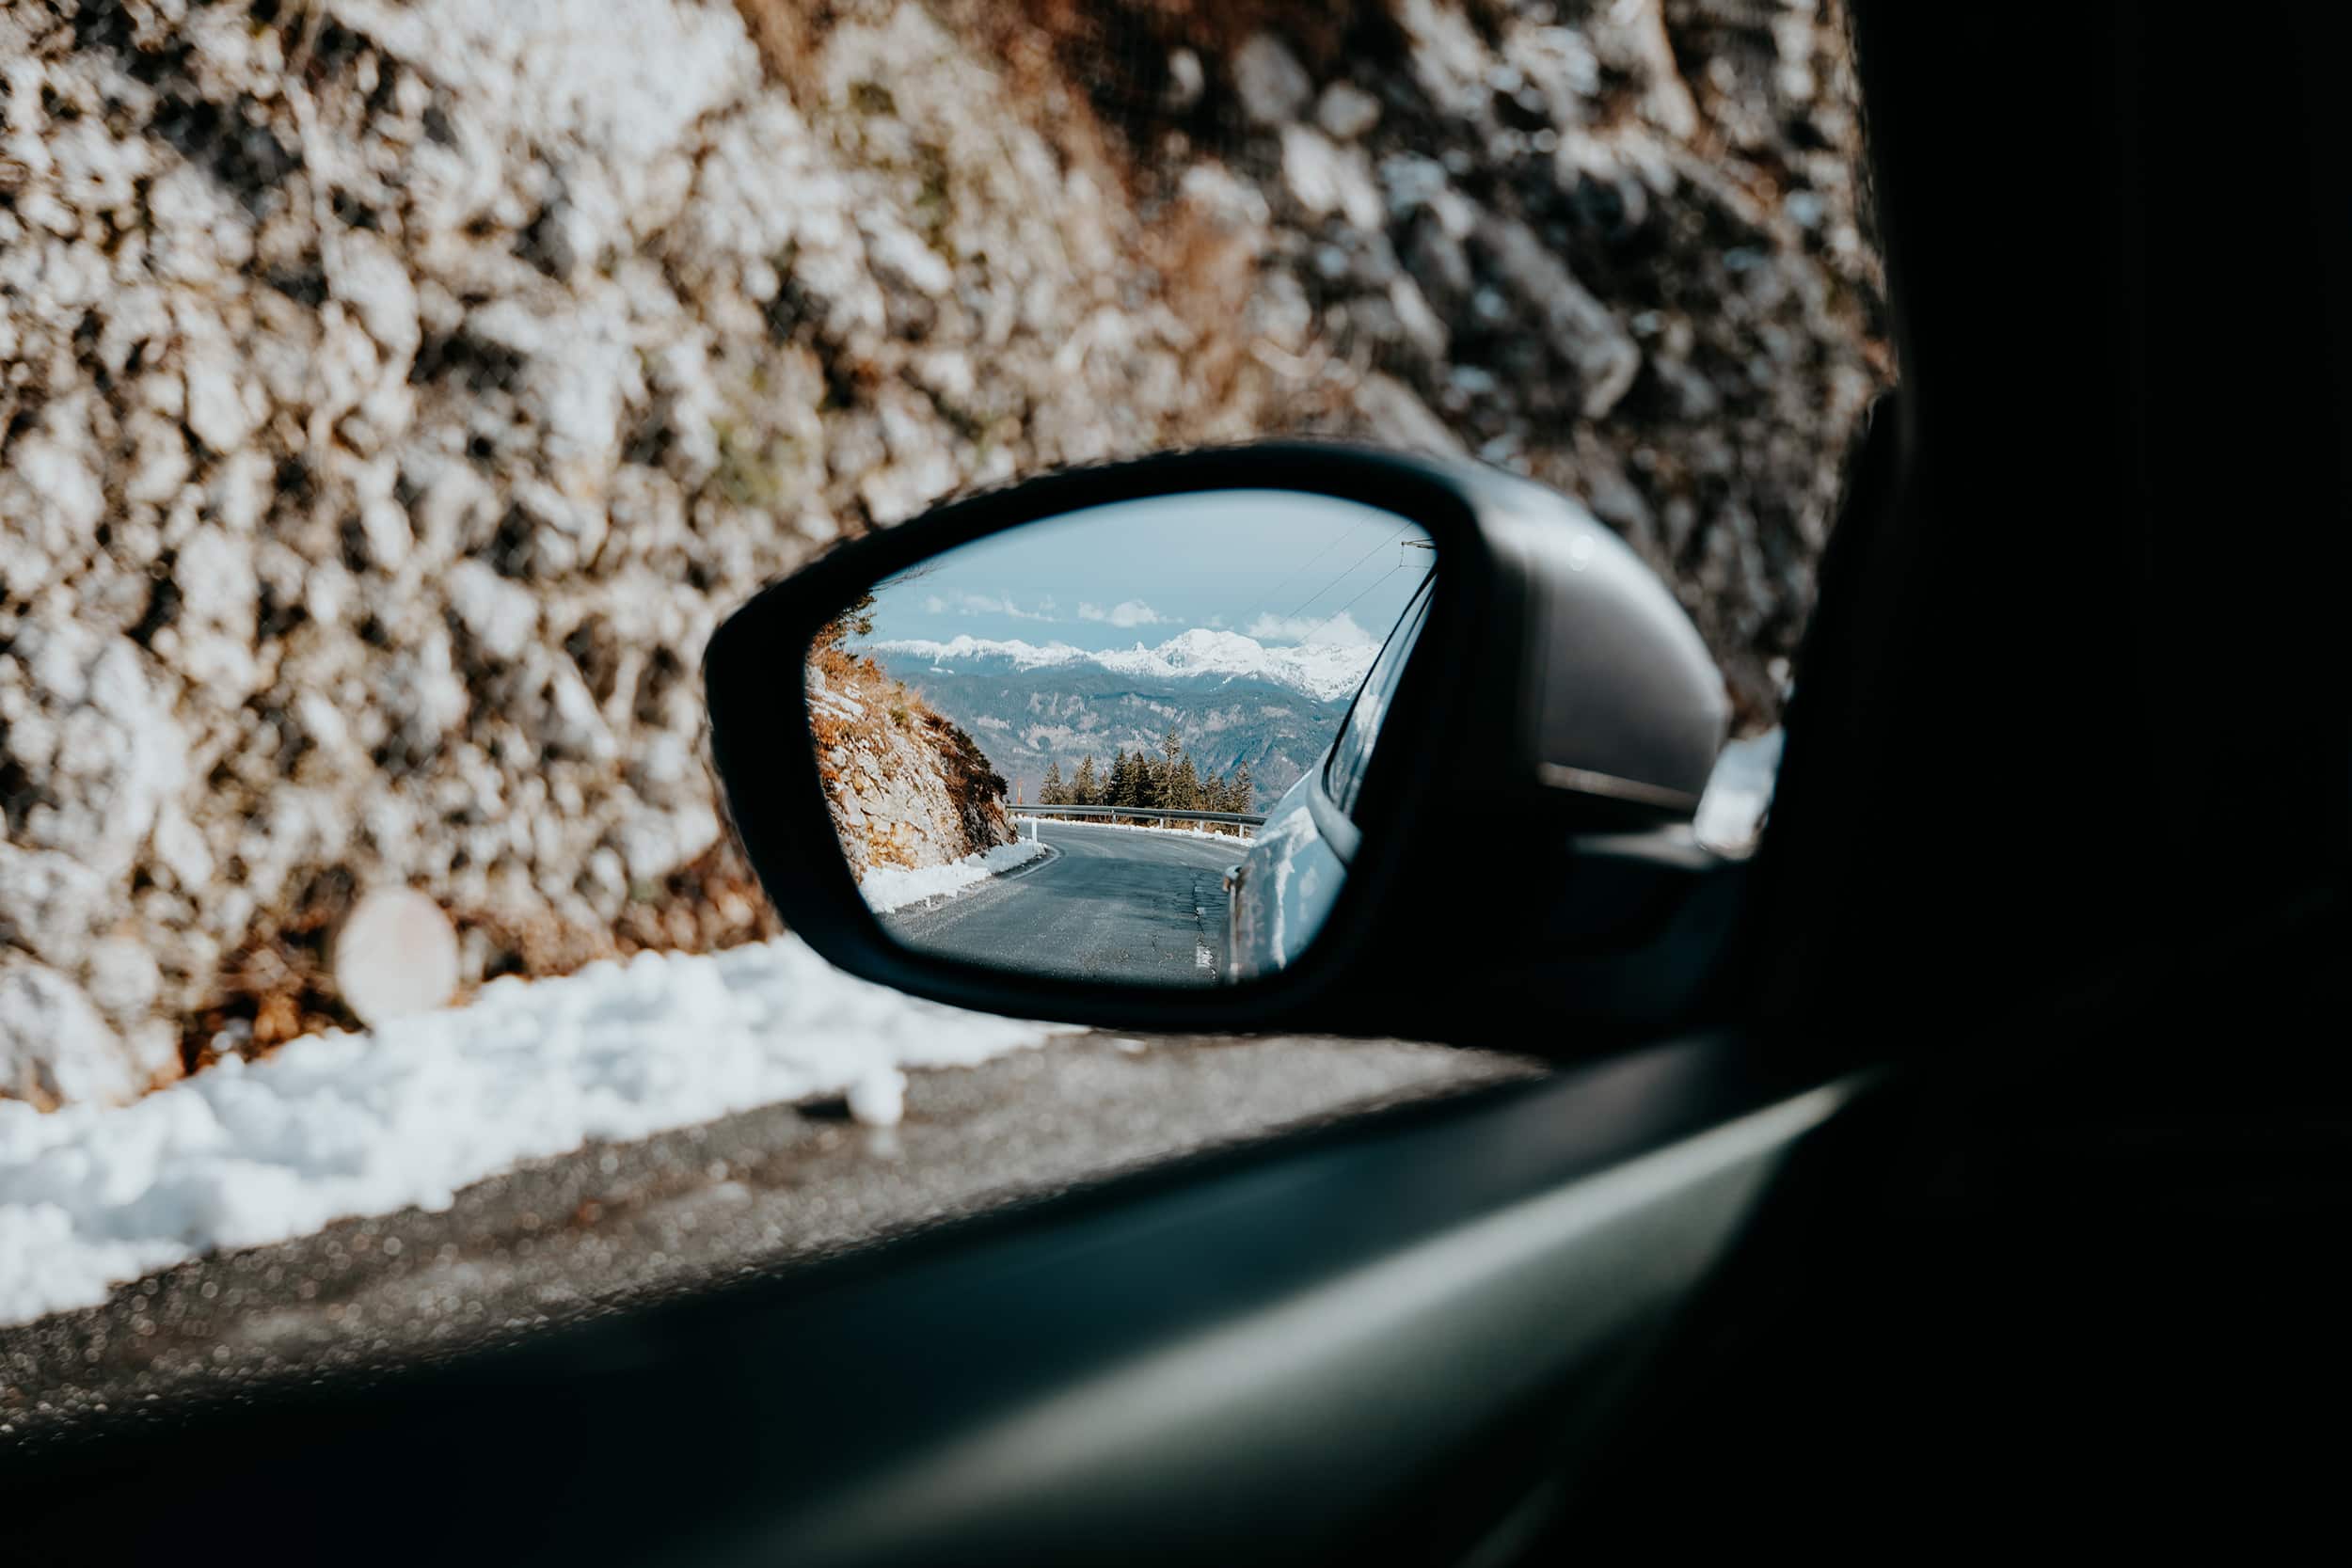
A guide to the Vrsic pass, Slovenia's breathtaking mountain pass
As a road trip aficionado by heart, a winding mountain pass like Vrsic is set to get me hyped up.
Running between Kranjska Gora and the pristine Soca valley, the Vrsic pass is without question one of the most spectacular drives in Slovenia, as it showcases the immense beauty of the Julian Alps in an utterly fascinating way.
After driving the Vrsic pass twice (in fall and winter), it’s safe to say that no Slovenia road trip itinerary is complete without a drive over the exciting, yet slightly feared mountain pass – there’s simply nothing that matches the feeling of taking on the many hairpin bends, while the mesmerising views unfold before you.
However, with a height of 1,611m and exactly 50 hairpin bends to conquer, driving the pass comes with quite a unique set of challenges, which is why I’ve put together this guide.
This in-depth guide includes everything you need to know before driving the Vrsic pass, including where to stop, car rental in Slovenia, the best time to visit, and some of my personal tips.
Enjoy, and remember to keep your eyes on the road.
If you choose to use any of the links on this page, I may receive a small commission at no extra cost to you. By using these links, you’ll have a direct impact on WTSW and my ability to continue to create free insightful travel content for you. If you find any of my tips useful, you can support me by buying a virtual coffee here.
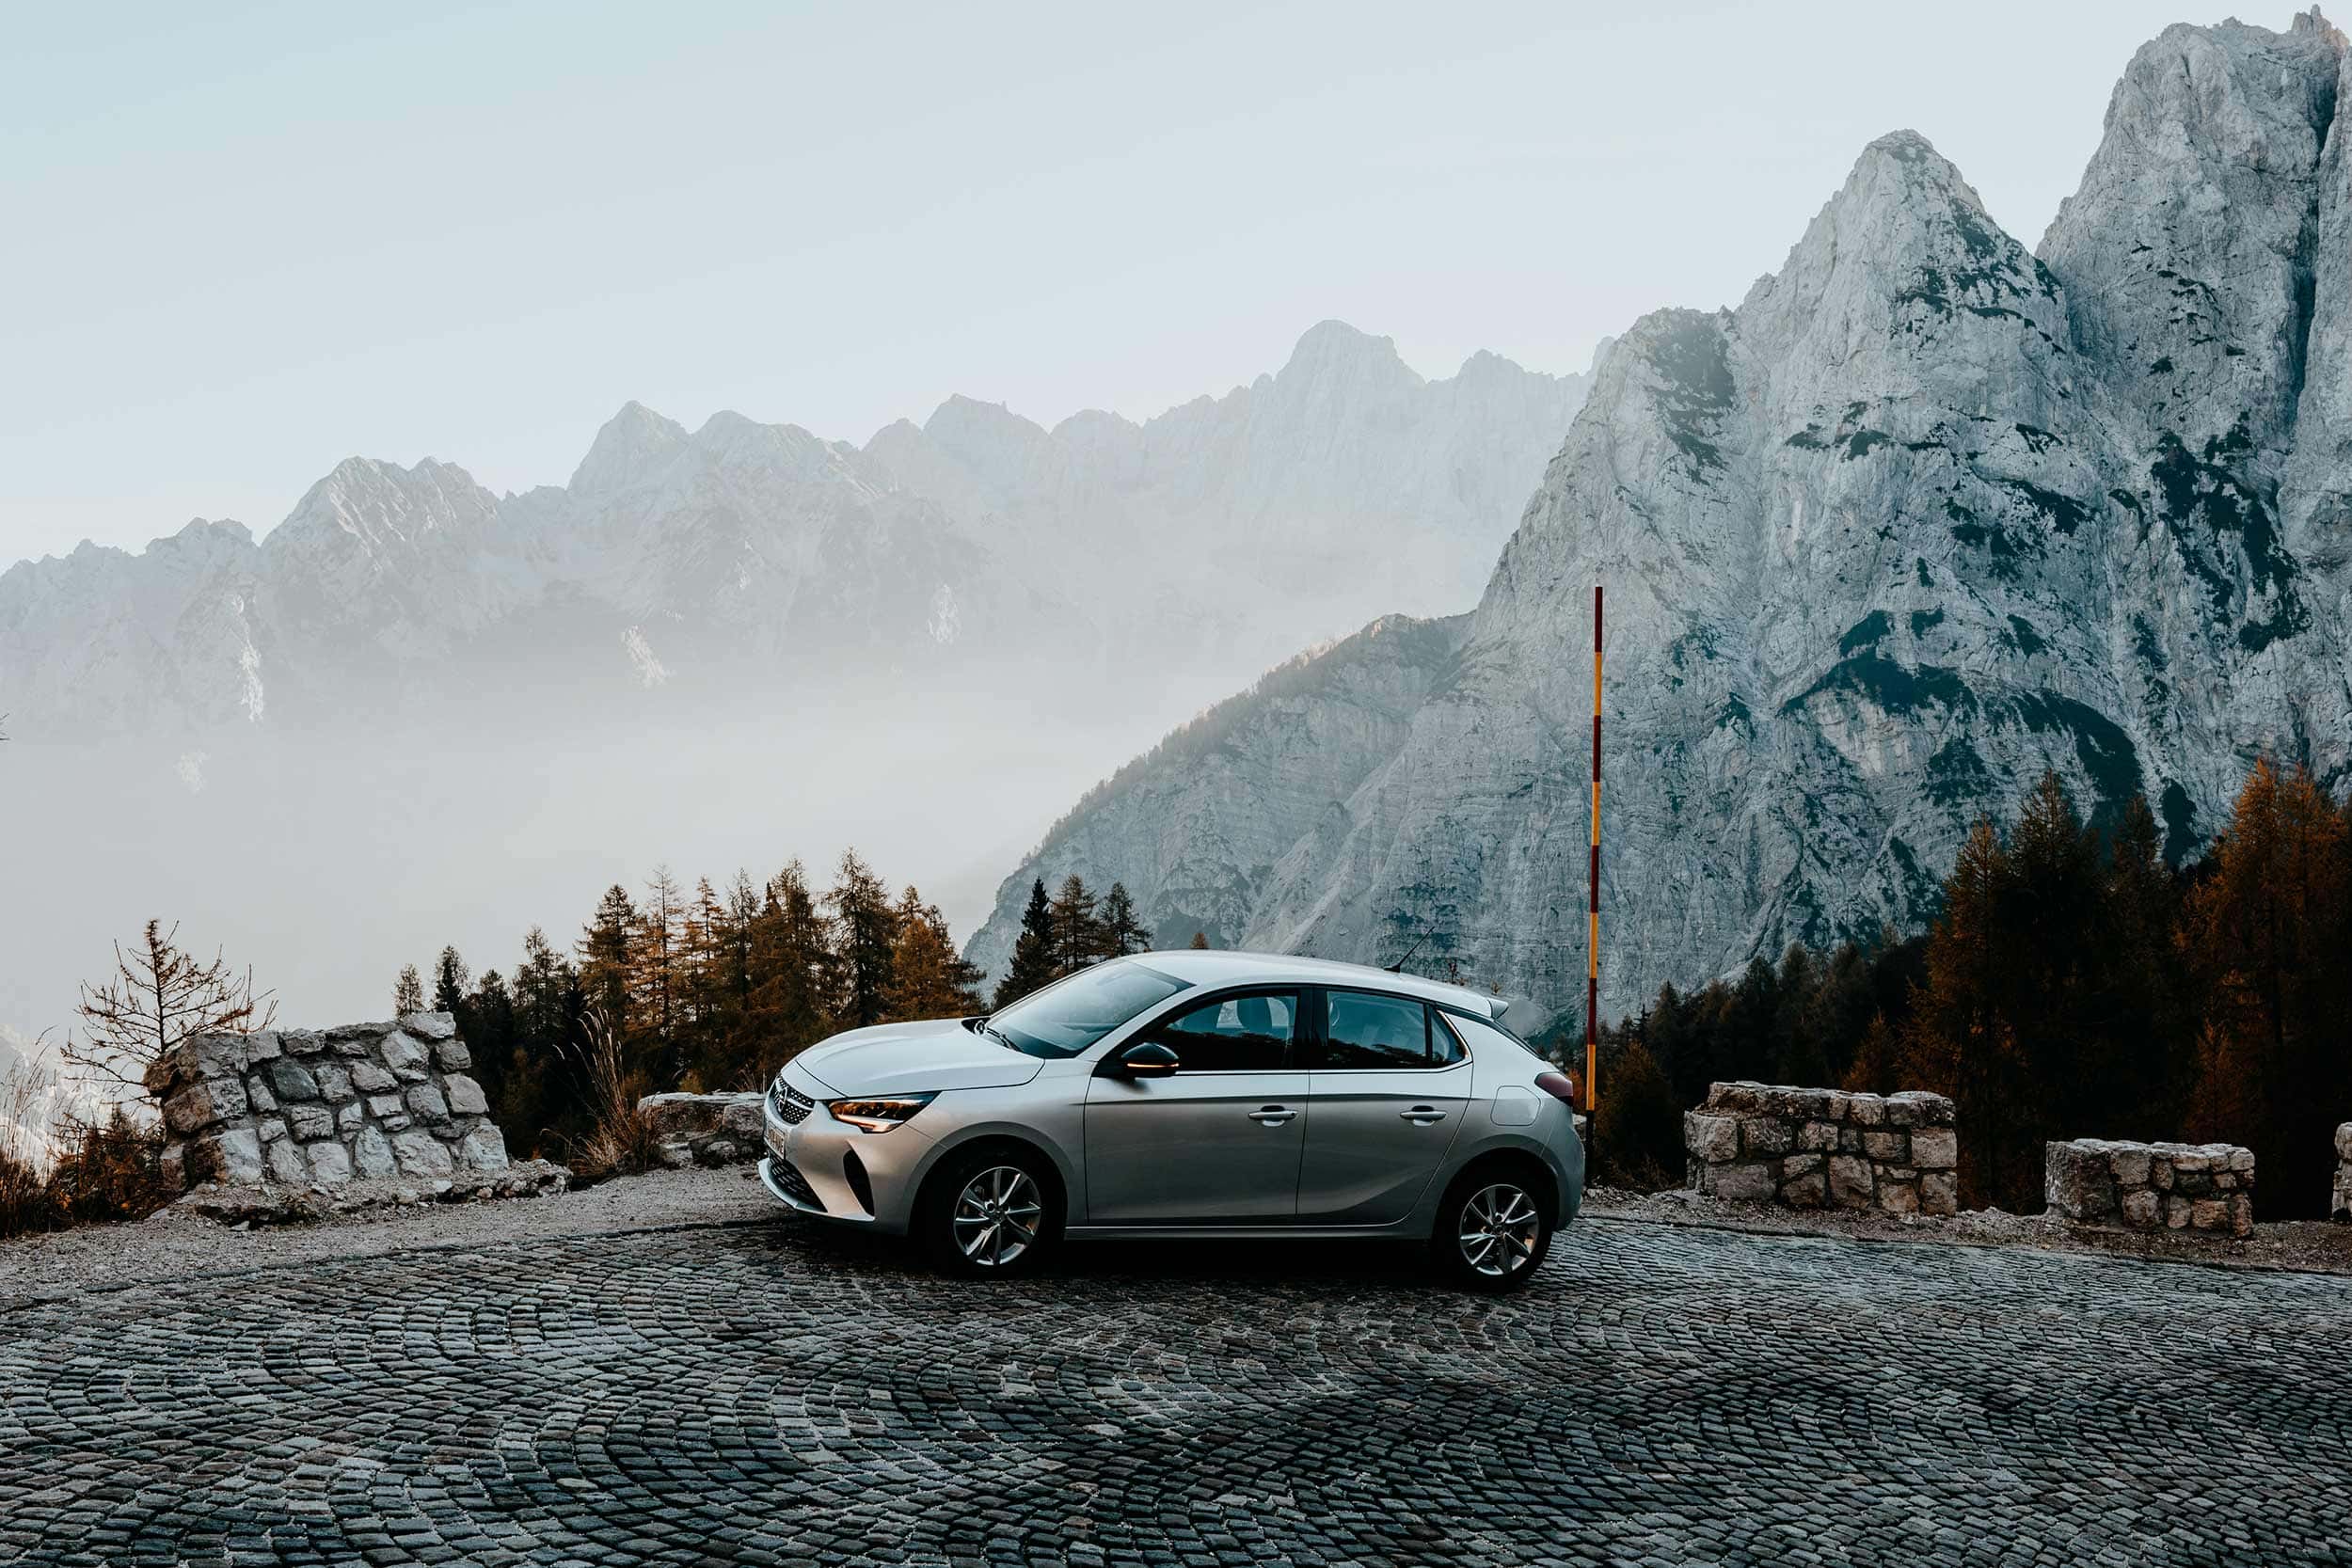
Where is the Vrsic Pass?
The Vrsic Pass is a 1,611m high mountain road amongst the stunning Julian Alps in the northwest of Slovenia.
With exactly 50 hairpin turns, this stunning mountain pass connects two of Slovenia’s most popular areas; Kranjska Gora and the Soca Valley.
Those who’d like to conquer the Vrsic Pass can access the road from Trenta or Kranjska Gora, which makes it an exceptional addition to your road trip through Slovenia.
About the Vrsic pass
The winding mountain road of the Vrsic Pass has been around for more than a hundred years, and has a rich history that dates back as far as World War 1.
But sadly, much of its history is a rather tragic one.
Throughout World War I, the Vrsic Pass served as a crucial supply route for the Austro-Hungarian soldiers battling the infamous Isonzo Front; one of the most brutal battlefronts of the Great War, where a total of twelve battles took place.
Given the importance of this route, the army drafted roughly 10.000 Russian prisoners of war to improve and maintain the Vrsic pass throughout the war.
It was an utterly gruelling task, as it required the prisoners to work under extremely harsh conditions, which, sadly, resulted that many of them lost their lives in the process.
On March 8, 1916, more tragedy struck, when heavy snowfall triggered an avalanche which wiped out the entire camp of prisoners, leaving a death toll of over 300.
At present, the road serves as a war memorial to the lost soldiers, while also being one of the most scenic stretches of pavement in the country, where fifty adrenaline-inducing hairpin turns guide travellers from one Alpine valley to another.
With a height of 1,611m, the Vrsic pass is deemed the highest mountain pass in the whole of Slovenia, making it an incredibly popular destination on any Slovenia itinerary.
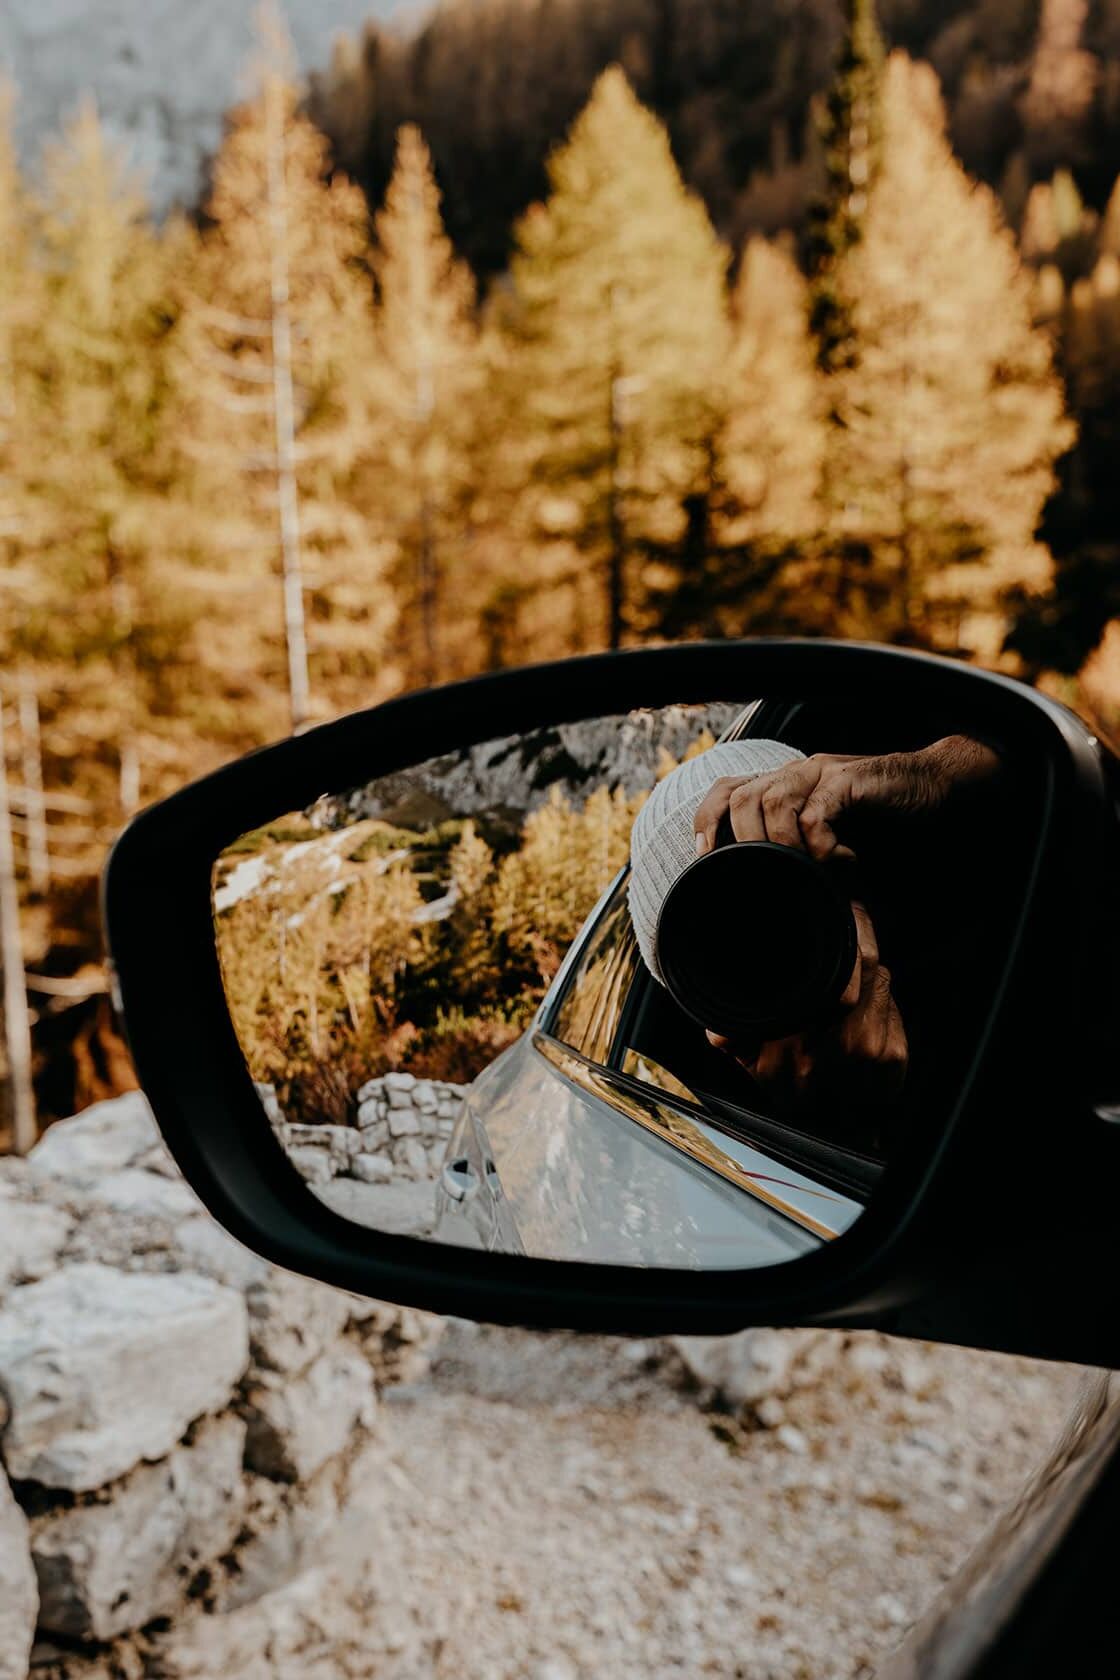
Driving the Vrsic Pass | Where to stop and what to see
Admire Lake Jasna before taking on the Vrsic Pass
While it’s not officially on the Vrsic pass, I do highly recommend dropping by the incredibly scenic Lake Jasna, before zigzagging your way along the winding roads of Vrsic.
Nestled in the foothills of the Jullian Alps, Lake Jasna is a set of two interconnected lakes, surrounded by the stunning mountain peaks of the Triglav National Park, including that of Mangart, Jalovec and Prisank.
Make sure you spend a few moments around the lake and witness how the crystal clear water acts as the perfect mirror to reflect the spectacular peaks of Spik, Razor and Prisank.
After taking in the beauty of Lake Jasna, it’s time to take on the somewhat challenging, yet extremely rewarding drive along the Vrsic pass.
Where | Lake Jasna
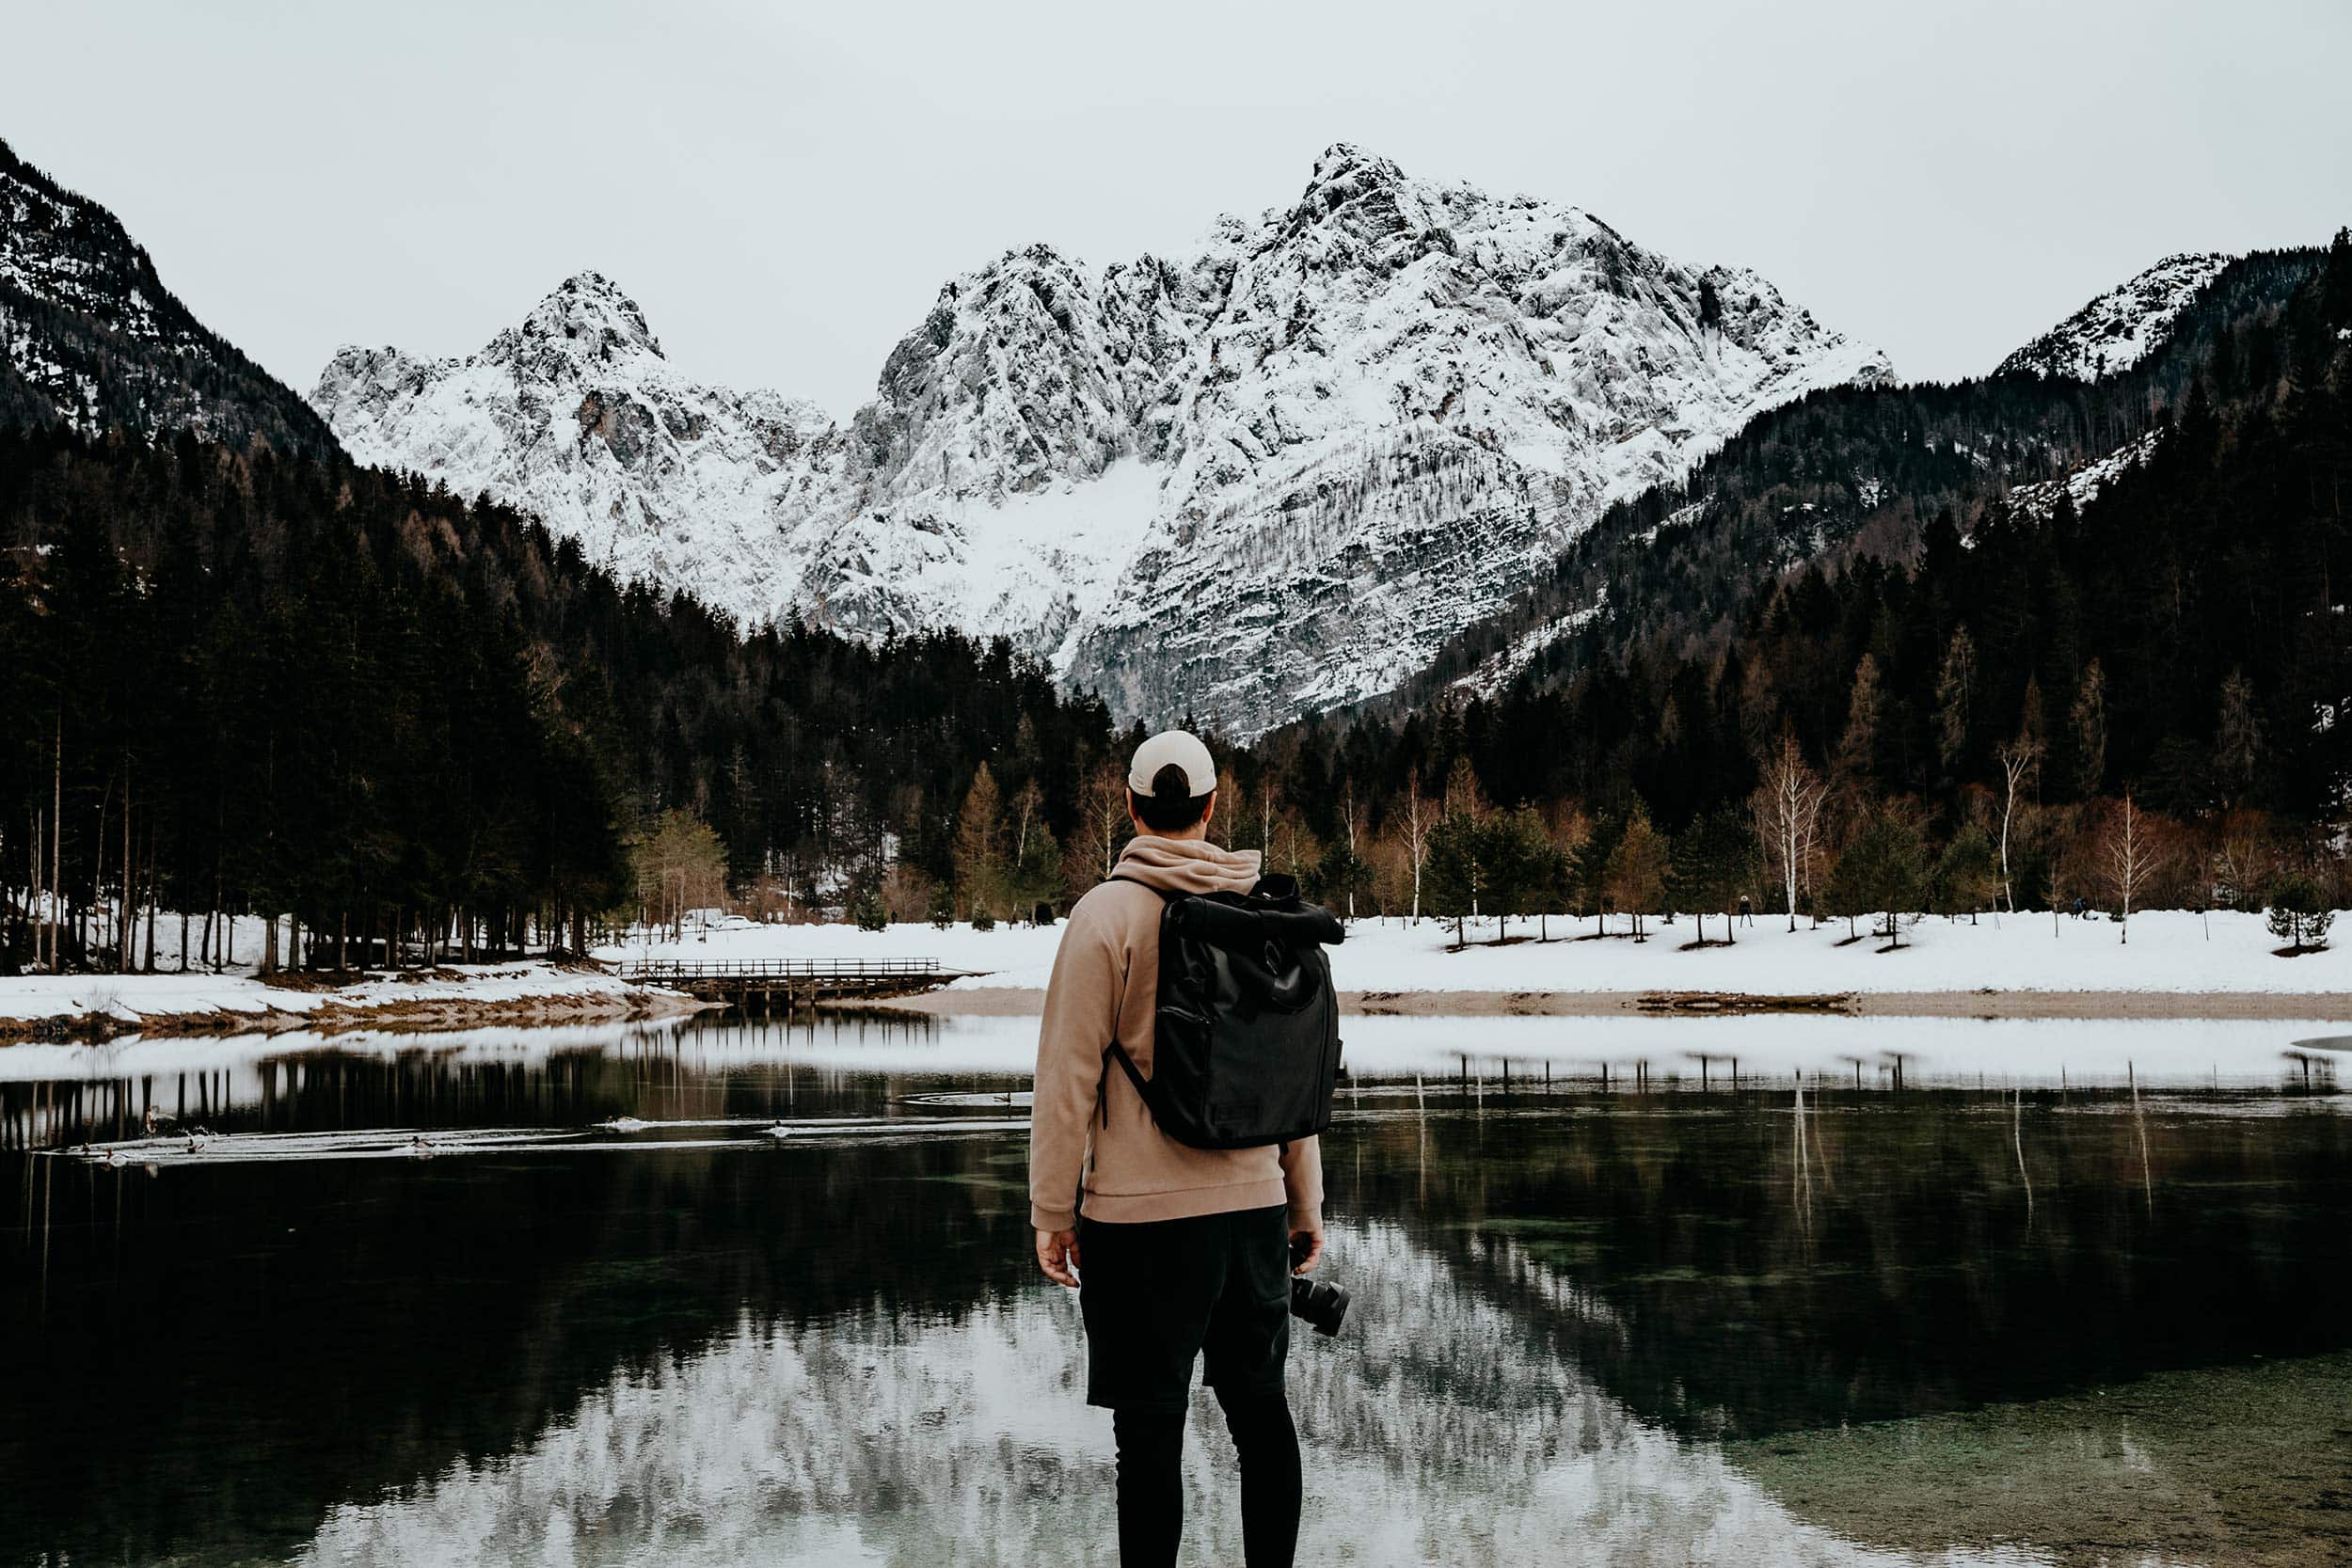
The Russian Chapel
Situated just after hairpin turn #8 from the Kranjska Gora side, the Russian Chapel is a small wooden chapel built in memorial of the Russian prisoners of World War 1, who died here in the process of constructing the pass.
This traditional Russian orthodox chapel is dedicated to Saint Vladimir and was built in the year 1917 by the prisoners who survived the avalanche that had struck the area.
While the chapel is a relatively simple structure, I have to say that it’s still very authentic and impressive, making it an essential stop for anyone driving the Vrsic pass.
Though its purpose is to reflect on the past and honour those who died, the church itself is also the perfect subject for some aesthetically pleasing Instagram shots.
Given the chapel is somewhat of a blink-and-you-miss-it spot, I’d advise keeping an eye out for a blue sign with #8 on it, as the chapel is hidden in a dense forest right after that turn.
Where | The Russian Chapel
Prisank Viewpoint
The Prisank viewpoint is one of the most popular stops along the Vrsic pass, given it is often referred to as the ideal gateway to the stunning nature of the Triglav National Park.
From Prisank, you can explore Ajdovska Deklica (Heathen Maiden), a carved-out rock formation that looks like the face of a female, as well as the famous Prisank window, which is the best-known mountain window in the Julian Alps, with a size of roughly 80 by 40m.
Prisank is also home to a small mountain meadow with a wooden cabinet, which makes for an ideal place to sit down and enjoy lunch or a cup of coffee. The meadow is located right next to hairpin #16, where you will also find a small parking area.
This area is seriously stunning, so make sure you bring out your camera gear and snap some bangers while exploring the scenic mountain meadow.
Where | Prisank viewpoint

The Vrsic pass – the highest point of the road
After completing the first 24 turns, you’ve finally made it to the highest point of the road; the Vrsic Pass at 1,611 metres above sea level.
From this point, you’ll be welcomed by some of the best views in Slovenia, so drop your car in the parking, and seek out a quiet spot to take in the stunning panoramic vistas of the rugged peaks of the Triglav National Park.
It’s worth mentioning that the Vrsic pass gets extremely busy early in the day, given it’s marked as the starting point for most of the hikes in the Triglav National Park.
If you’re keen to grab a coffee or lunch before taking on the remaining 26 hairpin turns, there’s a mountain hut about 5 minutes from the parking, which serves delicious local food, and excellent coffee too.
Where | The Vrsic Pass
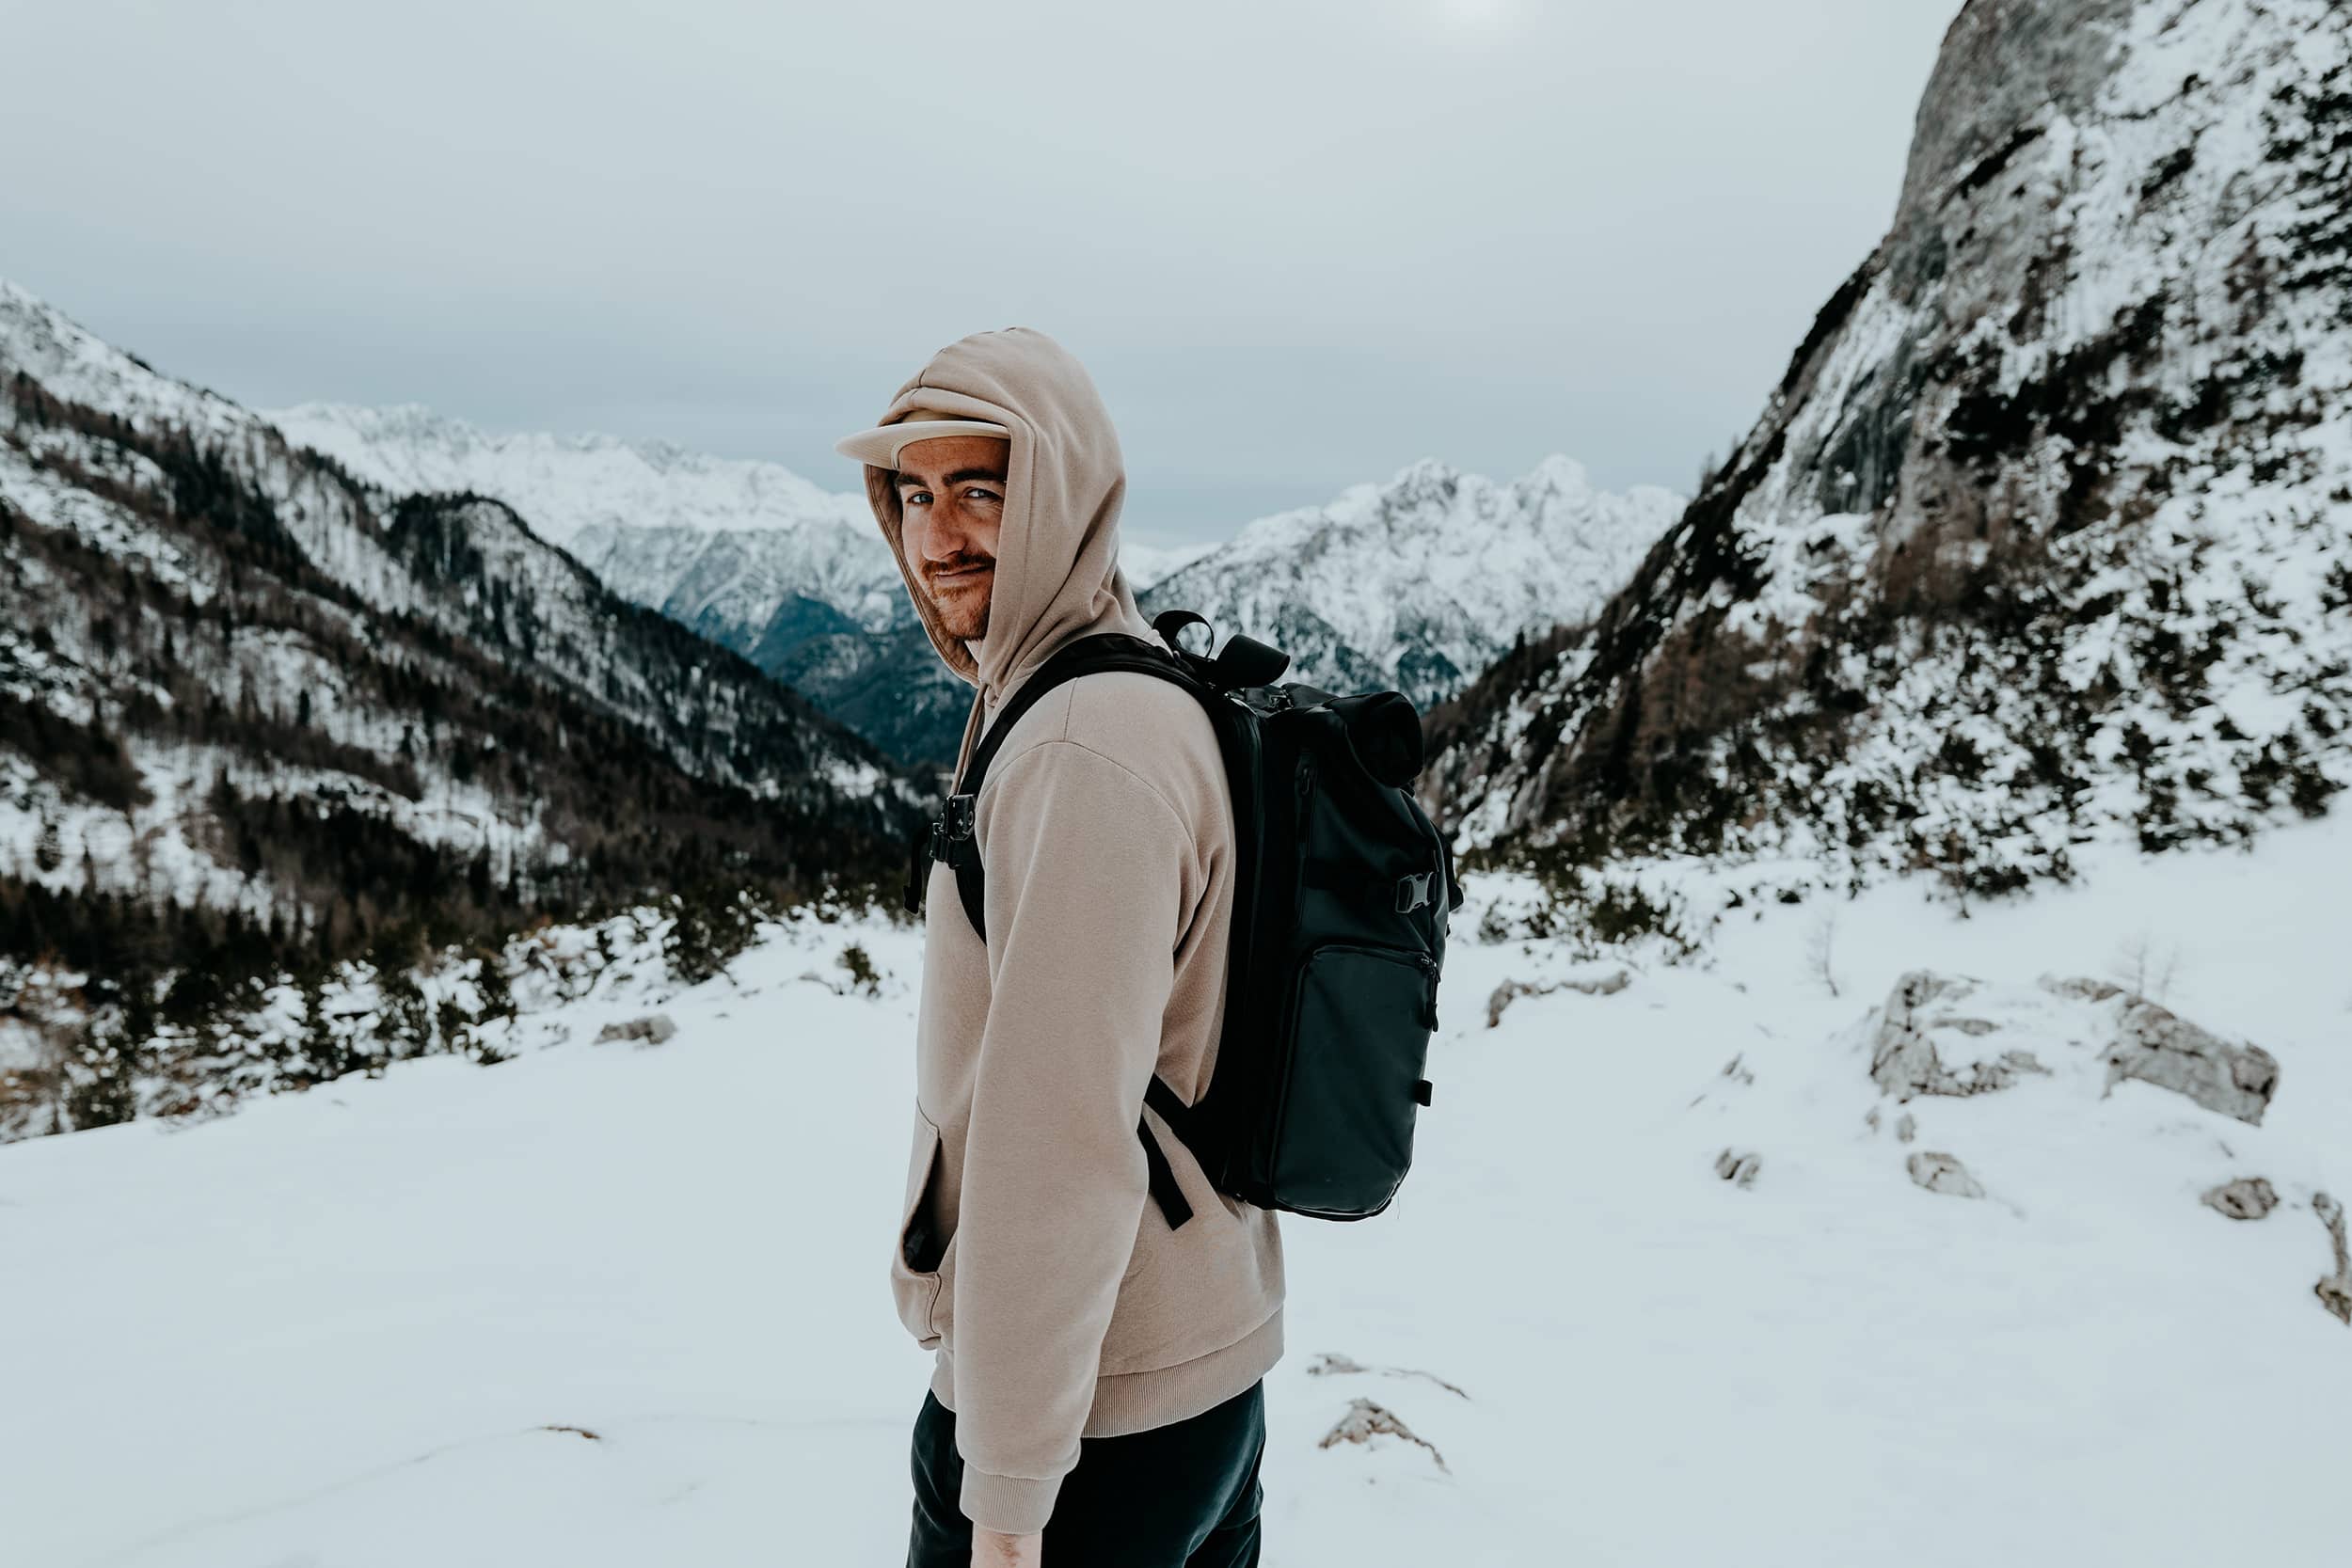
The upper Soca Valley
As you make your way down the winding roads of the Vrsic pass, the views of the Julian Alps slowly give way to the breathtaking beauty of the Soca valley.
With every hairpin turn, the road flattens out further, offering a relaxing drive that allows you to take in the natural grandeur that surrounds you.
But it’s not just the picturesque drive that will capture your heart.
Famous for its distinctive emerald green waters, the gushing Soca river is a constant companion as you make your way in the direction of Bovec, inviting you to stop at just about every turn.
Though the Soca valley breathes unparalleled beauty throughout, I believe there’s one absolute highlight here; the magnificent Soca gorge.
Make sure you stop here, and experience how the powerful Soca river carves its way through the steep, rocky walls of the gorge – it’s truly a spectacle to behold.
Where | The upper Soca Valley
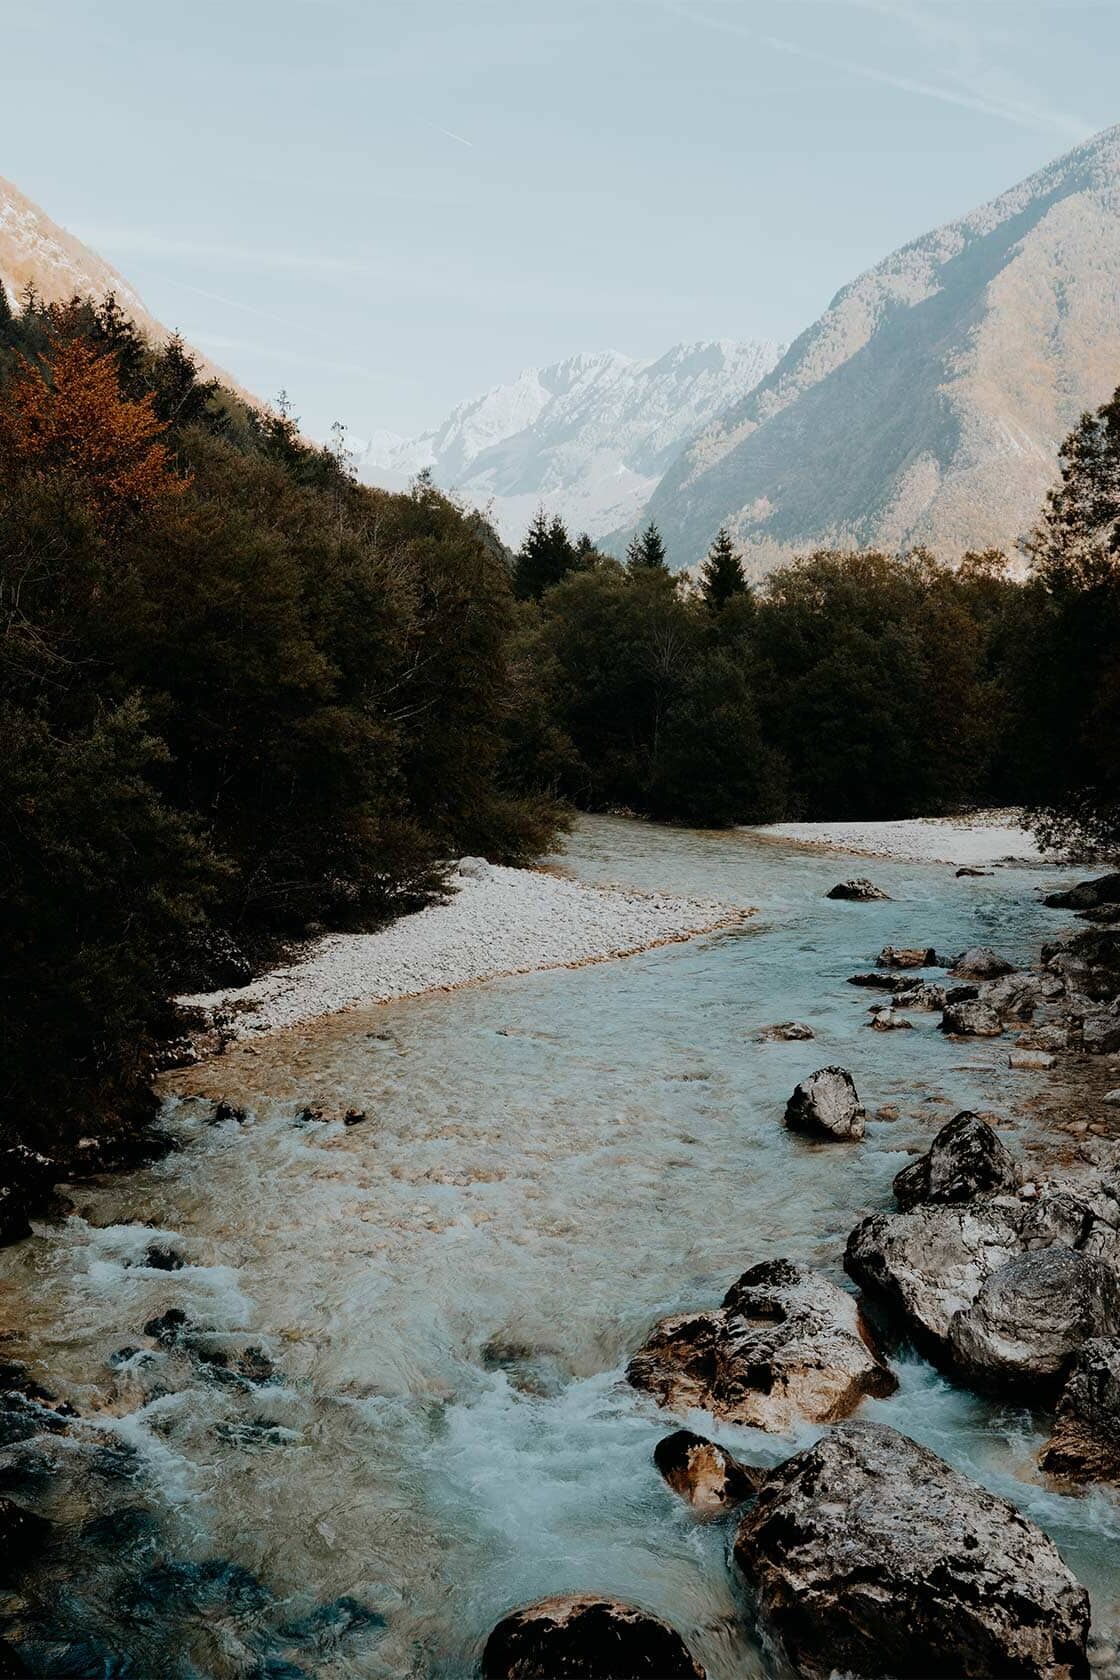

Conquer the road to Mangart Saddle
Those who want to turn it up a notch, continue driving in the direction of Mangart Saddle, Slovenia’s highest mountain road and easily one of the most captivating places in the country.
Marked by extremely narrow parts – just wide enough to fit one car, sharp hairpin turns, and steep drop-offs with sporadically a crash barrier, the road to Mangart is not for the faint of heart, especially during the peak summer months.
However, those who take on the challenge will quickly learn that the reward is absolutely worth it.
Once you arrive at the top of Mangart, you’ll be welcomed by breathtaking panoramic views of the surrounding peaks and valleys – you can even see the lakes of Fusine in Italy in the distance.
Hiking enthusiasts will be pleased to know that some of Slovenia’s most exciting hiking trails start exactly here, at Mangart Saddle.
One word of caution though; while I managed the drive to Mangart fairly effortlessly, I believe there’s nothing that can fully prepare you for the drive up.
For that reason, I’d highly suggest taking it one step at a time, and more importantly; don’t feel rushed by other drivers.
Where | Mangart Saddle
Read more | A guide to Mangart Saddle, Slovenia’s highest mountain road (coming soon)
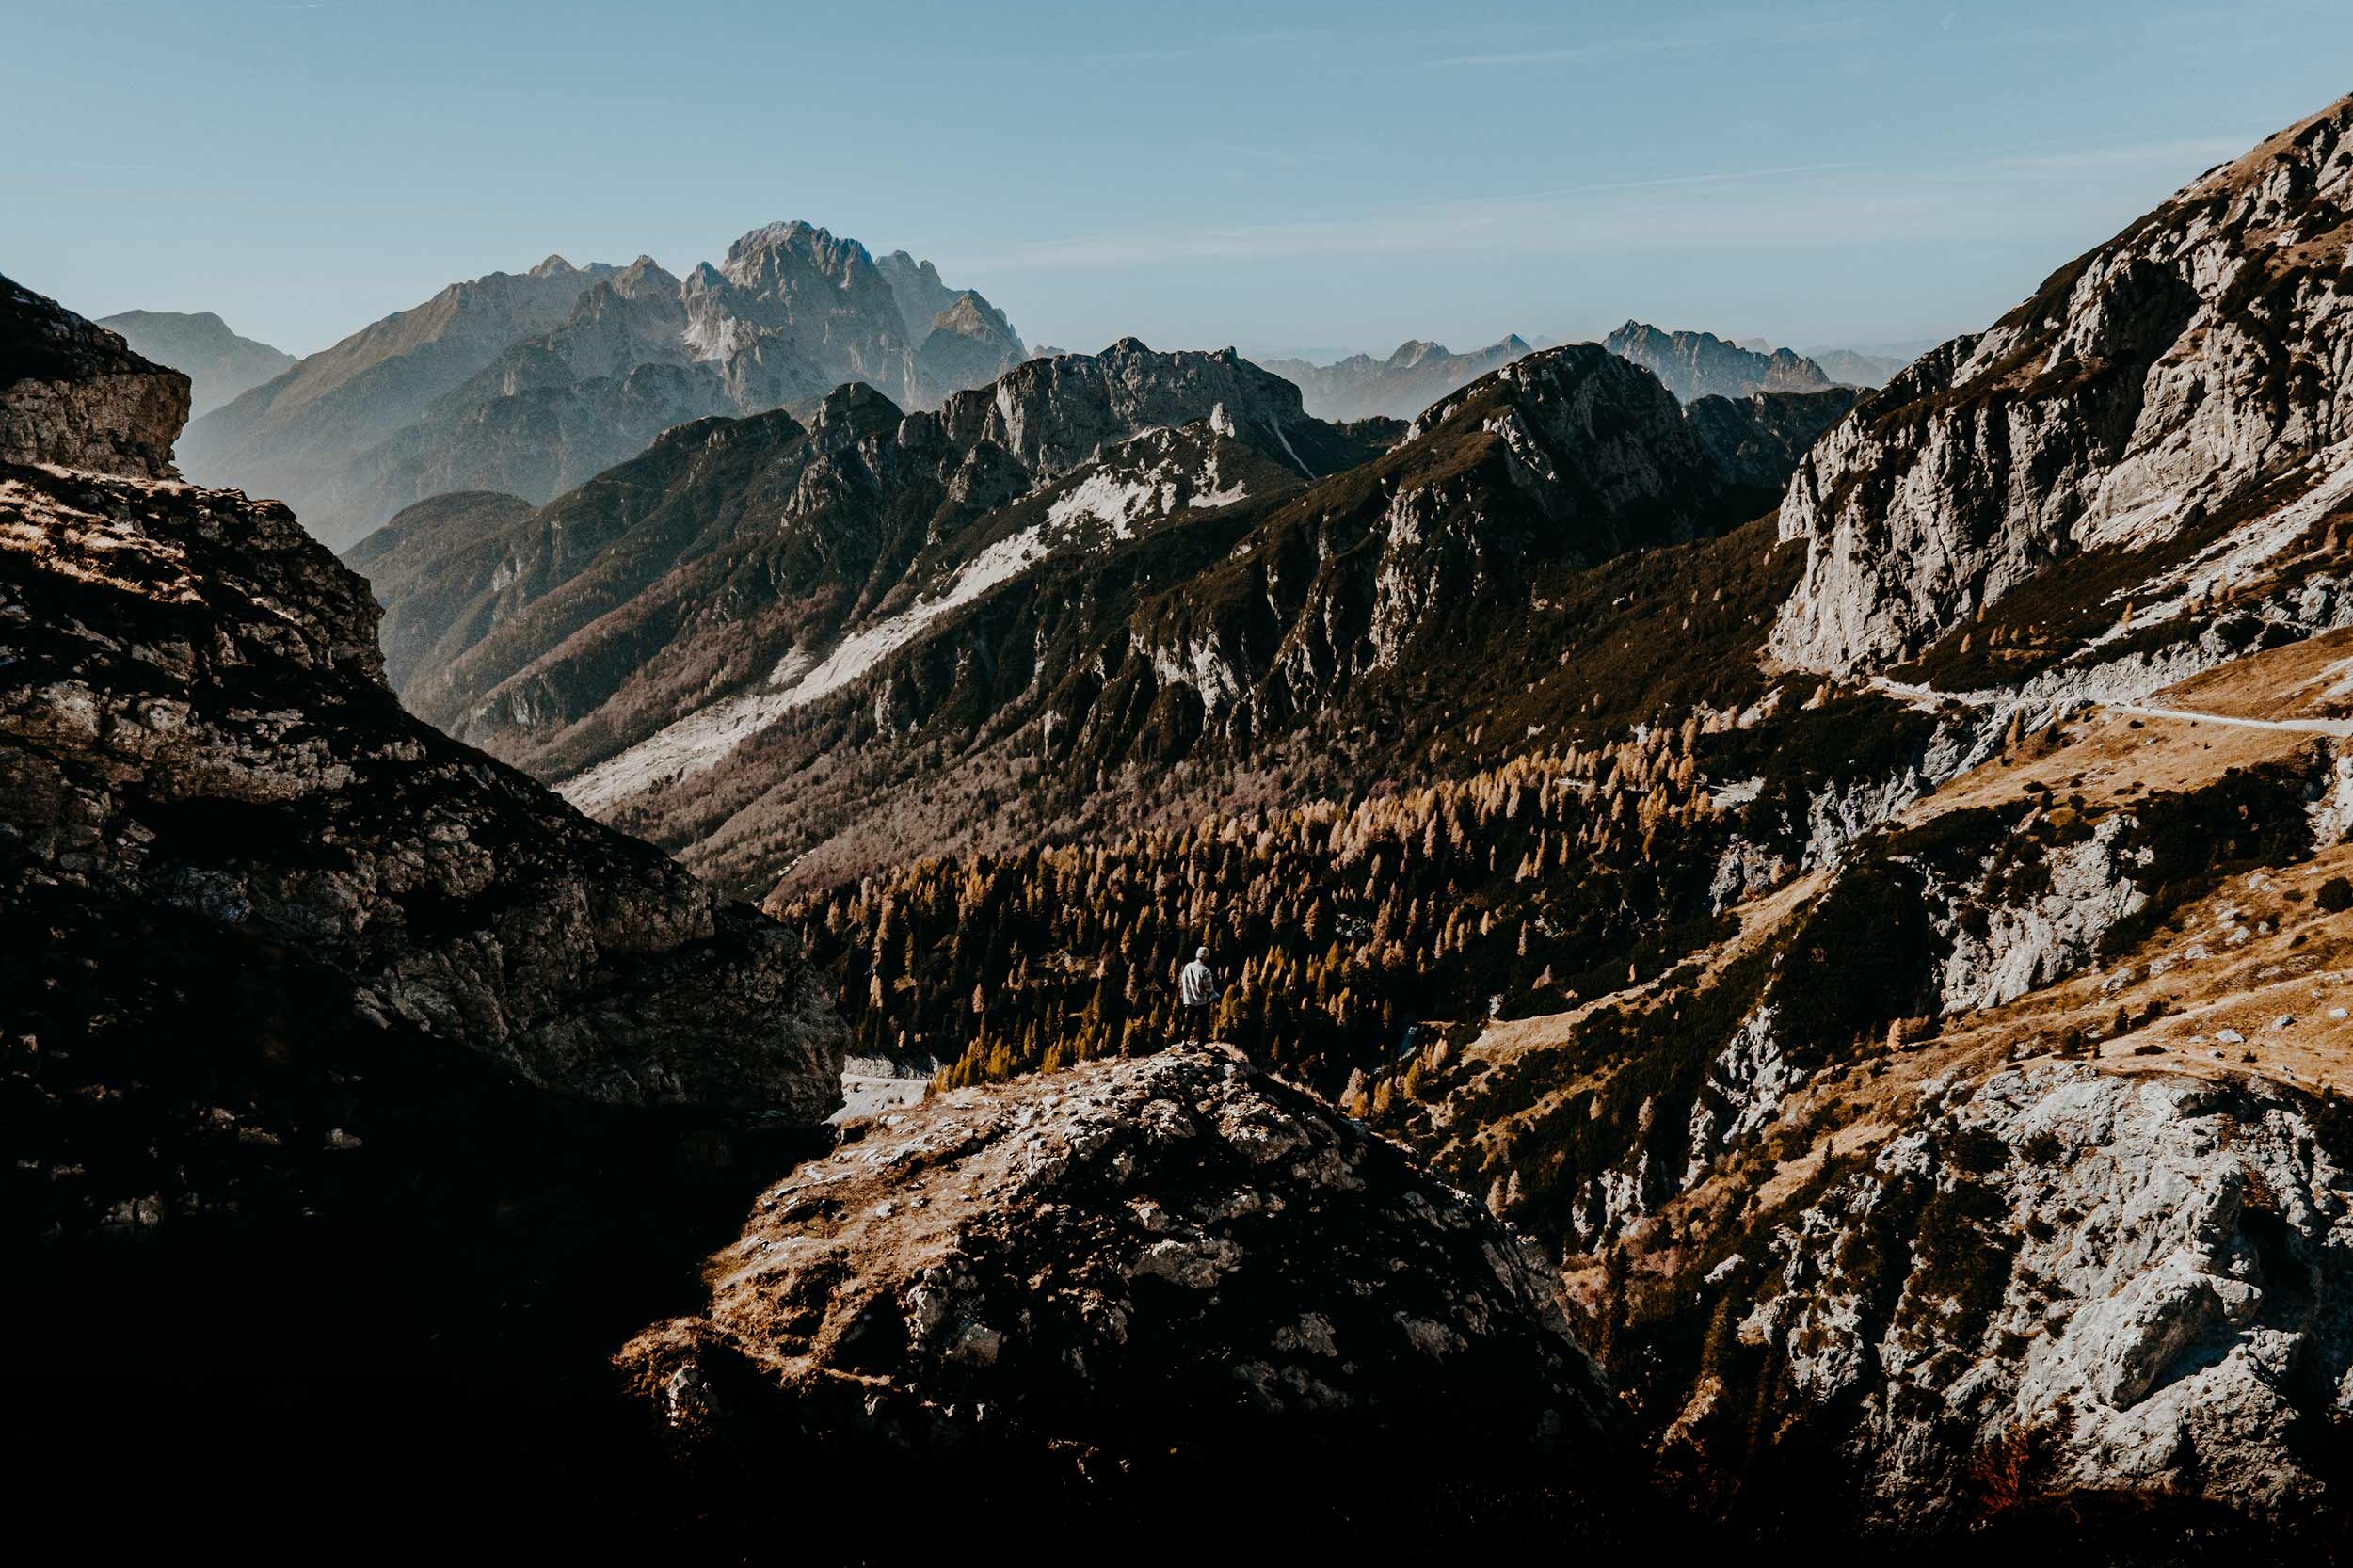
Things to know before driving the Vrsic Pass
Though I firmly believe that experienced drivers will have an easy time driving here, there are a few things that you should know before taking on the winding roads of Vrsic.
After driving the Vrsic pass twice (in autumn and winter), I’ve put together a comprehensive list of useful tips and tricks that will hopefully make your journey as comfortable as mine.
To prepare you for the journey, I’d highly recommend paying attention to the following:
The turns are steep and narrow | Do exactly as Kanye West raps in one of my favourite tracks of Ye’s Late Registration; drive slow, homie – I highly recommended to navigate the hairpin turns at a steady pace (10 to 15km/ph).
Driving experience is a must | To me, driving the Vrsic pass requires at least a few years of driving experience, since the somewhat challenging circumstances are far from ideal for those new to driving.
Go in the early morning | Like so many popular tourist places in the world, Vrsic pass gets extremely busy throughout the day, especially during the peak summer months. For that reason, I can’t stress enough to drive the road in the early hours, when the road is still relatively empty.
There could be road closures in winter | While I’d passed the Vrsic pass on a snowy Thursday in January, road closures are actually pretty common during the winter. In general, the road is open for around 7 months a year, depending on the severity of the winter months. Just to be sure, I’d advise keeping an eye out for the latest updates on road closures on the Vrsic pass here.
Bring lunch, snacks and coffee | While there is a restaurant on the Vrsic pass, I’d highly recommend packing your own lunch, a few snacks and a thermos filled with coffee, to enjoy in the midst of nature.
Keep an eye out for cyclists | Since the Vrsic Pass is popular among cyclists, you’ll share the road with lots of them, especially in the peak summer season. As a driver, it’s therefore pretty important to drive with caution, while also giving plenty of space in narrow areas.
Make use of the parking | Throughout your journey along the Vrsic pass, you’ll notice plenty of parking spaces, and I highly recommend making use of them. Although it’s tempting to take in the views from behind the steering wheel, I believe it’s essential to keep your eyes on the road at all times here. So, if you see something that piques your interest, don’t mind parking along the road, so you can experience it in a relaxing manner.
Limited phone connection is common | Even though Vrsic counts only one road, it is wise to set up your maps for offline use, since phone connection could be limited in the mountains. This is especially handy if you’re planning to do some hiking in the area.
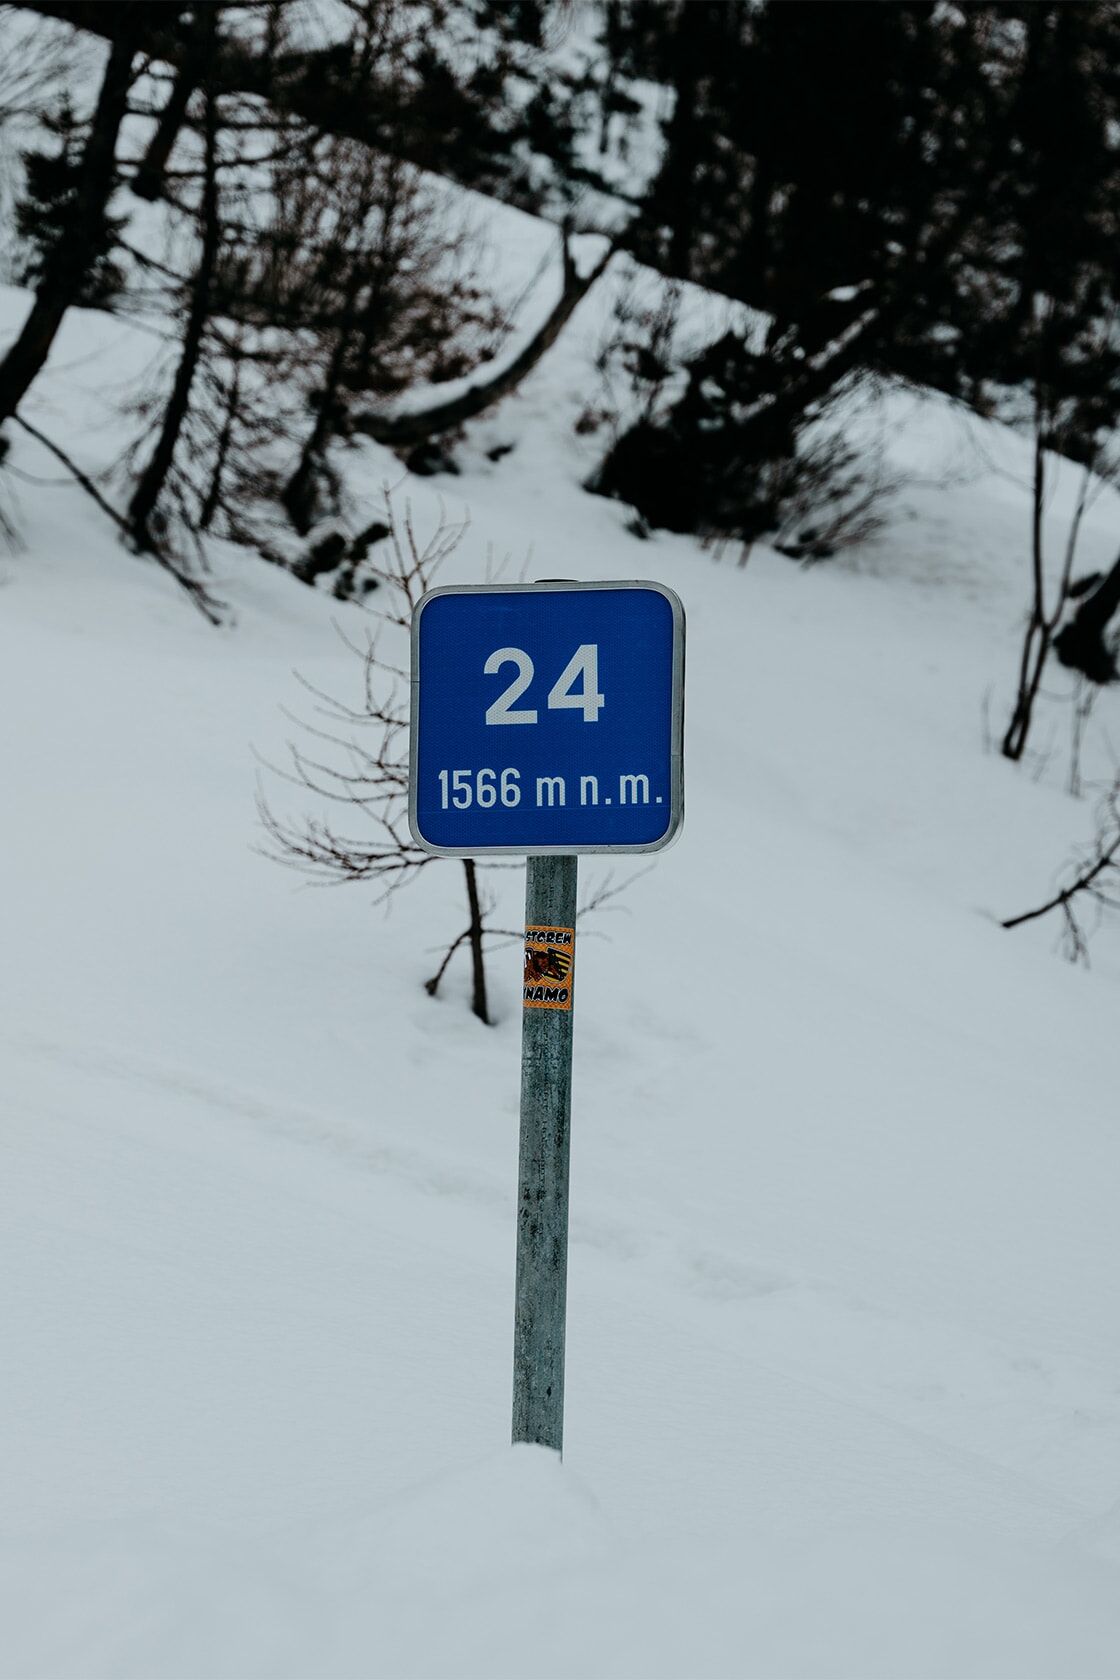
The best time of year to visit the Vrsic Pass
The road along the Vrsic pass is without question one of the most spectacular drives in Slovenia (Mangart I see you), as it showcases the Julian Alps in an utterly stunning way.
I’d highly recommend visiting the Vrsic pass between March and November, when the weather is perfect for hiking and explorations, and it’s almost guaranteed that the pass is open.
But to me, the absolute best time to visit the Vrsic pass is during the shoulder months of March to May and September to November, when it’s significantly less crowded.
I first visited the Vrsic Pass in the fall, and was blown away by the warm orange colours – it truly was an epic time of year to explore Slovenia.
While the Vrsic pass is stunning at any time of year, it is worth noting that the road closes during the winter months, due to heavy snowfall and the potential threat of avalanches.
Since these road closures depend on the severity of the weather conditions, I’d highly suggest checking if the pass is open here, before planning your visit.
Surprisingly, the Vrsic pass was open during my second visit in the midst of winter – so road closures are not set to a fixed period.
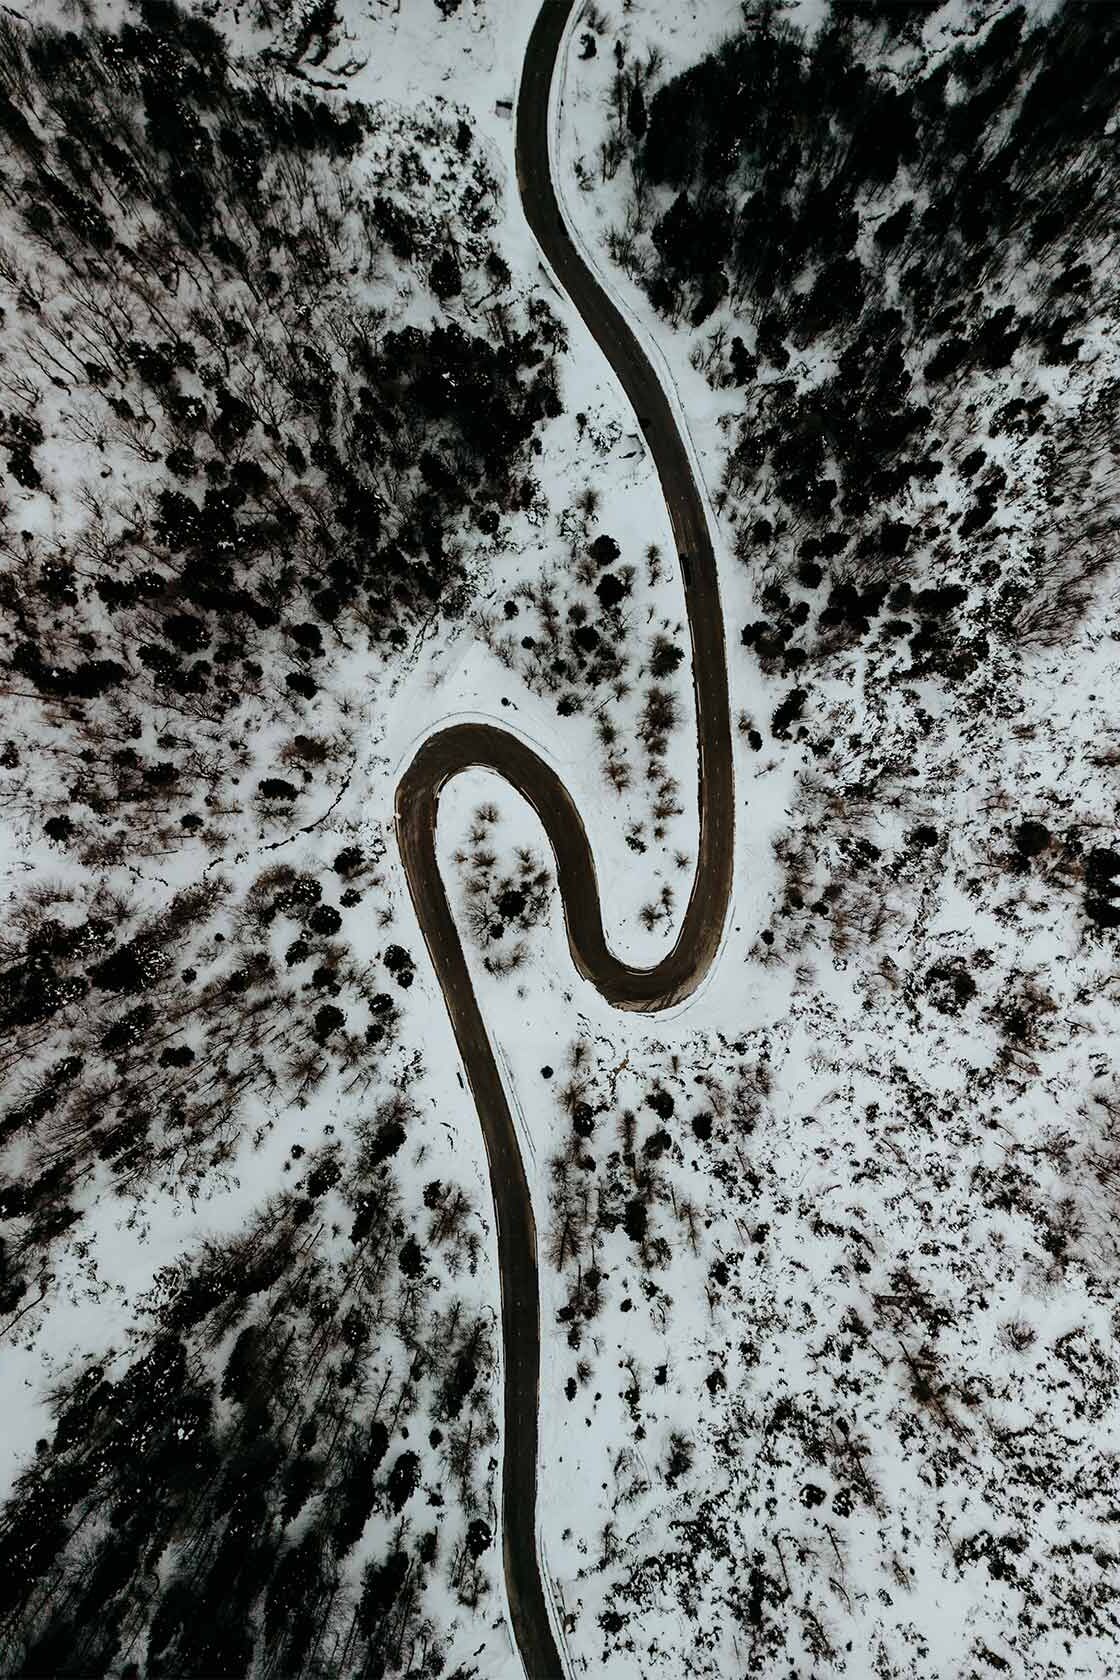
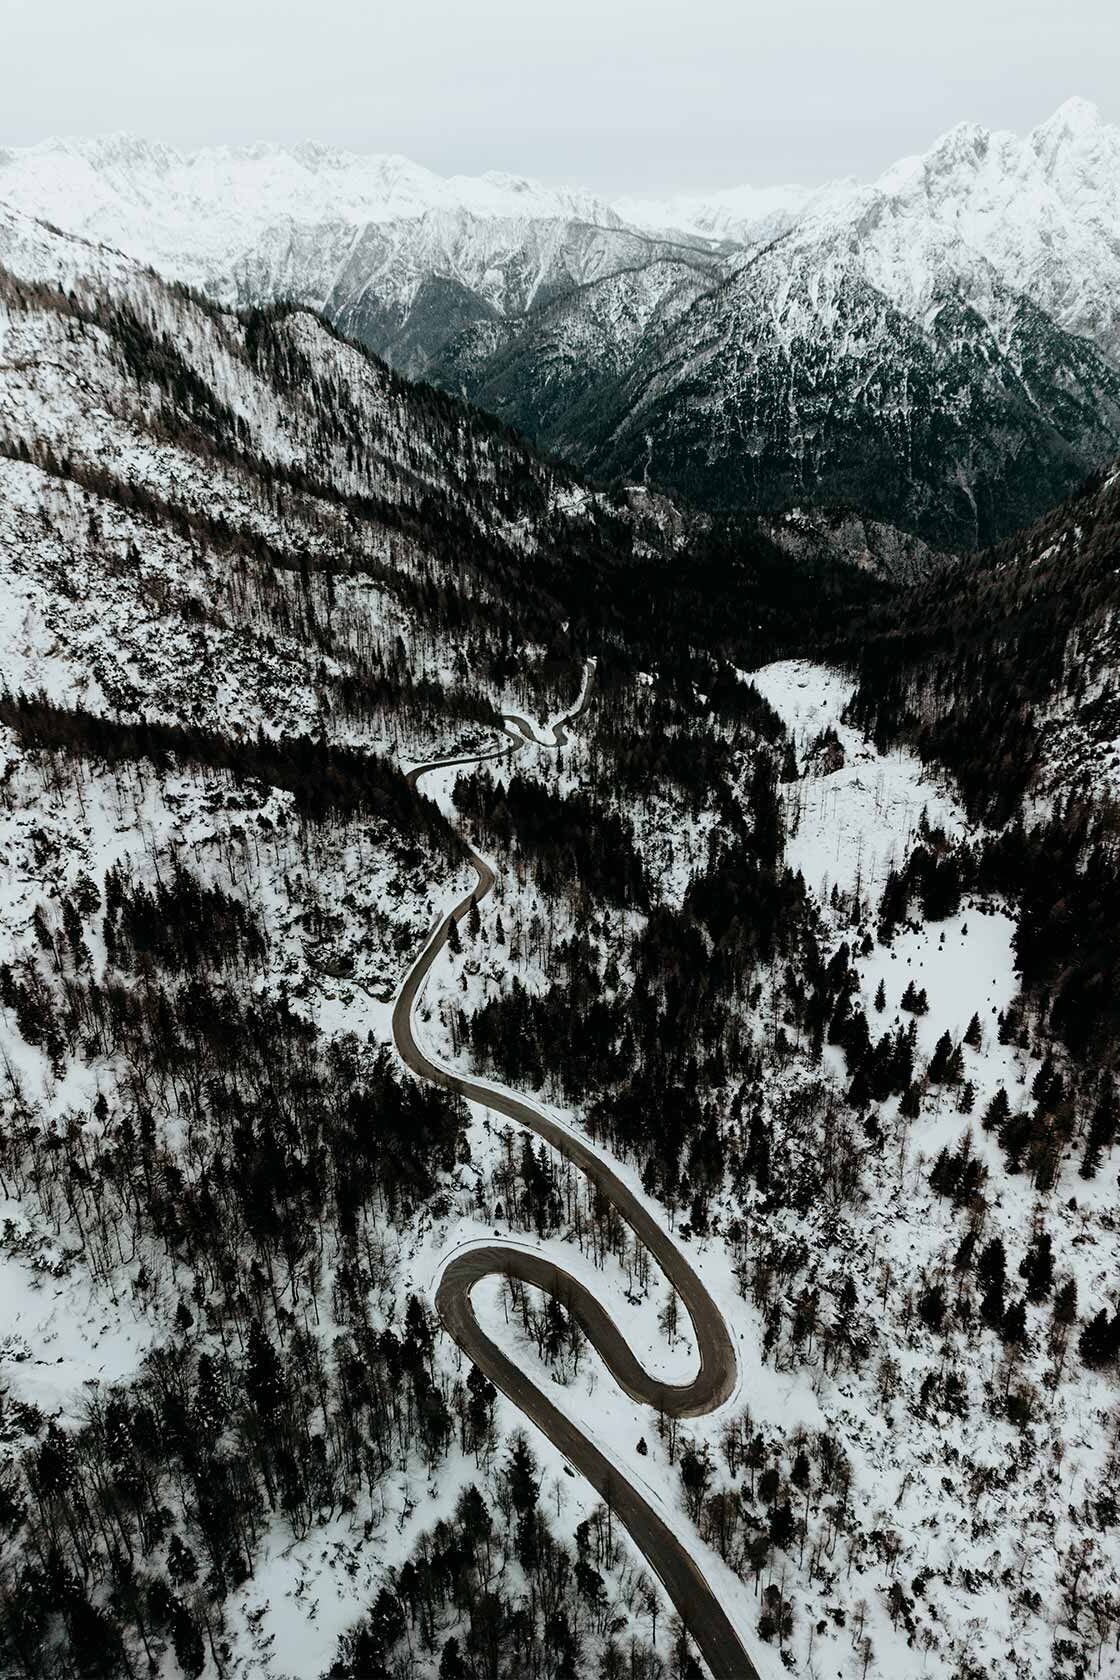
Renting a Car in Slovenia
If like me, you’re planning an epic road trip in Slovenia, I’d recommend sorting out a rental car in advance, so you have all the freedom to visit wherever, whenever suits you.
I always use Rentalcars.com to book my car rentals, as they offer all the major rental car companies, excellent service, and additional insurance – plus, it’s super easy to find yourself a deal here too.
I’ve also written a comprehensive guide on driving in Slovenia (coming soon), so make sure you give that a read too – you can find it here.

Where to stay near the Vrsic Pass
Given that the Vrsic pass is more of a day trip between two popular areas, where you’ll plan to spend the night will highly depend on the starting point of your Vrsic pass journey.
Since I explored Kobarid, Bovec and the Soca Valley before taking on the Vrsic pass, it was quite logical to choose Bovec as my Vrsic pass base.
I stayed at Hotel Soca, a comfortable hotel with spacious rooms in the heart of Bovec, about 20 20-minute drive away from the beginning of the Vrsic pass, making it a solid base from where to start your Vrsic pass adventures.
Depending on your itinerary (make sure you check out my Slovenia itinerary), you could also opt for a stay in Kranjska Gora or the Soca Valley, both of which are great places to include in your Slovenia itinerary.
Stay safe in Slovenia | Travel insurance
Since Slovenia has plenty of adventurous activities on offer, I advise everyone to sort out good travel insurance before setting out on their own adventure.
While I believe that it’s unlikely to experience any troubles when following the advice in this guide, something unfortunate can happen at any time, whether it’s an injury, a stolen camera, or an accident on the road.
For travel insurance, I use Heymondo, as they offer full covid-19 coverage, as well as a handy app with 24-hour medical assistance. Make sure you check it out – readers of WTSW receive 5% off any insurance policy too.
Cheers!
I’ve been on this travel blogging journey since 2019.
If you appreciate what I do here, these are some ways you can support me.
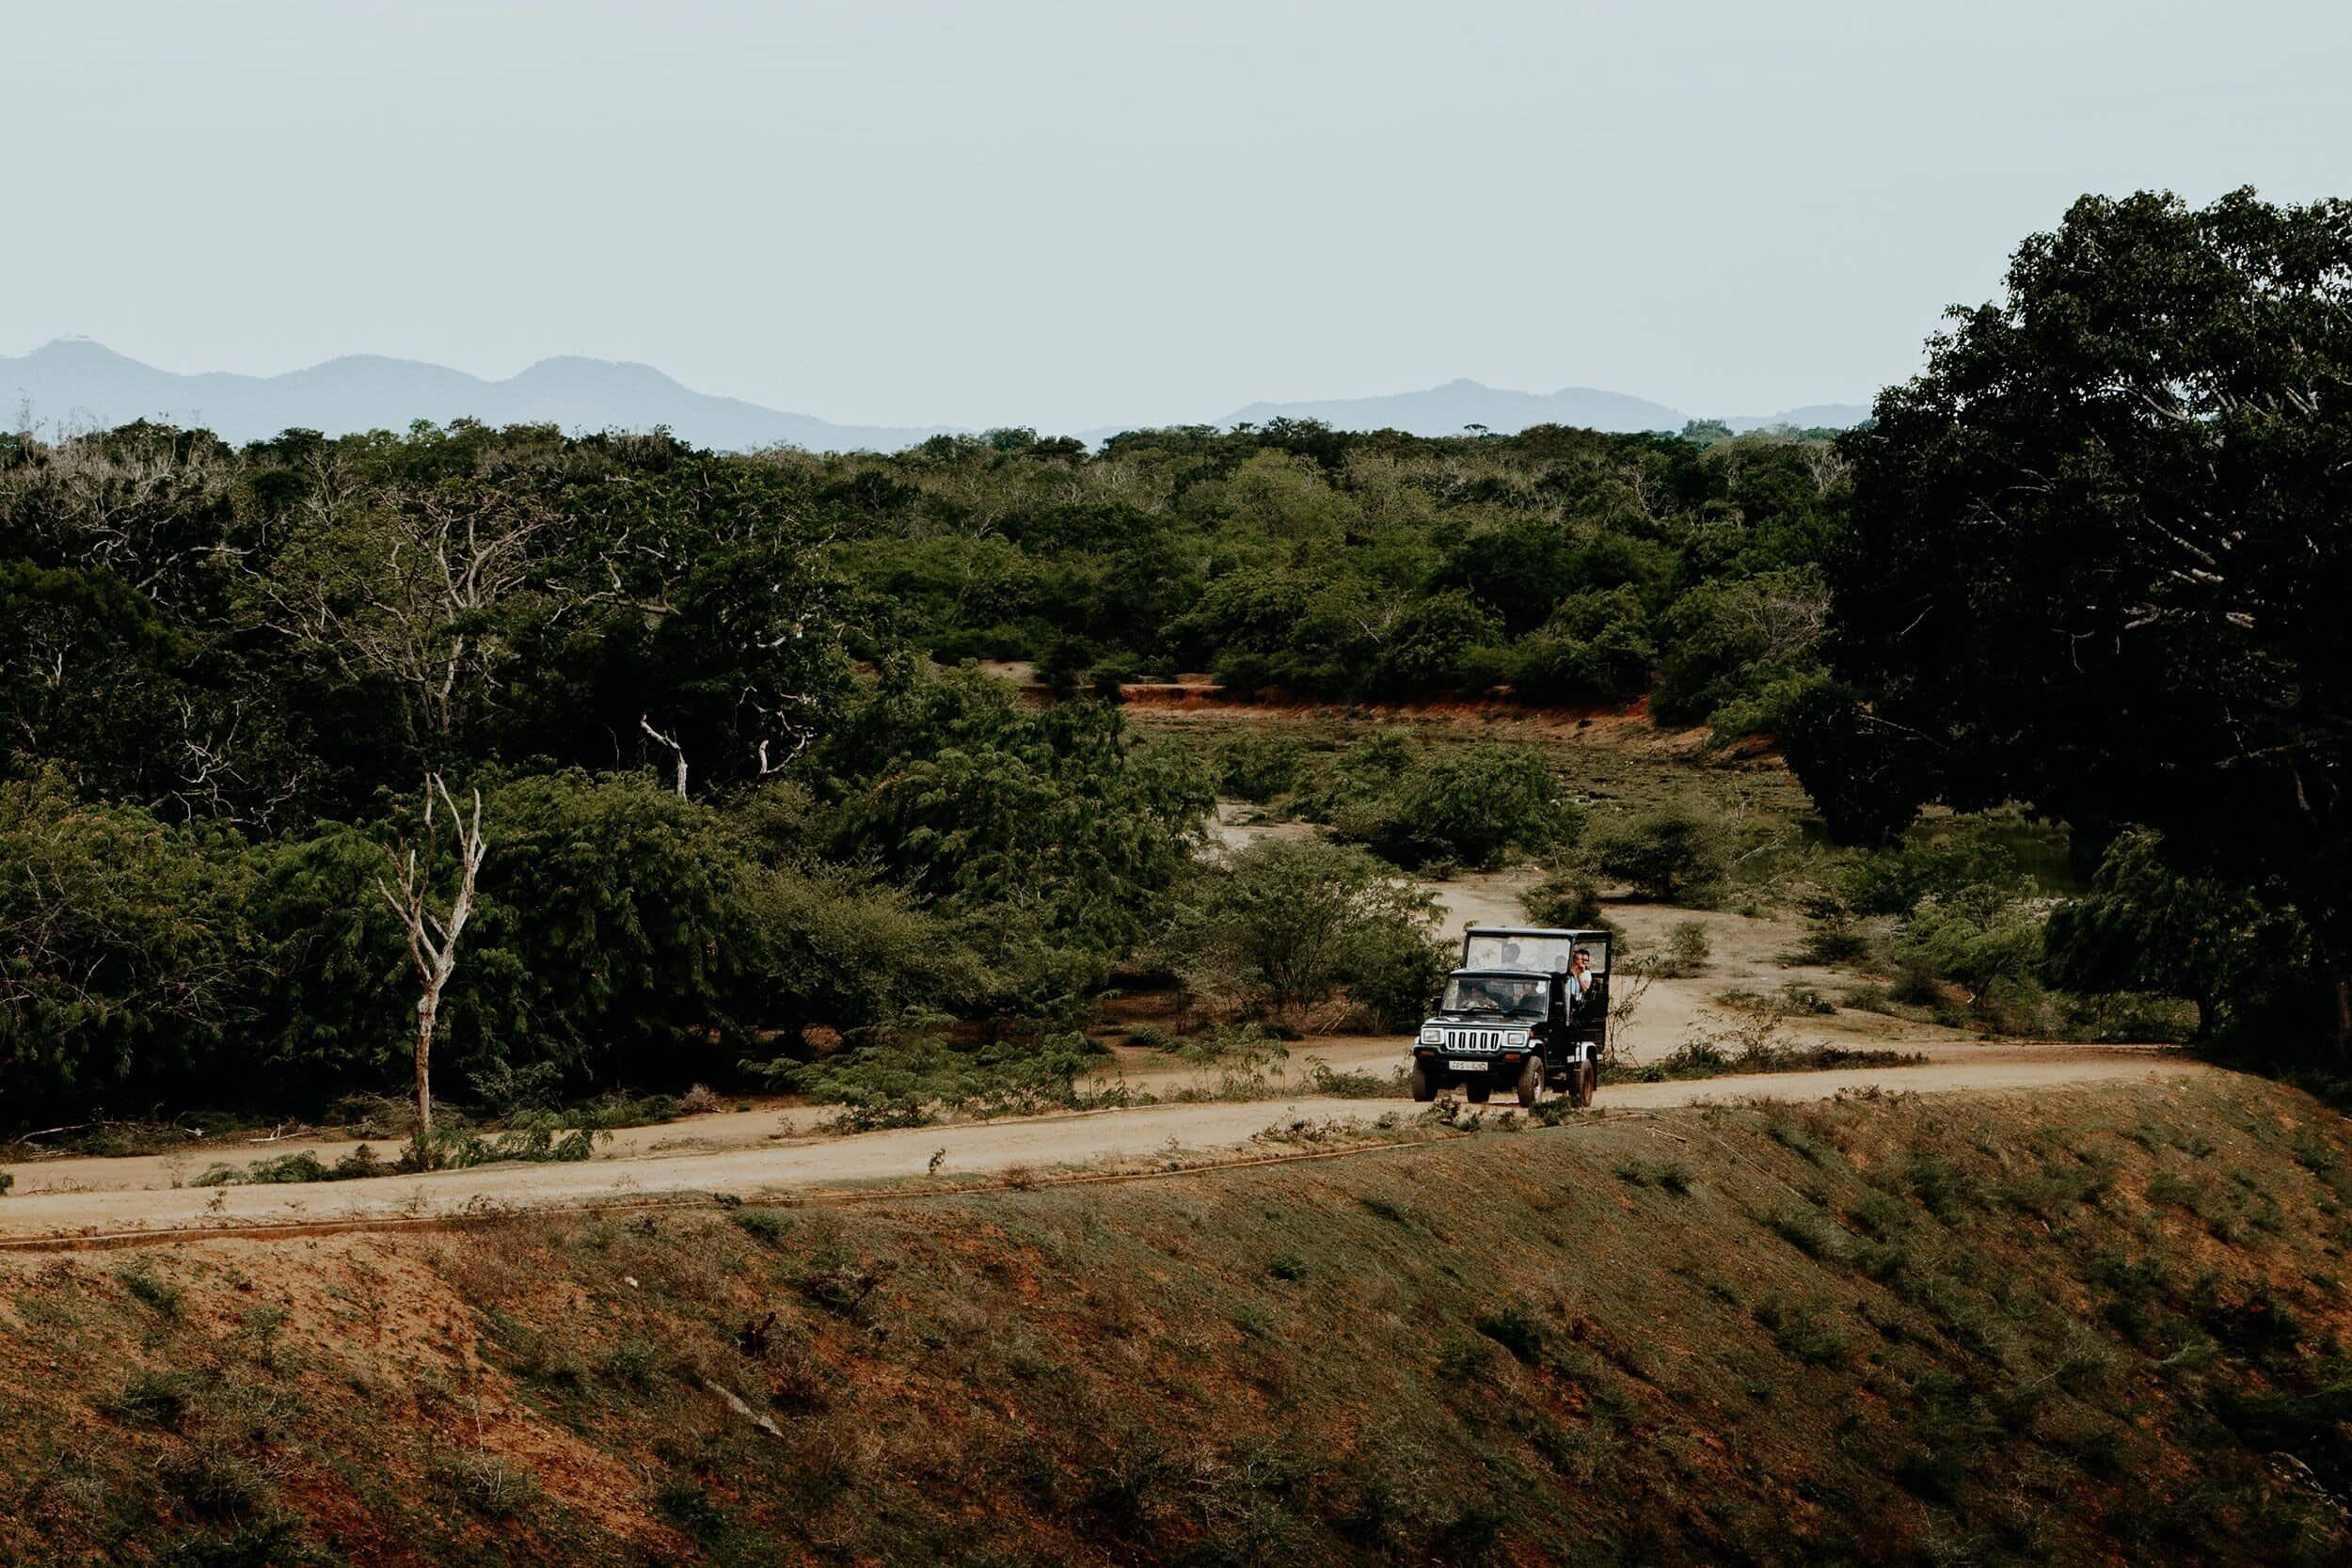
A guide to Yala National Park, Sri Lanka’s best safari destination (Update 2023)
Looking to do a jeep safari in Yala National Park? Here’s my guide to Sri Lanka’s best safari destination, including what to see and do, the jeep safari price, and insightful travel tips.
For me, someone who never went on a wildlife safari before, Yala National Park was, without a doubt the most rewarding and exciting adventure during my trip to Sri Lanka.
It’s an exhilarating happening to embark on a jeep safari, knowing you’re about to observe extraordinary animals in their natural habitat while driving along the bumpy roads of the wildlife park.
Especially if you realize that Yala National Park is considered the most popular wildlife park on Sri Lanka’s teardrop-shaped island.
This excellent reputation is due to its dynamic landscape, great variety and density of wildlife – plus the fact that the park is acknowledged as one of the best places in the world to see leopards in the wild.
Here’s my guide to Yala National Park, featuring what to see and do, which safari to choose, and where to stay – plus insightful travel tips, including costs, the best time to visit, and how to get to Yala National Park.
If you choose to use any of the links on this page, I may receive a small commission at no extra cost to you. By using these links, you’ll have a direct impact on WTSW and my ability to continue to create free insightful travel content for you. If you find any of my tips useful, you can support me by buying a virtual coffee here.

Where is Yala National Park?
Yala National Park is situated in the southeast region of Sri Lanka’s teardrop-shaped island and stretches over the two provinces, Hambantota and Monaragala.
The Yala National Park is quite remote, and therefore it’s almost inevitable to visit a town named Tissamaharama.
Tissamaharama itself isn’t the most interesting town and it’s also quite difficult to get to. Nevertheless, it functions perfectly as the only official gateway to the wildlife park.
The official Yala visitor centre is around 20km east of the town, which is easily reached by joining a Yala National Park tour from Tissamaharama.
Yala National Park opening hours
The Yala National Park is open daily from 06:00 to 18:00 and is pretty strict regarding the regulations of the opening hours.
If you’re joining a morning safari, the goal is to arrive at the gate well before it opens. Being one of the first in line provides the benefit of entering the park as early as possible.
It’s also essential that all jeeps are out of the park before it closes at 18:00. This is monitored by the official wildlife officers who note and check the license plates of the jeeps that enter and leave the park.
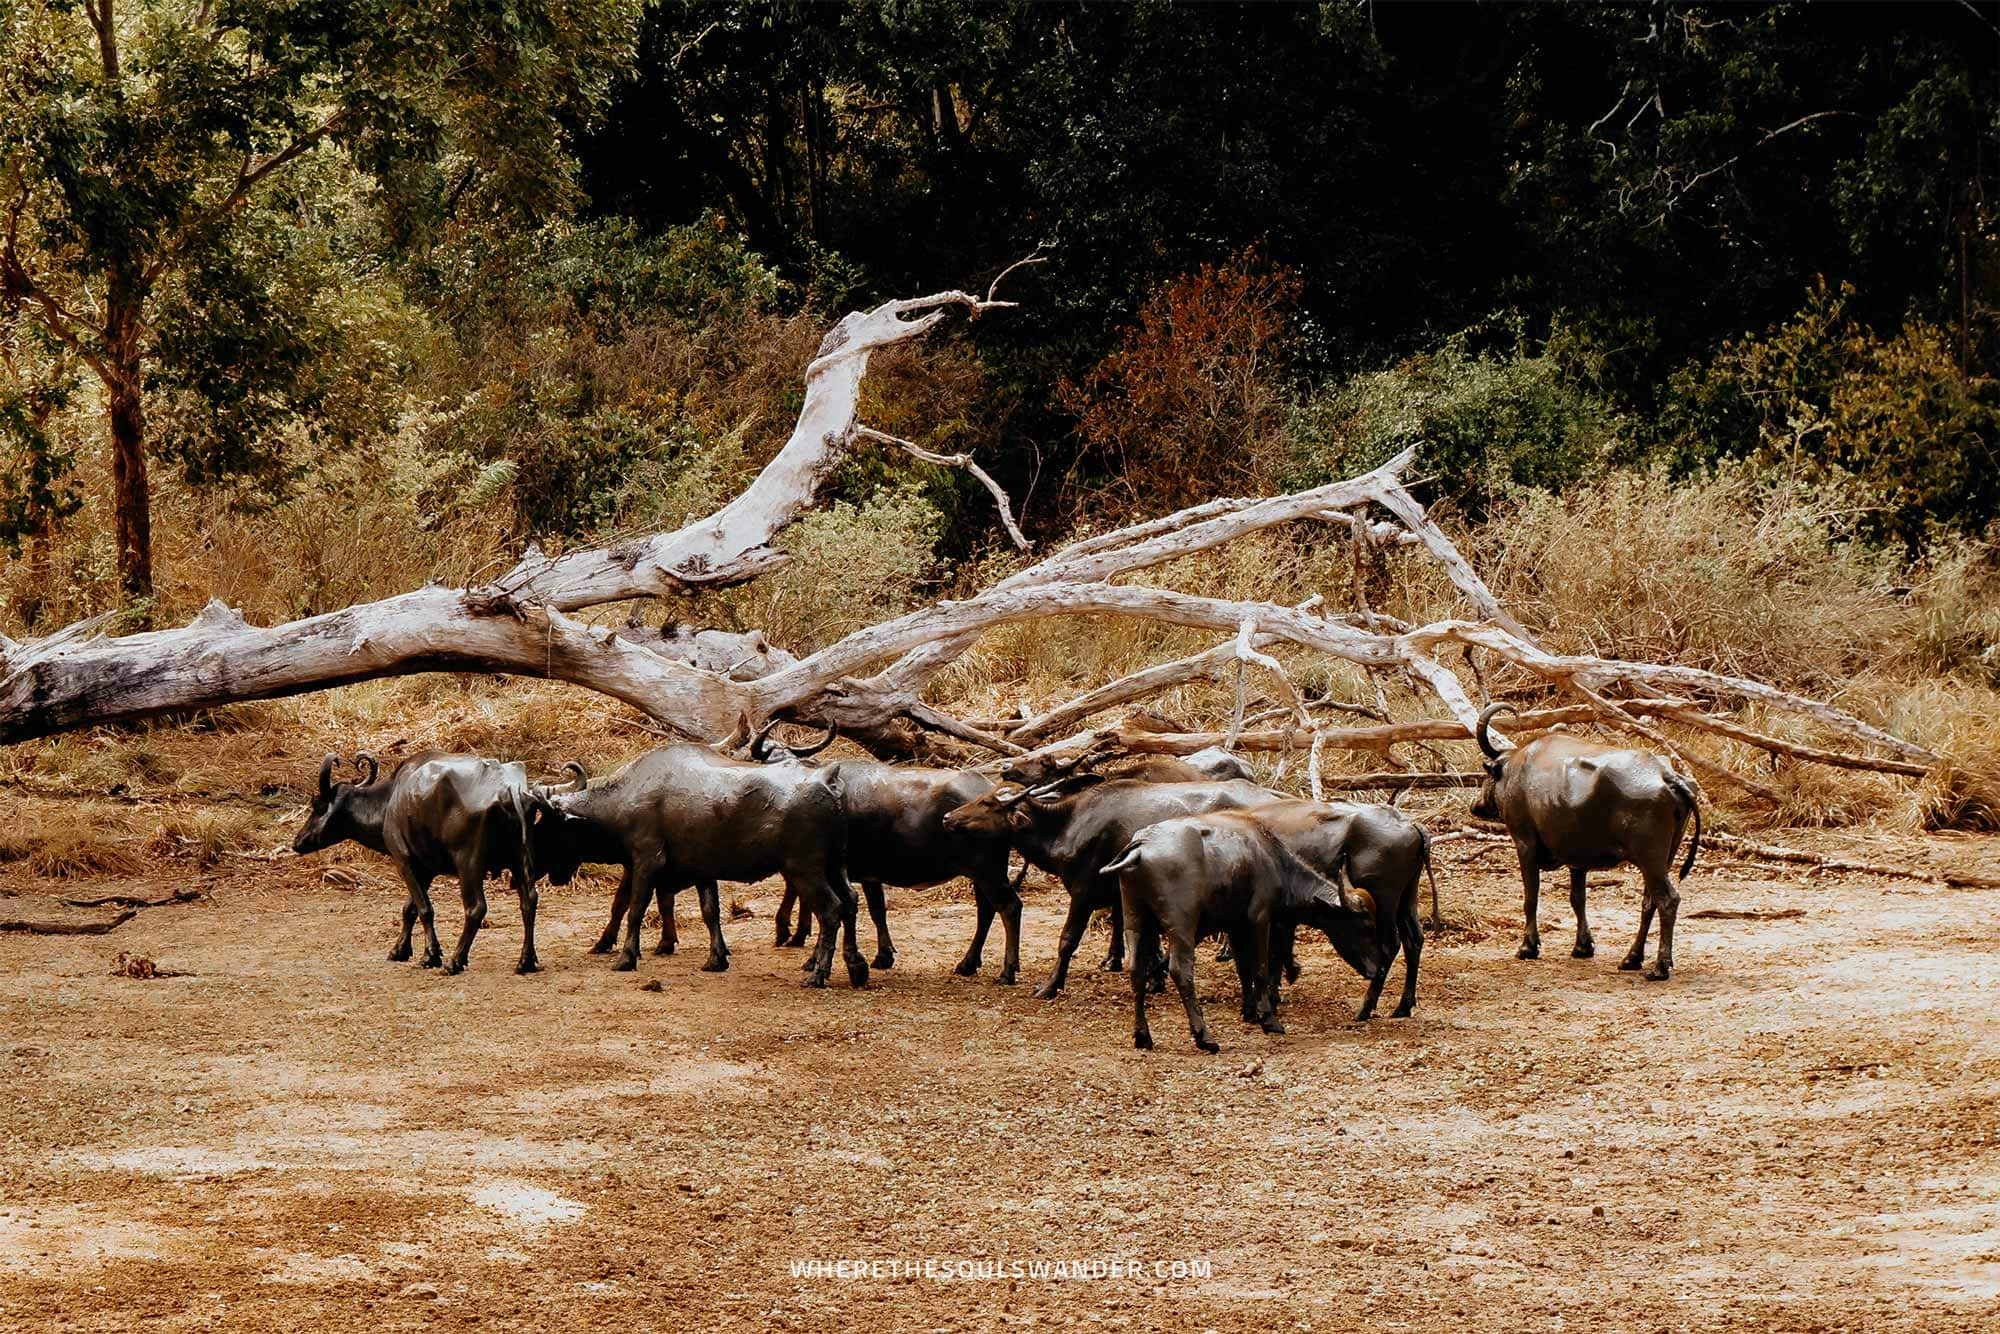
Where to stay near Yala National Park
You’ll find an abundance of excellent accommodations (both in and outside the park) that suit almost every budget and travel style.
Tissamaharama has no shortage of budget-friendly options, comfortable lodges and luxury hotels, while there’s also a great number of luxurious wildlife campings and chalets inside the Yala National Park itself.
Going on a safari in Yala National Park is extremely popular and therefore it’s wise to book your accommodation a couple of weeks in advance, especially if you’re planning to visit during the high season.
Some of the accommodations I recommend include:
Hotel River Front |A charming riverfront hotel with spacious air-conditioned rooms, comfortable beds, and a great outdoor swimming pool. The hotel has a good in-house restaurant that serves excellent local, Chinese and Continental food.
Thaulle Resort | Located directly at Yoda Lake, Thaulle Resort is a great hotel with traditional Sri Lankan-style rooms, spectacular lakeside views, a large outdoor pool and a courteous and helpful staff. This hotel provides all the essentials to unwind after an adventurous safari tour in Yala National Park.
Cinnamon Wild Yala | If you’re looking for a once-in-a-lifetime experience, look no further. Cinnamon Wild offers astonishing eco-friendly chalets in the midst of the lively jungle of the beloved Yala National Park. Undisputedly one of the best picks when it comes to uniqueness, comfort and world-class service.
Jetwing Yala | A luxurious hotel with a marvellous outdoor pool, spacious air-conditioned rooms, and a charming ambience. Given the location of the hotel, you’ll be encircled by delicate nature and fascinating wildlife. The friendly staff also provide great service and hospitality.
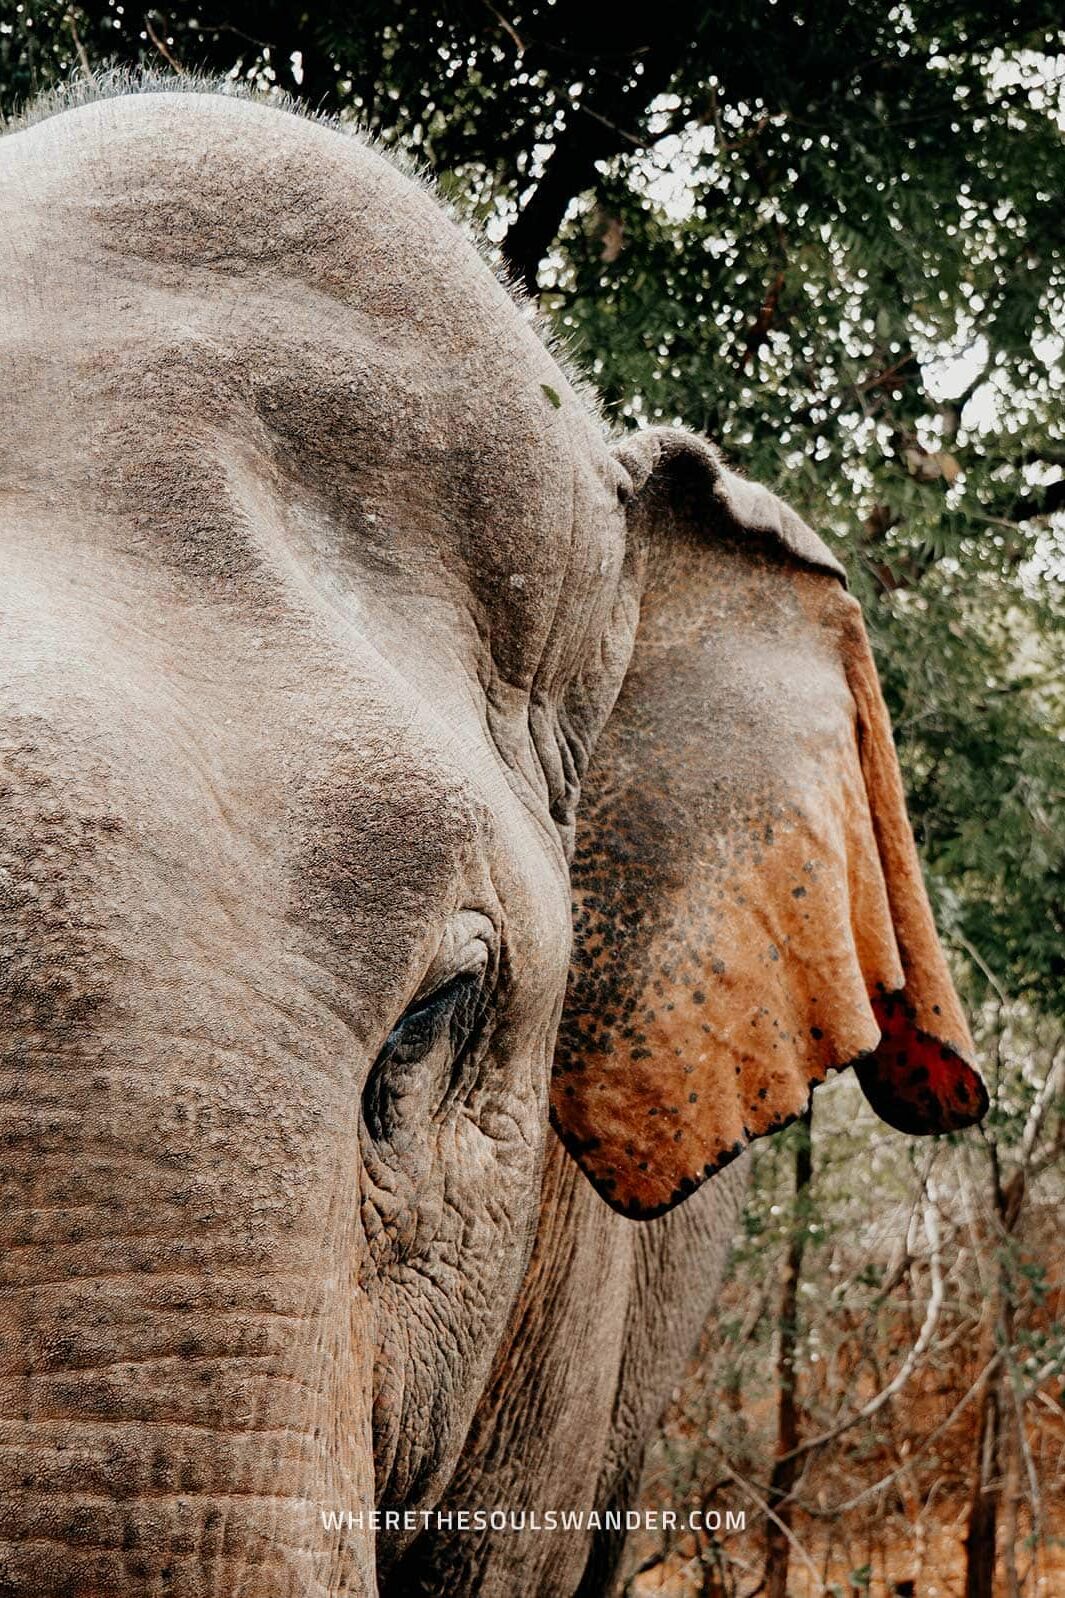

What animal could you see during a Yala National Park Safari?
Yala National Park is a vast dynamic reserve, consisting of dense jungle, endless grasslands and several lakes and lagoons.
This distinct landscape ensures the perfect habitat for a great variety and density of wildlife, making Yala one of the best national parks in Sri Lanka.
But it isn’t just the variety of animals that makes Yala National Park so popular. No, it’s mostly the fact that it’s acknowledged as one of the best spots in the world to see wild leopards.
The animals of Yala National Park
Although taking a safari tour doesn’t guarantee that you’ll see every animal that lives in the Yala National Park, it’s safe to expect to get up close and personal with water buffalos, wild boars, spotted deer, monkeys and peacocks.
Beyond the aforementioned wildlife, there is the potential sighting of leopards, elephants, Black Sloth bears, Fishing cats, Red Slender loris and crocodiles.
In total, the Yala National Park is home to 44 species of mammals, 215 species of birds and 46 species of reptiles, which makes it impossible not to spot any animals during your safari.
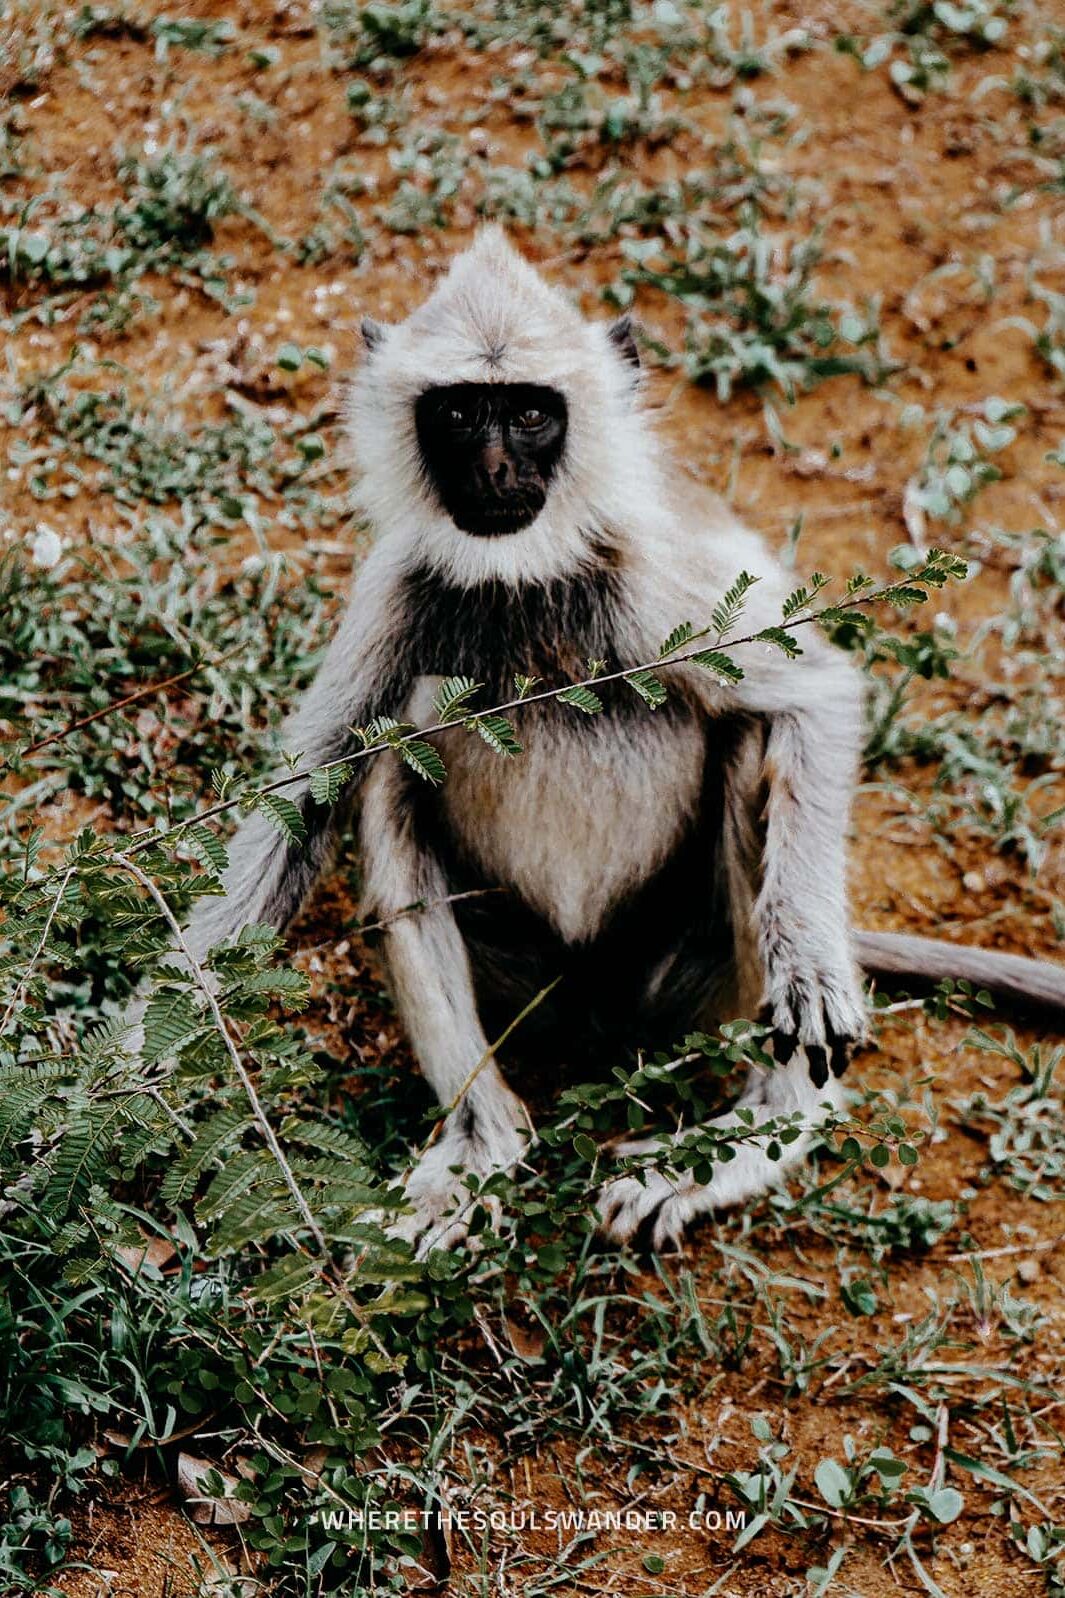
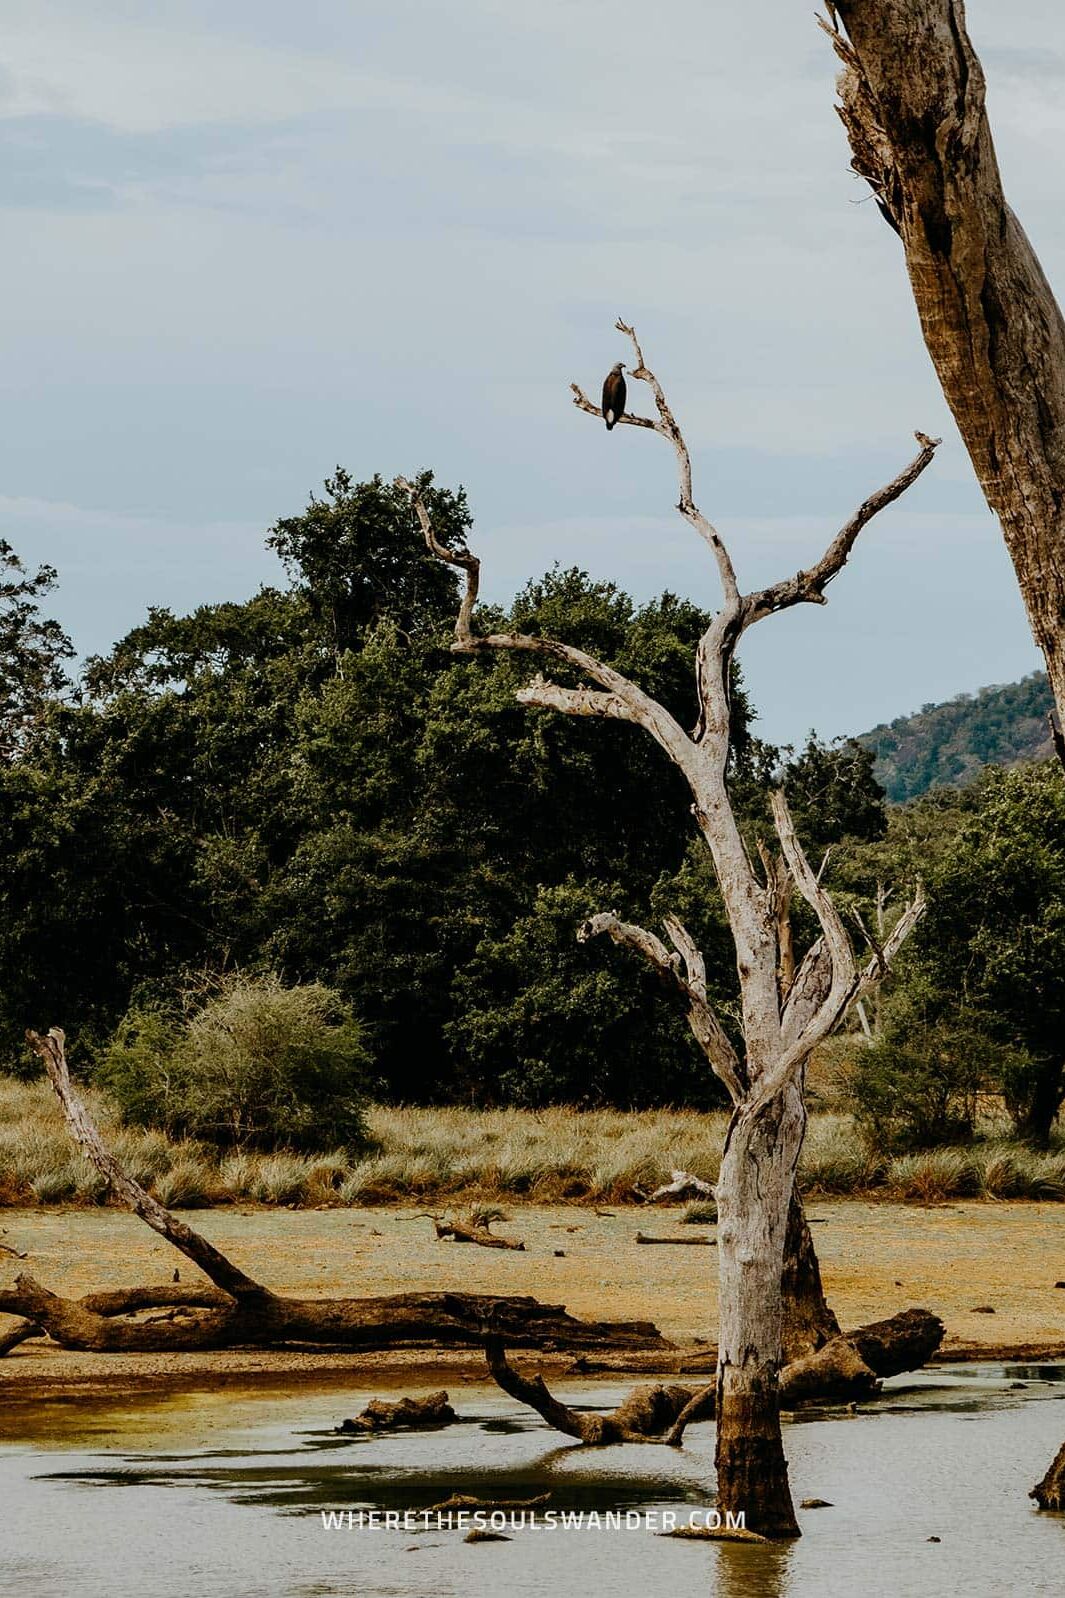
Leopard sightings in Yala National Park
According to extensive research, Yala National Park is said to have the biggest concentration of leopards in the world.
And given there live roughly 55 leopards within the park, you might have the good fortune to encounter one during your jeep safari in Yala.
However, each safari is completely unique and it’s impossible to guarantee what animals you’re going to see (especially the rare species). Therefore I highly recommend lowering your expectations, as it’s less common to encounter leopards.
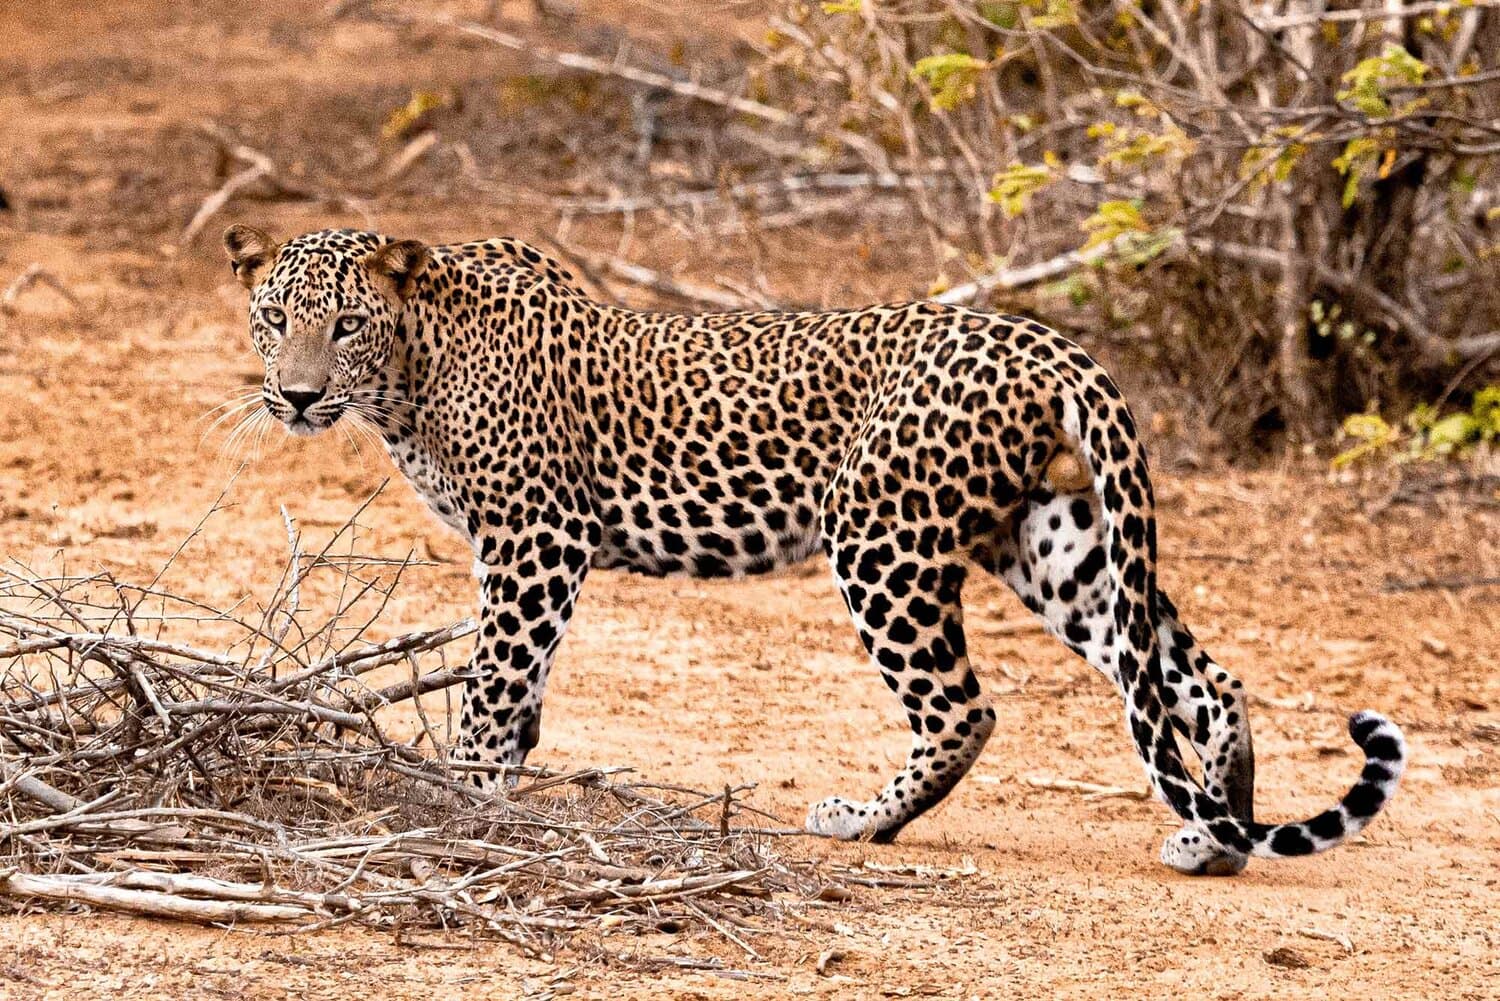
Join a Yala National Park tour
Tissamaharama is home to an abundance of safari tour operators, that are all extremely willing to take you on your once-in-a-lifetime Yala National Park safari experience.
A Yala safari jeep has the capacity for up to 6 people and the safari tour operator will usually arrange a pick-up and drop-off at your accommodation.
Yala National Park can be visited as part of a morning, afternoon or full-day jeep safari.
Book | Arrange your Yala National Park Safari Tour in advance
Morning safari in Yala National Park
It is often said that a morning safari in Yala National Park provides the best circumstances when it comes to the potential sightings of elusive wildlife.
This is mainly due to the fact that the animals aren’t yet disturbed by the countless amount of jeeps that drive along the park’s dusty roads throughout the day.
Even though waking up at 04.30 is pretty intense, it’s safe to say that it’s completely worth it.
By joining a morning safari, you’ll get picked up at your accommodations around 05.00 with the mission to arrive at the entrance of the park before it opens at 06.00.
In my opinion, the best part of a morning safari is the exciting journey to the park whilst it’s still dark, knowing you’re about to witness exquisite wildlife while it’s still relatively quiet in the park.
BOOK | This extremely popular guided safari during the golden hour
Duration | 05:00 – 10:00 with approximately 3 hours in the park.
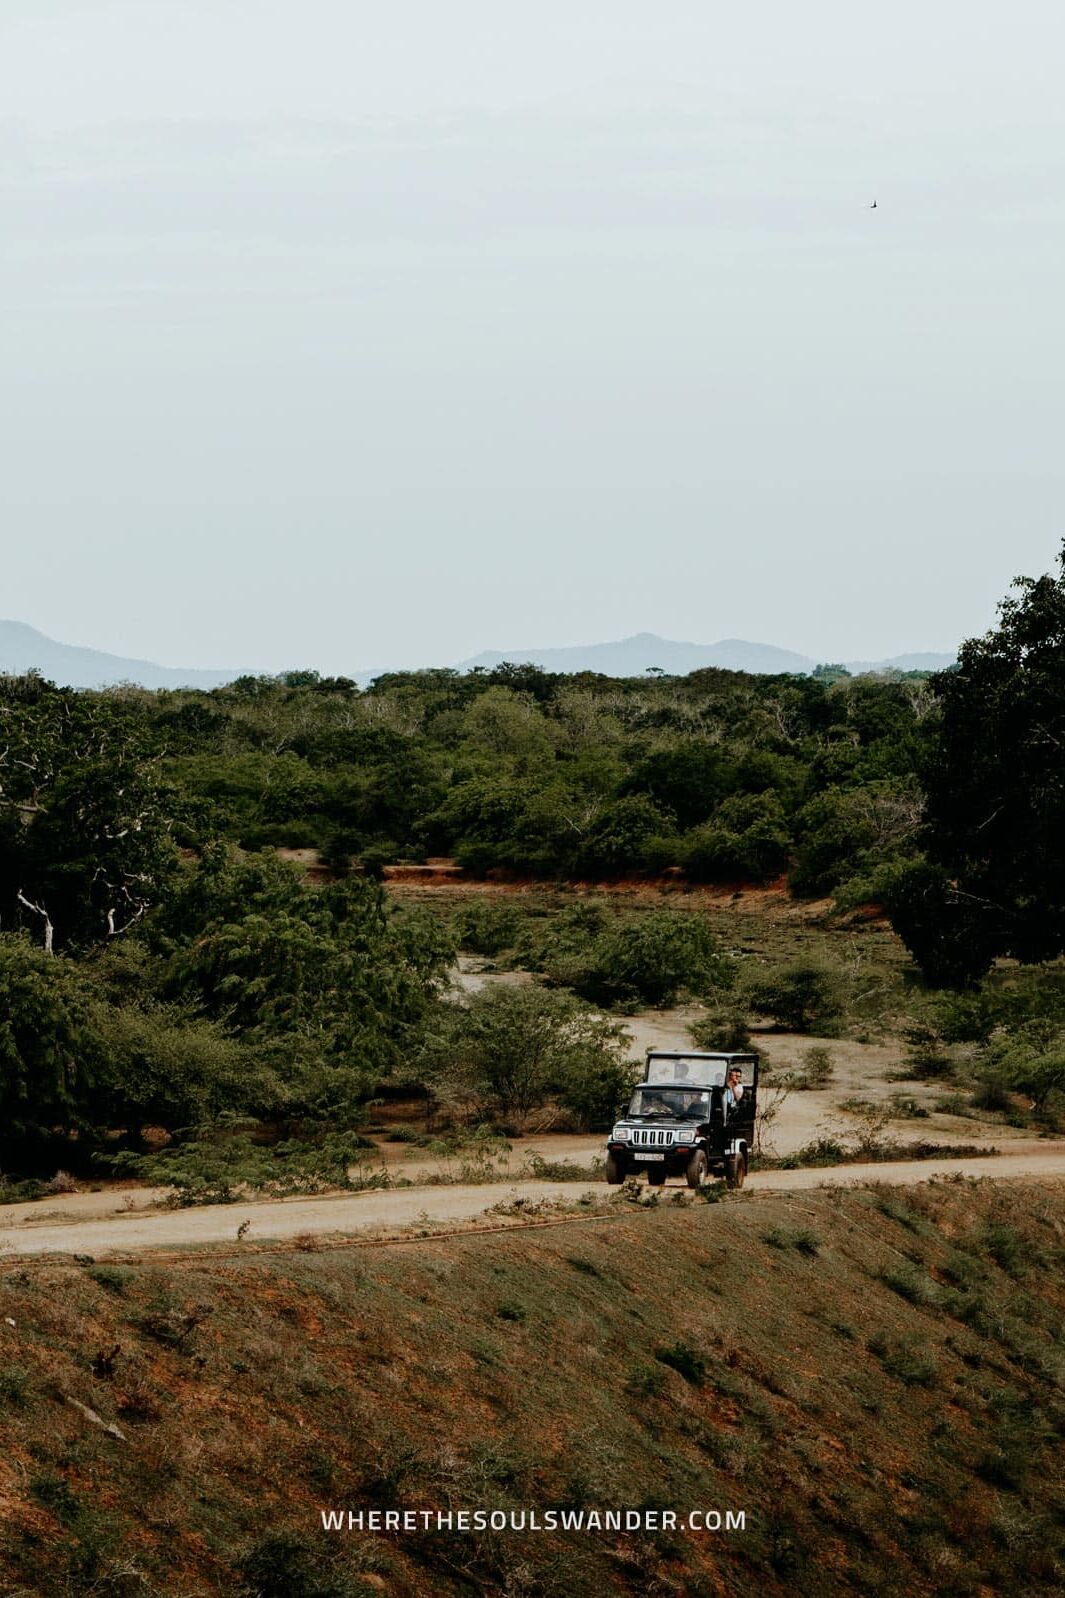
Afternoon safari in Yala National Park
A great alternative for those who experience difficulties when waking up early is taking the slightly more popular afternoon safari in Yala National Park.
According to most Yala safari rangers, there isn’t a significant difference between the morning and afternoon safari when it comes to the sightings of wildlife.
I’ve seen a great variety of animals during my afternoon safari in Yala National Park, and found it a tranquil yet adventurous experience – plus I witnessed a magnificent sunset while leaving the park.
Duration | 13:00 – 18:00 with approximately 3 hours in the park.

Full-day safari in Yala National Park
Although it sounds pretty attractive, I personally wouldn’t recommend going on a full-day safari in Yala National Park.
Being in the park for 12 hours straight is extremely exhausting – plus you should keep in mind that you’re in the park during the hottest part of the day. Believe me, this can be quite intense in Sri Lanka.
It is also not guaranteed that you’ll see more animals during a full-day safari than during a morning or afternoon safari in Yala National Park.
Duration | 05:00 – 19:00 with approximately 12 hours in the park.
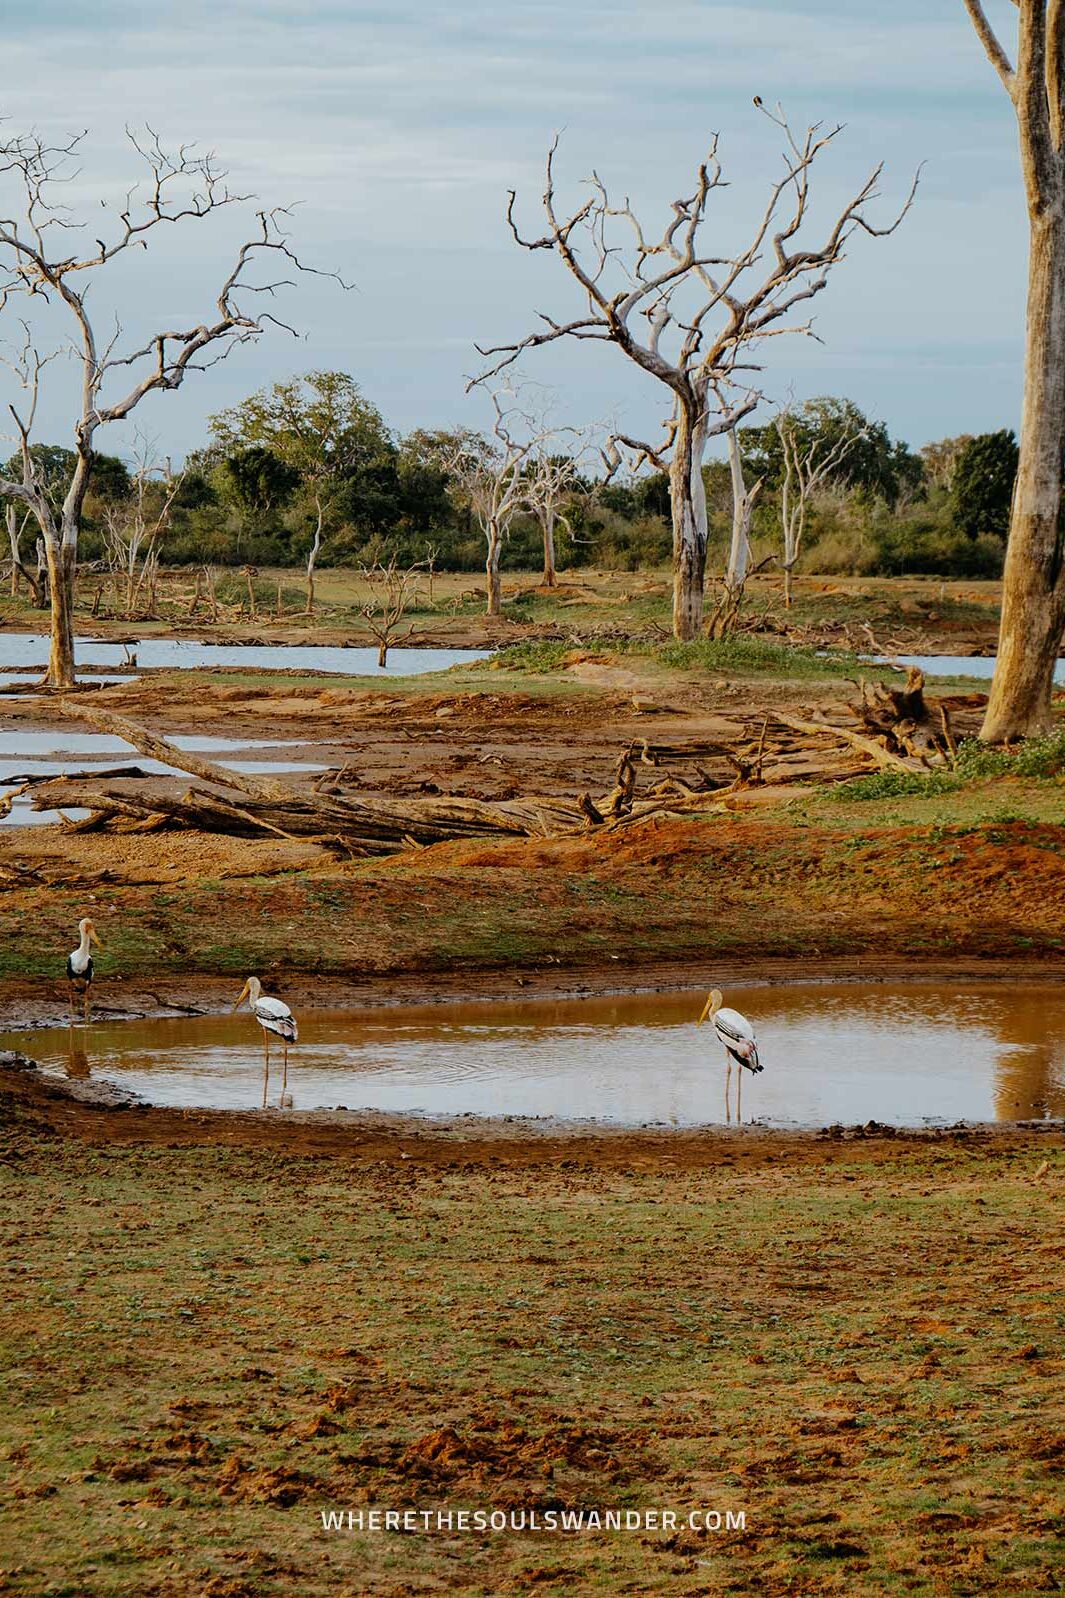
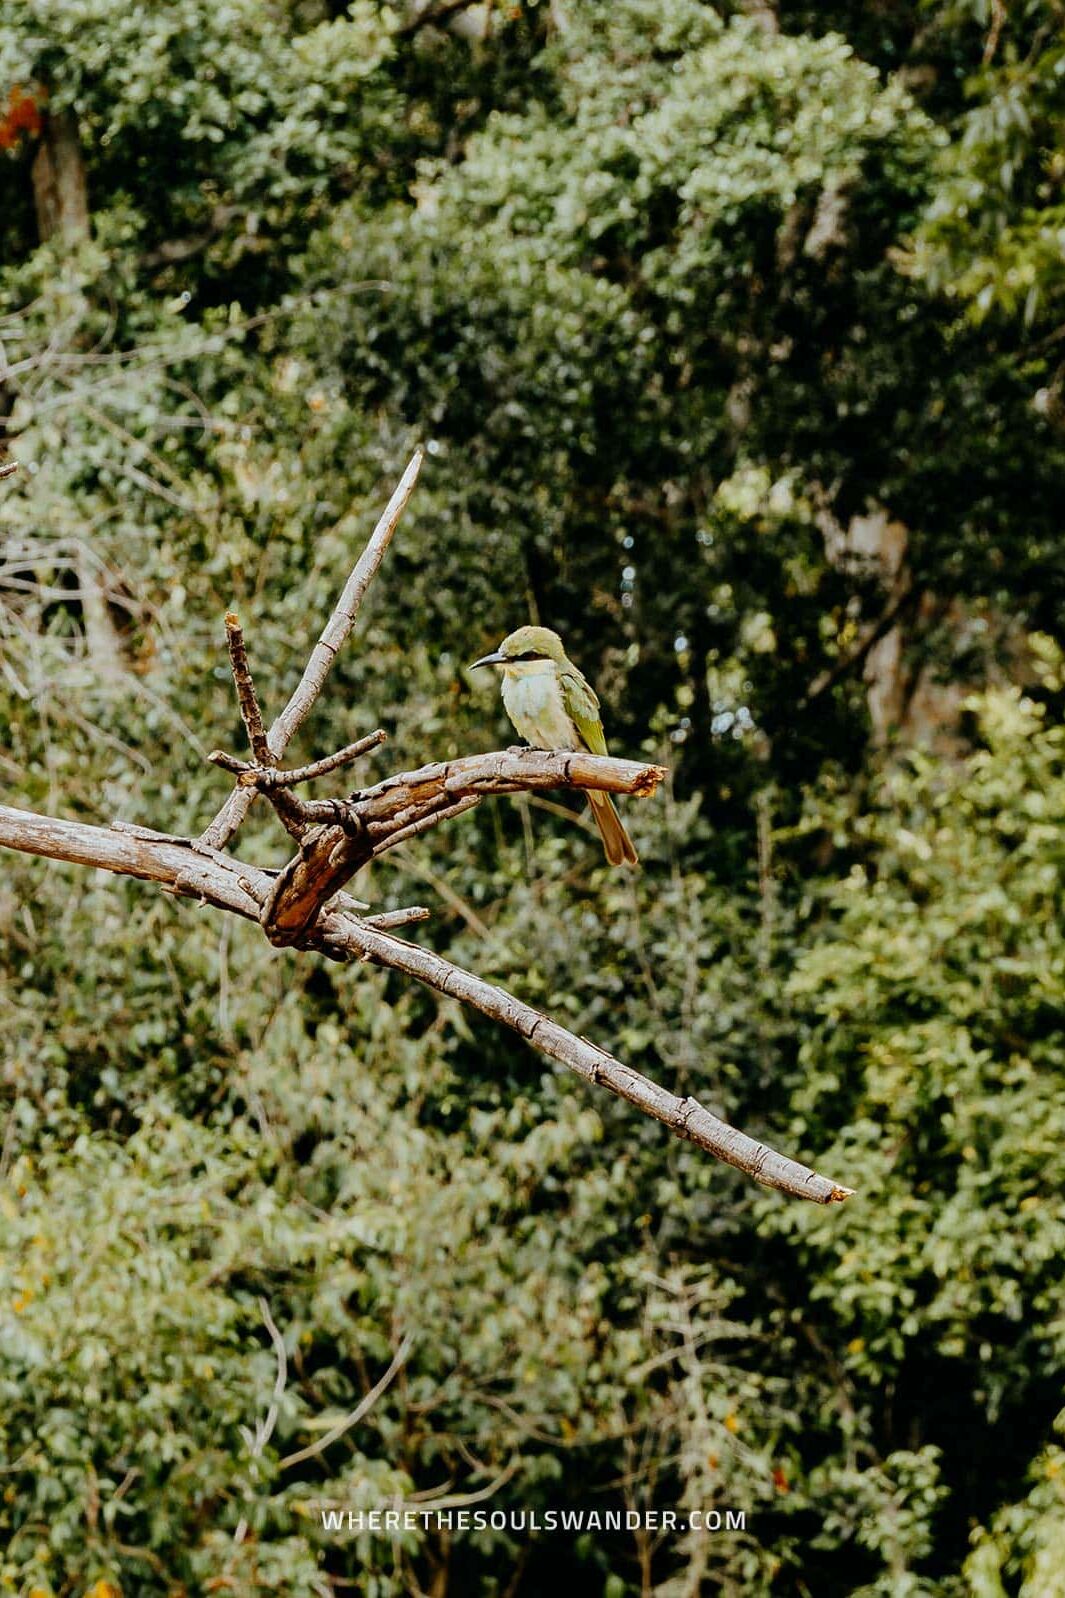
Yala National Park cost overview
The price of a jeep safari is made up of the official Yala National Park entrance fee – plus the price that you’ll arrange with your safari tour operator.
The price of a safari tour operator varies and depends on the following elements: the duration of the tour, the tour operator and the number of people that join the safari tour.
The jeep safari tour prices are often per jeep, which can hold up to six persons, and are easy to organize at nearly every accommodation in Tissamaharama.
I made an insightful summary, so you’ll have a clear indication of the costs of a jeep safari in Yala National Park.
Yala National Park entrance fee in 2024 | 11.000 LKR, ($37.50) per person
Half-day jeep safari | 14.000 – 17.000 LKR ($47.60 – 57.80) per jeep
Full-day jeep safari | 28.000 – 34.000 LKR ($95 – 115) per jeep
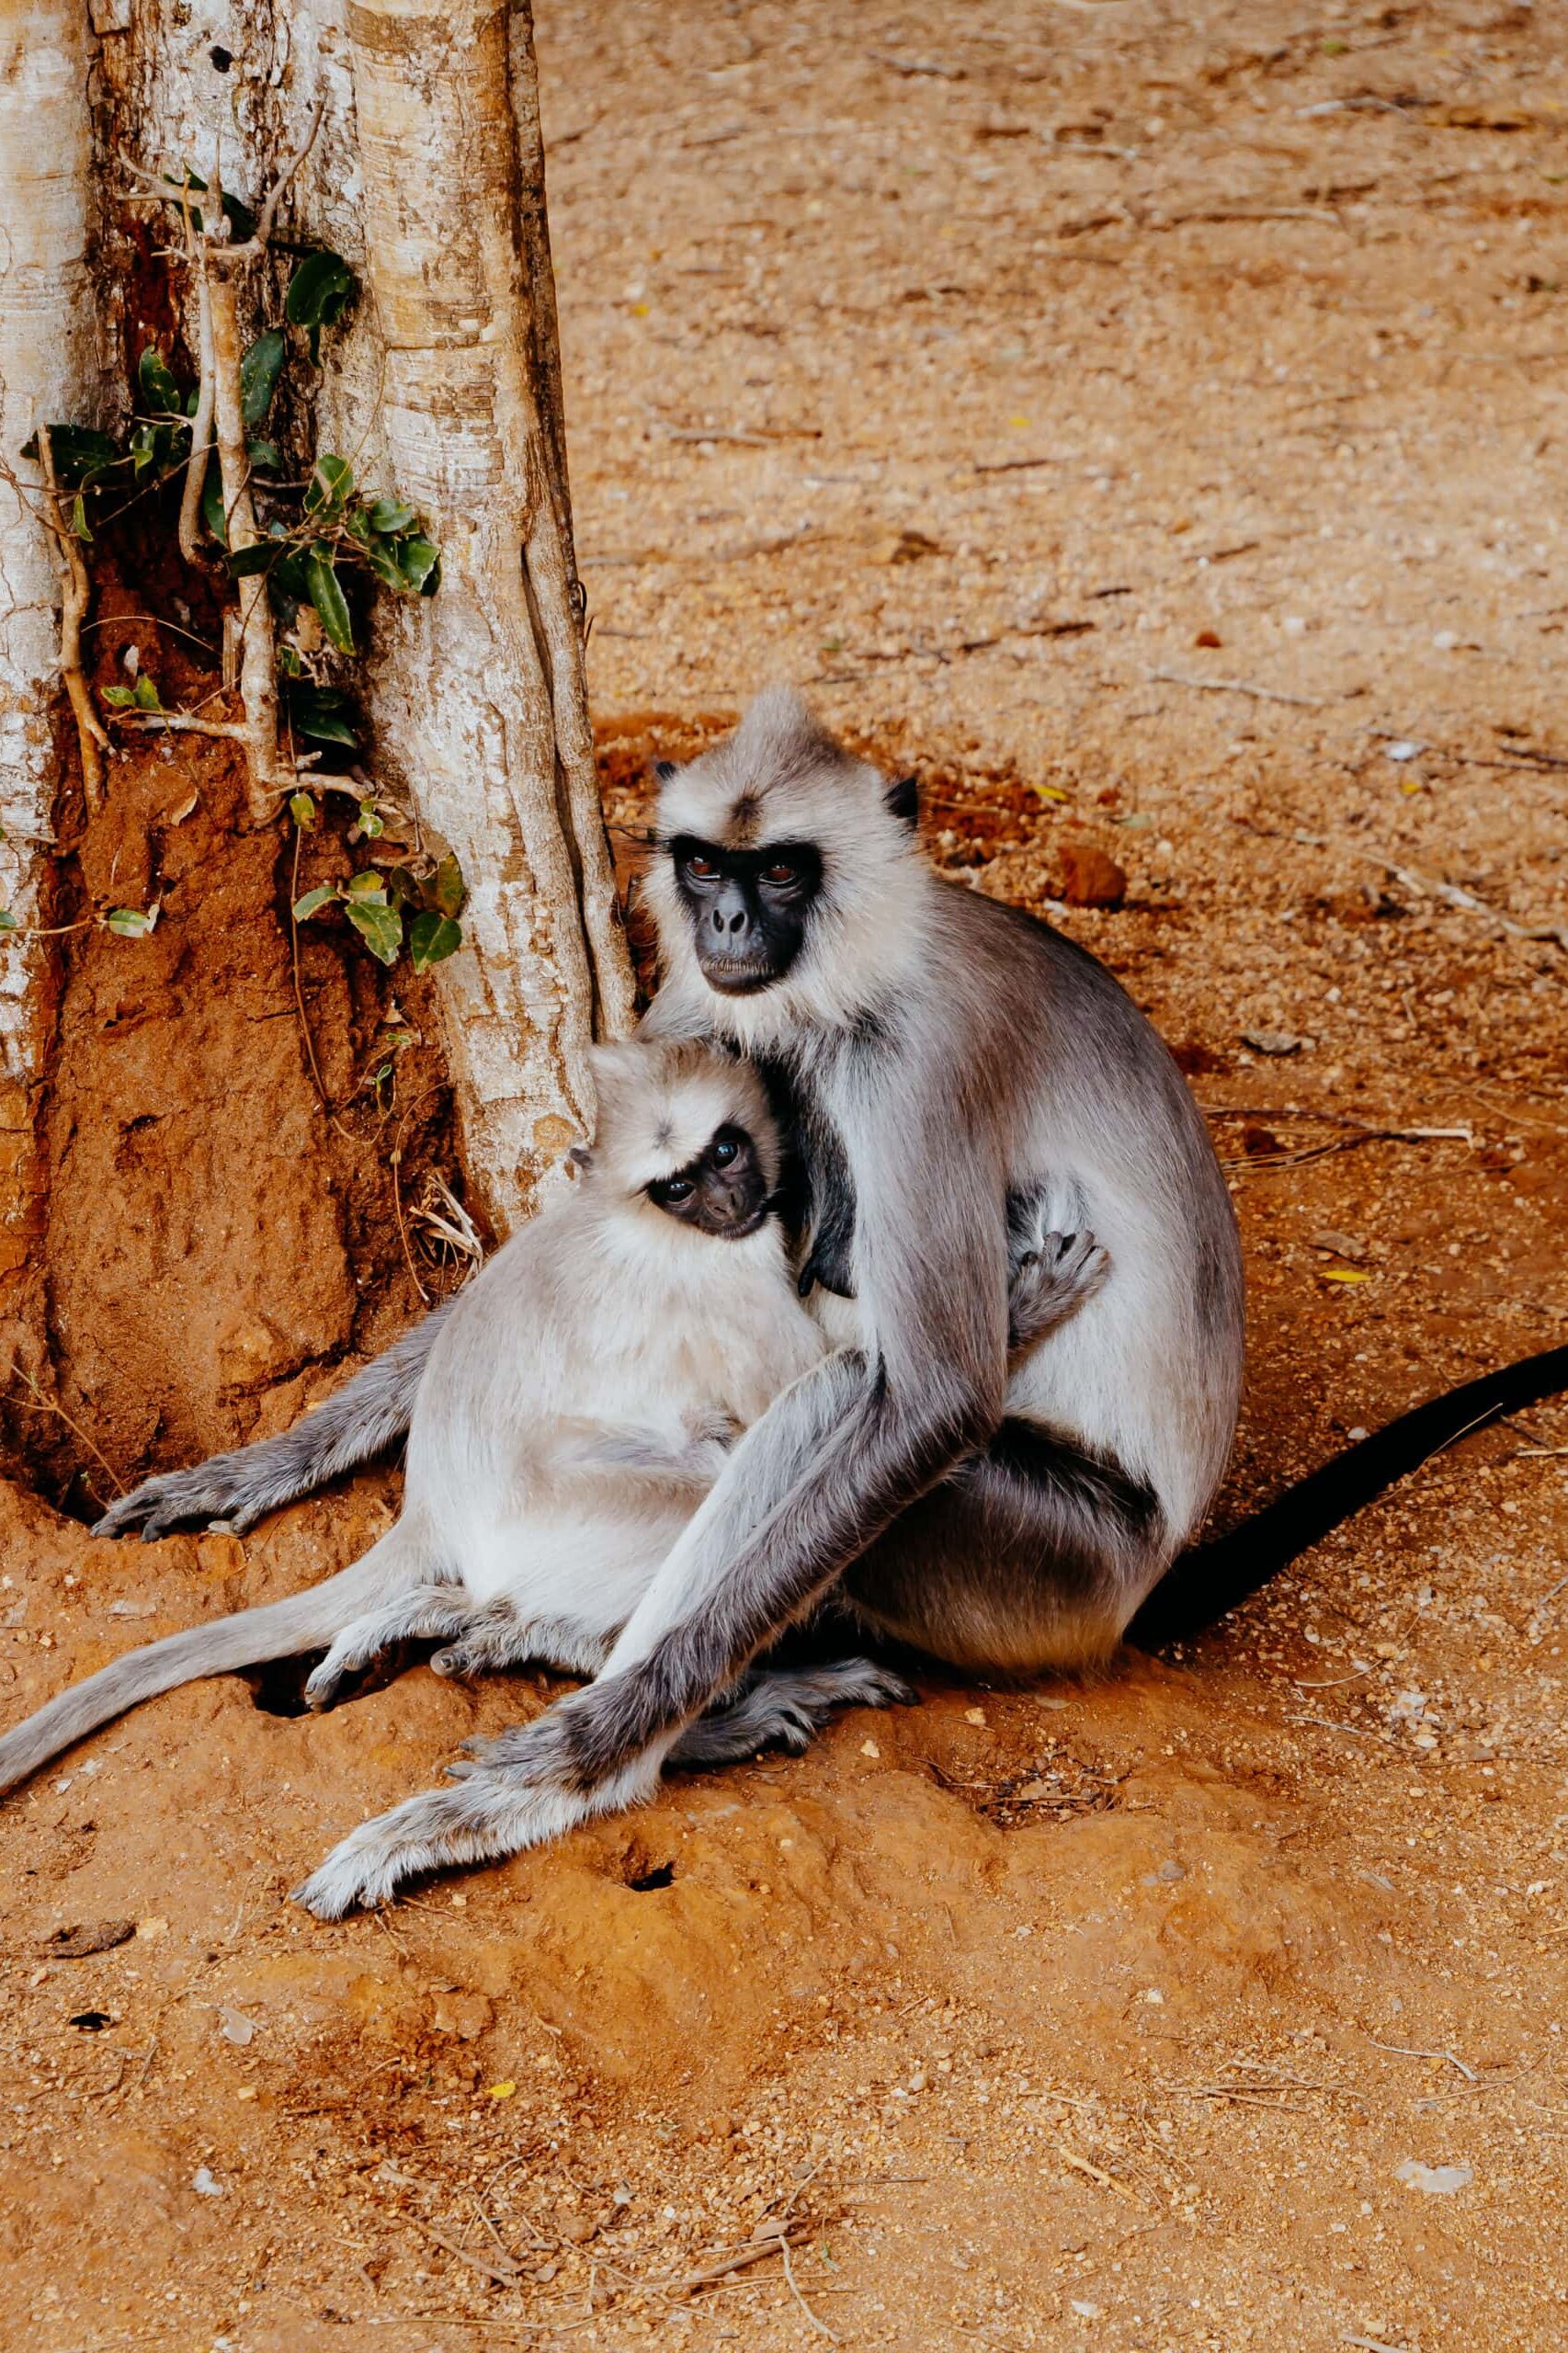
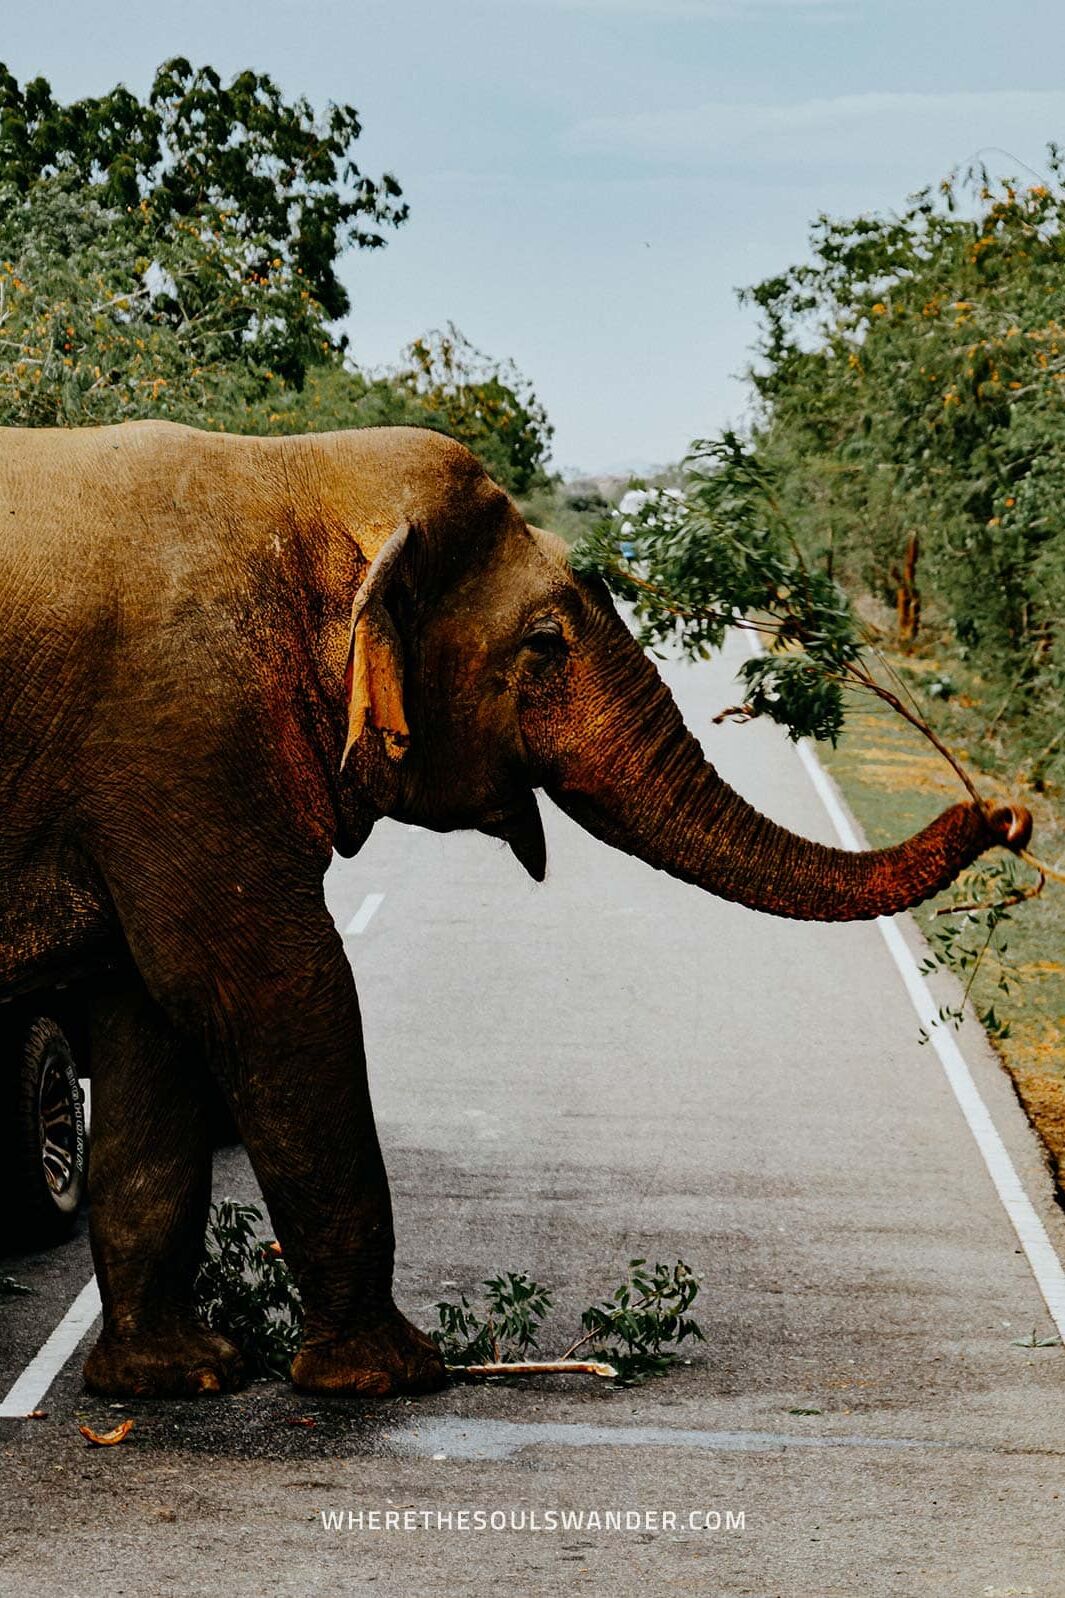
Yala National Park | The essentials
The best time to visit Yala National Park
Although you can visit the park year-round, the absolute best time to visit Yala National Park is during the dry season. This season runs from February to June, with February and March as the undisputed peak months to spot leopards.
It is said that it’s easier to spot wildlife during this period, mainly because of the deficient natural water resources that are available in the park. For that reason, animals get active to go out of their hideouts and drink from the accessible water ponds.
I personally visited Yala National Park during the offseason in September and had a great safari experience with an impressive number of animal sightings.
Do keep in mind that there is a great possibility you’ll find the park closed for maintenance in September.
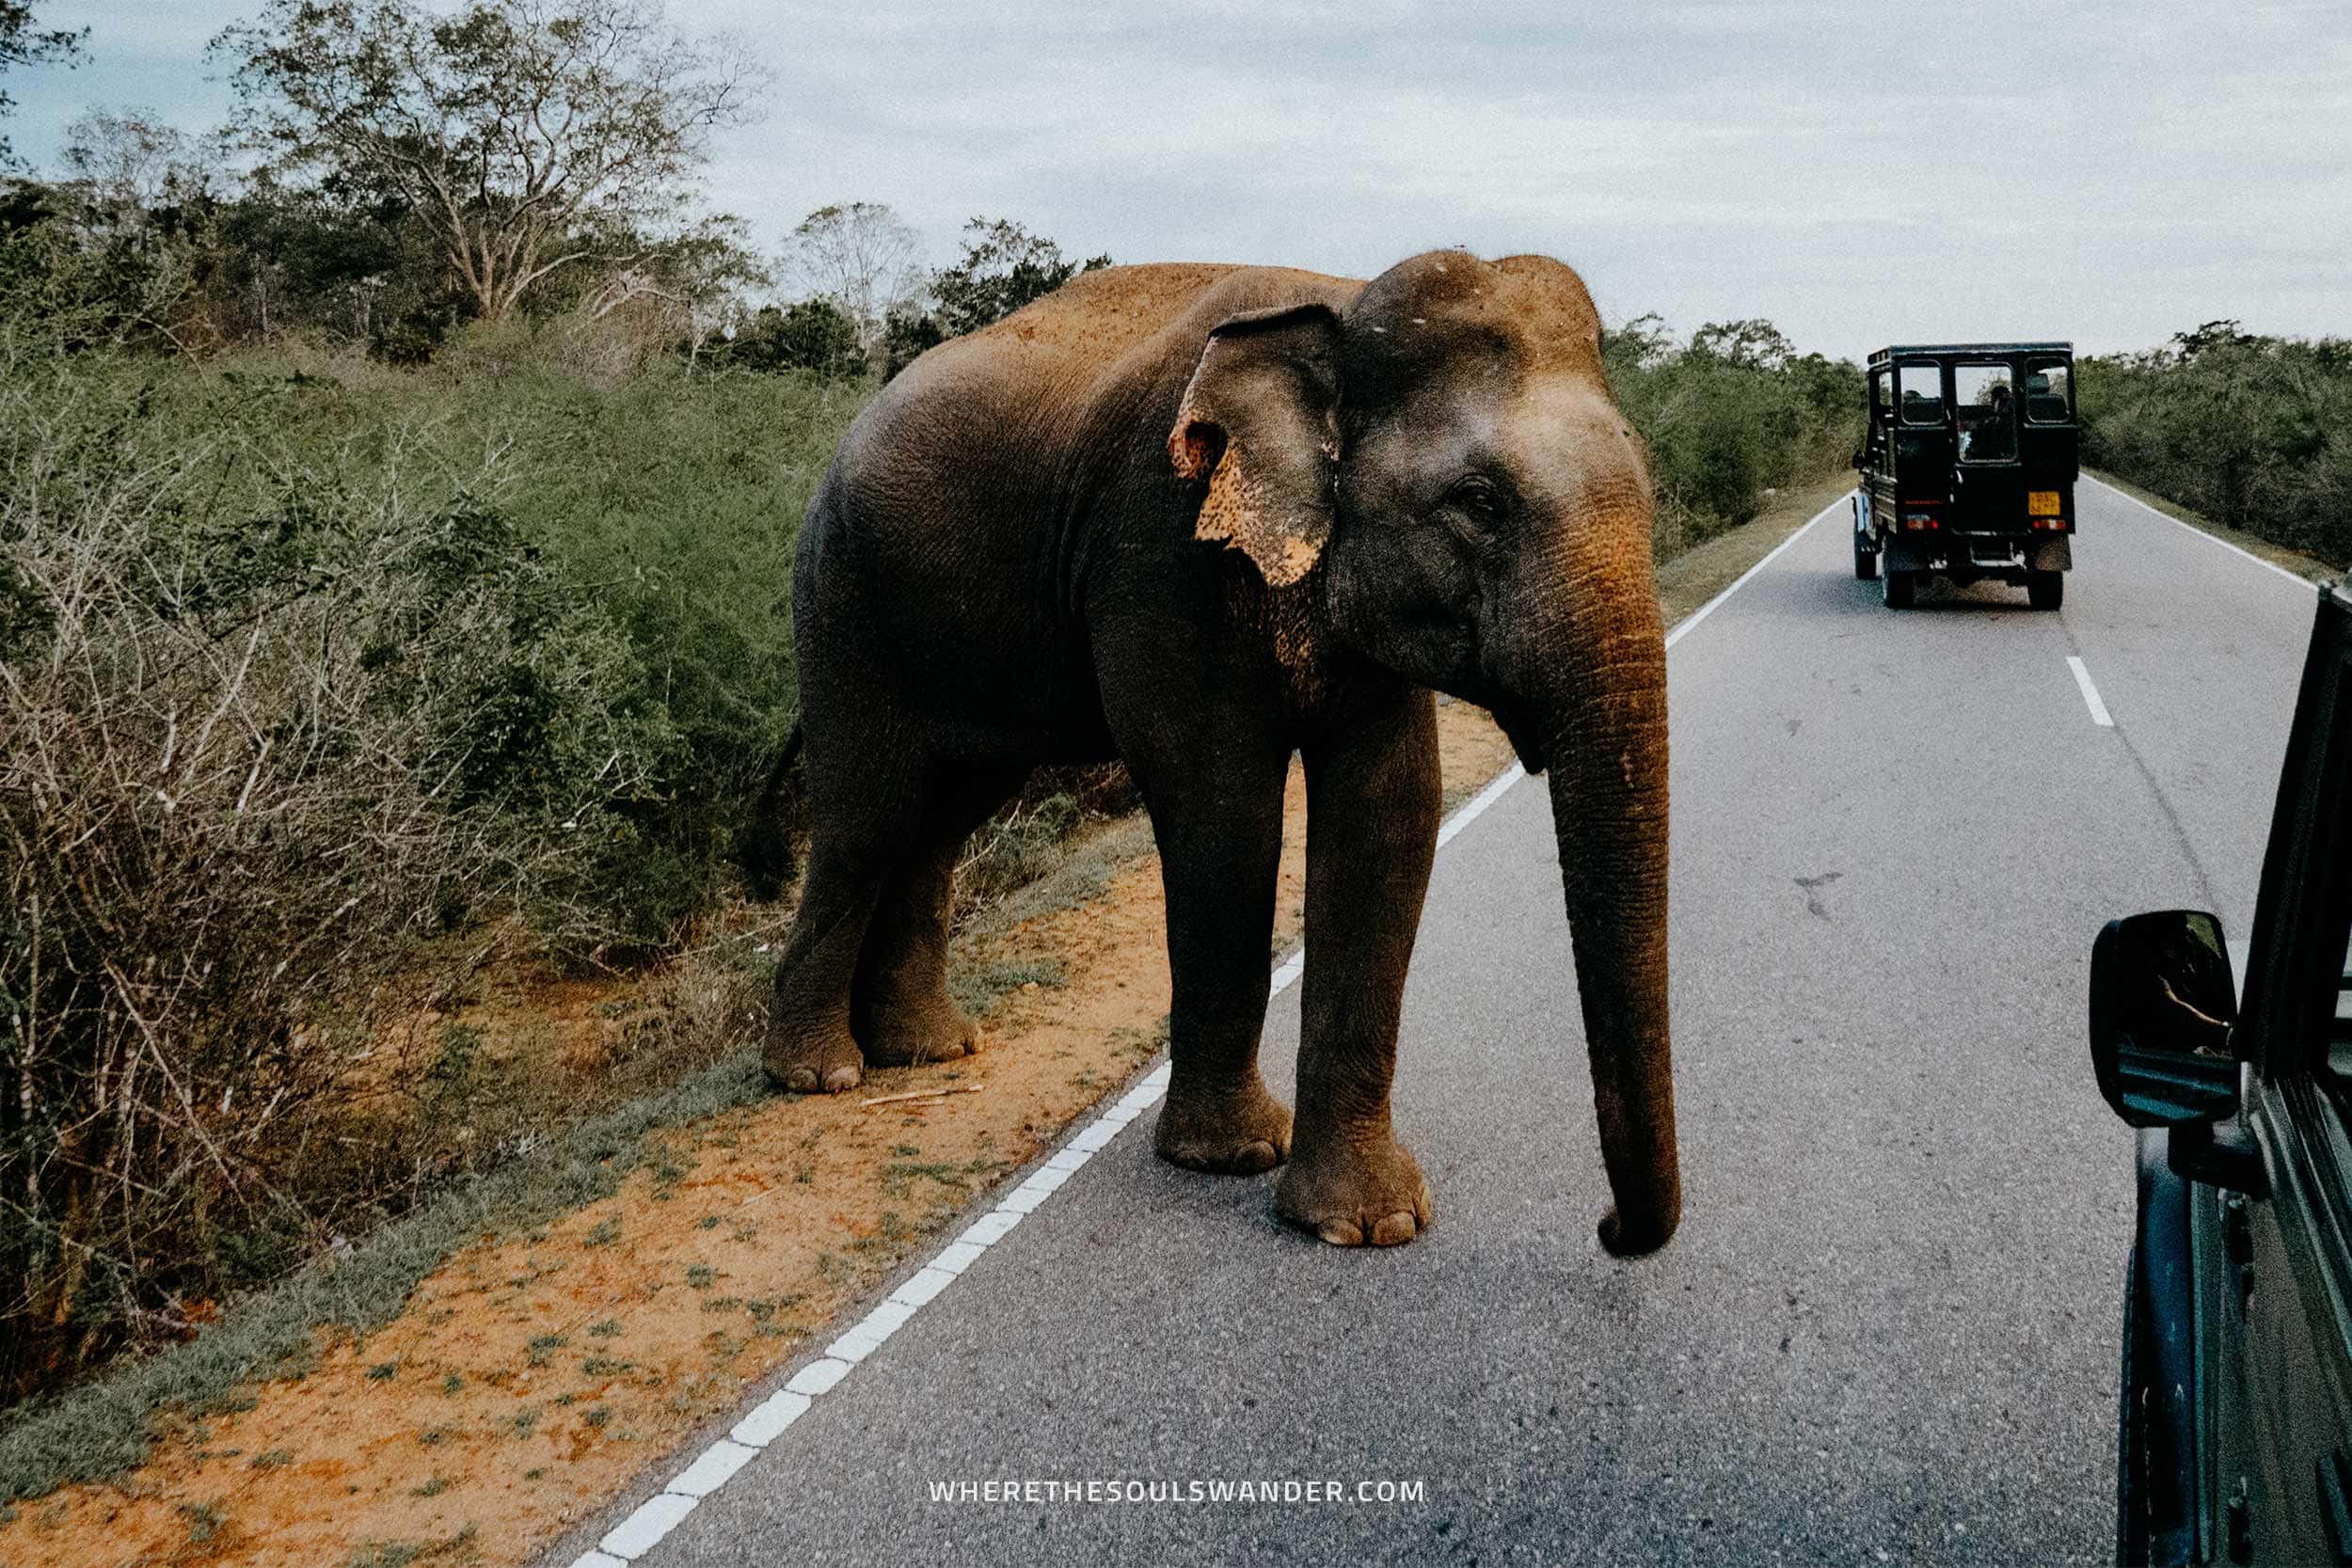
How to get to Yala National Park
The Yala National Park is slightly off the beaten path compared to other popular sights in Sri Lanka. This doesn’t mean you’ll have to be discouraged, it’s more than worth the extra effort.
The only gateway to the Yala National Park is a town named Tissamaharama, which is best reached by local bus or car.
The journey by bus can be quite long, intense and exhausting, but trust me, it’s one of the best ways to experience daily local life.
Do keep in mind that the local bus stops frequently and that you’ll need to change busses on several occasions to reach Tissamaharama.
The Yala National Park is usually visited after Mirissa, Ella or Arugam Bay.
From Mirissa to Tissamaharama
Bus journey | Mirissa – Matara – Tissamaharama
Cost | 250 – 330 LKR, ($1.30 – 1.80) per person
Travel time | Around 3.5 hours
From Ella to Tissamaharama
Bus journey | Ella – Tissamaharama
Cost | 220 – 250 LKR, ($1.20 – 1.35) per person
Travel time | Around 2.5 hours
From Arugam Bay to Tissamaharama
Bus journey | Pottuvil – Monaragala – Wellawaya – Tissamaharama
Cost | 350 – 380 LKR, ($1.90 – 2.10) per person
Travel time | Around 6.5 hours
Insightful travel tips for a visit to Yala National Park
Photography gear | If you’re into serious photography you might want to bring your camera and zoom lens. See what’s in my camera bag here.
Sunscreen | Even though the jeep is partly covered, the sun can be extremely harsh during a safari in Yala. Better safe than sorry.
Bug repellent | It’s always good to have a good bug repellent within hand reach.
Sweater | Bring a warm sweater. This will be your best friend during a morning safari.
Drinking water | Bring drinking water to stay hydrated throughout the day.
No toilets in the park | Do keep in mind that there are no toilets available inside the park.
Visit without expectations | Last but not least, lower your expectations before going on a safari. Every safari is unique and there is no guarantee that you’ll see all the animals you hope to see.
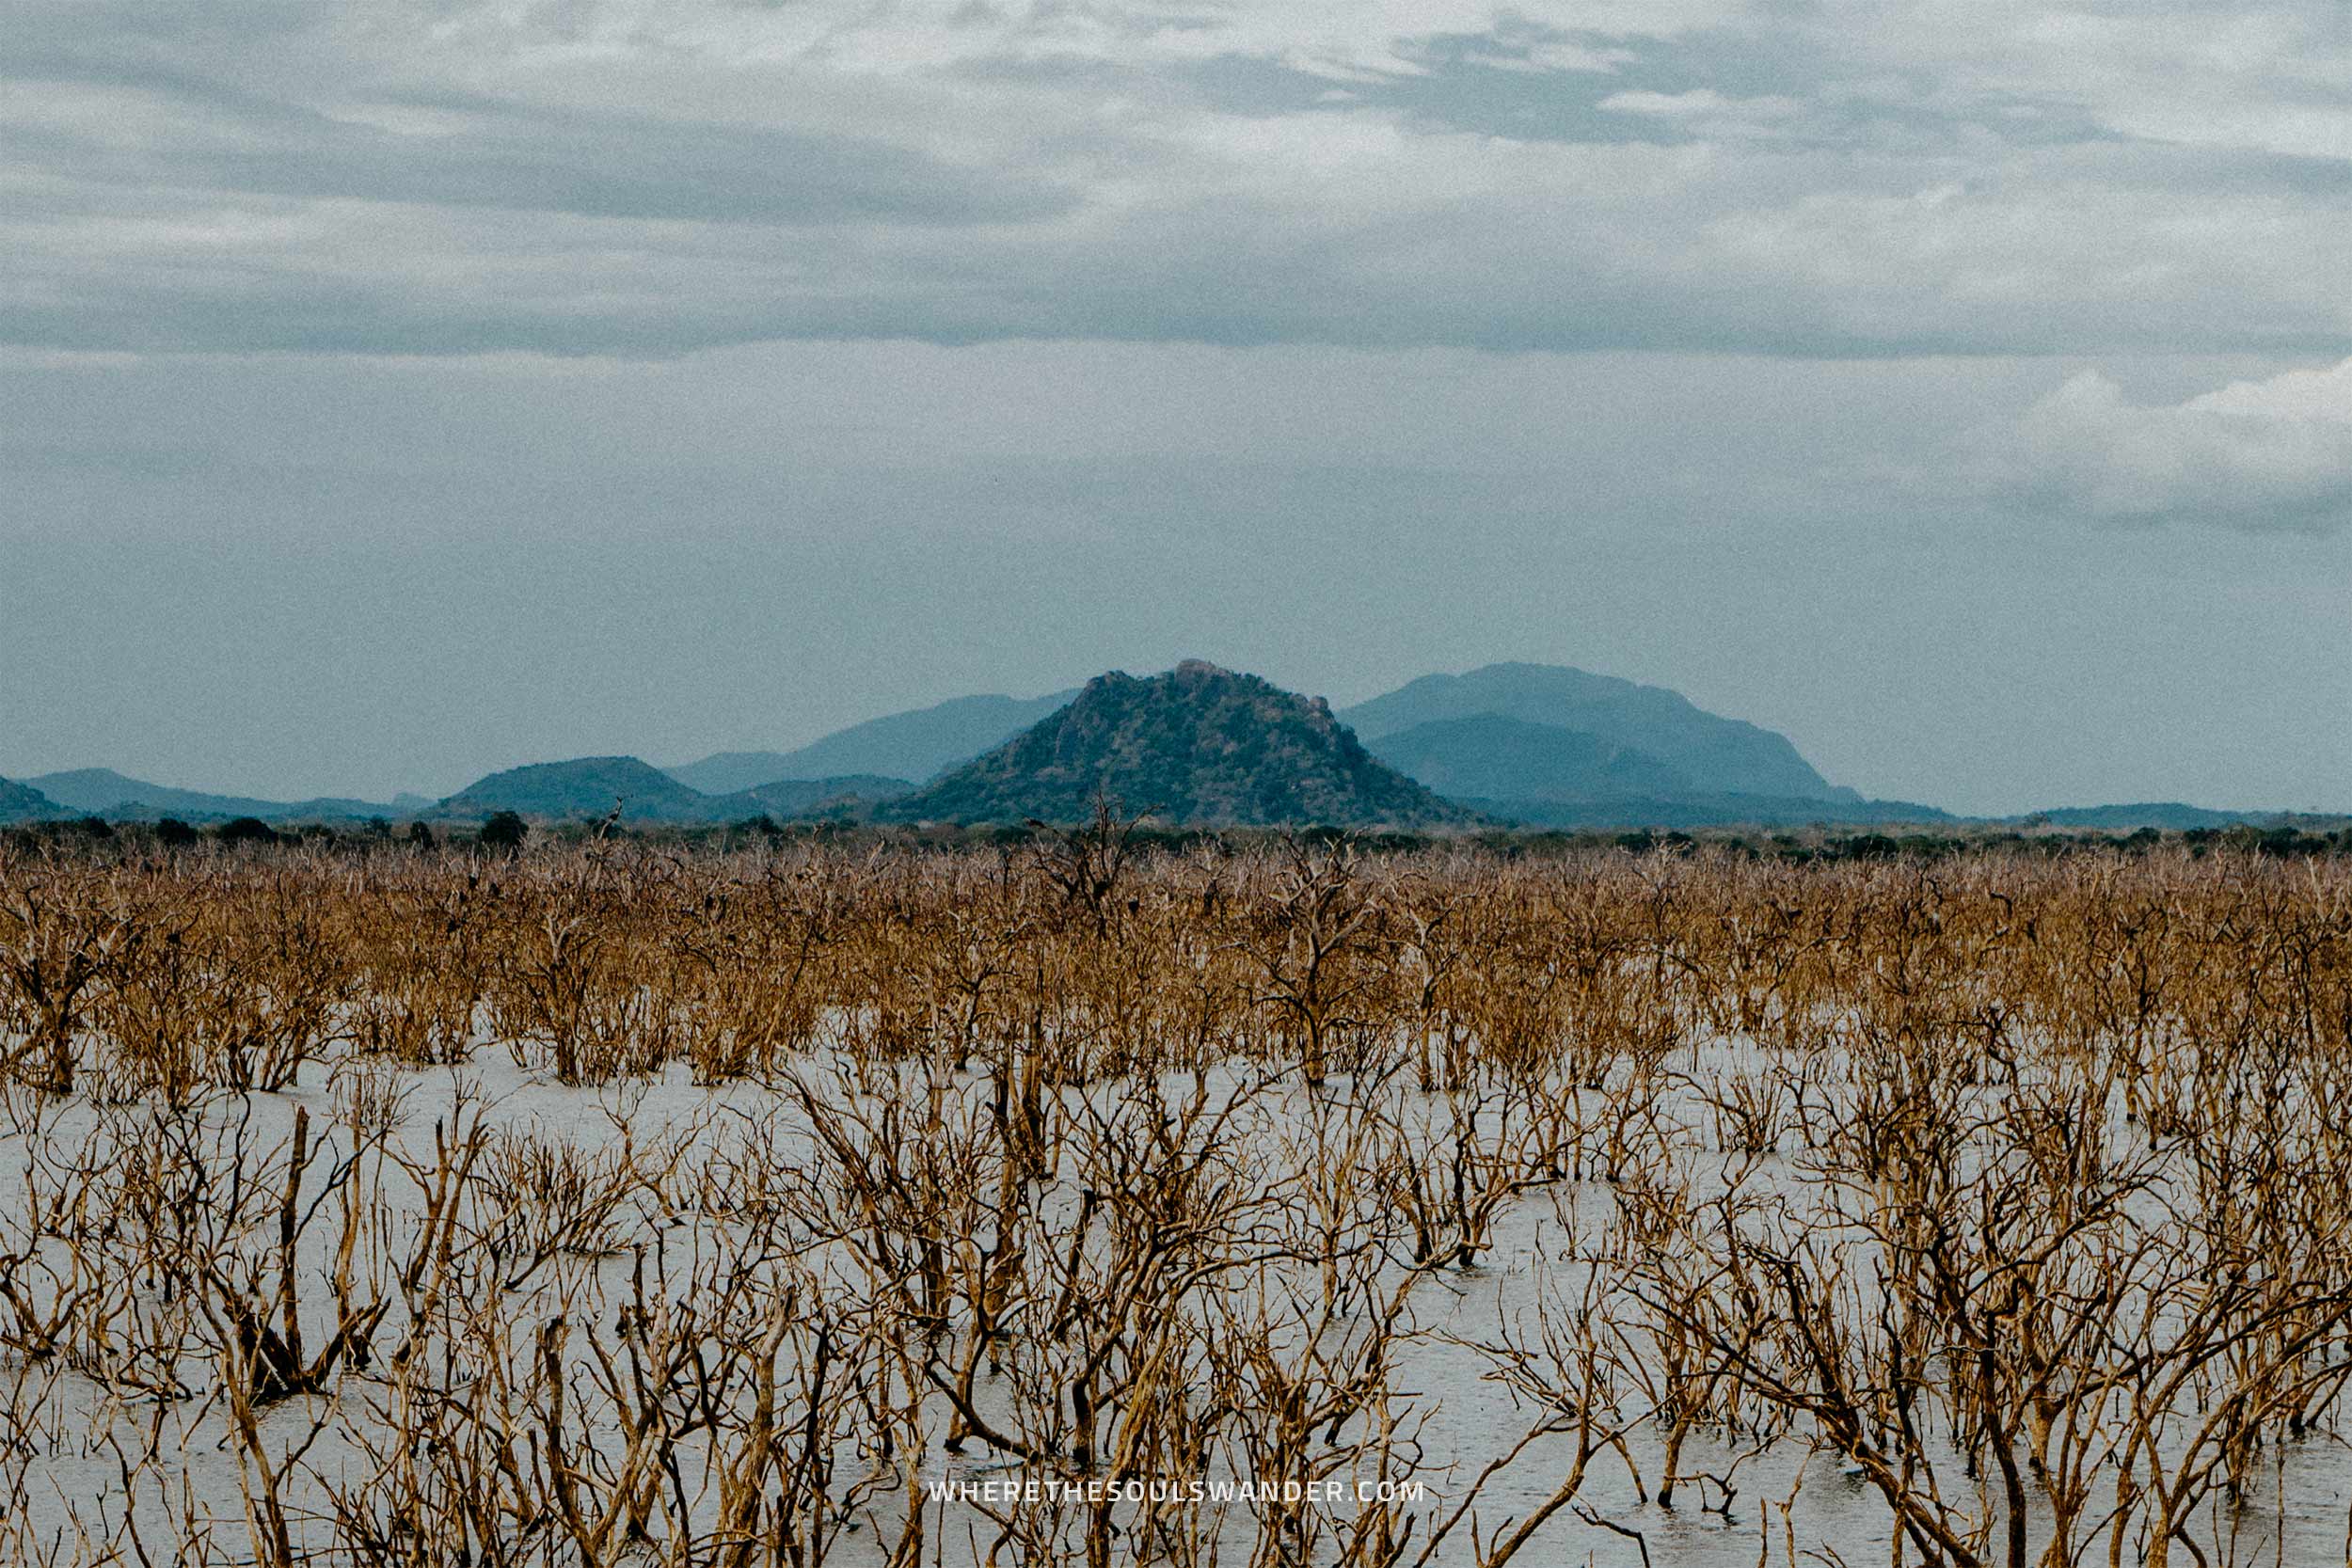
Stay safe in Sri Lanka | Travel insurance
Though Sri Lanka is perfectly safe for travellers, I always strive to sort out my travel insurance before arriving in a foreign country, and I highly advise anyone else to do the same.
Where we prefer that everything goes smoothly during our travels, something unfortunate can happen at any moment, whether it’s an injury or an accident on the road. When that happens, it is better to be safe than sorry.
Heymondo | Whether you’re going on a 3-week backpacking trip, or planning a long stay somewhere abroad, Heymondo has excellent insurance options either way – plus full COVID-19 coverage and a handy app with 24-hour medical assistance. Readers of WTSW receive 5% off any insurance policy, more information here.
Cheers!
I’ve been on this travel blogging journey since 2019.
If you appreciate what I do here, these are some ways you can support me.