
A guide to Levada do Caldeirão Verde, the PR9 hike on Madeira
It’s no secret that Madeira is the dream destination for those into nature and hiking, given there’s plenty of adventurous levada walks dotted throughout the dense inland of the island.
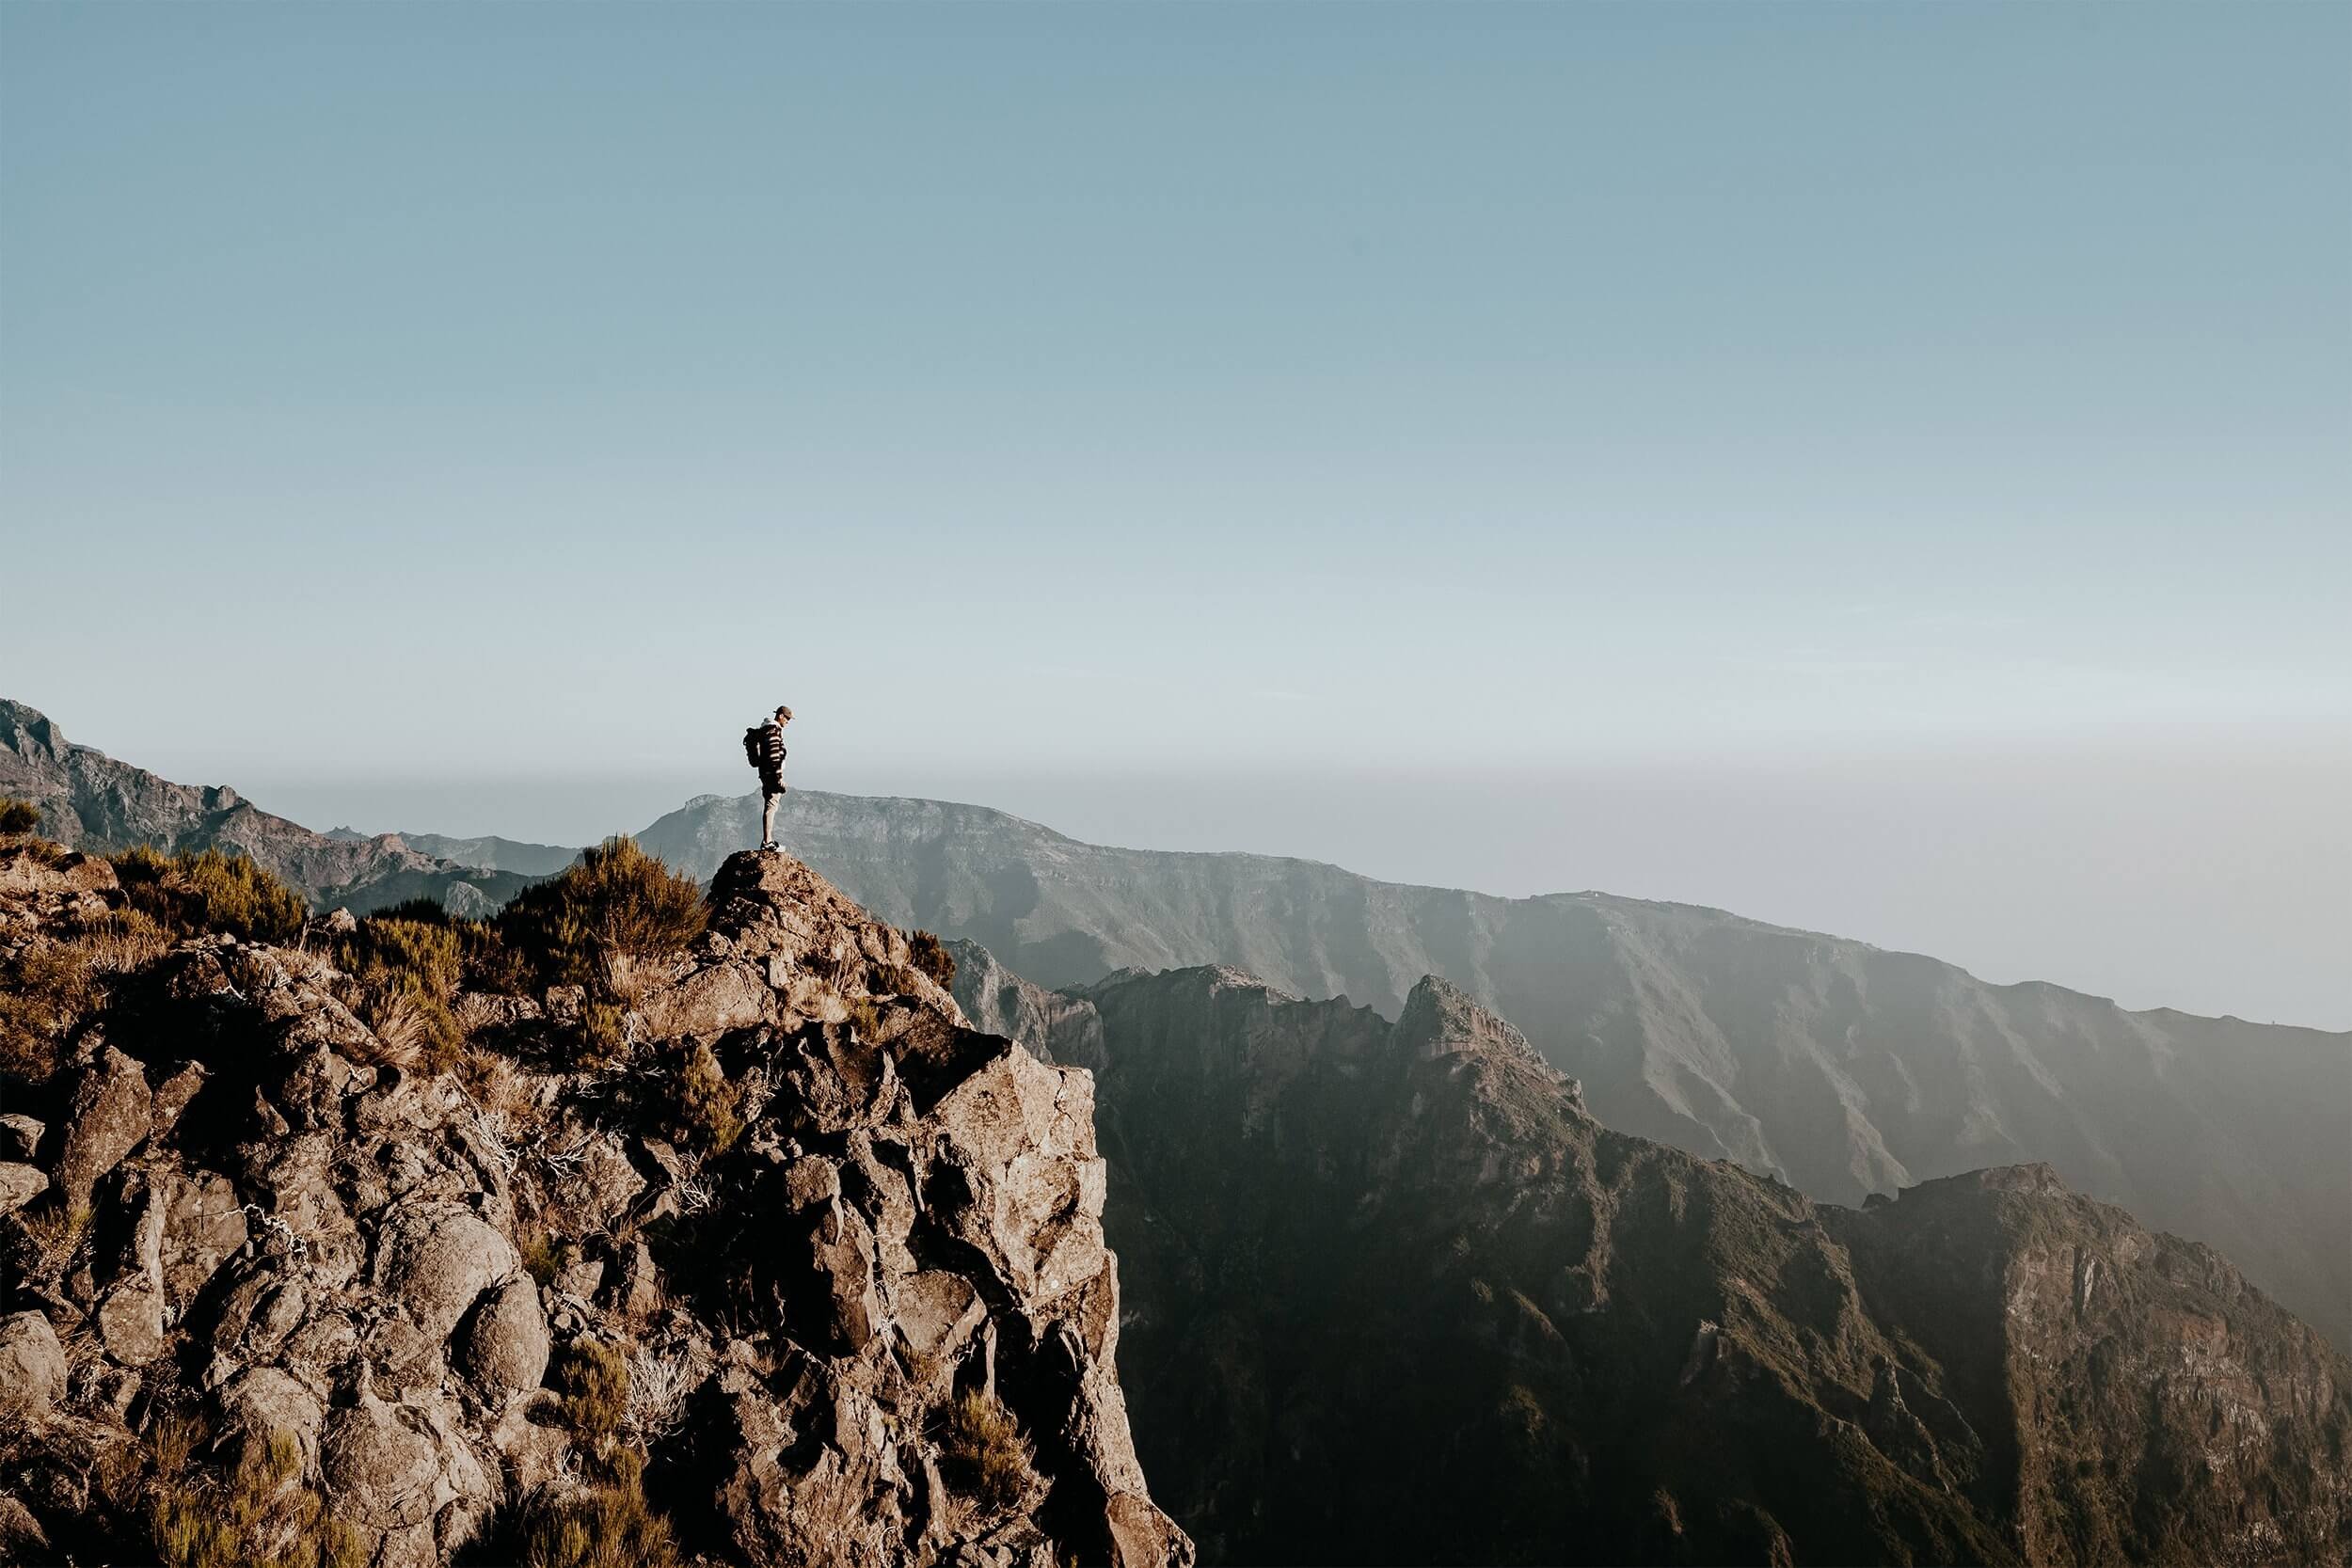
Located in the midst of the lush valley of São Jorge, the Levada do Caldeirão Verde is such a walk and in my opinion, an essential hike for anyone travelling to Madeira.
From distinctive tropical flora to gushing waterfalls to dense mountain hills tucked between beds of rolling clouds, the PR9 hike, with its stunning natural features, is truly one of the island’s most scenic levada walks.
After doing several levada walks and hikes on Madeira, I came to the conclusion that Levada do Caldeirão Verde is up there with my absolute favourites, and I’m pretty sure it will be yours too.
So if you’re planning to do the Levada do Caldeirão Verde PR9 hike, here’s my hiking guide featuring all the essential information, as well as some of my best hiking tips.
If you choose to use any of the links on this page, I may receive a small commission at no extra cost to you. By using these links, you’ll have a direct impact on WTSW and my ability to continue to create free insightful travel content for you. If you find any of my tips useful, you can support me by buying a virtual coffee here.
Where is Levada do Caldeirão Verde
Situated just outside of the Santana municipality, the Levada do Caldeirão Verde hike starts at the Queimadas Forestry Park, before guiding you deep into the picturesque valley of São Jorge.
The Queimadas Forestry Park itself – the starting point of the popular PR9 hike, is easily accessible and about an hour’s drive from Funchal.

Levada do Caldeirão Verde hike details
Levada do Caldeirão Verde hike details
HIKE DIFFICULTY
EASY
HIKE DURATION
3 – 4 HOURS
HIKE DISTANCE
13KM ROUND TRIP
ELEVATION GAIN
100 METERS

How to get to Levada do Caldeirão
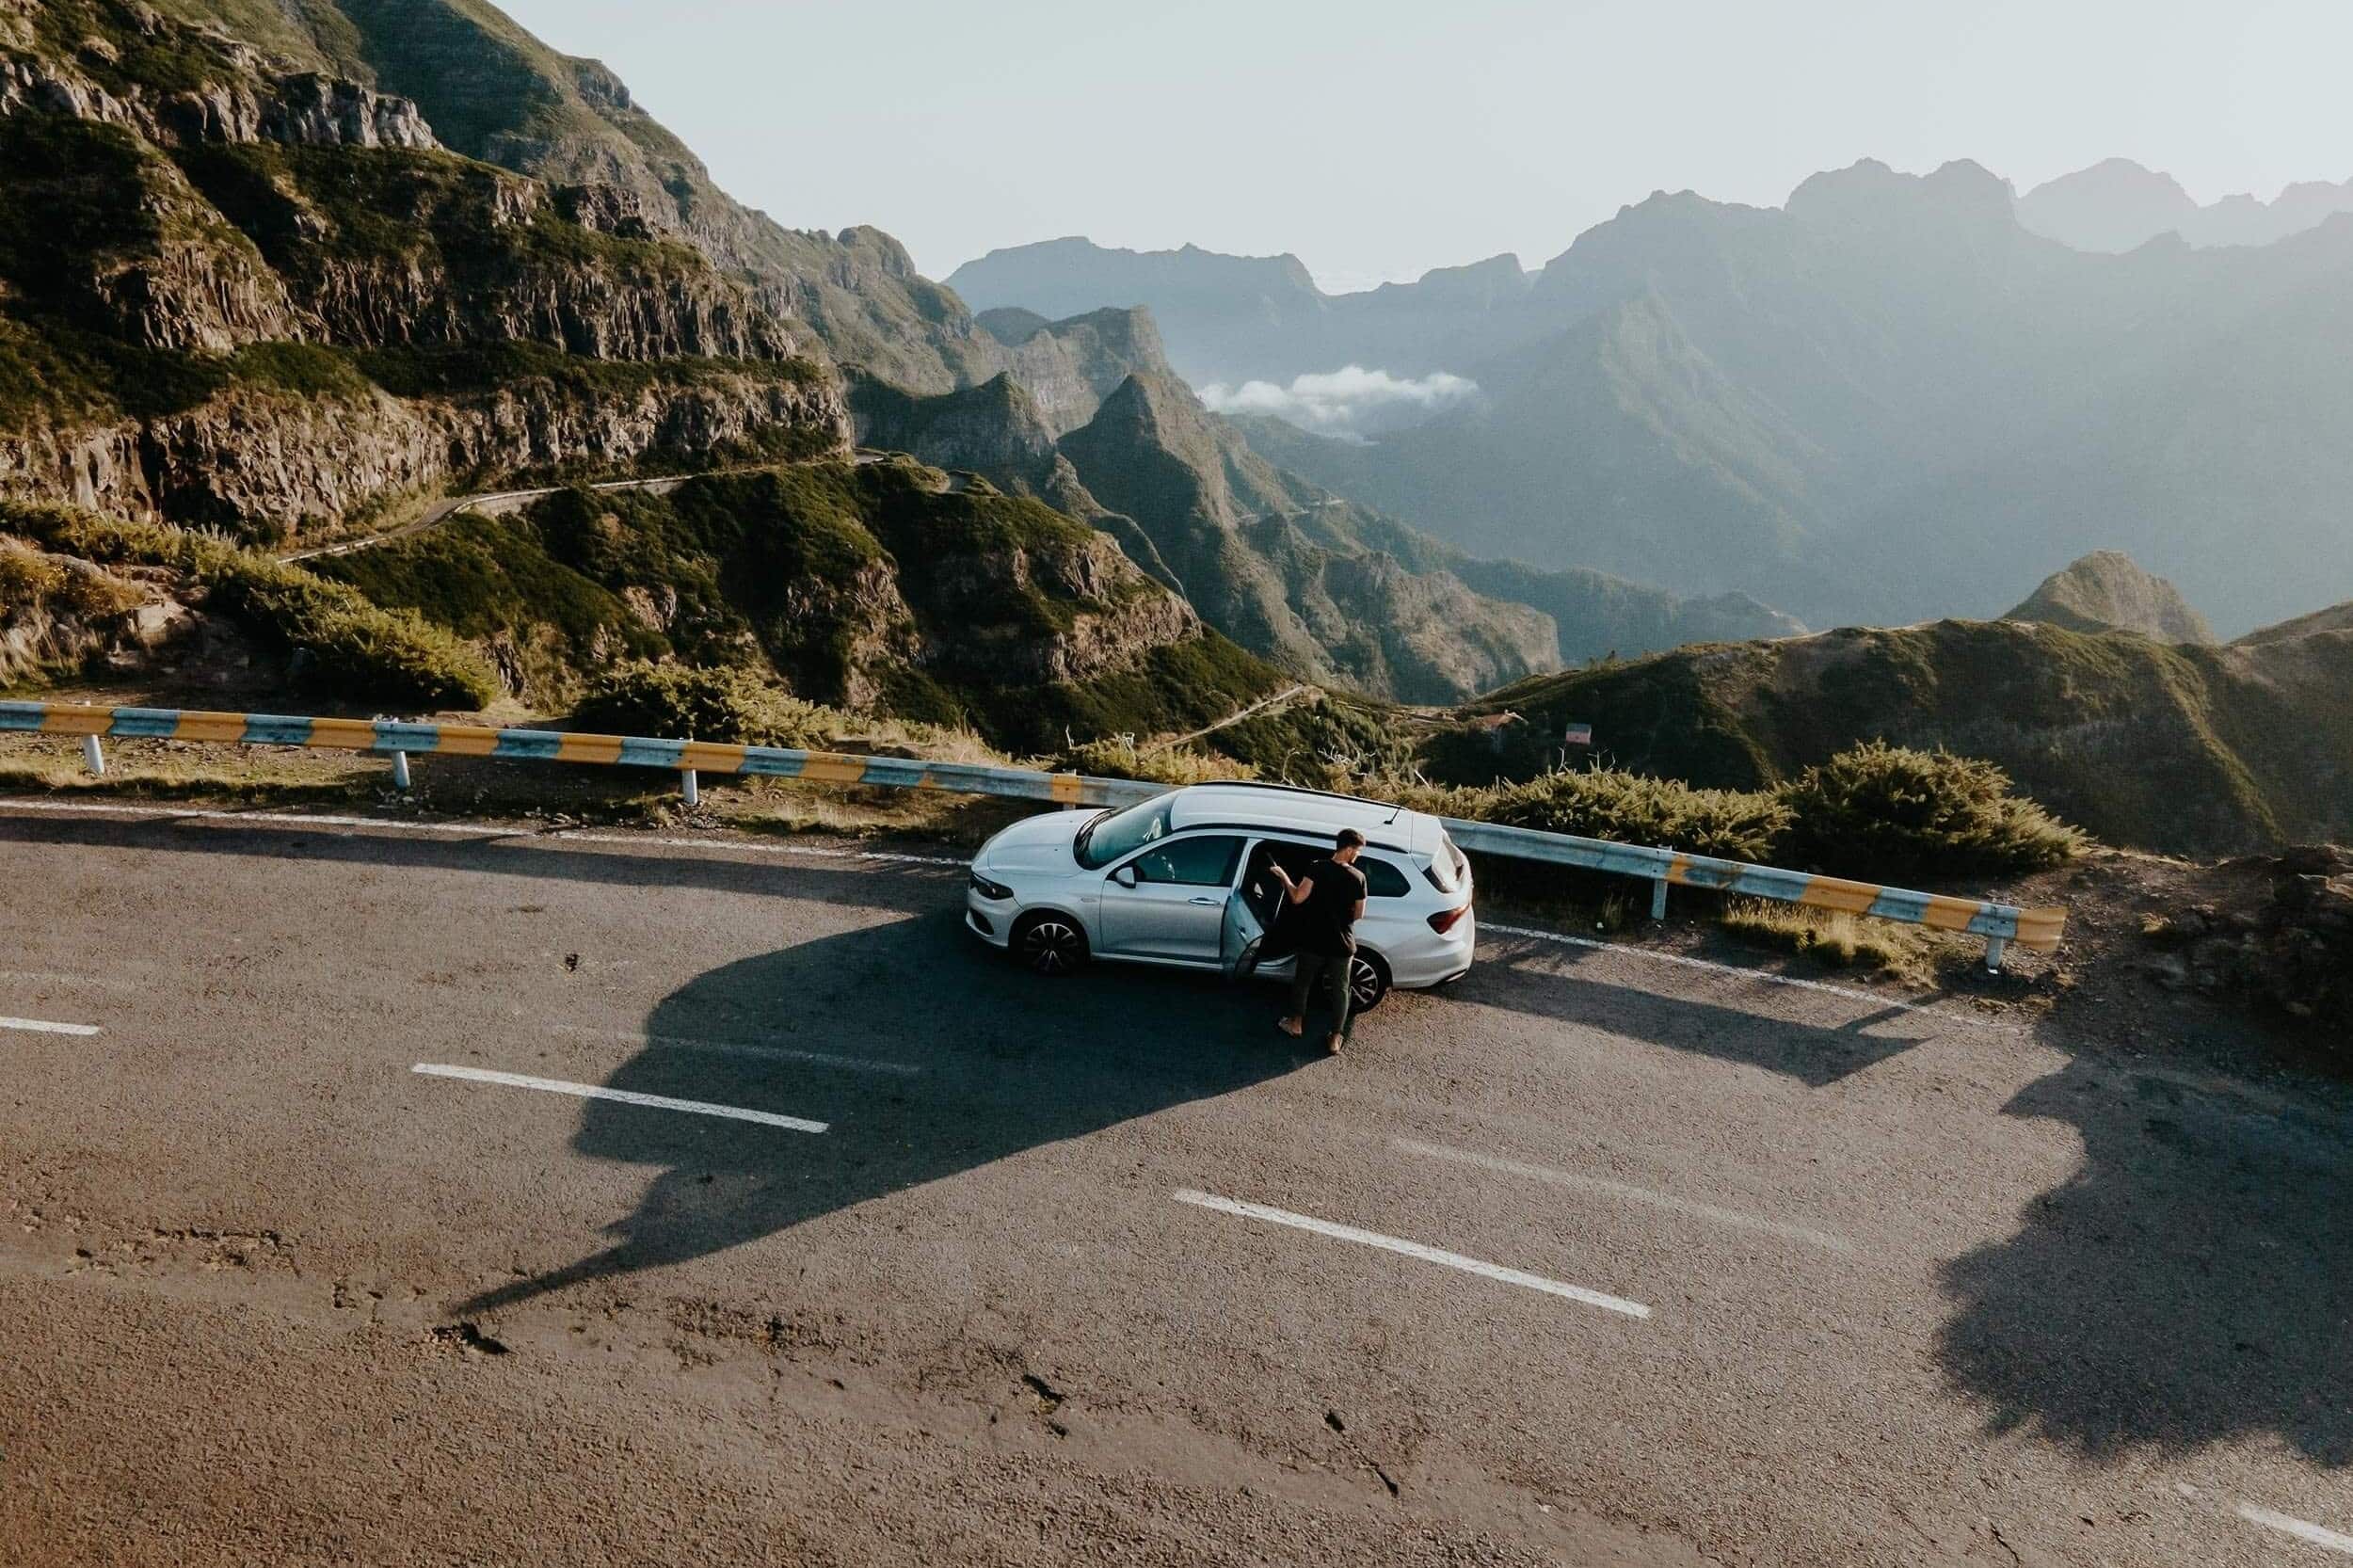
CAR | If you’ve read any of my other Madeira articles, you should likely already know that the best way to explore the island is by renting yourself a car for the duration of your trip.
From Funchal, it takes only an hour to get to the Queimadas Forestry Park, where you can park your car for just under €3,- a day. From the parking lot, it’s only a short walk until you reach the beginning of the Levada do Caldeirão Verde PR9 hike.
It is worth mentioning, that the parking ticket should be paid at a cafe named Casa de Abrigo das Queimadas.
If you haven’t sorted out your rental car yet, make sure you explore the options at Rentalcars.com. Not only do they have a wide range of cars on offer, but they provide brilliant service and extra insurance options too.
GUIDED TOUR | Another great option to do the Levada do Caldeirão Verde hike, is by joining this full-day guided group tour of the PR9 hike, as it offers an experienced local guide, as well as hotel pickup and dropoff service from both Funchal and Canico.
If you prefer going on a private tour, you might want to consider this private tour of Levada do Caldeirão Verde instead. This option offers the same services as the aforementioned tour, yet the group size is limited to you and you’re company. However, do note that the luxury of a private tour comes with a cost.
PUBLIC TRANSPORTATION | While it’s totally possible to get to Levada do Caldeirão Verde by public transportation, I would not necessarily recommend it, since it’s quite a long journey.
First, you’ll need to hop on either bus lines 56, 103 or 138 in the direction of Santana. Upon arrival at the bus station in Santana, you’ll notice a taxi stand, where you can grab a taxi for the remainder of the journey.
Altogether, this journey takes around 2 hours.

The Levada do Caldeirao Verde PR9 hike
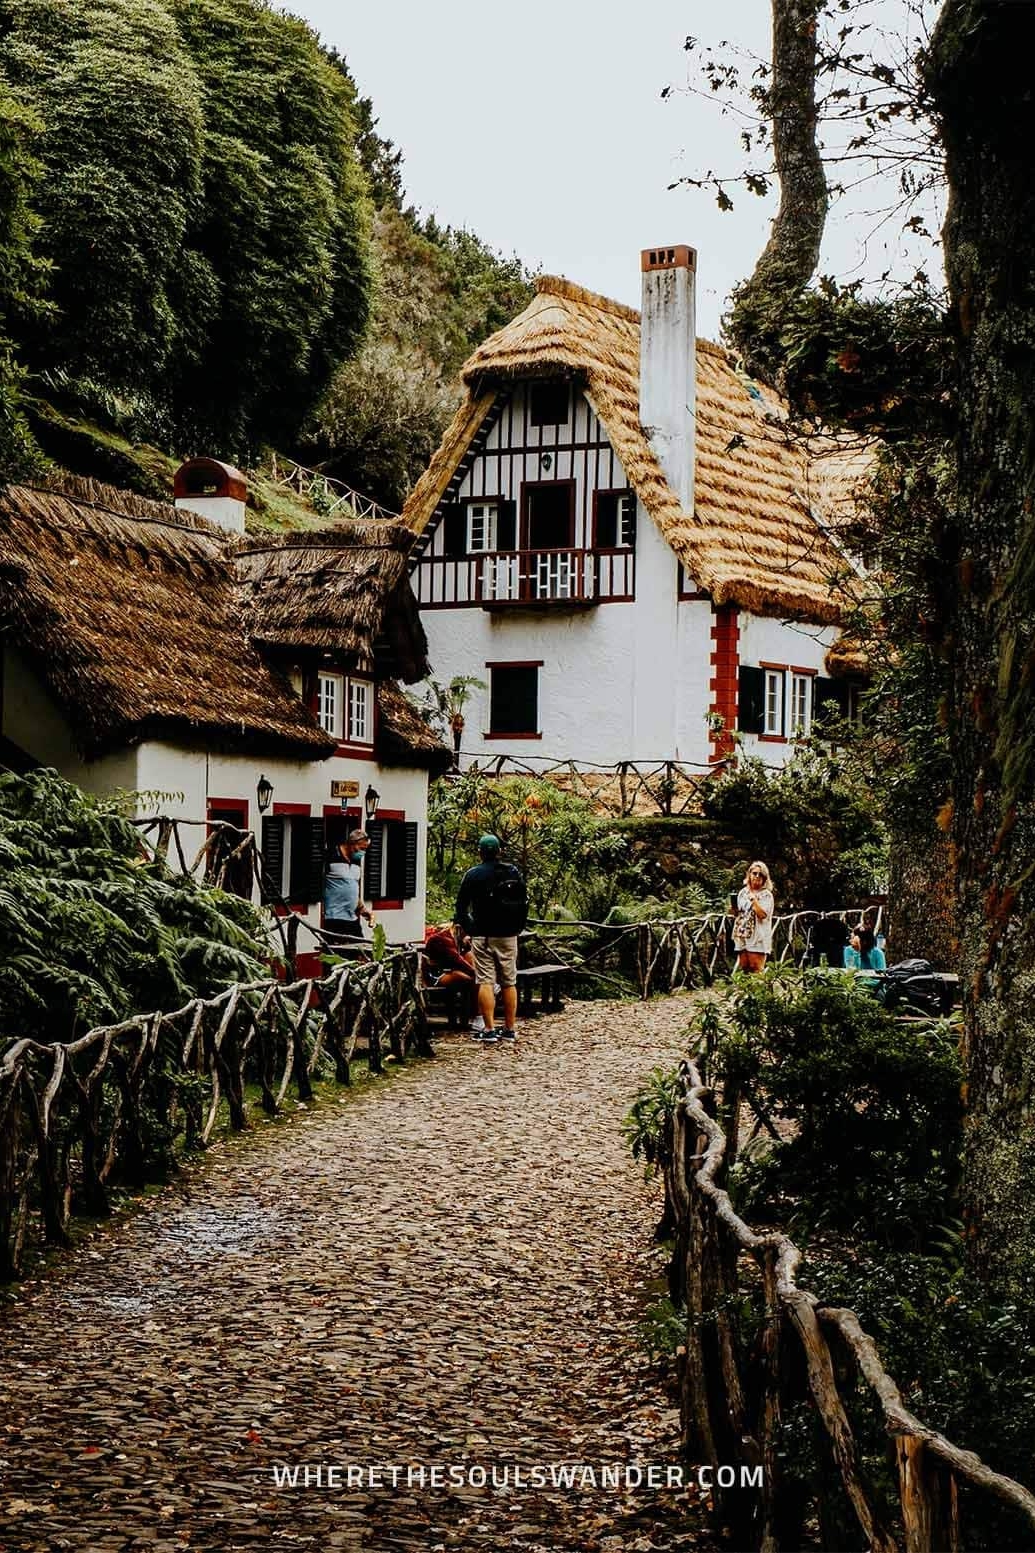
Arrival at the Queimadas Forestry Park
As soon as you arrive at the parking lot of Queimadas Forestry Park, you notice a small cafe that goes by the name of Casa de Abrigo das Queimadas – this is basically the starting point of the Levada do Caldeirão Verde hike.
The cafe is the perfect place to start as they sell excellent coffee and several homemade cakes and cookies (make sure you try one of the cakes, you won’t regret it). I decided to do the hike first and had a short coffee break before driving back to Funchal.
Section I | Start of the trail and the first waterfall
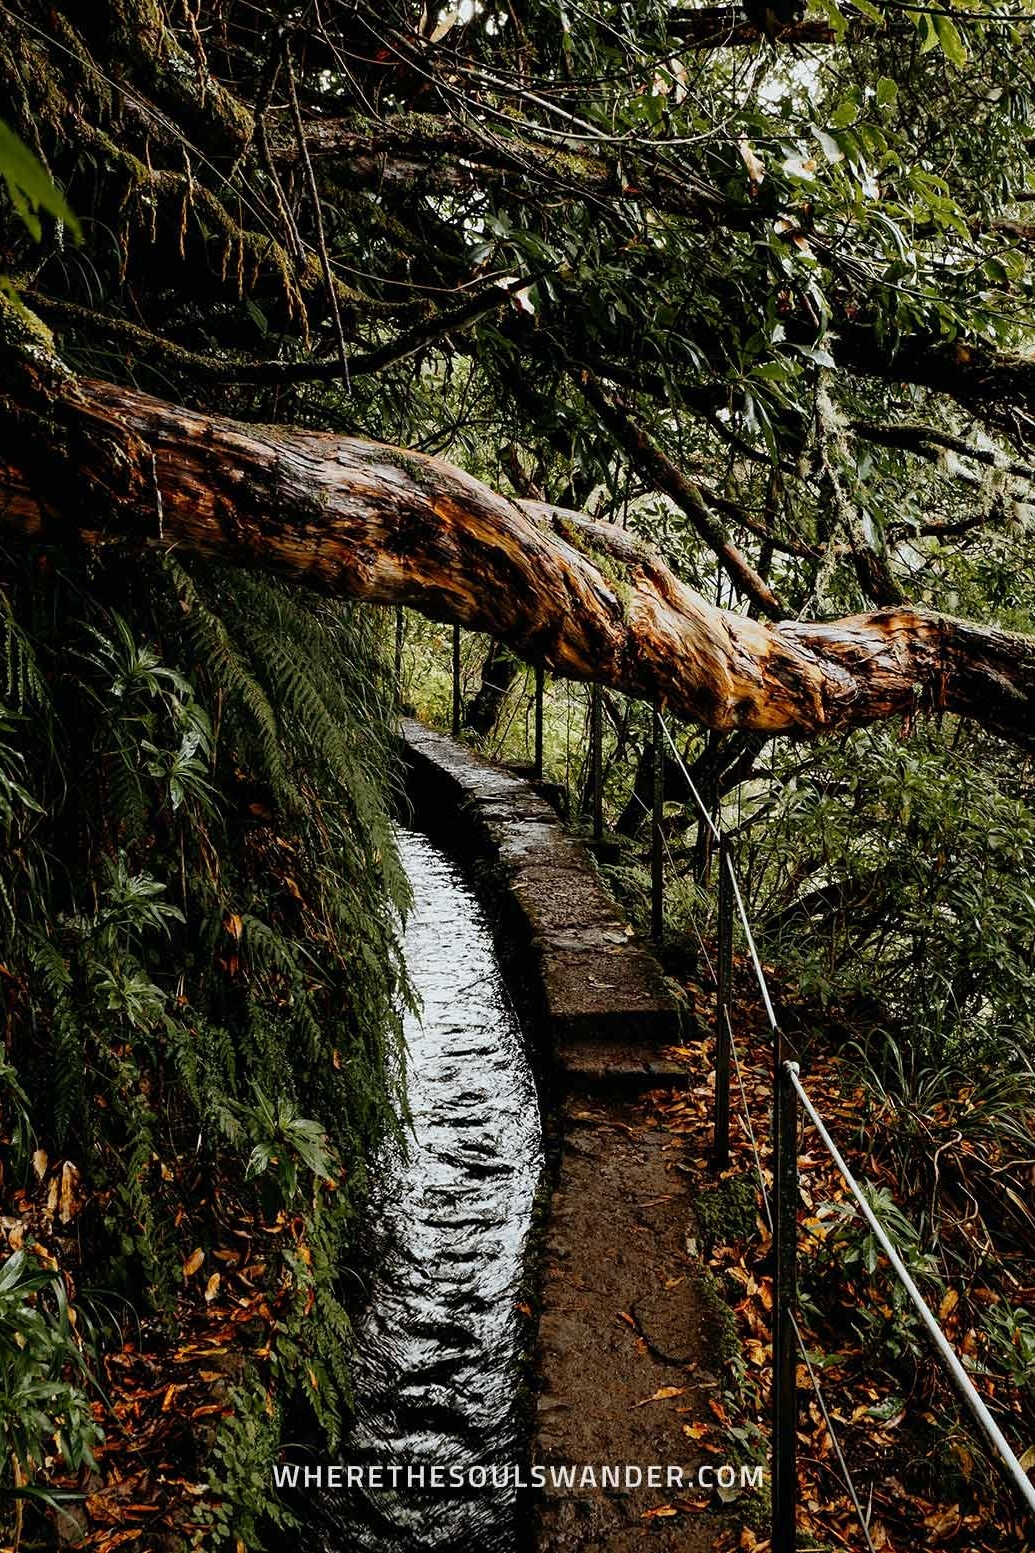
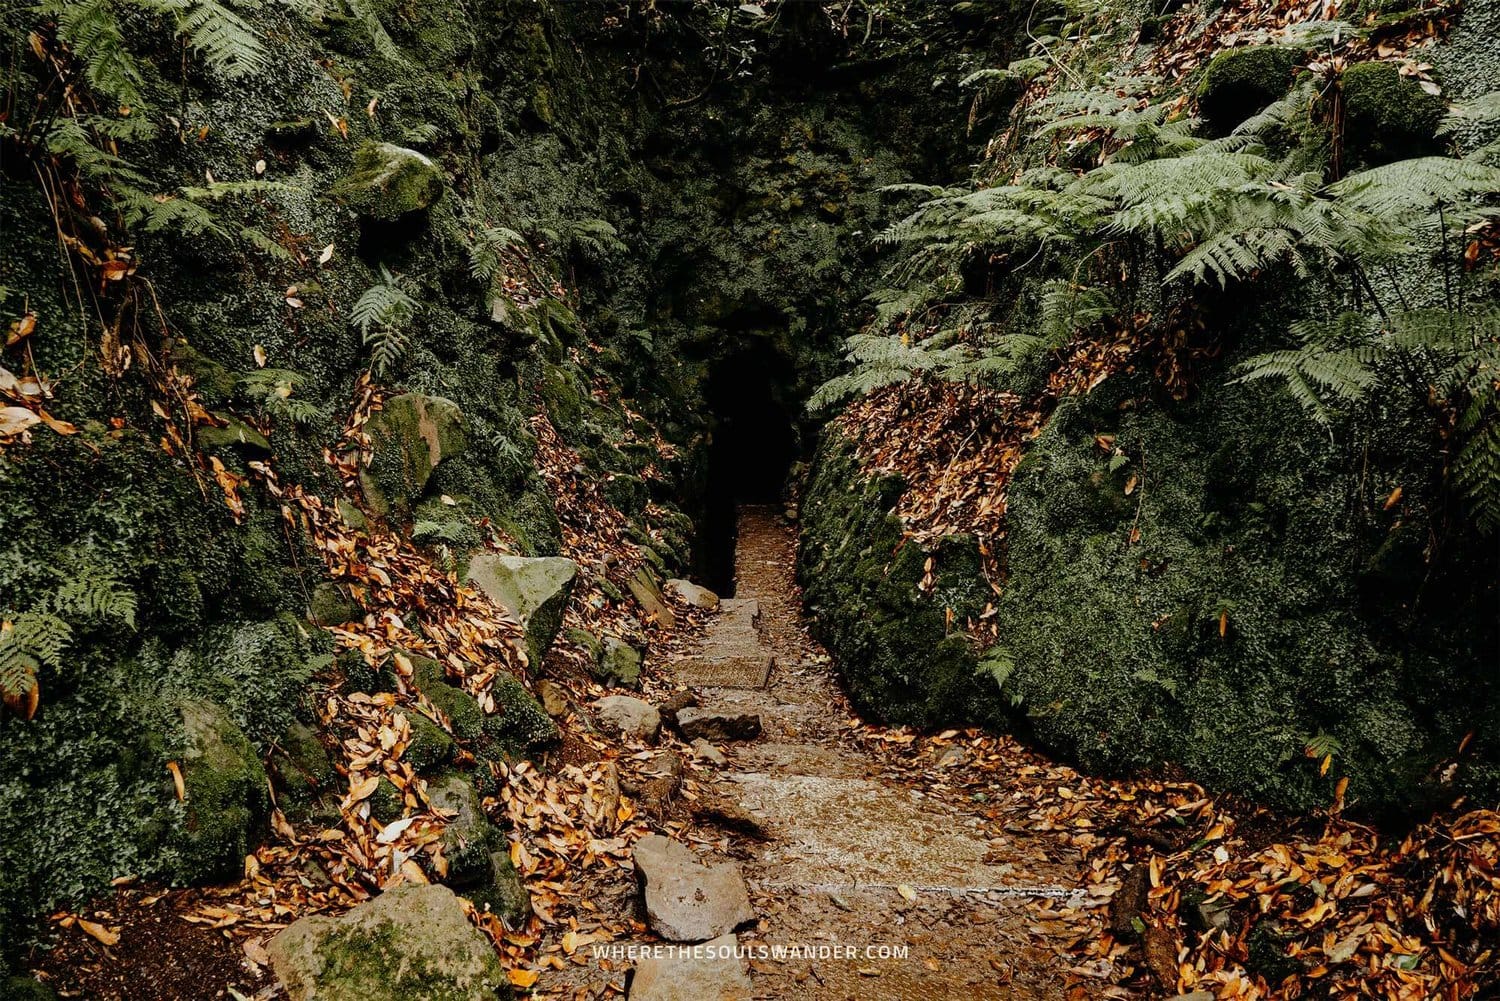
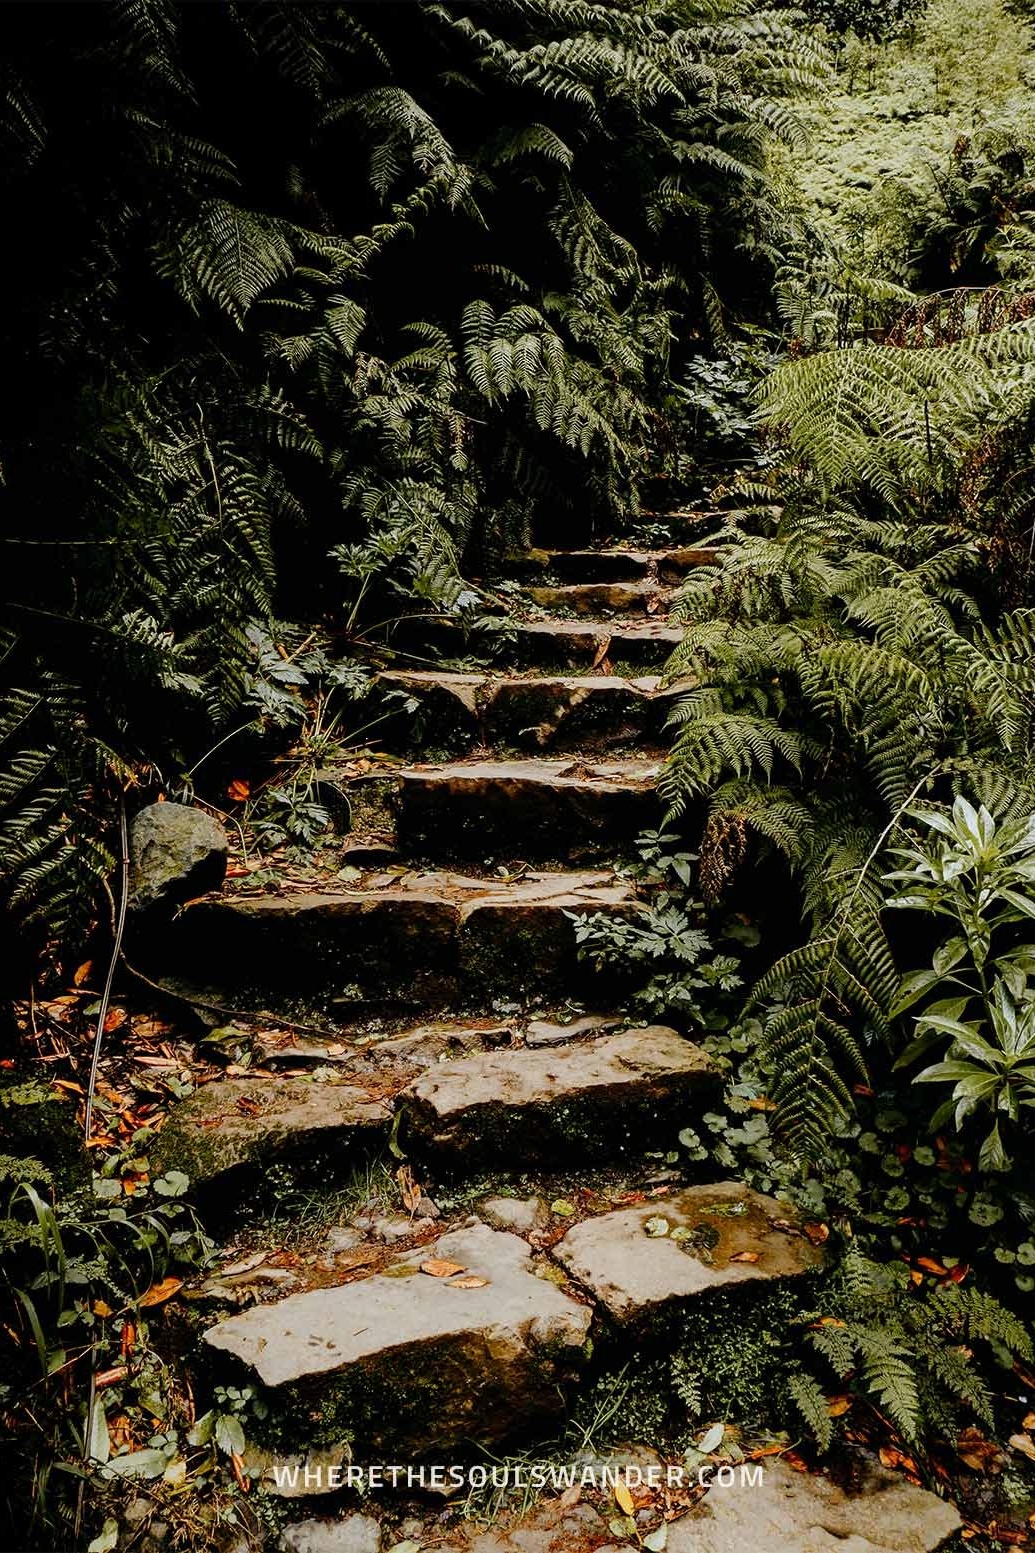
Once you’ve passed the cafe, you notice a signpost, followed by a clear winding pathway along the levada. The path itself is straightforward since there’s basically only one path to the Caldeirão Verde waterfall.
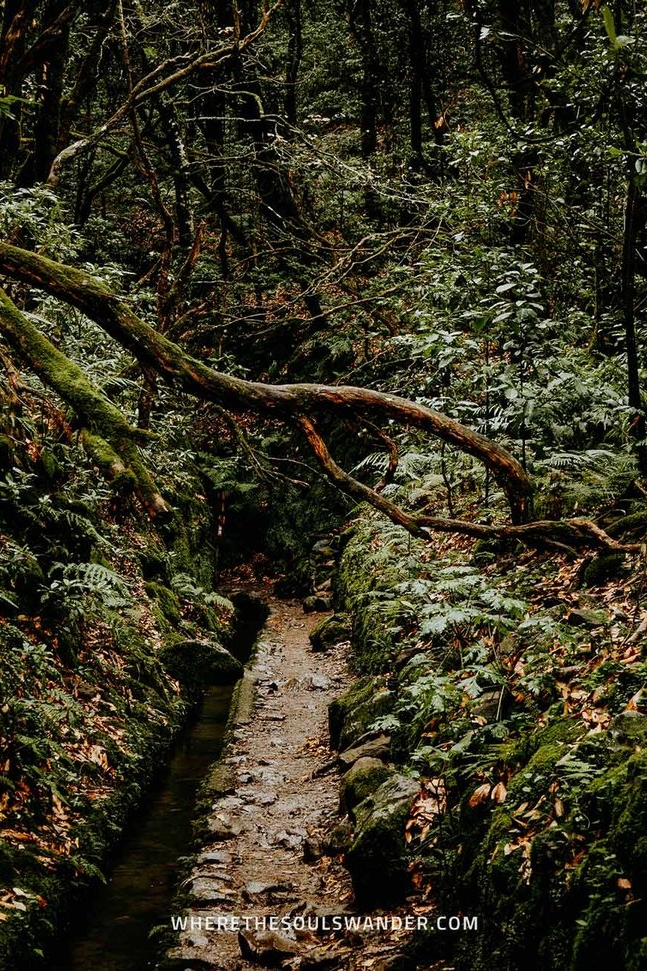
Once you’ve arrived on the path, you’ll be surrounded by impressive trees, wild-grown branches, and some of the most beautiful flowers found on Madeira. In some parts, the greenery is so dense that you can see only a few meters of the trail.
After about an hour into the hike, the path begins to narrow, and you’re about to arrive at the first waterfall. Though this waterfall is relatively small (and somewhat dried up during my visit), it’s a good teaser for what’s waiting for you at the end of the hike.
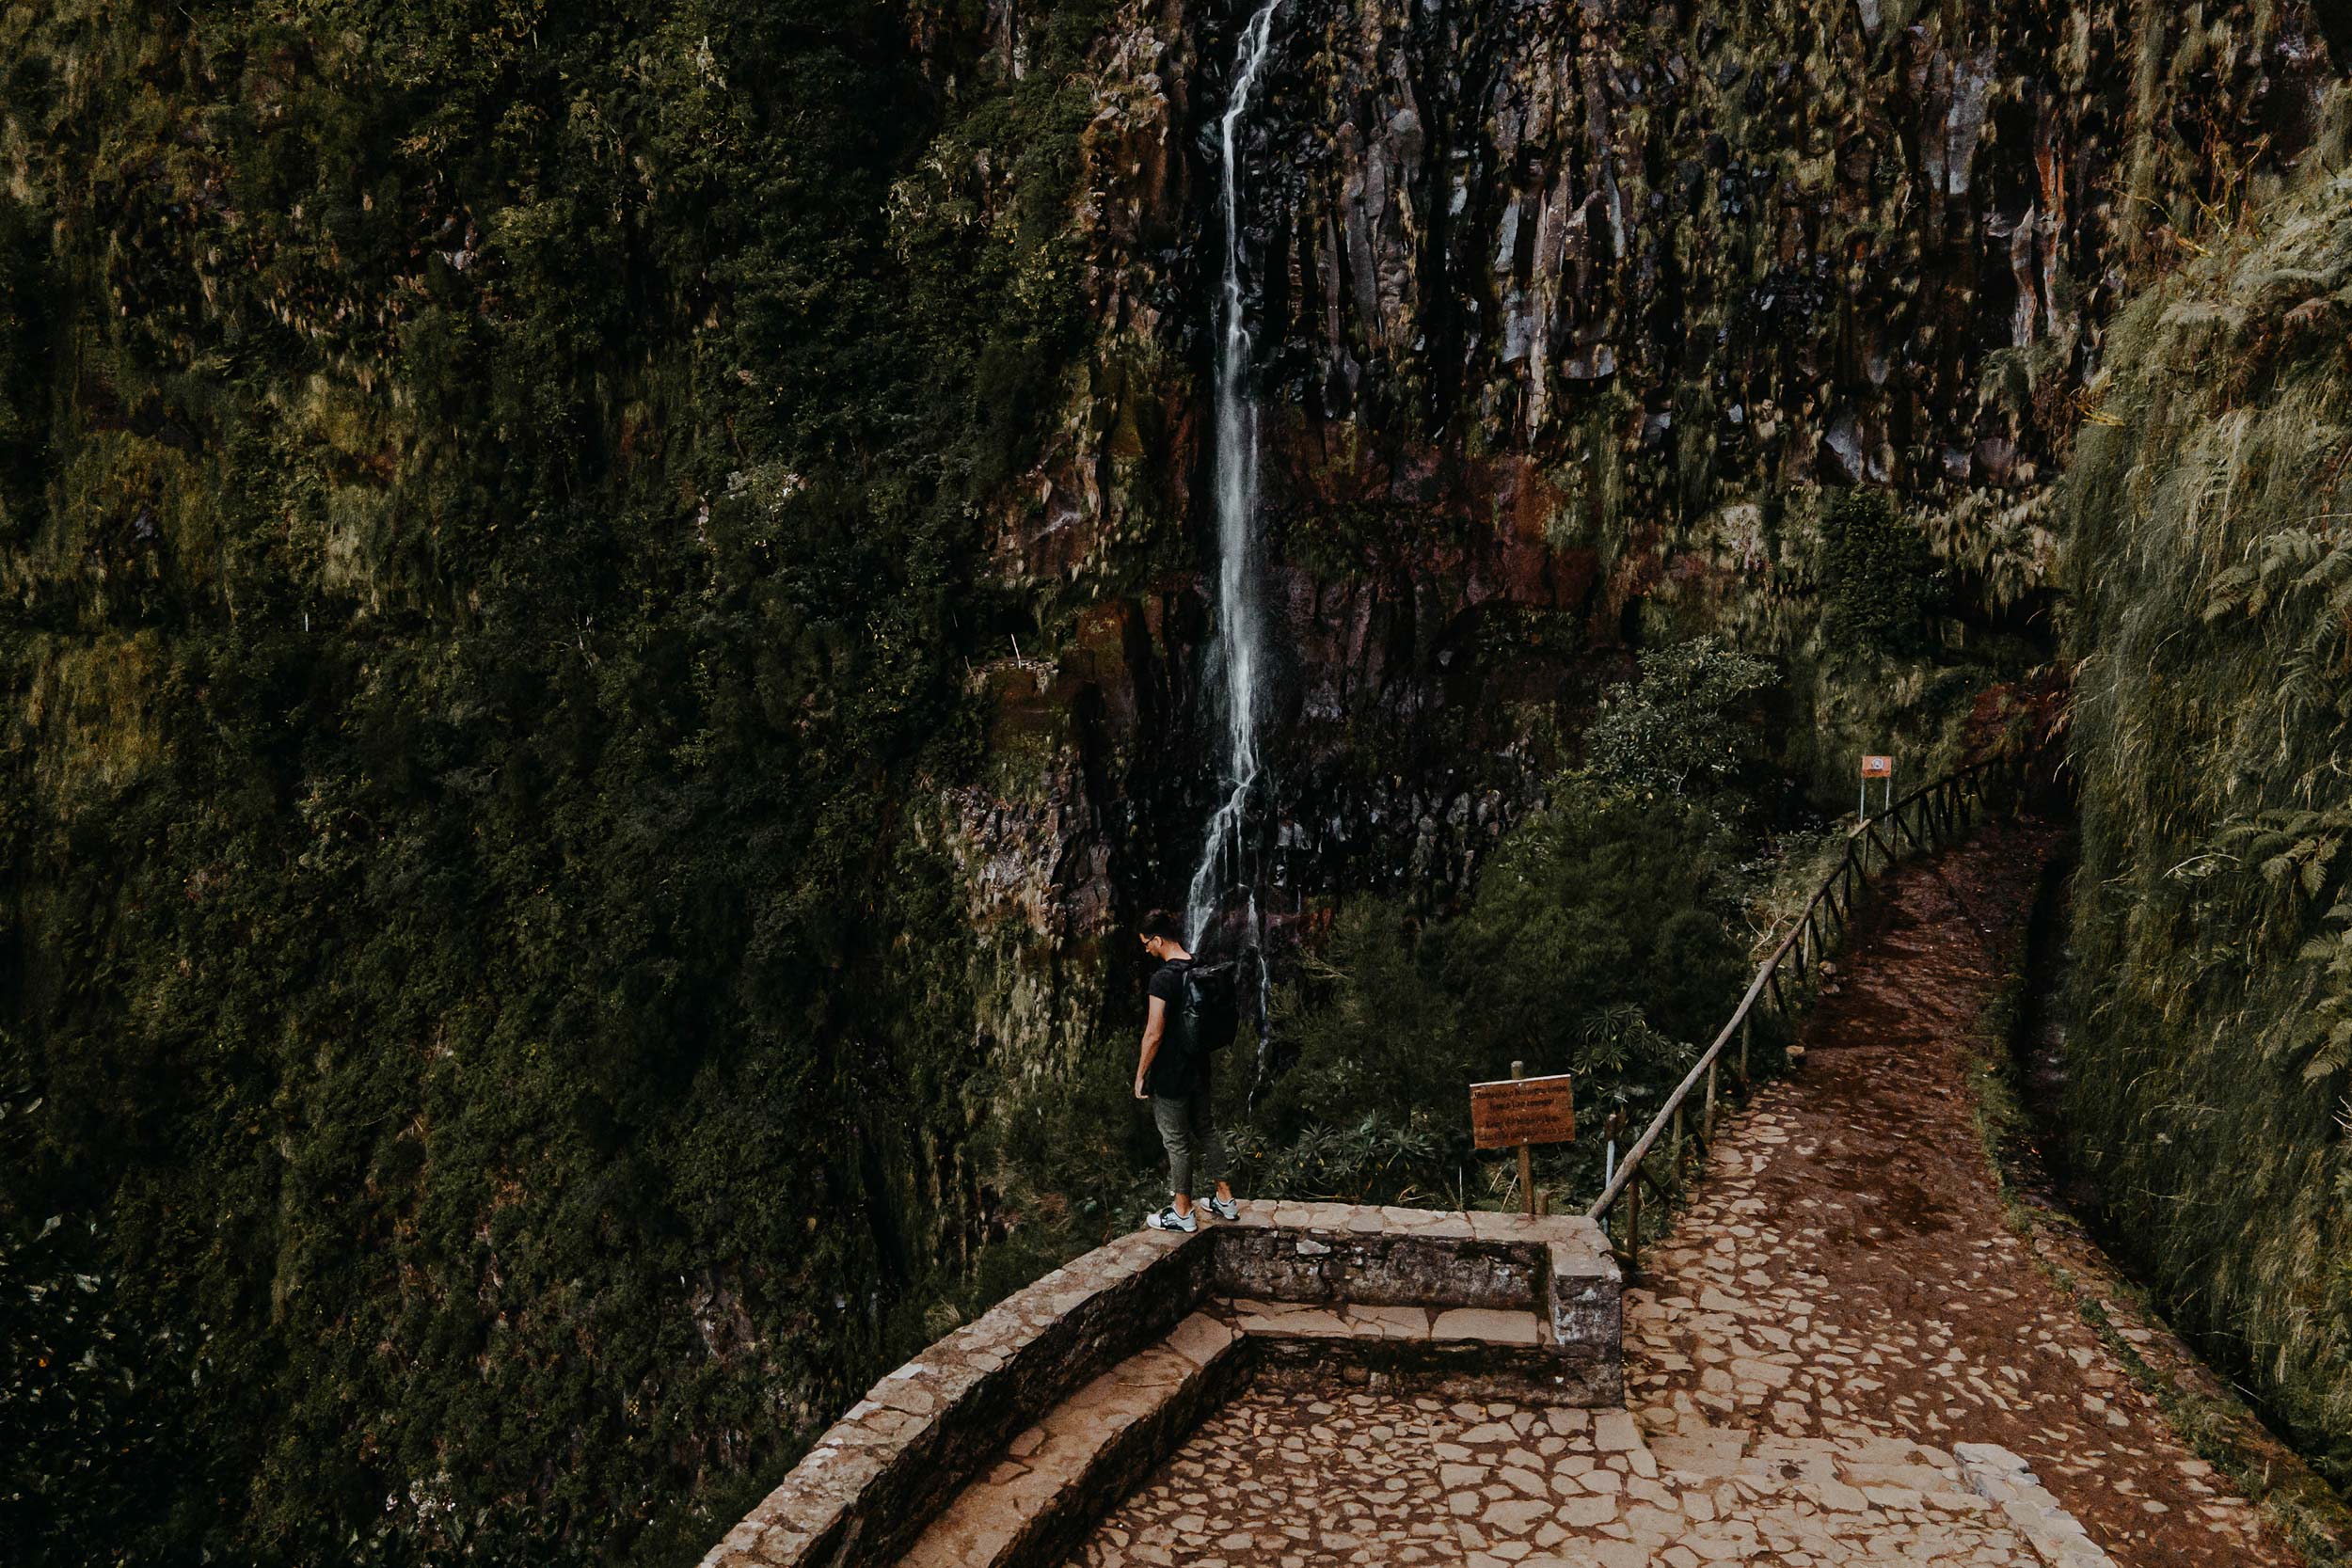
Section II | Tunnels and mountain views
The second, and final section of the hike before reaching the Caldeirão Verde waterfall is marked by four tunnels and a scenic levada trail around a cliffside.
First of all, you’ll need to pass through the tunnels, which is quite an adventurous experience. Since some parts of the tunnels have low ceilings, it’s essential to bring a flashlight, headlamp or a fully charged phone.
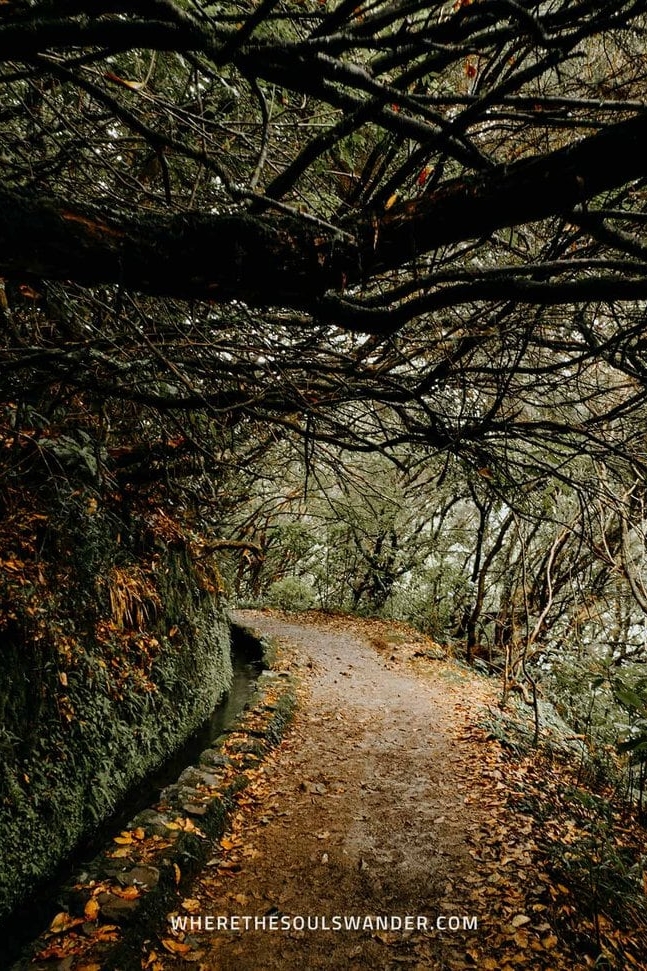
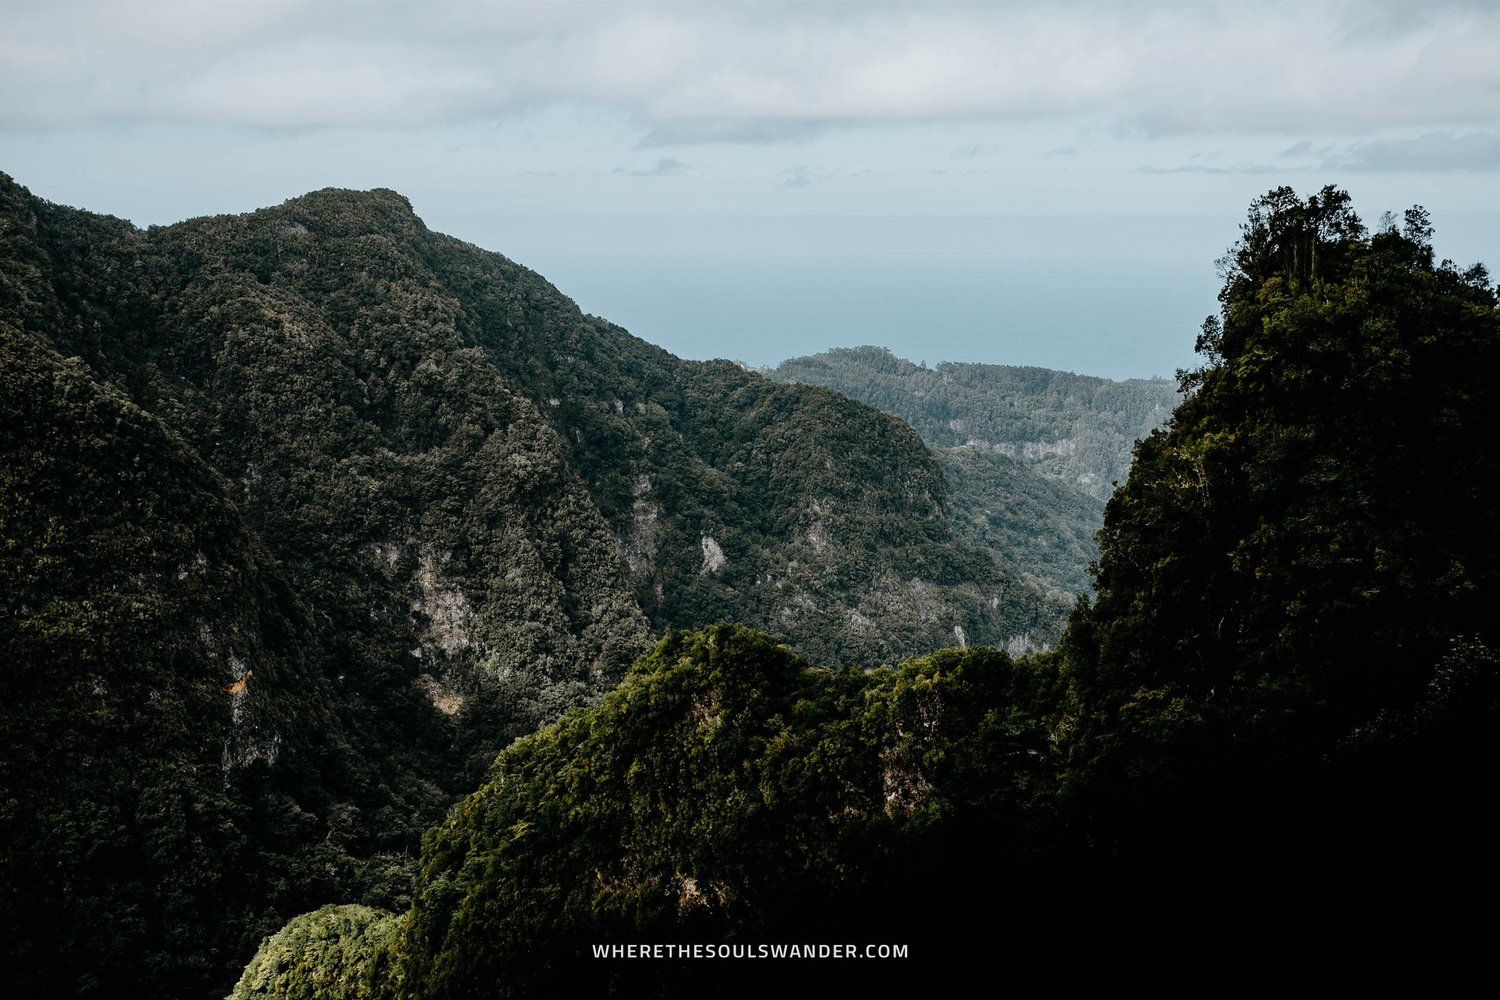
After you’ve made it through the last tunnel, the trail continues around a cliffside and will welcome you to stunning views of the surrounding mountains and the lush valley of São Jorge.
Though the path is completely fenced off, this part of the hike has quite a deep abyss on the right-hand side, so make sure you’re taking the right safety precautions.
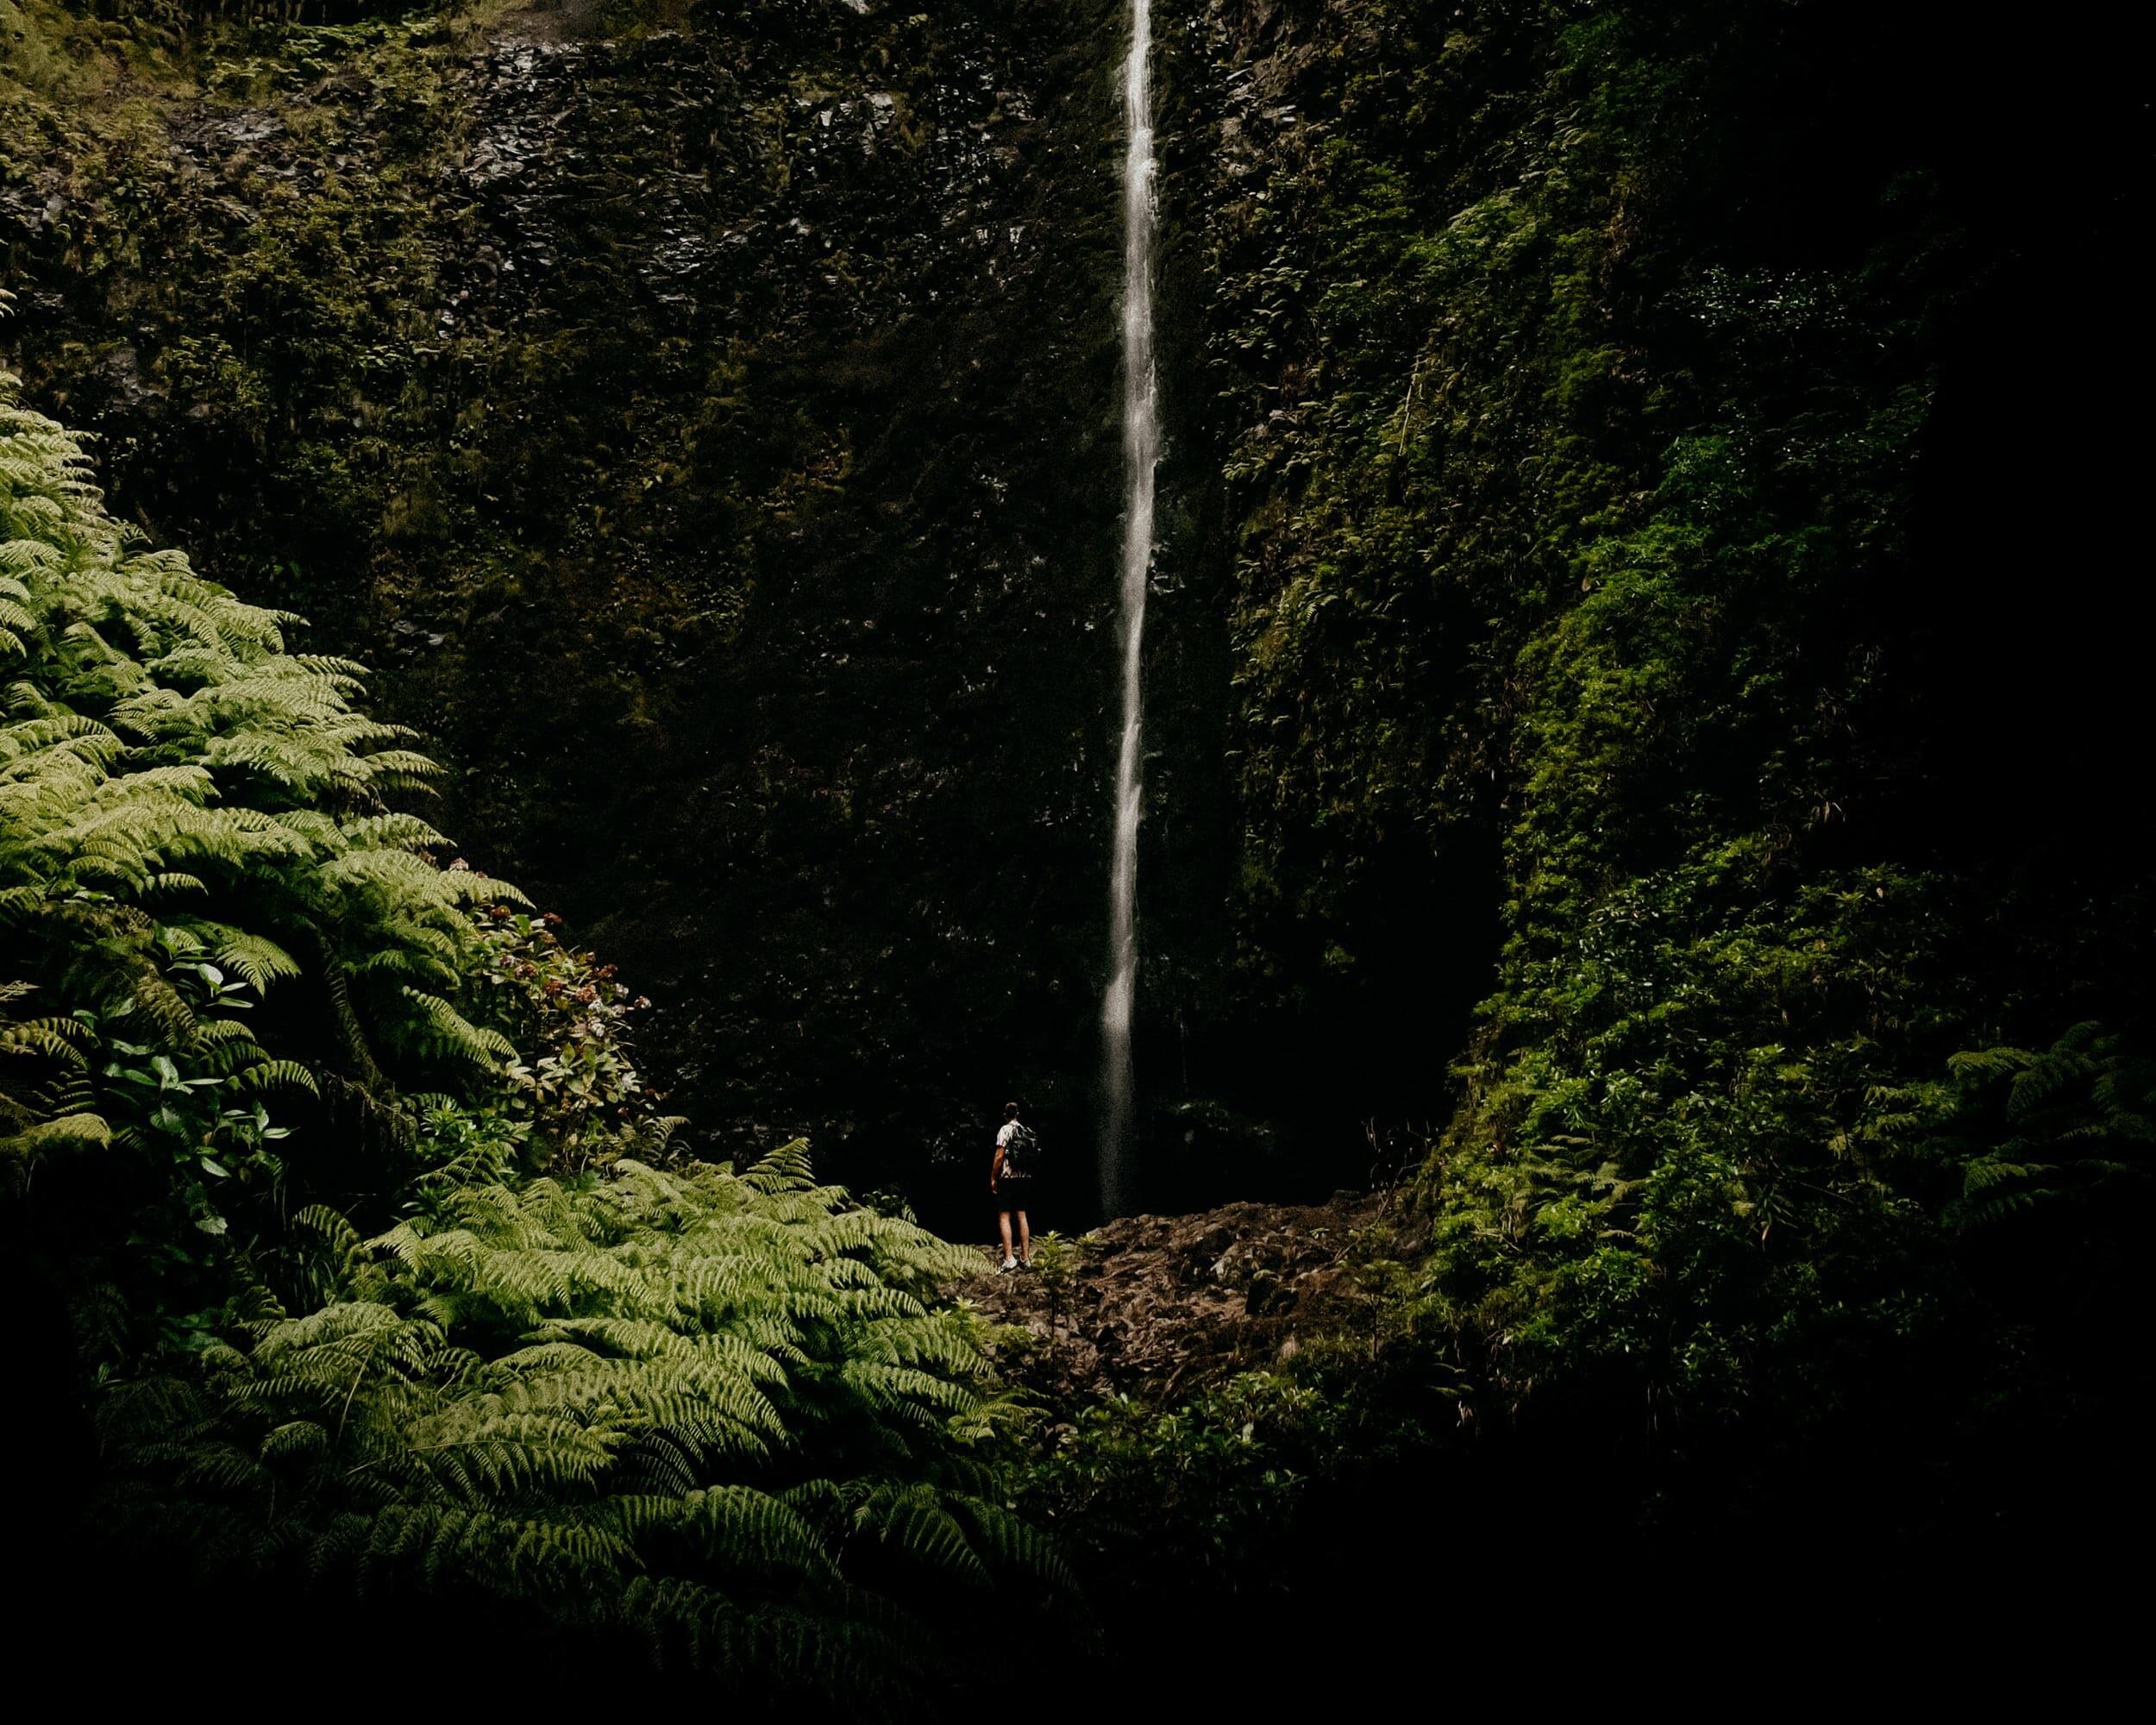
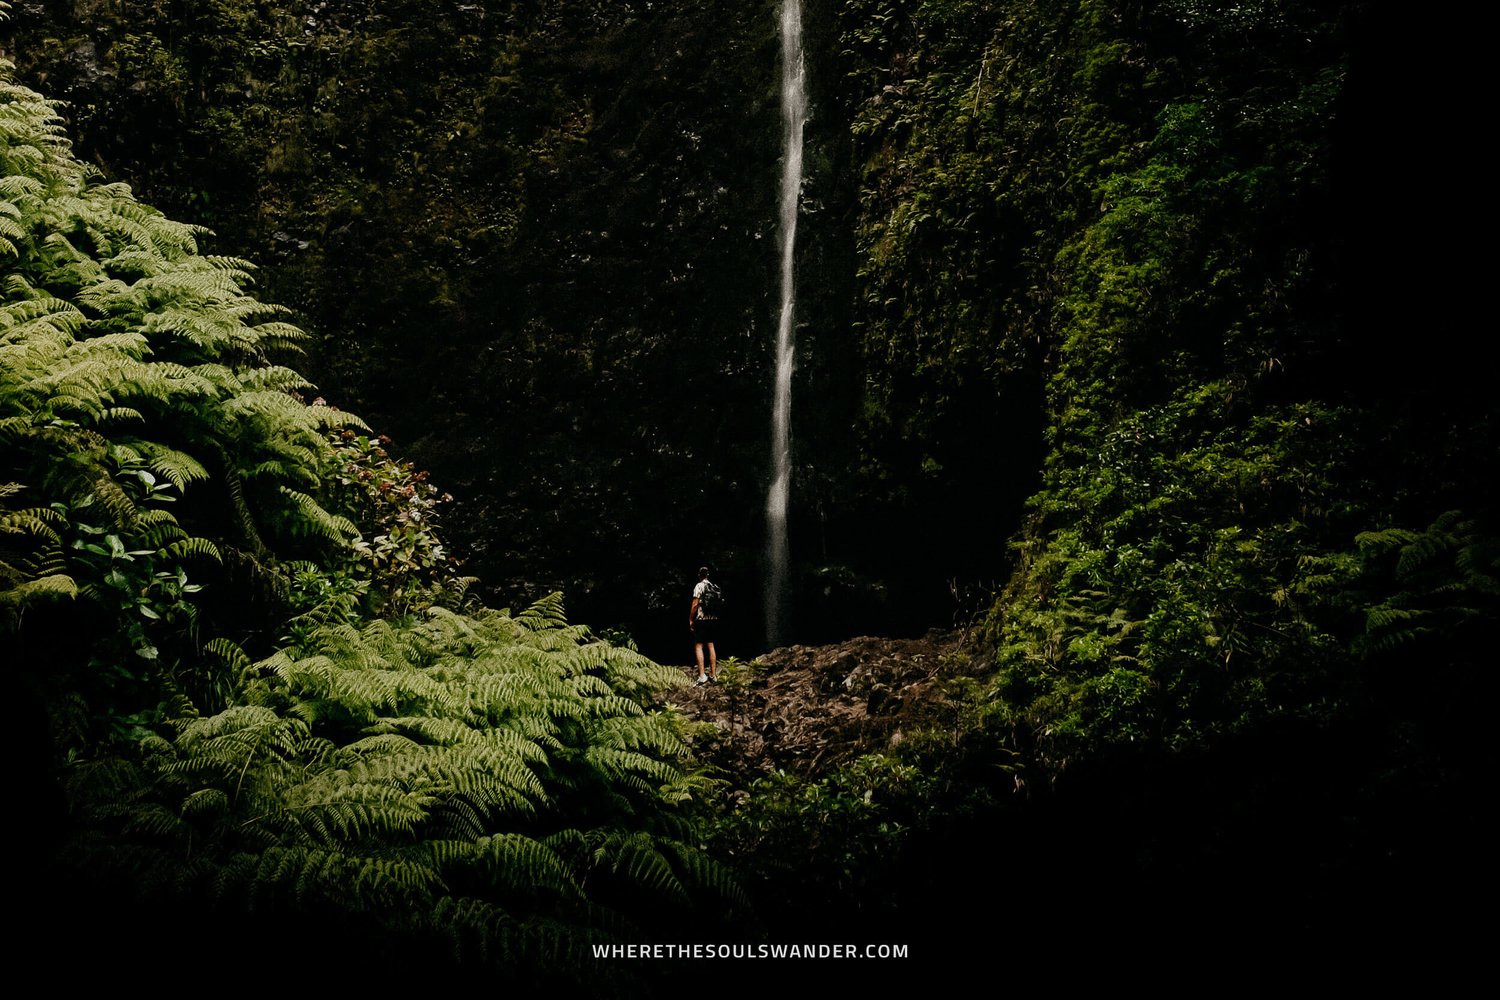
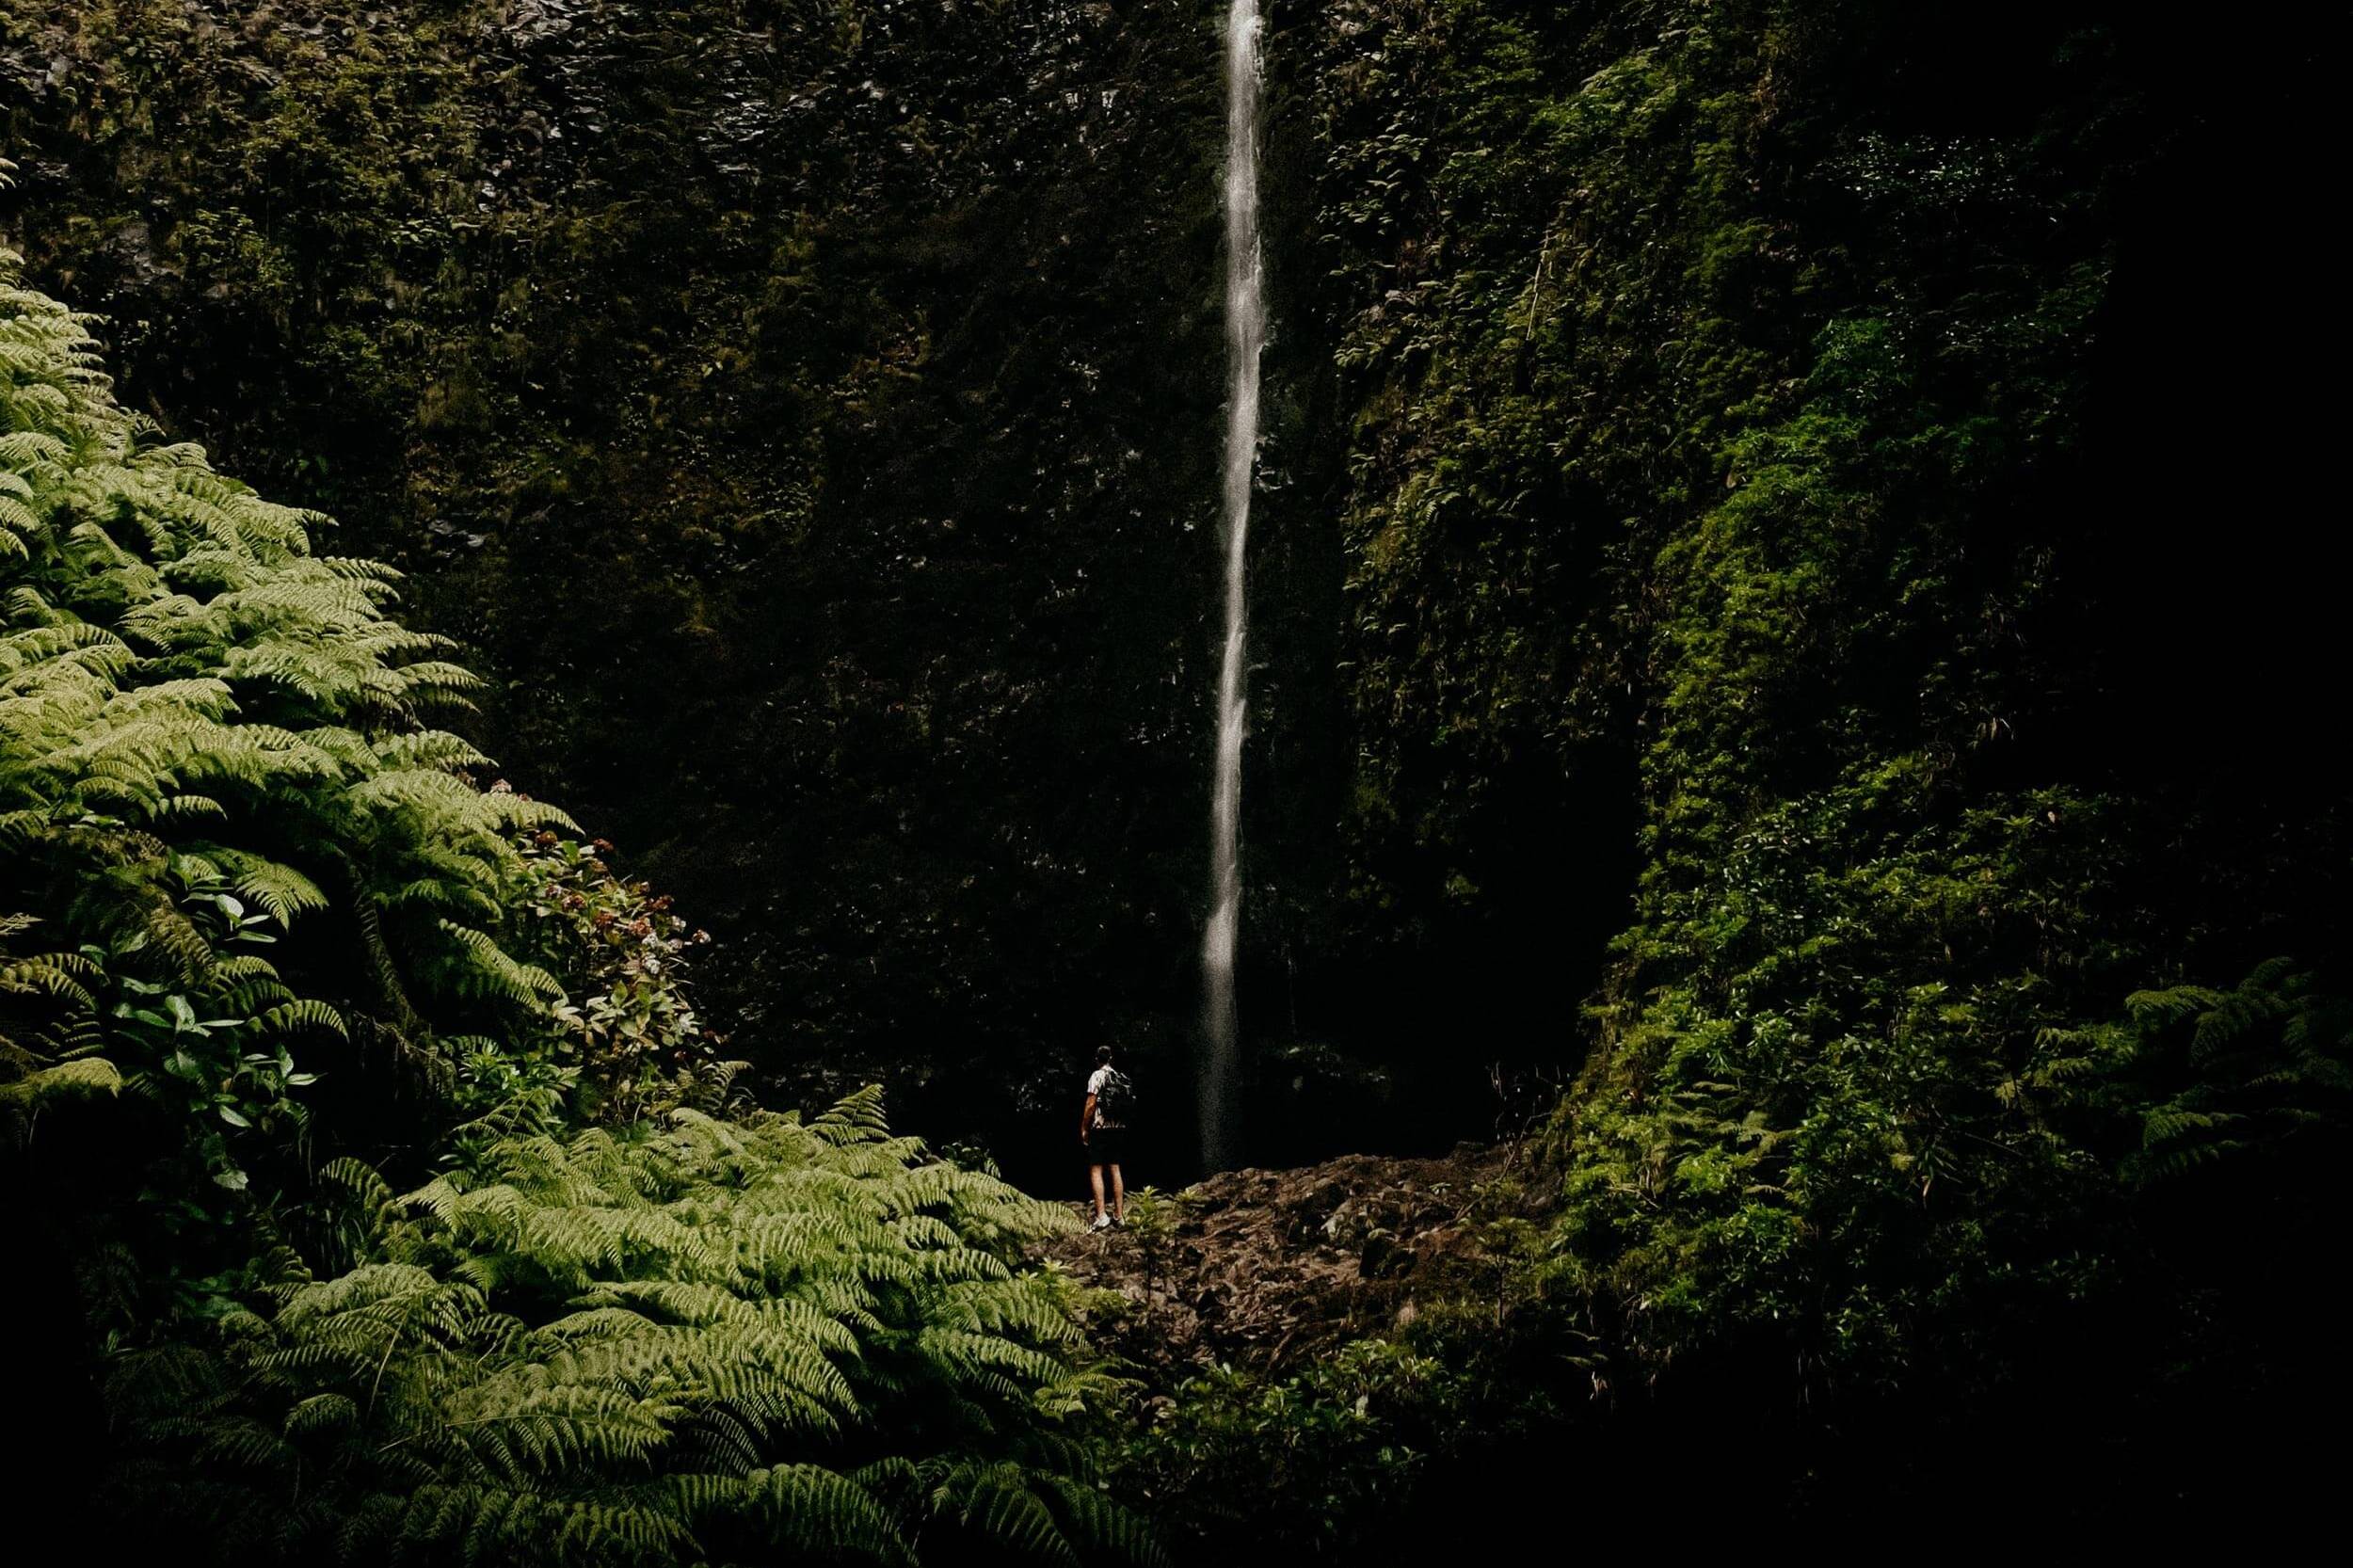
Section III | The Caldeirão Verde waterfall
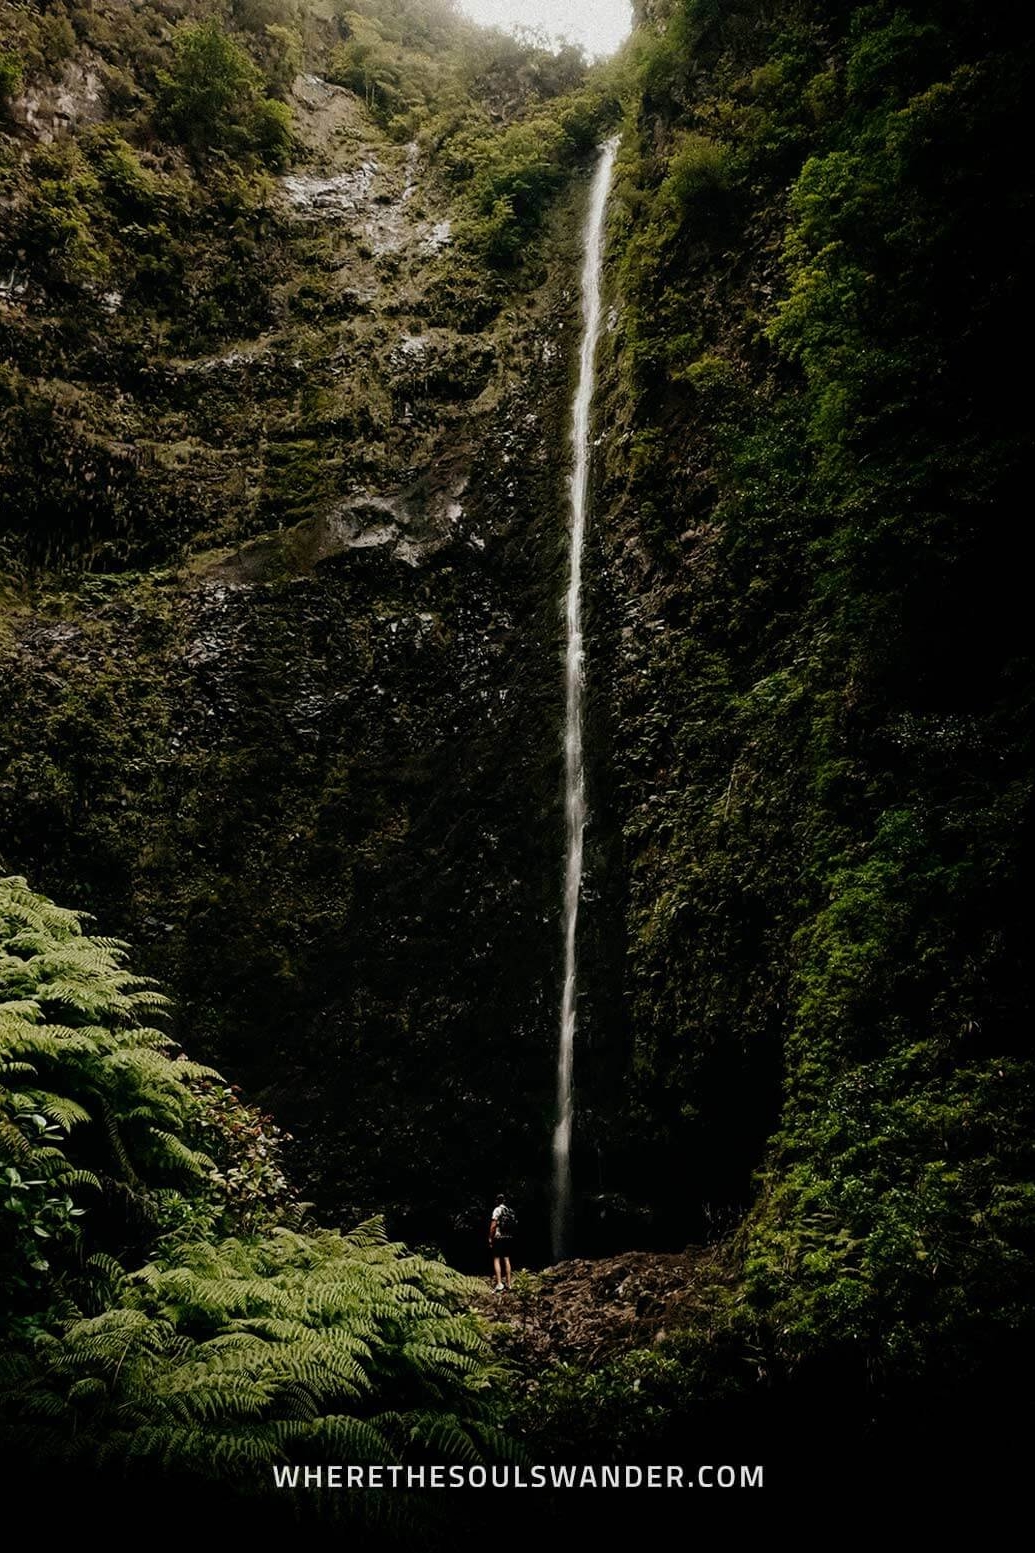
As you head deeper and deeper into the jungle, you’ll gradually begin to hear the sound of water falling down. After a few more steps you’ve arrived at one of the highest waterfalls on Madeira; the impressive Caldeirão Verde waterfall.
From around 100 metres, the waterfall gushes down into a perfectly shaped natural pool – which is truly a spectacular sight to behold.
Though it’s completely possible to take a dip into the ice-cold water, I’d highly advise being cautious, since landslides are pretty common near the waterfall.
How to complete the Caldeirão Verde PR9 hike
After you’ve spent some time at the Caldeirão Verde waterfall, it’s time to continue.
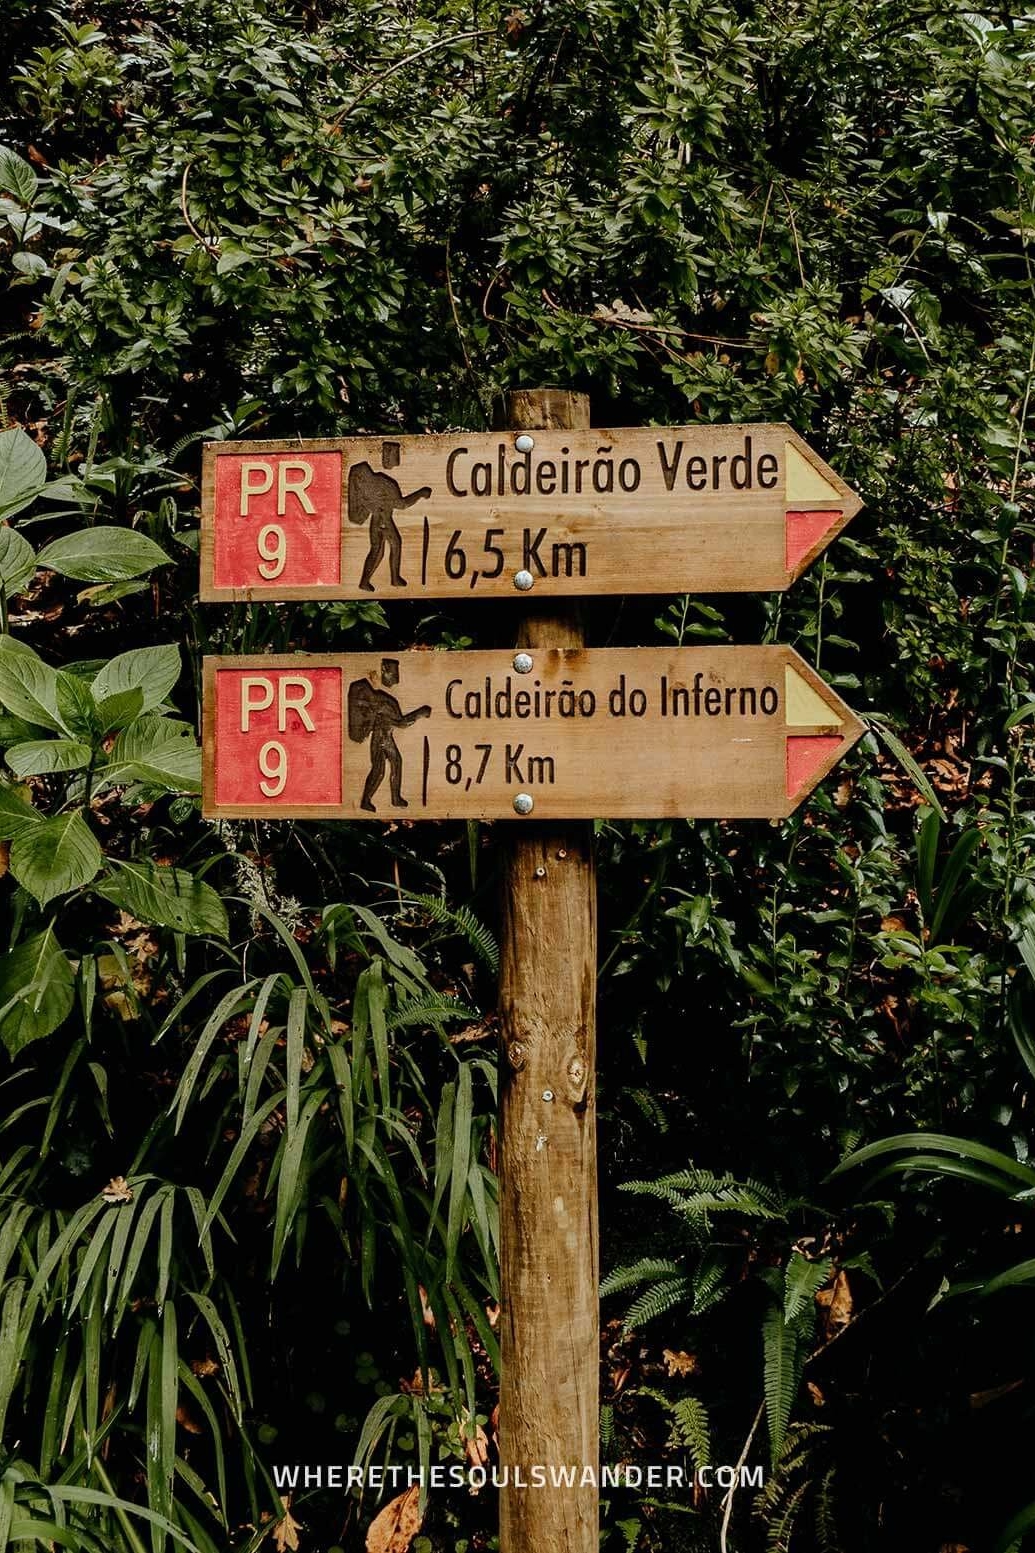
From here, you can choose to hike back following the exact same path or opt to proceed with the hike to the neighbouring Caldeirão do Inferno waterfall.
Though I chose to turn back at this point, I definitely believe that combining the two waterfalls is a great option, especially if you have the time and energy.
However, this isn’t for the faint of heart, as the total hike will land around the 20km mark.
Best time of day to do the Caldeirão Verde PR9 hike
Since Caldeirão Verde is one of Madeira’s most popular Levada walks, it does get pretty busy throughout the day, especially during the peak summer months.
Therefore, I believe the best time to start the PR9 hike is early in the morning. By doing so, you’ll be one of the first to arrive at the impressive Caldeirão Verde waterfall.
If you don’t necessarily feel the need to have the waterfall to yourself, then starting in the late morning or afternoon is fine too. Just make sure you get back to the trailhead before dark.
Best time of year to do the Caldeirão Verde PR9 hike
Though Madeira enjoys comfortable weather year-round, this area is known to experience significantly more rainfall than elsewhere on the island.
For that reason, the best time to do the Levada do Caldeirão Verde PR9 hike is during the peak summer months of June, July, or August, when the temperature is good, and less rainfall occurs.
Additionally, if you prefer fewer other people on the trail, opt for the shoulder months of May, September or October. During this period, you experience smaller crowds, yet still have comfortable weather conditions.
I did the Levada do Caldeirão Verde PR9 hike in early October and had excellent hiking circumstances – plus it was pretty quiet on the trail, which is awesome if you’re into photography.
What to pack for the Caldeirão Verde PR9 hike
As with any hike, I believe it’s essential that you’re well-equipped before setting out on your adventure.
For that reason, I recommend anyone who’s planning to hike the Levada do Caldeirão Verde PR9 hike to do the same. To help you have a comfortable journey, I’d highly suggest bringing the following items:
REUSABLE WATER BOTTLE | One travel essential that I carry with me at all times is the Grayl Geopress. This reusable water purification bottle allows me to fill up water from nearly every water source, making it one of my best investments to date.
HIKING BOOTS OR A GOOD PAIR OF SNEAKERS | While hiking boots definitely provide more stability to your ankles, I believe you could easily do the PR9 hike in a good pair of sneakers – just be sure that they have a firm sole with enough grip, so you’re supported when things get slippery.
HEADLAMP, FLASHLIGHT OR PHONE | The Levada do Caldeirão Verde PR9 hike is home to four tunnels, and for that reason, I’d advise you to bring one of the following light sources; a flashlight, headlamp or a fully charged phone.
SNACKS | Even though I practise intermittent fasting, and prefer to hike on an empty stomach, I always bring a few snacks to fuel me during my hikes. And I advise everyone to do the same, especially since you’ll only be able to buy something at the beginning or end of the hike. So, don’t mind bringing some fruits, nuts and a few protein bars. Also, bring enough cash to get a coffee or some snacks from the mountain hut if necessary.
HIKING POLES | I did the PR9 hike without hiking poles, but if you have poor knees or prefer a little support during the more strenuous parts of the trail, I highly advise bringing a set of quality hiking poles. These Montem Ultra Strong Hiking Poles are light, collapsible, and a great value for the price.

Where to stay on Madeira
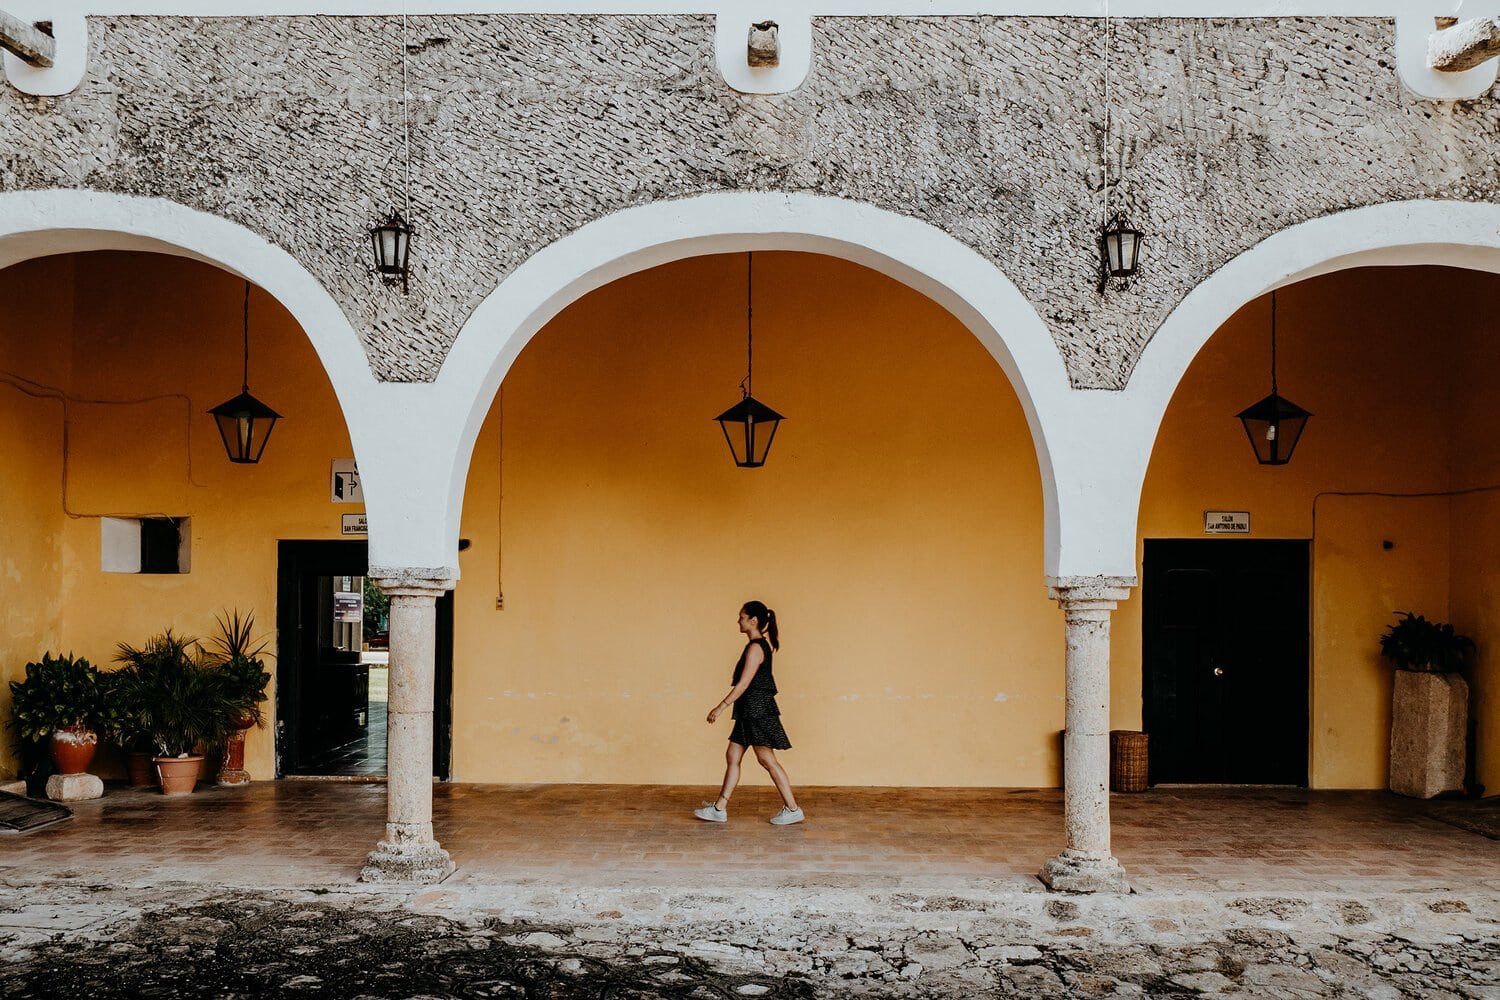
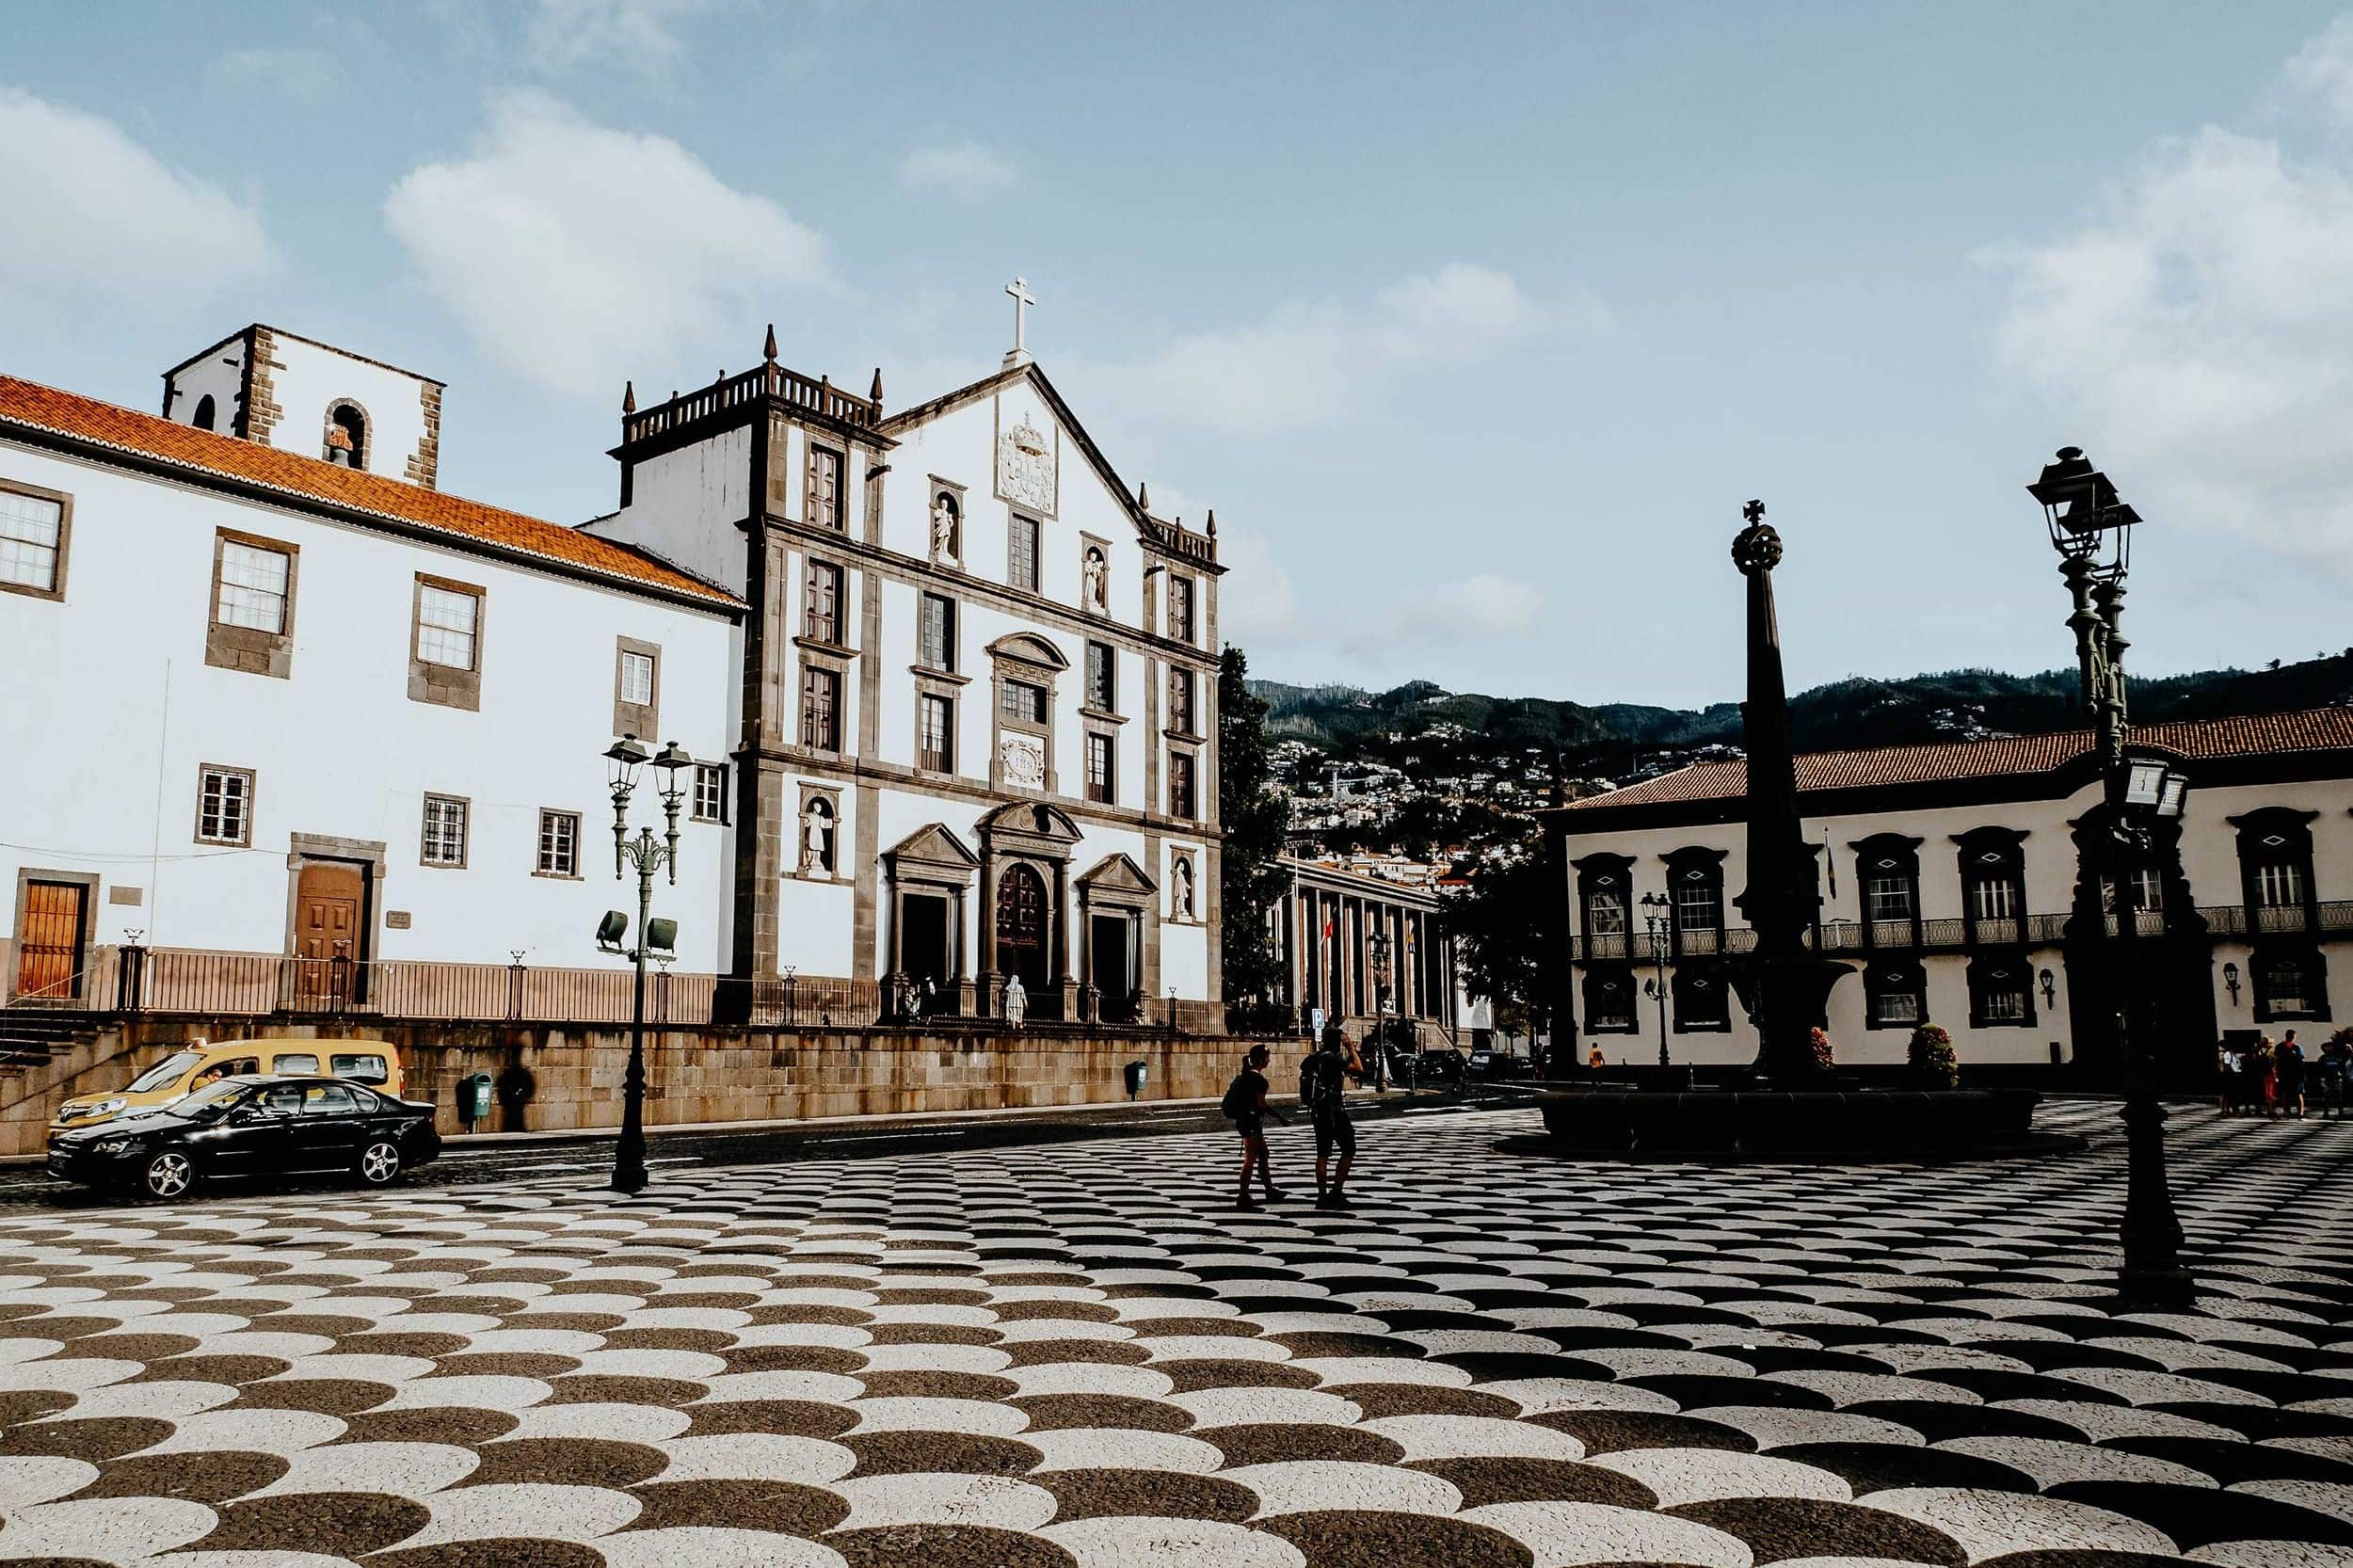
Given Madeira is rather compact, I highly recommend anyone to base themselves in Funchal, Madeira’s vibrant capital city.
Funchal is an awesome city in its own right and is home to plenty of excellent accommodation options, is packed with history and culture, plus it has trendy restaurants and cafes at just about every corner.
To help you find suitable accommodation, I’ve listed three of my favourites below, one of which is marked – this is the place where I stayed.
+ Vila Baleira | This was my base for the whole of my trip, and if you’re seeking comfort without spending your entire budget straight away, Vila Baleira will be perfect for you too. Located within the popular Lido area, this hotel offers spacious rooms, comfortable beds, a large rooftop terrace with a swimming pool. They also have a tasty breakfast spread, excellent wifi throughout the entire property, and a secured parking lot right under the property.
Hotel Cajú | Set within the heart of Funchal, Hotel Cajú is a great place to stay, with stylish double rooms, friendly staff, and a small yet excellent in-house fitness centre. All bookings come with exceptional breakfast too. One small downside though, they don’t have private parking.
NEXT – Savoy Signature | This budget-friendly hotel in the centre of Funchal has spacious modern-style rooms with comfortable double beds and a brilliant private bathroom with a rain shower. They also have an incredible rooftop swimming pool with amazing sea views. Double rooms at only €50,- per night make this place one of the best picks in Funchal.
Alternatively, search for accommodation in Funchal on booking.com.
Stay safe on Madeira | Travel insurance
Since travelling on Madeira is all about hiking and nature, I recommend everyone to sort out good travel insurance before setting out on their own adventure.
Where we prefer that everything goes smoothly during our travels, something unfortunate can happen at any moment, whether it’s an injury during a hike or an accident on the road.
For travel insurance, I use Heymondo, as they offer full covid-19 coverage, as well as a handy app with 24-hour medical assistance. Make sure you check it out – readers of WTSW receive 5% off any insurance policy too. Additionally, I also recommend World Nomads.
Keep on reading with these in-depth Madeira guides
Need more inspiration for Madeira, I’ve made plenty of guides that might interest you too.
Funchal | 9 Things to do in Funchal
Madeira Driving Essentials | A guide to driving on Madeira
The best viewpoints on Madeira | 9 Incredible viewpoints on Madeira
Vereda da Ponta de São Lourenço | A guide to the PR8 hike
Pico do Arieiro to Pico Ruivo | A guide to the PR1 hike
Levada do Caldeirão Verde | A guide to the PR9 hike
Levada das 25 Fontes | A guide to the PR6 hike
Cheers!
I’ve been on this travel blogging journey since 2019.
If you appreciate what I do here, these are some ways you can support me.


7 Wonderful things to do in Antalya, Turkey
Often referred to as the pearl of the Turkish Riviera, Antalya and its stunning coastline are famed as one of the best summer destinations in Turkey, if not Europe.
While I can’t deny Antalya’s phenomenal beaches and pleasant temperature, I also know that this is merely a fraction of what Turkey’s number-one beach getaway has to offer.
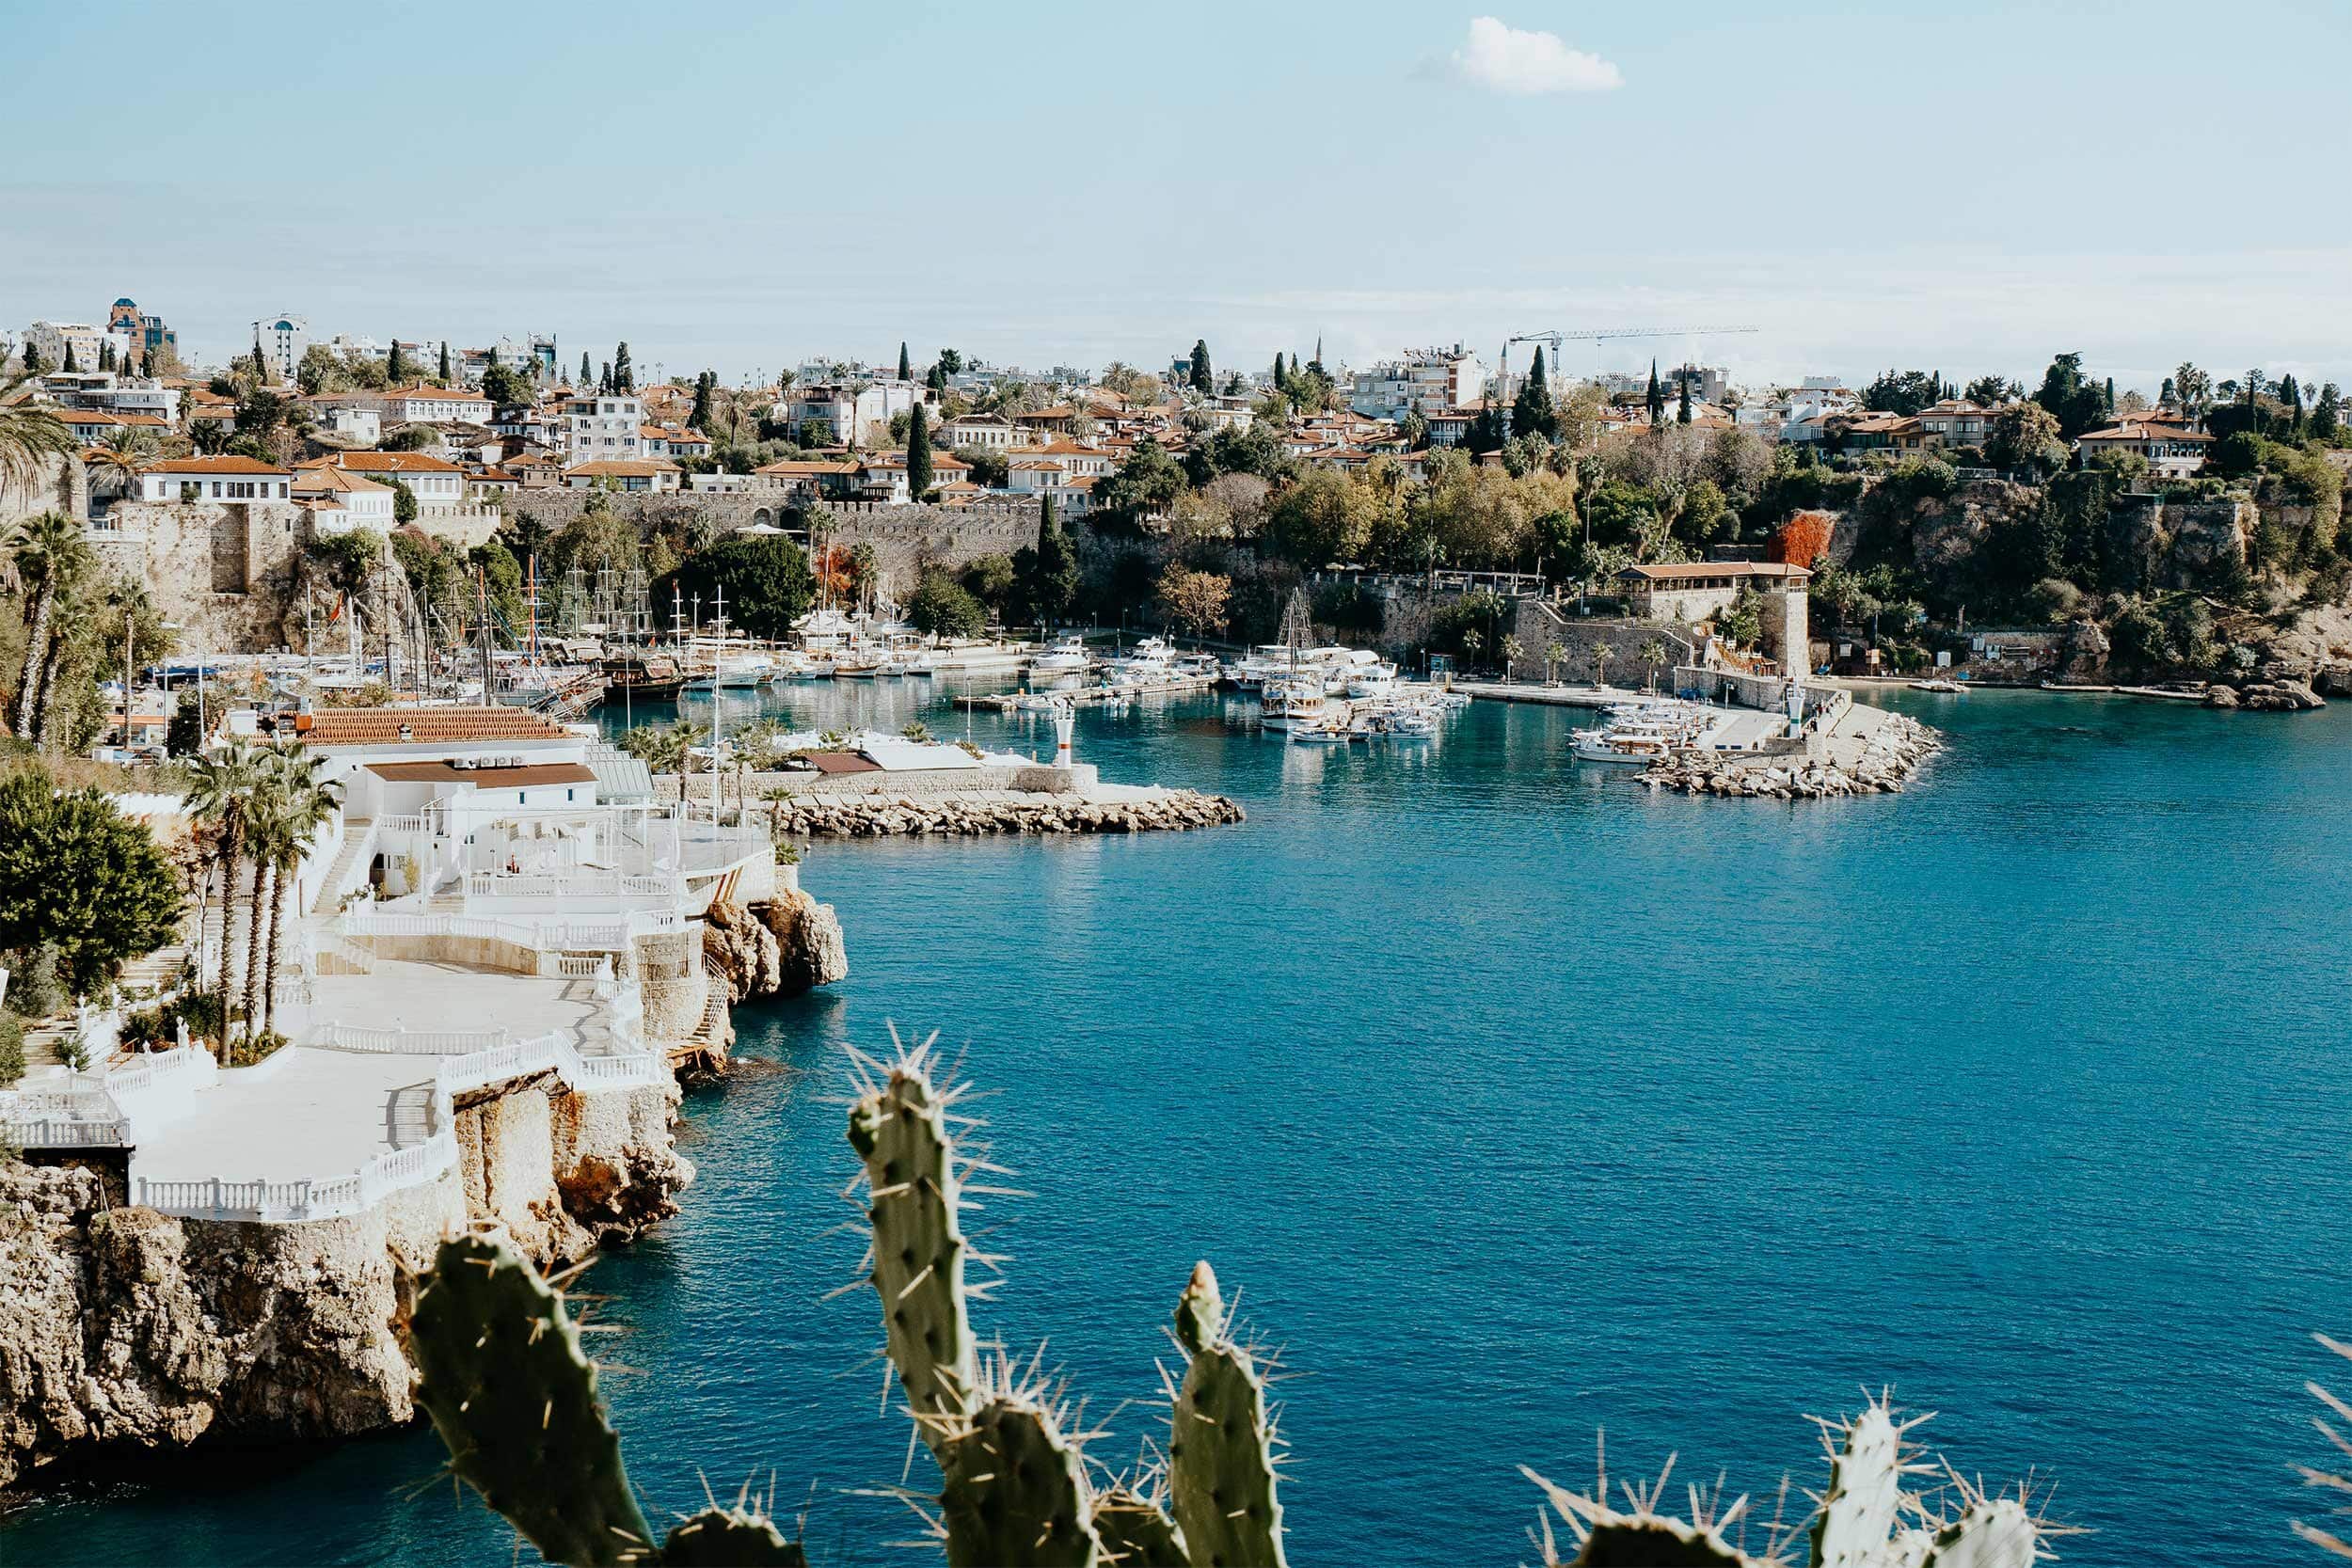
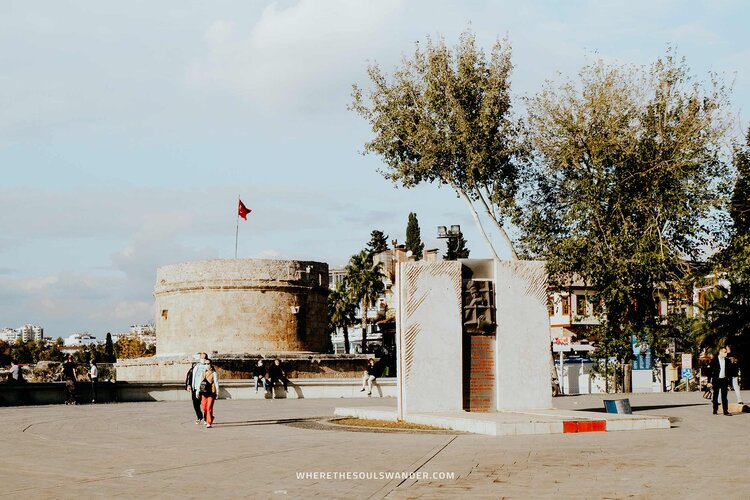
The starting point of all these incredible things to see and do is the old town; Antalya’s historical centre, celebrated for its maze-like cobblestone laneways, lively harbour and ancient Roman structures.
Add to that incredible nature (make sure you check out the Düden Waterfalls), loads of excellent dining options, and several exciting day trips within reach, and you understand why Antalya has become a favourite among travellers and locals alike.
To help you make the most out of your time here, I’ve created this Antalya guide, including my favourite things to see and do, where to stay, travel tips and more.
So whether you solely visit Antalya for everything beach related or wish to dive deeper into the history of this fascinating town on the paradisiac Turkey coast, I’ve got you covered!
WHERE IS ANTALYA
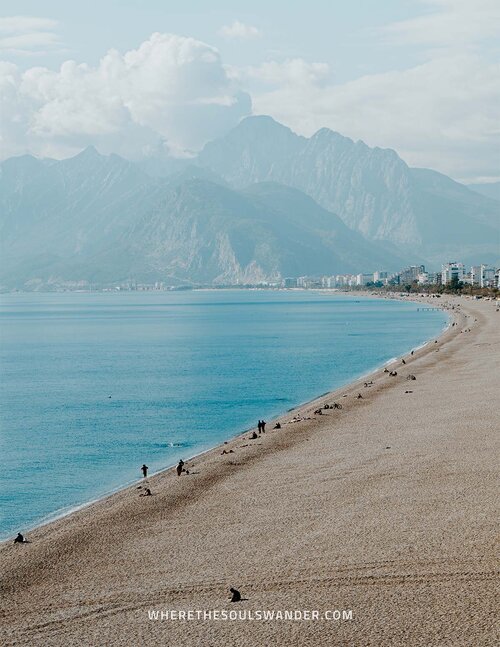
Antalya is a popular beachside destination on Turkey’s picturesque southwest coast and is flanked by the incredible Taurus Mountains and the Mediterranean Sea.
With over 1 million inhabitants – and loads of travellers during the summer months, the capital of the Antalya region is considered Turkey’s fifth-most populous city.
WHERE TO STAY IN ANTALYA
As one of the main summer destinations along Turkey’s paradisiac Mediterranean coast, Antalya is home to accommodation that cater to every budget and travel style.
Whether you’re after an upscale beachfront resort, a comfortable apartment with a swimming pool, or something in between, this coastal town is teeming with brilliant accommodation options.
All that is left to do, is pick the right accommodation for you – to make choosing easier, I’ve listed some of my personal favourites below:
APARTMENTS & HOTELS IN ANTALYA
Casa Sur Antalya | Situated in the heart of Antalya Old Town, this place is easily one of my most authentic finds in Antalya. The rooms are minimalistic, yet utterly stylish – think brick walls, wooden furniture, patterned carpets, and rustic design elements. It also boasts a garden of calm with plenty of comfy lounge corners as well as a rooftop terrace with views over Hadrian’s Gate.
Pacco Boutique Hotel & SPA | If you’re looking for a comfortable boutique hotel without breaking the bank, Pacco Boutique Hotel & SPA is a high-rated hotel with a spacious outdoor swimming pool for less than €60,- a night. It also has direct access to Konyaalti Beach, a trendy bar, several lounge areas, and an in-house fitness centre.
Elegance East Hotel | As the name might already suggest, the Elegance East Hotel is probably the most elegant hotel in Antalya Old Town. Traditional Kaleici architecture set the tone for an excellent stay, while a large outdoor pool and its prime location in the historical centre offer you the ultimate holiday feeling. Make sure you click the link to see if this palace-like hotel is for you.
BEACHFRONT RESORTS IN ANTALYA
Ramada Plaza Antalya | Just 700 metres from Antalya’s historic Kaleiçi, Ramada Plaza offers world-class service, modern spacious rooms with sea view, a swimming pool, and a superb sundeck on a cliff next to the Mediterranean. Ramada Plaza also offers all-inclusive stays for those craving a fully arranged summer getaway.
Rixos Downtown Antalya | Set within the exotic gardens of the Ataturk Culture Park, this luxurious hotel offers the best of both worlds. With extremely comfortable rooms, a large outdoor swimming pool, a gym, and an excellent location next to Konyaalti Beach, Rixos offers all the amenities for a relaxing stay. Add that you’re only a stone throws away from the lively old town and its historical ambience, and it is clear why Rixos is travellers favourite in Antalya.
Alternatively, search for accommodations in Antalya on booking.com.
7 WONDERFUL THINGS TO DO IN ANTALYA, TURKEY
1 | TAKE A WALK AROUND KALEIÇI | ANTALYA OLD TOWN
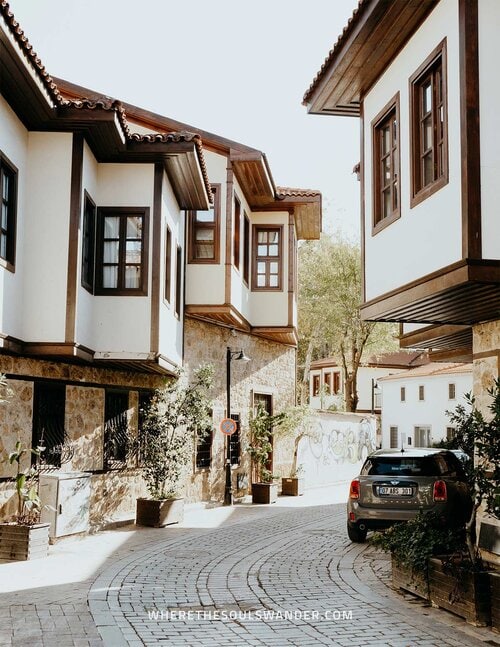
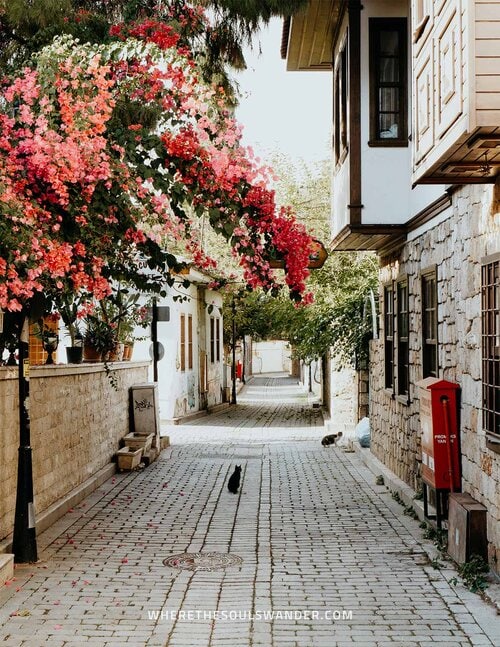
I fairly believe that any trip to Antalya should involve at least one day of explorations in its most picturesque part; Antalya Old Town, locally known as Kaleiçi.
Perched between the Mediterranean and Antalya’s somewhat chaotic city centre, Kaleiçi is a charming old town full of maze-like cobblestone laneways, historical architecture, and trendy cafes and restaurants.
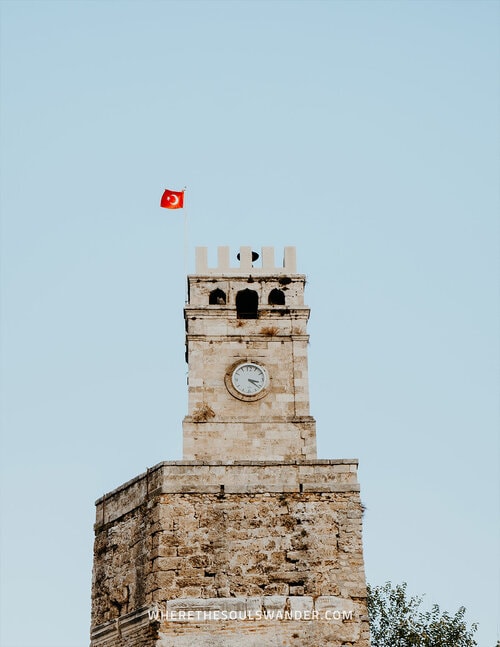
Although Antalya Old Town is pretty compact in size, it is home to several intriguing historical sights, including Hadrian’s Gate, Hidirlik Tower, and the Yivli Minaret to name a few.
I’ve spent plenty of time in the streets of Antalya Old Town, and have to say that it’s best explored on an early morning walk when the temperature is still bearable and the light perfect for photography.
If you’re in the mood for a tasty dinner or a few late-night drinks, the old town has plenty of excellent options to satisfy those needs too.
THE ESSENTIALS
Where | Antalya Old Town
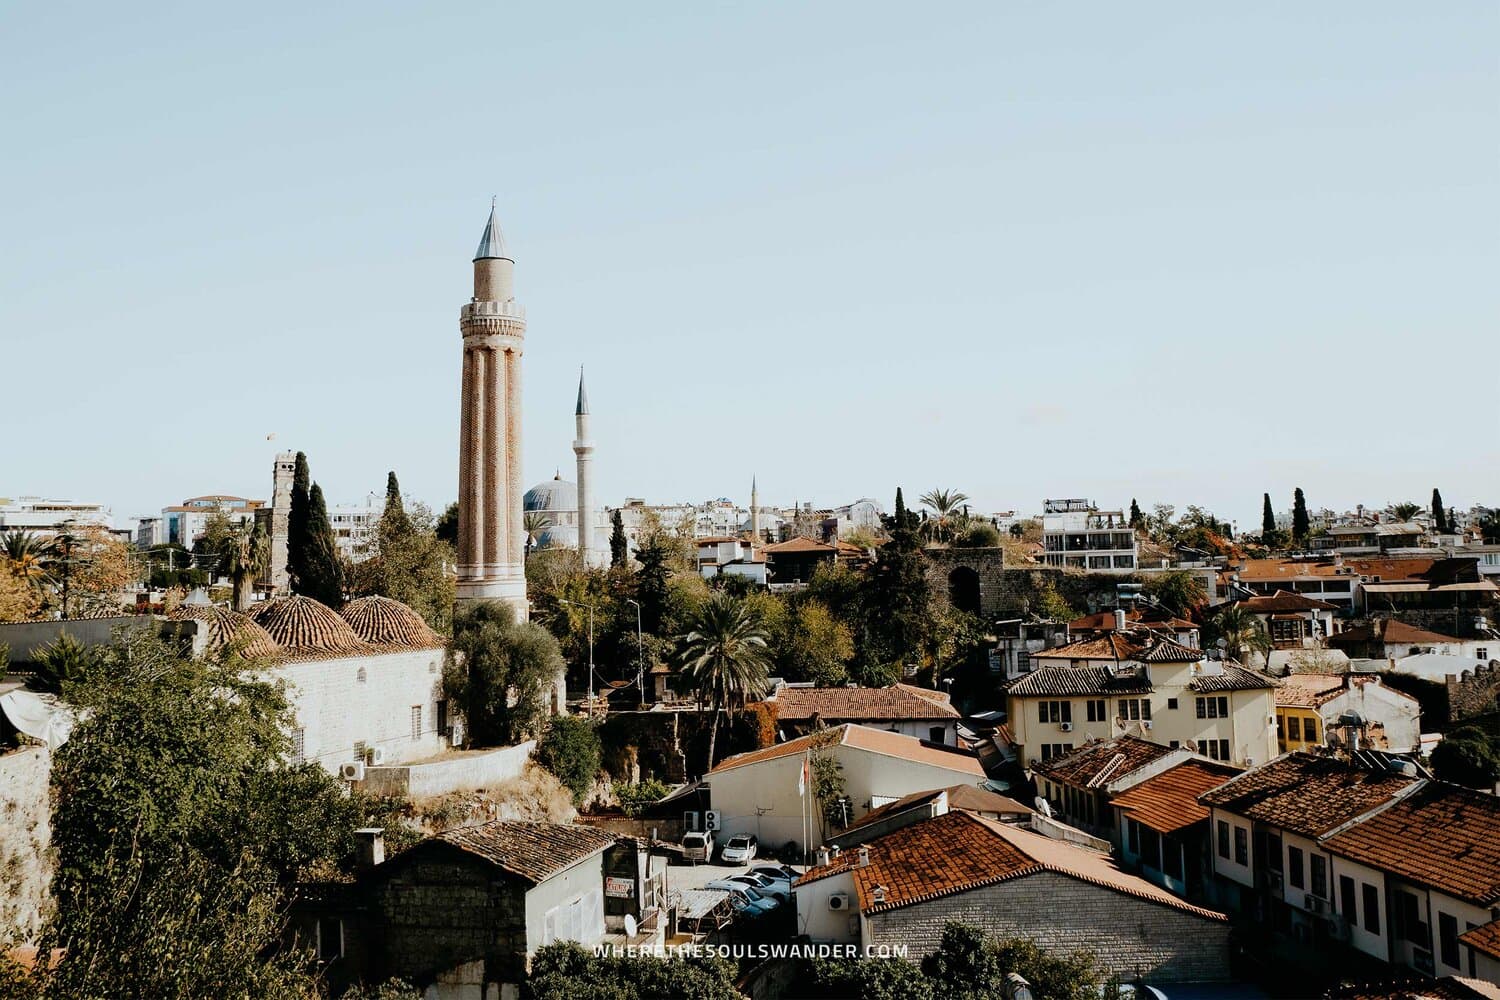
2 | ADMIRE THE ANCIENT YIVLI MINARE
Rising high above Antalya Old Town is the ancient Yivli Minare, an incredibly elegant ‘fluted’ minaret that is known as the symbol of Antalya.
The towering minaret and its adjacent mosque were built in the early 13th century by Seljuk Sultan Aladdin Keykubad I, and are still very much in use today.
Besides its value to serve worshippers, the ornate building is also one of the best visited historical monuments in the region, as it displays the beauty of Anatolian Seljuk architecture.
Something worth noticing is an ancient inscription placed next to the entrance of the Yivli Minare, as it seems to illustrate the building process of the minaret.
Merely for its distinctive Turkish Anatolian design, the Yivli Minare should be on any list of things to do in Antalya. Luckily, it is inevitable that you’ll encounter this towering masterpiece when planning a visit to the historic old town.
THE ESSENTIALS
Where | Yivli Minare, Antalya Old Town
3 | SWIM AND RELAX AT KONYAALTI BEACH
You can’t come to one of Europe’s hottest summer destinations and not spend at least a couple of days relaxing on a lounger next to the inviting Mediterranean sea.
And if you ask me, there’s no better place to do so than at Konyaalti Beach.
Situated at only a short walk of Antalya Old Town, this extensive pebbly beach is one of Antalya’s best beaches and perfectly suited for an afternoon of sunbathing and swimming.
Konyaalti Beach is also backed by a lively boulevard that is packed with trendy restaurants and cafes, public shower facilities, and incredible views of the Taurus Mountains in the distance.
All in all, Konyaalti Beach has everything on offer for a lazy beach day under the Turkish sun.
THE ESSENTIALS
Where | Konyaalti Beach
Cost | Sun loungers and umbrellas should cost 20 to 40 TL (€2 – 4) a day
Bring | Swimwear, a towel and a good book
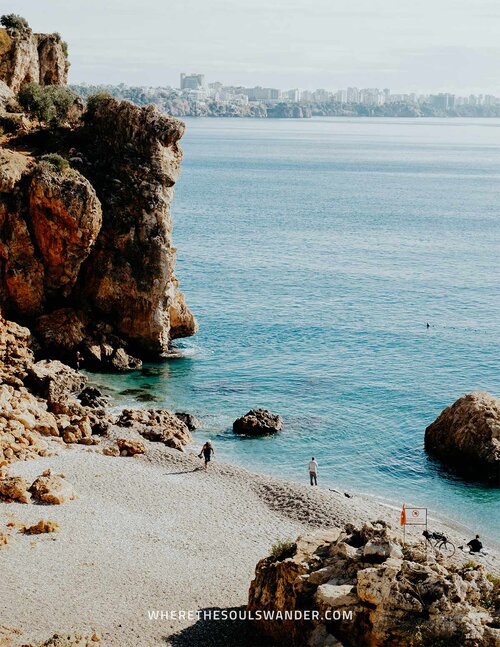

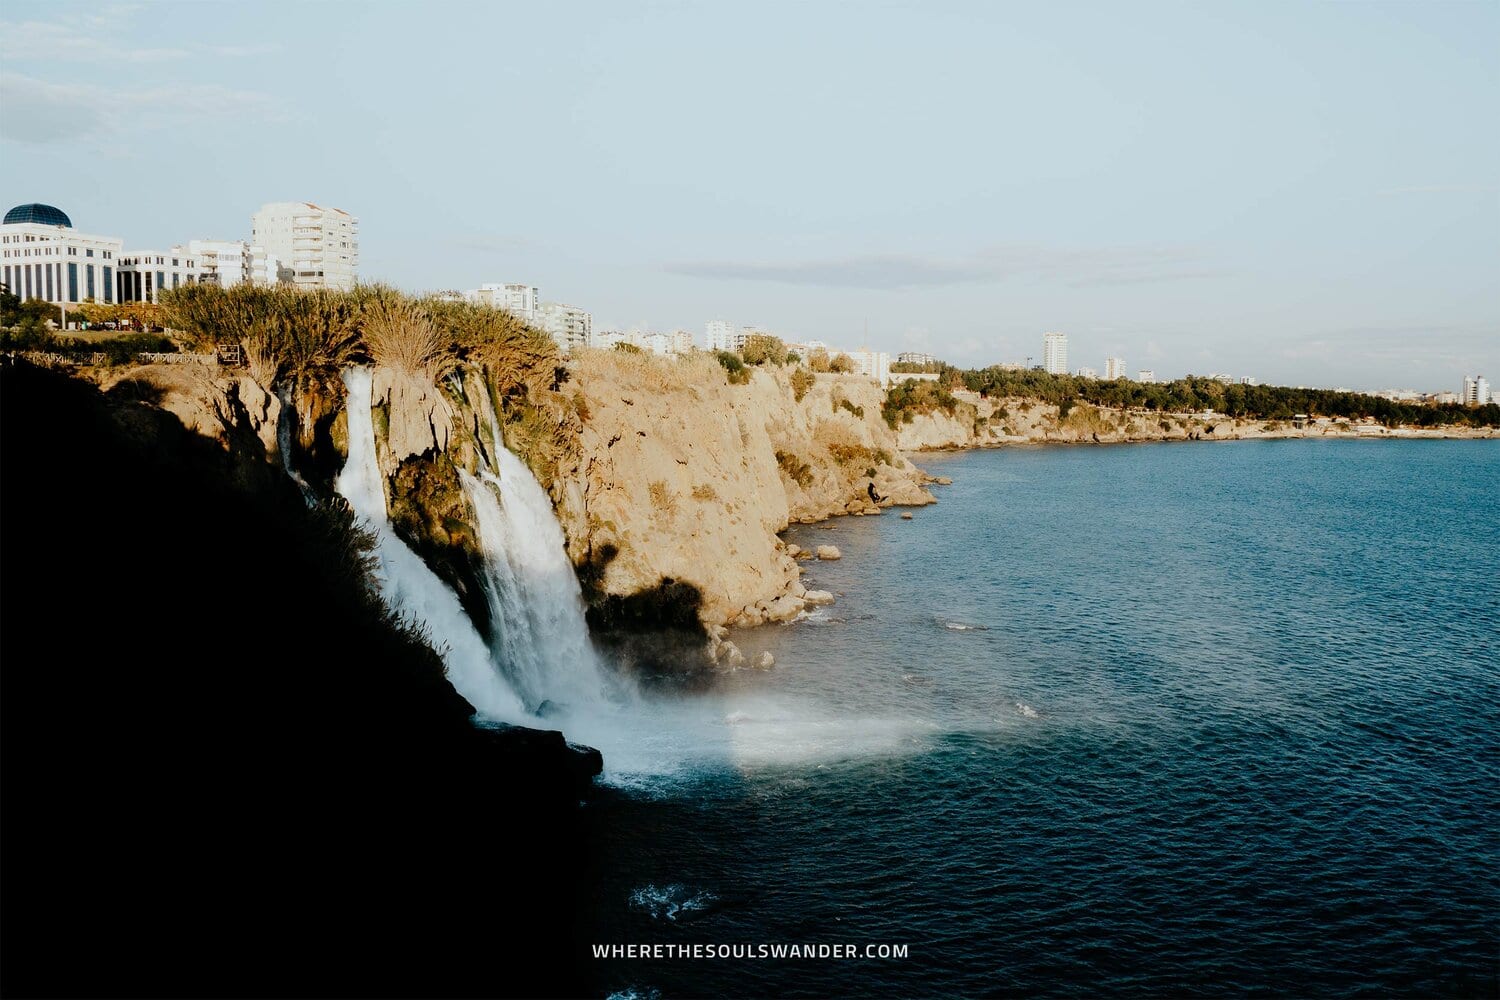
4 | BEHOLD THE RUSHING DÜDEN WATERFALLS
Nestled on a towering cliff on Antalya’s stunning coastline, the Lower Düden Waterfall is a 40-metre high waterfall that flows directly into the Mediterranean.
While I’ve seen quite a few waterfalls throughout my travels, this was the first time I’ve seen one ending in the ocean, which makes the Lower Düden Waterfall a pretty unique sight to behold.
It was in fact, one of the most surprising places that I’ve stumbled upon in Antalya.
But as impressive as the Lower Düden Waterfall might be, the Düden Waterfalls are actually a set of two separate waterfalls that are interconnected by a stream.
Unfortunately, I only heard of the Upper Düden Waterfall after leaving for Istanbul, but from what I’ve heard it must be equally as impressive as the Lower Düden Waterfall.
So if you have a day spare, you now know what to do with it!
THE ESSENTIALS
Where | Düden Waterfalls
Recommended tour | This 8-hour tour of Antalya includes a boat ride to the Lower Düden Waterfall – plus a trip to the Upper Düden Waterfall and Antalya Old Town. Prices and availability here
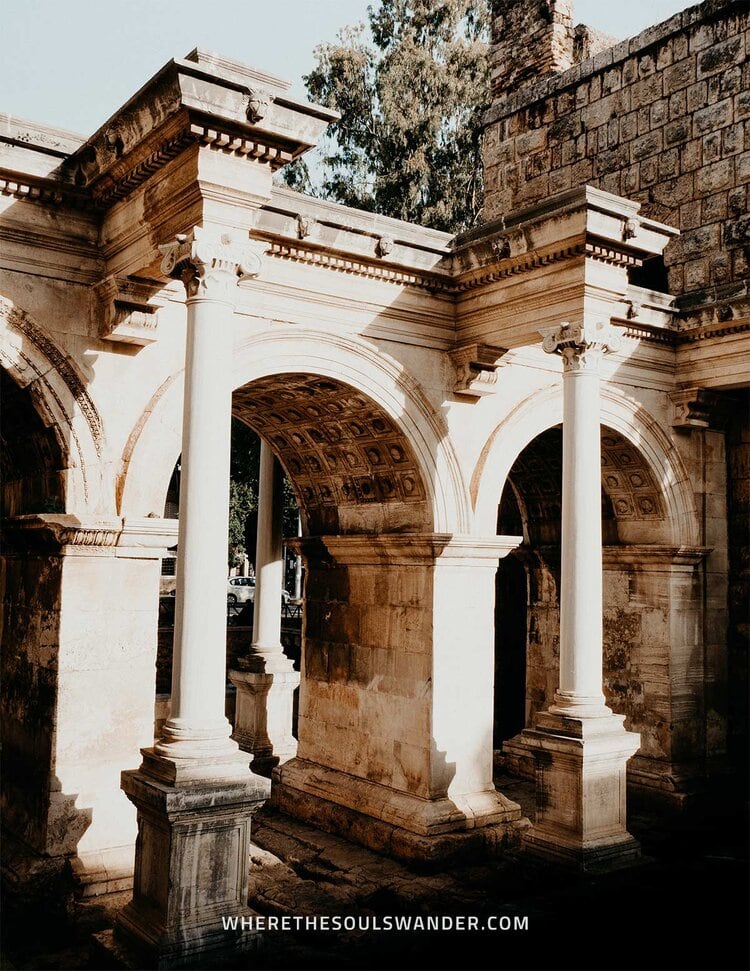
5 | ADMIRE HADRIAN’S GATE
During my travels, I often feel fascinated by the greatness of the former Roman Empire and the amount of incredible ancient architecture that they actually left behind.
It was the ornate Hadrian’s Gate that initiated this exact feeling in Antalya.
Built in the name of Roman emperor Hadrian back in 130 AD, this triumphal arch is now one of Antalya’s most important historical sights, and entering the old town through it is quite a happening.
If you look closely, you’ll notice that the two towers on either side of the gate hold architectural elements that indicate different periods in history.
Most notable is an Arabic inscription that dates back to the reign of Seljuk sultan Alaeddin Keykubat on the upper part of the Northern Tower.
At present, Hadrian’s Gate is the only remaining entrance gate to Kaleiçi (old town), and therefore the perfect starting point for explorations within it.
THE ESSENTIALS
Where | Hadrian’s Gate, Antalya Old Town

6 | WATCH THE SUNSET IN KALEICI HARBOUR
When wandering through the twisting laneways of Antalya Old Town, you’re fortunately never too far from the old town’s picture-perfect Harbour.
Tactically situated at the core of Antalya’s fortified old town, the Kaleici Harbour is a hip and happening place that is bursting with positive energy, especially on a warm summer’s evening.
Whether you’re planning to enjoy a few sunset drinks in a trendy bar, take a relaxing evening stroll with a scoop of gelato in hand, or sit down at a dock to take in the sunset instead, you’re ensured of a wonderful evening anyhow.
THE ESSENTIALS
Where | Kaleici Harbour, Antalya Old Town

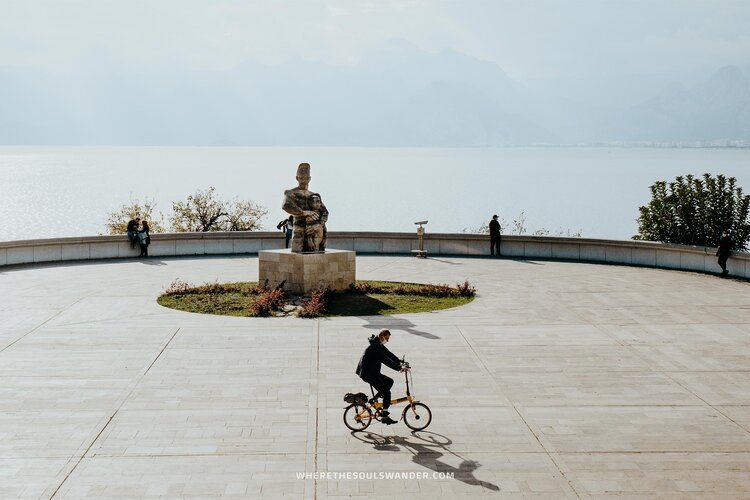
7 | SPEND AN AFTERNOON RELAXING IN KARAALIOGLU PARK
Taking it easy in Antalya’s lush Karaalioglu Park is easily one of my favourite things to do in Antalya, as it’s a great way to see daily local life unfold.
Situated at only a stone’s throw away from Antalya Old Town, the Karaalioglu Park is a large oasis of calm where locals and travellers alike come to escape the hustle and bustle of the city.
In addition to an extensive collection of imposing exotic plants and trees, the park is also home to the Hidirlik Kalesi, a striking Roman structure that dates back nearly 2.000 years ago.
Add to that the shimmering Mediterranean and Taurus Mountains as its backdrop, and you instantly realize why Karaalioglu Park has become such a popular summer hangout.
THE ESSENTIALS
WEATHER IN ANTALYA | BEST TIME TO VISIT ANTALYA
Given its position in the Mediterranean, Antalya is an attractive destination at any time of year.
However, I believe most of you travel to a beach destination to enjoy good weather, and in that case, the best time to visit Antalya is between April and October, when temperatures reach up to 36 degrees, especially in the peak summer months of June, July and August.
With long summer days overflowing with the sun, the conditions are excellent for spending time poolside or at the beach, while explorations around the old town are completely possible too.
One thing worth mentioning is that summertime in Turkey is pretty popular, meaning you’ll share the beach with many sun-seeking tourists during the peak season.
HOW TO GET AROUND ANTALYA
With so many awesome places near Antalya (Pamukkale, Purge and Aspendos just to name a few), picking up a rental at the airport is actually one of the best things you can do.
If you wish to have the freedom to travel around Antalya on your own terms, you might want to consider renting a car. Not only is it easier to reach the nearby highlights, but it also saves you time and money.
For car rental in Turkey, I would recommend searching for an option that suits your needs on Rentalcars.com. They offer excellent service, additional insurance, and a broad selection of cars, all at an affordable price. More information and availability here.
MY FAVOURITE DAY TOURS & ACTIVITIES IN ANTALYA
If you’re after an organized tour of Antalya and its surroundings, here are some of the best picks.
HOW TO GET TO ANTALYA
As a major summer destination in Europe, you’ll be amazed at how easy it actually is to get to Antalya via plane, especially during the peak summer months.
Both Domestic and International flights arrive at the Antalya Airport, located only 13 kilometres northeast of Antalya’s picturesque old town.
For cheap flights to Antalya, make sure you check out Skyscanner. Not only is their website user-friendly, but they also offer a large range of airline options – plus it’s easy to find good rates.
A shuttle bus leaves from the Antalya Airport every 30 minutes and takes you to the city centre in roughly 50 minutes. A one-way ticket costs 3,60 TL (€0,70) per person.
If you prefer some extra comfort, taxis are a relatively cheap alternative too. A taxi should cost no more than 60 TL (€15,-), and takes only 20 minutes.
SAFETY IN TURKEY | TRAVEL INSURANCE
While Turkey is completely safe for travellers, I always aim to enter a foreign country with my travel insurance sorted out, and I highly advise anyone else to do the same.
Where we prefer to assume that everything runs smoothly during our travels, the reality is often that something can go wrong at any given moment – when that happens, it is better to be safe than sorry.
Heymondo | Whether you’re going on a 3-week backpacking trip, or planning a long stay somewhere abroad, Heymondo has excellent insurance options either way – plus full covid-19 coverage and a handy app with 24-hour medical assistance. Readers of WTSW receive 5% off any insurance policy, more information here.
World Nomads | If you’re an adventure seeker, backpacker, or planning your once-in-a-lifetime world trip, make sure you check out World Nomads, they designed the perfect travel insurance to help you travel safer and smarter. Do note that they’re not covering covid-19 related claims.
KEEP ON READING WITH THESE IN-DEPTH TURKEY GUIDES
After spending 3 weeks in Turkey, I’ve made plenty of in-depth guides that might interest you too.
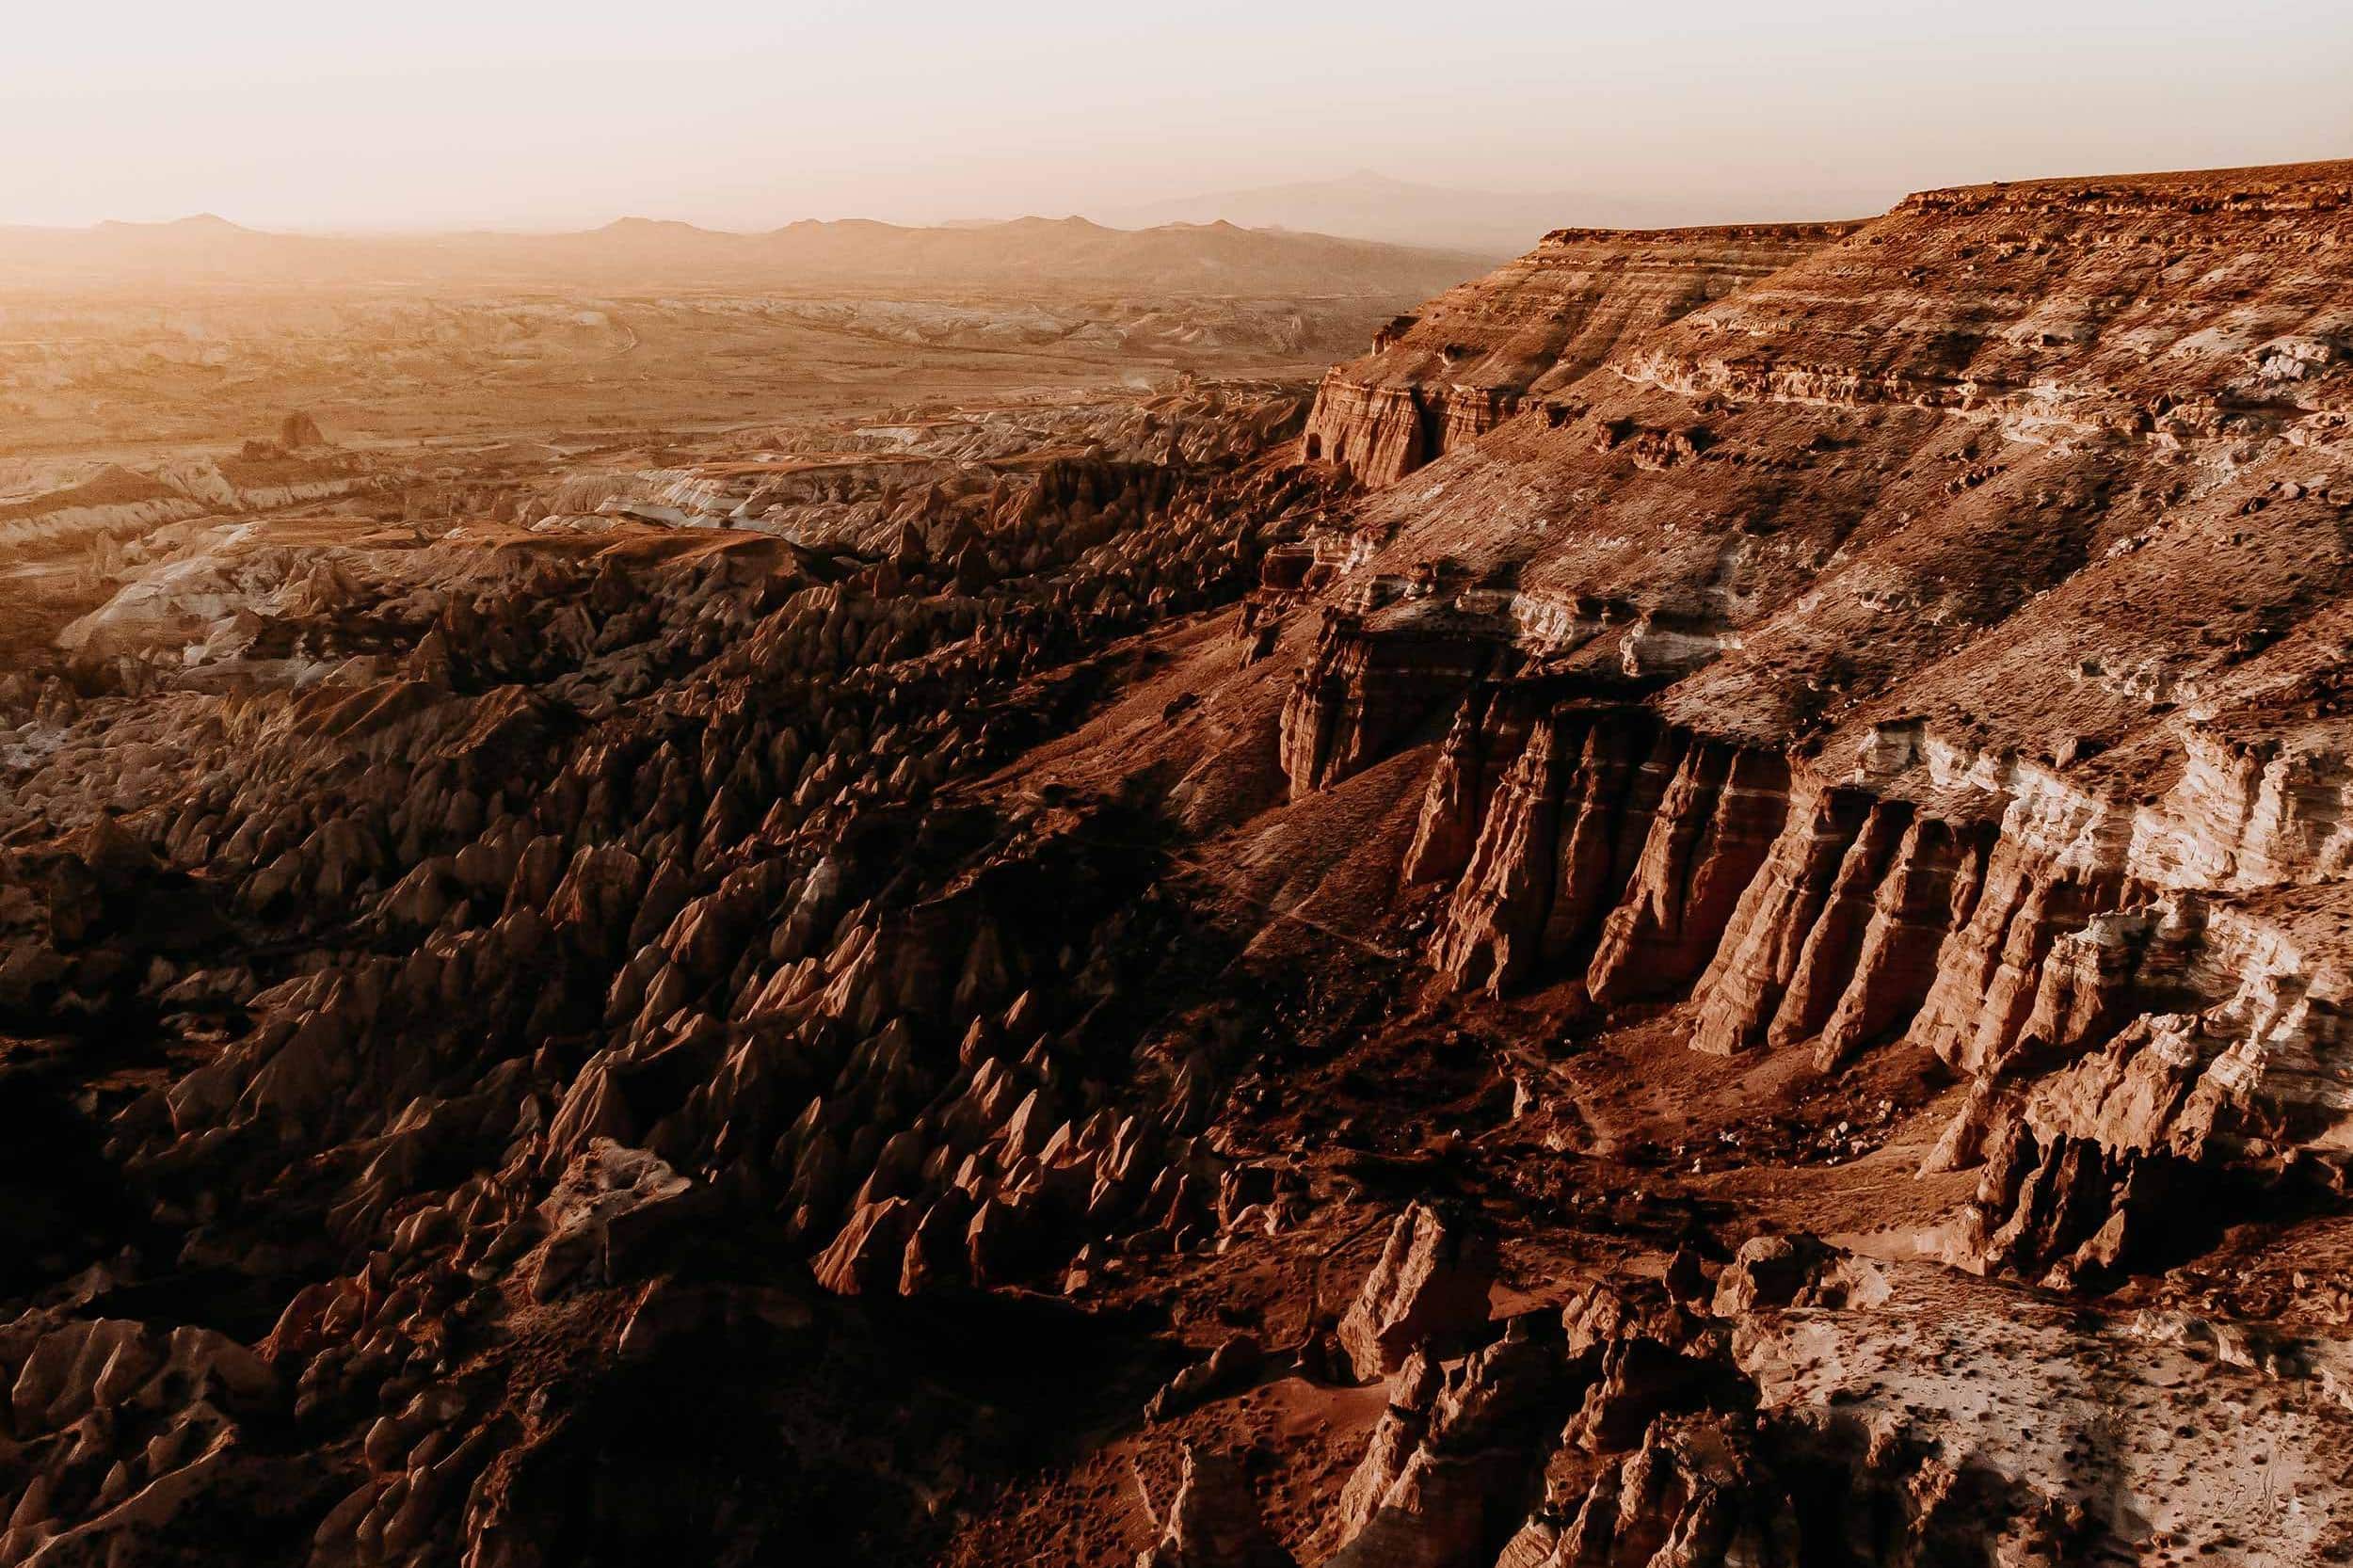
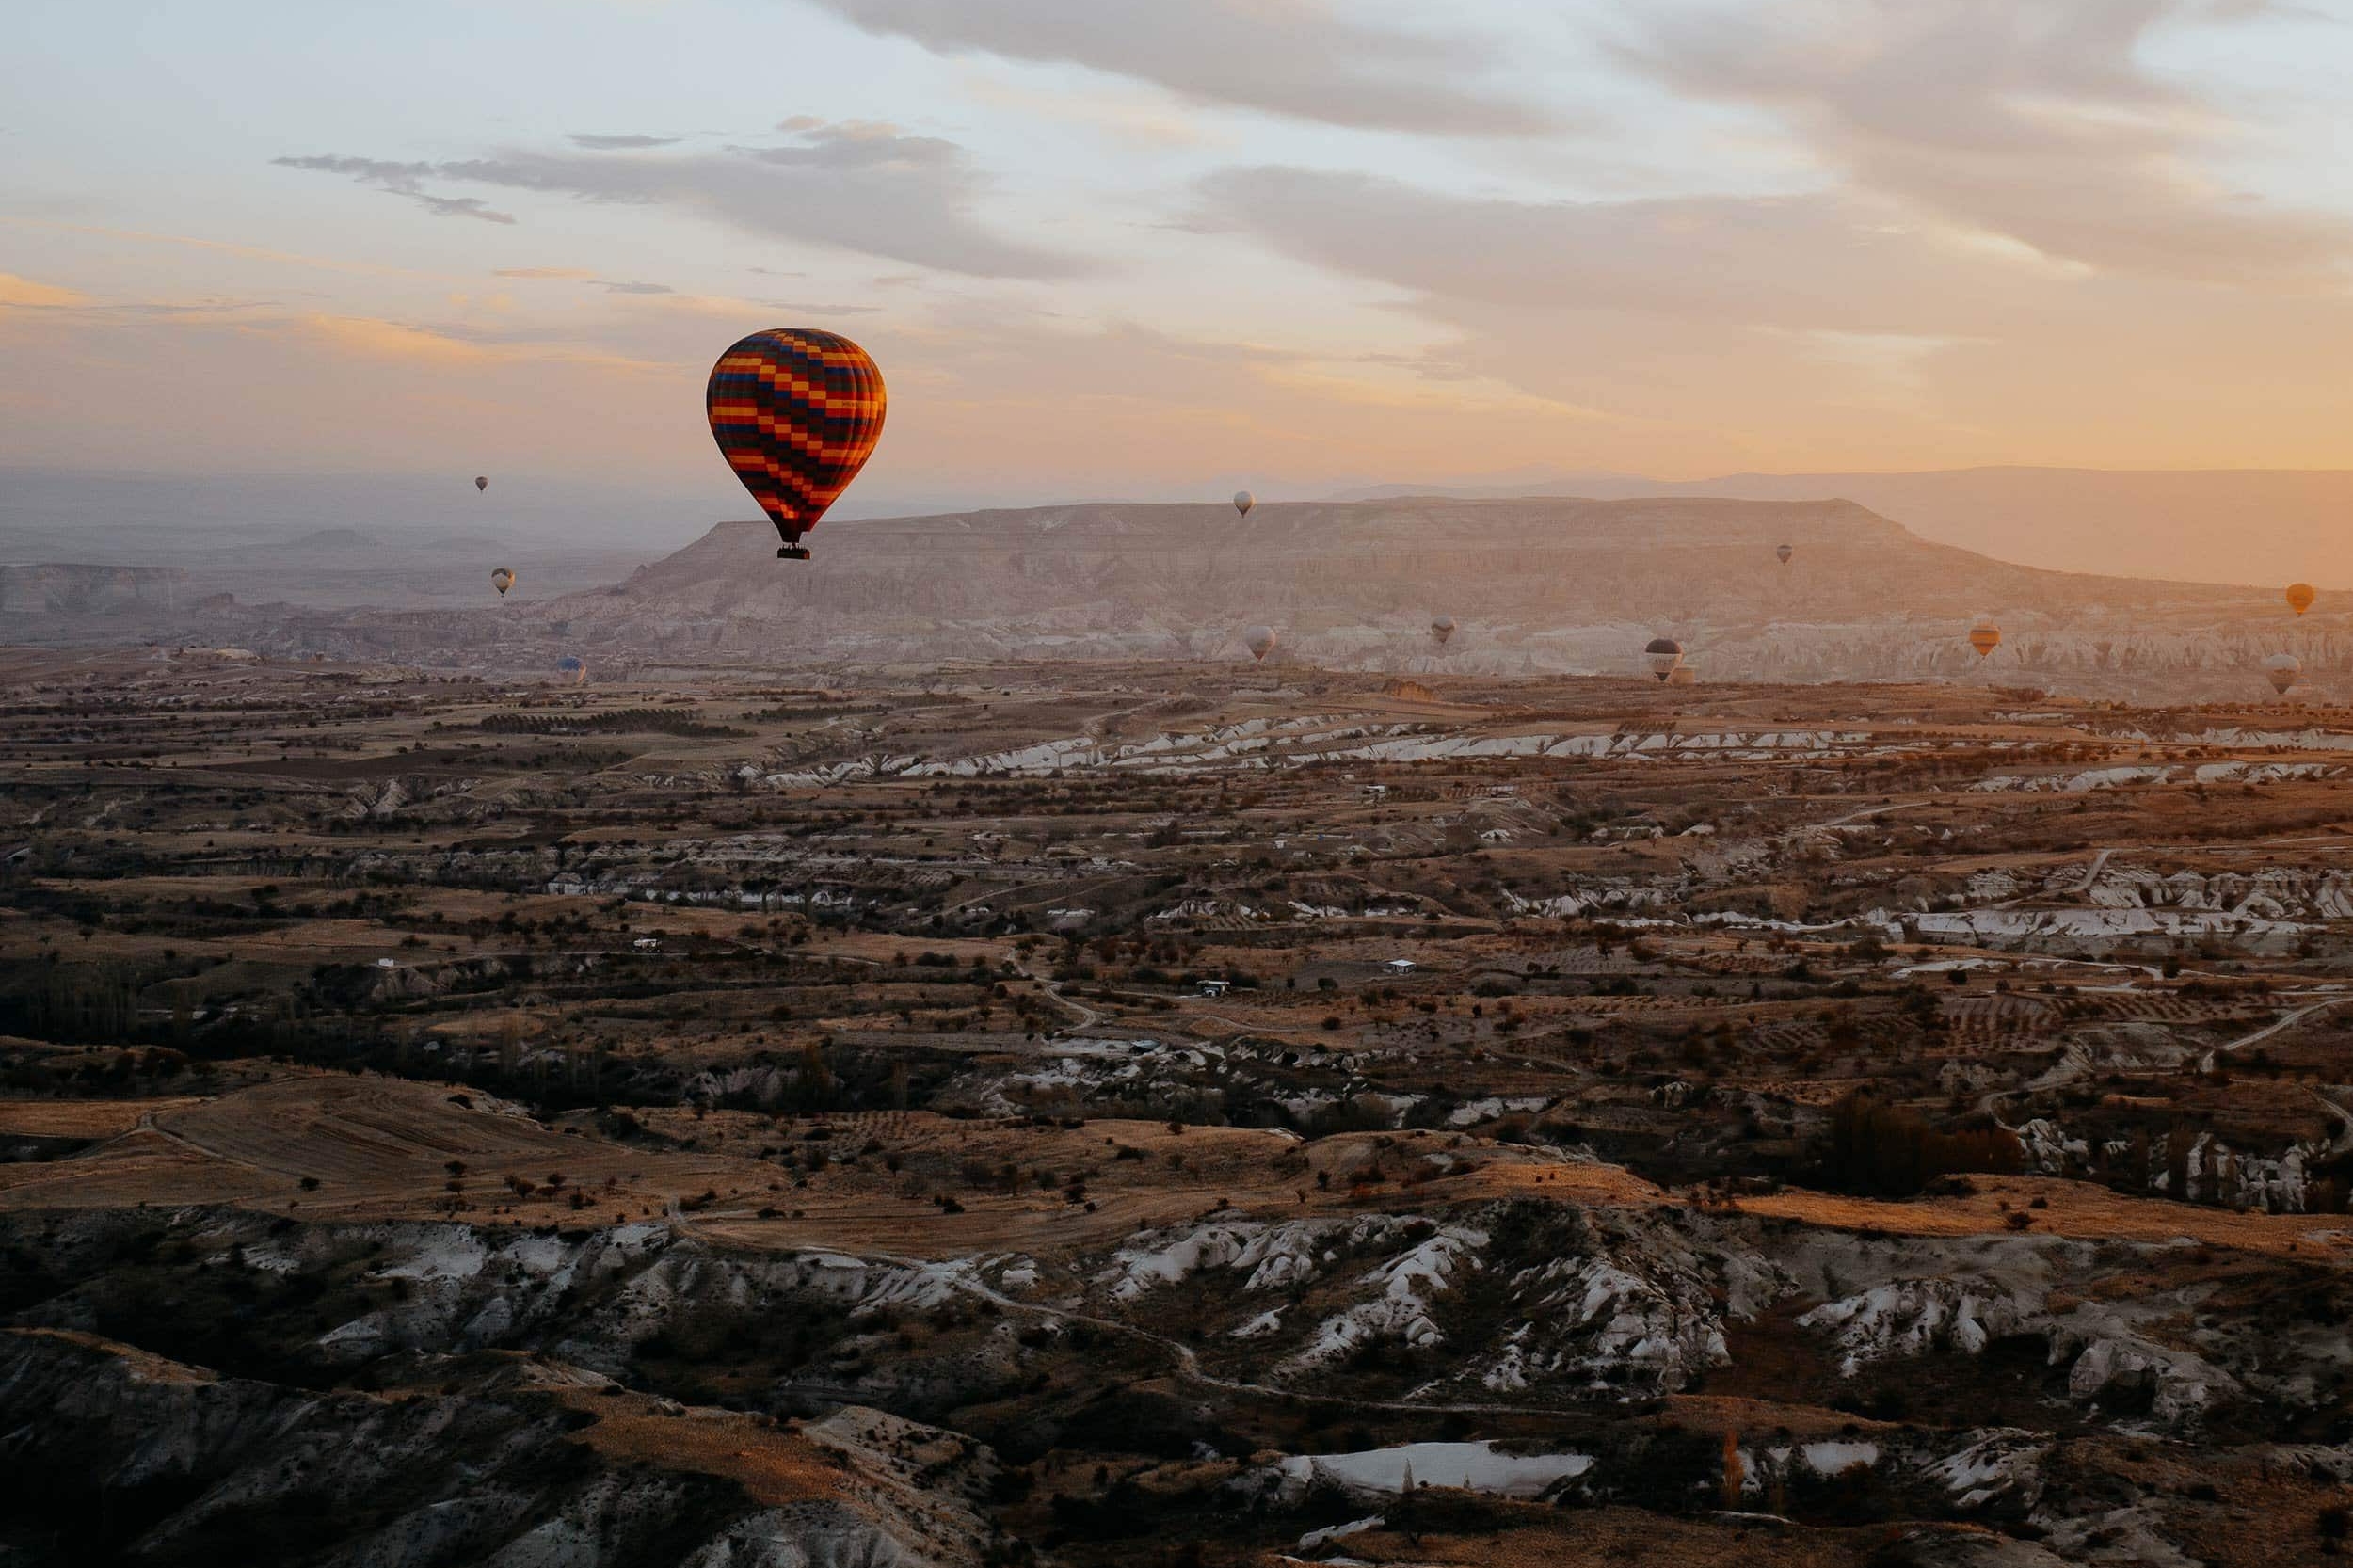
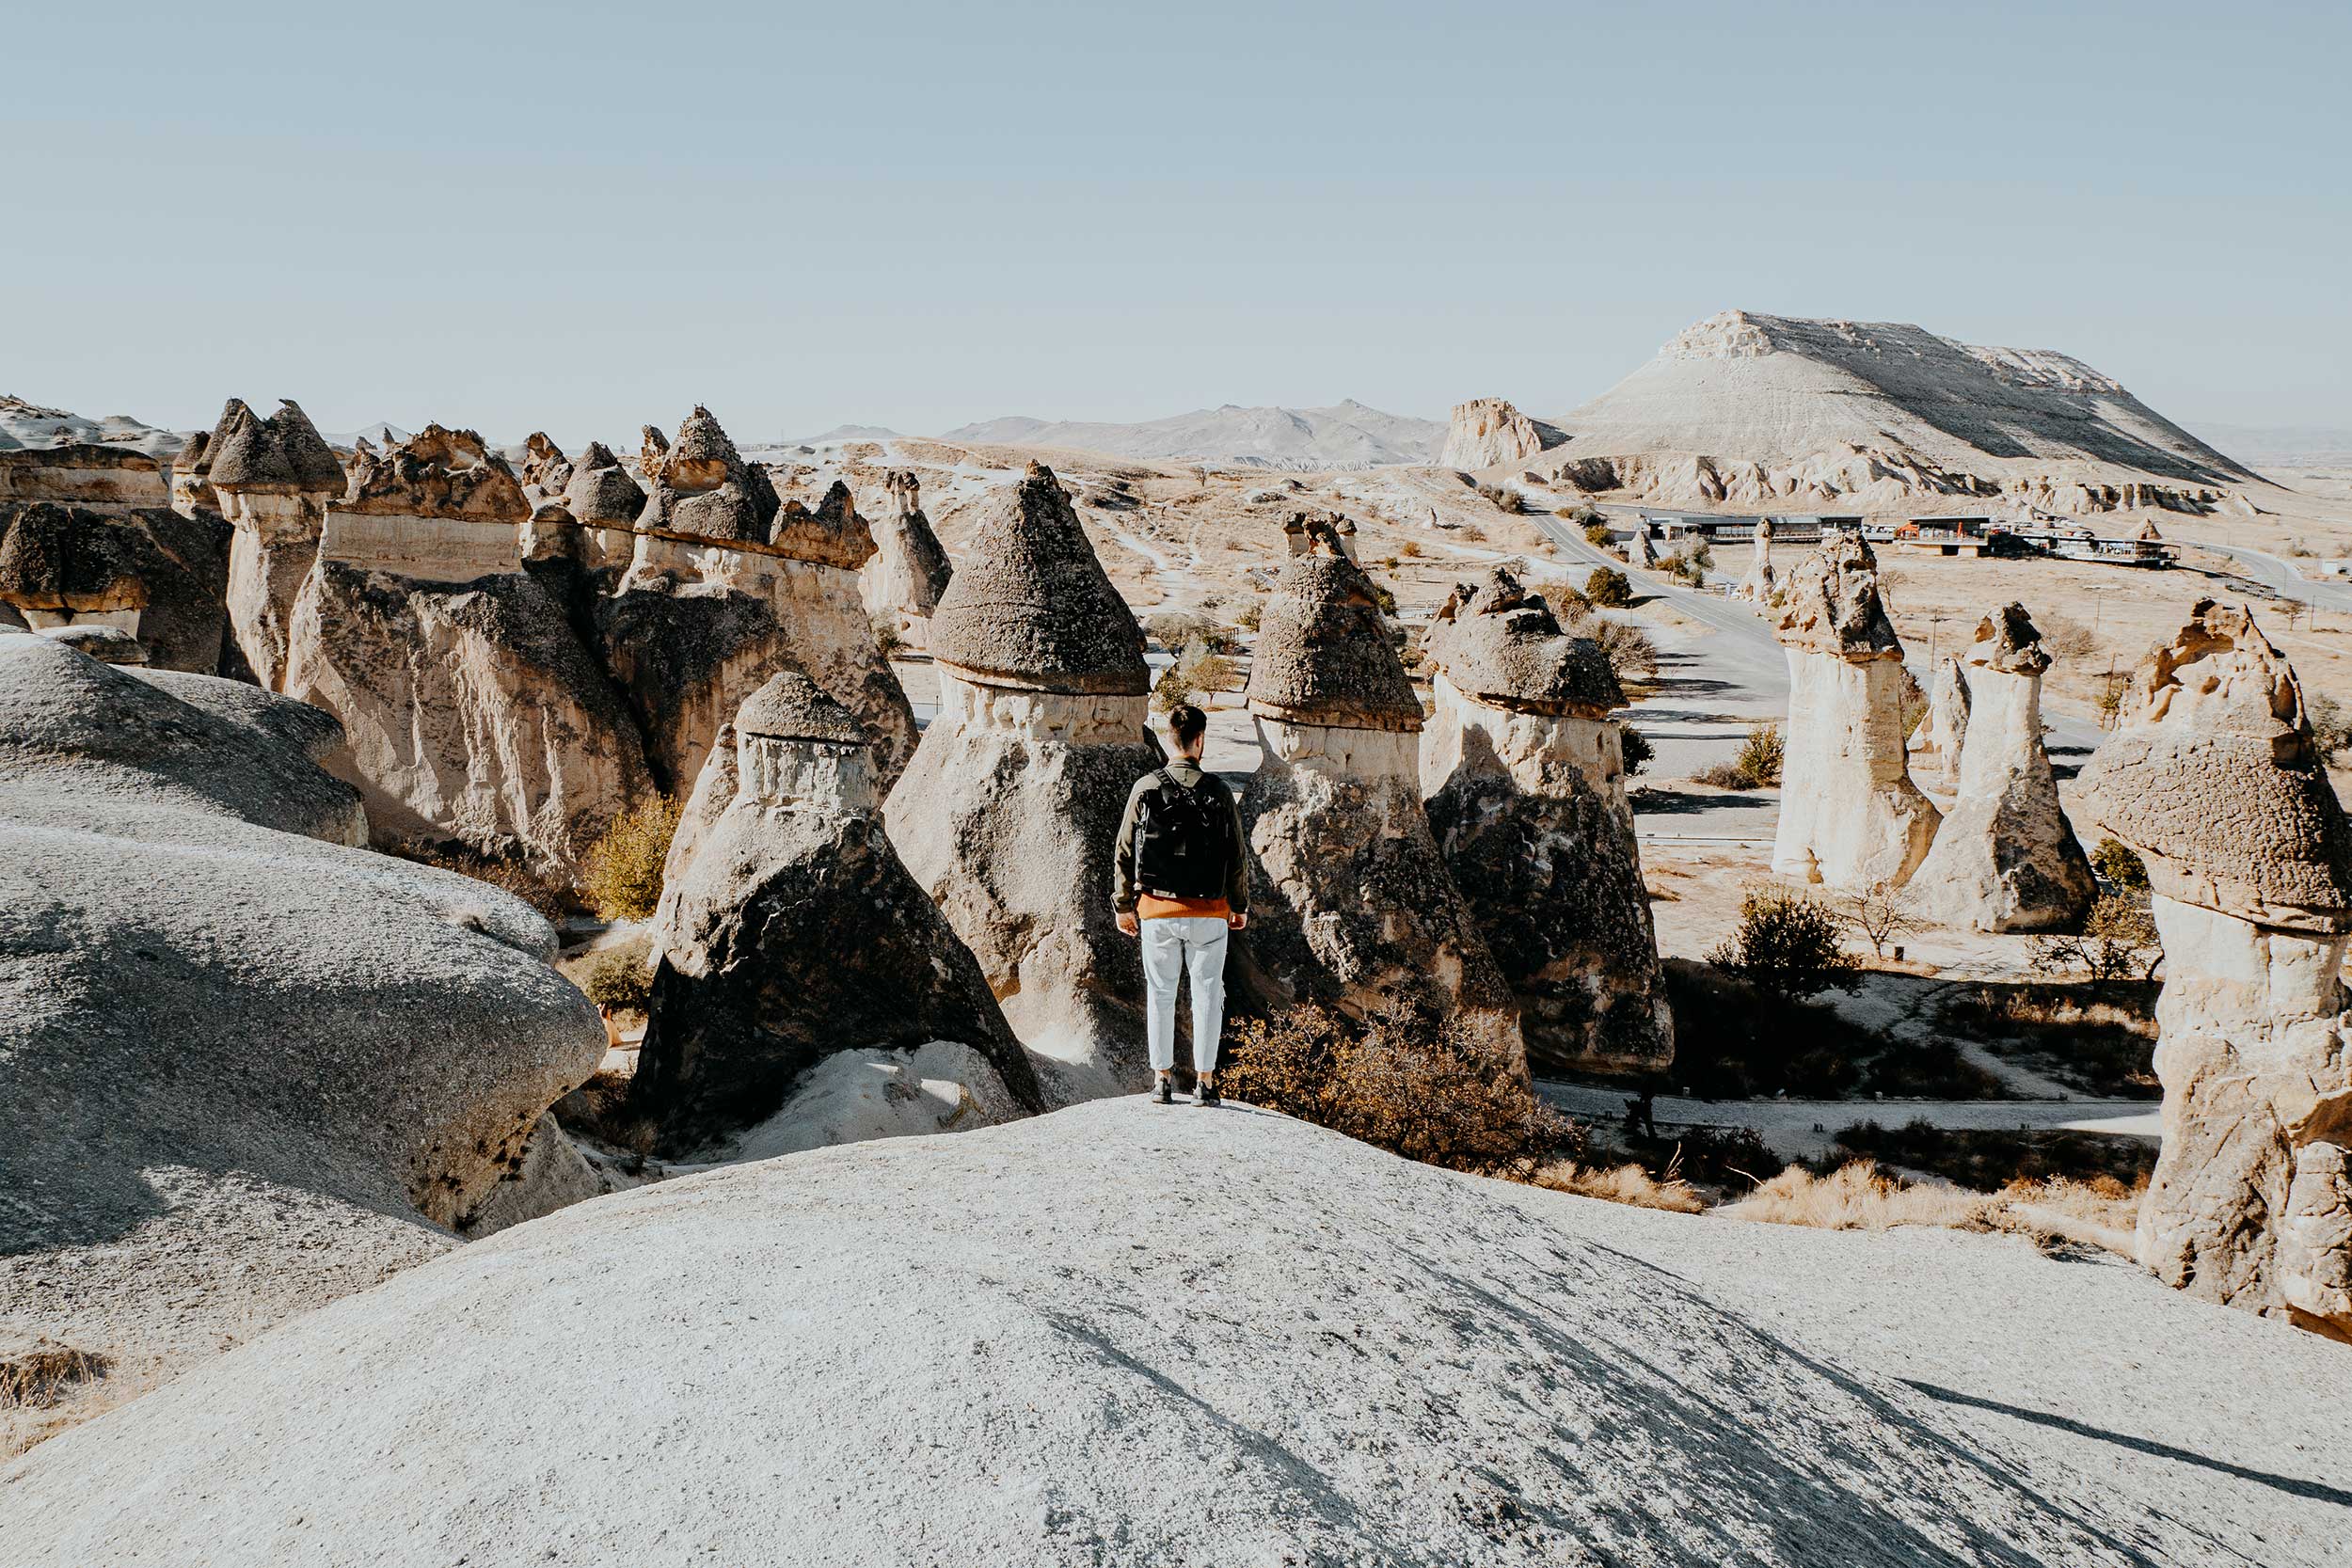
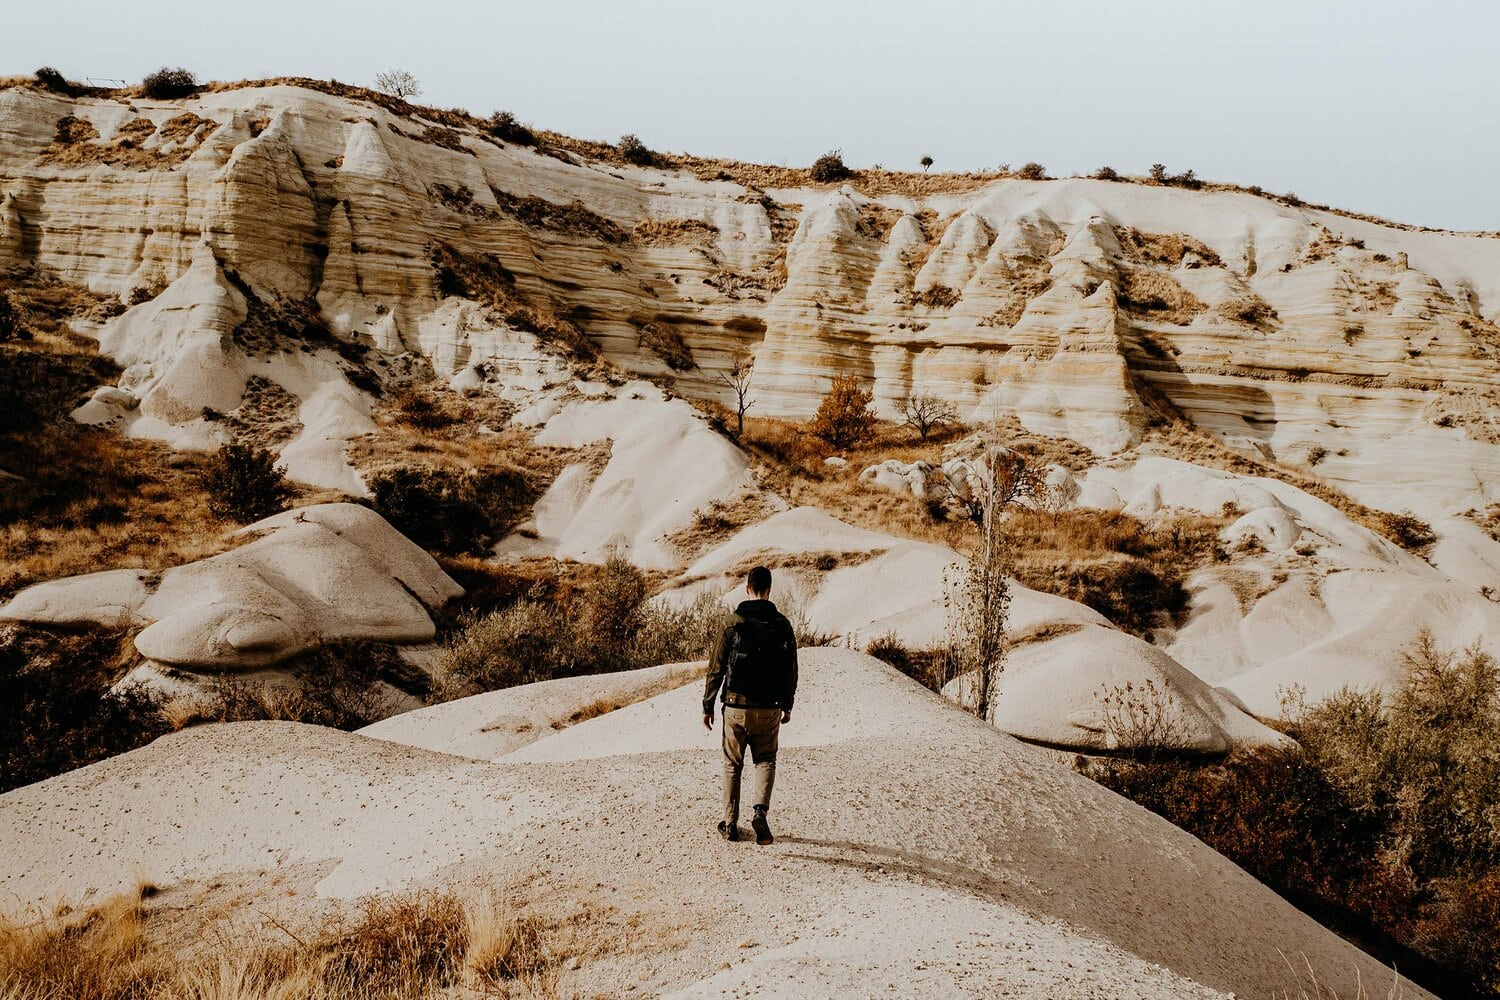
CAPPADOCIA | 13 Wonderful things to do in Cappadocia
CAPPADOCIA HOT AIR BALLOON FLIGHT | A guide to a hot air balloon flight in Cappadocia
RED & ROSE VALLEY IN CAPPADOCIA | A hiking guide to Red and Rose Valley
LOVE VALLEY IN CAPPADOCIA | A complete guide to Love Valley in Cappadocia
ANTALYA | 7 Wonderful things to do in Antalya
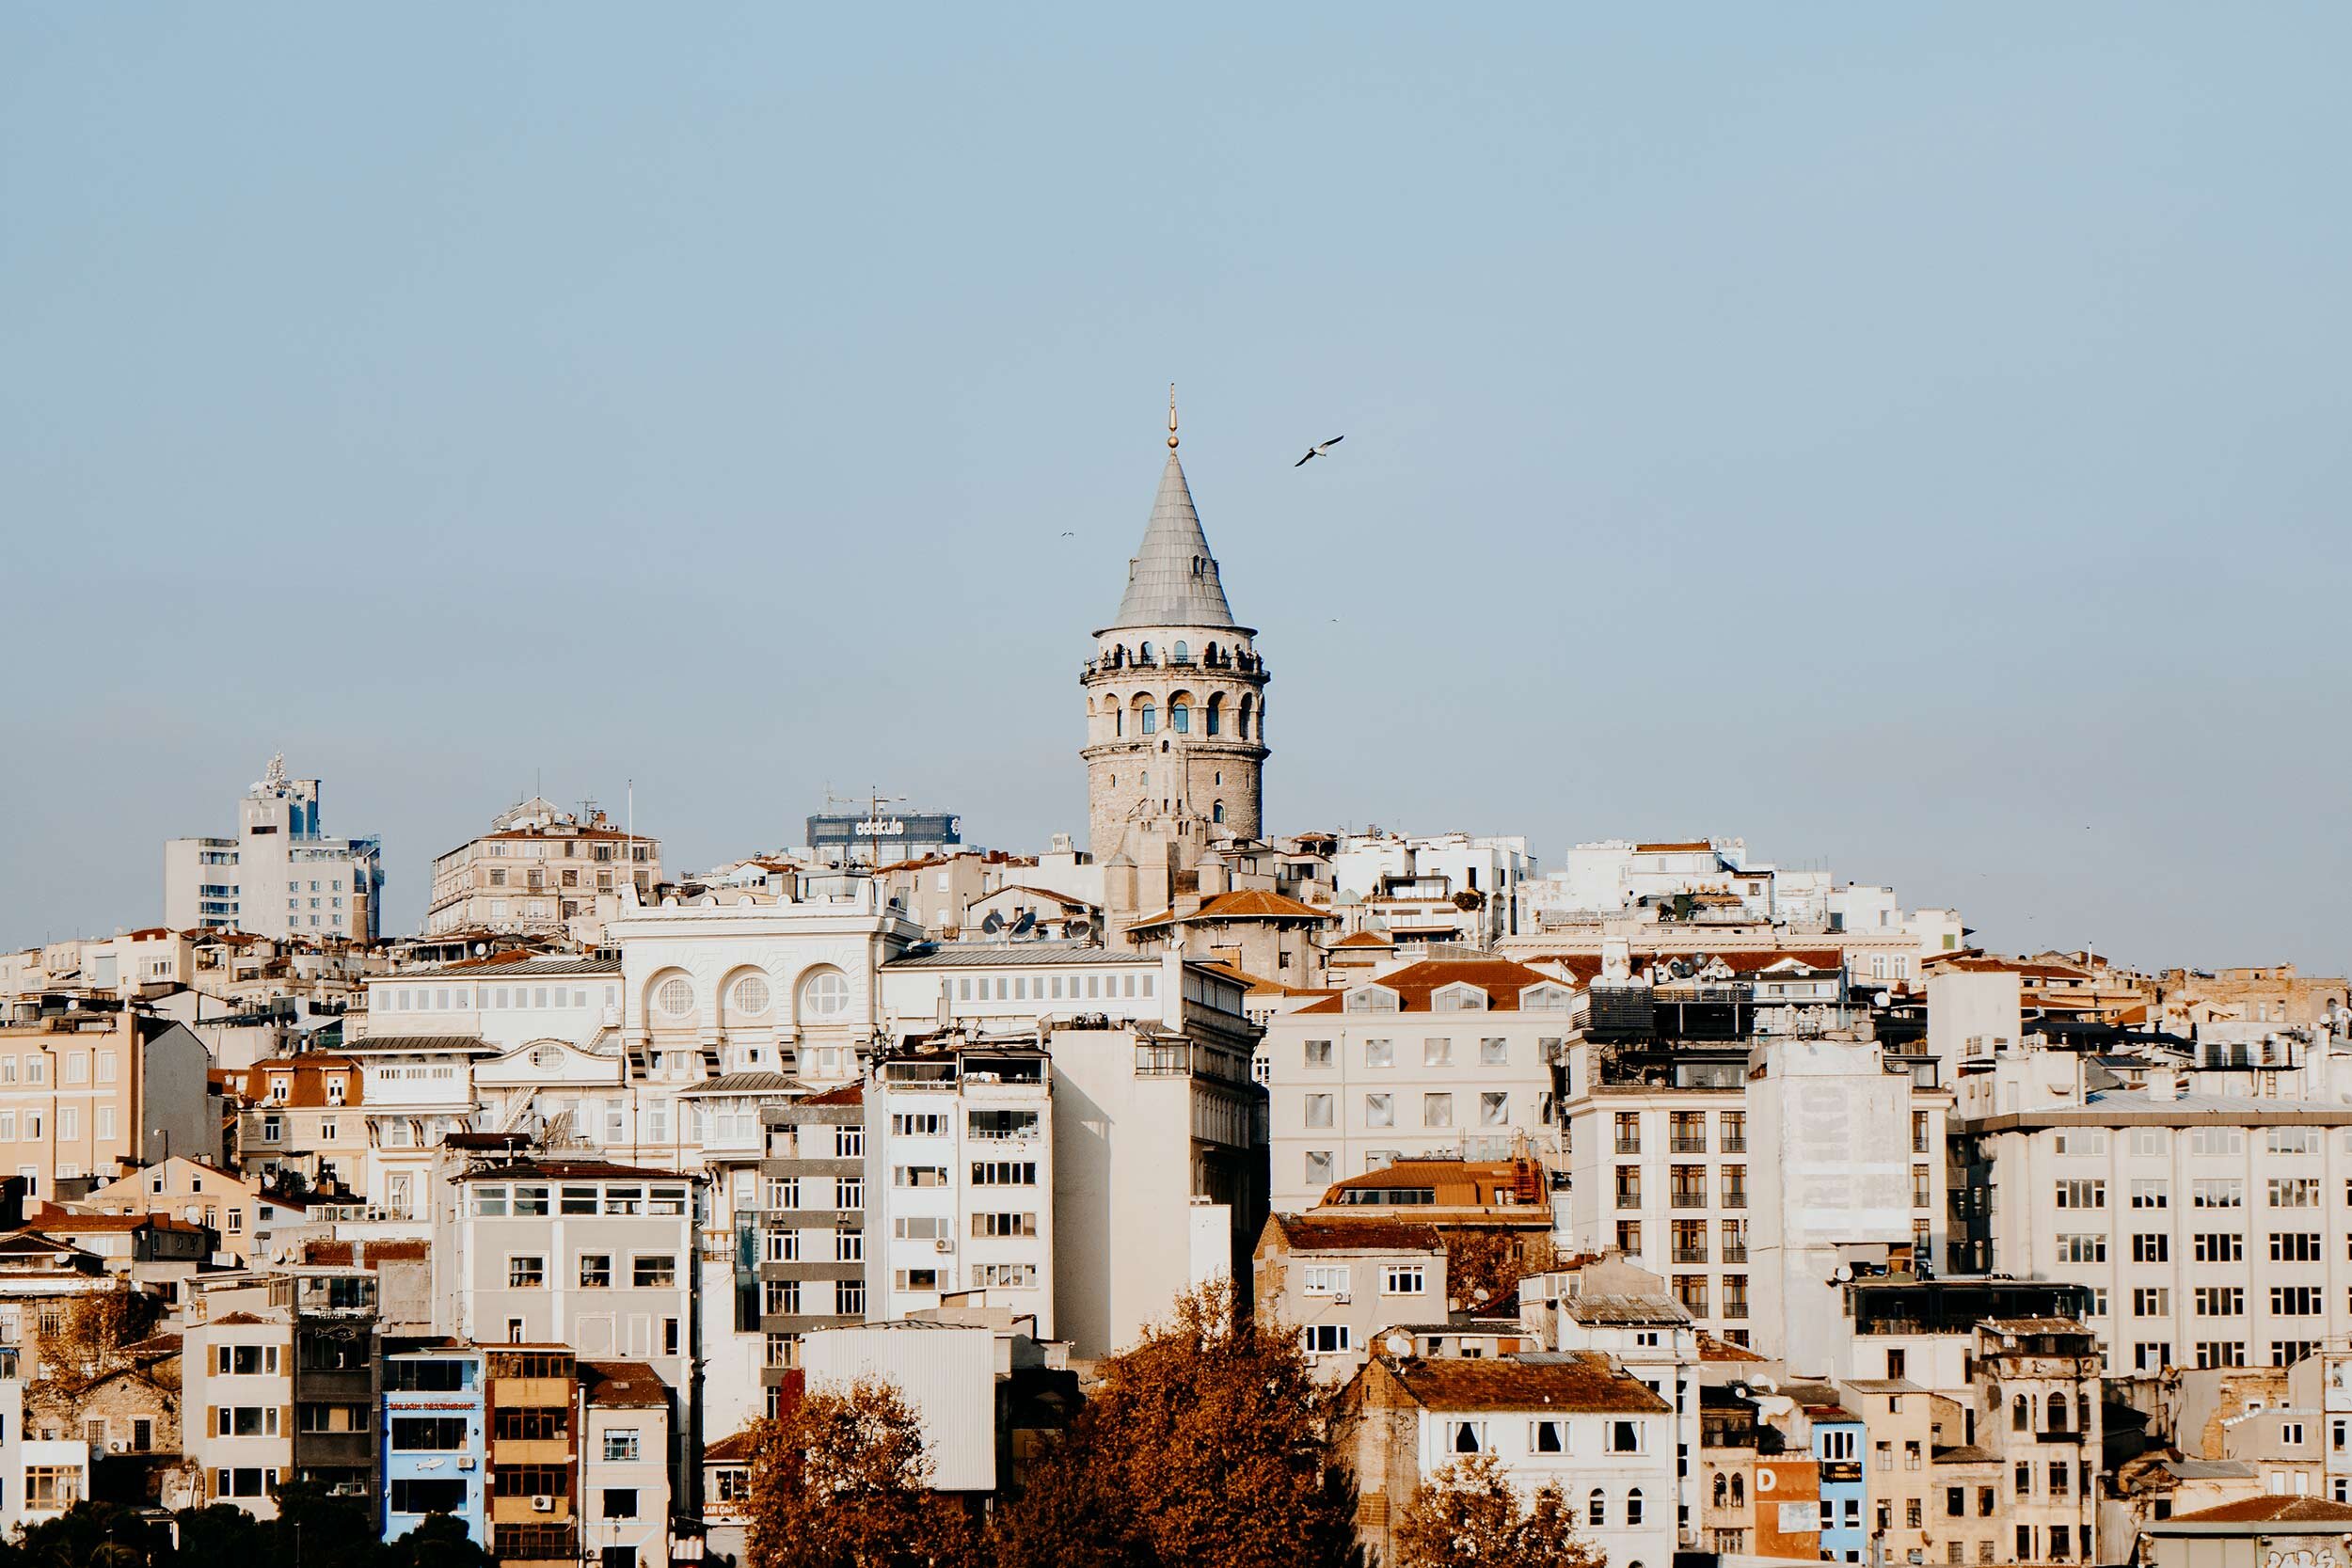
ISTANBUL | 13 Awesome things to do in Istanbul
PLAN YOUR TURKEY ITINERARY WITH THESE ESSENTIAL GUIDES
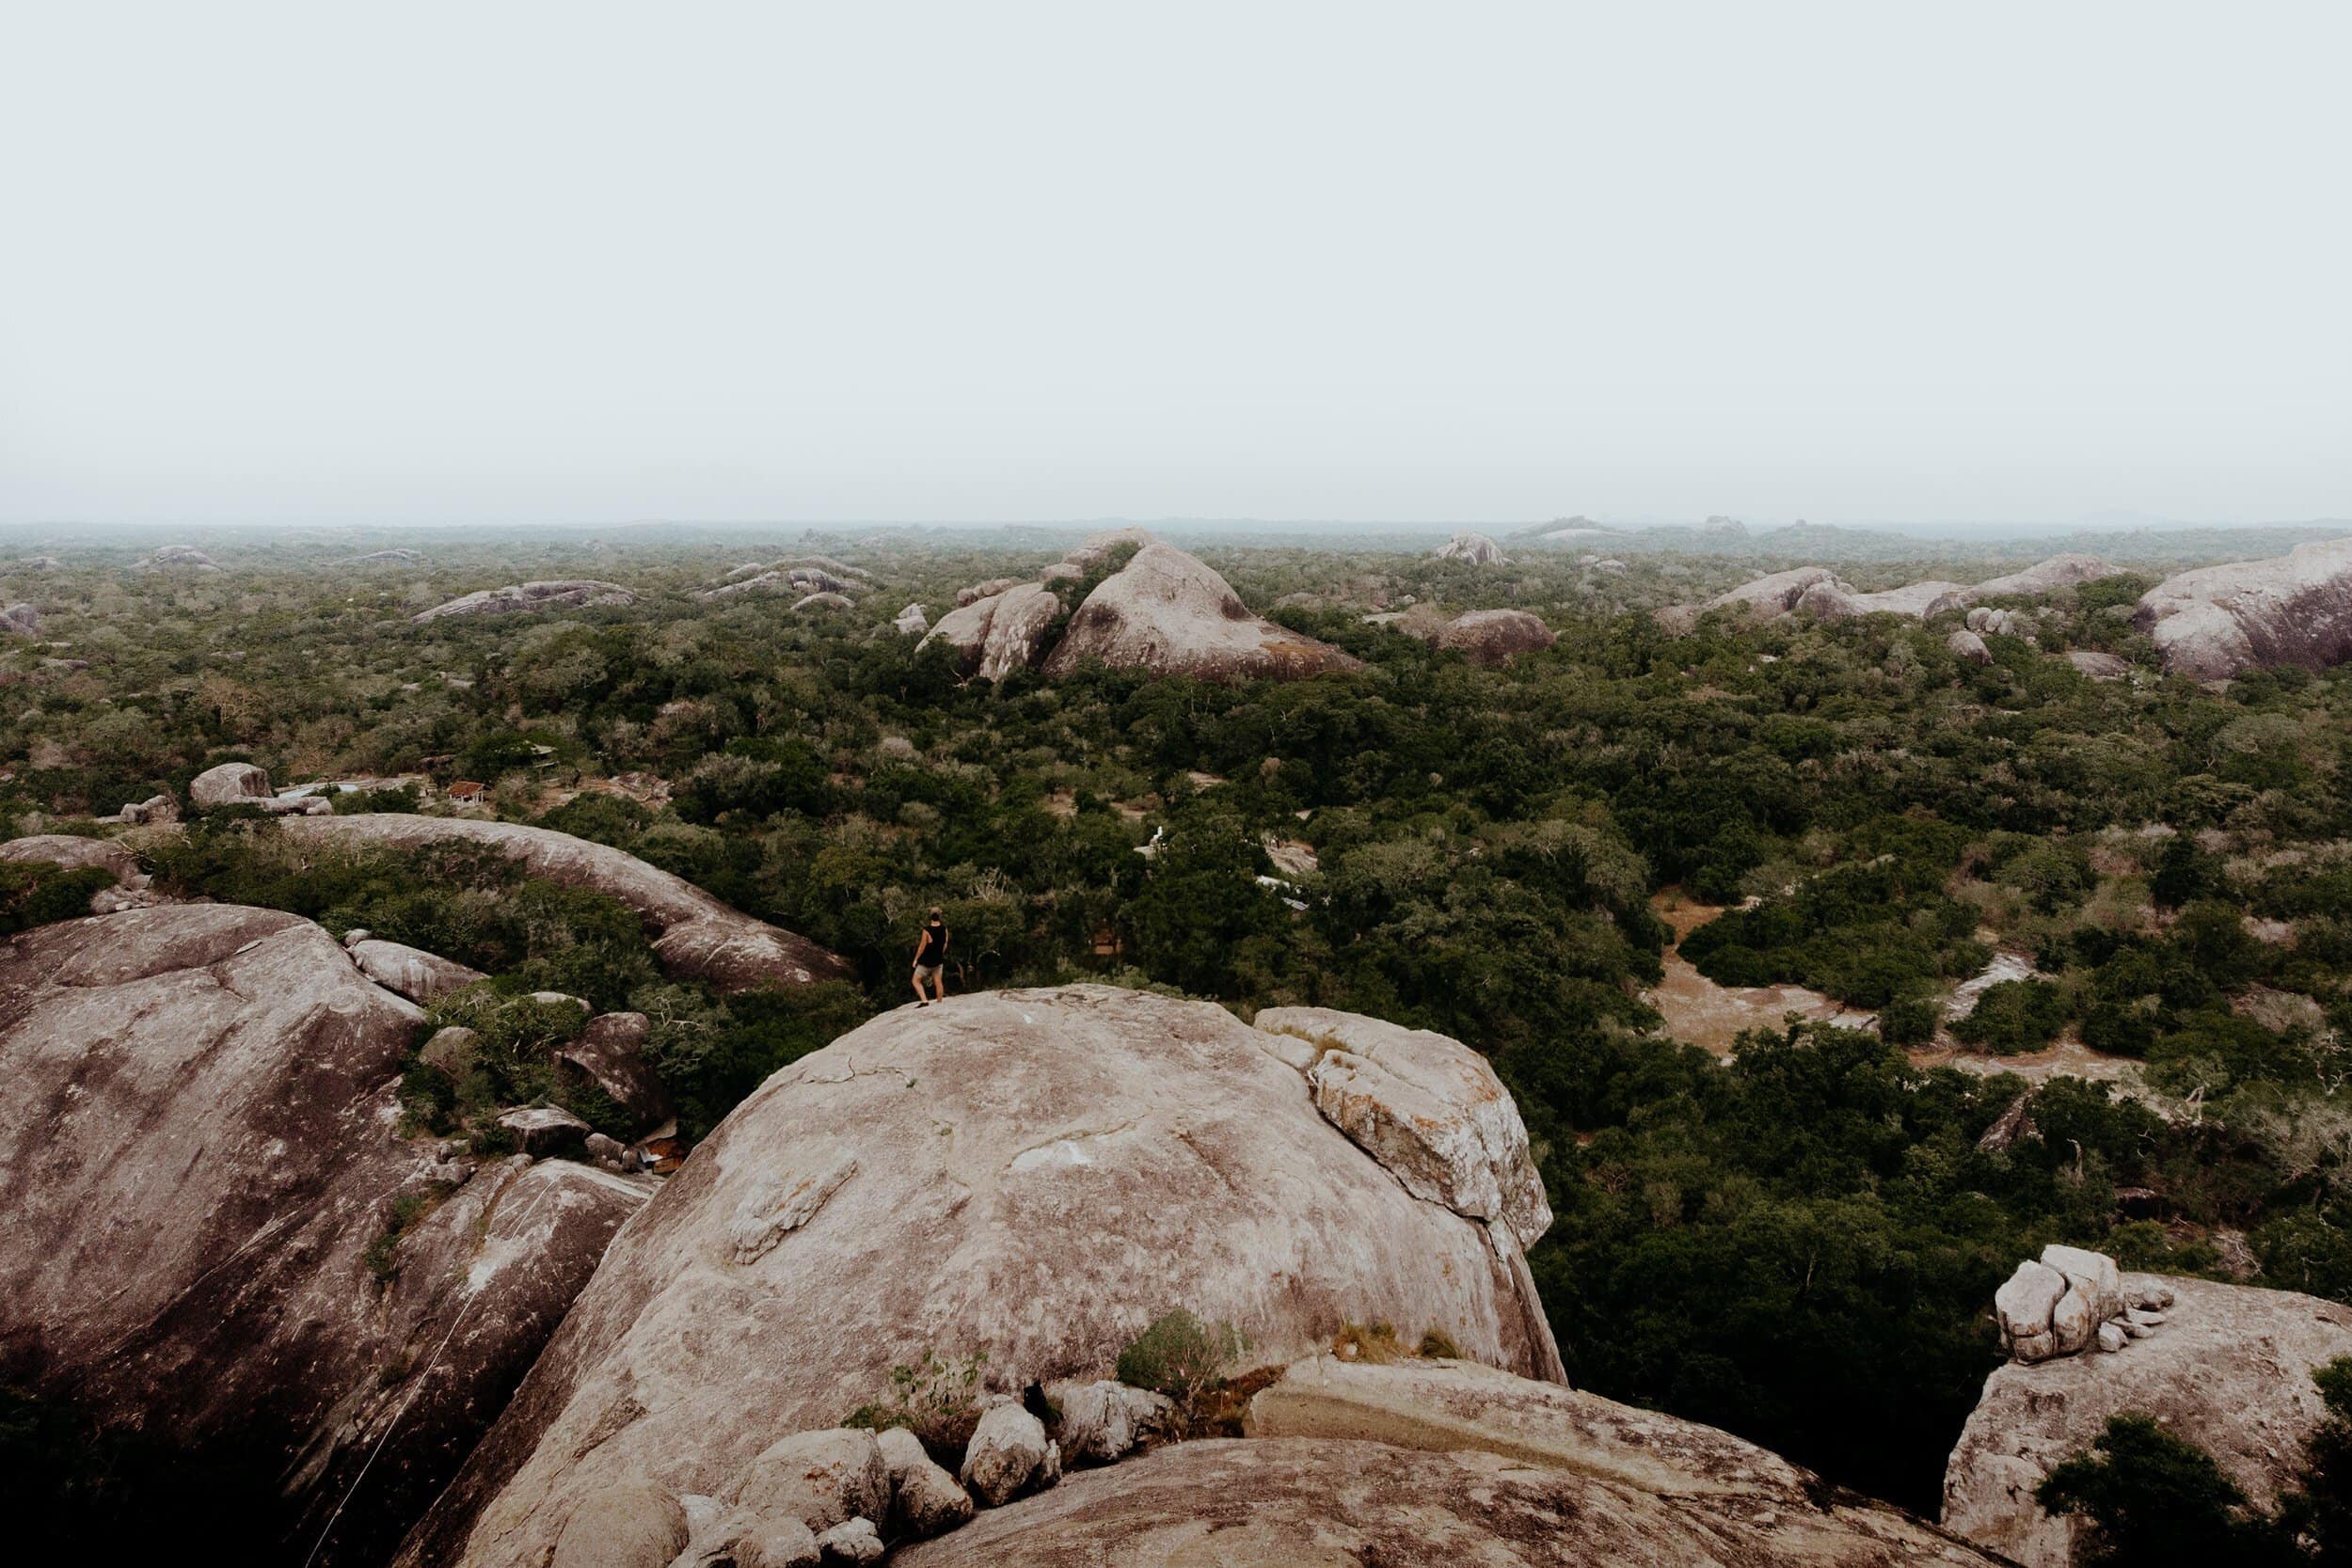
The ultimate 3-week Sri Lanka itinerary | The best of Sri Lanka
Uncover the absolute best of Sri Lanka with this detailed 3-week itinerary. This itinerary covers all the best things to see and do – including the best beaches & surf breaks, must-see attractions, and impressive ancient World Heritage Sites.
You’ll be hard-pressed to find an island that amazes travellers as much as Sri Lanka.
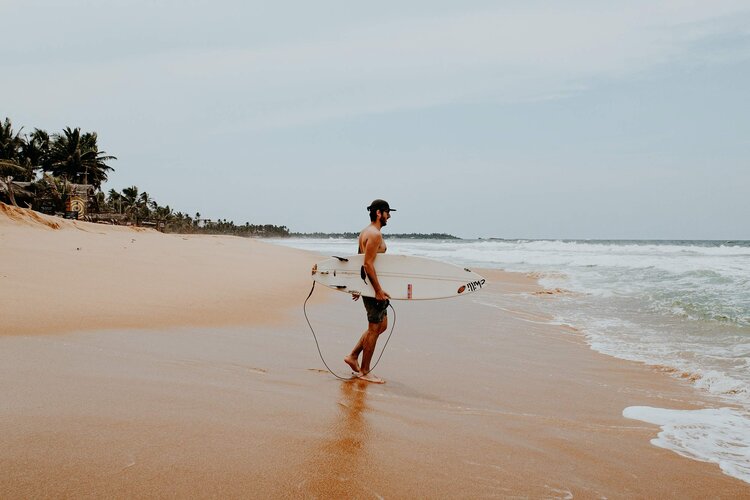
Sri Lanka’s natural beauty is unrivalled – from the beloved gold-sanded beaches on the southern coast to mysterious mountain towns in the idyllic hill country to the dense, wildlife-rich jungles of Yala National Park.
There is simply a myriad of reasons to travel to Sri Lanka, and the world’s most scenic train ride is absolutely one of them. Not to mention that Sri Lanka occupies some of the most vibrant cultural heritage sites, including a colonial seaside fortress, lush tea plantations, and multiple ancient cities which include Kandy, Polonnaruwa and Sigiriya.
You could easily say that Sri Lanka’s unique experiences and breathtaking landscapes go hand in hand, and it’s my intention to help you plan, and make the most out of your journey. I’ve put together the best possible itinerary to spend 3 weeks in Sri Lanka.
My 3-week Sri Lanka itinerary is a detailed introduction and covers all the best things to see and do – plus additional guides that help you throughout your trip. Now the only thing left for you to do, is soaking up beautiful Sri Lanka and its magical experiences.
If you choose to use any of the links on this page, I may receive a small commission at no extra cost to you. By using these links, you’ll have a direct impact on WTSW and my ability to continue to create free insightful travel content for you. If you find any of my tips useful, you can support me by buying a virtual coffee here.
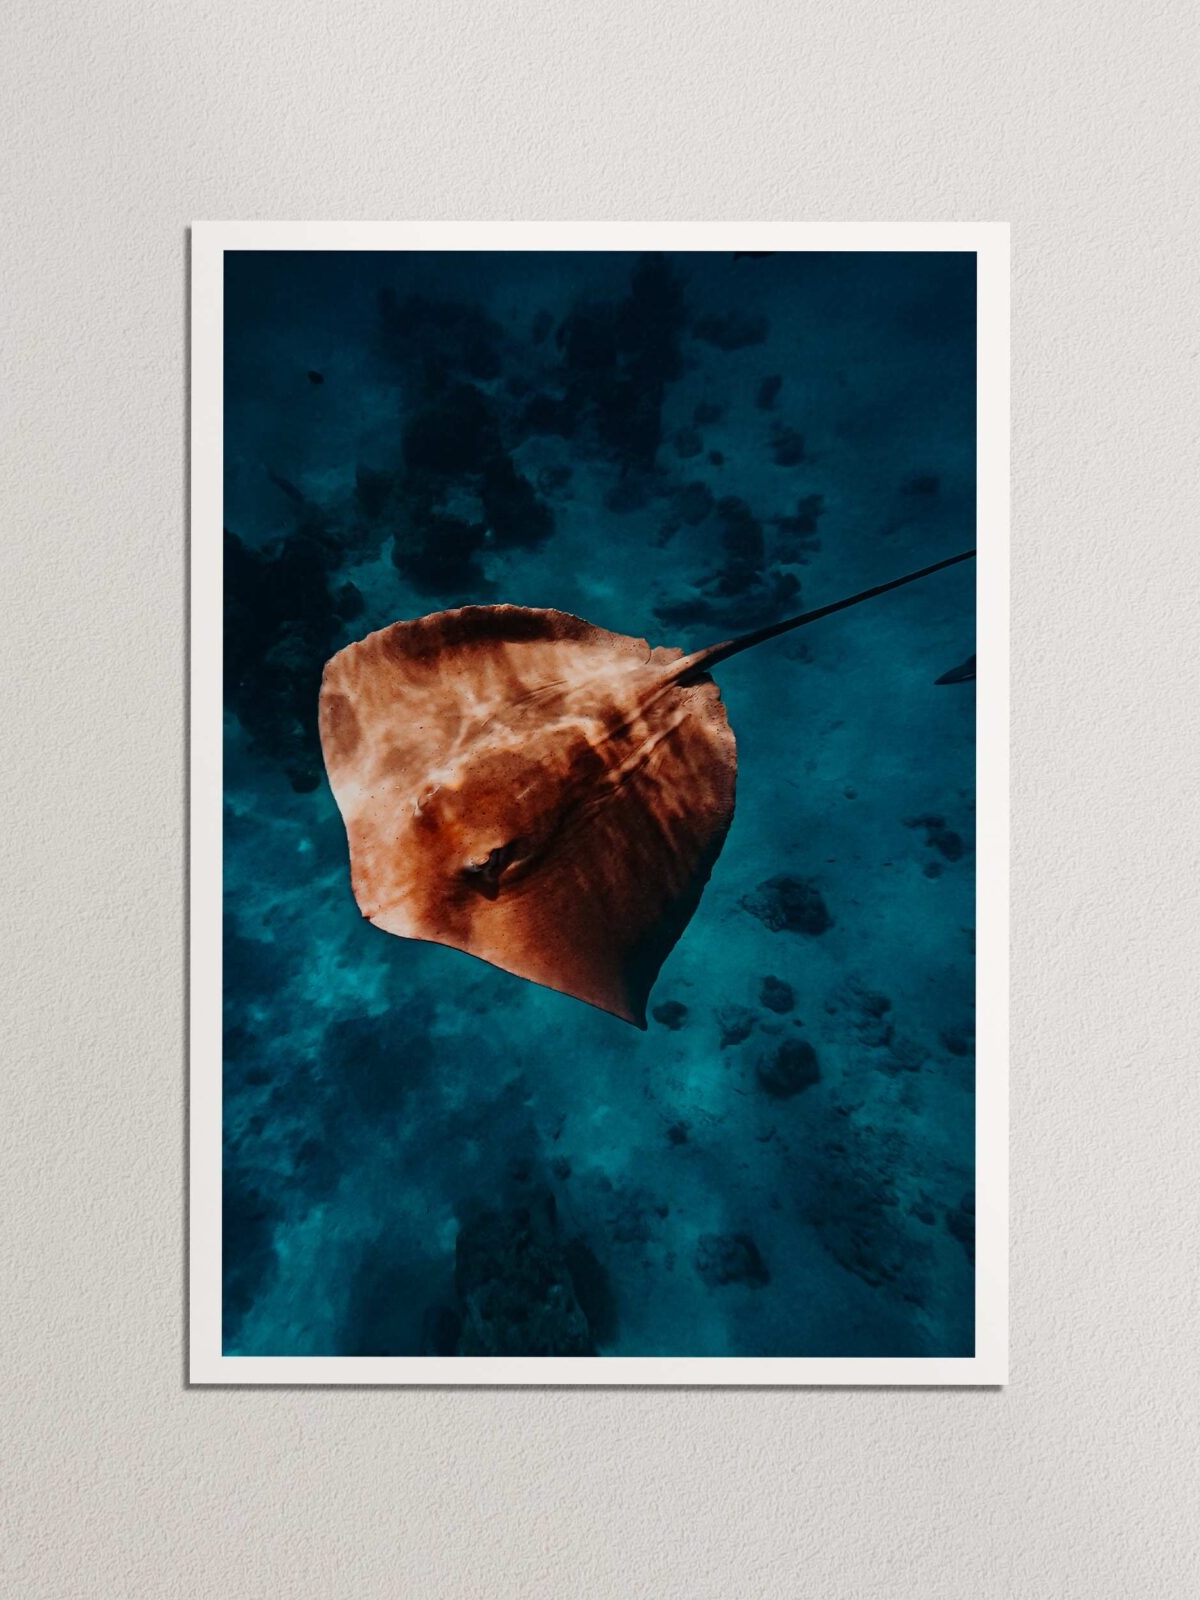
The New Where the Souls Wander Print Store
After putting out my first-ever print collection in 2022, I decided it was finally time to re-open my print store, and I couldn’t be happier with the result.
Whether you’re looking to grab a unique piece for your own wall, gift one to a loved one to remind them of a memorable trip together, or simply get your hands on a piece because it provokes a specific memory or feeling, I’d be honoured and grateful if you decide to collect or gift one of my prints.
To celebrate the launch, I’m offering a 20% discount until the 24th of December.


My 3-week Sri Lanka itinerary | Daily Overview
Day 1 | Colombo, Sri Lanka’s somewhat chaotic capital
Sri Lanka’s vibrant capital makes an excellent first destination in your Sri Lanka itinerary, especially if you look at the fact that it is located just 45 minutes from the Bandaranaike International Airport.
With nearly 620,000 inhabitants, Colombo is considered Sri Lanka’s biggest city. Unfortunately, this comes with the side note that the city is rather intoxicating, and often too overwhelming to fully enjoy.
Although Colombo isn’t the most captivating city in terms of must-see attractions, I think you shouldn’t just skip over it. I would recommend spending at least one day here to experience the hustle and bustle of Sri Lankan everyday life.
COLOMBO | MUST-SEE ATTRACTIONS
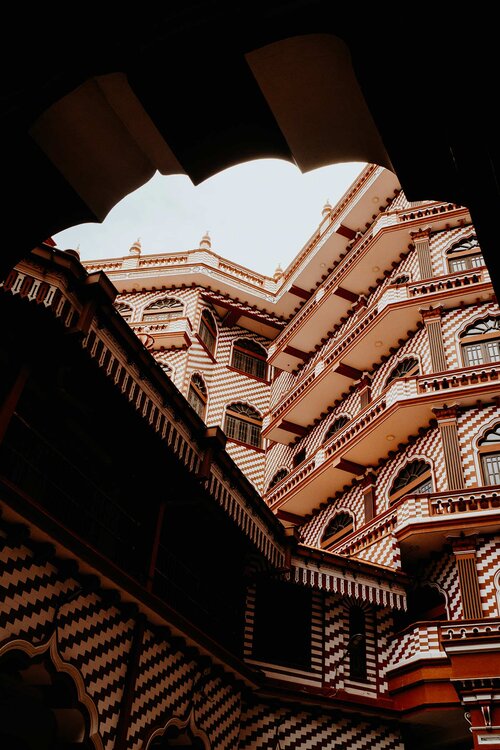
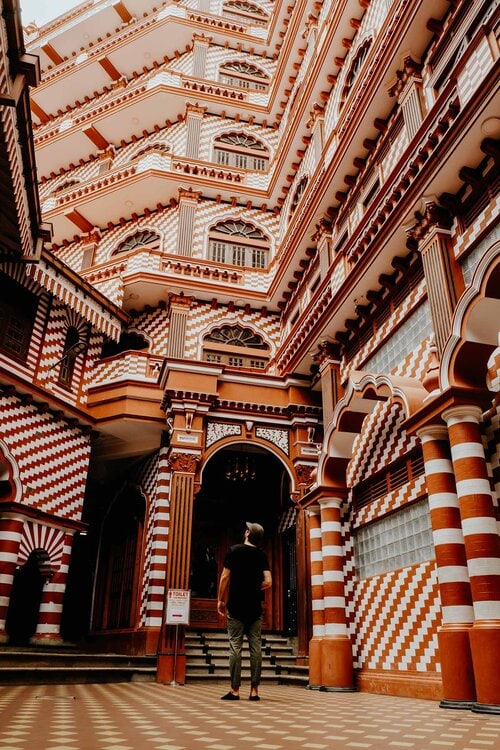
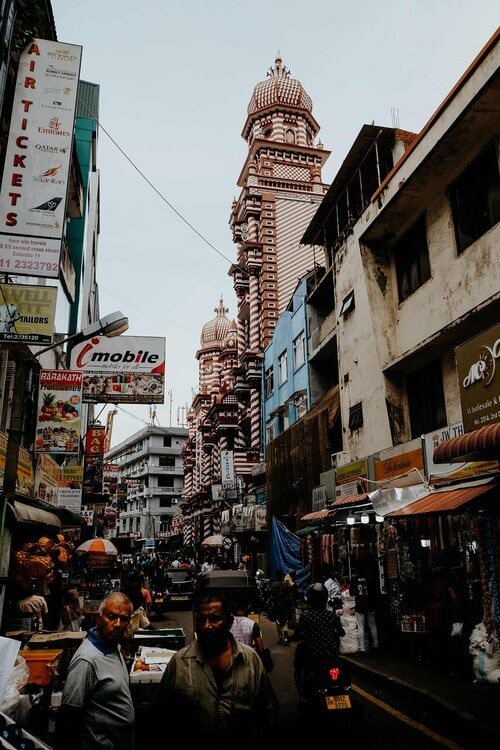
The Red Mosque (Jami Ul-Alfar Mosque) | Located in the narrow streets of Pettah, Jami Ul-Alfar Mosque is one of the few must-see attractions in Colombo. The mesmerising mosque is charmed by a distinct colour pattern, towering minarets, and ornate domes that can be seen from quite a distance. It’s utterly breathtaking to see the towering mosque appear while strolling through the lively streets of Pettah.
Barefoot | Barefoot is an iconic shop, gallery, bookshop, and courtyard café in the heart of Colombo’s spirited fort area. The vibrant café is tucked away in a garden of calm and serves a wide variety of delicious dishes, while the shop sells traditional artisan crafts like fabrics, linen, clothes and gifts. Barefoot also houses a unique bookstore that offers a great selection of books on art, architecture, photography and spirituality.
The streets of Pettah | Pettah is considered one of the oldest districts in Colombo and a stroll through its narrow streets is quite the experience. The Pettah market is an excellent area to get a feel for the country and its people. While you’re there, make sure to grab a bite at one of the many street food stalls. Bear in mind that these streets are very chaotic and overwhelming, therefore it is best to give in, and go with the flow.
COLOMBO | THE ESSENTIALS
Where | Colombo
Where to stay in Colombo | I recommend Lavonca Boutique Hotel, a small, comfortable hotel in the heart of Colombo. Alternatively, use booking.com to find accommodations in Colombo.
How to get around Colombo | Colombo is quite an extensive city and somewhat challenging to navigate by foot. The easiest way to get around is by making use of the famous tuk-tuks, which are found at about every corner. To avoid unnecessary costs, use the PickMe app, or arrange a price with your tuk-tuk driver in advance.
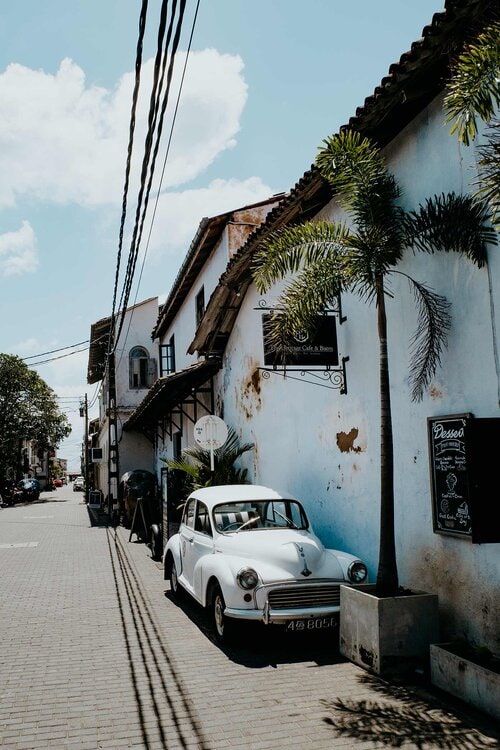
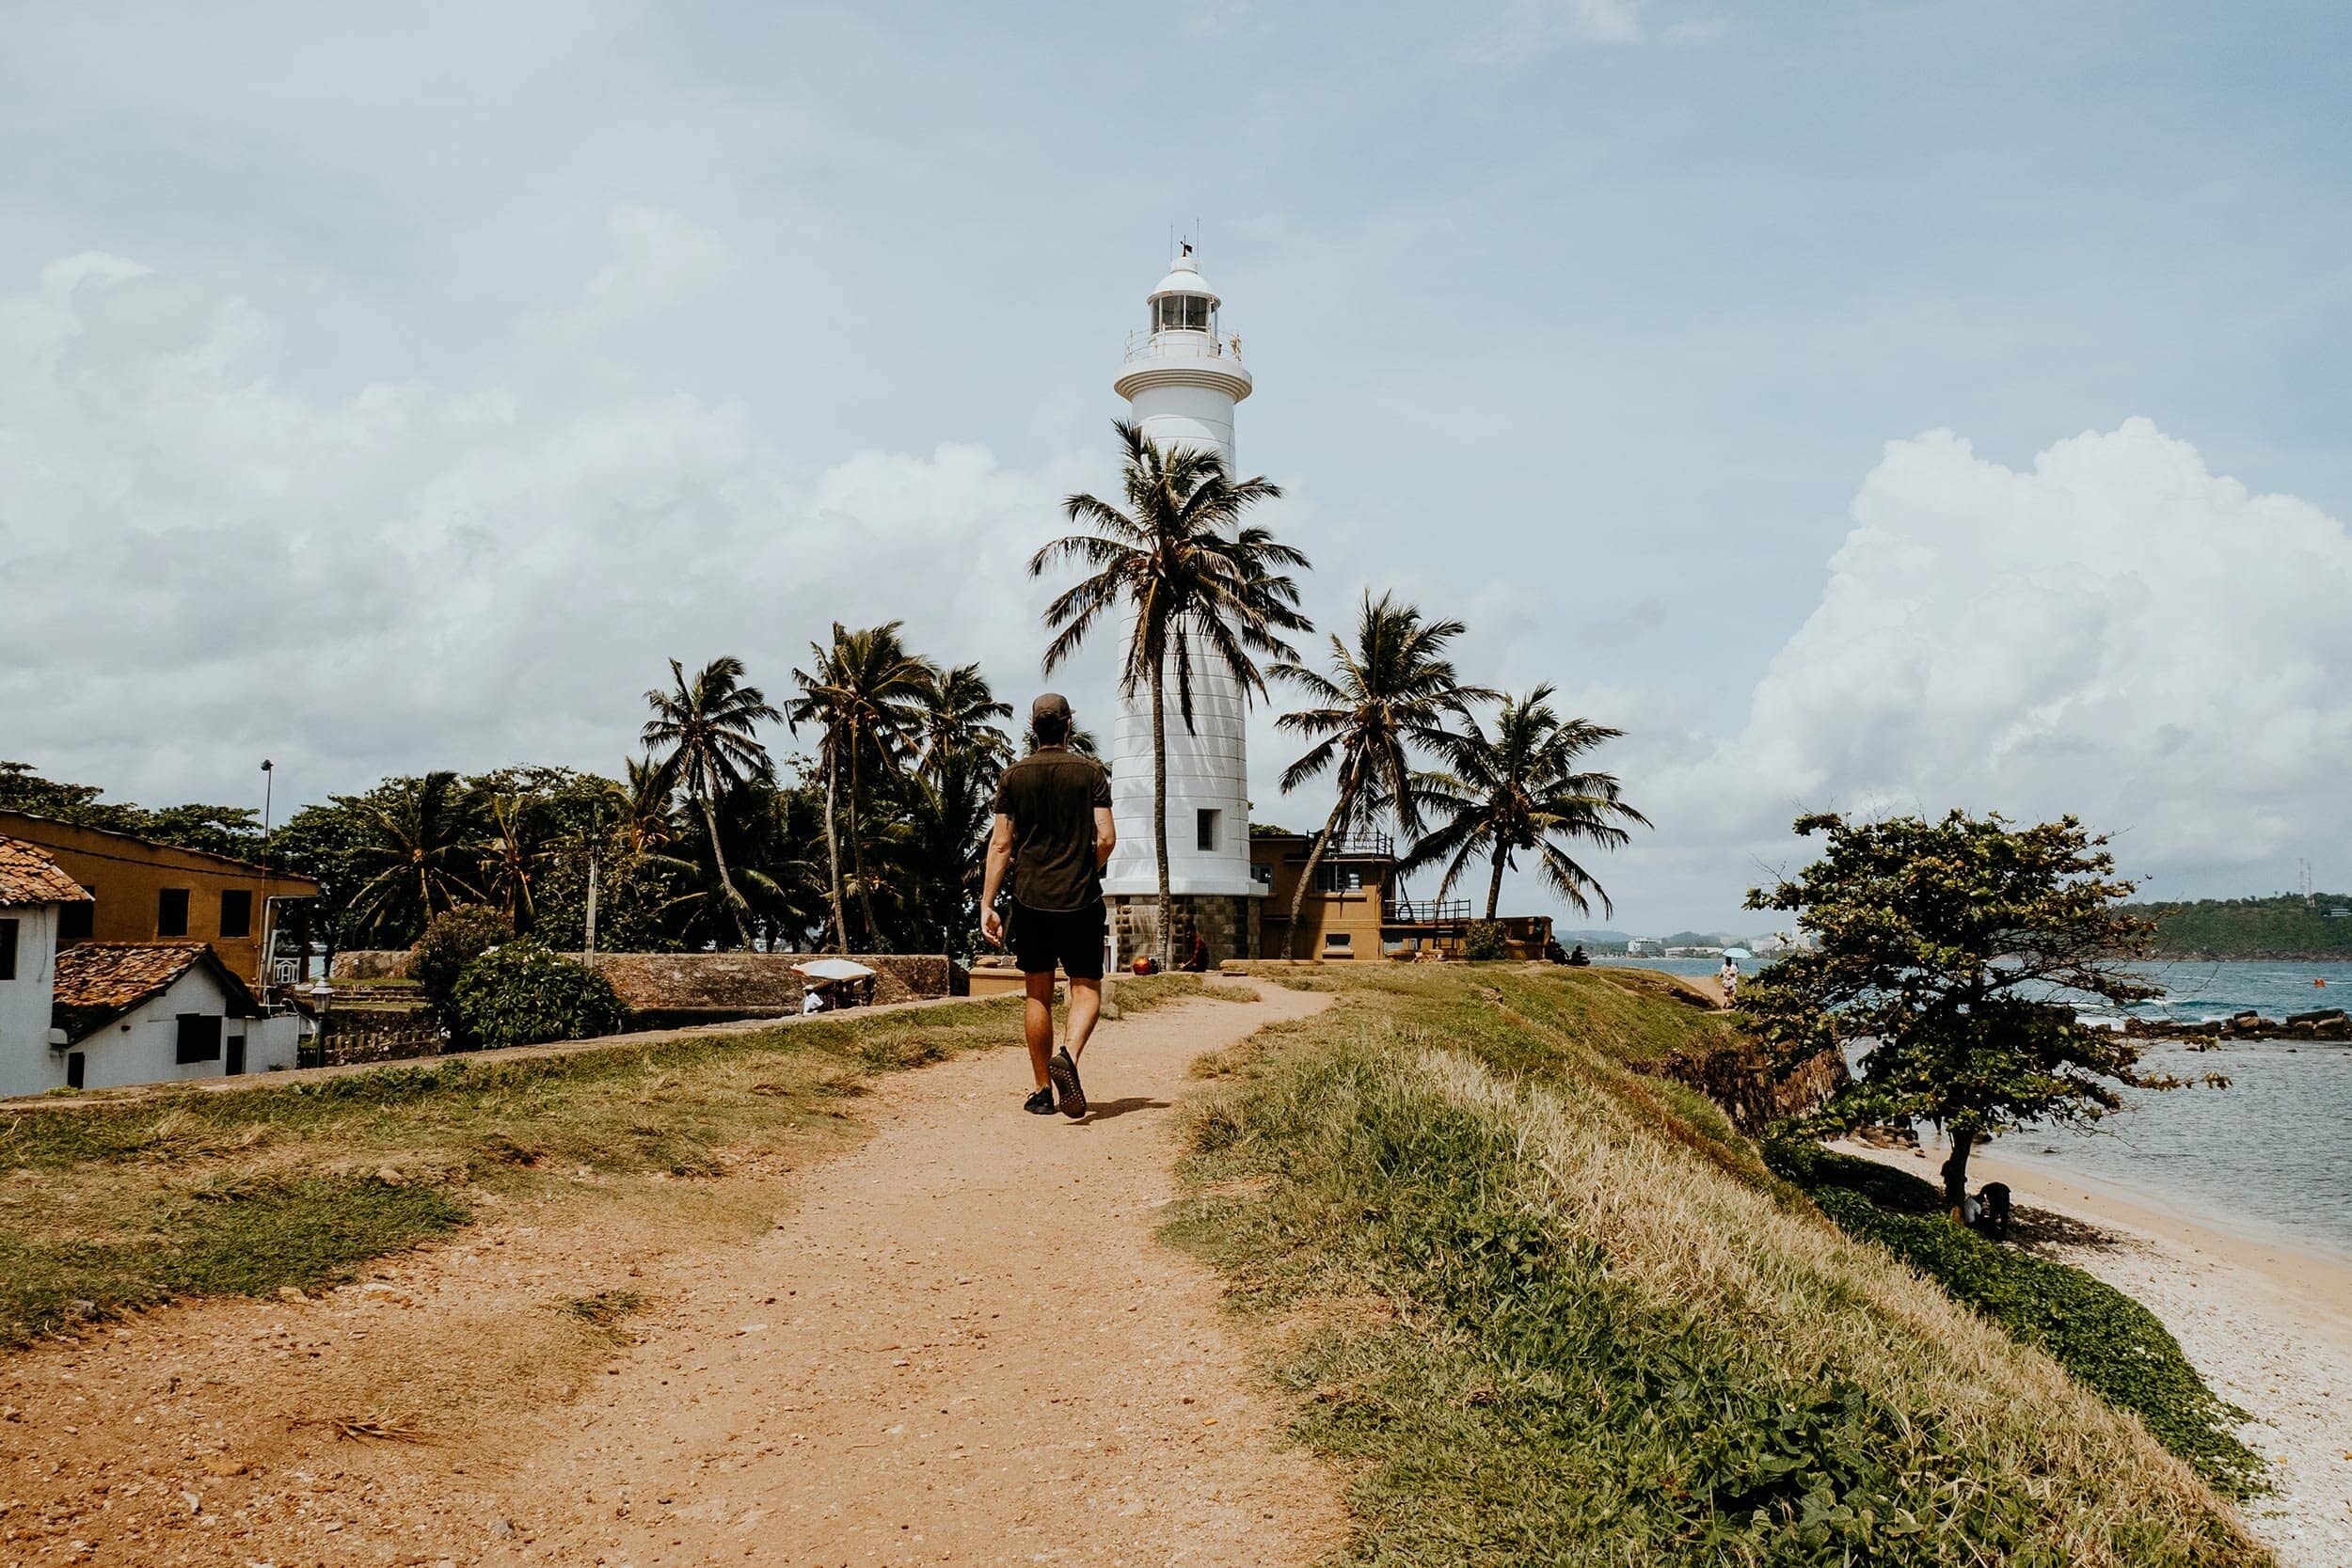
Day 2 – 3 | Galle Fort, a colonial seaside fortress
After experiencing the hustle and bustle in Colombo, it’s time to embark on a scenic train journey in the direction of Sri Lanka’s spirited south coast.
During this 3-hour journey from Colombo Fort to Galle, you’ll get spoiled by views of vivid sceneries, as well as authentic local villages and the island’s golden-sanded coastline.
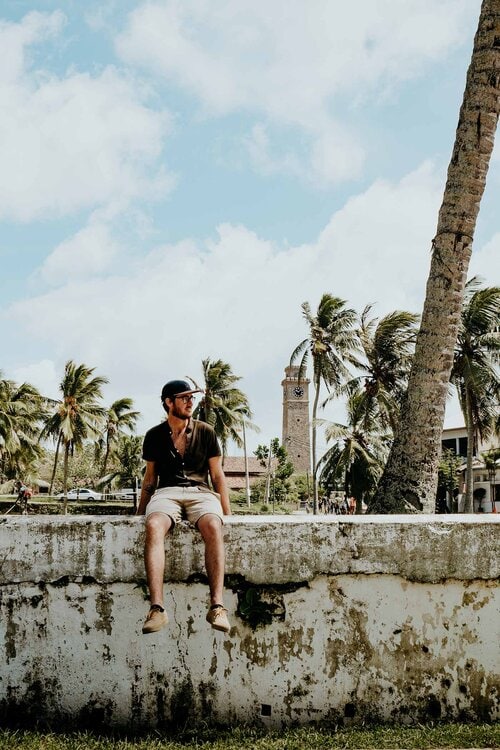
Once you arrive in Galle, you’ll quickly come to realize why it is such a beloved destination. The seaside town was once of significant importance and is still largely visited for its historical Galle Fort, a UNESCO World Heritage site that continues to amaze travellers.
The Dutch Colonial fort in Galle has a rich and captivating character. With lively, narrow streets, decaying colonial buildings, trendy contemporary cafés, and an appealing, tropical ambience, Galle Fort is, in my opinion, a must-see in any Sri Lanka itinerary.
GALLE FORT | MUST-SEE ATTRACTIONS
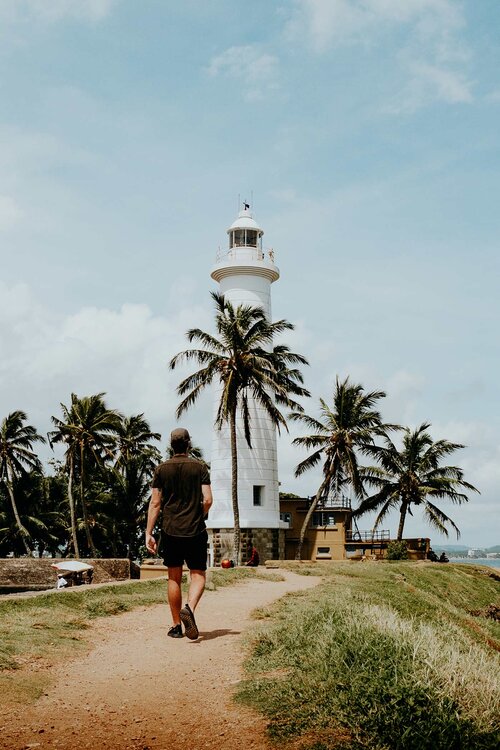
Galle Fort Lighthouse | The Galle Fort Lighthouse is framed by tropical palm trees and is one of the many picture-perfect scenes in Sri Lanka. For that reason alone, it’s one of the things that shouldn’t be missed within the ramparts of the historical Galle Fort.
The Galle Markets | Just outside Galle Fort, you’ll notice several authentic markets that sell a wide variety of fruit, fish and spices. By visiting these local markets you have an excellent chance to taste delicious tropical fruits, and stock up on high-quality spices – plus you become familiar with Sri Lankan culture.
Galle Fort interior | Taking a stroll through the narrow, colonial streets of the fort was by far one of the best things I did during my time in the Galle Fort. By doing so, you come across a collection of decaying colonial buildings, which makes it seem as if you’re living during the VOC era.
GALLE FORT | THE ESSENTIALS
Where | Galle Fort, Galle
Where to stay in Galle Fort | Galle has no shortage of good accommodations, both in and outside the fort. I would highly recommend The Heritage Hotel Galle Fort and 50 CHURCH STREET – GALLE FORT. Alternatively, use booking.com to find accommodations in Galle.
How to get from Colombo to Galle Fort | The easiest and most scenic travel option is from Colombo Fort to Galle by train. The direct train operates frequently (about 10 times a day) and takes around 2.5 – 3 hours.
How to get around Galle Fort | Galle Fort is easily explored by foot. If your accommodation is slightly remote, make use of the accessible tuk-tuks.
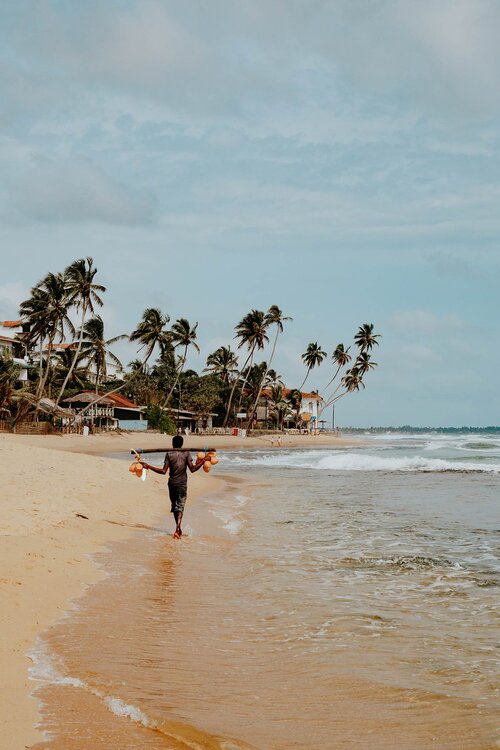
Day 4 – 5 | Unawatuna, Sri Lanka’s backpacker beach town
Situated at only a 10-minute drive from Galle lies Unawatuna, one of Sri Lanka’s most popular coastal towns and the first proper beach destination in this itinerary.
Unawatuna has rapidly become a fixture for travellers who visit Sri Lanka and trust me, that’s for a good reason. The trendy beach town is home to a laidback backpacker vibe and has no shortage of palm-fringed beaches, contemporary cafés, and irresistible beachfront restaurants.
Accordingly, I would recommend spending a few nights here, it has some of the island’s most beautiful beaches after all.
UNAWATUNA | MUST-SEE ATTRACTIONS
Dalawella Beach | Dalawella Beach is an extremely picturesque stretch of beach and without a doubt one of my favourite beaches in Sri Lanka. The charm that defines Dalawella Beach is realized by a scenic rock formation, exciting beach swings and plenty of low-bending palm trees. Make sure you visit early morning or during sunset.
Skinny Tom’s Deli | Only head over to Skinny Tom’s Deli, if you’re keen on tasting the best brunch in town. This European-style café has a great reputation on the southern coast and serves life-changing bacon, dhal & egg hoppers, fresh eggs benedict toast, and delicious artisanal cakes and desserts.
Jungle Beach | Although it’s located slightly off the beaten path, Jungle Beach is an exceptional place for an afternoon of relaxing, swimming and tanning. Make sure you take a look at the Japanese Peace Pagoda, which is situated in the lush jungle right above the secluded beach.
UNAWATUNA | THE ESSENTIALS
Where | Unawatuna
Where to stay in Unawatuna | Unawatuna has great accommodations in every price range and I would highly recommend Levels Unawatuna and Green Escape Unawatuna. Alternatively, use booking.com to find accommodations in Unawatuna.
How to get from Galle Fort to Unawatuna | Take a 10-minute drive by local bus from Galle Fort to Unawatuna. Alternatively, take a tuk-tuk.
How to get around Unawatuna | Unawatuna is easily navigated by foot. If you’re keen to explore the surrounding towns, make use of the affordable tuk-tuks, or rent a scooter.

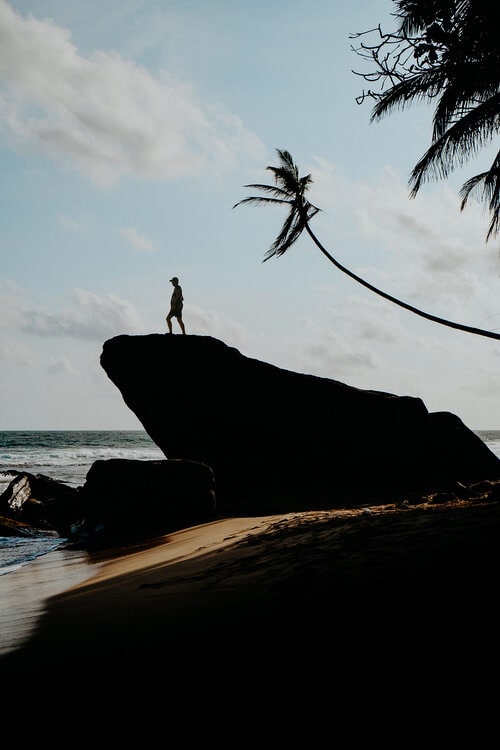
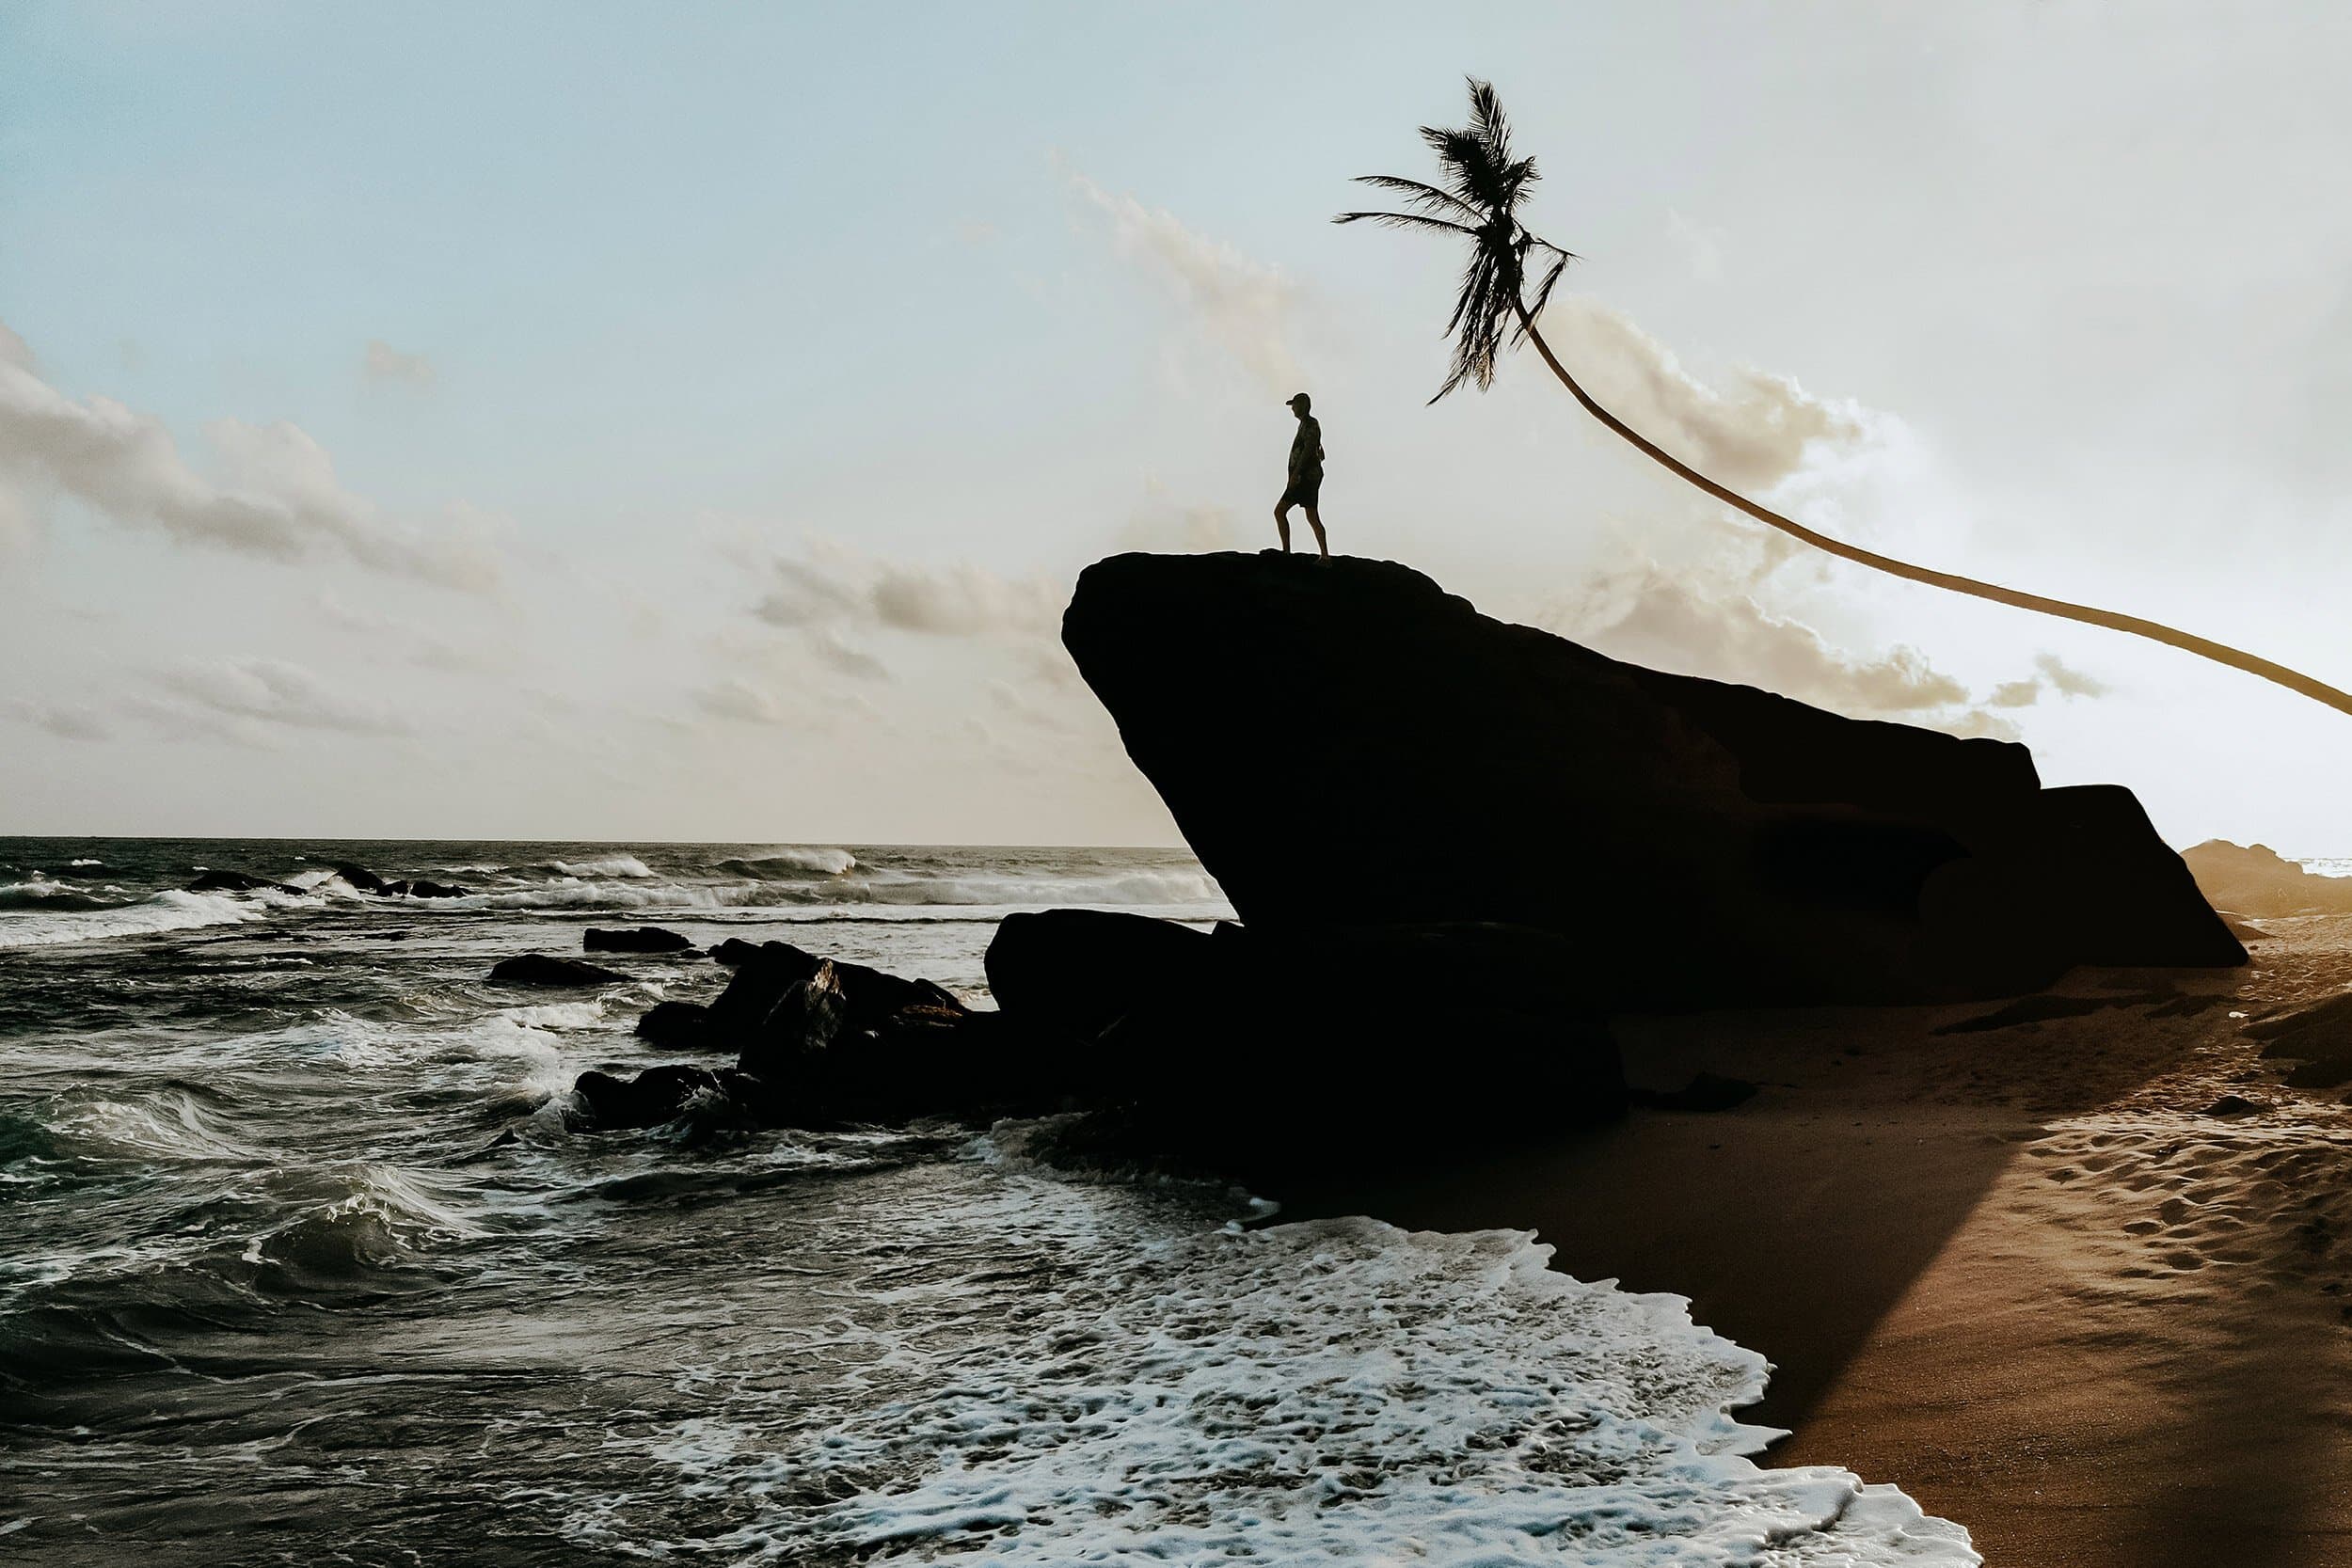
Day 6 – 7 | Mirissa, a tranquil beachside paradise
After unwinding at one of the tropical beaches in Unawatuna, it is time to continue your journey along the island’s beloved south coast.
Mirissa is an energetic beach town that has not gone unnoticed by backpackers and travellers alike. It has, in fact, become quite an unmissable destination in Sri Lanka itineraries.
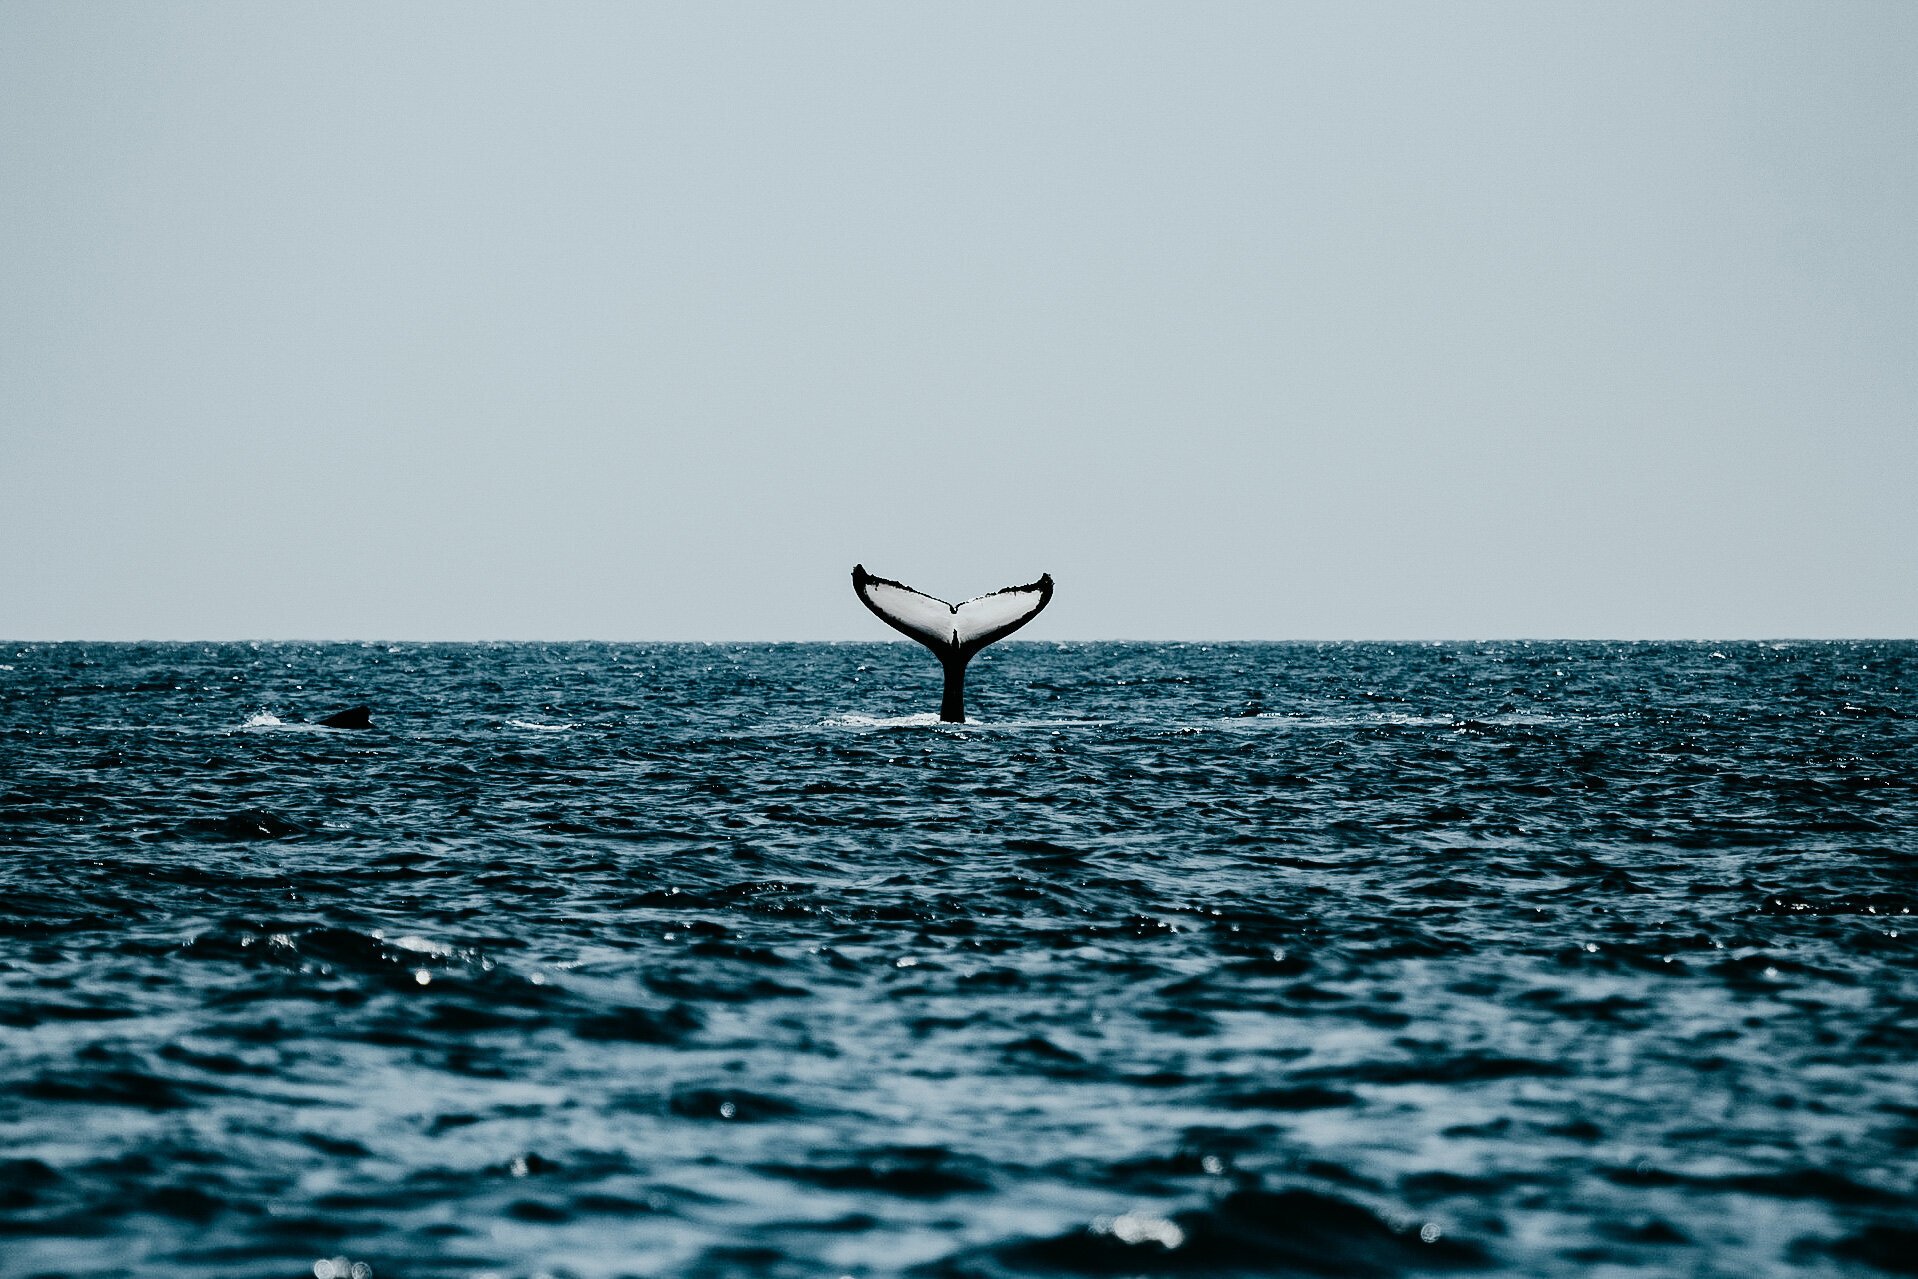
The beach town is all about riding waves, paradisiac stretches of beach, trendy cafés and the tranquil ambience that characterizes it. But what really highlights Mirissa is that it’s deemed to be one of Sri Lanka’s best places to get up close and personal with Blue Whales.
MIRISSA | MUST-SEE ATTRACTIONS
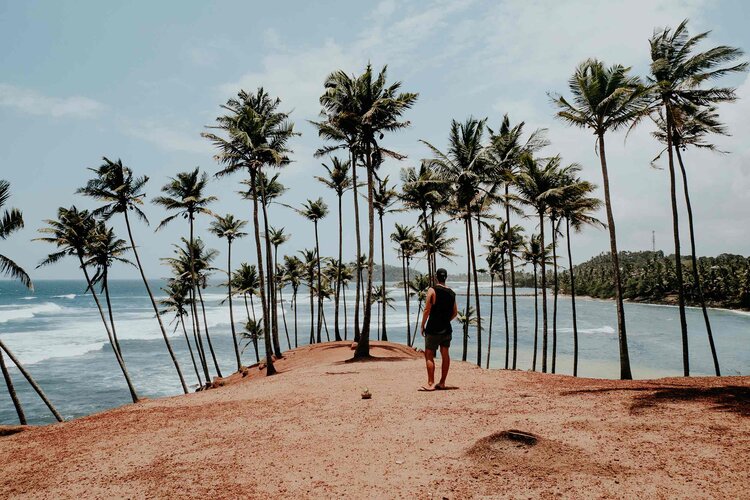
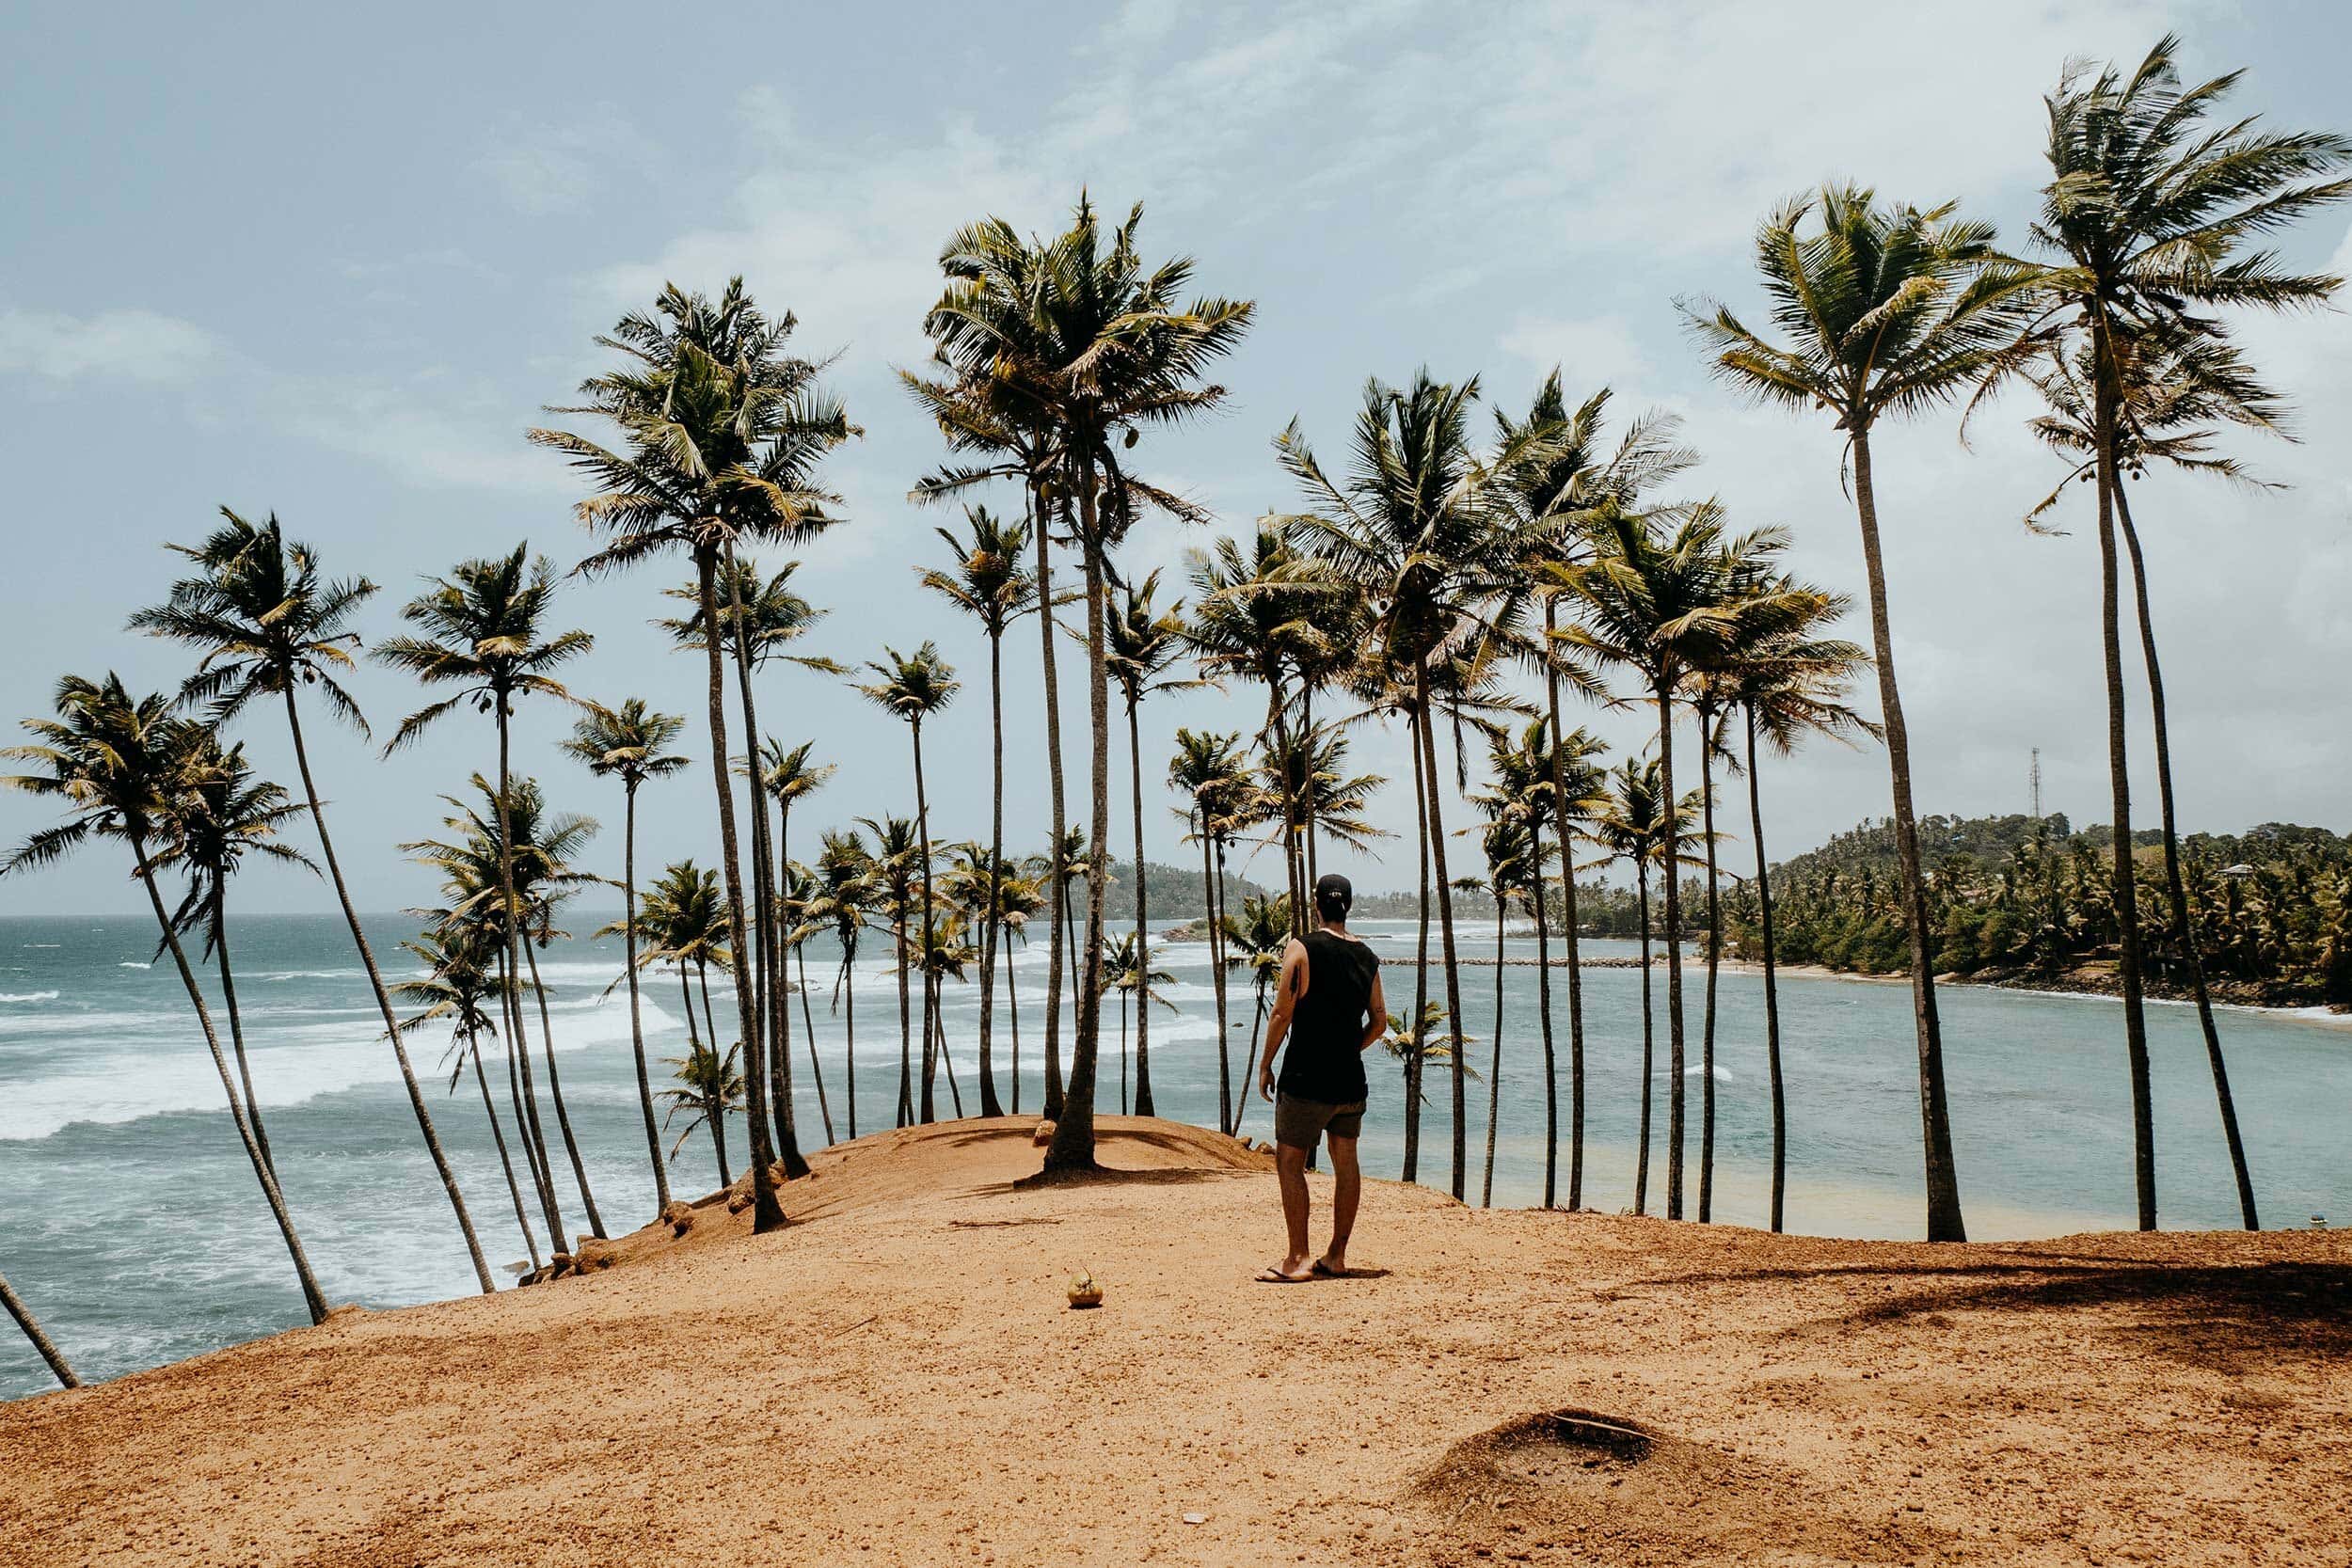
Coconut Tree Hill | Coconut Tree Hill is without a doubt among the most iconic things to see in Sri Lanka. The tangerine-coloured cliff is extremely popular and well-known for its sea of swaying palms and views over the shimmering Indian Ocean. I’d recommend stopping by earlier in the day or during a glorious sunset.
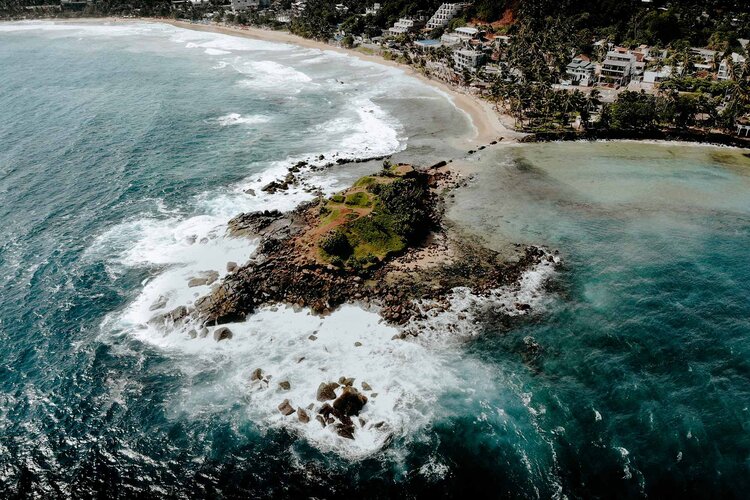
Parrot Rock | Only just off Mirissa’s main beach is Parrot Rock, a small secluded rock-island that provides the most stunning views over the town’s golden-sanded shoreline. Make sure you climb to the summit, it’s one of Mirissa’s best spots to sit and watch the world go by.
Surfing in Weligama | With decent waves rolling in year-round, Mirissa is one of the leading surf destinations on Sri Lanka’s south coast. The vibrant town is home to excellent surf schools that provide lessons and board rental. The waves in Mirissa are perfect for beginners, intermediate and advanced surfers.
MIRISSA | THE ESSENTIALS
Where | Mirissa
Where to stay in Mirissa | Mirissa has many excellent accommodations and I would highly recommend The Spice House Mirissa and Triple O Six. Alternatively, use booking.com to find accommodation in Mirissa.
How to get from Unawatuna to Mirissa | Jump aboard a direct train from Unawatuna to Mirissa that operates frequently (about 5 times a day). Expect the journey to take around 0.5 – 1 hour.
How to get around Mirissa | Walking around town is your best option as the distances are quite short. For surfing in Weligama, I would recommend taking a tuk-tuk.
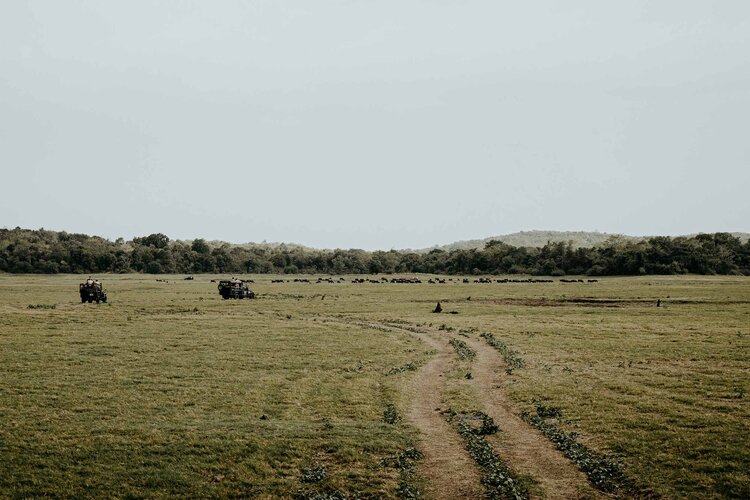
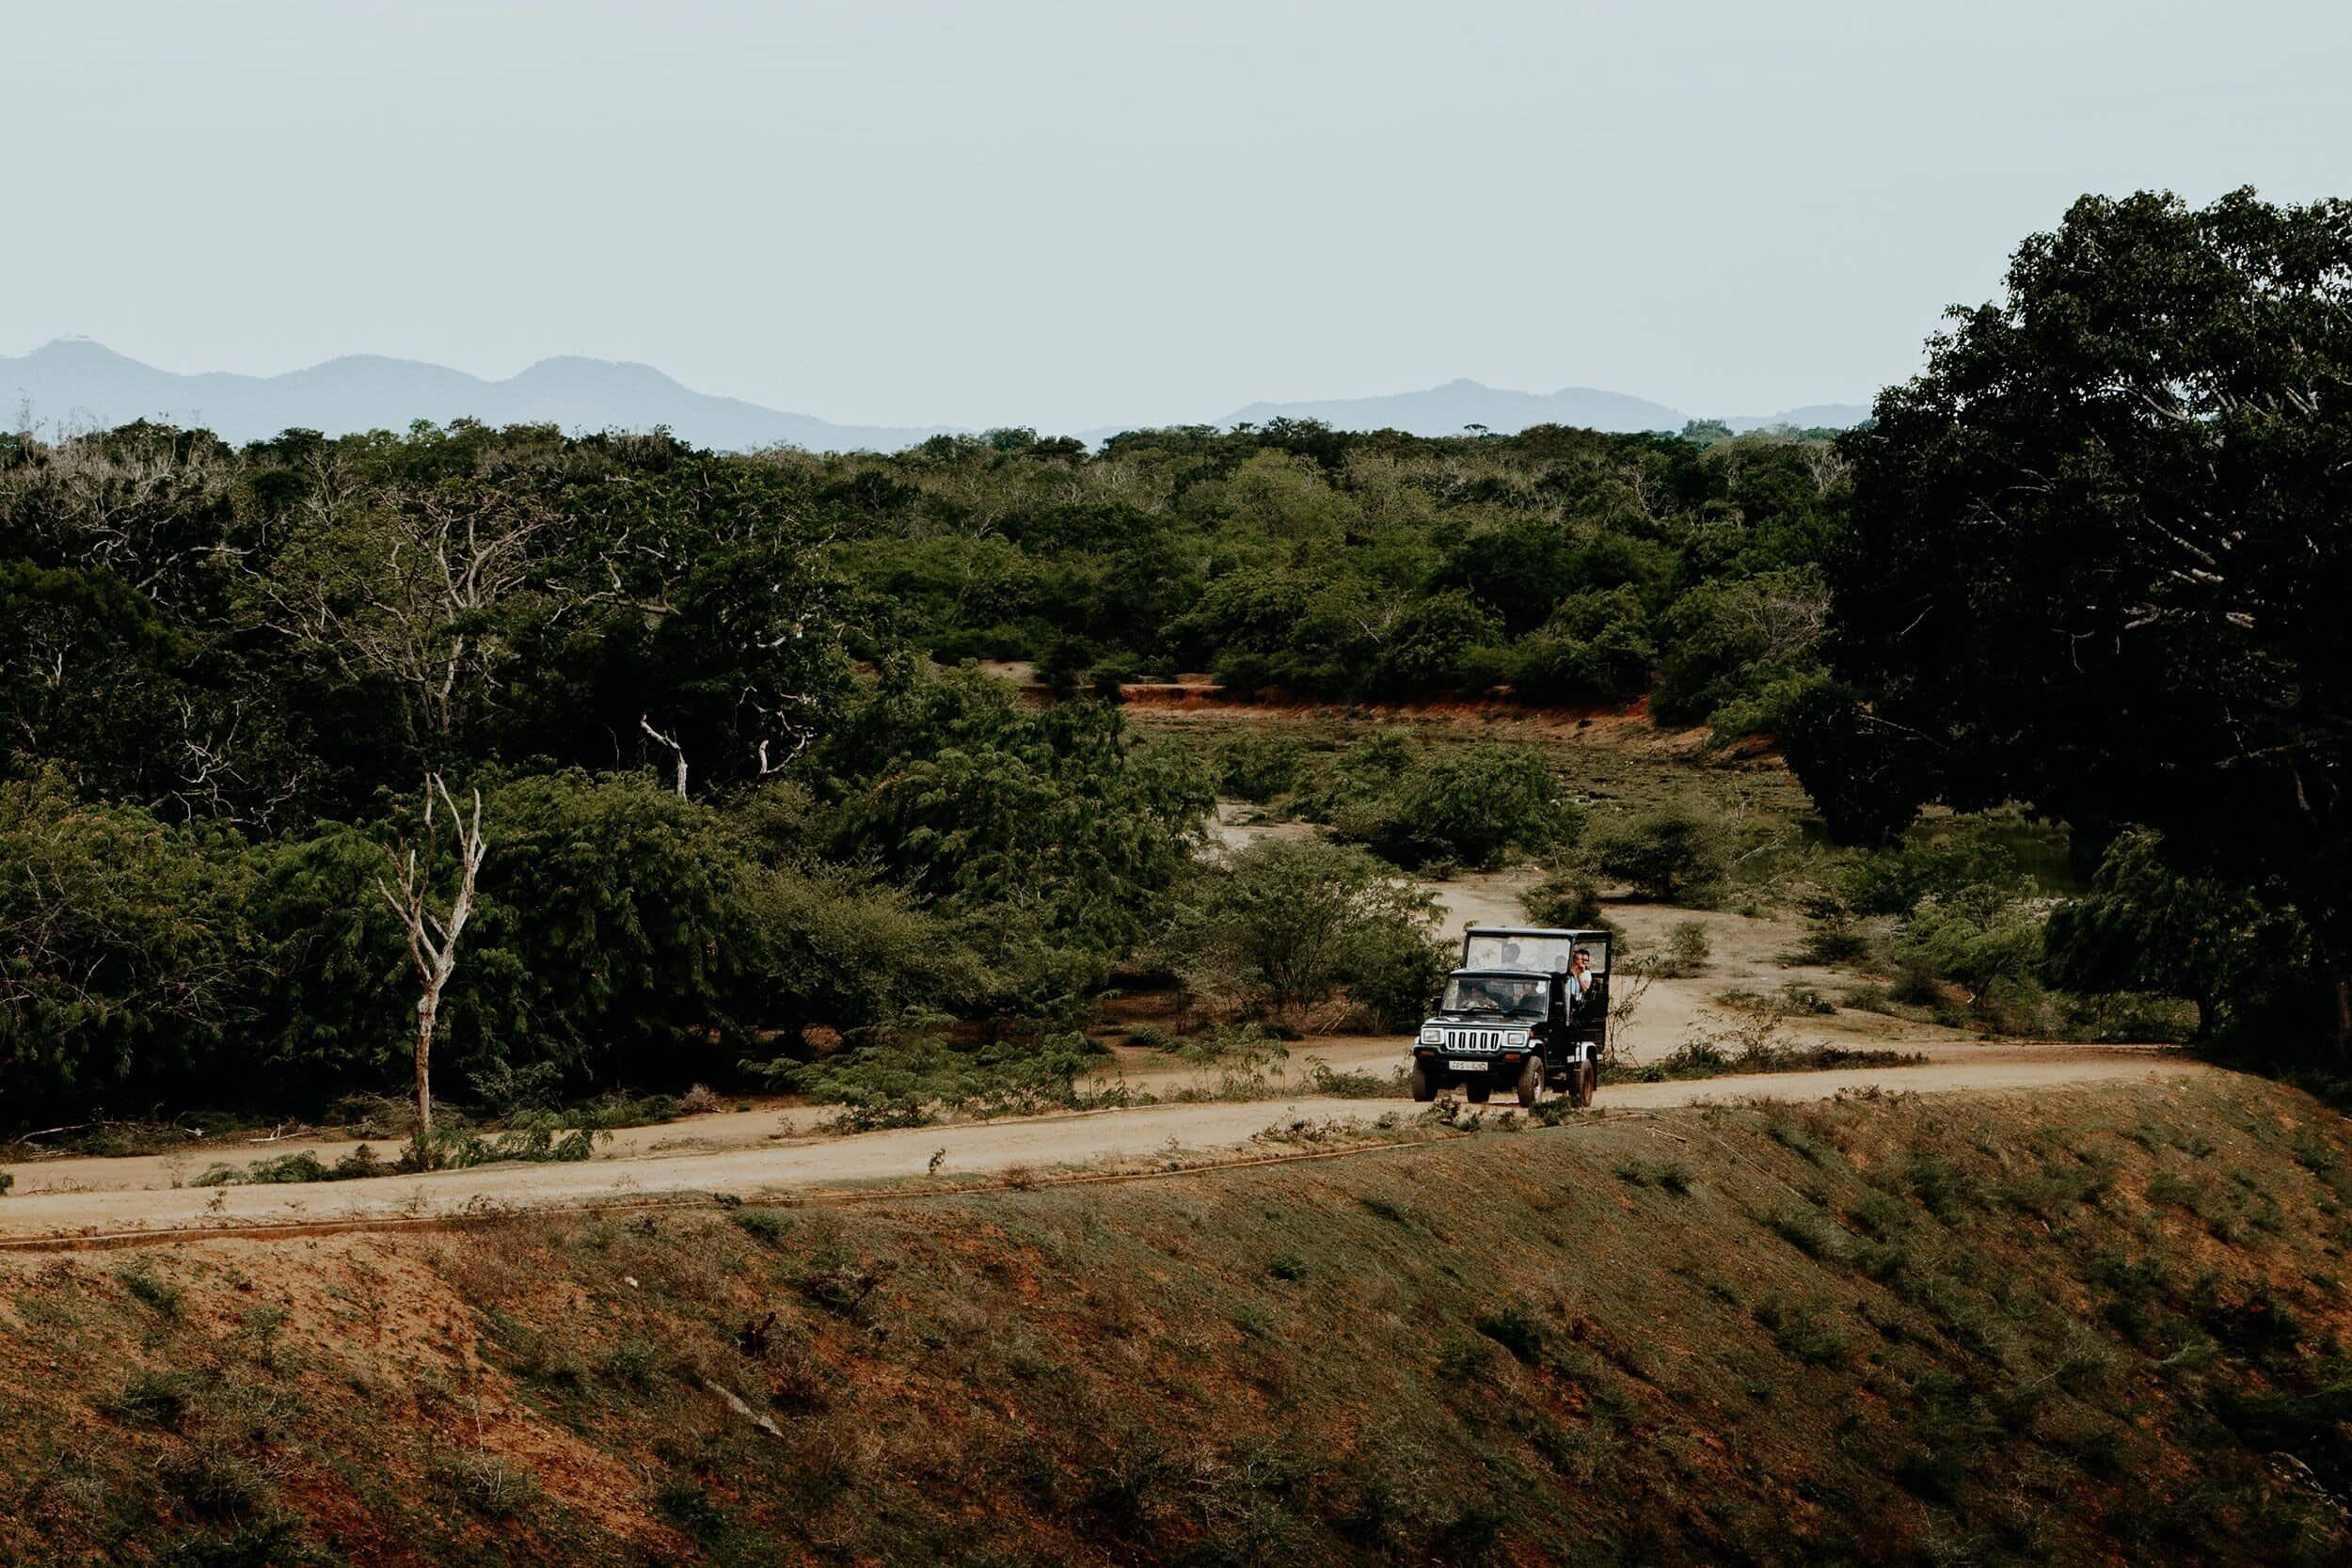
Day 8 | Yala National Park, Sri Lanka’s best safari destination
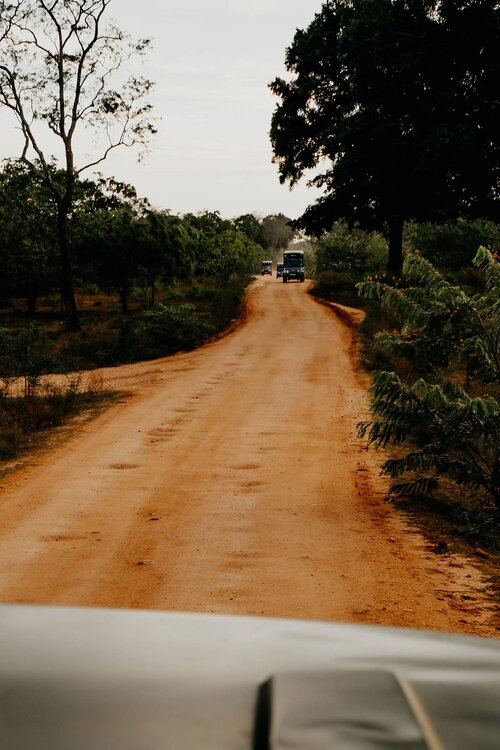
From the moment I booked my flight to Colombo, I was excited about one specific thing, travelling to the wildlife-rich jungles of the Yala National Park to experience my first-ever safari.
The incredible Yala National Park, situated on the island’s south-eastern coastline, is famed as Sri Lanka’s most popular national park and is unquestionably a must-see on any Sri Lanka itinerary.
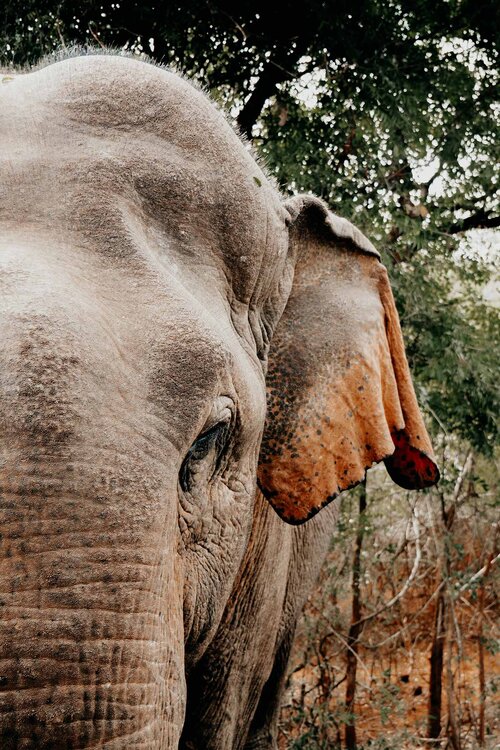
The park is home to dense jungles, sandy dunes, wide stretched grasslands and several lakes and lagoons. This distinct landscape is the perfect habitat for a great variety and density of wildlife, which results in the potential sighting of leopards, elephants, Black Sloth bears, Fishing cats, Red Slender loris and crocodiles.
In totality, the national park is home to 44 species of mammals, 215 species of birds and 46 species of reptiles, which makes an excellent reason to jump aboard a jeep and roam around the jungles of the park. Believe me, it’s one of the most fulfilling adventures in Sri Lanka.
It’s easy to book your Yala National Park safari through your accommodation in Tissamaharama. I would recommend joining a morning safari, this increases the potential of leopard sightings.
YALA NATIONAL PARK | THE ESSENTIALS
Where | Yala National Park
Where to stay in Yala National Park | Tissamaharama has great accommodations (both in and outside the park) and I would highly recommend Thaulle Ayurveda Resort and Cinnamon Wild Yala. Alternatively, use booking.com to find accommodations in Yala National Park or Tissamaharama.
How to get from Mirissa to Yala National Park | For this journey, the local bus is the easiest and cheapest option. Head to Matara, and here change to a direct bus to Tissamaharama. The journey can be quite intense and takes around 3.5 hours.
Entrance fee in 2024 | 11.000 LKR, ($37.50) per person.
Half-day jeep safari costs | 14.000 – 17.000 LKR ($47.60 – 57.80) per jeep, with a maximum of 6 people.
Day 9 – 10 | Arugam Bay, a laidback surfer town
Travelling to Arugam Bay requires quite a long and exhausting journey, as it is pretty off the beaten path compared to other destinations on this Sri Lanka itinerary. That being said, I truly believe that the detour is worth every minute of it.
Slightly hidden on Sri Lanka’s untouched east coast, with Yala National Park as its neighbour, lies Arugam Bay: one of the island’s leading surf destinations. With great bays, excellent surf breaks, stunning natural sceneries, and trendy cafés, there’s enough to see and do in Arugam Bay, therefore, I would recommend staying at least two days.
ARUGAM BAY | MUST-SEE ATTRACTIONS
Kudumbigala Monastery | Just 45 minutes from Arugam Bay’s spirited main street is the Kudumbigala monastery, a sacred place where locals come to practise deep meditation techniques. In addition to those mysterious, spiritual vibrations, you’ll find a viewpoint that provides the most stunning panoramic views of the entire region.
Muhudu Maha Viharaya | Known as the temple of the ocean, Muhudu Maha Viharaya is a charming white Buddhist stupa, overlooking Pottuvil’s sandy dunes and shimmering ocean. Fortunately, the temple is out of range of the regular tourist area, so it gives an authentic glimpse of Sri Lanka’s daily life. As always, follow religious customs and visit in a respectful manner.
Elephant Rock | Acknowledged as one of the best surfing breaks in the area, and a great place to sit and watch the world go by, especially during the golden hour. Elephant Rock gives a marvellous view over the bay and its wave-riding surfers, certainly a must-see in Arugam Bay.
ARUGAM BAY | THE ESSENTIALS
Where | Arugam Bay
Where to stay in Arugam Bay | Arugam Bay has no shortage of great accommodations. For surfing, I’d highly recommend The Spice Trail – another excellent option is Bay Vista. Alternatively, use booking.com to find accommodation in Arugam Bay.
How to get from Yala National Park to Arugam Bay | Local bus is the cheapest option. Do keep in mind that this is one of the most exhausting bus journeys in Sri Lanka – plus it requires changing bus up to three times. Alternatively, hire a tuk-tuk or arrange a taxi with the PickMe app. The journey can take up to 6.5 hours.
How to get around Arugam Bay | If you’re looking to explore the surrounding area, I would highly recommend renting a scooter. Alternatively, walk or make use of tuk-tuks.
Day 11 – 13 | Ella, Sri Lanka’s extraordinary hill country
After learning to ride the waves in Arugam Bay, it’s time to head for Sri Lanka’s mysterious mountains and one of my favourite places in the country, the sleepy town of Ella.
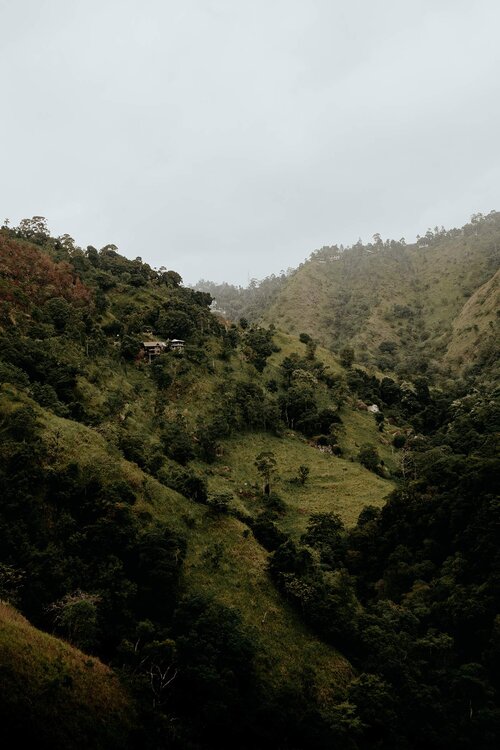
Around 1,041 metres above sea level and hidden in Sri Lanka’s peaceful hill country is Ella: a small town that is encircled by charming tea plantations, towering mountains and rushing waterfalls.
If you’re a nature & adventure enthusiast like me, Ella’s incredible sceneries will surely blow your mind. I enjoyed this town so much, that I’ve ended up staying slightly longer than initially planned. Therefore I’d always recommend adding some flexibility to your Sri Lanka itinerary.
ELLA | MUST-SEE ATTRACTIONS
Ella Rock | It is no surprise that Ella Rock is one of the must-see attractions in Ella as it provides breathtaking views of Little Adam’s Peak, Ella Gap and the mysterious hill country of Ella. If you’re a seasoned hiker, you certainly feel hyped for the somewhat challenging Ella Rock hike. Do bear in mind that the best time to hike up Ella Rock is around sunrise.
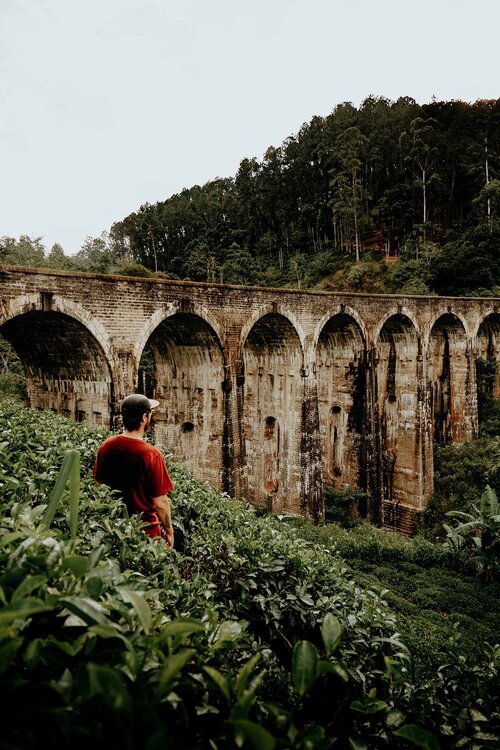
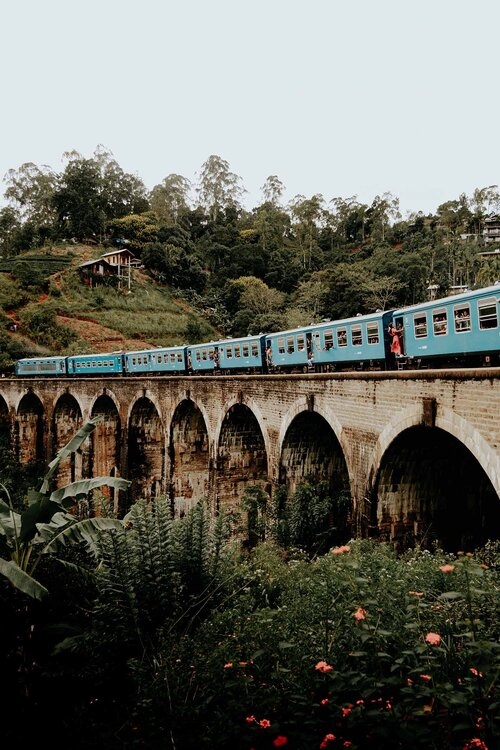
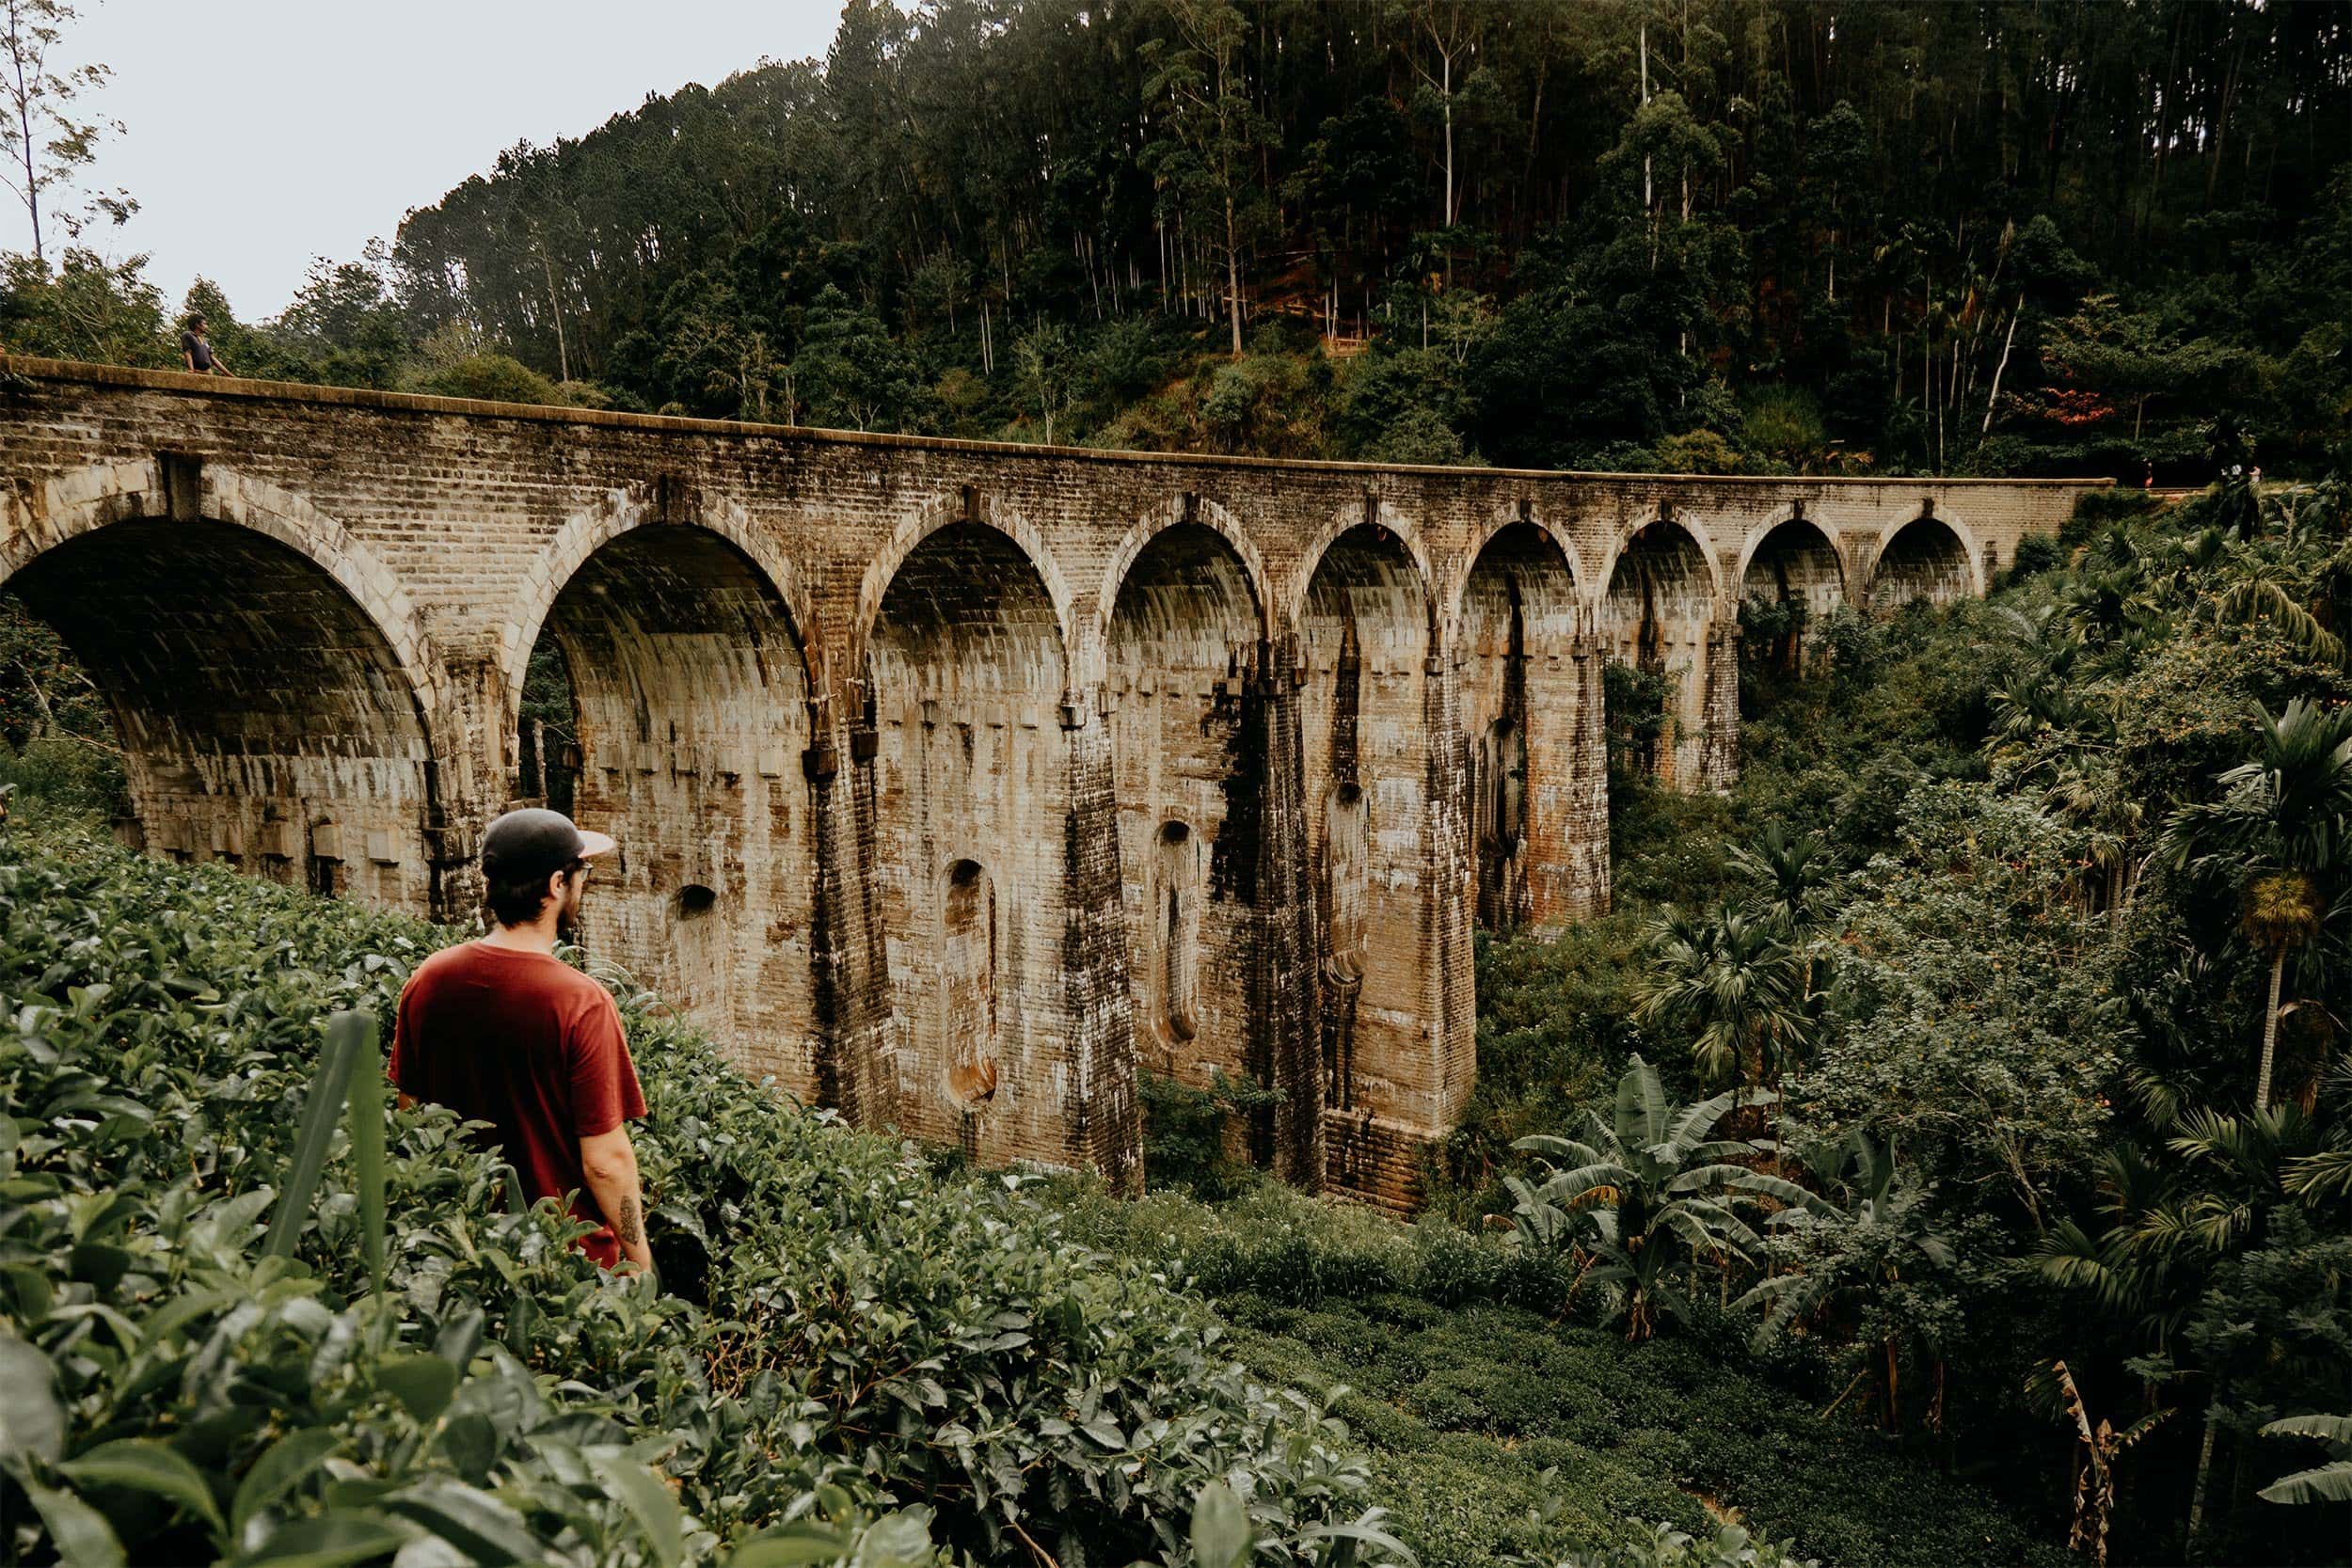
Nine Arch Bridge | The now-famous Nine Arch Bridge is single-handedly responsible for the largest part of travellers that come and visit Ella. Tucked away between the dense jungle and tea plantations; this stunning piece of architecture impresses both travellers and locals on a daily basis. The scene becomes even more remarkable when the famous blue train slowly navigates its way across the bridge.
Little Adam’s Peak | As the name implies, Little Adam’s Peak is named after its taller and better-known brother, Adam’s Peak. The hike to the summit of Little Adam’s Peak guarantees the most excellent overview of both Ella Rock and the infinite-looking Ella Gap. It’s therefore little wonder that it’s such a popular attraction in Ella.
ELLA | THE ESSENTIALS
Where | Ella
Where to stay in Ella | Ella has some of Sri Lanka’s finest accommodations and I would recommend Rawana Den, 98 Acres & Spa and Mountain Heavens. Alternatively, use booking.com to find accommodation in Ella.
How to get from Arugam Bay to Ella | Take a bus to Monoragala, before changing to the bus that heads for Wellawaya. Here take the bus to Ella. If you’re fortunate, you may catch a direct bus between Arugam Bay and Wellawaya. Since the journey is quite chaotic, alternatively hire a tuk-tuk or arrange a taxi with PickMe. The journey can take up to 4.5 hours.
How to get around Ella | Ella is an easy town to navigate by foot. Alternatively, jump aboard one of the many tuk-tuks.

Ella to Kandy, the most scenic train ride in the world
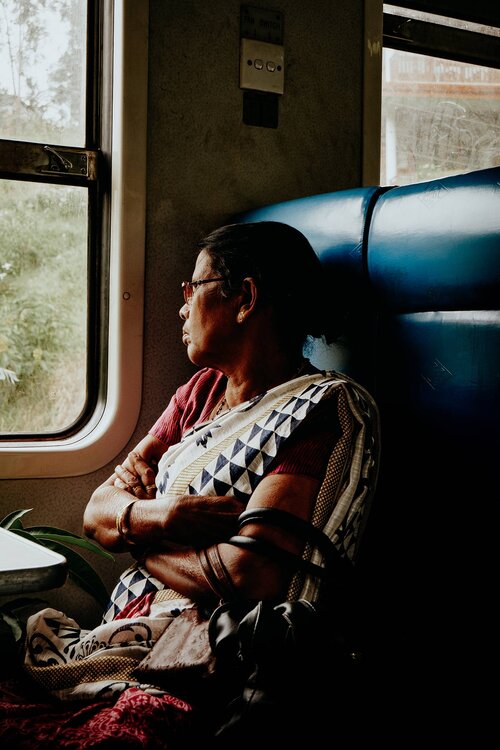
Ask anyone who jumped aboard the famous Ella to Kandy train and they all answer the same – this scenic train journey is one of the absolute highlights in any Sri Lanka itinerary.
Secure yourself a window seat and witness the train meandering through mysterious woodlands, authentic local towns and leafy tea plantations. This seven-hour journey is one of the most spectacular train rides in the world, so make sure you enjoy every moment of it.
ELLA TO KANDY TRAIN JOURNEY | THE ESSENTIALS
Where | Ella Railway Station
Costs | 2nd class: 270 LKR ($1.50), 3rd class: 180 LKR ($1). If you prefer to book your ticket in advance, visit 12go.asia.
Train times from Kandy to Ella | 06:40, 09:24, 10:57 and 12:48. For up-to-date timetables, visit the Seat61 website.

Day 14 – 15 | Kandy, the city of kings
Following the breathtaking train journey, you’ll arrive in Kandy, a vibrant city that is of major significance to Sri Lanka’s rich, captivating culture and history. It is, therefore, more than rightly so named, the city of kings by its locals.
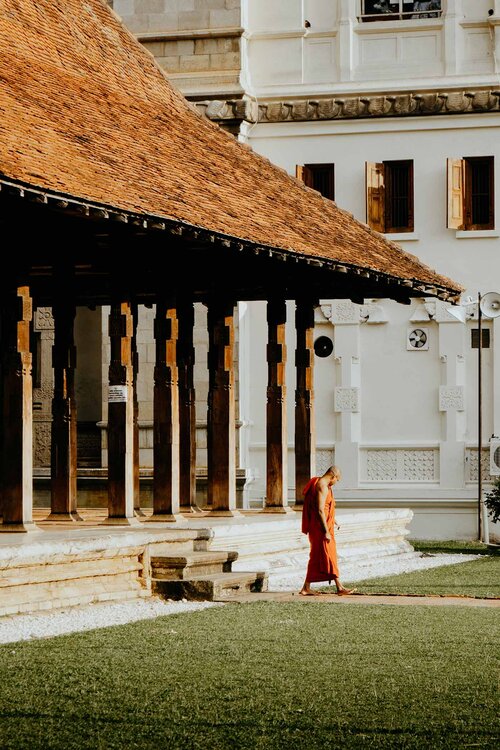
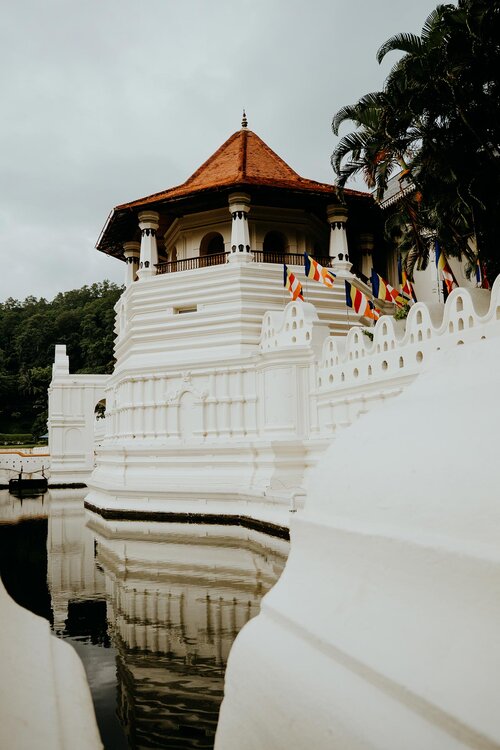
Sri Lanka’s second-largest city is famed for its most important spiritual site, the Temple of the Sacred Tooth Relic; which according to Sri Lankan legends houses a tooth of the Buddha.
Although many travellers tend to visit Kandy in a hurry, I think there are quite a few fascinating places to see and appreciate in Kandy. I would highly recommend spending at least two days exploring the lively city and surroundings.
KANDY | MUST-SEE ATTRACTIONS
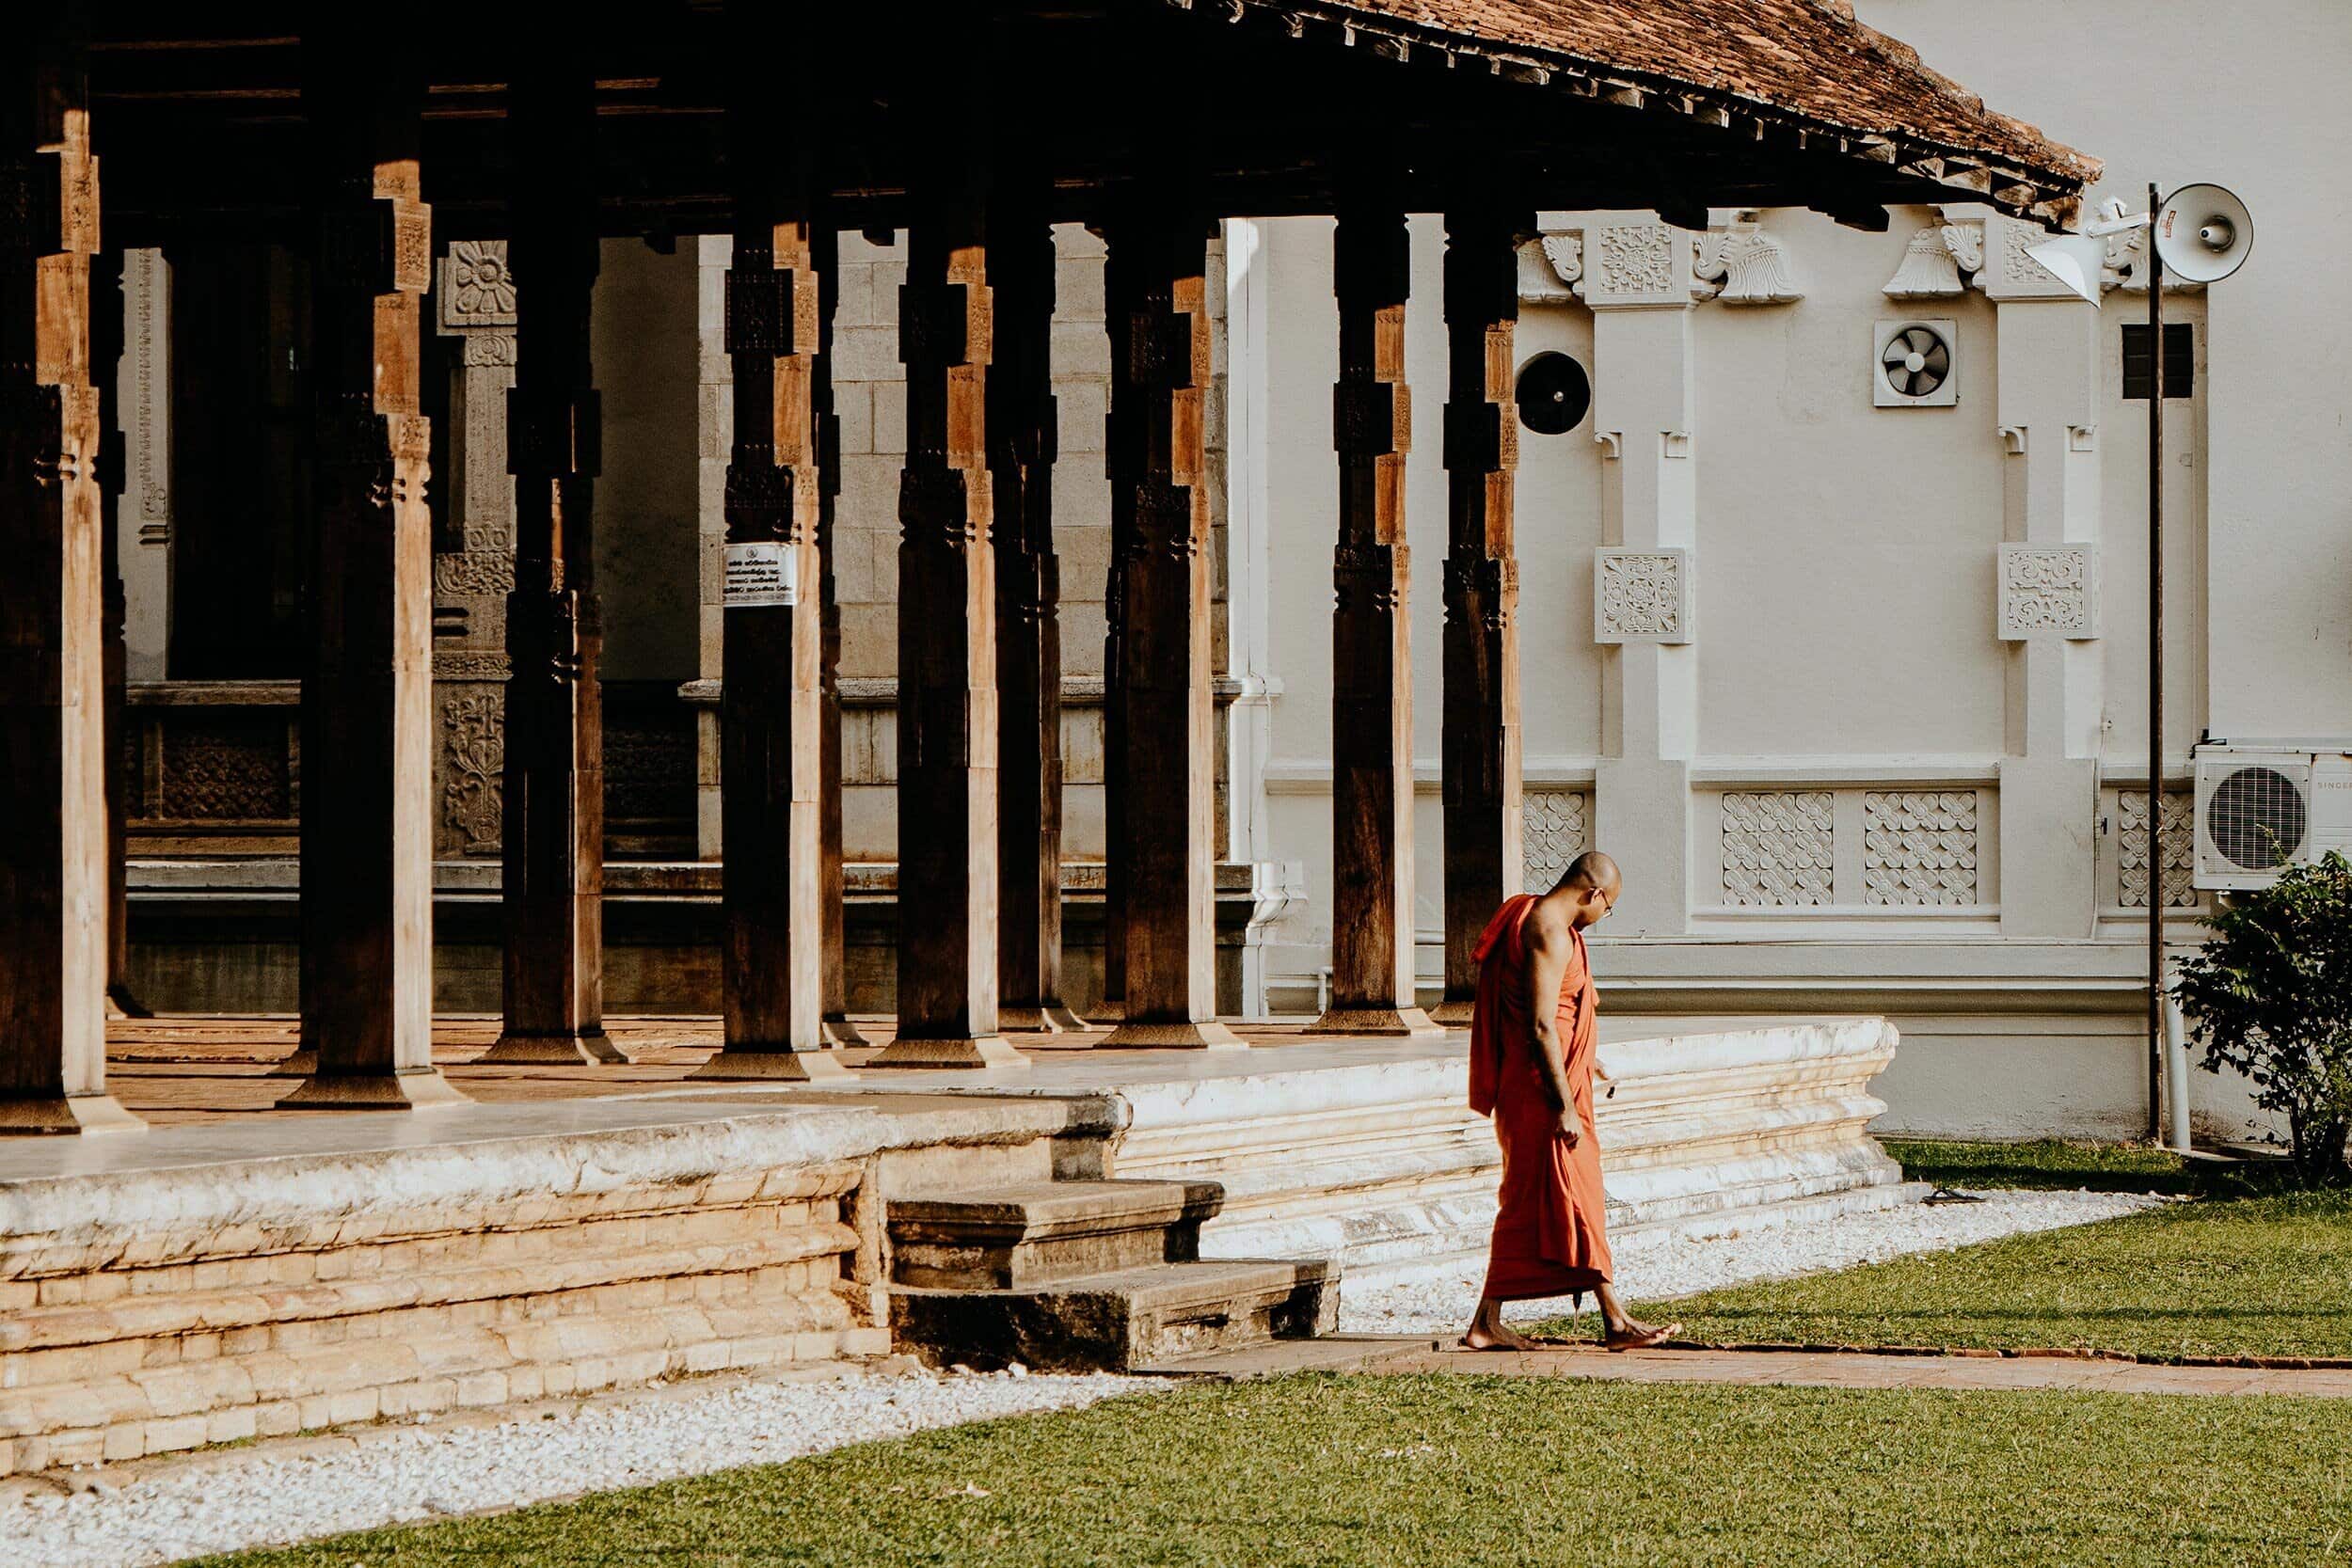
Temple of the Sacred Tooth Relic | Right at the heart of Kandy and next to the Kandy Lake is the Temple of the Tooth Relic, Sri Lanka’s most important Buddhist shrine. The best time to visit is during a Buddha Puja ceremony, when pilgrims from all over the world reflect, sing and bring offerings to deepen the appreciation of the Buddha and his teachings.
Royal Botanical Gardens of Peradeniya | For me, it’s always impressive to see a large urban city park in the midst of a lively city, the Royal Botanic Gardens of Peradeniya is exactly that. The verdant gardens are home to over 4,000 species of plants, including palm trees, medicinal plants, orchids and spices. A peaceful morning walk is a perfect activity to escape the sizzling heat and chaos of Kandy.
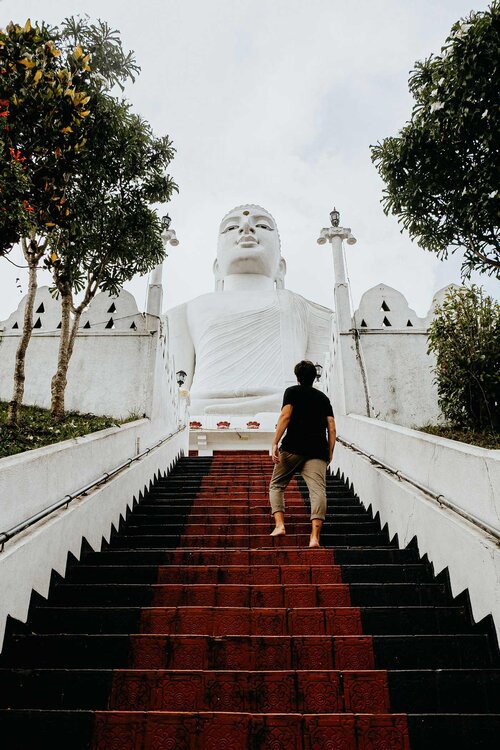
Bahirawakanda Temple | Located atop the Bahirawa Kanda hill and to be seen from the whole of Kandy lies the majestic Bahirawakanda Temple. The towering Buddha reaches a height of 27 metres and is considered one of the largest Buddha statues in Sri Lanka. Make sure you snap some shots of the panoramic views of Kandy.
KANDY | THE ESSENTIALS
Where | Kandy
Where to stay in Kandy | I stayed at Range Hotel Kandy and Cafe Aroma Inn. Additionally, I would recommend Dumbara Peak Residence. Alternatively, use booking.com to find accommodation in Kandy.
How to get from Ella to Kandy | Jump aboard the famous Ella to Kandy train. It’s cheap and considered the most scenic train ride in the world – 2nd class: 270 LKR ($1.50), 3rd class: 180 LKR ($1). If you prefer to book your ticket in advance, visit the 12go.asia website.
How to get around Kandy | Kandy is easily explored by foot. I’d recommend grabbing a tuk-tuk for attractions that are situated just outside the town.
Day 16 – 17 | Sigiriya, Sri Lanka’s eight wonder of the world
It’s time to head further North to the Ancient City of Sigiriya, one of my all-time favourite places in Sri Lanka, and an unmissable destination on this itinerary.
It is little surprise that Sigiriya is loved by so many, it has essentially everything a traveller yearns for. The town is surrounded by nature, has no shortage of breathtaking sceneries and houses the authentic ambience of a local village.
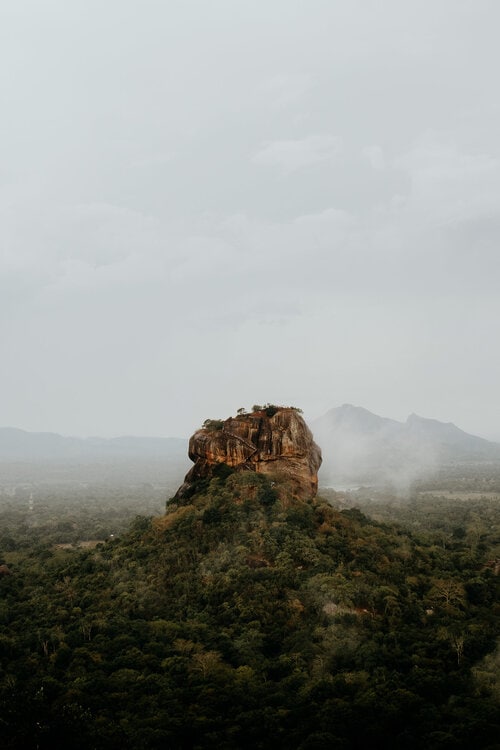
The real draw though is the Ancient Sigiriya Rock Fortress, one of the country’s most famous landmarks, and often stated as the eighth wonder of the world.
It is safe to say that being surrounded by Sigiriya’s idyllic nature has a therapeutic effect on both body and mind. Therefore, I’d recommend spending a few days to explore and unwind in this magnificent area.
SIGIRIYA | MUST-SEE ATTRACTIONS
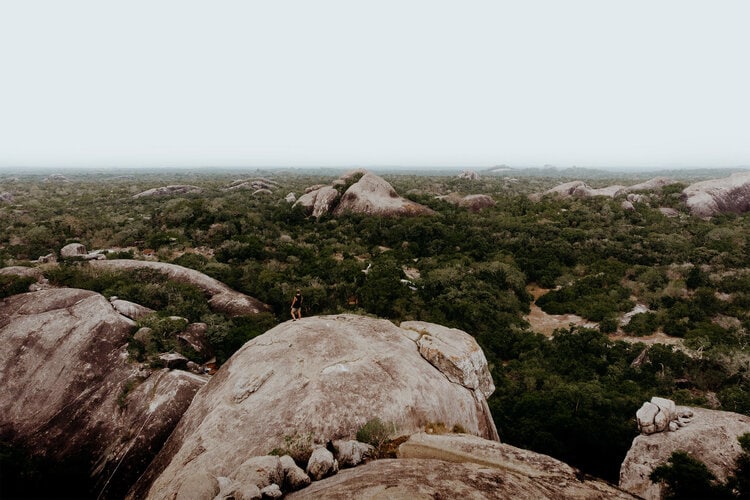
Sigiriya Rock Fortress | Sigiriya’s natural beauty is unrivalled – and that is largely by means of the Sigiriya Rock Fortress. Witnessing this unique, ancient fortress, should be on every Sri Lanka bucket list, whether viewed from Pidurangala Rock or up close and personal.
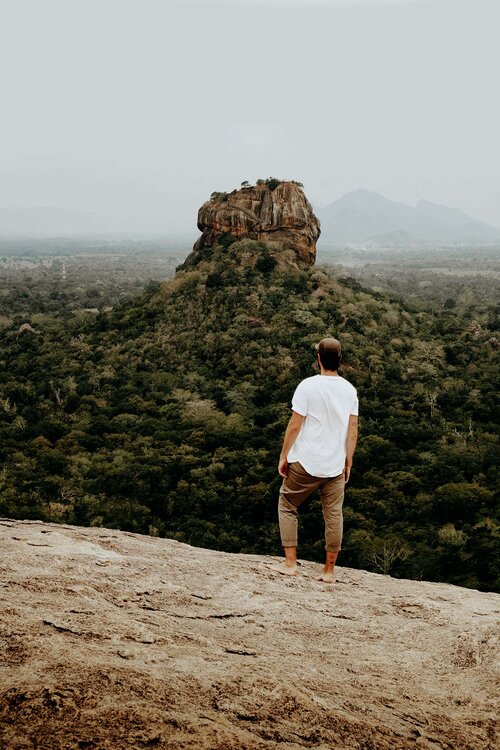
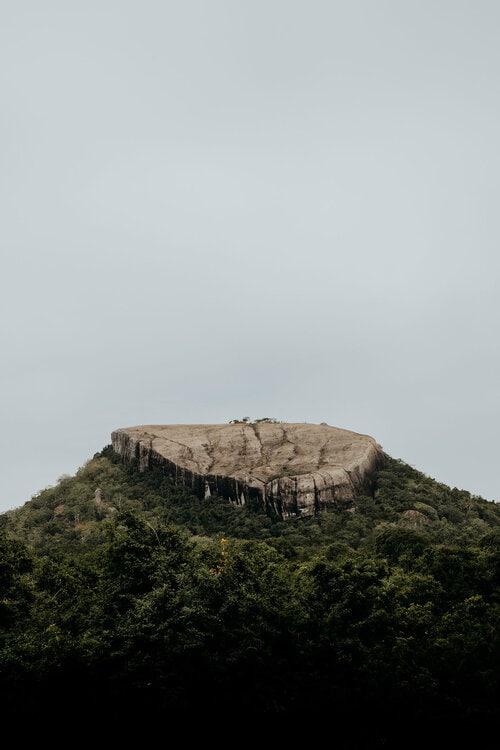
Pidurangala Rock | The Sigiriya Rock Fortress might be the number one attraction in Sigiriya, it’s the incredible view from Pidurangala Rock that stole my heart. Hiking the summit of Pidurangala Rock has rapidly become a must-do activity for travellers and locals alike. To experience the mesmerizing view at its full potential, make sure to visit at sunrise or sunset.
SIGIRIYA | THE ESSENTIALS
Where | Sigiriya
Where to stay in Sigiriya | I stayed at Hotel Sigiriya multiple times and I felt at home every single time. If you’re a creative like me, this is an inspiring place where you surely want to stay. Alternatively, use booking.com to find accommodation in Sigiriya.
How to get from Kandy to Sigiriya | Take a bus to Dambulla, where you change for the bus that heads to Sigiriya. Alternatively, hire a tuk-tuk from Dambulla to Sigiriya (1,000 LKR – $5.50). The journey takes around 2.5 hours.
How to get around Sigiriya | Walking around town is your best option as the distances are quite short. Do be aware that elephants often roam around the jungles. Alternatively, hire a bicycle to explore the stunning surroundings.
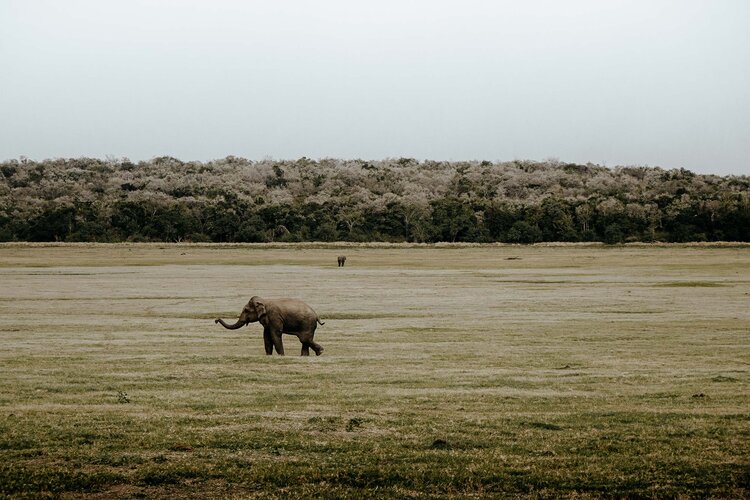
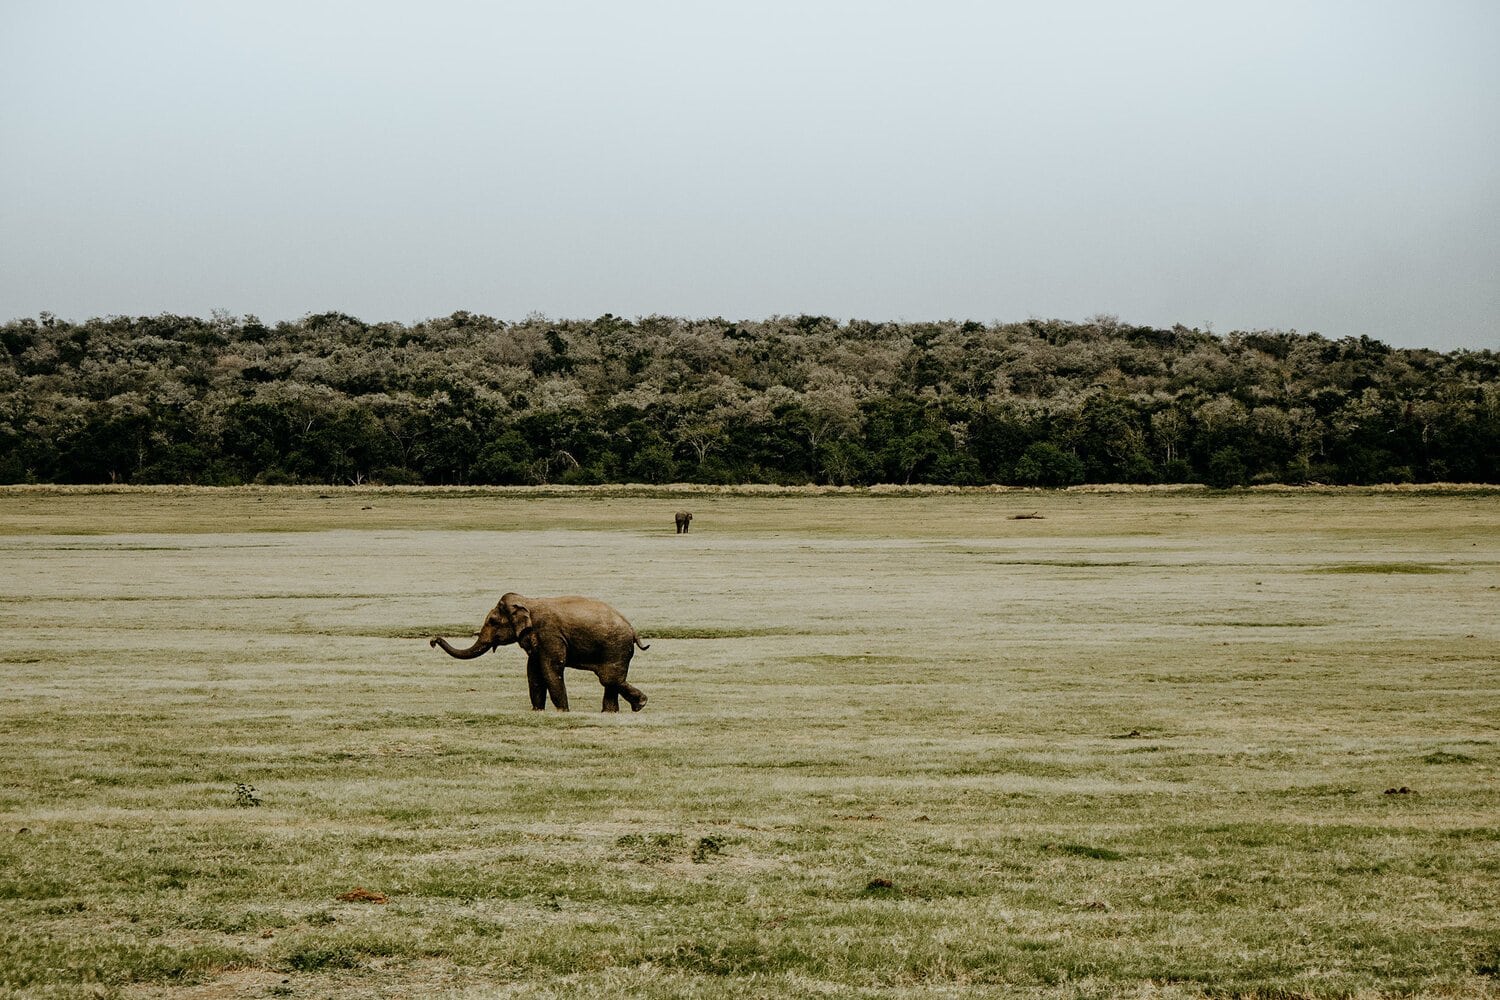
Day trip | Kaudulla National Park | The gathering of Elephants
Sigiriya is conveniently located and makes the perfect base for an exciting day trip: a jeep safari in Kaudulla National Park.
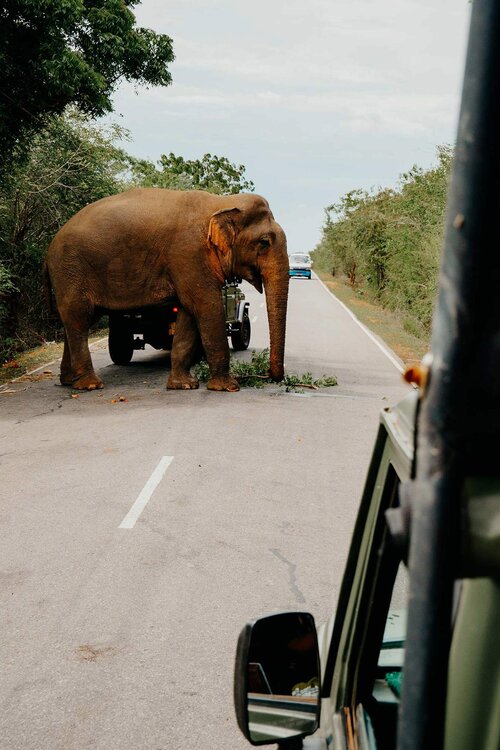
Poised between Sigiriya and Trincomalee, Kaudulla National Park is one of Sri Lanka’s best national parks, and home to over 200 wild elephants, including a newborn. The extensive wildlife park is often referred to as; The Gathering, the world’s largest gathering of Asian elephants.
It’s easy to book your Kaudulla National Park safari through your accommodation in Sigiriya. I would recommend joining an afternoon safari, right after you spend the morning visiting Sigiriya Rock Fortress or Pidurangala Rock.
KAUDULLA NATIONAL PARK | THE ESSENTIALS
Where | Kaudulla National Park
How to get from Sigiriya to Kaudulla National Park | By safari jeep. A safari tour always includes pick-up and drop-off at your accommodation.
Entrance fee in 2024 | 7.350 LKR ($25).
Half-day jeep safari costs | 9,500 – 10900 LKR ($32.50 – 37.50) per jeep, with a max of 6 people.
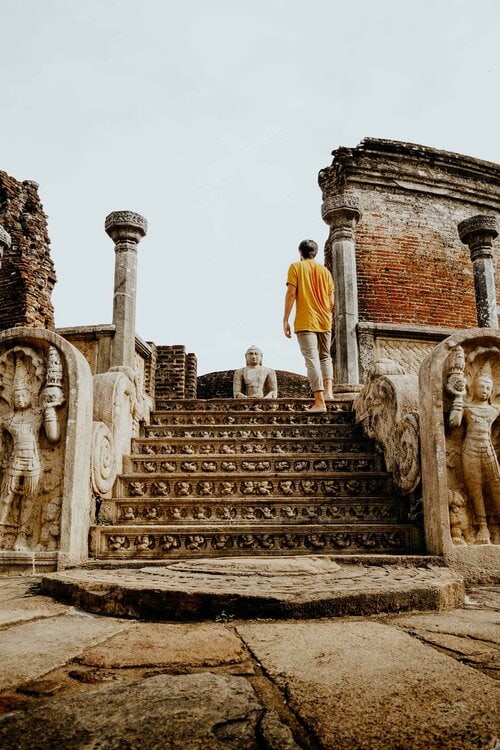
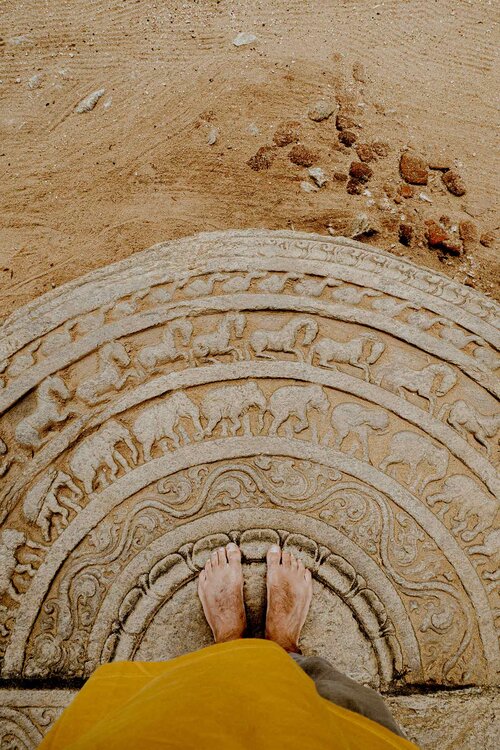
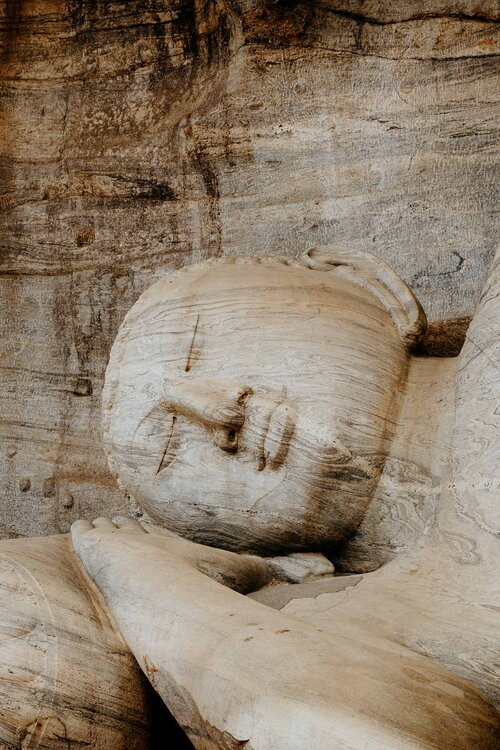
Day 18 | Polonnaruwa, Sri Lanka’s ancient capital city
Part of Sri Lanka’s glorious cultural triangle and only an hour away from Sigiriya is the ancient city of Polonnaruwa, an impressive UNESCO World Heritage site that makes for one of the best stops on any Sri Lanka itinerary.
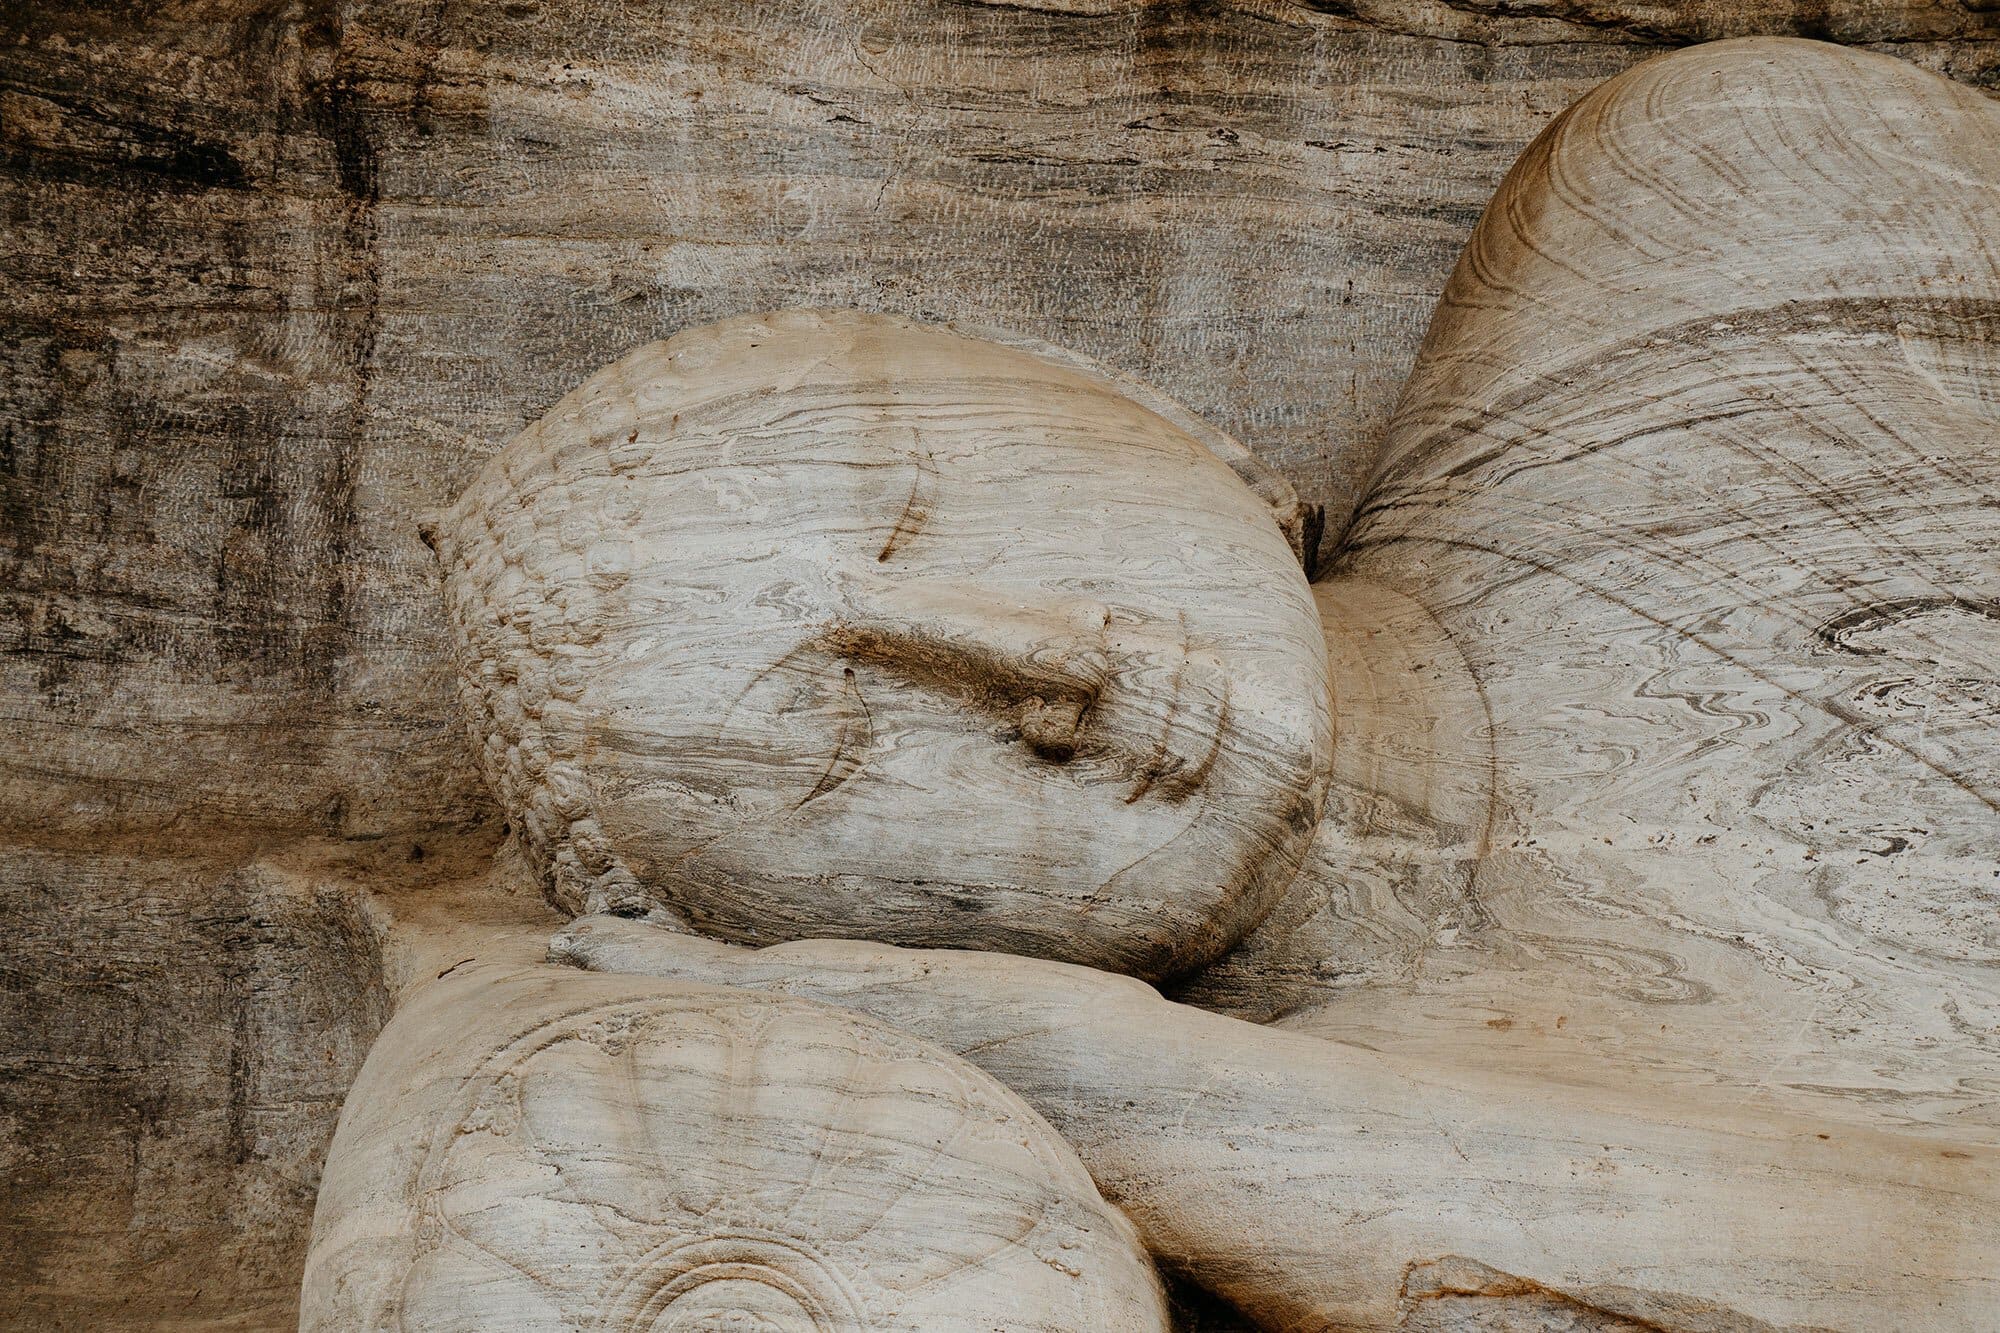
Present-day, this ancient city has no shortage of grandeur, whether it’s the remains of temples and religious buildings, impressive shrines, or elegant Buddha statues. The ancient city of Polonnaruwa features some of the most impressive ruins in Sri Lanka – which is a true pleasure to seasoned travellers.
I’ve heard many backpackers who experience difficulties when choosing between Anuradhapura and Polonnaruwa. When I followed my intuition and chose Polonnaruwa, it felt like the right decision, and up until this day, I’m still delighted with it – even after visiting the Angkor temples in Cambodia.
POLONNARUWA | THE ESSENTIALS
Where | Polonnaruwa
Entrance fee | Adult 4,550 LKR ($25), children 2,275 LKR ($12.50).
Opening hours | 07:00 – 18:30 daily.
Where to stay in Polonnaruwa | I stayed at Hotel Lake Park and would additionally recommend Giritale Hotel and Mahanuge Hotel Polonnaruwa. Alternatively, use booking.com to find accommodation in Polonnaruwa.
How to get from Sigiriya to Polonnaruwa | Take the local bus to Inamaluwa, before changing to a direct bus that heads for Polonnaruwa. The journey should take no longer than 1.5 hours.
How to get around Polonnaruwa | The most fun way to explore Polonnaruwa is by bicycle. Alternatively, hire a tuk-tuk that guides you around the complex.
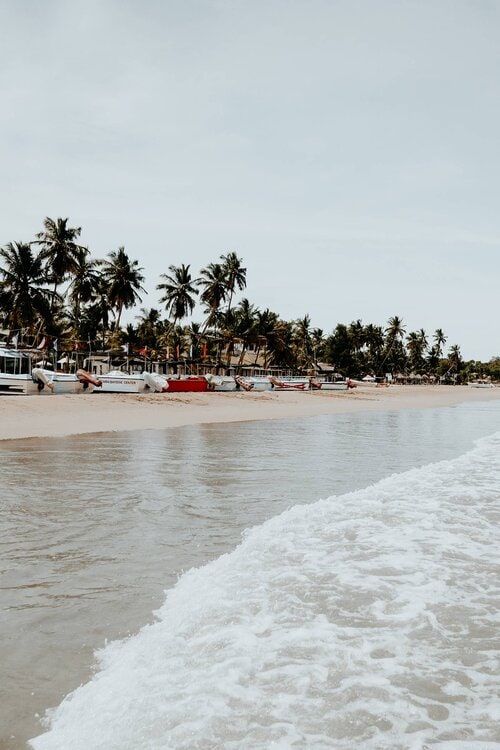
Day 19 – 20 | Trincomalee, Sri Lanka’s undiscovered East coast
After soaking up all that Polonnaruwa has to offer, it’s time to venture further east to the pristine, undiscovered beaches of Trincomalee and surrounds.
Trincomalee, often called Trinco by the locals, is a relaxed coastal town that is less frequently visited by travellers and backpackers alike. Even so, I sincerely feel that its beaches aren’t inferior to most of the must-see beaches on Sri Lanka’s beloved south coast.
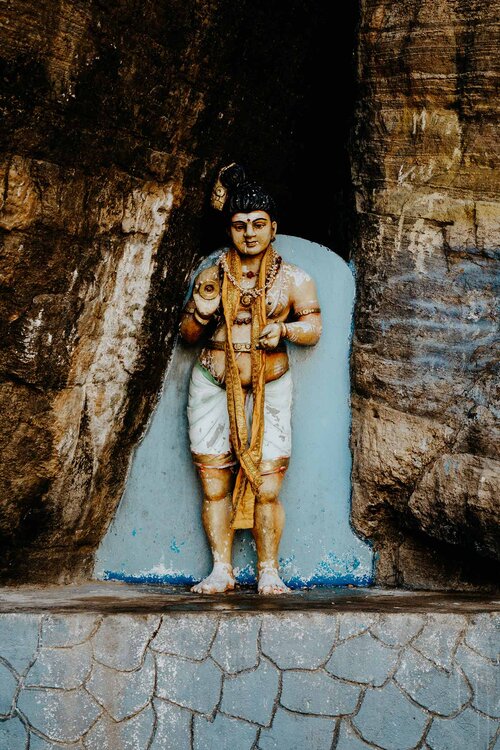
But what really distinguishes Trincomalee is the fact that it’s deeply influenced by Tamil culture, resulting in a completely different atmosphere than elsewhere on the island. Trinco is thus, no stranger to vivid, breathtaking Hindu temples, and I would highly recommend attending at least one of them.
TRINCOMALEE | MUST-SEE ATTRACTIONS
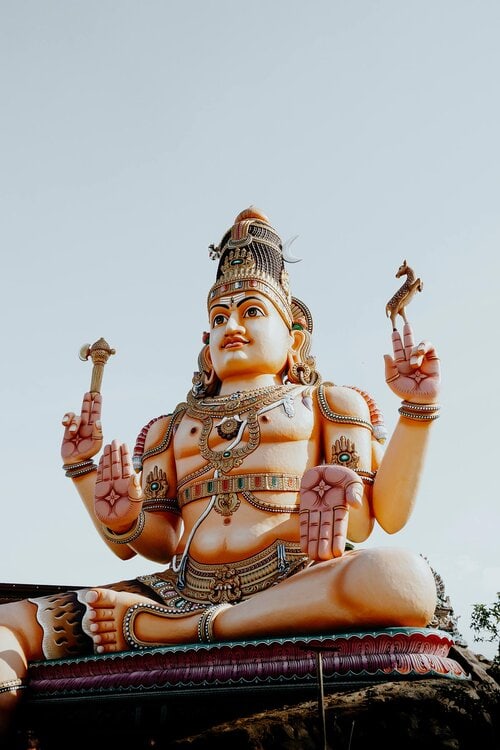
Koneswaram Temple | The colourful Koneswaram Temple holds the upper area of Fort Frederick and is a must-see in Trincomalee. The fascinating temple is dictated by its main shrine, a large vivid statue of the Hindu god Shiva, and faces one of the world’s largest natural harbours. If you plan to visit, remember to respect religious customs.
Nilaveli Beach | Just 20 minutes north of Trincomalee you’ll find Nilaveli Beach, a secluded beach that is said to be among the best beaches in Sri Lanka. The sleepy town and its eponymous beach are still largely undiscovered to backpackers and houses an authentic local atmosphere. Nilaveli may be a little off the beaten path, but it is worth visiting, and a great place to grab a coconut while watching the world go by.
Sri Pathirakali Amman Kovil | Trinco may be renowned for its pristine beaches, it is the incredibly ornamented Hindu temples that amazed me the most. Established adjacent to the Trinco bus station is one of them, the Sri Pathirakali Amman Kovil, a work of art that is dedicated to the Hindu goddess Bhadrakali. To fully experience the temples, I’d recommend taking a peaceful walk in and around the buildings.
TRINCOMALEE | THE ESSENTIALS
Where | Trincomalee
Where to stay in Trincomalee | Trincomalee has excellent accommodations and I would highly recommend Amaranthe Bay Resort & Spa and Trinco Blu by Cinnamon. Alternatively, use booking.com to find accommodation in Trincomalee.
How to get from Polonnaruwa to Trincomalee | From Polonnaruwa’s main station, take the local bus to Habarana, before changing to a direct bus that heads for Trincomalee. The journey takes around 3.5 hours.
How to get around Trincomalee | If you’re looking to explore the surrounding area, I would highly recommend renting a scooter. Alternatively, go walking or hire one of the many tuk-tuks.
Day 21 | Negombo, time to leave Sri Lanka
It’s time to leave Trinco and board the train that brings you from Trincomalee to Negombo (departs once a day at 06:50).
This scenic train journey is the last glimpse you’ll have of this unique, captivating country. It’s a great moment to reflect and appreciate the fascinating adventures you’ve had during your 3 weeks in Sri Lanka.
To avoid unnecessary problems, make sure you arrive in Negombo one day prior to your return flight. By doing so, you ensure yourself a stress-free journey to the airport.
NEGOMBO | THE ESSENTIALS
Where to stay in Negombo | The last night before a flight, I always try to pick the most comfortable, budget-friendly accommodation possible. For Negombo, I would highly recommend Ayur Ayur Resort & Ayurveda Retreat. Alternatively, use booking.com to find accommodation in Negombo.
How to get from Trincomalee to Negombo | Take the direct train from Trincomalee station to Gampaha station. From there, hire a tuk-tuk or arrange a taxi with the PickMe app to bring you to your accommodation in Negombo. The journey can take up to 9 hours.
Train times from Trincomalee to Negombo | Train departs once daily, 06:50. To avoid unnecessary problems, make sure you arrive in Negombo one day prior to your return flight.
Sri Lanka itinerary | The essentials
Weather in Sri Lanka | The best time to visit Sri Lanka
Although Sri Lanka is just a small island, it is quite a challenge to figure out the best time to visit.
Sri Lanka’s weather is somewhat confusing and dictated by two individual monsoon seasons, and since they alternate, it’s important to plan where you want to go. Due to this distinct climate, there’s always a part with good weather, making Sri Lanka a year-round travel destination.
May – September | The absolute best time to go and visit Sri Lanka’s undiscovered northern and eastern areas.
December – March | Sri Lanka’s popular south and central areas have excellent weather this time of year.
I did this Sri Lanka itinerary in September and was lucky to enjoy the best of both worlds. That said, be aware that travelling during the shoulder season doesn’t always ensure good weather.
Money essentials | The currency in Sri Lanka
Sri Lanka’s official currency is the Sri Lankan Rupee, a currency that is indicated by LKR and Rs. The notes that are currently in circulation include Rs10, Rs20, Rs50, Rs100, Rs500, Rs1000, Rs2000 and Rs5000. Make sure you have enough notes in lower denominations, especially if you plan to stroll the markets and hire tuk-tuks.
Exchanging currency in Sri Lanka | I would sincerely recommend you avoid buying Sri Lankan Rupees either ahead of time or at the airport. I made the mistake of buying upfront, and since the Rupee isn’t rated as a major currency, I ended up getting a bad exchange rate.
The exchange rate at the time of writing – November 2024 | $1 equals 294 LKR, and €1 equals 315 LKR. For up-to-date exchange rates, visit the XE website.
ATMs in Sri Lanka | ATM services are found throughout most popular tourist areas and work well. To avoid unnecessary costs, I’d highly recommend choosing the local currency when withdrawing money.
Fee-free ATM | I used The People’s Bank on many occasions, and had no commission whatsoever.
Stay safe in Sri Lanka | Travel insurance
Though Sri Lanka is perfectly safe for travellers, I always strive to sort out my travel insurance before arriving in a foreign country, and I highly advise anyone else to do the same.
Where we prefer that everything goes smoothly during our travels, something unfortunate can happen at any moment, whether it’s an injury or an accident on the road. When that happens, it is better to be safe than sorry.
Heymondo | Whether you’re going on a 3-week backpacking trip, or planning a long stay somewhere abroad, Heymondo has excellent insurance options either way – plus full COVID-19 coverage and a handy app with 24-hour medical assistance. Readers of WTSW receive 5% off any insurance policy, more information here.
Cheers!
I’ve been on this travel blogging journey since 2019.
If you appreciate what I do here, these are some ways you can support me.
10 Awesome things to do in Tulum, Mexico
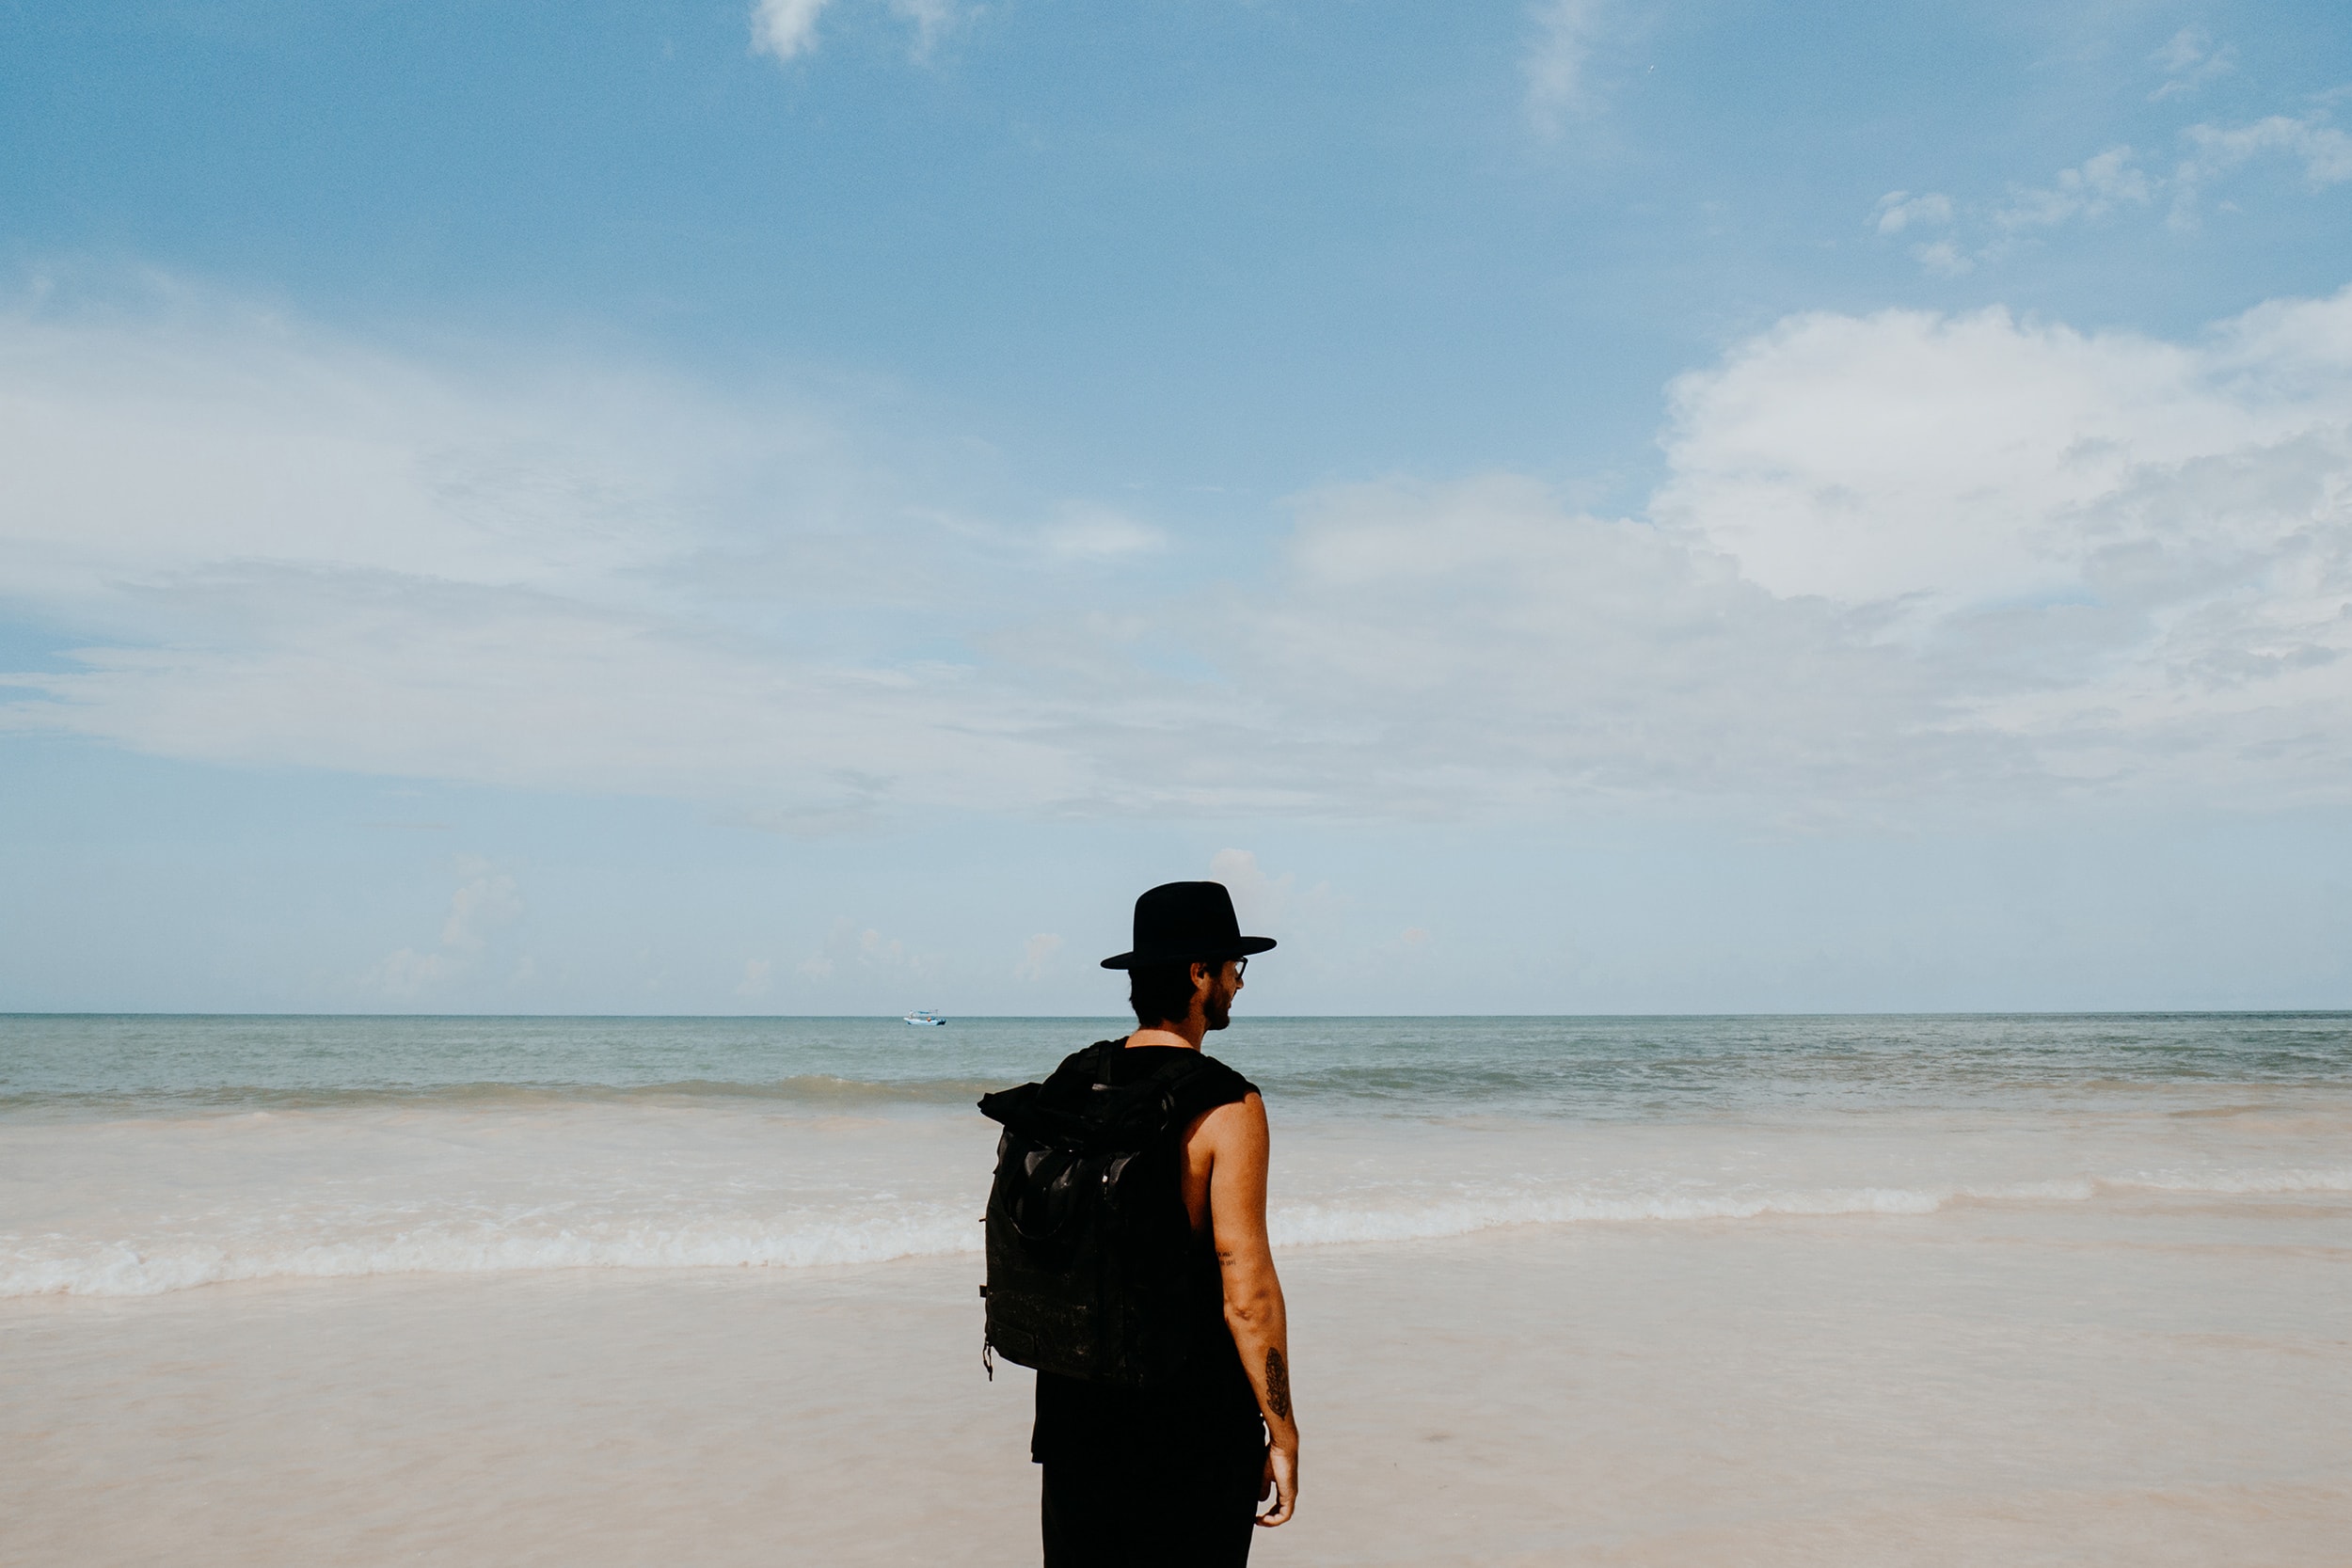
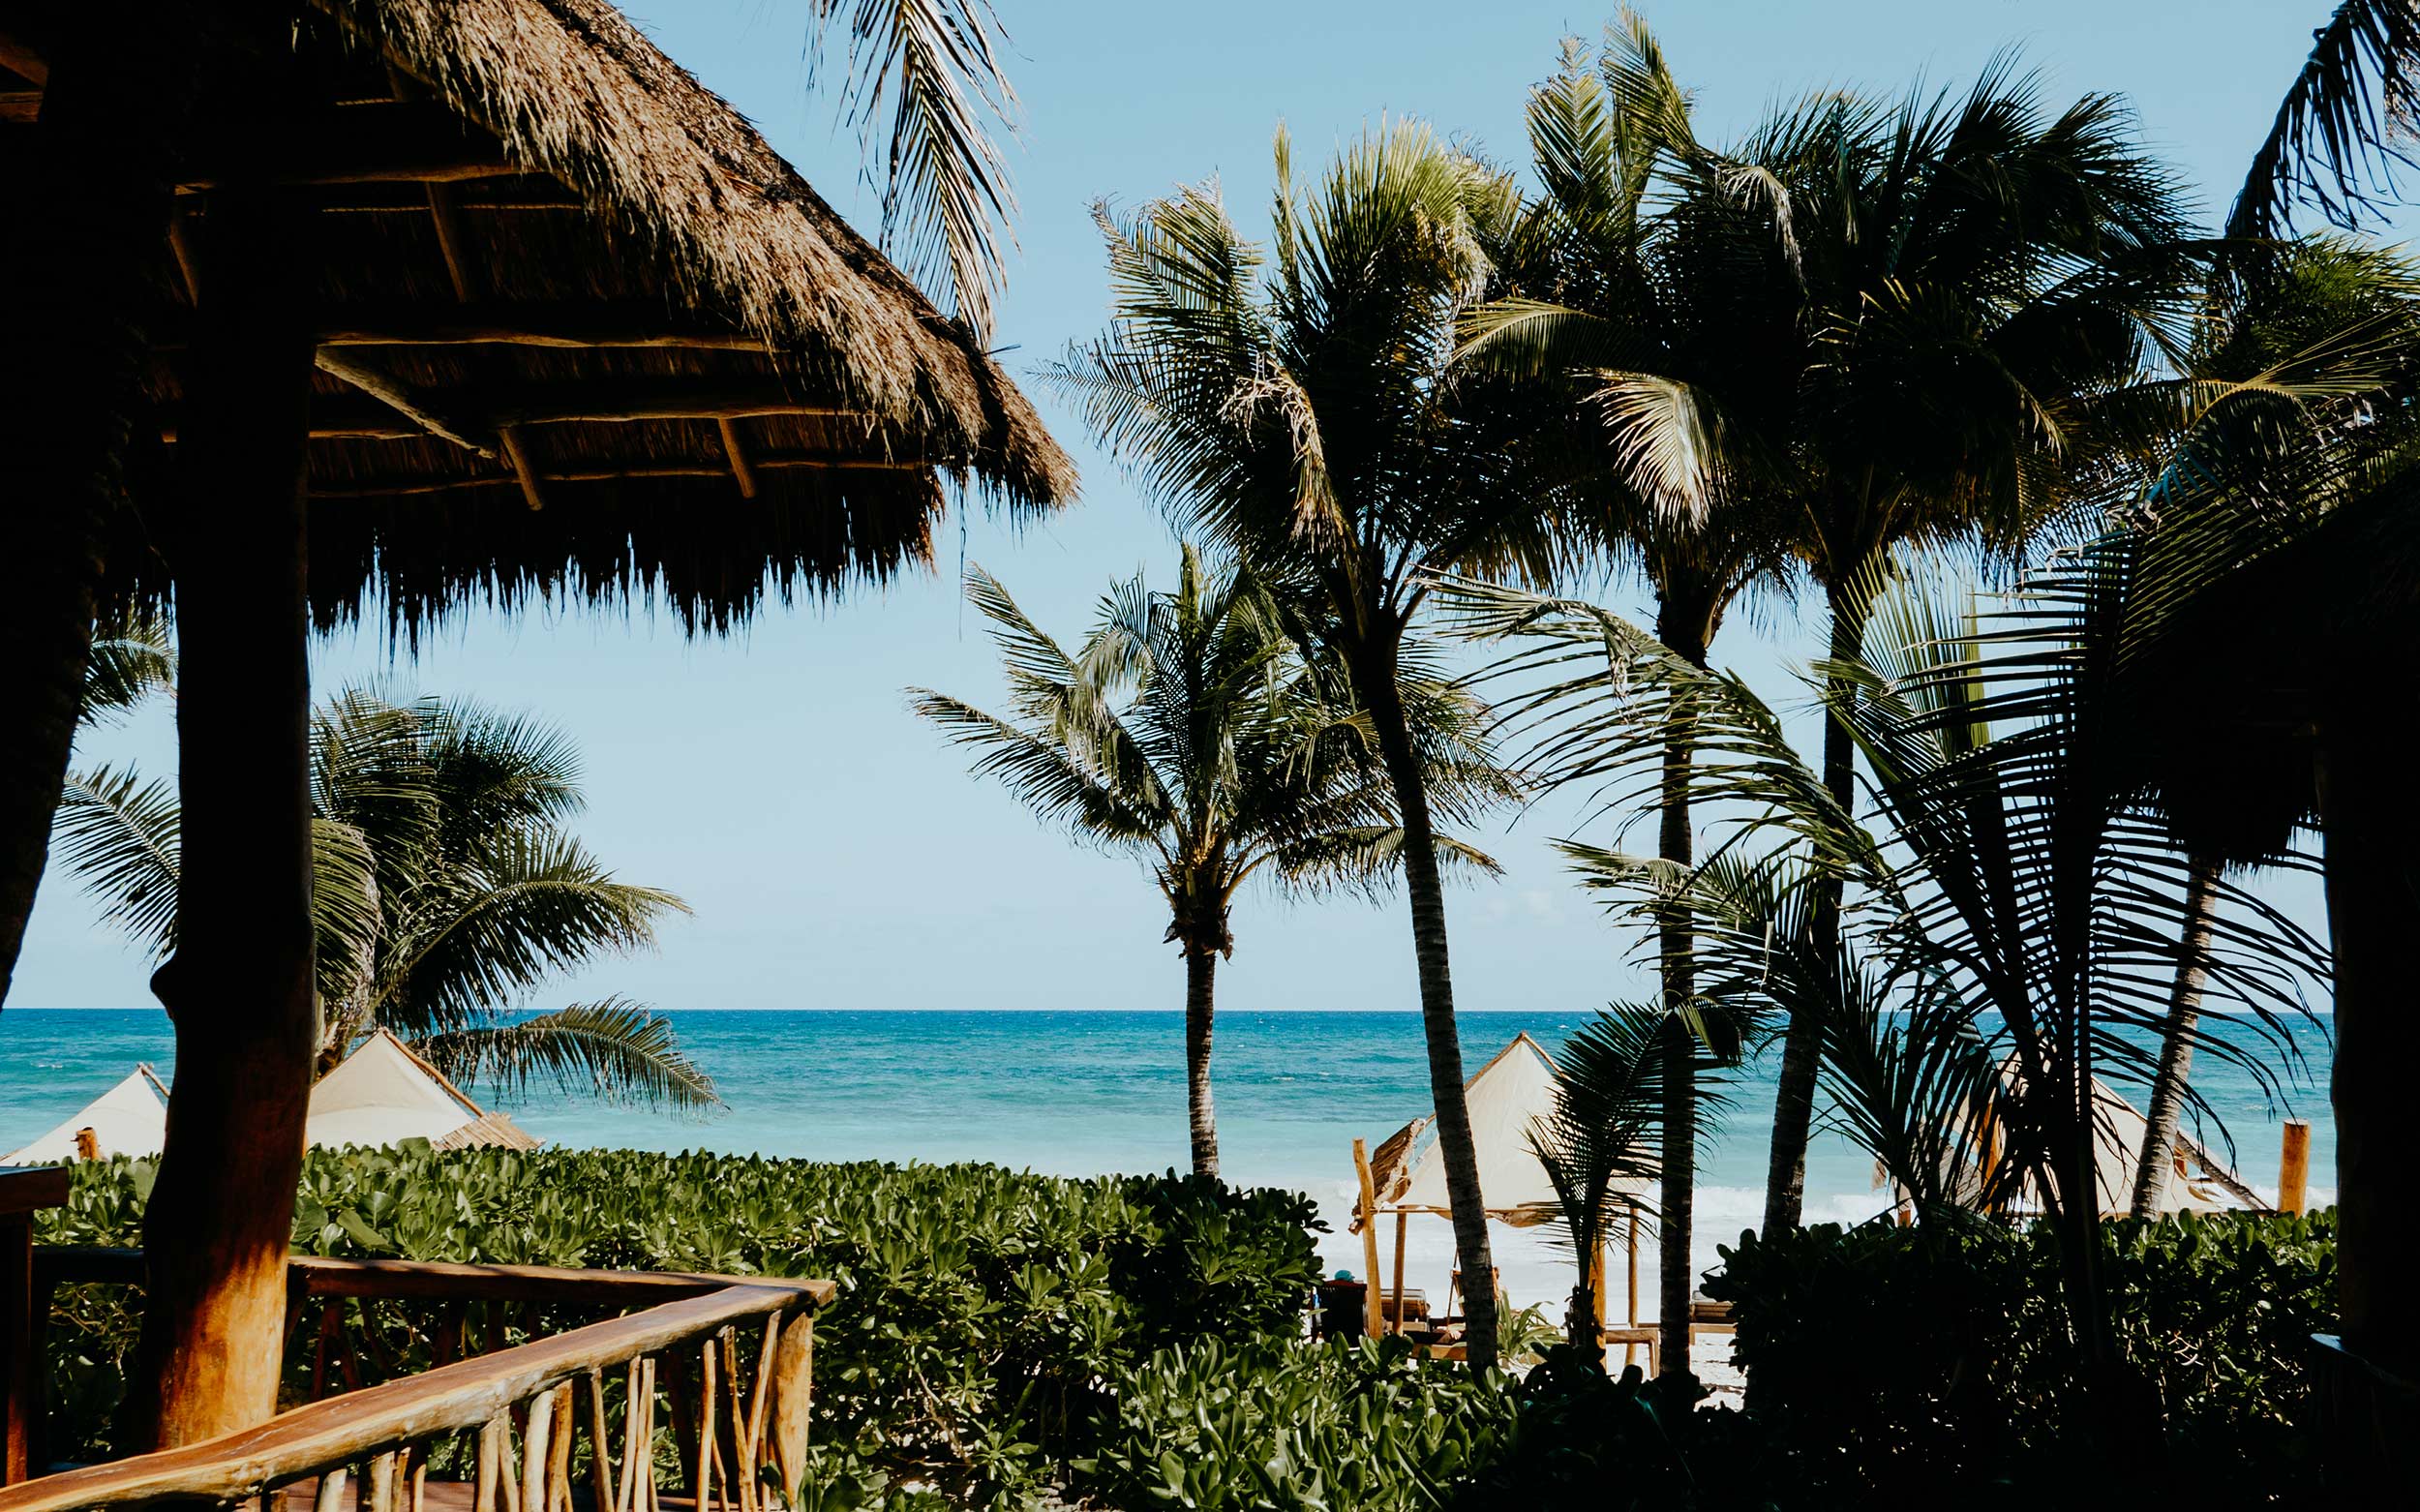
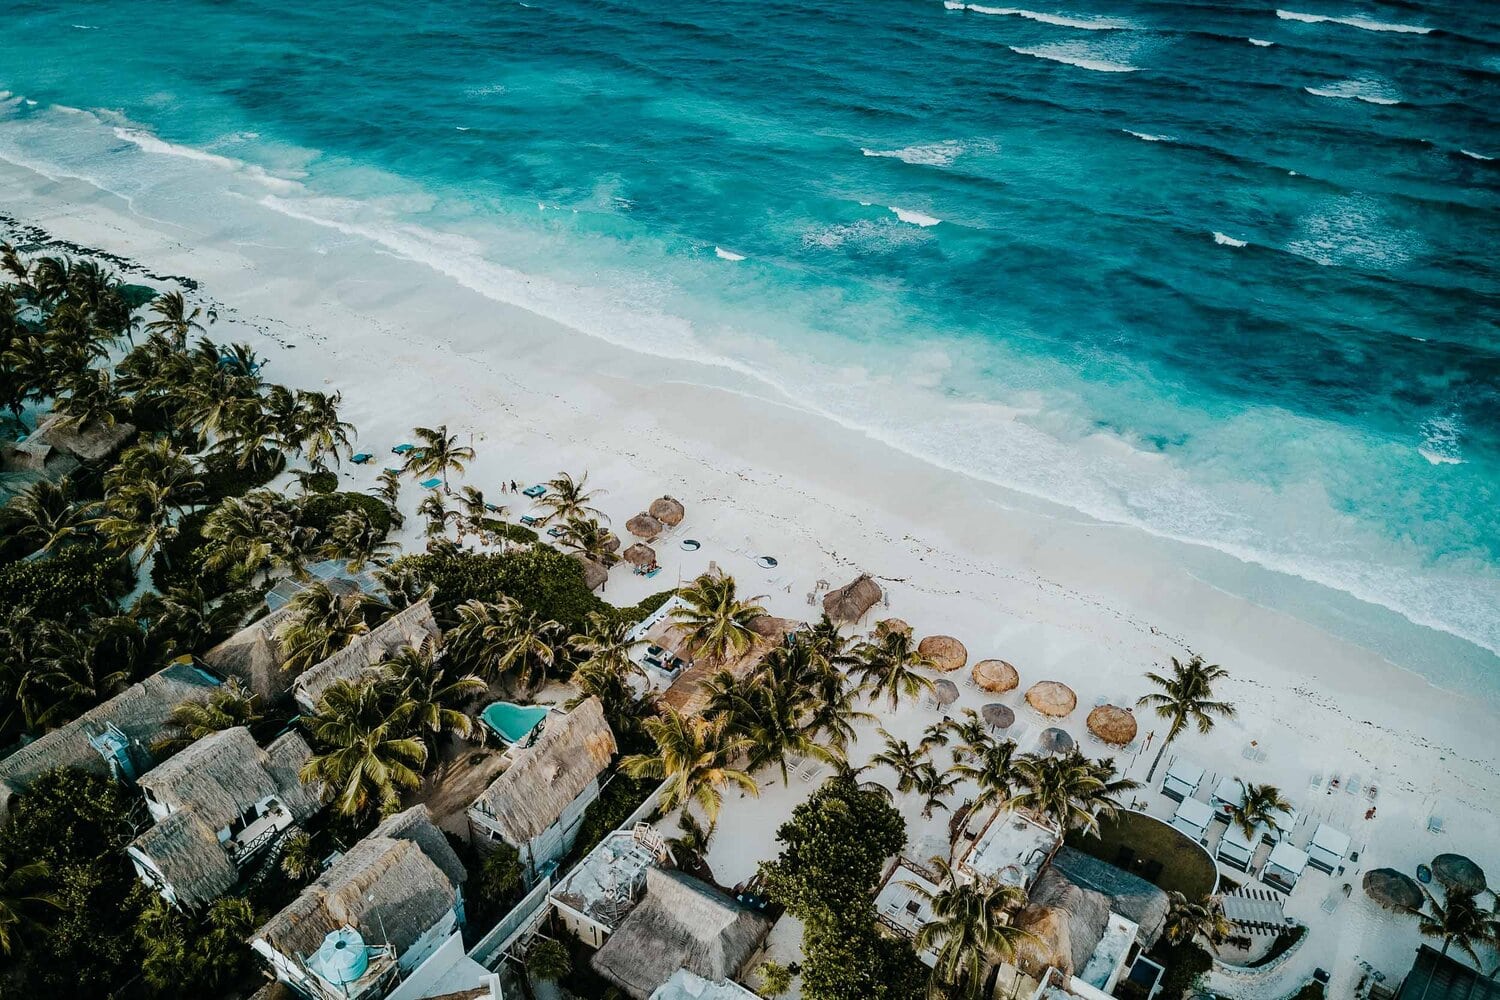
Tulum has rapidly become Mexico’s most trendy beach destination, attracting travellers from all over the globe, and after visiting recently, it is easy to understand why.
Charmed by the most delicate stretches of white-sand beach, inviting crystal clear waters, and a tranquil ambience that will effortlessly make you feel at ease, Tulum is easily one of Mexico’s best destinations for those looking to kick back and relax.
While I normally prefer to explore lesser-known destinations, I didn’t want to miss out on this one, so I went to see what Tulum had to offer.
Quite frankly, I was positively surprised after spending several days in the most popular and photogenic town of Mexico’s famous Riviera Maya.
In fact, Tulum is a town that makes a perfect base for some of the best experiences in Yucatán.
Think of impressive Mayan ruins, a wide array of picturesque cenotes, as well as a great selection of good restaurants and bars – not to mention that Tulum is home to some of the most innovative hotels and resorts in the whole of Mexico.
That said, here’s my traveller’s guide to Tulum, where I cover all the nifty details to have a wonderful time, including the best things to do in Tulum, where to stay, as well as some insider tips that make your stay unique.
If you choose to use any of the links on this page, I may receive a small commission at no extra cost to you. By using these links, you’ll have a direct impact on WTSW and my ability to continue to create free insightful travel content for you. If you find any of my tips useful, you can support me by buying a virtual coffee here.
Where is Tulum
Tulum is located in the state of Quintana Roo on Mexico’s popular Yucatán peninsula, about two hours drive from Cancun.
With its white-sand beaches, densely forested jungle, and some of the most stunning sunset points in Yucatán, Tulum is considered one of the best beach destinations in Mexico.
Where to stay in Tulum
When it comes to accommodation in Tulum, there are heaps of brilliant options to choose from.
Whether you’re after a pillow in an affordable hostel, an upscale eco-friendly resort, a boutique hotel next to the sea, or something in between, I’m pretty sure you’ll find an option that suits your travel preferences and budget.
To help you out, I’ve listed a couple of my absolute favourites below, some of which are marked – these are the ones where I stayed myself.
+ Una Vida | Tucked away in the lush jungle of Tulum is Una Vida, an outstanding set of luxurious villas that are marked by the most incredible bohemian-style design – you should definitely click the link to see how awesome this place is. Adjacent to these elegant villas is a serene garden that features two incredible zen-like pools, and a spacious common area. And though it sounds like you’re in a remote paradise, you’re still at only a stone’s throw away from the trendy bars and restaurants of Tulum.
Elements Tulum Boutique Hotel | Located within a short walk of Tulum’s lively city centre, Elements is a charming boutique hotel that provides elegant rooms that are unrivalled in terms of comfort. A large outdoor pool, various breakfast spreads, and a set of complimentary bicycles to take around town, make Elements one of the best options in Tulum.
+ Turquoise Petit Hotel Tulum | Set in the heart of Tulum, this charming boutique hotel offers exceptional value for the money, with luxurious suites starting at just $95 a night. The rustic-style rooms (the artwork is awesome) are spacious, air-conditioned and utterly comfortable. There are also two outdoor pools and a lush garden – something that’s always appreciated.
Habitas Tulum | Internationally known as one of the best Eco-resorts in Tulum, Habitas grants travellers a once in a lifetime experience, by combining the magical environment of Tulum Beach with world-class facilities and hospitality. It also features a large ocean-facing pool, a private stretch of beach, and a high-end wellness centre. Do keep in mind that this luxury comes at a price – Habitas is an absolute splurge.
Mayan Monkey Hotel & Hostel | Unquestionably the best hostel in Tulum, Mayan Monkey provides semi-private bunk beds, a large outdoor pool, and an in-house restaurant and bar. All rooms come with air-conditioning, and a great breakfast spread is presented every morning. Throw in the fact that it’s just $35 a night, and Mayan Monkey is an absolute champ.
Tubo Tulum Hostel | An excellent option for those after something a little different, Tubo offers tube-like rooms based on a unique eco-friendly concept. Alongside the characteristic tubes, you’ll have a cosy common area, making it a perfect place to meet up with fellow travellers. Tube rooms start at around $38 per night.
If the above accommodations do not resonate with your travel preferences, search accommodations in Tulum on booking.com.
10 Awesome things to do in Tulum, Mexico
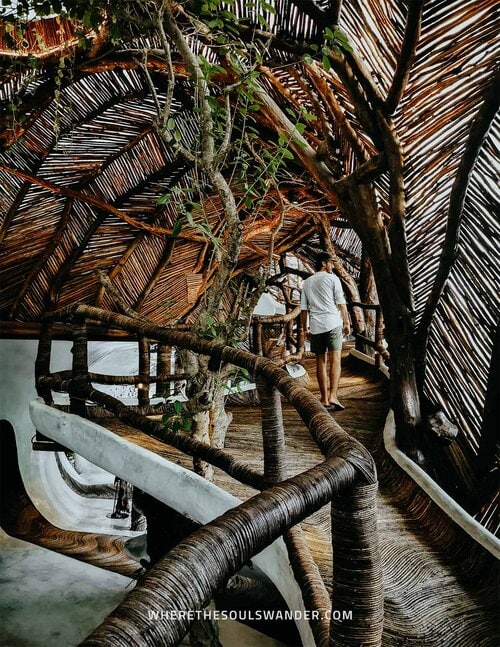
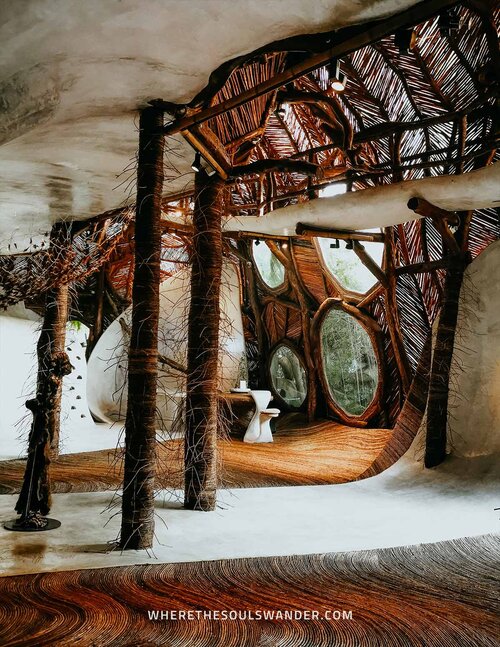
1. Behold the aesthetic IK Lab Art Gallery
Established within the renowned Azulik ecological resort, IK Lab is an impressive art gallery that is, without doubt, the most aesthetically pleasing museum I’ve ever stepped foot in.
Designed by Jorge Eduardo Neira Serkel on behalf of the great-grandson of famous art collector Peggy Guggenheim, this distinctive gallery became a huge success from the moment it opened its doors at the beginning of 2018.
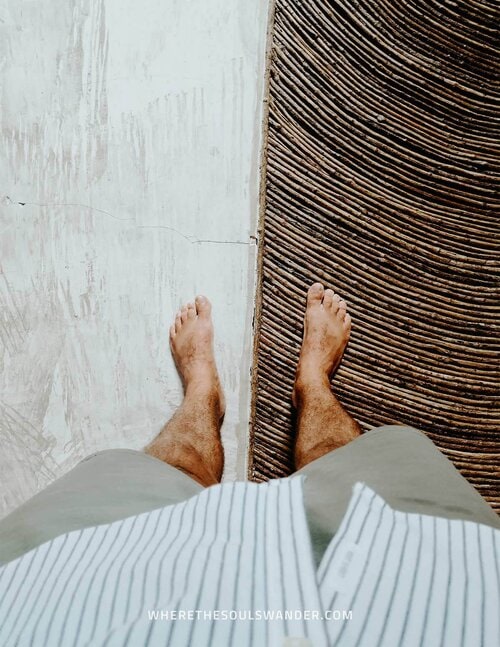
Upon entering, you’re asked to take off your shoes, which brings the experience to a whole nother level.
Cool concrete floors alternate with rough curved bejuco vines, that are crafted in wave-like shapes. Those traditional vines have been used since ancient times by Mayan artisans, which piqued the interest of the designer.
The changing texture underneath your feet, an aromatic breeze of incense, and IK Lab’s incredible aesthetic design elements further increase the gallery’s mystical ambience.
With its design inspired by nature, the IK Lab art gallery is not just your typical museum, and for that reason, I highly believe it is one of the more unique things to do in Tulum.
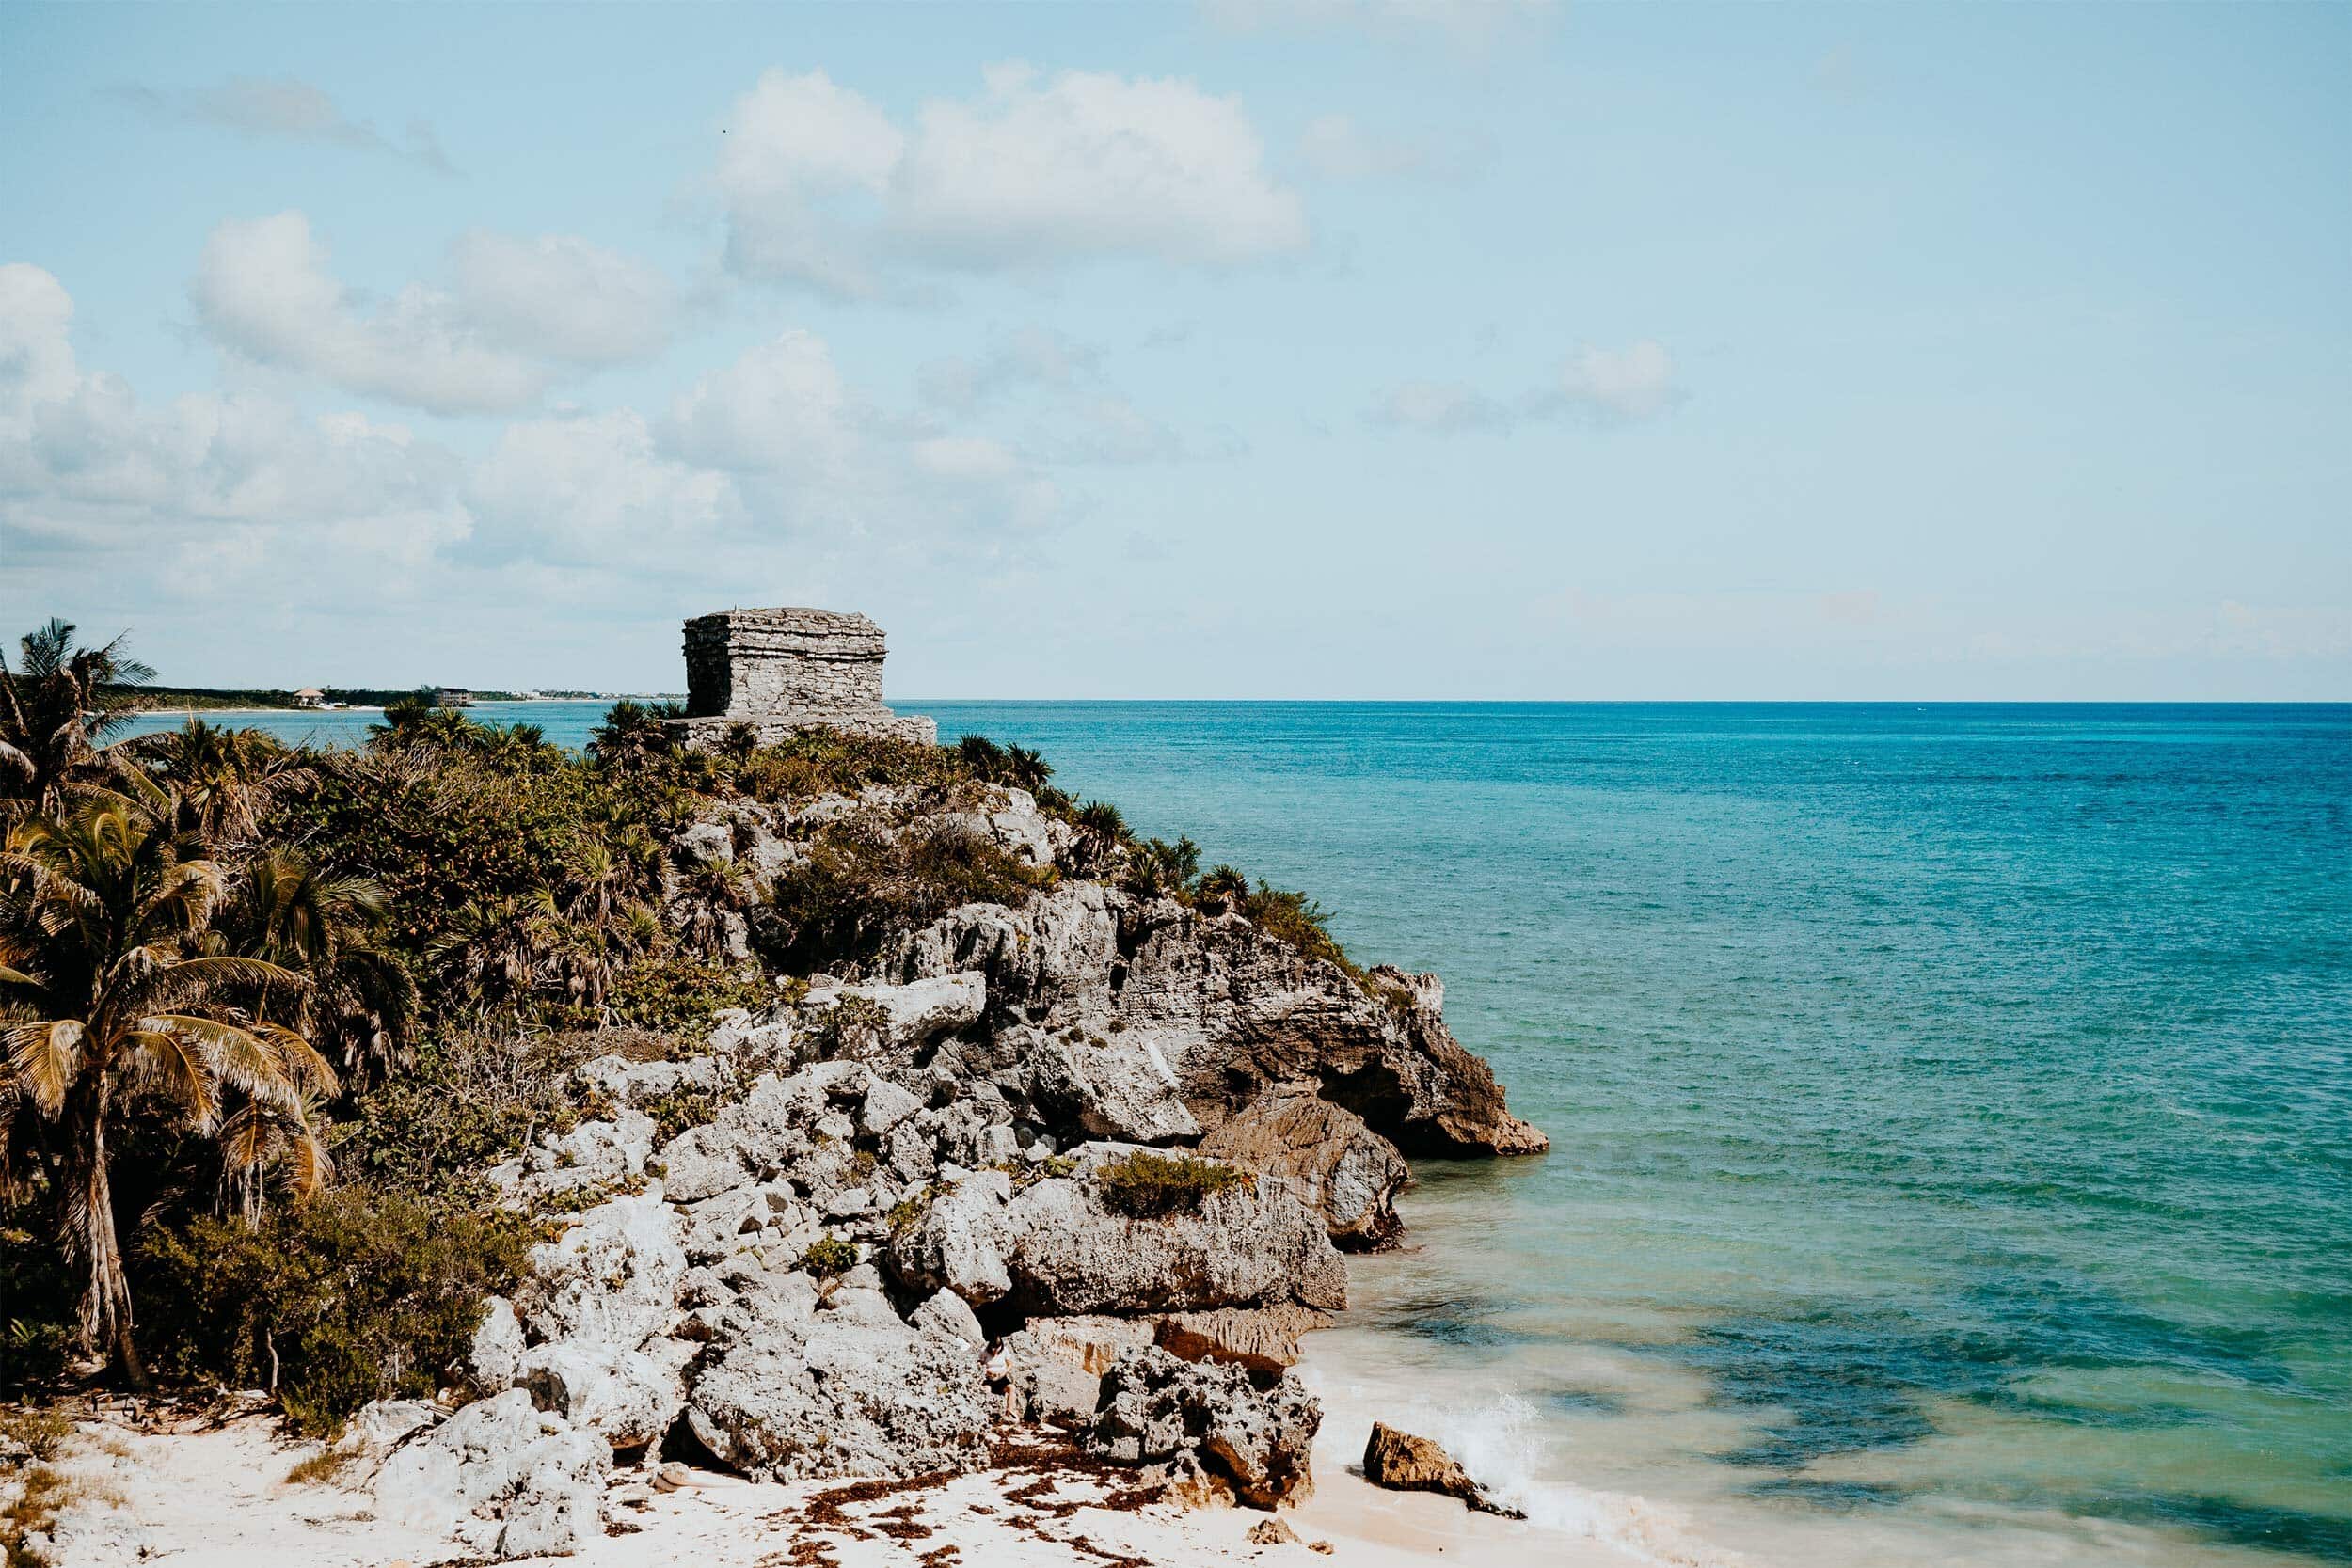
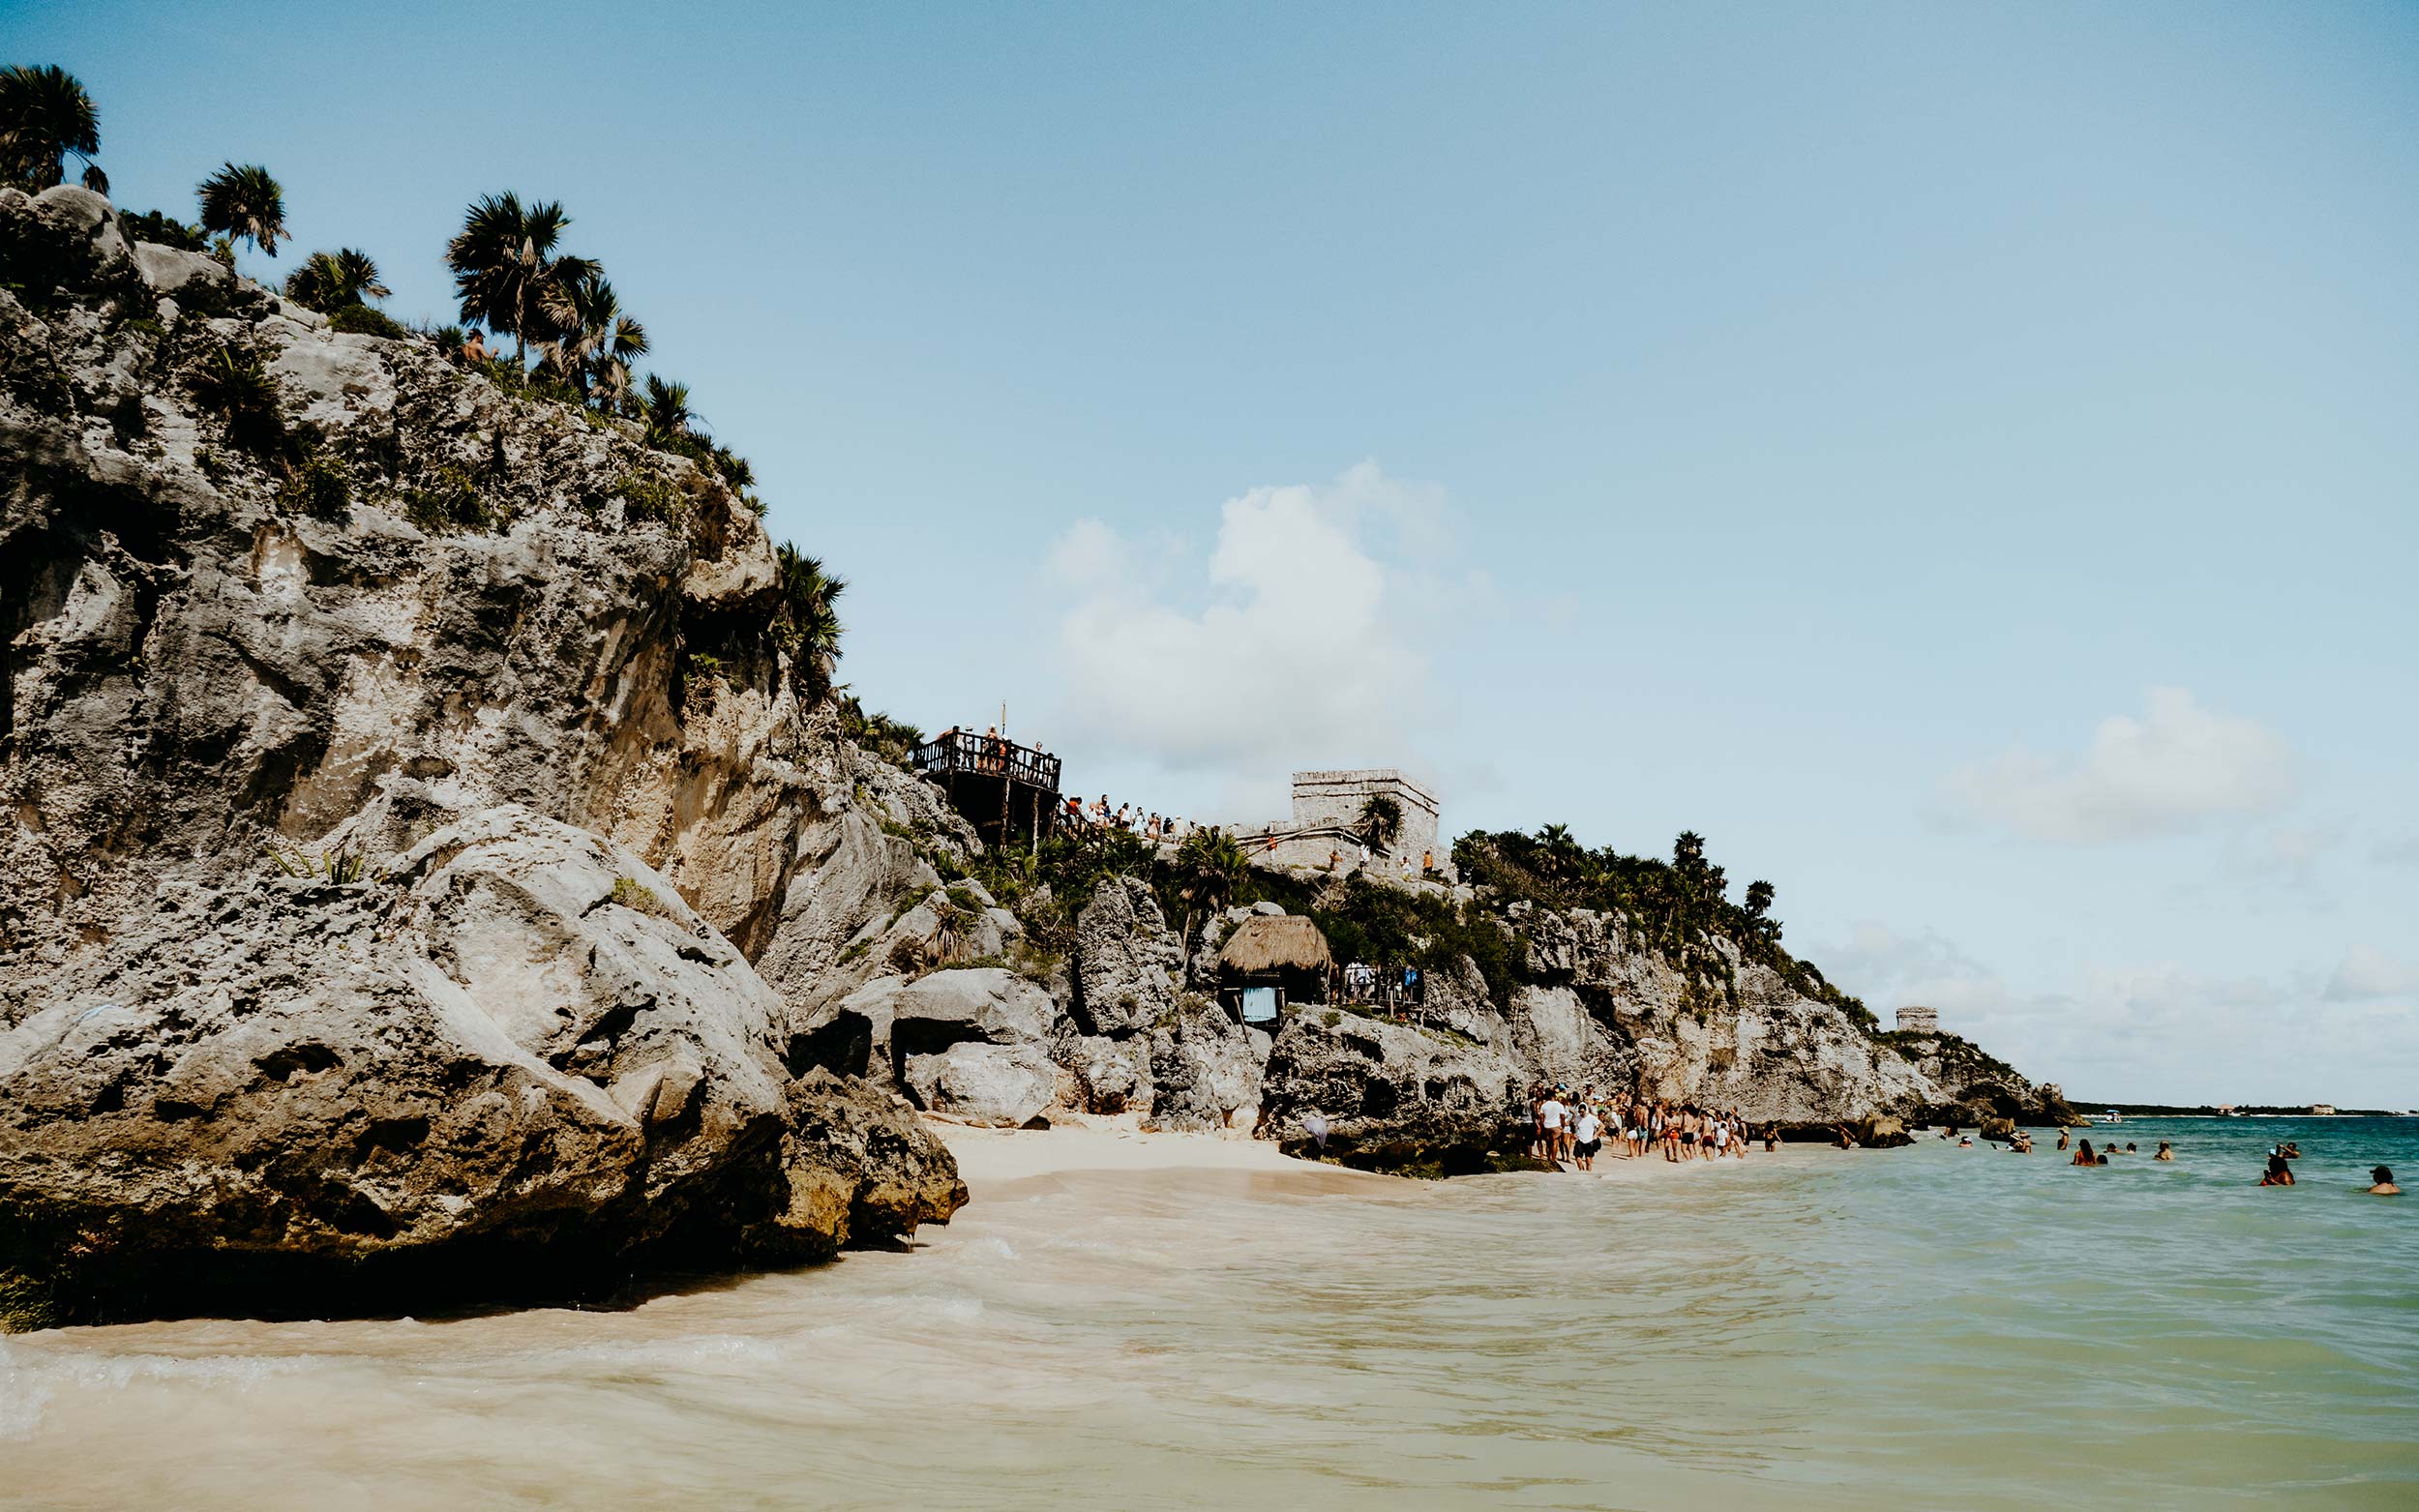
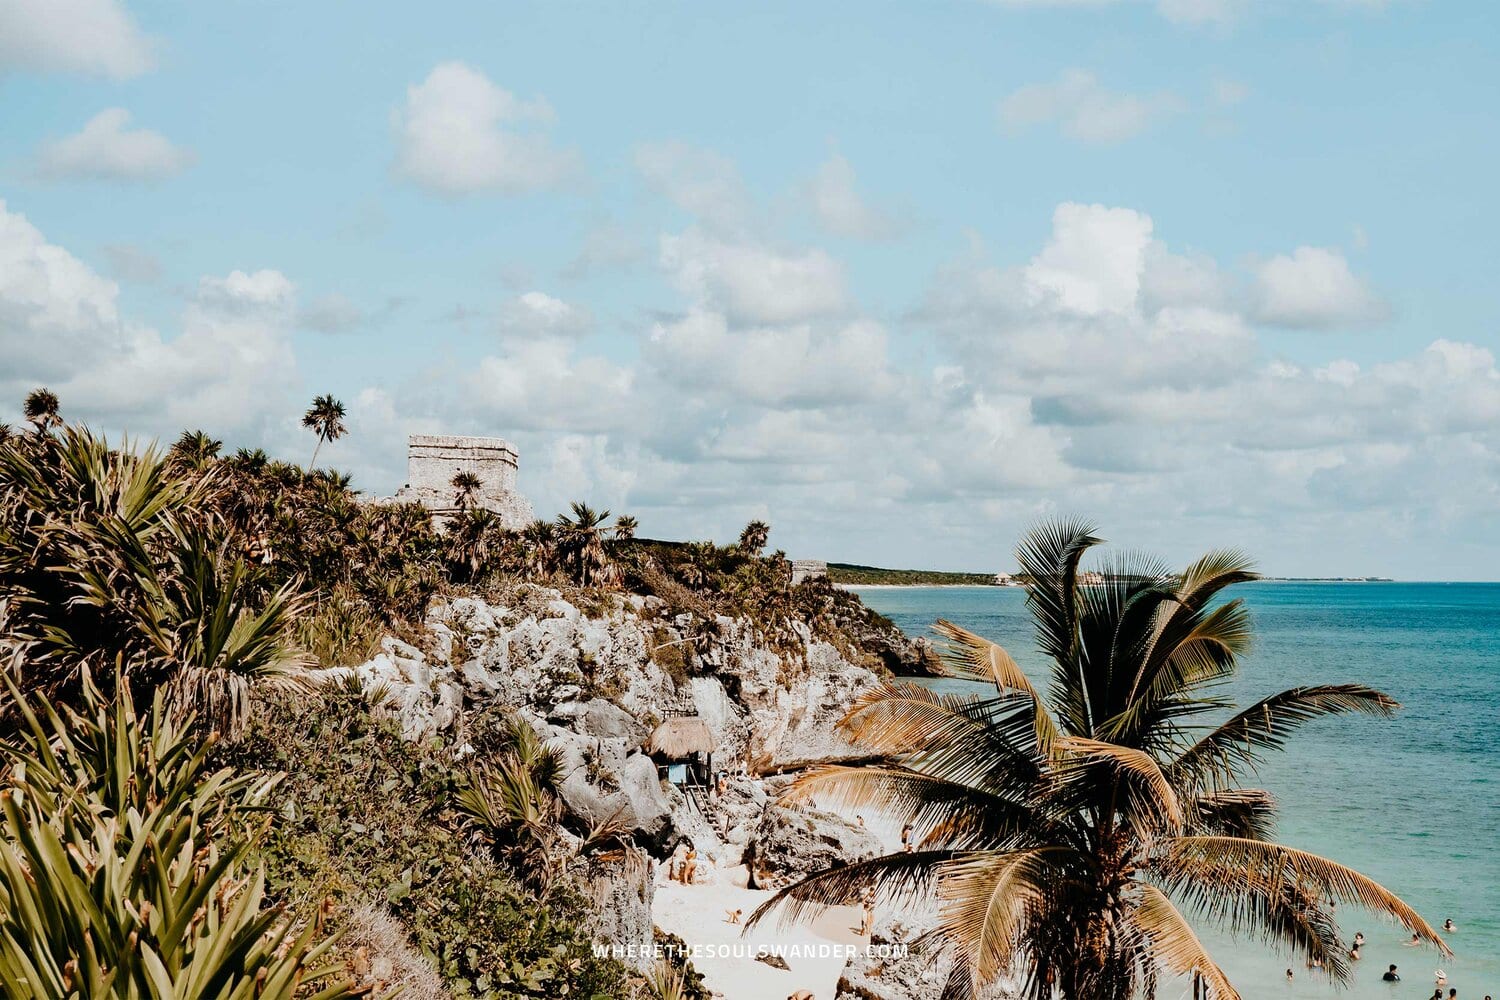
2. Visit the paradisiac Tulum Ruins
Perched atop the edge of a steep cliff, overlooking the Caribbean Sea are the picturesque Tulum ruins, a site that should be high on your list of things to do in Tulum.
The ancient Mayan town of Tulum was once of significant importance, as it functioned as one of the major trading hubs of the Mayan civilization. Goods that were traded often here include cacao beans, turquoise, cotton and jade.
In comparison to other archaeological sites in Yucatán – Chichen Itza, Coba and Uxmal to name a few, the Tulum ruins are rather unique, and roaming around the complex feels as though you’ve stepped straight into a scene of Pirates of the Caribbean.
The reason for this is a phenomenal tropical ambience, acquired by picture-perfect ocean views, steep rugged cliffs, and heaps of lush palm trees.
However, with Tulum still rising in popularity, the ruins can be a bit overrun at times – therefore I can’t stress it enough to visit the Tulum ruins first thing in the morning. For those who want to learn more about its history, I highly recommend this guided tour of the Tulum Ruins.
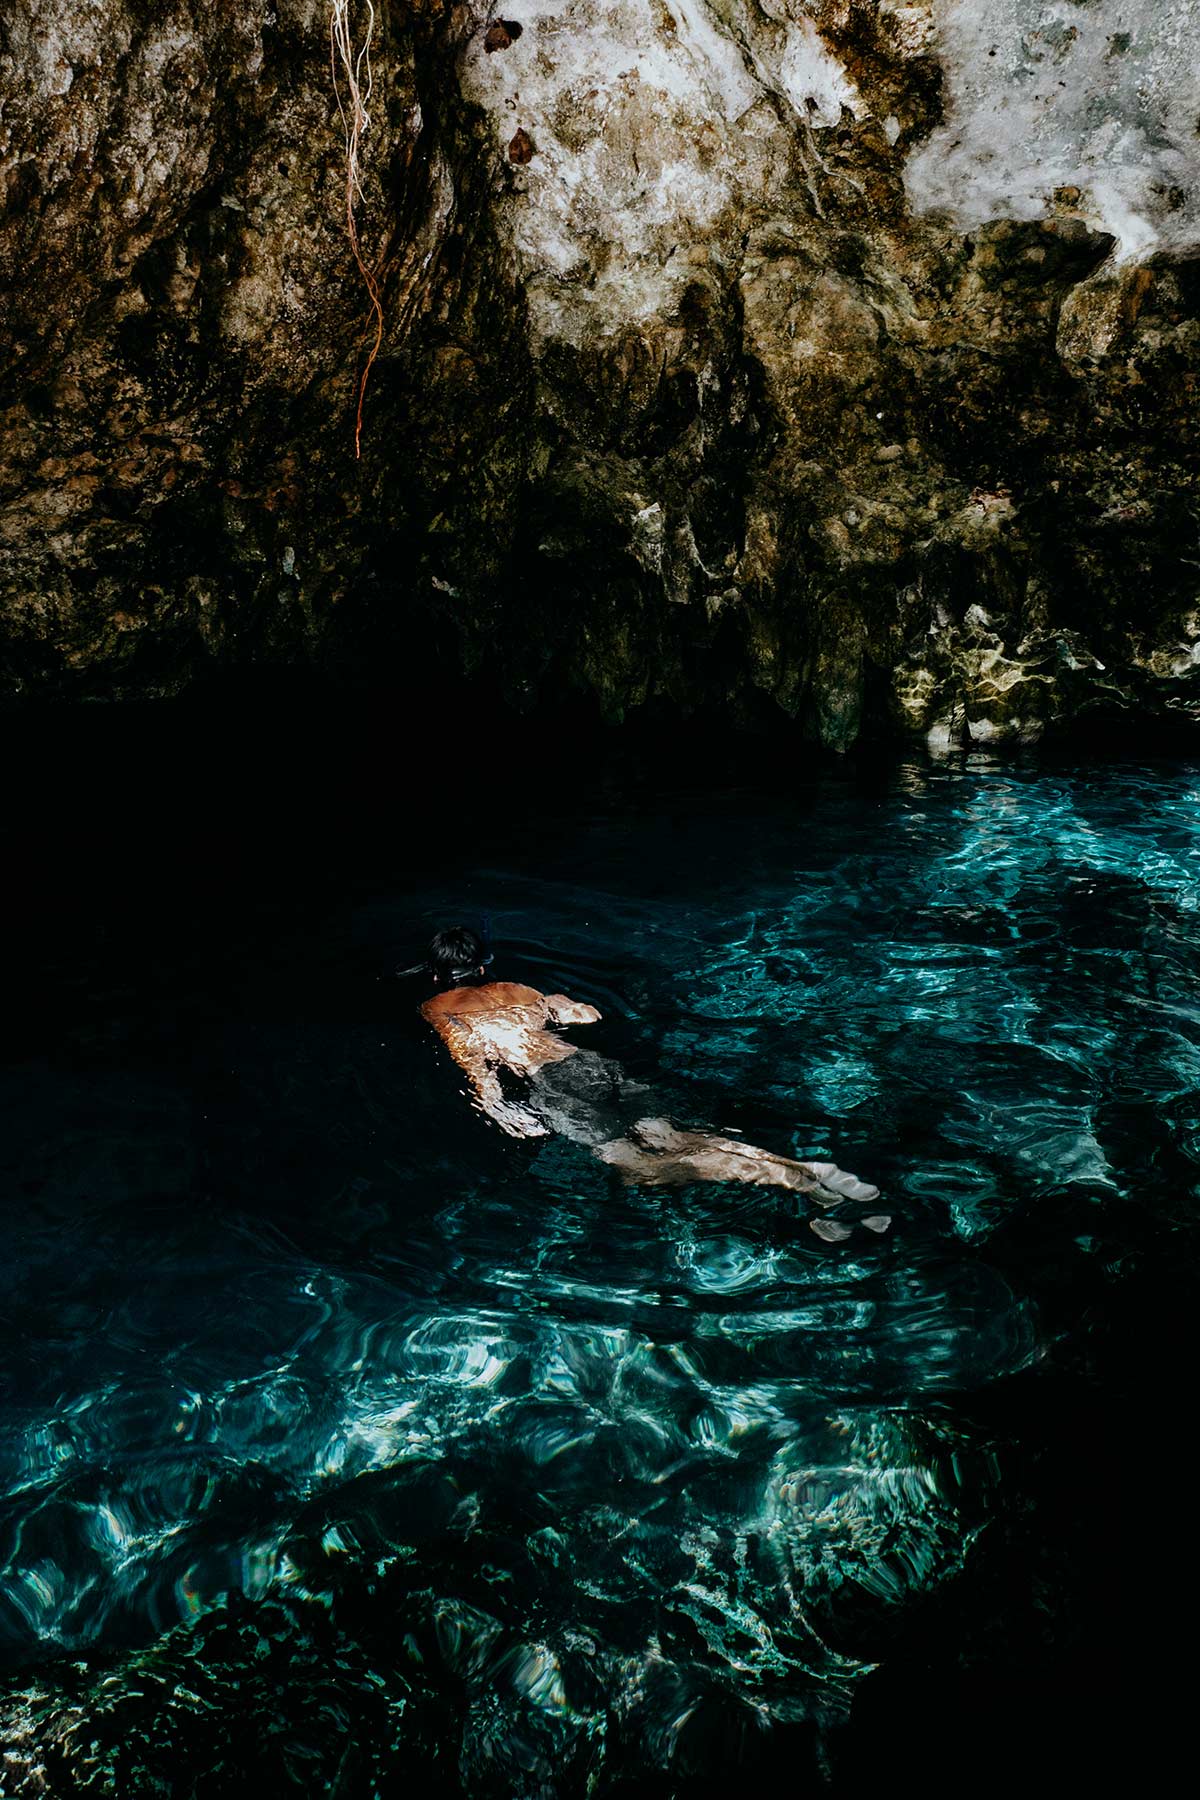
3. Take a swim at the Gran Cenote
The incredibly scenic Gran Cenote is among the most attractive cenotes in the Riviera Maya, and luckily for you, it is situated only a stone’s throw away from the town centre of Tulum.
Gran cenote is a large open-air cenote with an idyllic cave-like ambience. The cenote is well-known for its crystal clear groundwater, which is supplied from the many underground rivers that lead to the centrally positioned basin.
The marvellous cenote is home to an abundance of small fish and freshwater turtles. The Gran cenote is unquestionably the most popular cenote when it comes to snorkelling, diving and cave-diving, therefore it is extremely busy throughout the day.
What many people don’t know, including ourselves, is the fact that there is a second cenote. This smaller cenote is way more peaceful and just as beautiful.
The less-crowded cenote is easily accessed by swimming through a natural tunnel full of exquisite stalagmites and stalactites. If this option sounds too adventurous, opt for the easy way and take the stairs.
Although it is quite busy throughout the day, I liked my time at Gran Cenote. Still, I recommend visiting right after the doors open.

4. Stop by the famous ‘Follow that Dream’ sign
While cruising along the dusty roads alongside Tulum Beach, you’ll most likely notice a broad spectrum of inspiring road signs.
The best known of these signs is the ‘Follow That Dream’ sign, an uplifting road sign that has rapidly become one of the most popular Instagram hotspots in Tulum.
And I must admit, I deeply admire the creative and conscious approach that Olivia Steele manifested with her ‘Public Display Of Awareness’ street art project.
Other signs that are part of this powerful project in Tulum, state the following insightful mantras; Stay Present, If Not Now, When?, Know Thyself and Be Here Now.
It doesn’t matter if you’re into serious photography or just trying to nail your next Instagram shot, Tulum has an endless amount of creative photography possibilities, and those inspiring signs are definitely one of them.

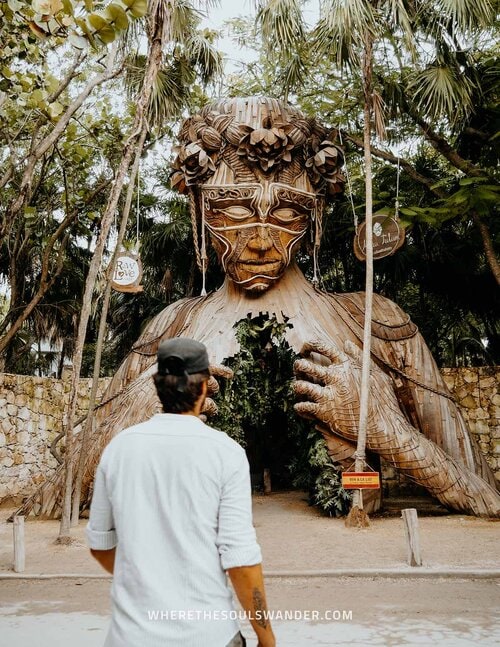
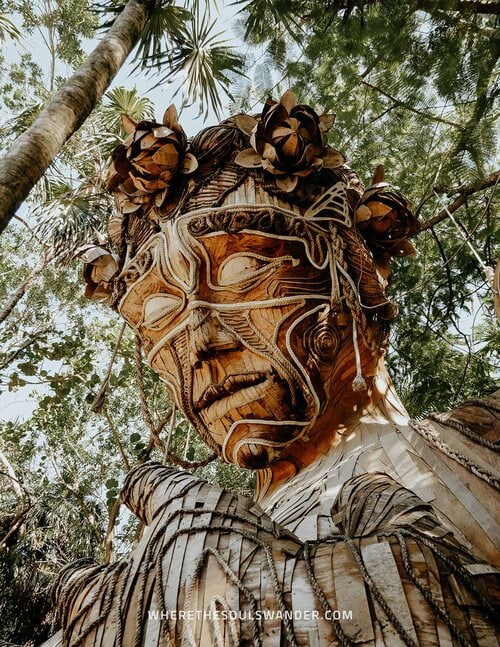
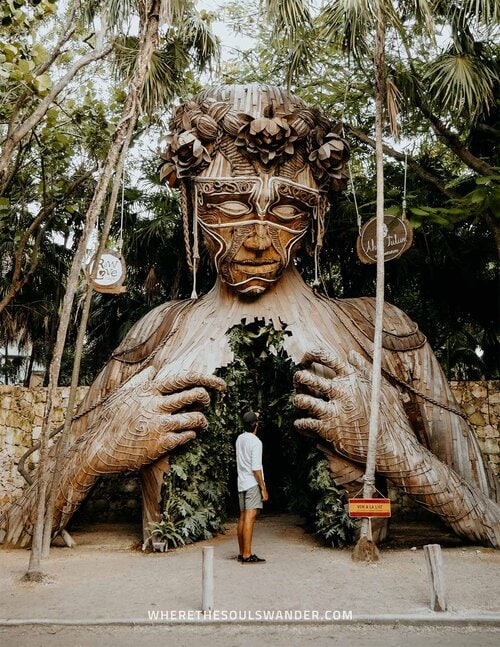
5. Admire Ven a La Luz Tulum
As you might have noticed throughout this guide, it is clear that Tulum is a breeding place for progressive contemporary artists and their inspiring art installations.
One of the best-known installations is the towering wooden sculpture that is positioned at the entrance of Raw Love and AHAU Tulum.
The picturesque Ven a La Luz sculpture, created by Cape Town artist Daniel Popper, symbolises the deep-rooted connection between human beings and nature.
The 10-meter high sculpture was originally designed to raise awareness for the sensitive ecosystem in Tulum before it was placed as decoration at AHAU Tulum.
We can assure you that this elegant sculpture attracts people from dawn till dusk, so if you’re looking to have some photography freedom, head there as early as possible.
6. Relax at La Eufemia Beach Club
With so many luxurious resorts established at Tulum Beach, it can be quite a challenge to find your slice of paradise while travelling on a budget.
Luckily, it is La Eufemia that secured a stretch of sand at Tulum’s popular Beach.
La Eufemia Beach Club is, without a doubt, our happy place when it comes to relaxing after a full day of exploring in and around Tulum.
A well-balanced mix of affordable prices and a laidback vibe, make the beach club extremely beloved among locals and travellers.
We’d spend numerous afternoons at La Eufemia and recommend checking it out if you’re in for some well-deserved relaxing time, a badass sunset and a few cold drinks supplemented by delicious local bites.
7. Have a nutritious lunch at Raw Love Cafe
Nestled between the beach and dense jungle is Raw Love Café, a trendy café that is deemed to be one of the best places to energize your body in Tulum.
At Raw Love, they serve a bunch of healthy vegan dishes that are primarily based on superfoods, making it an excellent café to have breakfast and lunch.
The trendy café is best known for its nutritious smoothie bowls, which we can say are pretty yum. However, they serve so much more nourishing dishes and bites.
Think of traditional dishes served as a healthy vegan alternative, including raw pad thai, zucchini pasta and portobello burgers. Not to mention the boosting healing shots, fresh smoothies and lovely organic coffee.
All this gets enhanced by Raw Love’s laidback ambience, a garden full of palm shade and a glimpse of the best stretch of beach you’ll find along the coast of Tulum.


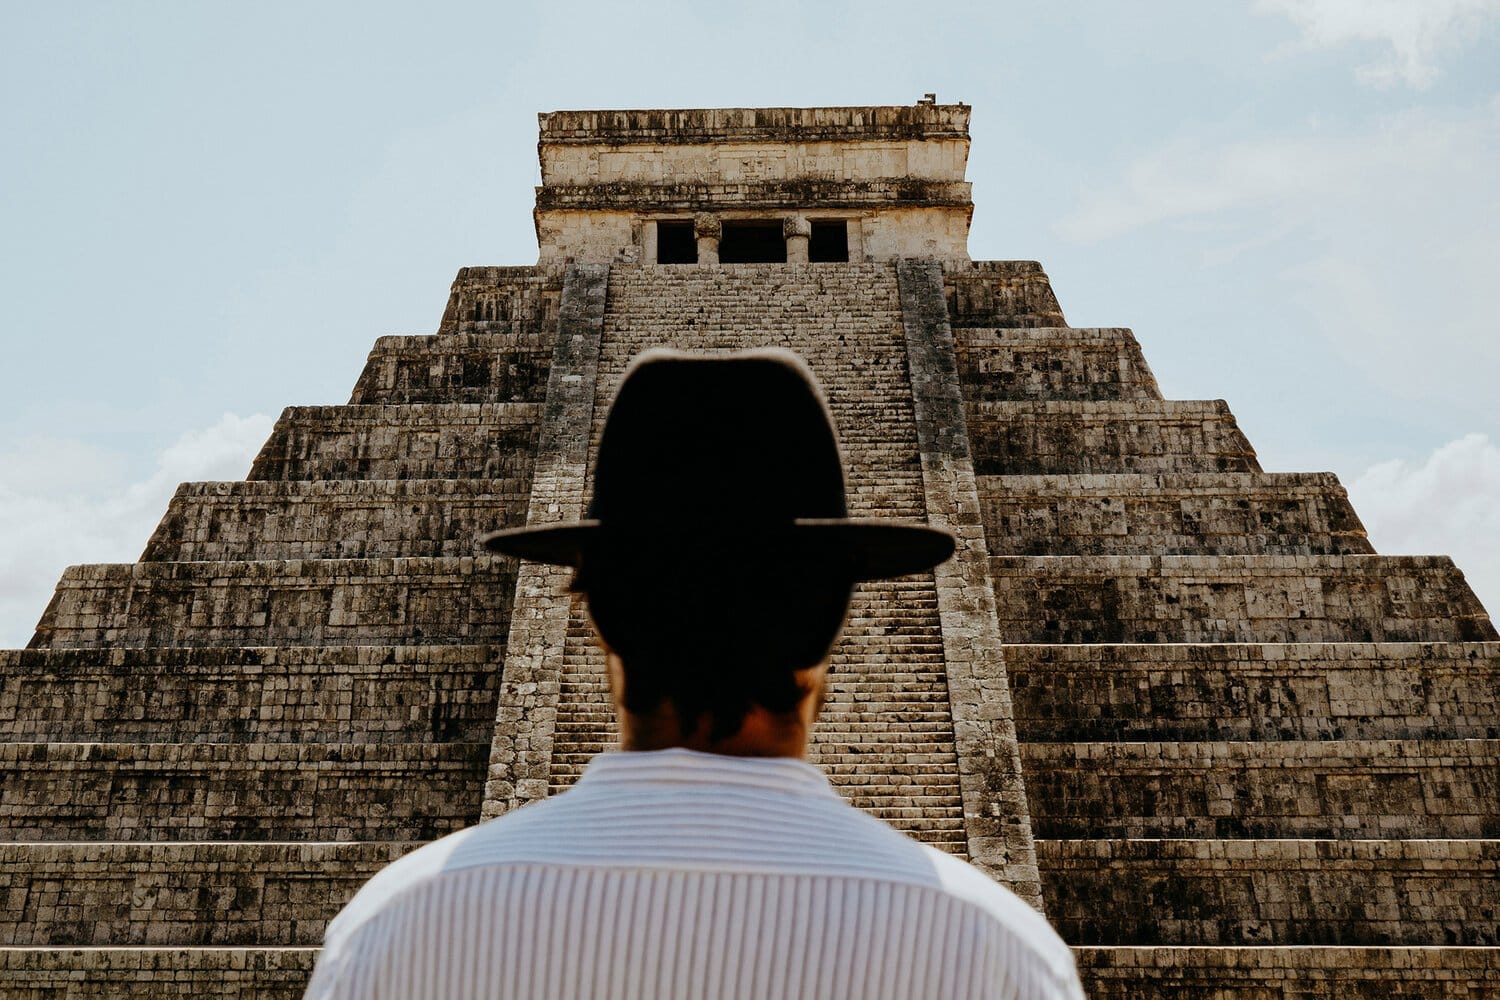
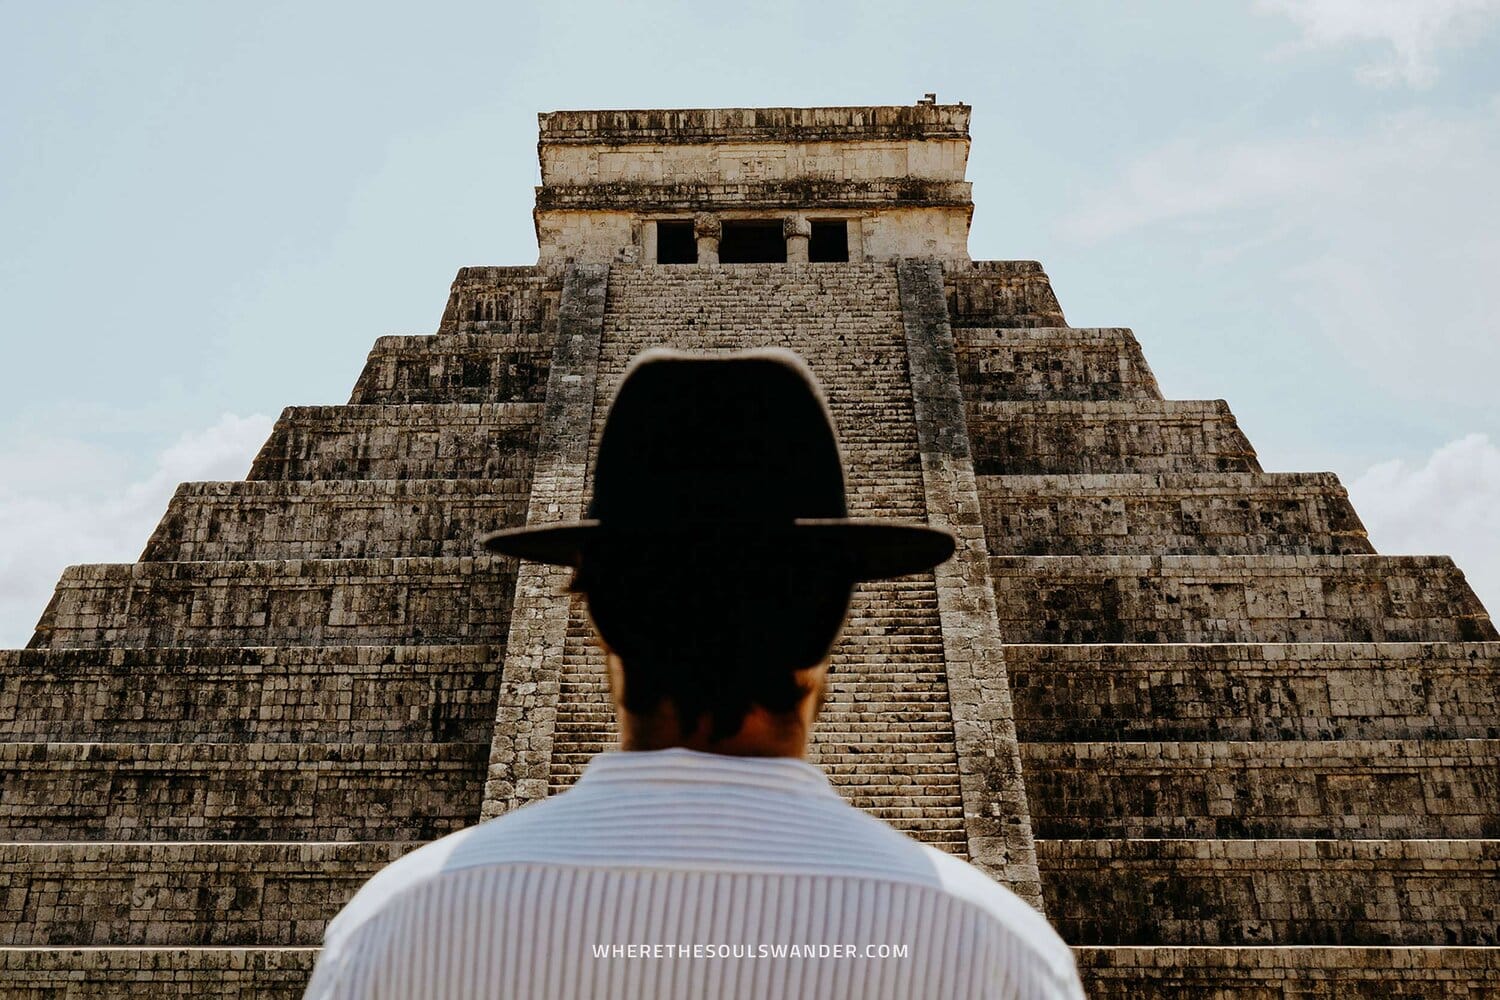
8. Explore the incredible ruins of Chichén Itzá
Once the bustling epicentre of Mayan civilization, Chichén Itzá is nowadays acknowledged as Mexico’s number one historical landmark, and that’s no wonder – it is a new wonder of the world after all.
The phenomenal Chichén Itzá is a vast complex that holds a bundle of imposing structures, with the magnificent El Castillo pyramid as one of the main reasons travellers flock to Mexico.
The Mayan people were extremely diligent when it came to mathematics and astronomy, which clearly reflected in the consciously designed structures you’ll see at Chichén Itzá today.
Now you’re reading this Tulum guide, I assume you most likely have a wonderful trip to Tulum planned. If that’s the case, I highly recommend you visit the ruins of Chichén Itzá too.
Though it’s totally possible to visit independently from Tulum, I believe the best way to visit is by joining a guided tour of Chichén Itzá.
9. Jump in Cenote Calavera
Cenote Calavera is relatively undiscovered compared to other more popular cenotes in the Riviera Maya. That doesn’t mean the cenote isn’t impressive, it is in fact, quite an adventurous one.
The appealing cenote is entered by jumping into a perfectly round sinkhole, if this sounds scary, opt for the wooden ladder.
If you’re adventurous, like me, this most likely sounds interesting to you. Next to the cenote’s main opening are two small cracks where you could drop through.
Like many other activities in Tulum, I think it is best to visit early morning or late afternoon.
With so many cool features, including a rope swing, you won’t be disappointed – I genuinely think it is one of the best cenote’s you could visit in Tulum.


10. Grab a burger at Bonita Tulum
Despite the fact that I have an affection for local cuisine, I every now and then crave a good burger.
This is where Bonita Burger Bar came and saved the day. A wide variety of creatively composed burgers, including delicious vegan options, made it kind of difficult to choose at first.
Luckily, you can’t go wrong here. Bonita Burger Bar is excellent when it comes to flavour and seasoning, which results in unique, juicy, yet crispy burgers. It is even possible to customize your burger with extra toppings as you wish.
Additionally, I’d recommend grabbing some self-cut fries on the side, which come with four amazing homemade dips.
The venue itself has a charming outdoor terrace, where you’ll be able to play a handful of games, including one of my favourites: Jenga. That and the sincere staff make the trendy burger bar perfect to hang out while enjoying the best burgers and signature-crafted beers.

Things to do in Tulum | The essentials
The best time to visit Tulum
Situated at the heart of the attractive Caribbean, Tulum enjoys a pleasant tropical climate year-round, making it a top-notch destination for travellers from all over the world.
Whereas it’s basically possible to visit Tulum at any time of year, I believe the best time to visit Tulum is during the peak season that runs from November to April.
During this time of year, the weather is warm and pleasant, while there’s also barely any rainfall, making it the perfect period for both relaxing and exploring.
Additionally, I would recommend planning your trip in the off-season months of October and May. I visited Tulum in late October and had the fortune to enjoy excellent weather my entire trip, as well as the advantage of fewer people around.
One word of caution though, as with most tropical destinations, it isn’t guaranteed that you’ll get to experience good weather during the off-season.
How to get to Tulum
FLIGHTS | HOW TO GET TO TULUM
If you’re planning to visit Tulum, you most likely enter Mexico by plane through the Cancun International Airport, which is located around 1,5 hours drive north of Tulum.
For flights to Cancun, I would suggest the use of Skyscanner. Not only is their website easy to use, but they also offer a large variety of airlines – plus the possibility to find good rates.
After arriving in Cancun, it is pretty straightforward to get to Tulum, especially if you consider making use of one of the options I listed below.
CAR | HOW TO GET TO TULUM
The popular Yucatán Penisula is one of the safest areas in Mexico, making it the perfect destination for an adventurous road trip – which obviously, also includes a few days in Tulum.
When sorting out car rentals in Yucatán, I would advise checking out Rentalcars.com.
With excellent service, additional insurance, and a wide selection of cars to choose from, Rentalcars is in my opinion easily the most convenient pick – ooh, and rates are pretty good too!
BUS | HOW TO GET TO TULUM
Public transport is one of the most popular means of transport, if not the best option to travel around Yucatán.
ADO, Mexico’s main bus company is an excellent company where I travelled with on several occasions. I can say from first-hand experience, that their services are of great quality.
Not only are their busses comfortable, airconditioned and clean, but they also service the major cities in Mexico, including Cancun, Tulum, Playa Del Carmen and Valladolid.
For more information, departure times and online reservations, visit the ADO website.
Stay safe in Mexico | Travel insurance
While Mexico is perfectly safe for travellers, I always strive to sort out my travel insurance before arriving in a foreign country, and I highly advise anyone else to do the same.
Where we prefer that everything goes smoothly during our travels, something unfortunate can happen at any moment, whether it’s an injury or an accident on the road. When that happens, it is better to be safe than sorry.
Heymondo | Whether you’re going on a 3-week backpacking trip, or planning a long stay somewhere abroad, Heymondo has excellent insurance options either way – plus full COVID-19 coverage and a handy app with 24-hour medical assistance. Readers of WTSW receive 5% off any insurance policy, more information here.
Cheers!
I’ve been on this travel blogging journey since 2019.
If you appreciate what I do here, these are some ways you can support me.