


My 9-day Ireland itinerary | Wild Atlantic Way road trip
Ireland is without question, one of the most underrated countries in Europe.
From the country’s wild nature and rugged landscapes to the delicious locally grown produce, the rich and captivating history to the utterly friendly people, Ireland will win your over as soon as you’ve set foot into the country.
Add to that that Ireland is the motherland of the world-famous Guinness beer, produces some of the finest whiskey on the planet, and it’s safe to say that Ireland breathes uniqueness and authenticity.
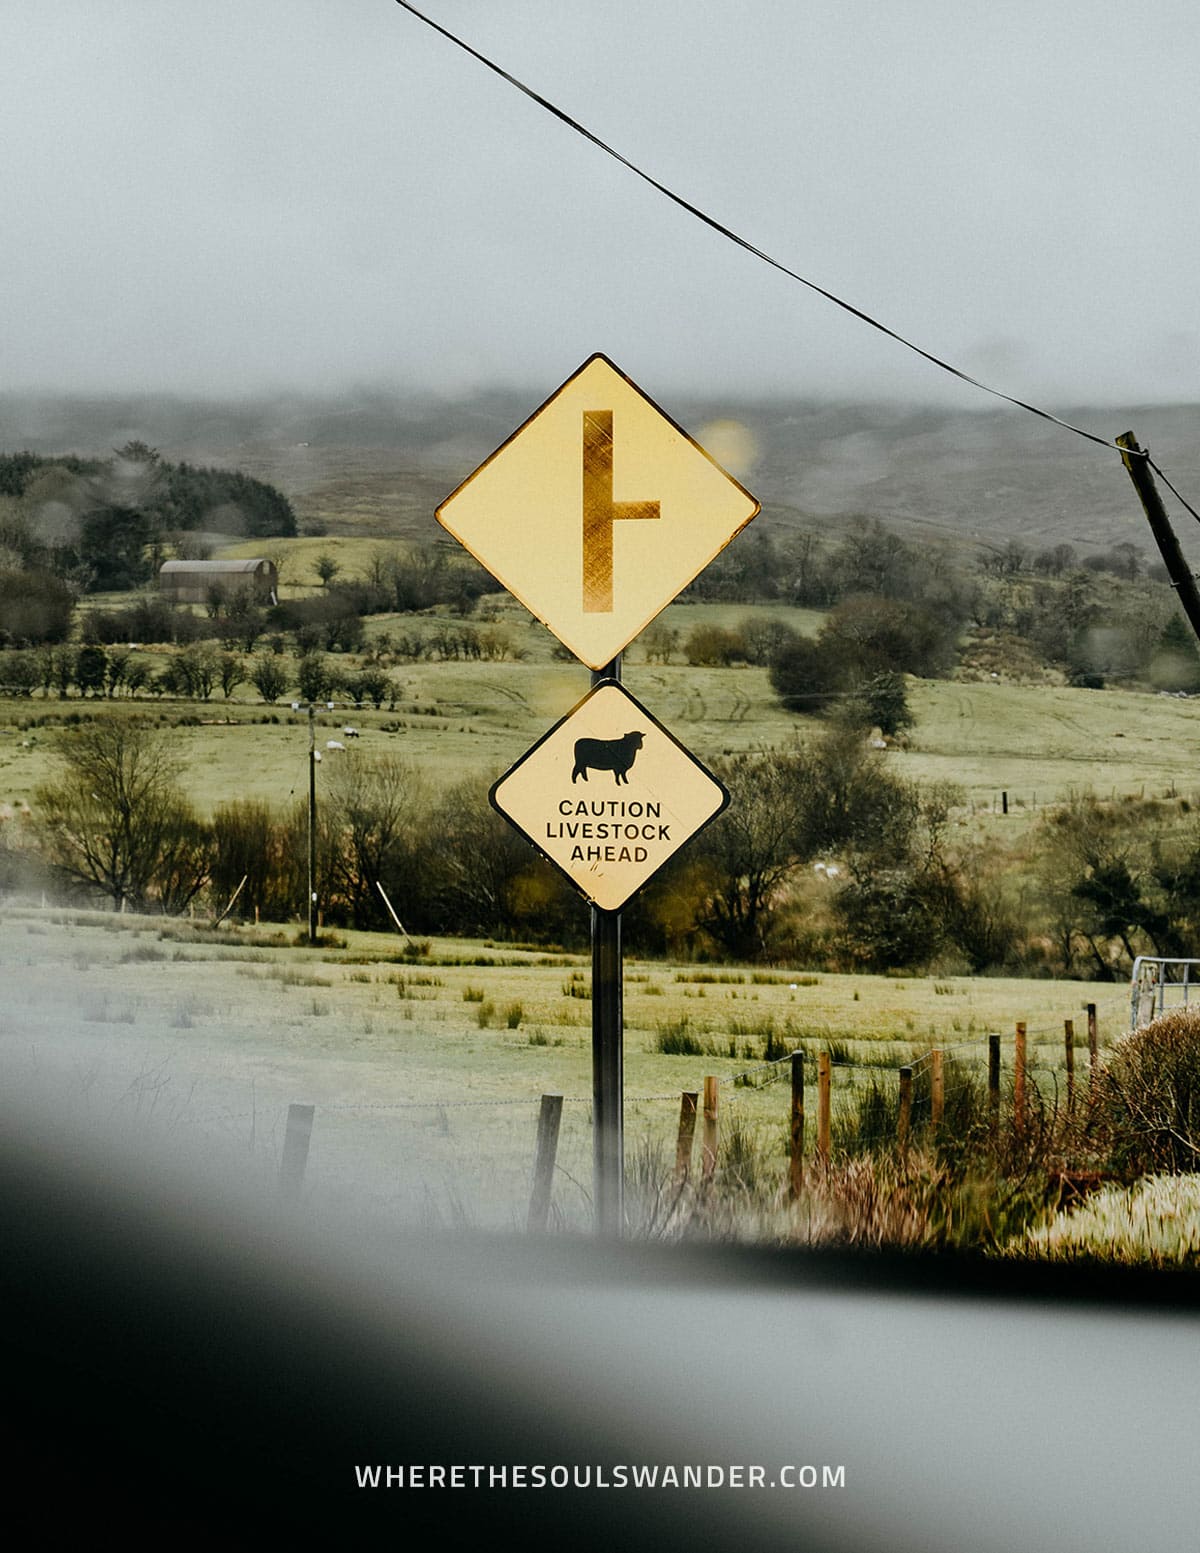
Ooh, and there are sheep. Lots of sheep!
Having now road-tripped through Ireland for nine days, ‘the Land of Saints and Scholars’, with its many interesting features, has become one of my favourite trips of the year.
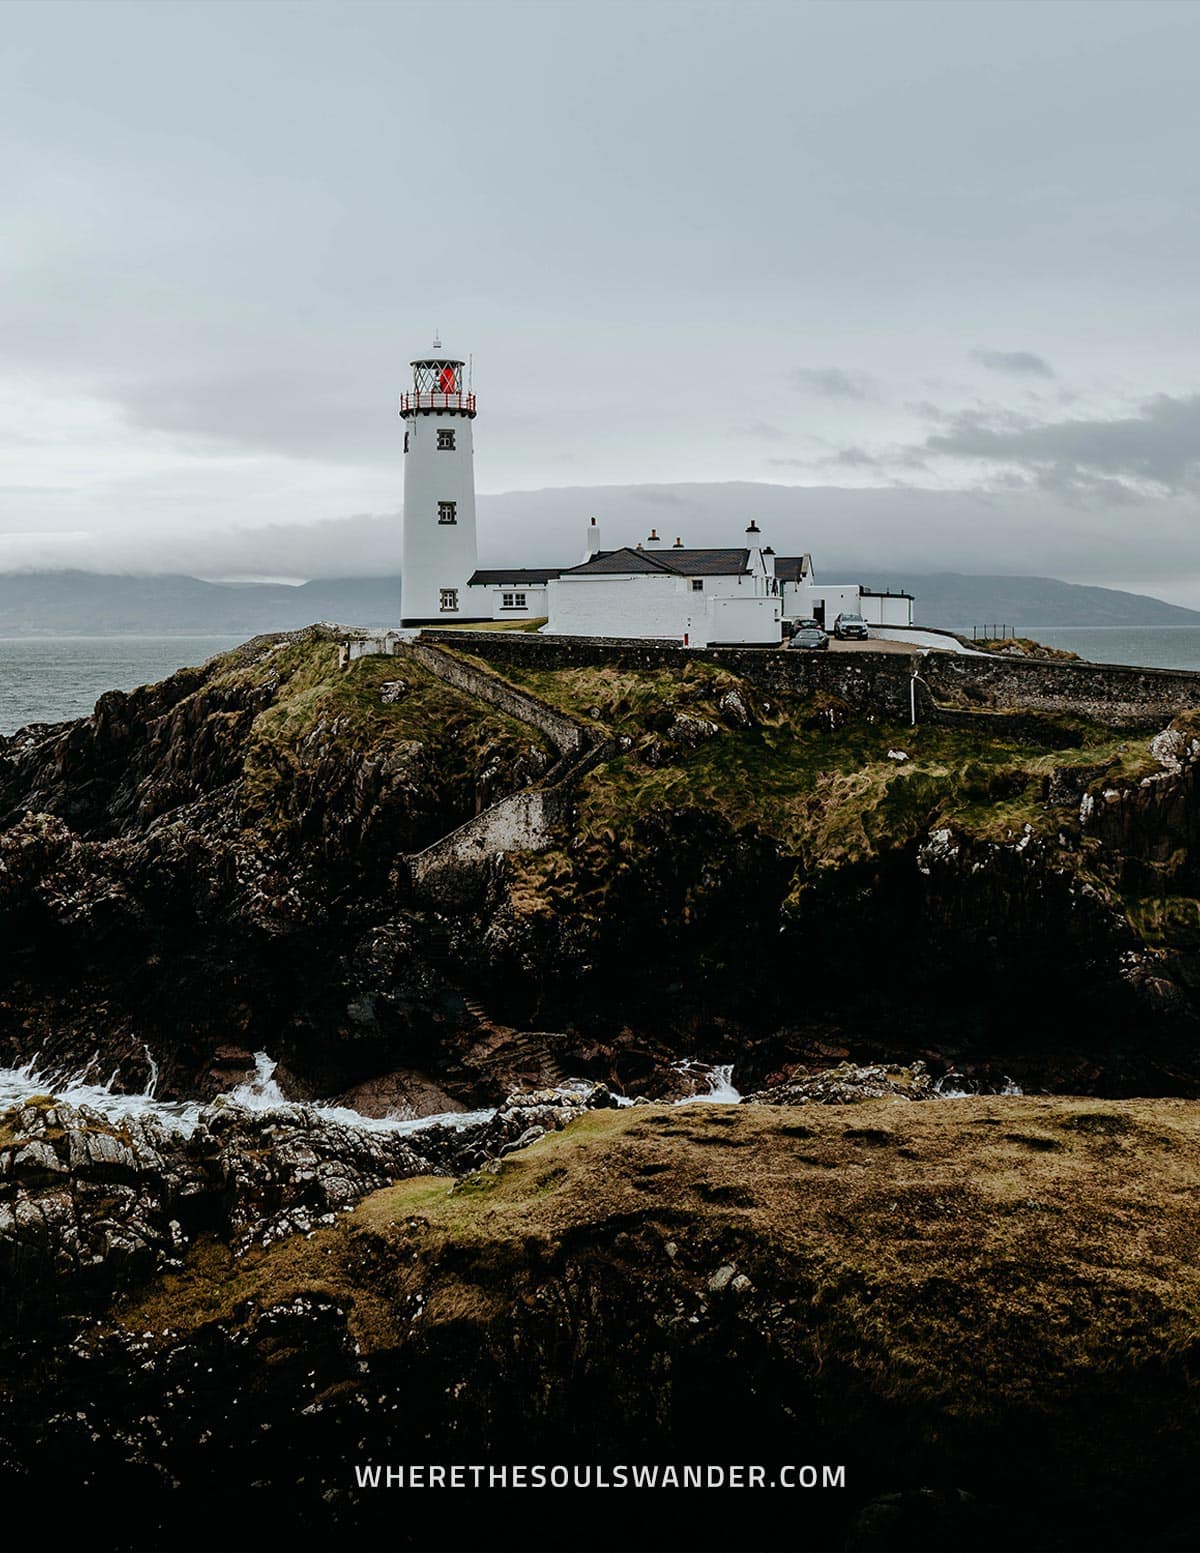
Starting in Dublin, my Ireland road trip has taken me to the majority of the highlights that are found along Ireland’s popular Wild Atlantic Way, including the Cliffs of Moher, Slieve League Cliffs, Connemara National Park, and the Fanad Lighthouse, to name but a few.
As a result, this itinerary reflects my 9-day road trip along the Wild Atlantic Way, and talks you through my detailed route, while also providing all the essentials in terms of accommodation, weather, transportation and more.
Here’s my Ireland itinerary – enjoy sorting out yours!
If you choose to use any of the links on this page, I may receive a small commission at no extra cost to you. By using these links, you’ll have a direct impact on WTSW and my ability to continue to create free insightful travel content for you. If you find any of my tips useful, you can support me by buying a virtual coffee here.
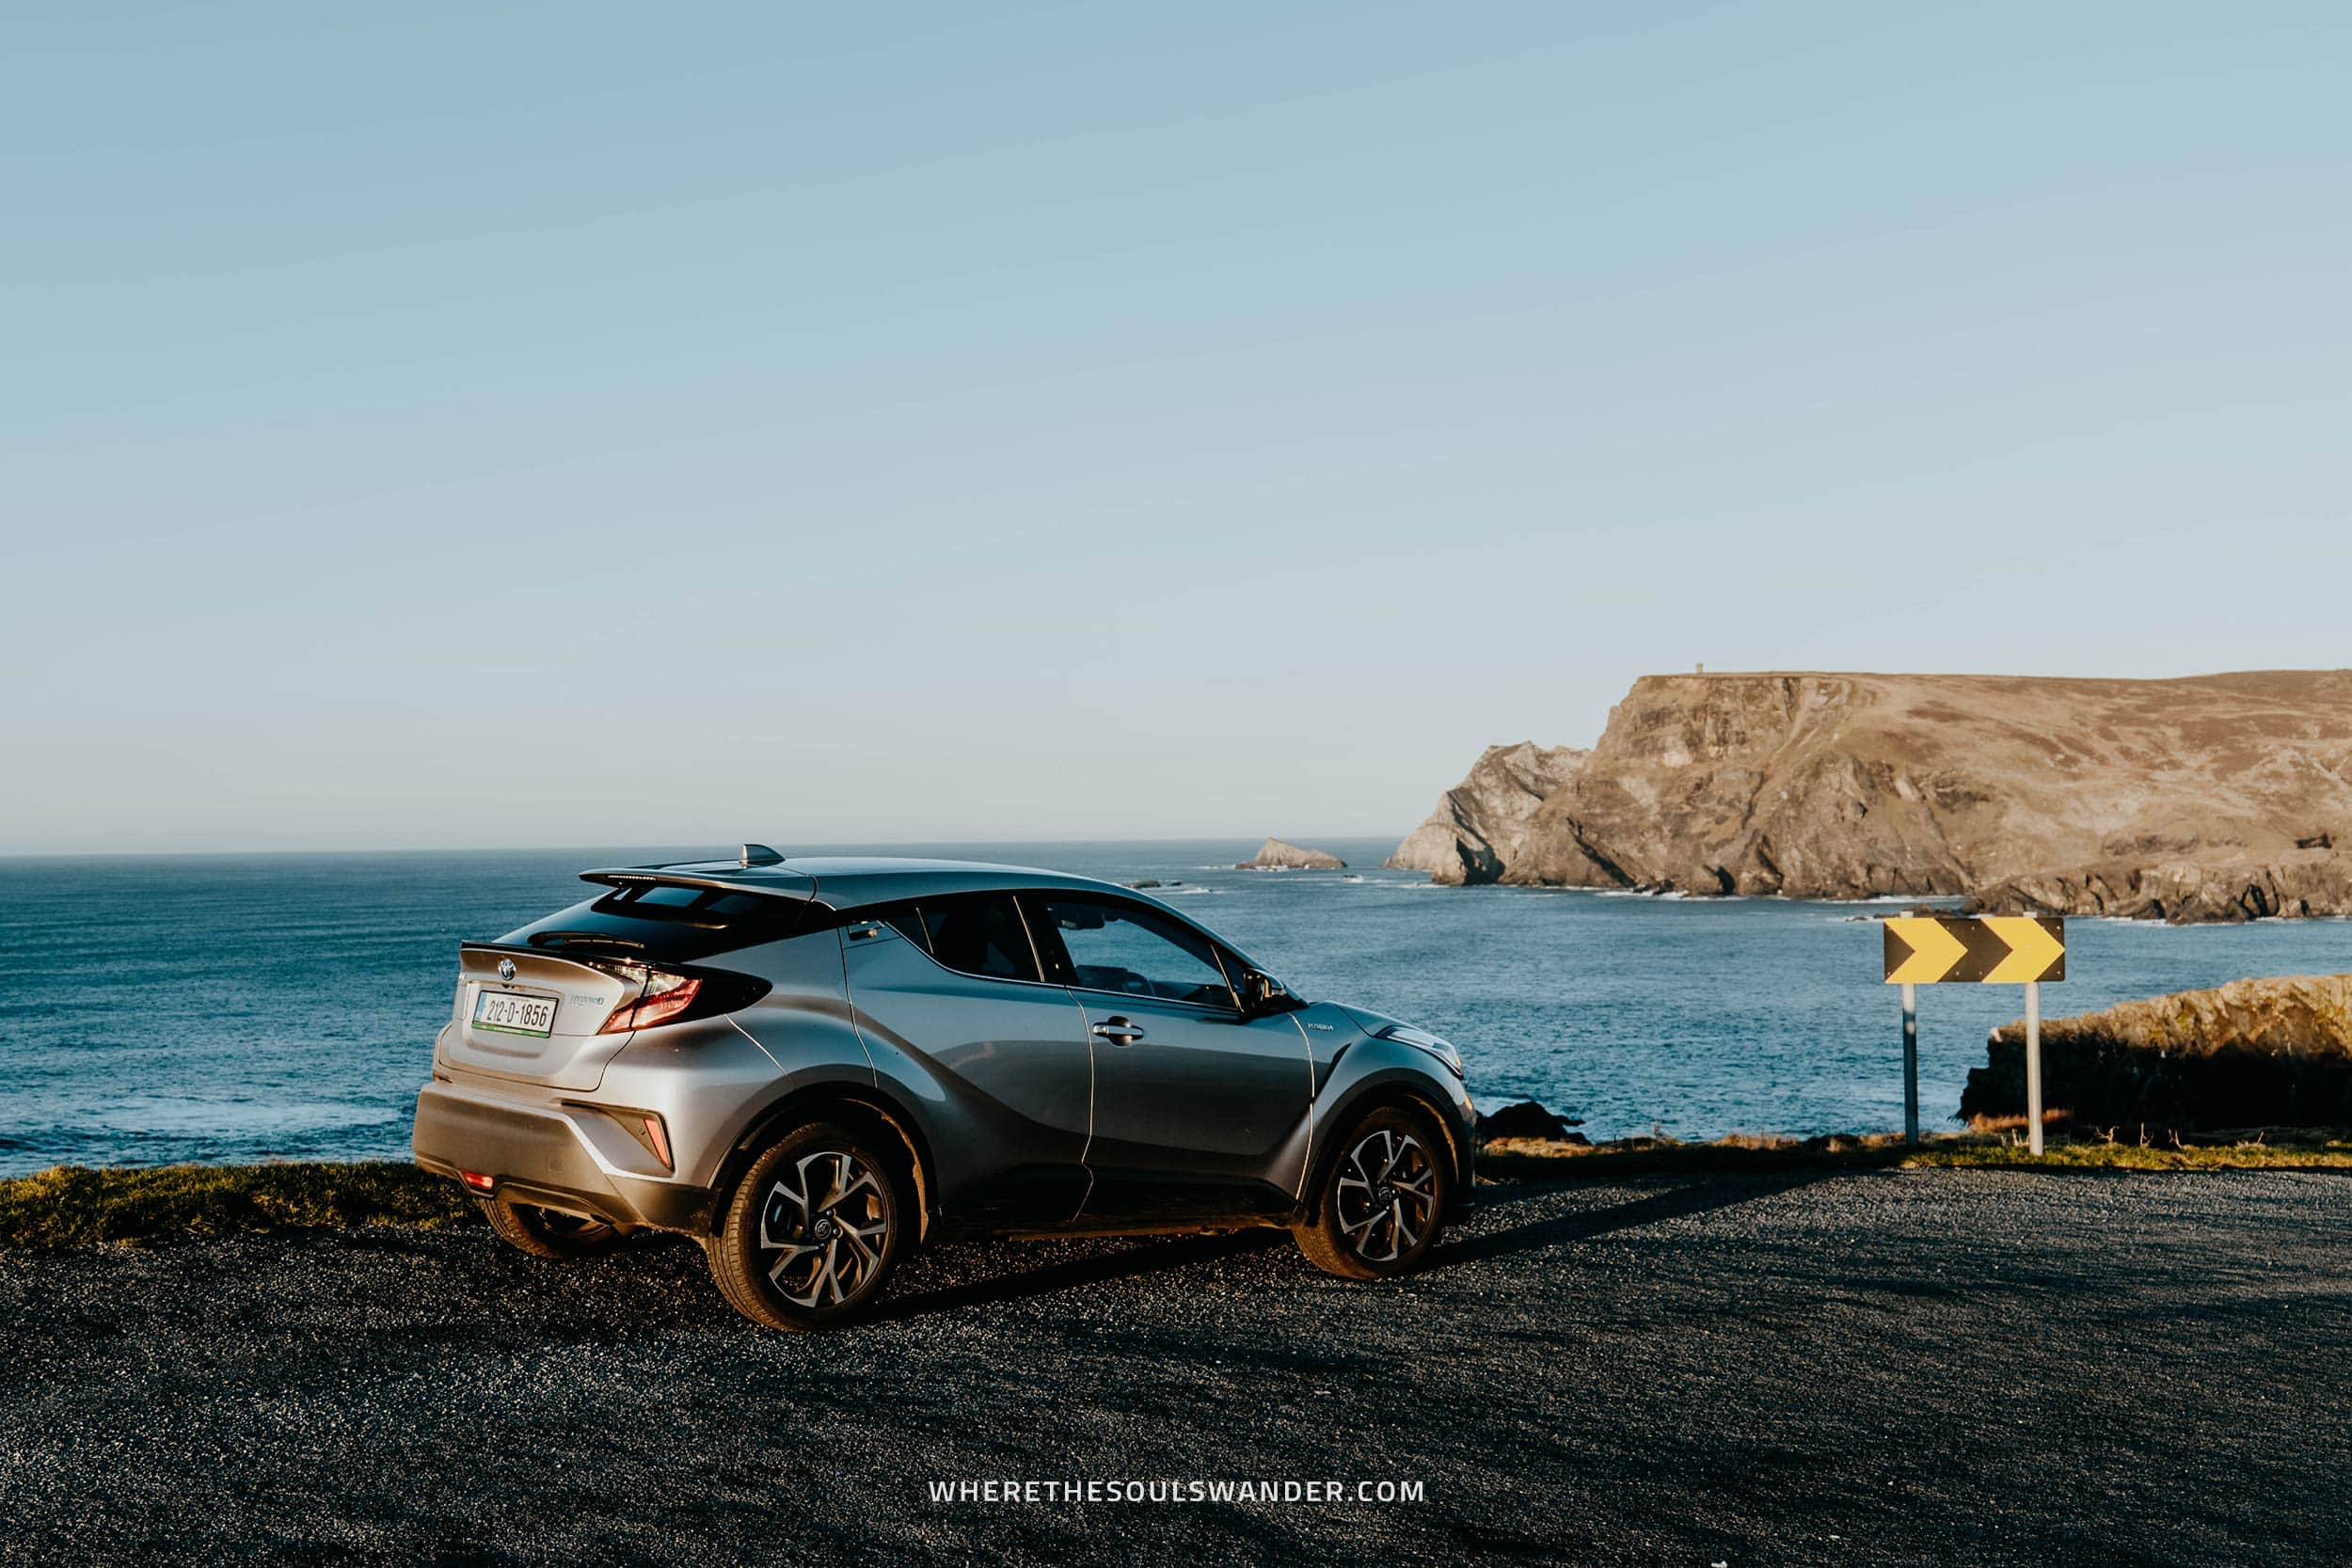
Renting a car in Ireland
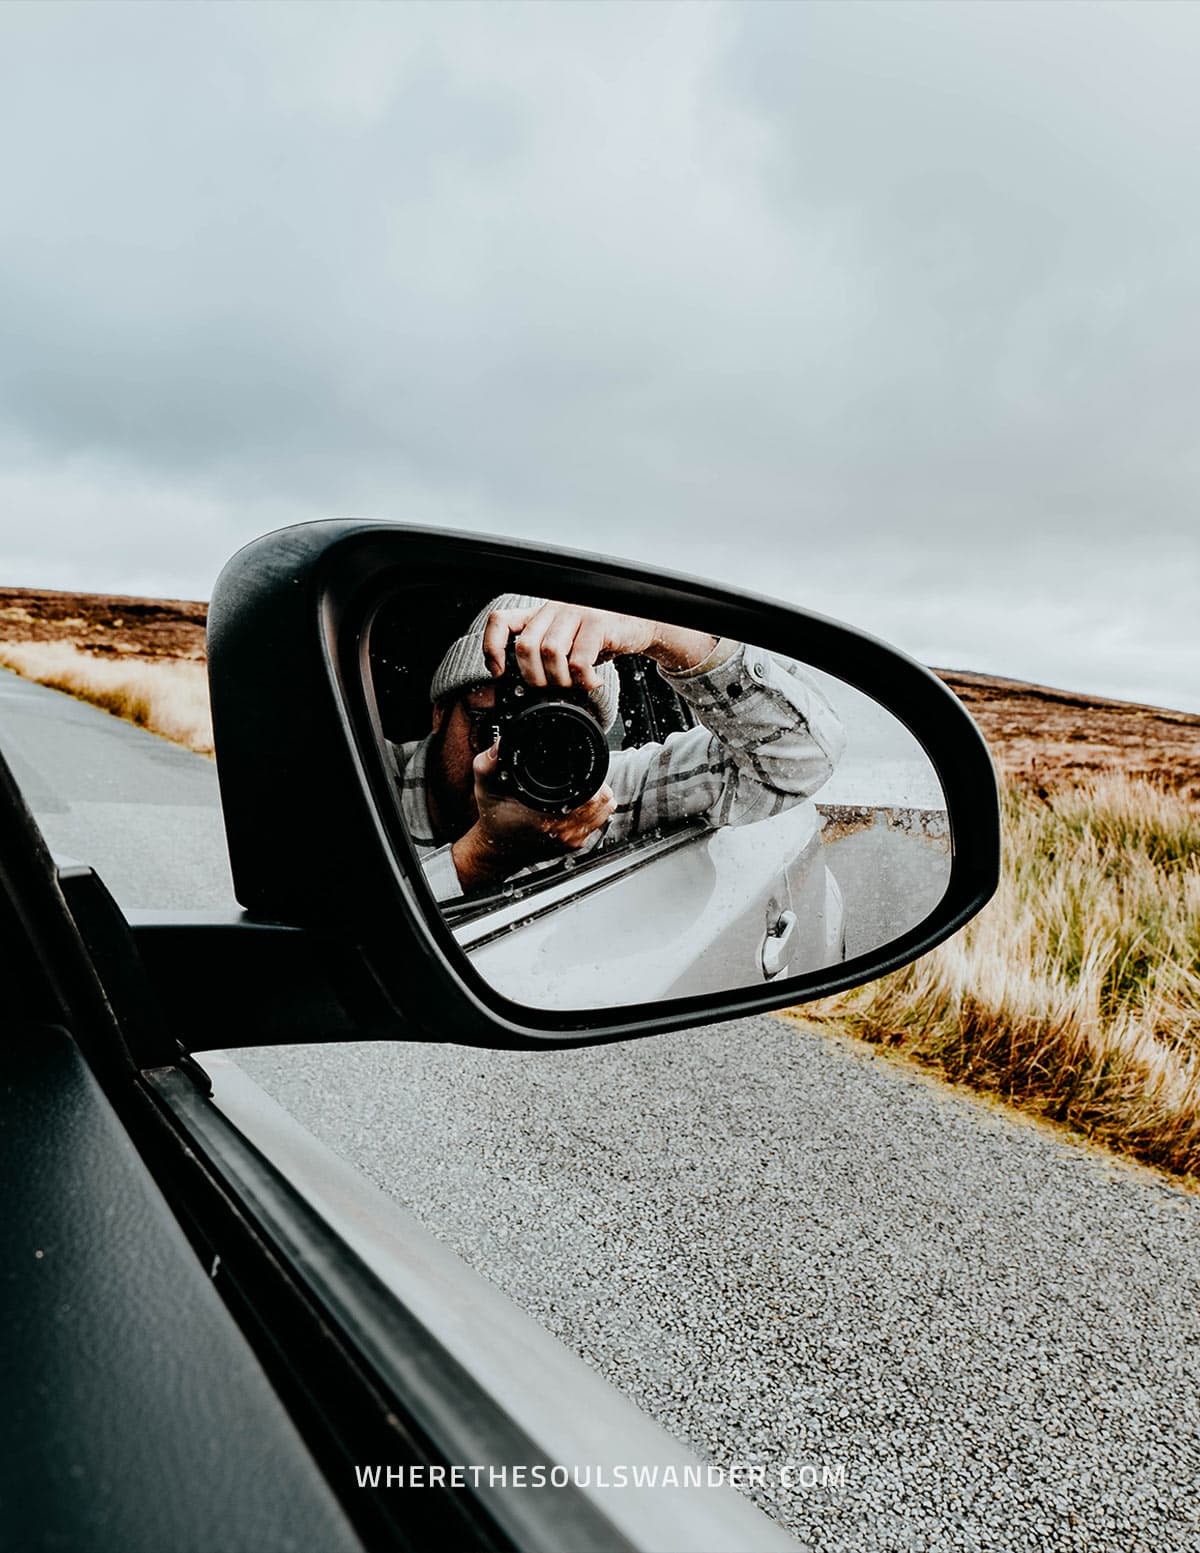
I highly believe that a destination like Ireland is best explored on your own set of wheels, as it provides all the freedom to travel around at your own pace.
And while driving on the left-hand side of the road is somewhat challenging at the beginning, the road infrastructure is extremely good, not to mention the views along the way.
One crucial thing you should be aware of though, is that the costs of renting a car in Ireland are some of the highest I’ve ever seen, with prices ranging from €400 to €600 a week during the high season. This includes free cancellation, theft protection and collision damage waiver.
If you choose to opt for a car with an automatic transmission (which I highly recommend if you haven’t driven on the left side of the road before), the costs of car rental will average out at €600 to €800 per week.
All in all, a road trip in Ireland is far from cheap, and with the above in mind, I’d advise booking your rental car well in advance to save yourself a few hard-earned bucks.
For car rental in Ireland, I’d highly recommend DiscoveryCars. They offer brilliant service, additional insurance options, and a wide selection of cars to choose from.
I’ve also written a complete guide to driving in Ireland, so make sure you check that one out too before planning your own road trip.
Accommodation | Where to stay in Ireland
Ireland, with its exceptional natural scenery, isn’t by any means a budget-friendly destination, this is clearly also the case when we’re talking accommodation.
During my road trip in Ireland, I noticed that the starting price for a standard double room ranges anywhere from €50 to €70 per night. One big upside though, is that in many cases, you’ll be staying in quite a luxurious hotel, apartment or guesthouse for only €15 extra.
If you’re travelling on a tight budget, €25 to €35 per night should be enough to get you a bed in one of the many great hostels that are dotted throughout the country.
Though prices are a little higher than elsewhere in Europe, the accommodation options in Ireland are actually pretty luxurious, which makes it a good value for the money.
As a solo traveller, my favourite website to find accommodation is booking.com.
If you’re curious to see my recommendations, make sure you check the accommodation options I’ve marked under each day of this itinerary. Additionally, it’s also a good idea to book your accommodation in advance, especially during the peak summer months.
Accommodation | Find your perfect stay here.
Ireland itinerary | Day to day overview
DAY 1 | Arrival in Dublin
DAY 2 | Car pickup, Cliffs of Moher and Galway
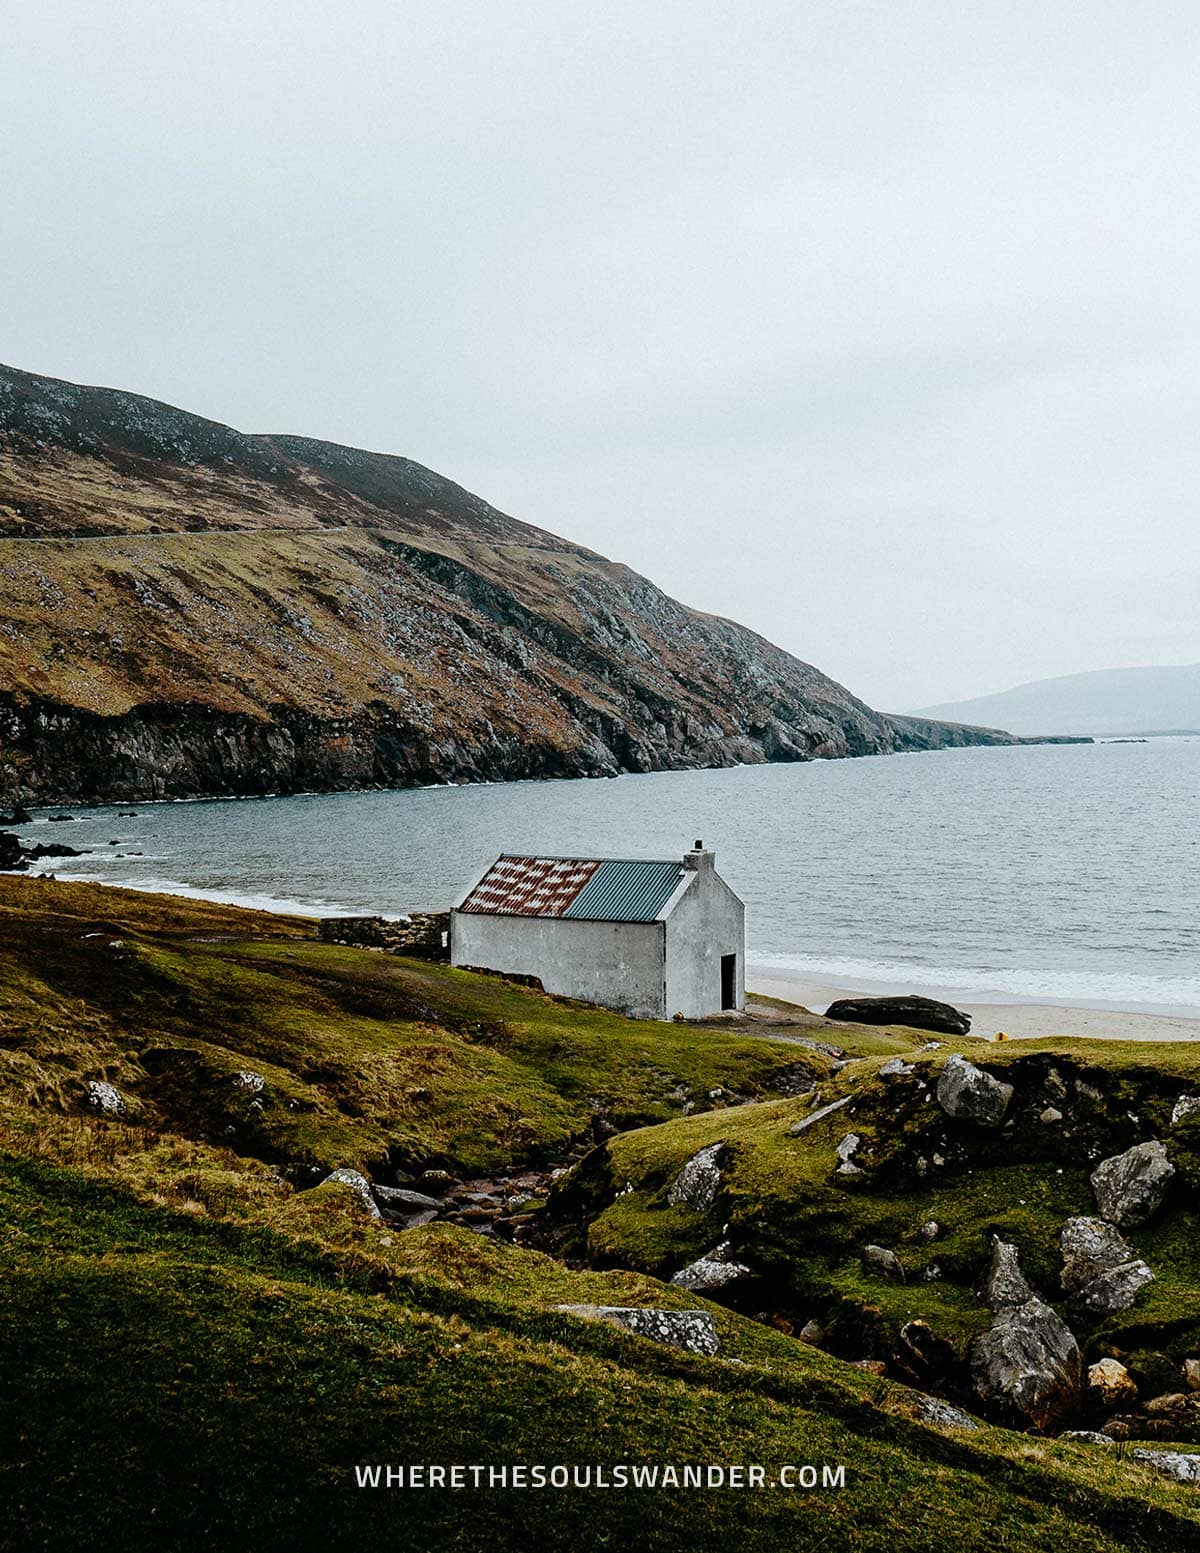
DAY 3 | Connemara National Park, Achill Island and Keem Beach
DAY 4 | Down Patrick Head, Mullaghmore Head and Classiebawn Castle
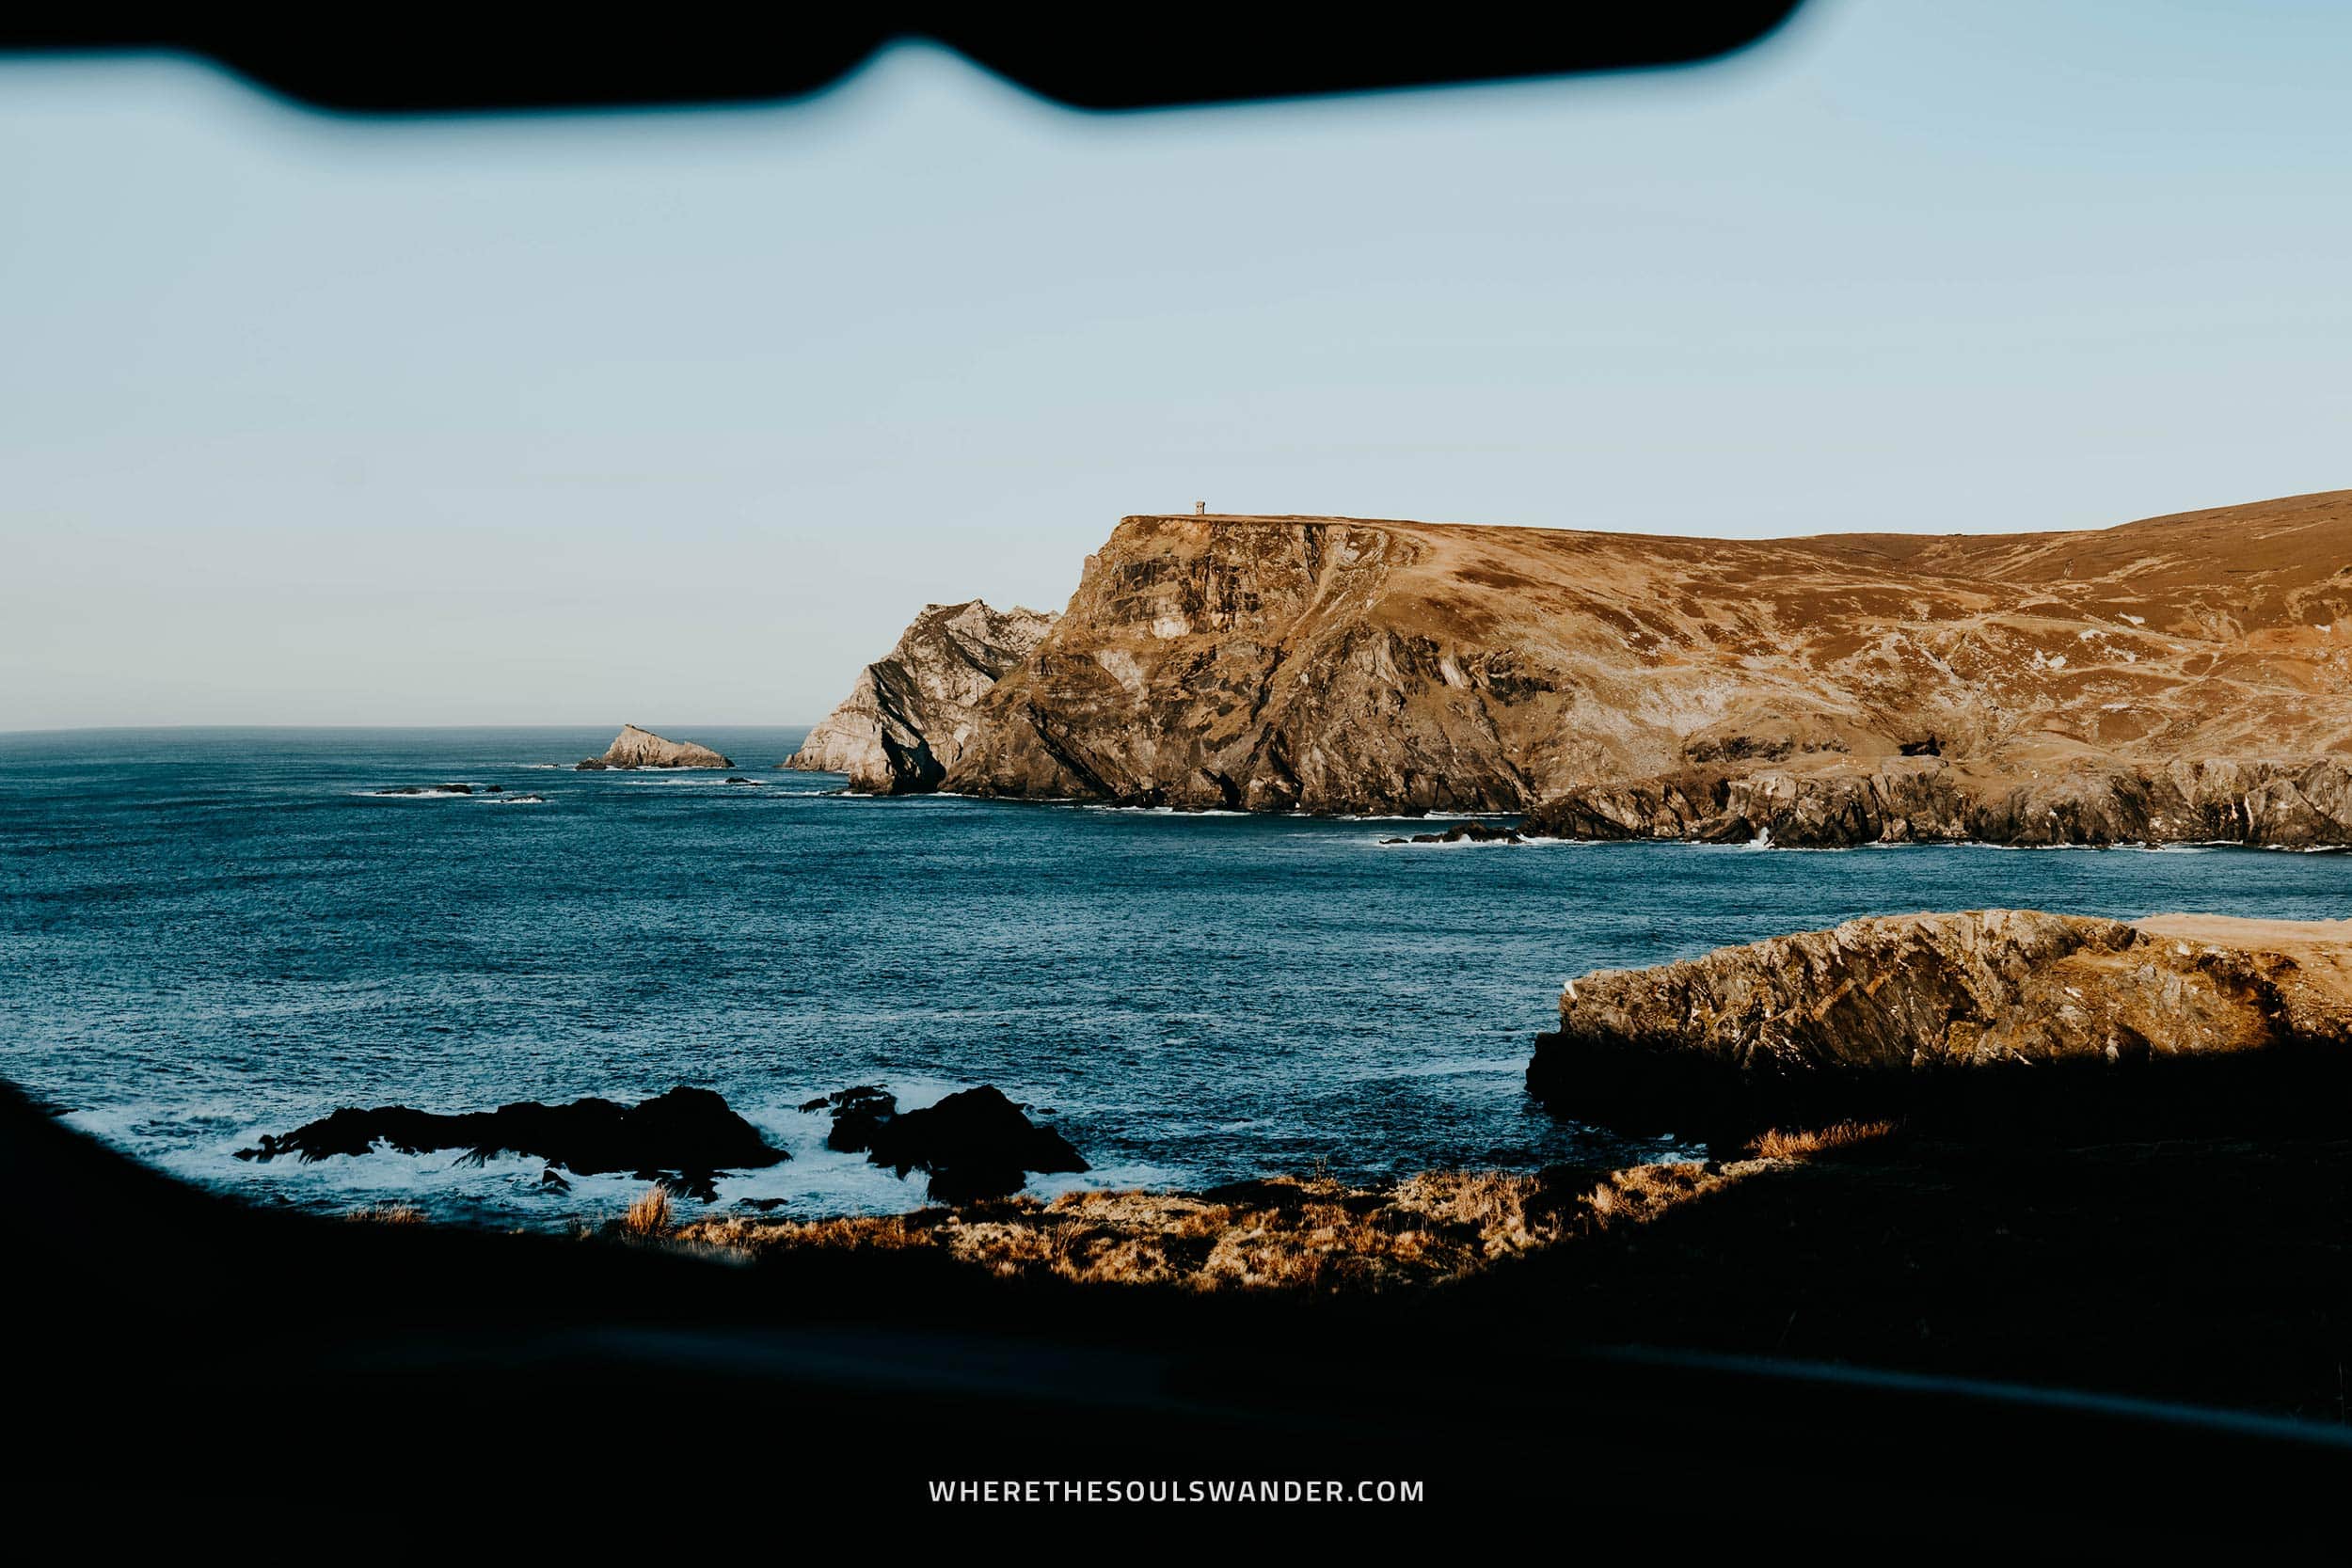
DAY 5 | Secret waterfall, Slieve League Cliffs and Glen head
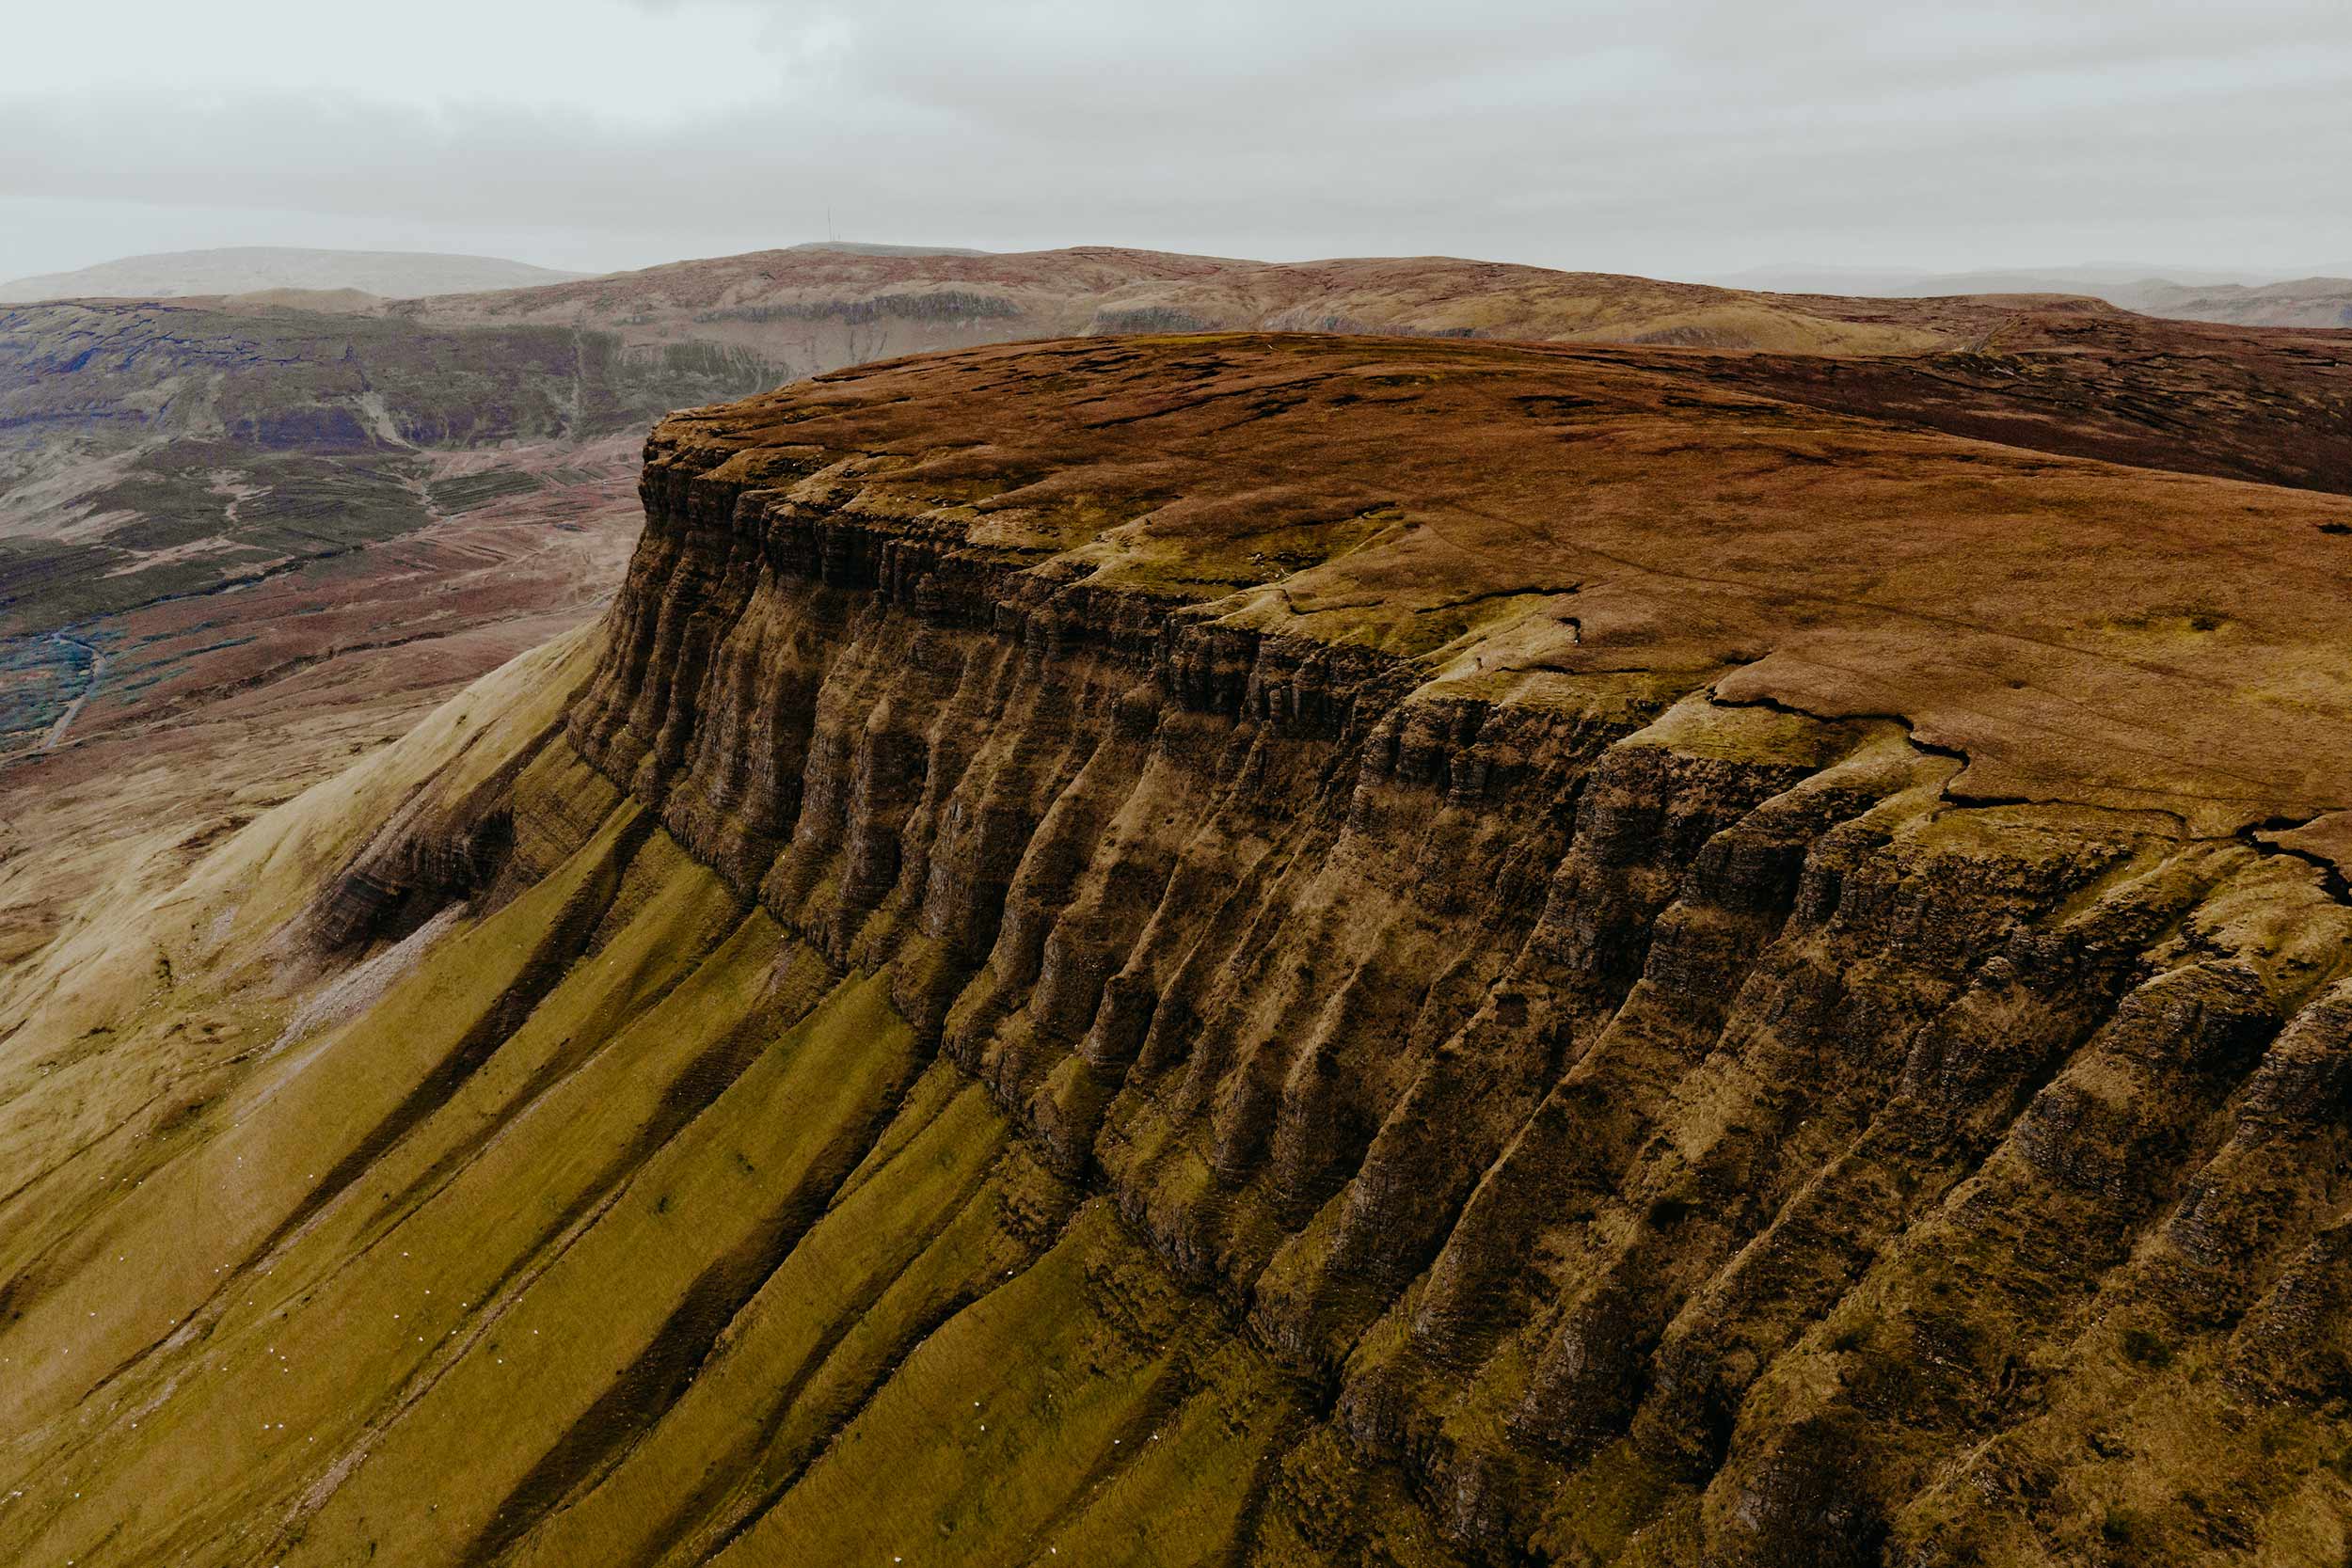
DAY 6 | Fanad Lighthouse, Benbulbin Mountain and Gleniff Horseshoe
DAY 7 | Hill of Tara and drive back to Dublin
DAY 8 | Lough Tay, returning your rental car and exploring Dublin
DAY 9 | Exploring Dublin and catching your flight home
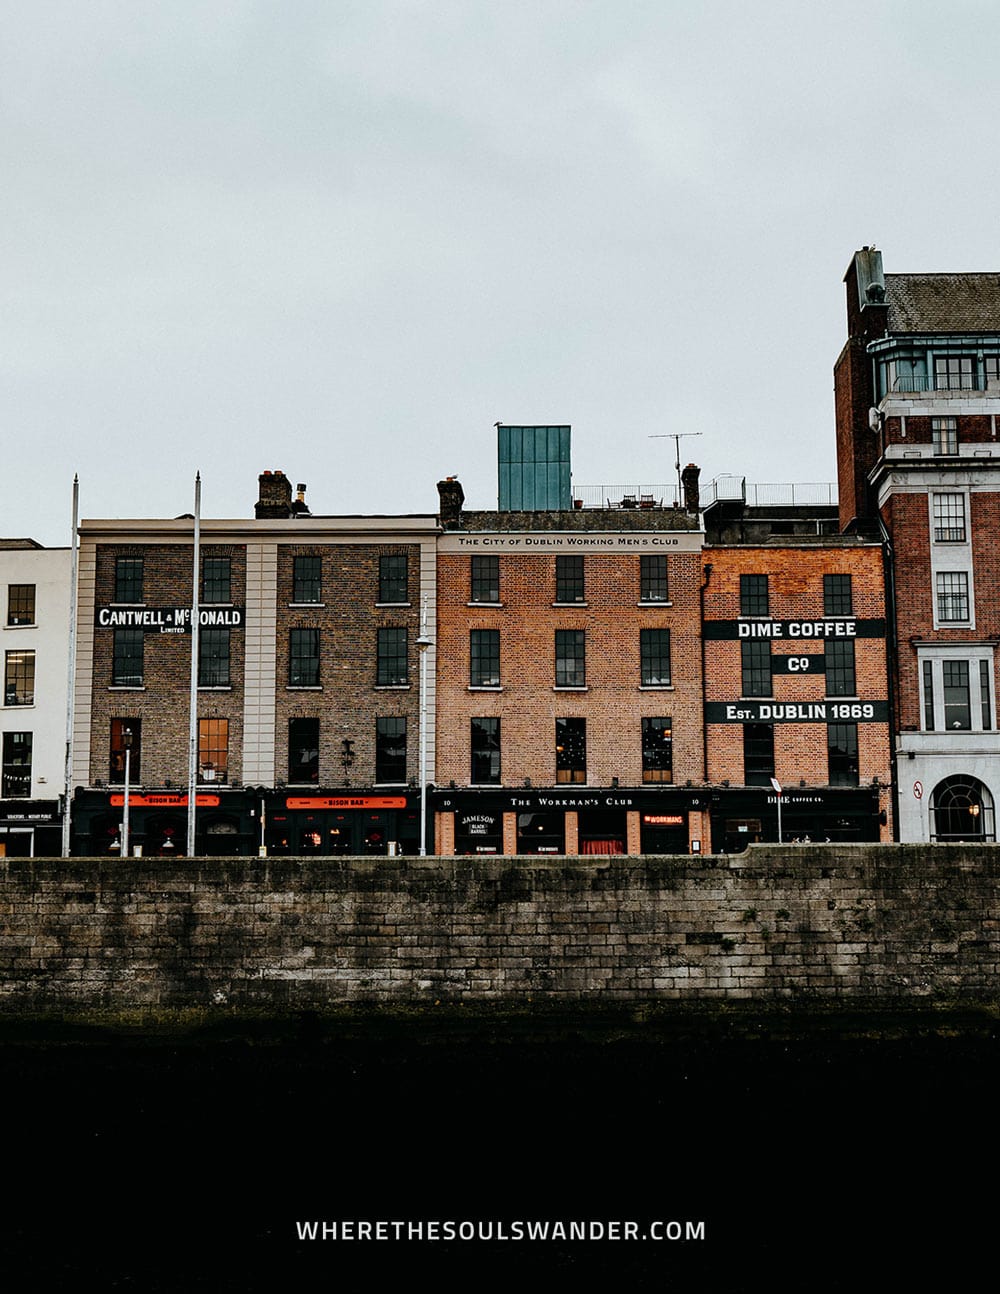
Day 1 | Arrival in Dublin
Given that most International flights arrive in Dublin, it is most likely that your trip will start out here.
While it’s totally possible to book your rental car from the start of your trip, I’d advise anyone to first take some time to get their bearings in Dublin before picking up their rental at the airport.
Not only is a car unnecessary when spending time in Dublin, but you will also save a bunch of money, as the parking costs will add up quickly in the city centre.
Having said that, how you plan your first day in Dublin is highly dependent on your arrival time at the Dublin International Airport.
If your flight arrives in the morning or early afternoon, I’d suggest exploring some of Dublin’s many highlights straight away.
If you arrive late, opt for a top-notch burger at Feather Blade or a few pints at the Templebar instead, before catching up on some sleep at your accommodation.
Ooh, and don’t worry, this itinerary ends with two full days in Dublin!
Where I stayed | For my first night, I opted for the Templebar Rooms, a budget-friendly apartment at only a stone’s throw away from the Dublin city centre.
How to get to Dublin | Take the Dublin Express for a quick transfer to the city. A return ticket costs €10,- per person.

Day 2 | Car pickup, Cliffs of Moher and Galway
After your first day in Dublin, it’s time to head back to the airport to pick up your rental car.
To me, this day started off with a mix of feelings of excitement and nervousness, given it was my first time ever driving on the left-hand side of the road. If it’s your first time too, make sure you take a few moments to practise in the parking lot of the car supplier, before setting out on the road.
Now that you’ve got a feel for the car, it’s officially time to start this Ireland road trip itinerary.
And to be honest, this part of the itinerary isn’t for the faint of heart, given you will start with almost a full day behind the wheel. Still, it’s absolutely one of the most rewarding days.
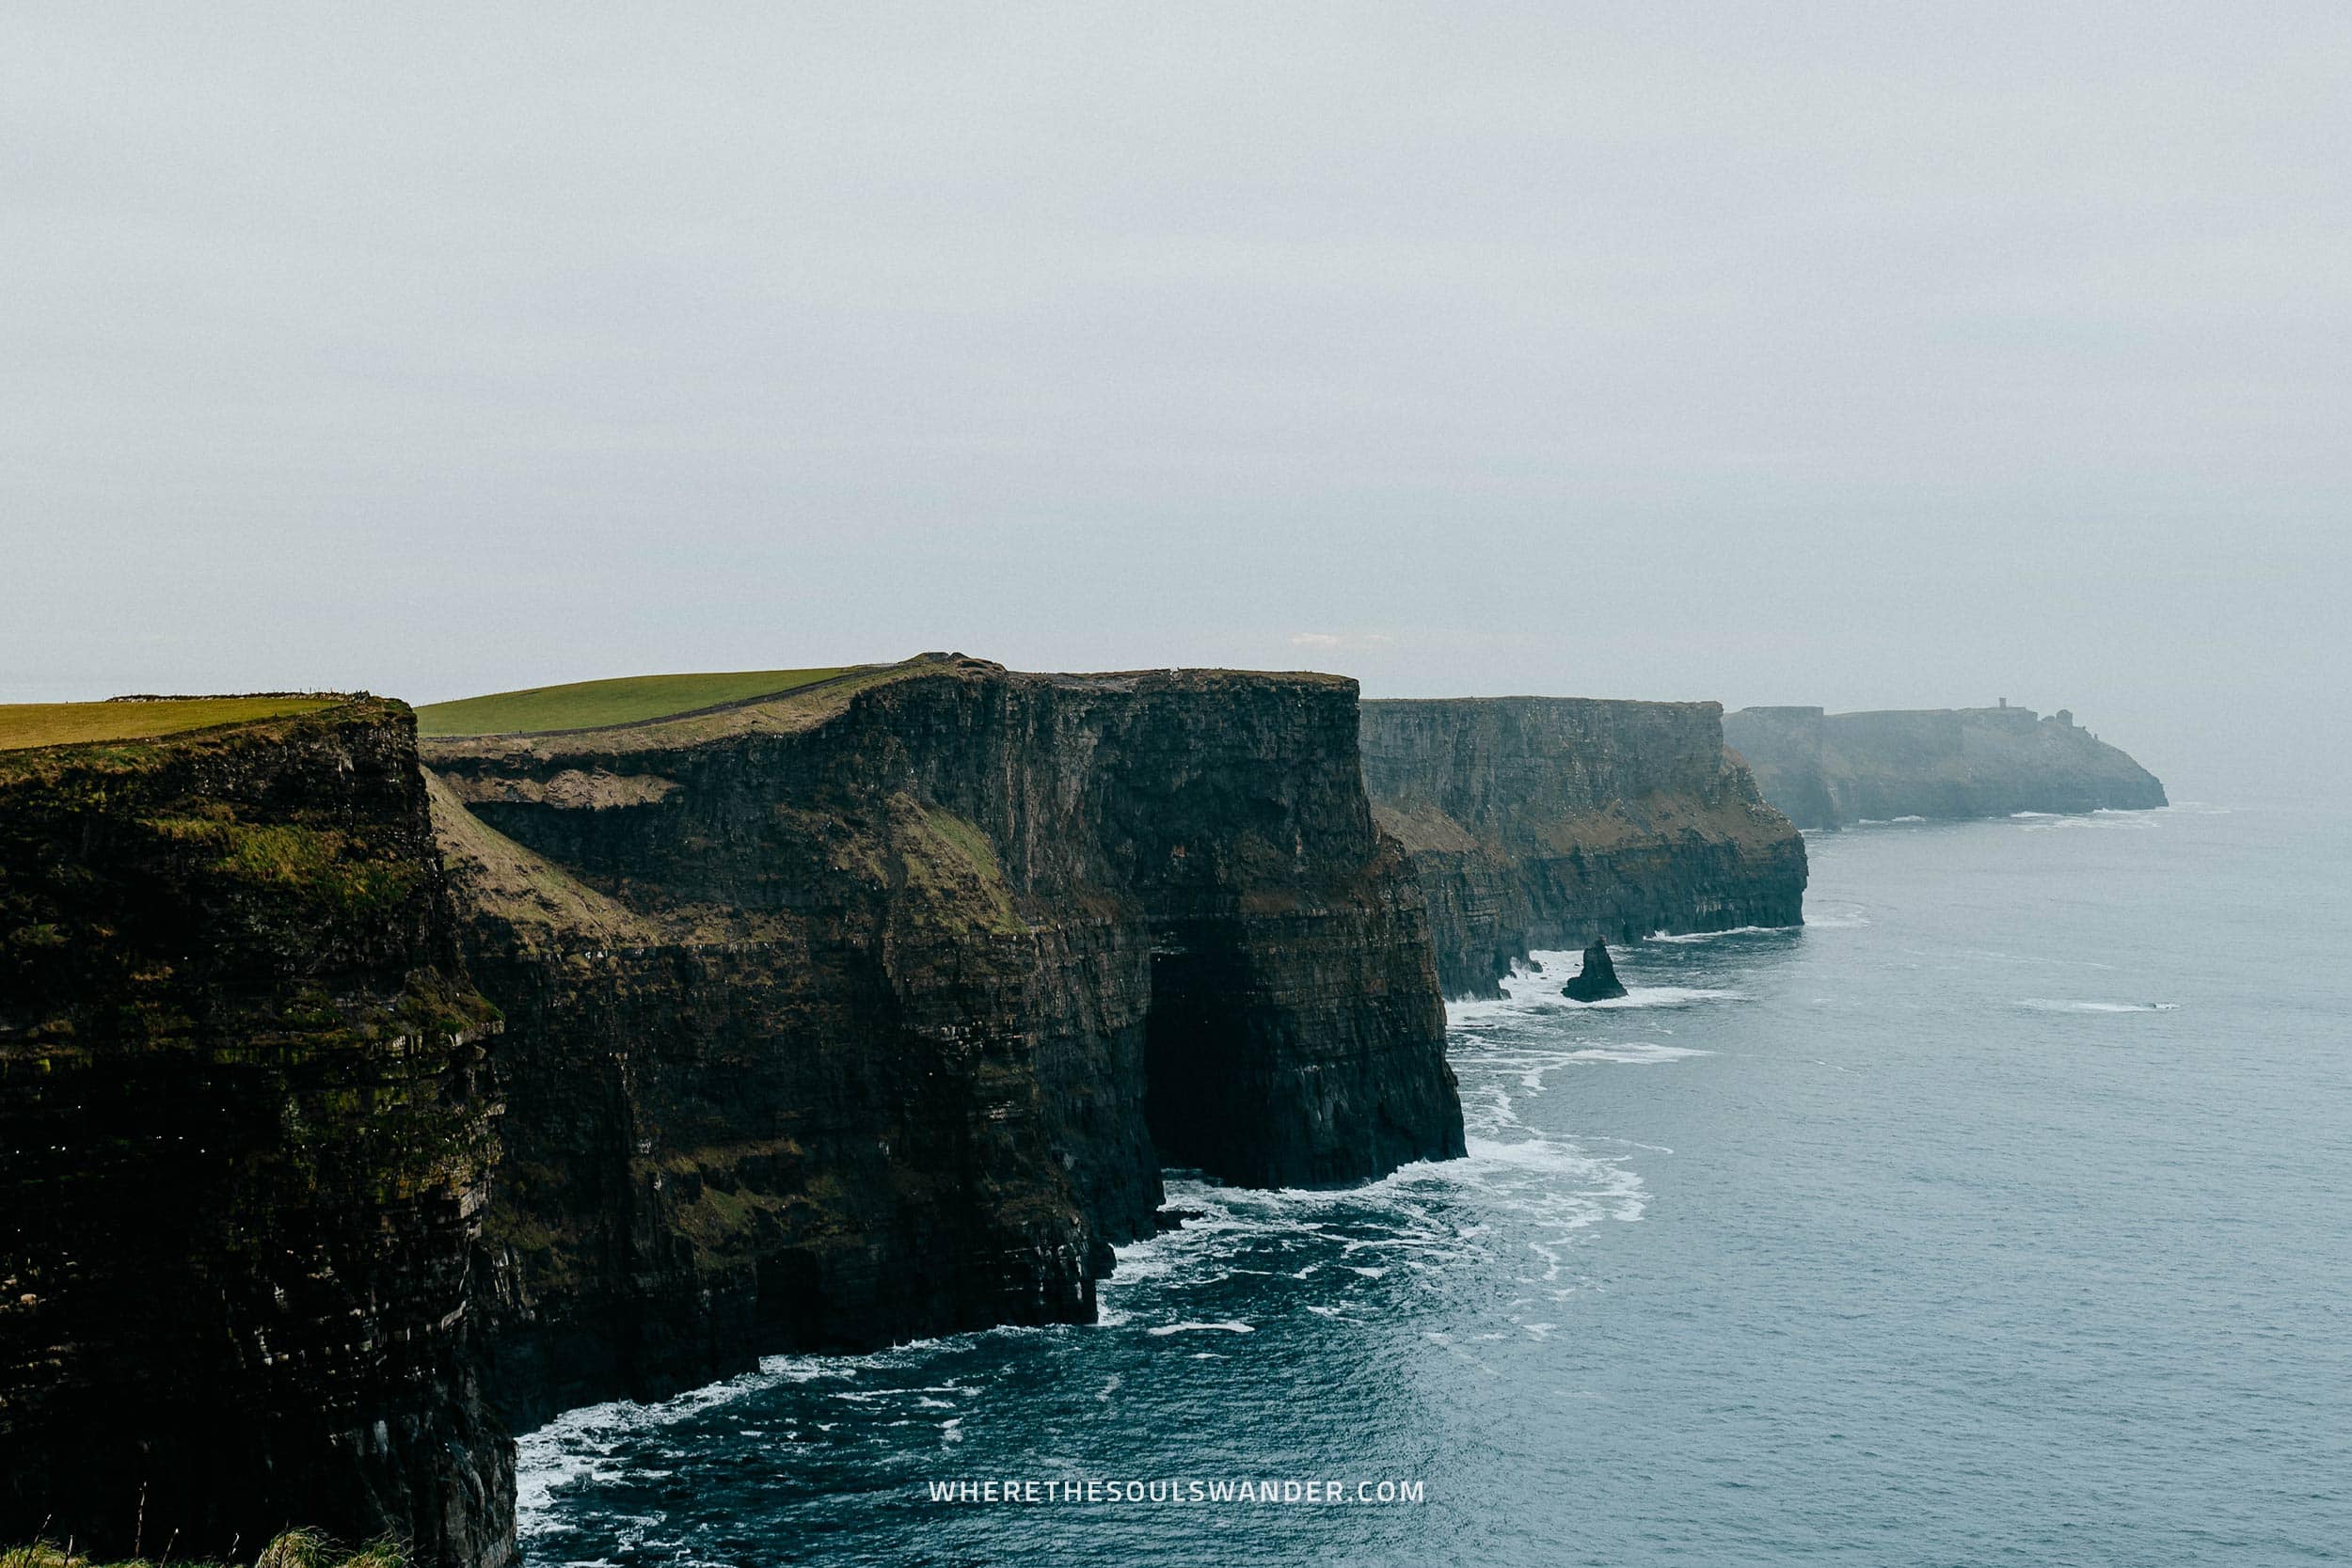
After covering lots of ground, you’ll reach your first stop, and immediately one of the country’s most popular tourist attractions, the Cliffs of Moher.
Slightly isolated on Ireland’s rugged West Clare coast, the Cliffs of Moher are an otherworldly natural sight and an essential stop for anyone travelling along the Wild Atlantic Way.
Once arrived at the Cliffs of Moher, it takes around 2 hours to walk along the insanely rough cliffs, with some of the most incredible views along the way.
From the Cliffs of Moher, it’s time to continue in the direction of Galway, a lively harbour city where I’d highly recommend you stay overnight.
Upon arrival in Galway, make sure you drop by the Dough Bros for one of the best pizzas you will ever eat – believe me, you won’t regret it as they’re freakin’ delicious.
Where I stayed | I opted for The Hardiman, a great hotel that offers great value for the price. It’s also pretty close to the city centre of Galway.
Related | Check out my Cliffs of Moher guide for inspiration, travel advice and essential information.
Driving time: 4,5 – 5 hours | Distance: 343 Kilometres
Day 3 | Connemara National Park, Achill Island and Keem Beach
Day three is off to an early start, as the morning is all about hiking the Upper Diamond Hill trail in the Connemara National Park.
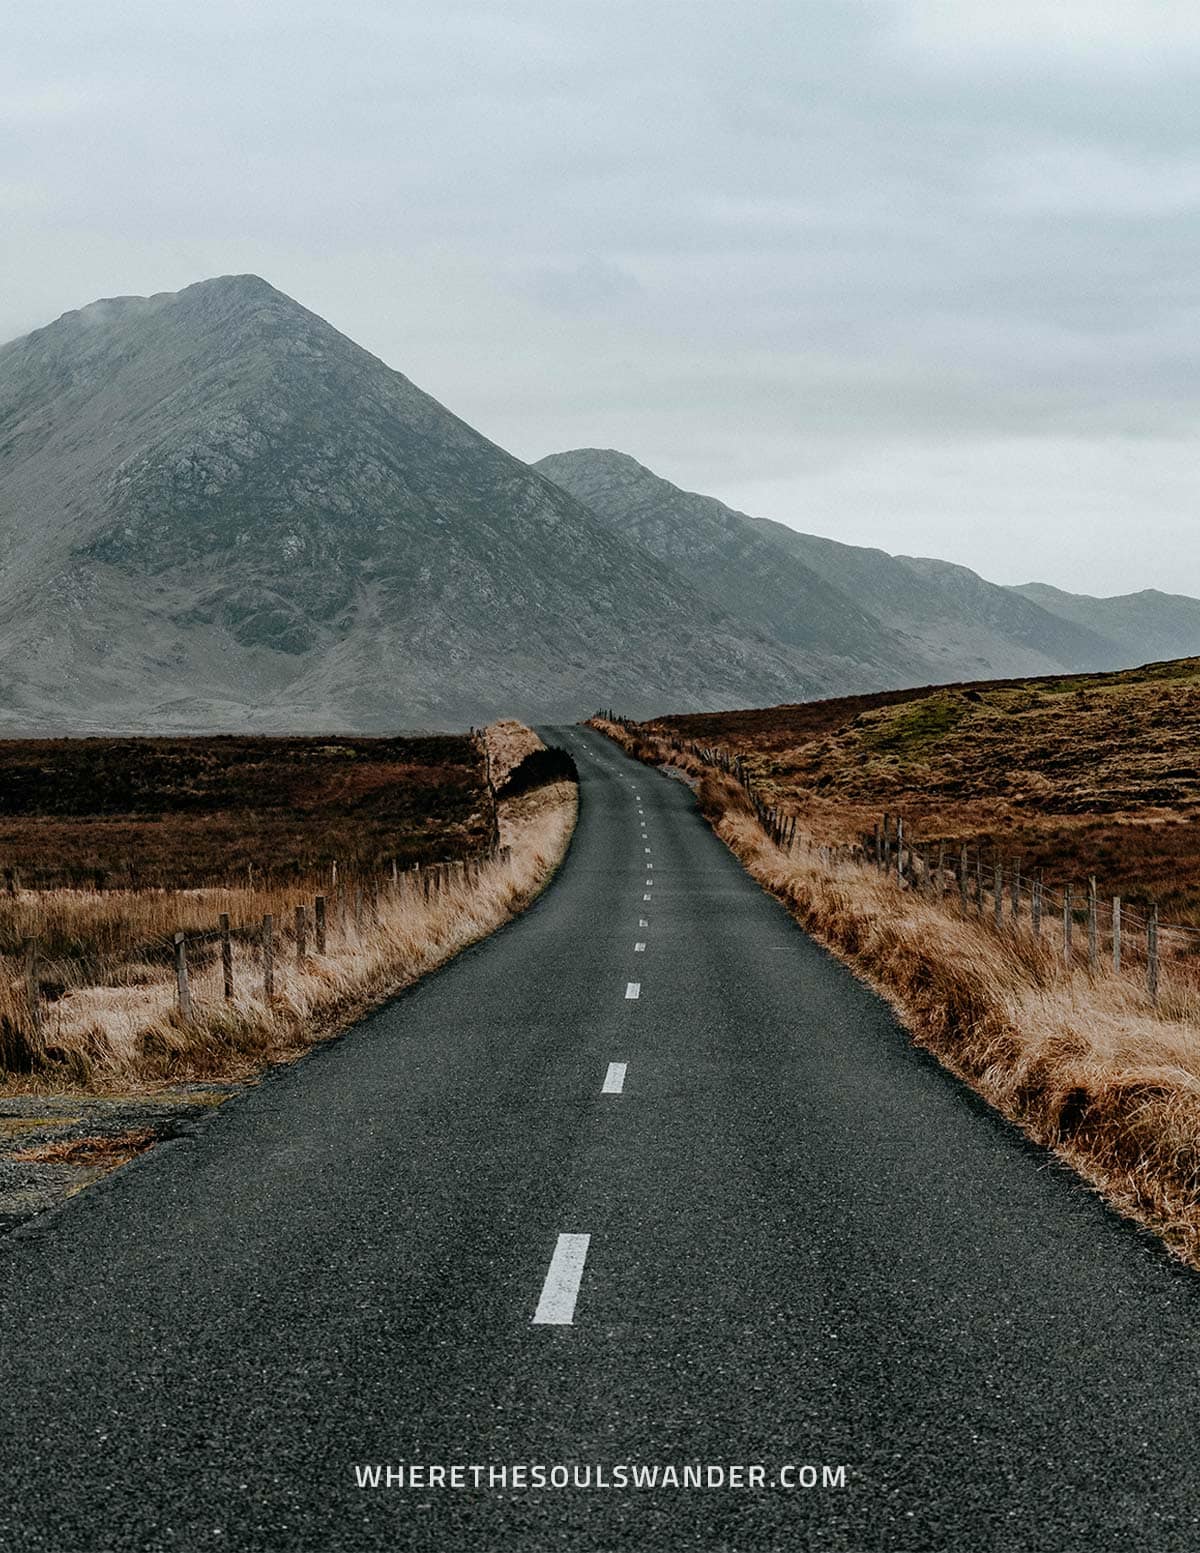
But first, it is time for a scenic drive through the rugged landscape of County Galway, which was one of my favourite stretches of road during this road trip through Ireland.
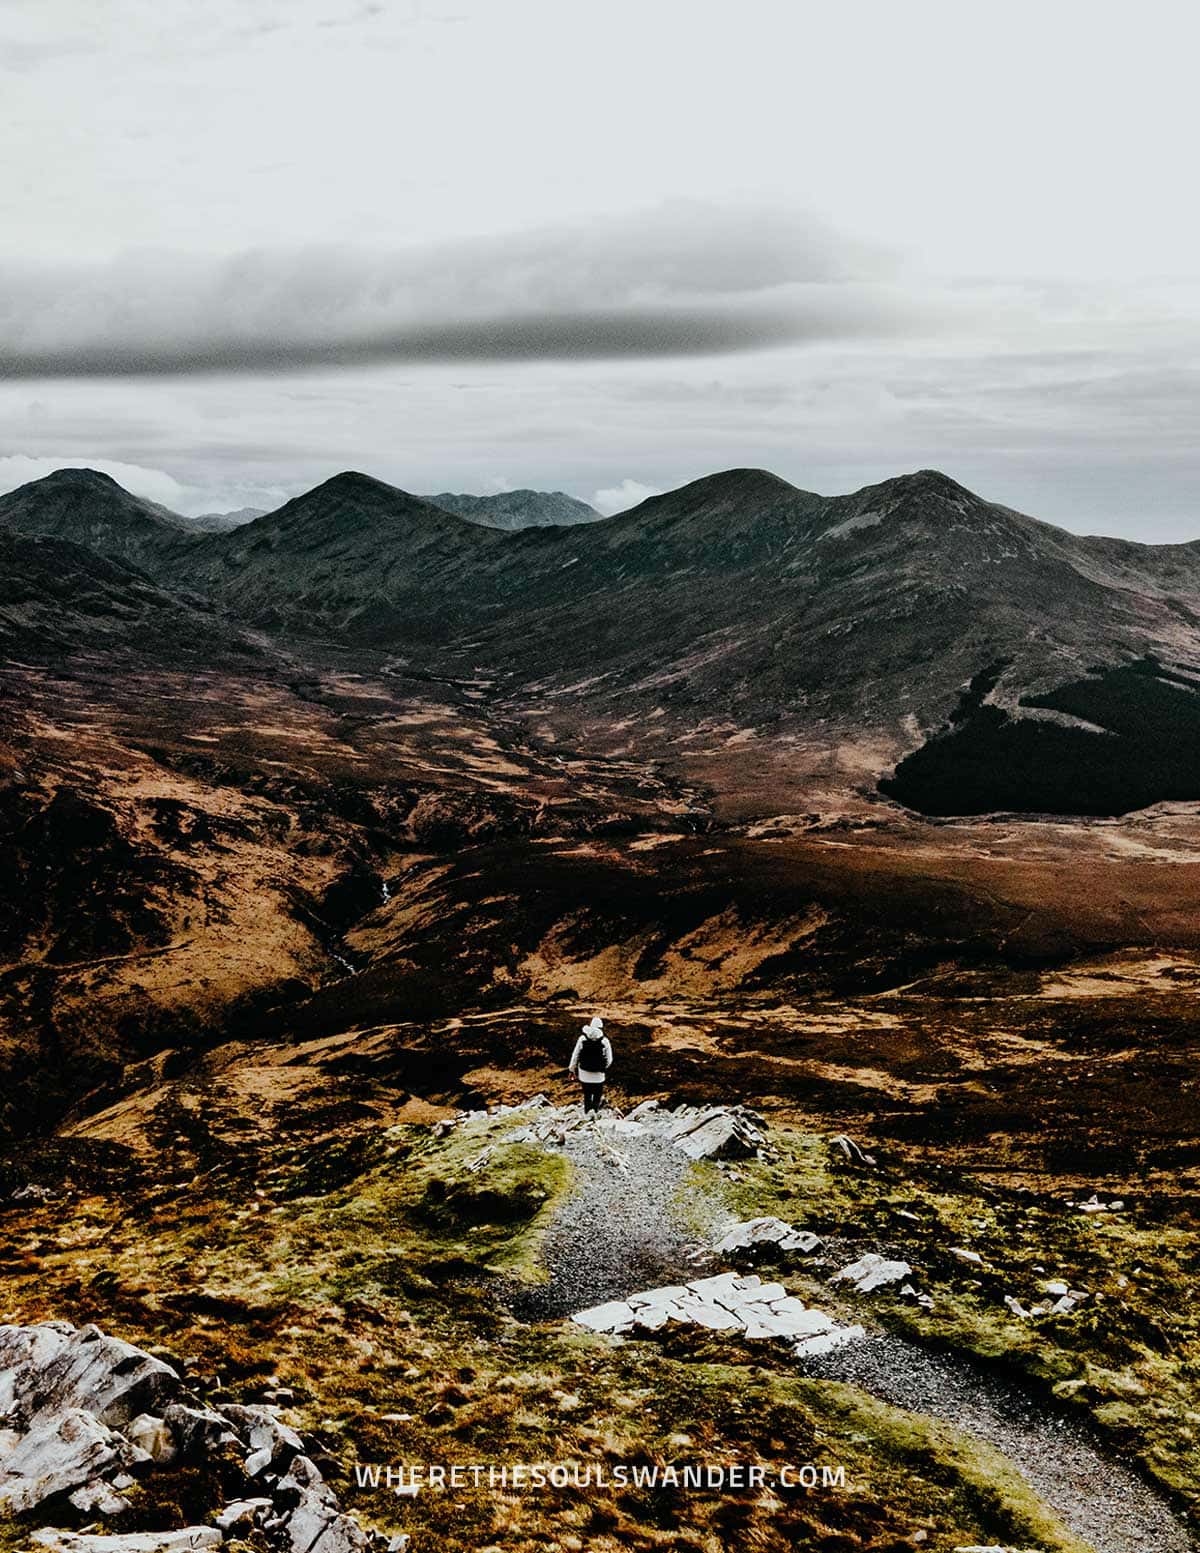
After around 1,5 hours of driving along picture-perfect mountain peaks and lakes, you’ll reach the Connemara National Park, one of Ireland’s most prestigious national parks, and one of the absolute highlights on this itinerary.
Situated in the northwest of Connemara, this popular national park is home to the Upper Diamond Hill trail; a gentle 6-kilometre hiking loop that offers the most stunning views of both the Twelve Bens Range and the Valley of Glanmore.
Following the hike, it’s time to head in the direction of Achill Island and Keem Bay.
Even though it’s slightly off the by Google Maps advised route, I can’t stress it enough to drive via the exceptional Doolough Valley between Leenaun and Louisburgh – trust me, this place is simply too good to miss out on.

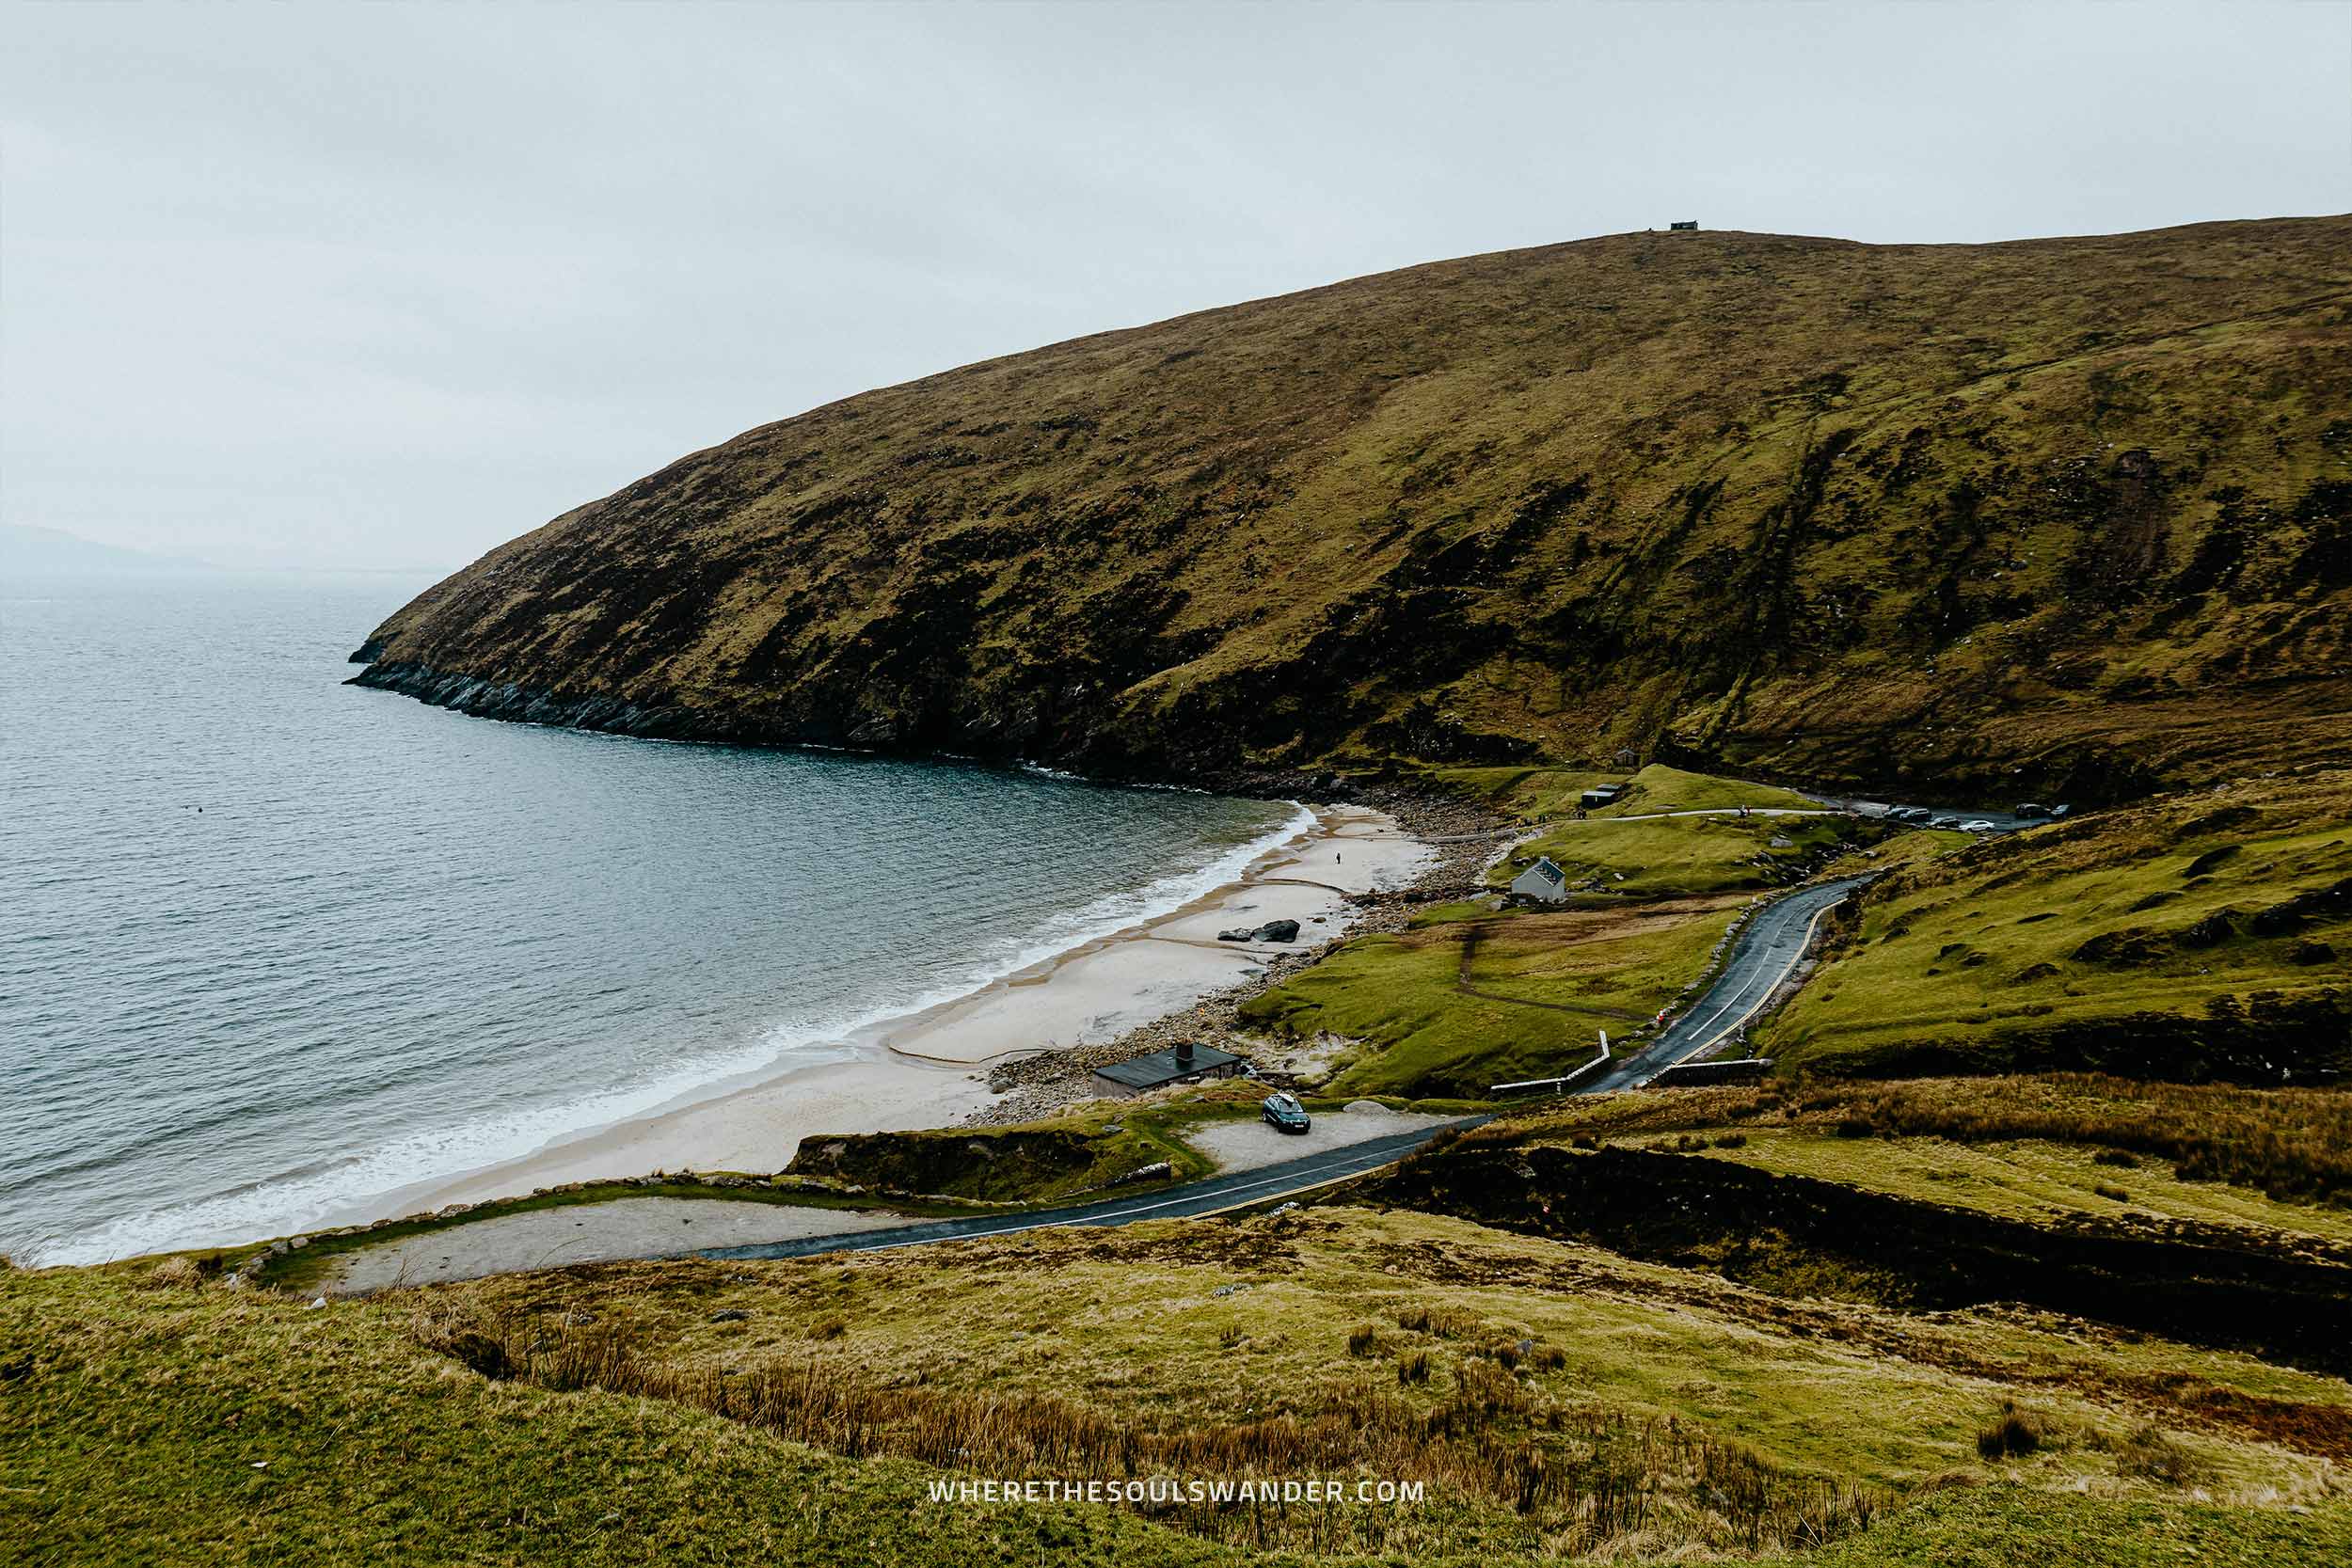
Once you’ve arrived on Achill Island, drive all the way west over winding mountain passages until you’ll reach Keem Bay, an unspoiled stretch of white-sanded beach that is flanked by rough seaside cliffs on either side.
The views over Keem Bay are like nowhere else in Ireland and the iconic setting causes for a moody and somewhat mysterious vibe, making it the perfect place to snap some stunning photographs while also having a well-needed moment to stretch your legs.
If you haven’t packed lunch, opt for a late lunch in one of Achill Island’s typical Irish pub-like cafeterias, before heading to Belmullet, where I’d advise you to stay for the night – since it’s nearby the stops that are planned for the next day.
Where I stayed | I’ve chosen to spend the night at Broadhaven Bay View House, a cosy family-run bed and breakfast in Belmullet.
Related | I’ve written an entire guide on the Connemara National Park, so make sure to read it for inspiration, travel advice and all the essential information.
Driving time: 6 – 7 hours | Distance: 312 Kilometres
Day 4 | Down Patrick Head, Mullaghmore Head and Classiebawn Castle
For day four, my plans had originally included the 3-hour Erris Head Loop Walk, but unfortunately, the weather gods had different plans for me. However, if the weather is in your favour, I’d still recommend doing this scenic walk along the rugged coast of Erris Head.
As a result, my first stop of the day took me to another incredible highlight found along the Wild Atlantic Way; the breathtaking Dún Briste sea stack of Downpatrick Head.
This 45 metres high sea stack was once connected to the mainland, but as a byproduct of rough seas and fierce weather conditions, it eventually got separated from the mainland.
While it’s a tad frightening due to the deep abyss, the sea stack of Dún Briste is a unique landmark to behold and thus an essential stop on any Ireland road trip itinerary.
From Downpatrick Head, make your way to Sligo, a lively town that makes the perfect base for explorations around County Sligo.
After a short lunch break and a quick check-in at your hotel, continue to Mullaghmore Head for the Classiebawn Castle, a privately owned castle with the towering Ben Bulben mountain as its backdrop. Though it’s not possible to enter the grounds, it truly is an epic scene to capture.
Once you’re done capturing some Instagram bangers, head back to Sligo for an afternoon of sightseeing and relaxation. While Sligo itself is rather small, the centre is worthy of an afternoon stroll.
Where I stayed | Make sure you stay at the Glasshouse, a comfortable hotel in the centre of Sligo.
Driving time: Around 3 hours | Distance: 193 Kilometres

Day 5 | Secret waterfall, Slieve League Cliffs and Glen head
Day five of this 9-day Ireland itinerary starts early, as it’s time to head to an undiscovered gem along Donegal’s scenic coastline; the Secret Waterfall in Donegal, also known as the Largy waterfall.
Completely hidden under the cliffs of Largy, this secret waterfall is reached by an adventurous hike, which takes you along muddy farmland, a secluded stretch of beach, and several boulders of rock, before reaching the remote waterfall.
Once arrived at the Secret Waterfall, you will be welcomed by a small, yet impressive waterfall that is still largely unexplored by those travelling along Ireland’s popular Wild Atlantic Way.
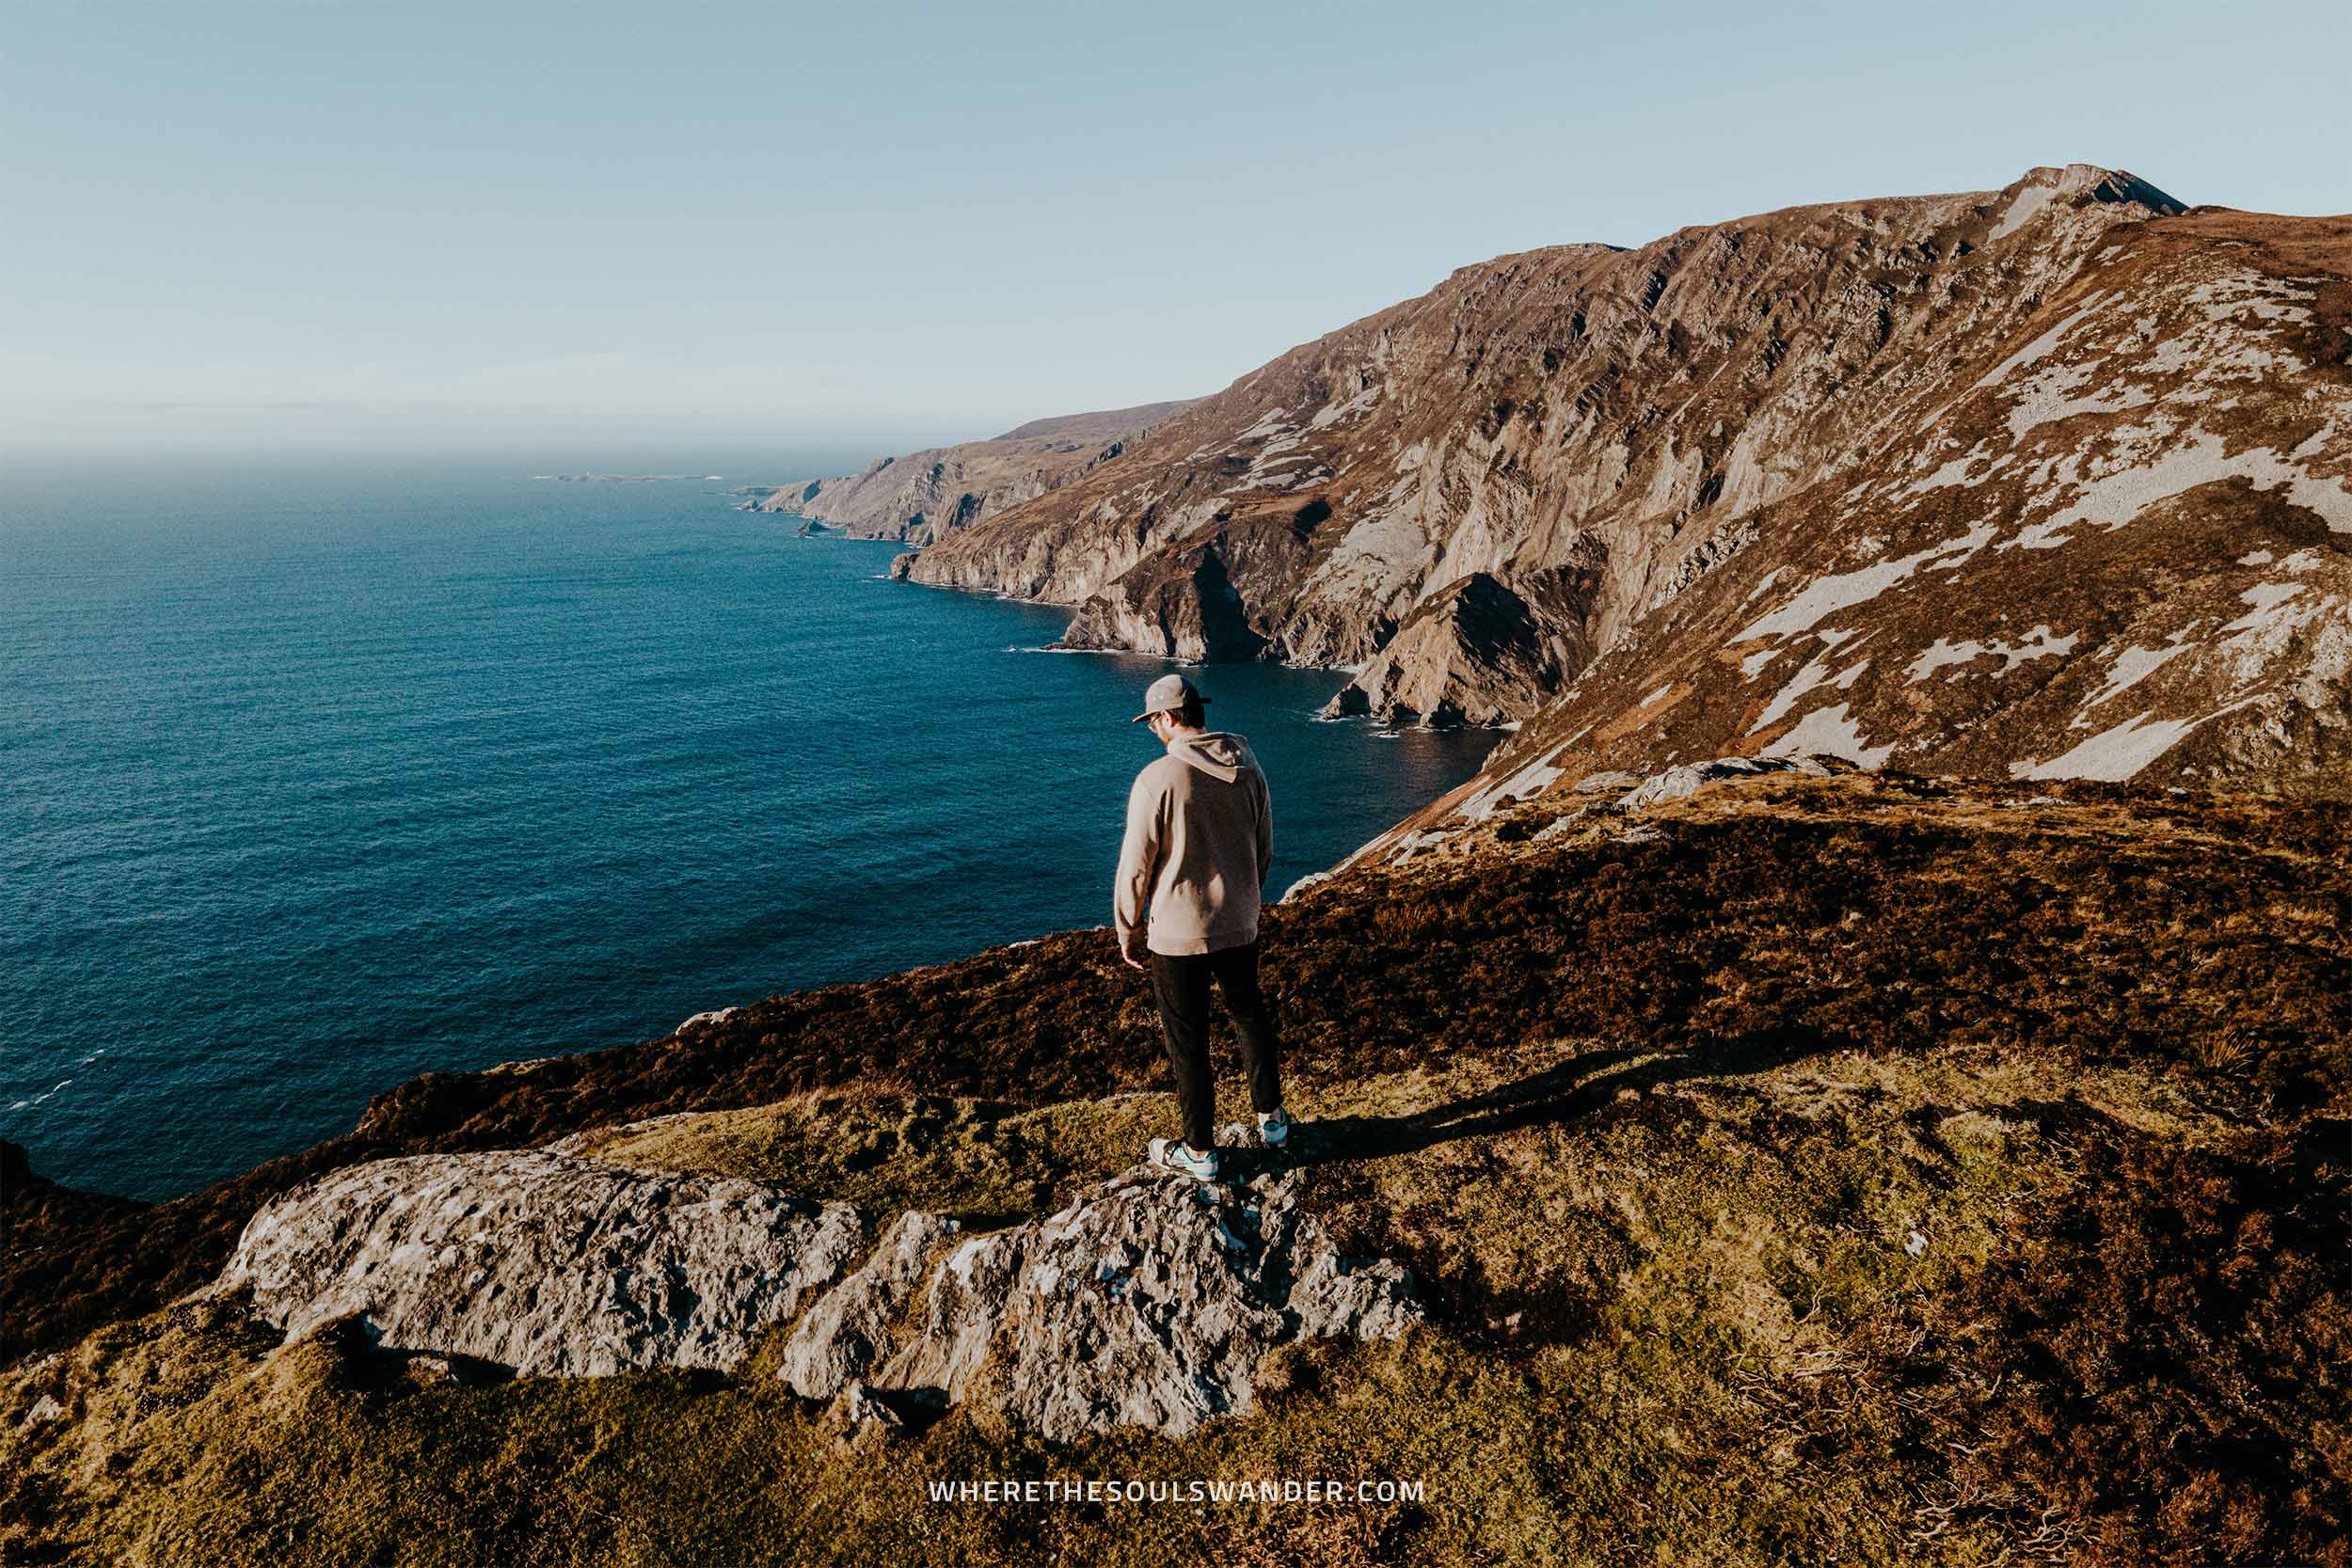
Following this off the beaten adventure, it’s time to continue along the Wild Atlantic Way in the direction of the Slieve League Cliffs, a set of 600-metre high sea cliffs that are without question the highlight of this day.
Located on the Donegal coastline, these impressive cliffs are among the highest sea cliffs in Europe and are definitely a must-see for anyone road tripping along the Wild Atlantic Way.
After hiking the incredible trail at Slieve League Cliffs, it’s time to set off to your last point of call for the day; the dramatic coastal cliffs of Glen Head in Glencolmcille.
On route to Letterkenny, and nestled on the edge of the towering cliffs, Glen Head is rugged, huge in size, and incredibly impressive to behold, especially when visiting around sunset, which is the case in this itinerary.
Once you arrive at the viewpoint, roll down your windows and watch an epic sunset unfold, before continuing in the direction of Letterkenny, where you will be spending the night.
Where I stayed | In Letterkenny, I decided to go for a little more comfort, so I chose to stay at the Radisson Blu Hotel, an excellent hotel with a sauna and swimming pool in the centre of Letterkenny.
Driving time: 4 – 5 hours | Distance: 212 Kilometres
Day 6 | Fanad Lighthouse, Benbulben Mountain and Gleniff Horseshoe
This morning is fully dedicated to driving to the far most Northern tip of Ireland to visit the incredibly scenic Fanad Lighthouse.
Perched on the eponymous Fanad Peninsula, the Fanad Lighthouse has been voted one of the most beautiful lighthouses in the world and is truly a photographer’s dream.
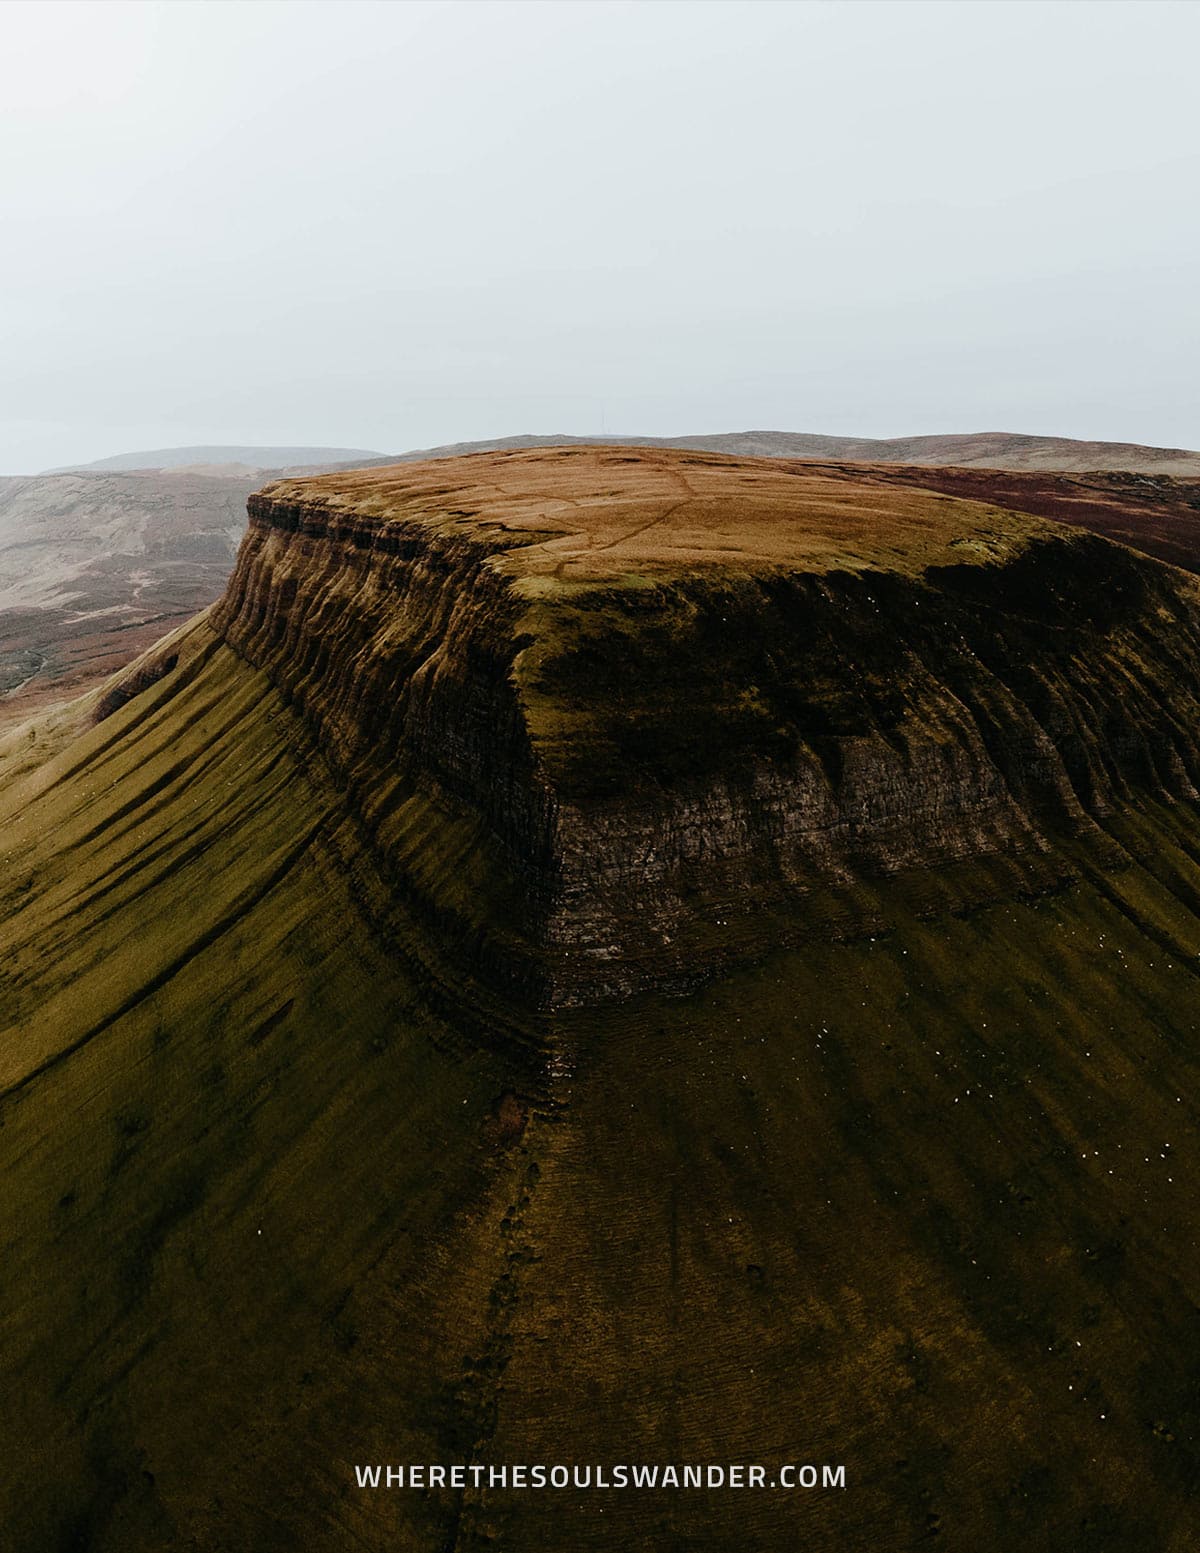
After snapping some awesome photography shots of the lighthouse, it’s time to head in the direction of Benbulben Mountain, another incredibly picturesque spot and easily one of my favourite stops on this Ireland itinerary.
Rising high above Drumcliffe village, the Benbulben Mountain is a gigantic flat-topped rock formation in the heart of County Sligo and is also part of the Dartry Mountains.
This iconic mountain range is best enjoyed by following the leisurely Benbulben Forest walk.
Situated at only a short distance from Benbulben is your next stop, the impressive Gleniff Horseshoe, a 10-kilometre hiking loop that offers sensational views of the encircling Dartry Mountains.
In the afternoon, head back to Sligo for an afternoon of exploring and relaxing – I’ve left this part of the itinerary open for you.
Where I stayed | I stayed at the Glasshouse, a comfortable hotel in the heart of Sligo Town.
Driving time: 3,5 hours | Distance: 222 Kilometres

Day 7 | Hill of Tara and drive back to Dublin
On day seven of this Ireland itinerary, I chose to sleep in and spend some extra time at the excellent breakfast buffet of the Glasshouse, before beginning the lengthy drive from Sligo to Dublin.
After a late check-out, it’s time to make your way to the Hill of Tara, an ancient ceremonial site that has great significance, given it is known as the inauguration place and seat of the High Kings of Ireland.
Legend has it, that the site has been in use for more than 5.000 years, and that it was once the ancient seat of power in Ireland. It is also said that during both prehistoric and historic times, a total of 142 kings reigned over the Hill of Tara.
While I’d have to admit that it’s not the most picturesque stop on this itinerary, I believe its long and captivating historical timeline is enough reason to include the Hill of Tara in your Ireland road trip itinerary.
From the Hill of Tara, it’s time for the last leg of the journey back to Dublin. This part of the trip should take around one more hour.
With a bit of luck, you’ll arrive in Dublin in the early afternoon, meaning there is plenty of time for a coffee break and explorations around town.
But let’s start with the coffee part. Brother Hubbard is the perfect place to enjoy an afternoon coffee, so make sure you grab one before exploring the vibrant streets of Dublin.
If you’re looking for the best things to see and do in Dublin, I’ve written an in-depth guide on Dublin, so make sure you read that one too!
Where I stayed | I stayed in the Cassidy hotel in the centre of Dublin, which was both comfortable and quiet.
Driving time: 3,5 hours | Distance: 227 Kilometres
Day 8 | Lough Tay, Kilmainham Gaol Museum and returning your rental car
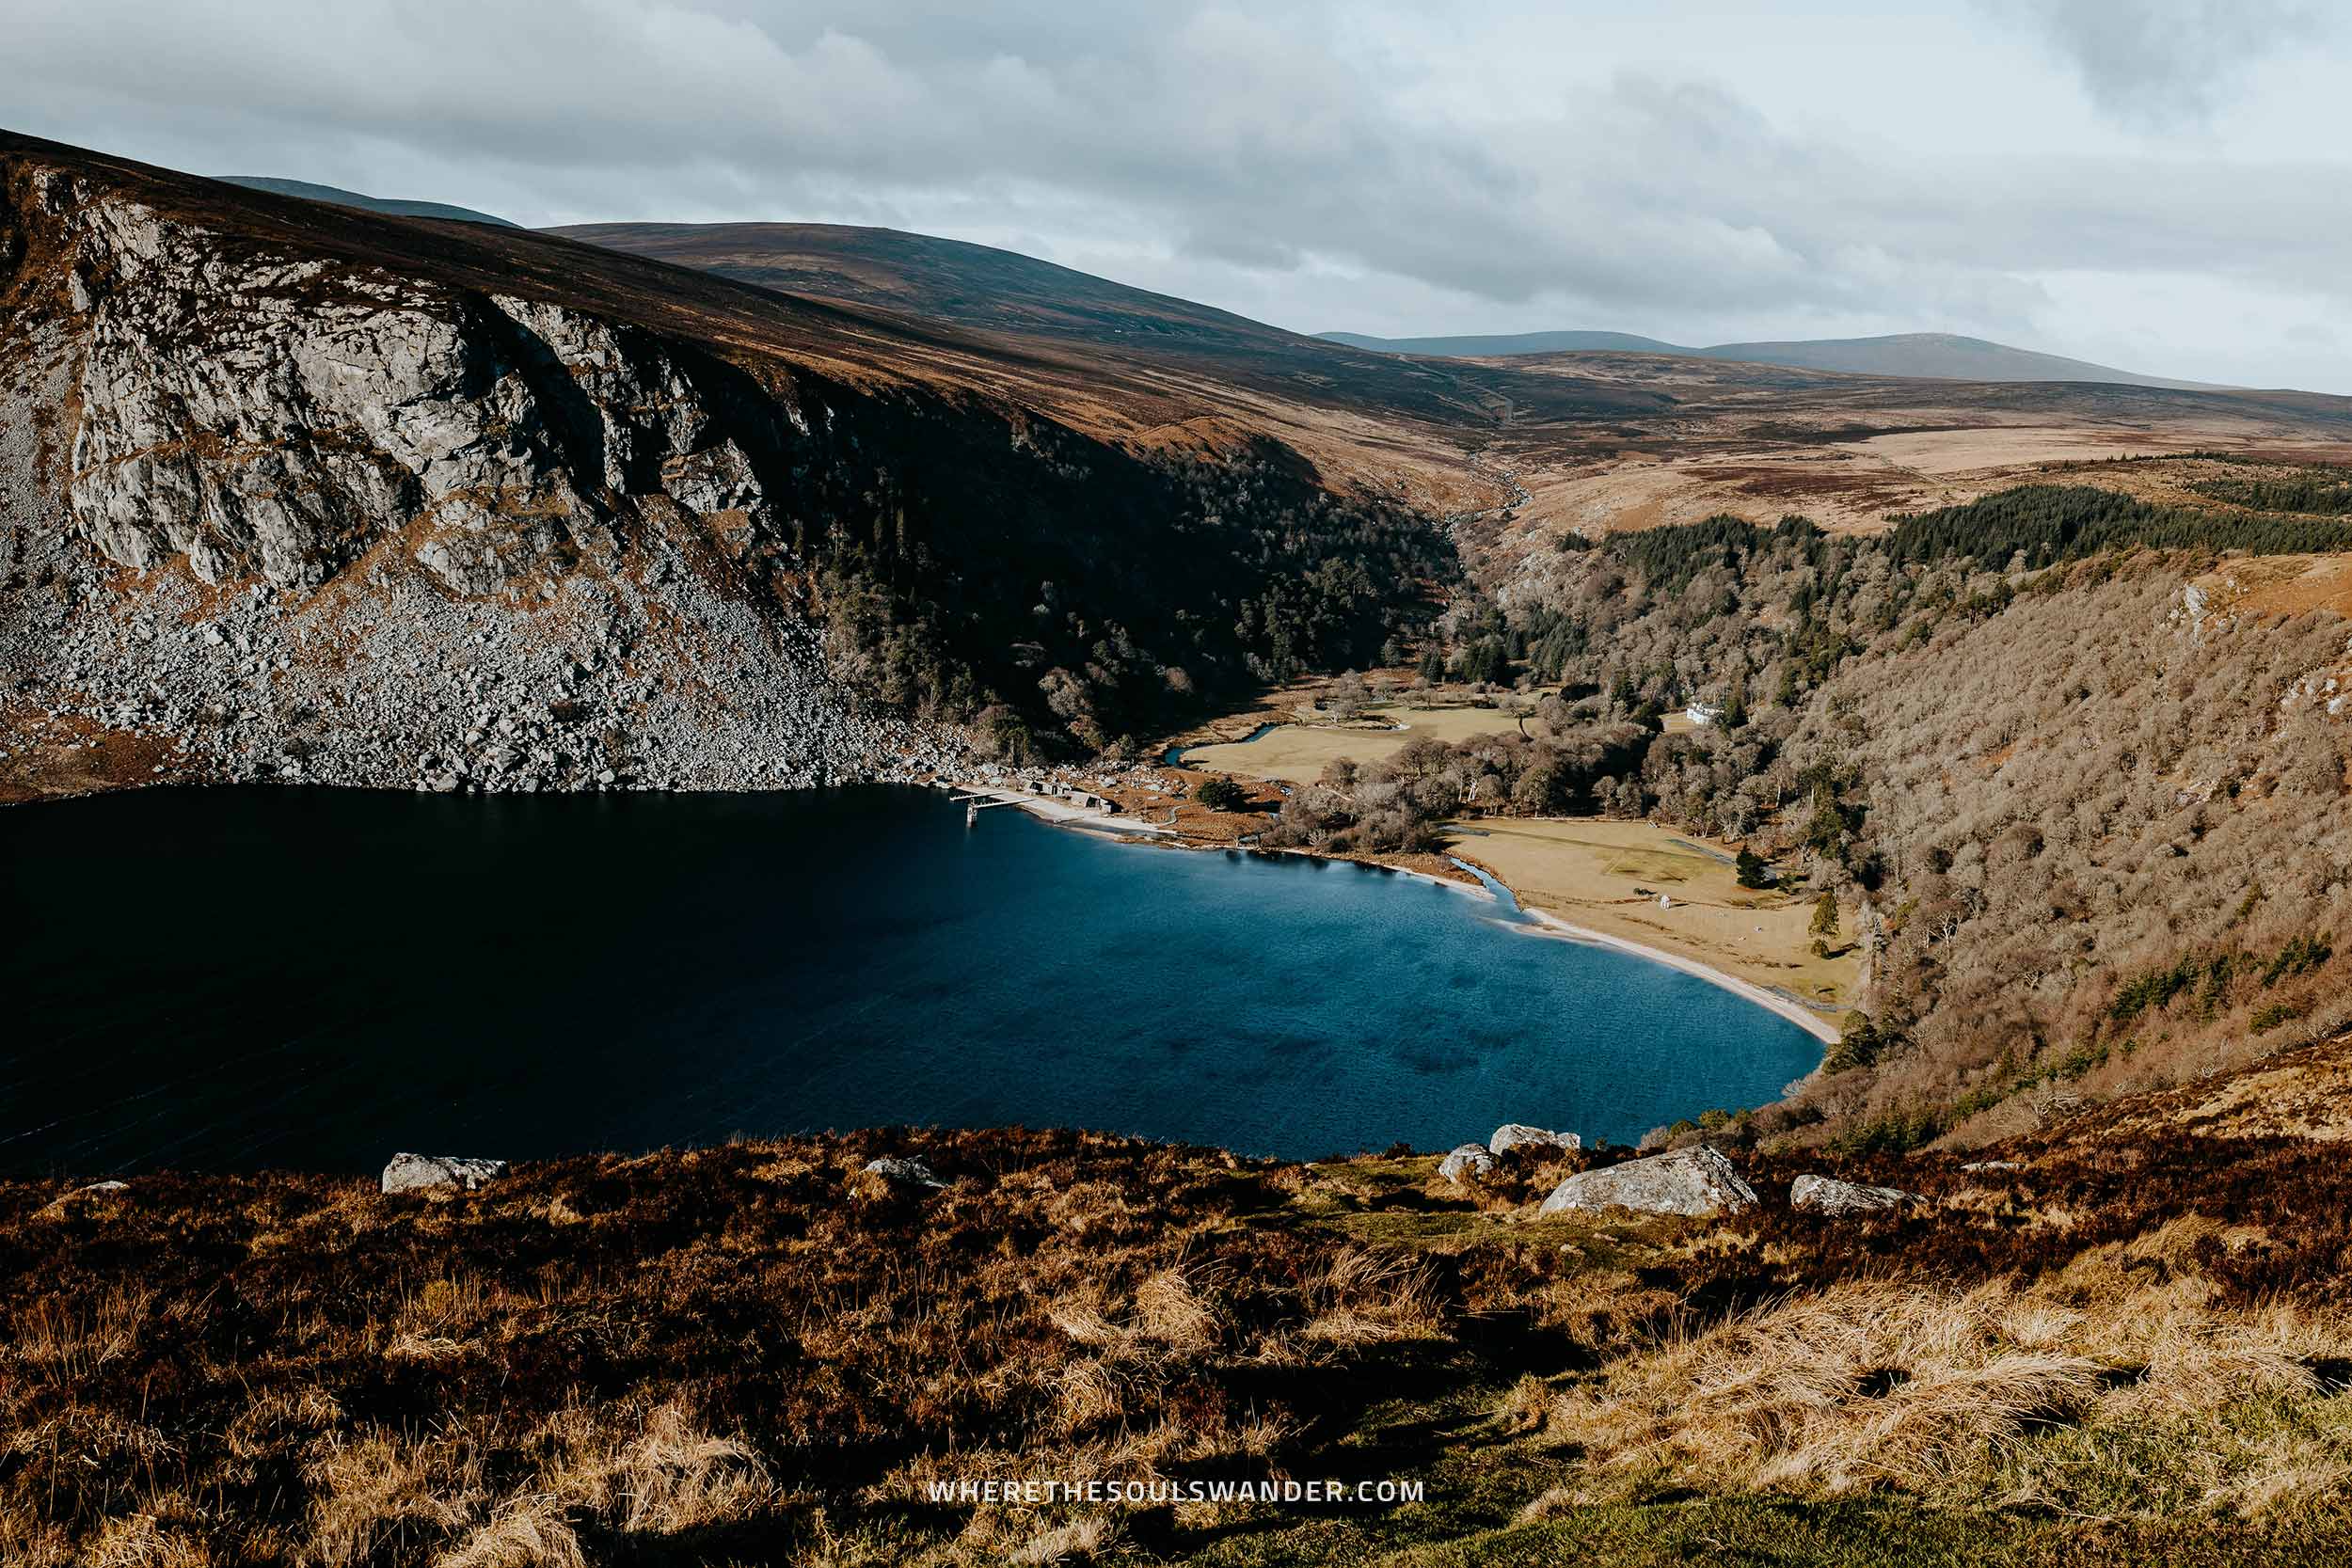
Now that you’re back in Dublin, it’s time to make your way to the breathtaking Wicklow Mountains.
Situated in the heart of the Wicklow Mountains, Lough Tay is a stunningly beautiful lake that has become famous for its appearance as ‘Kattegat’ in History’s blockbuster series ‘Vikings’.
While the shore is private property, and thus not accessible to the public, you’ll notice several viewpoints along the road, offering the iconic view that made the ‘Guinness Lake’ famous.
From Lough Tay, head back to Dublin for a visit at the intriguing Kilmainham Gaol Museum, a former prison turned museum that reminds its visitors to Ireland’s tragic fight for independence.
Since parking fees in the city centre of Dublin add up quickly, I’d recommend dropping off your rental car at the airport after visiting the Kilmainham Gaol Museum in Dublin.
Once you’ve returned your rental, jump aboard the Dublin Express for a short transfer back to the city centre (make sure you buy a return ticket so you can use it again tomorrow).
After you’ve returned your rental car, there’s still plenty of time to explore Dublin, so make sure to check out my guide to Dublin to make the most of your day.
Where I stayed | I’ve stayed a second night at the Cassidys Hotel.
Driving time: 2 hours | Distance: 100 Kilometres
Day 9 | Exploring Dublin and catching your flight home
Depending on your flight time, the last day of your itinerary will be all about catching your flight home.
If you have a late flight though, you can still squeeze in some sightseeing in the morning, before heading to the airport.
Since my flight was at 17:15, I was fortunate enough to visit the iconic Guinness Storehouse Factory (which is a must-visit for anyone travelling to Dublin), as well as revisiting a few spots that I visited earlier on this trip, including Murphy’s Ice Cream, Dublin’s best ice cream shop.
Then, after 9 incredible days, this Ireland itinerary has come to an end, and it’s sadly time to pack your stuff and head to the airport.

The best time to visit Ireland
It is largely known that the weather in Ireland is far from predictable, meaning you could experience all four seasons in a matter of one day.
While you should always bear in mind the potential weather changes, I’d believe the best time to plan your Ireland road trip itinerary is during the summer months of June, July and August, when the days are longer and the weather is slightly more stable.
Additionally, the shoulder months of April, May and September will still offer enjoyable circumstances – plus you will experience smaller crowds when visiting the major highlights along the Wild Atlantic Way too.
How to get to Ireland
Whether you’re from neighbouring England or Scotland, or from the other side of the world, it is safe to say that the easiest way to get to Ireland is by air.
Most international flights to Ireland arrive at the Dublin International Airport, situated around 20 minutes north of the city centre of Dublin, Ireland’s iconic capital city.
Dublin Airport is extremely well kept and hosts a great range of international flights, including those from major hubs in Europe, North America, and the Middle East.
While Dublin International Airport is clearly your best pick, you can also choose to fly into the country via the airports at Cork, Shannon and Knock. For this Ireland itinerary, however, I’d recommend entering the country at Dublin.
For flights to Ireland, I recommend using Booking. Not only is their website super user-friendly, but they also offer a great selection of airlines and the option to find good rates.
Safety in Ireland | Travel insurance
Given travelling in Ireland is all about the outdoors, I recommend everyone to sort out good travel insurance before setting out on their own road trip adventure.
Where we prefer that everything goes smoothly during our travels, something unfortunate can happen at any moment, whether it’s an injury during a hike, a stolen camera, or an accident on the road.
For travel insurance, I use Heymondo, as they offer full covid-19 coverage, as well as a handy app with 24-hour medical assistance. Make sure you check it out – readers of WTSW receive 5% off any insurance policy too. Additionally, I also recommend World Nomads.
Cheers!
I’ve been on this travel blogging journey since 2019.
If you appreciate what I do here, these are some ways you can support me.

An in-depth guide to the Red & Rose Valley hike & Sunset viewpoint in Cappadocia - Updated 2024
An in-depth guide to the Red & Rose Valley hike & Sunset viewpoint in Cappadocia - Updated 2024
Now that you’re reading this, it looks like you are researching and planning an upcoming trip to Cappadocia. Well, if that’s the case, you’ve come to the right place.
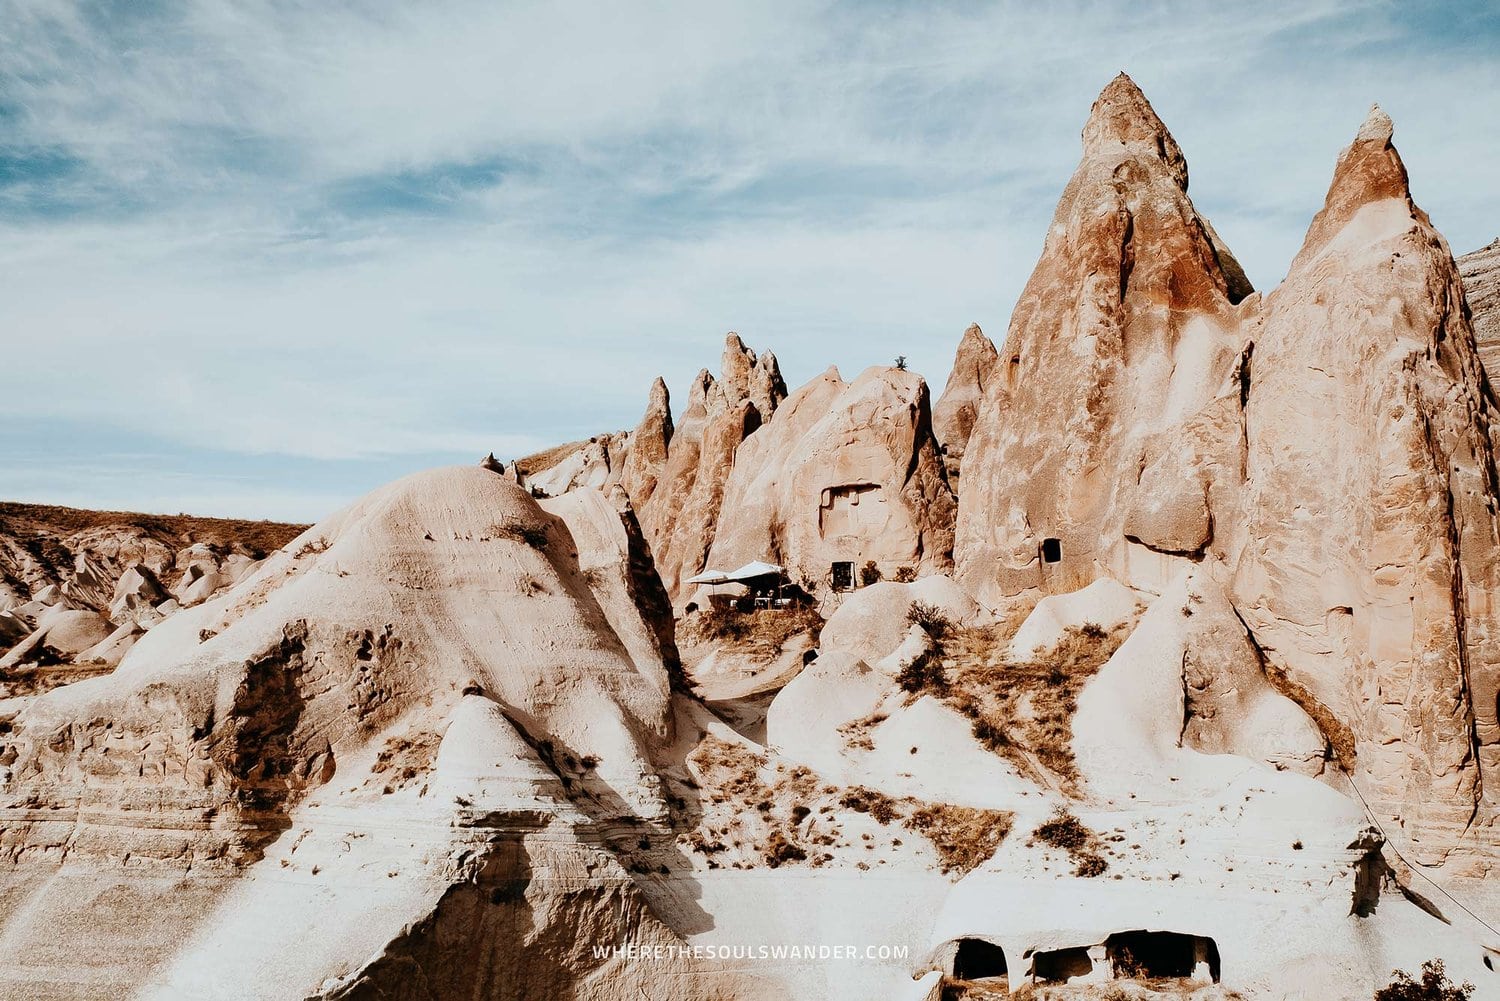
One of the experiences I looked forward to the most when I was planning my own trip to Cappadocia (besides an iconic hot air balloon flight), was the hike through the incredibly picturesque landscape of both the Red and Rose Valley.
Situated at the heart of Cappadocia, this easygoing hike takes you to some of Cappadocia’s most impressive landscapes, as well as plenty of iconic rock-cut churches and well-preserved cave dwellings.
Add to that, that it’s also one of the most easily accessible hikes in the region, and you realize why the Red and Rose Valley hike has become an unmissable highlight for anyone travelling to this insanely beautiful region in Turkey’s central Anatolia region.
To help you have a comfortable hike, I’ve put together this in-depth guide, featuring all the essentials, as well as plenty of my best hiking tips.
If you choose to use any of the links on this page, I receive a small commission at no extra cost to you. By using these links, you’ll have a direct impact on WTSW and support me to continue to create free insightful travel content for you. If you find any of my tips useful, you can support me by buying a virtual coffee here.

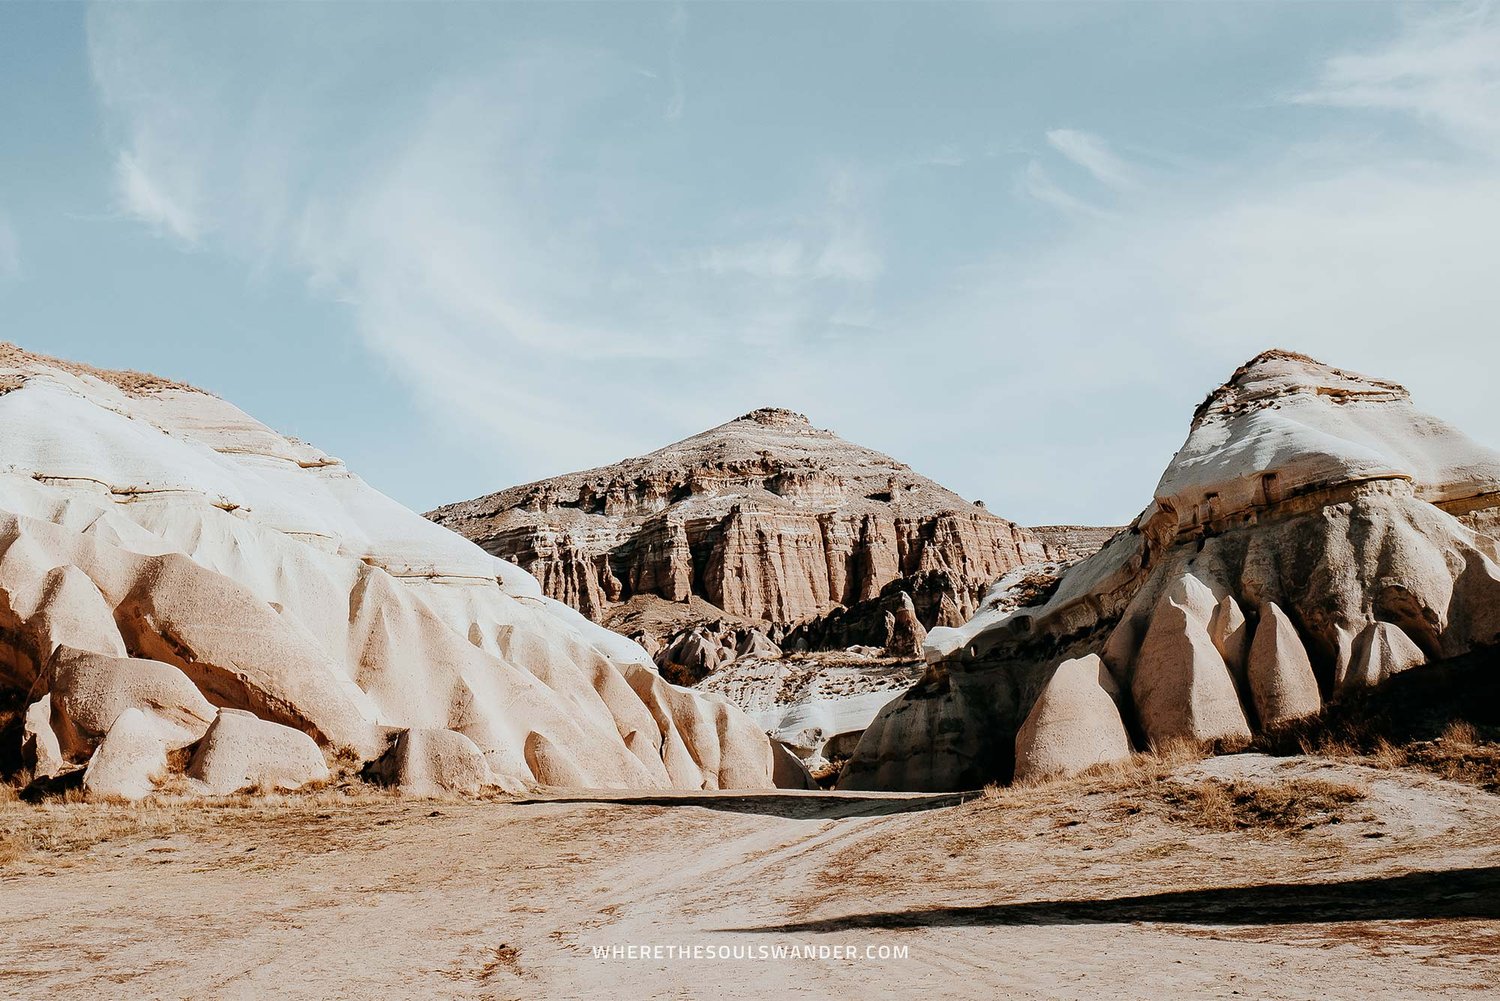
Where is the Red & Rose Valley hike
The Red and Rose Valley hike is found in the heart of the Göreme National Park in Cappadocia, about 15 minutes drive from the eponymous town; Göreme.
Named after their colourful features, I believe the Red and Rose Valley hike is an essential activity for anyone visiting Cappadocia.
Where to stay in Cappadocia
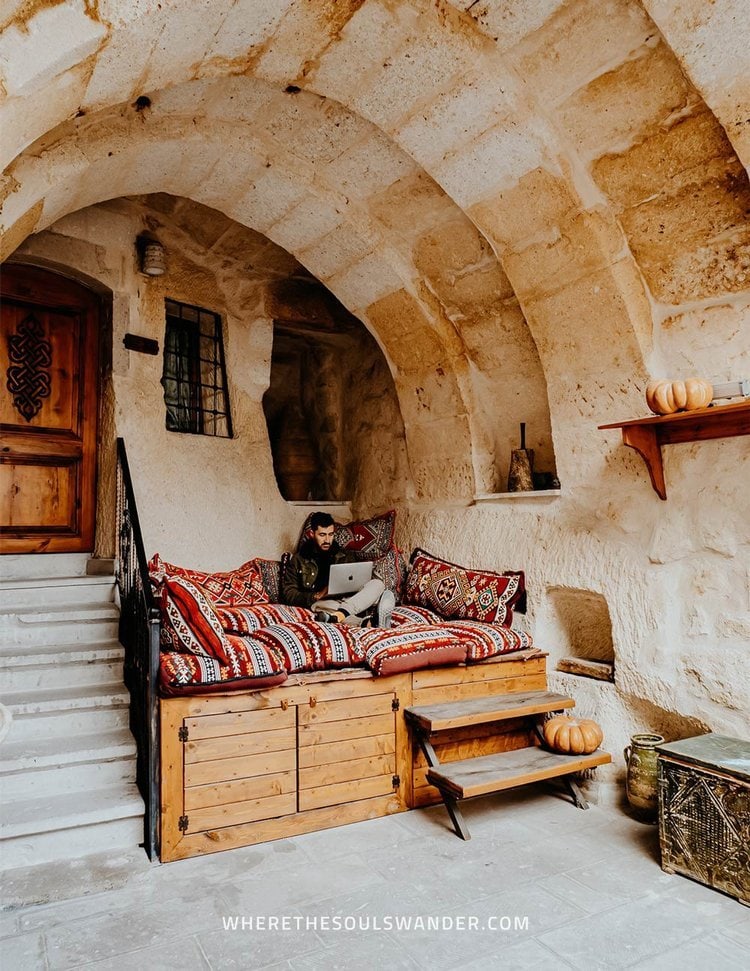
When it comes to accommodation in Cappadocia, Göreme is by far the most popular town from which travellers start their explorations, and after staying there myself, it’s easy to see why.
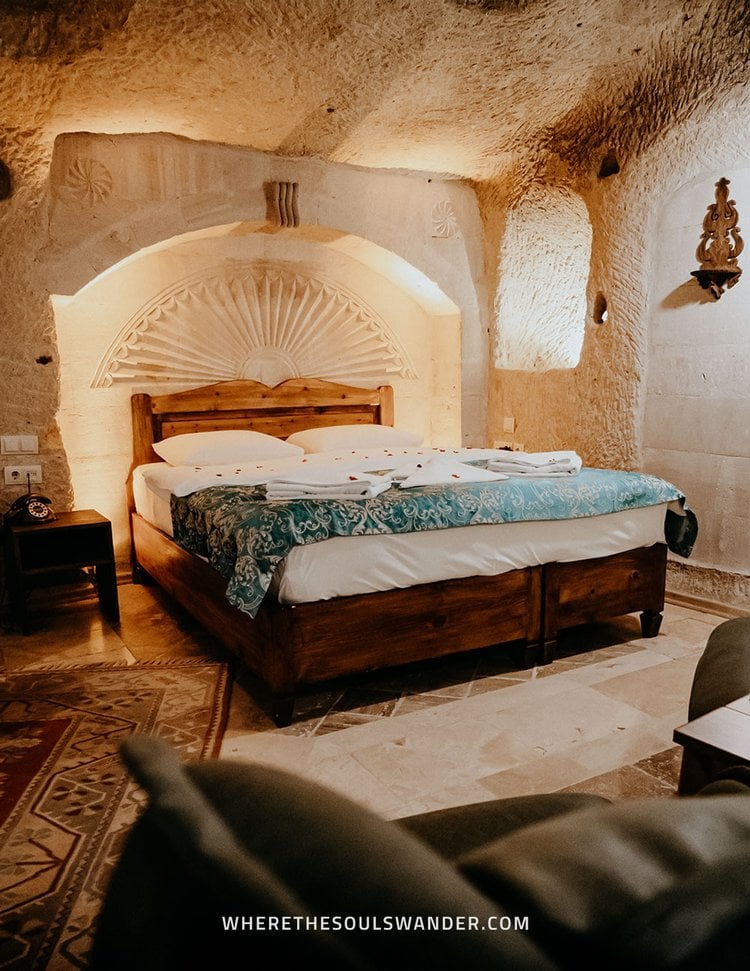
The historic town is encircled by iconic fairy chimneys, has no shortage of brilliant cafes & restaurants, and is home to one of the world’s coolest accommodations ever; cave-style hotels.
To help you find the right accommodation, I’ve listed three of my favourite options below, one of which is marked – this is the hotel where I stayed.
+ Charming Cave Hotel | During my time in Cappadocia, I was fortunate enough to spend a total of 6 days in Charming Cave Hotel, an authentic family-run hotel, situated at the heart of Göreme. Alongside a ‘picture-perfect’ rooftop terrace, the hotel offers a wide array of cave-style rooms, all marked by amazing design and elegant details. All bookings come with an incredibly yummy breakfast, and organizing a balloon flight is as easy as it gets.
Kelebek Special Cave Hotel | One of the most luxurious options in Göreme, Kelebek Special Cave Hotel provides spacious cave-style suites, a traditional Turkish bath, and a large outdoor swimming pool. Although this extra luxury comes at a cost, I believe, it’s a great value for the money, especially for those who are keen to take it easy after an adventurous day of exploring.
Artemis Cave Suites & Spa | Right at the centre of Göreme Town, Artemis Cave Suites & Spa offers traditional-designed rooms, an authentic rooftop terrace, as well as excellent in-house spa facilities. Rooms starting at just €47,- a night make Artemis one of the best options in Göreme, Cappadocia.
Alternatively, search for accommodations in Cappadocia on booking.com.

How to get to the Red & Rose Valley hike
By car | With so many incredible things to see and do, I believe the best way to explore Cappadocia is by renting yourself a car for the duration of your trip.
By renting a car, you will not only have the freedom to explore Cappadocia at your own pace, but you’ll also have an easier time reaching the region’s many natural attractions.
For car rental in Cappadocia, I would highly recommend Rentalcars.com, as they offer exceptional service, additional insurance, and a wide variety of cars, all at an affordable price.
Private driver | Alternatively, it’s also possible to hire a private driver for the day. By doing so, you’ll save quite some time, making it the perfect option for those shorter on time.
Also, this option gives additional flexibility, since it’s easy to arrange a pickup at the Red Valley sunset viewpoint after you’ve done the hike.
Joining a tour | Another excellent option where you’ll take in both the Red and Rose Valley is by going on the famous Blue tour of Cappadocia.
This full-day tour is given by a professional art historian guide and includes lunch, the national park fees and transport from and to your accommodation in Cappadocia.
At only €44,- per person, I believe this tour is great value for the money!
The Red and Rose Valley hike
As mentioned before, there are three ways to start the hike. I’d chosen option two and started the hike from the Love Valley trailhead. For that reason, I’ll solely discuss this option.
Finding the trailhead
First things first; the starting point of the Rose Valley hike can be rather confusing, as the hike begins in a vast valley with several paths leading to different directions.
Once you’ve reached the first sign that states Rose Valley, make sure you go to the right-hand side of the valley and follow the path up the mountain ridge.
While it’s quite tempting to head straight into the valley, it’s good to know that none of the pathways found there lead to the actual Rose Valley trail. Thanks to my trial and error, you’ll save about an hour of your time finding the right path.
The Rose Valley
As soon as you arrive at the Love Valley path, it’s actually quite a straightforward walk, with plenty of impressive cave dwellings and rock-cut churches along the way.
One thing worth noting though is that the valley is home to several somewhat confusing signs, that will all surprisingly lead you to a small cafe on top of the Rose Valley trail. The good news is that this cafe is also the beginning point of the Red Valley section of the hike.
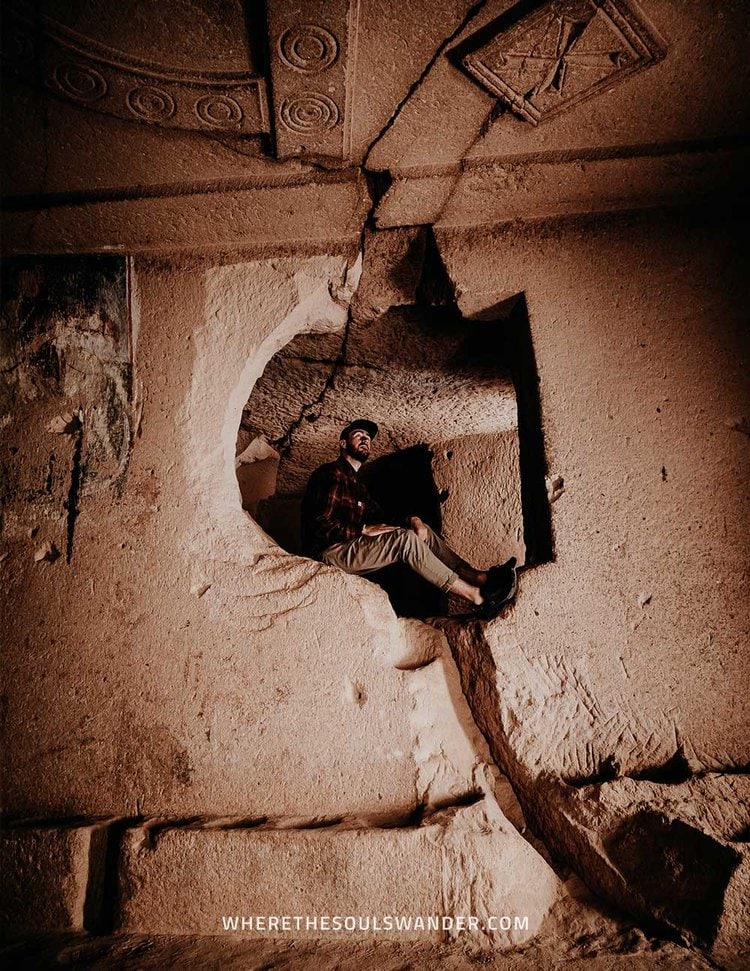
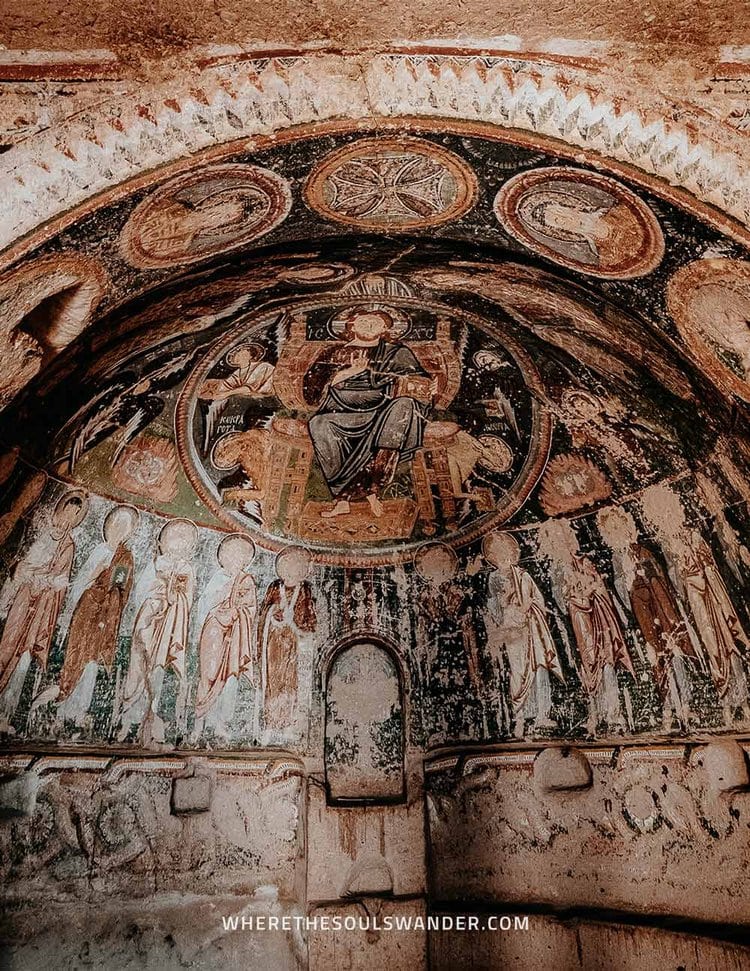
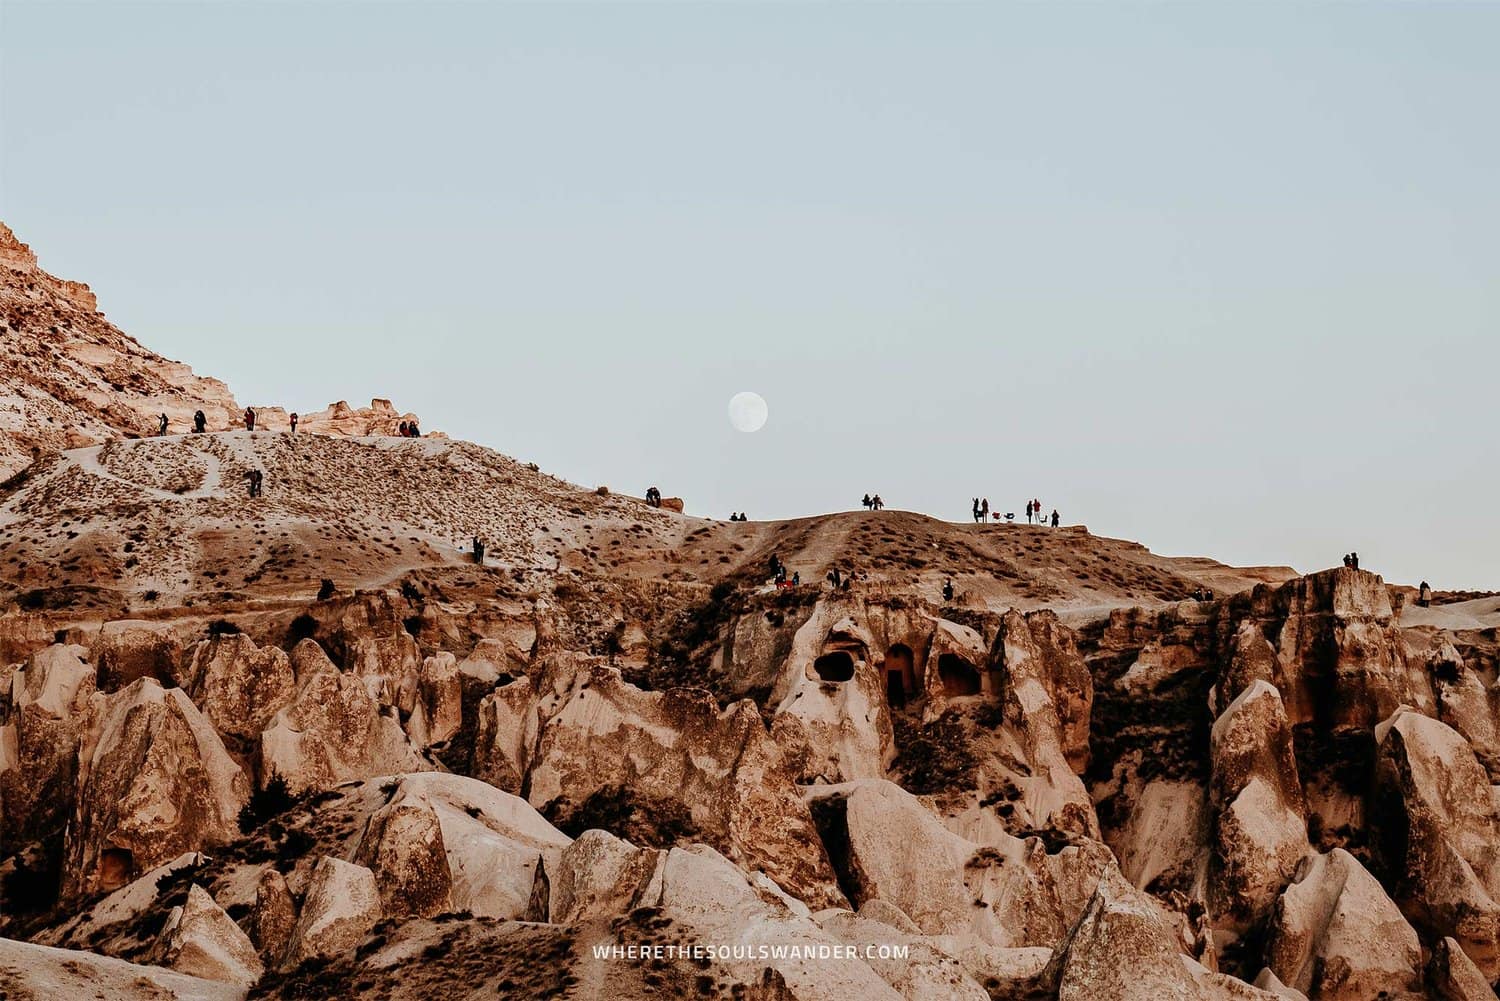
Rock-cut churches and cave dwellings
Once you arrive at the cafe, make sure you check out the incredible rock-cut church on the right – it’s one of the best-preserved churches in the Rose Valley and a pretty impressive sight to behold.
After a short break at the cafe, it’s time to follow the trail for another 5 minutes before entering the Red Valley.
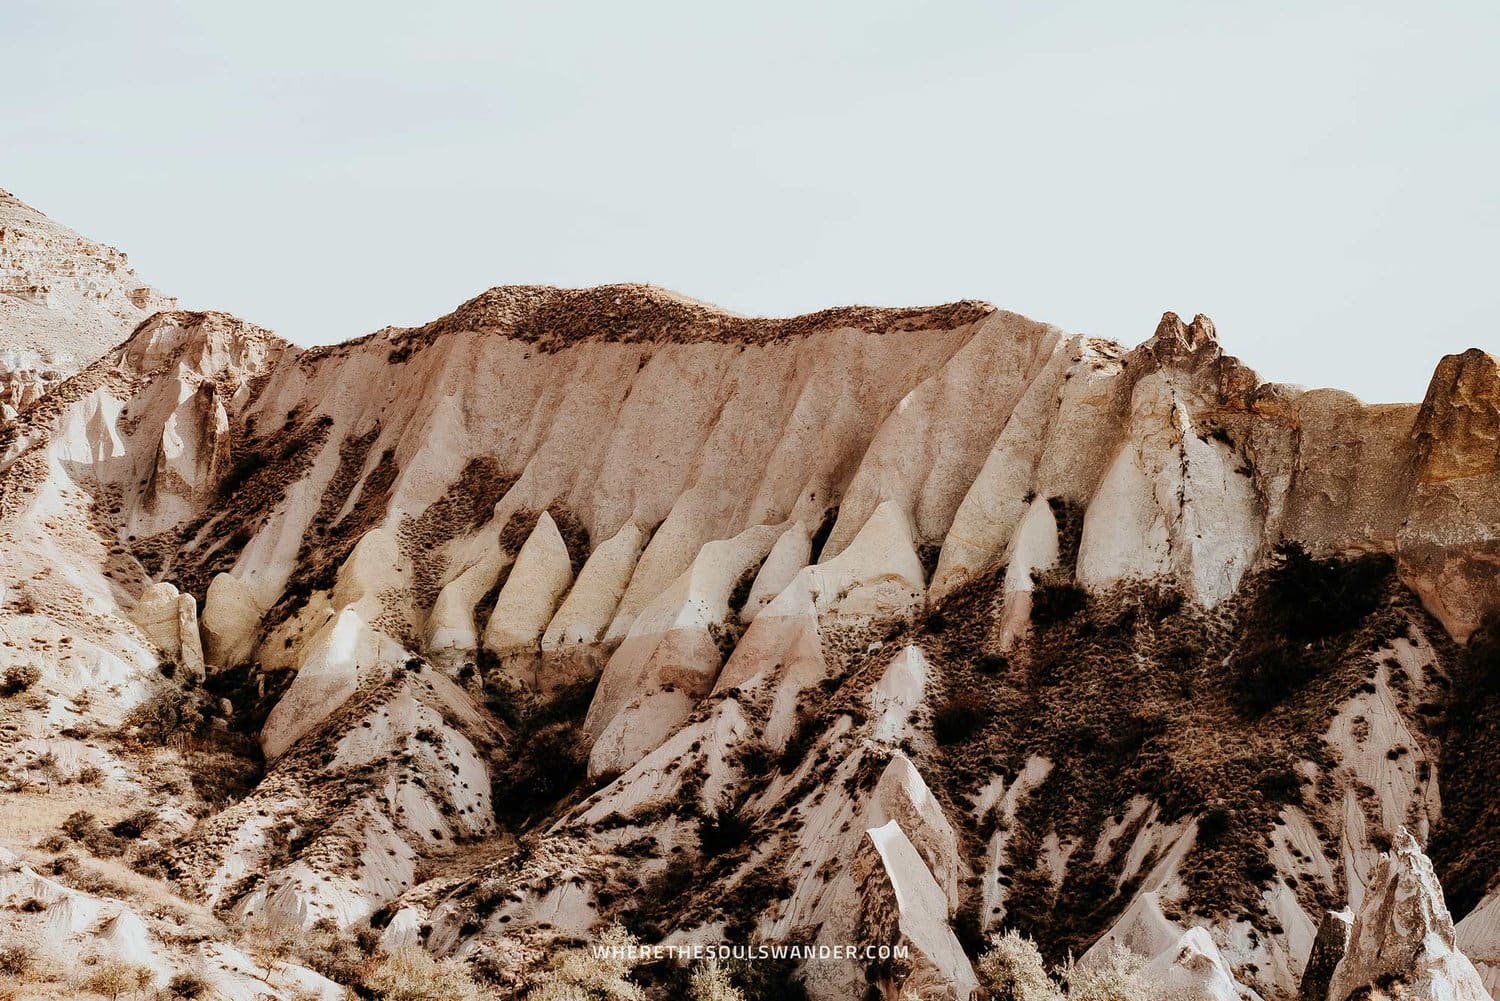
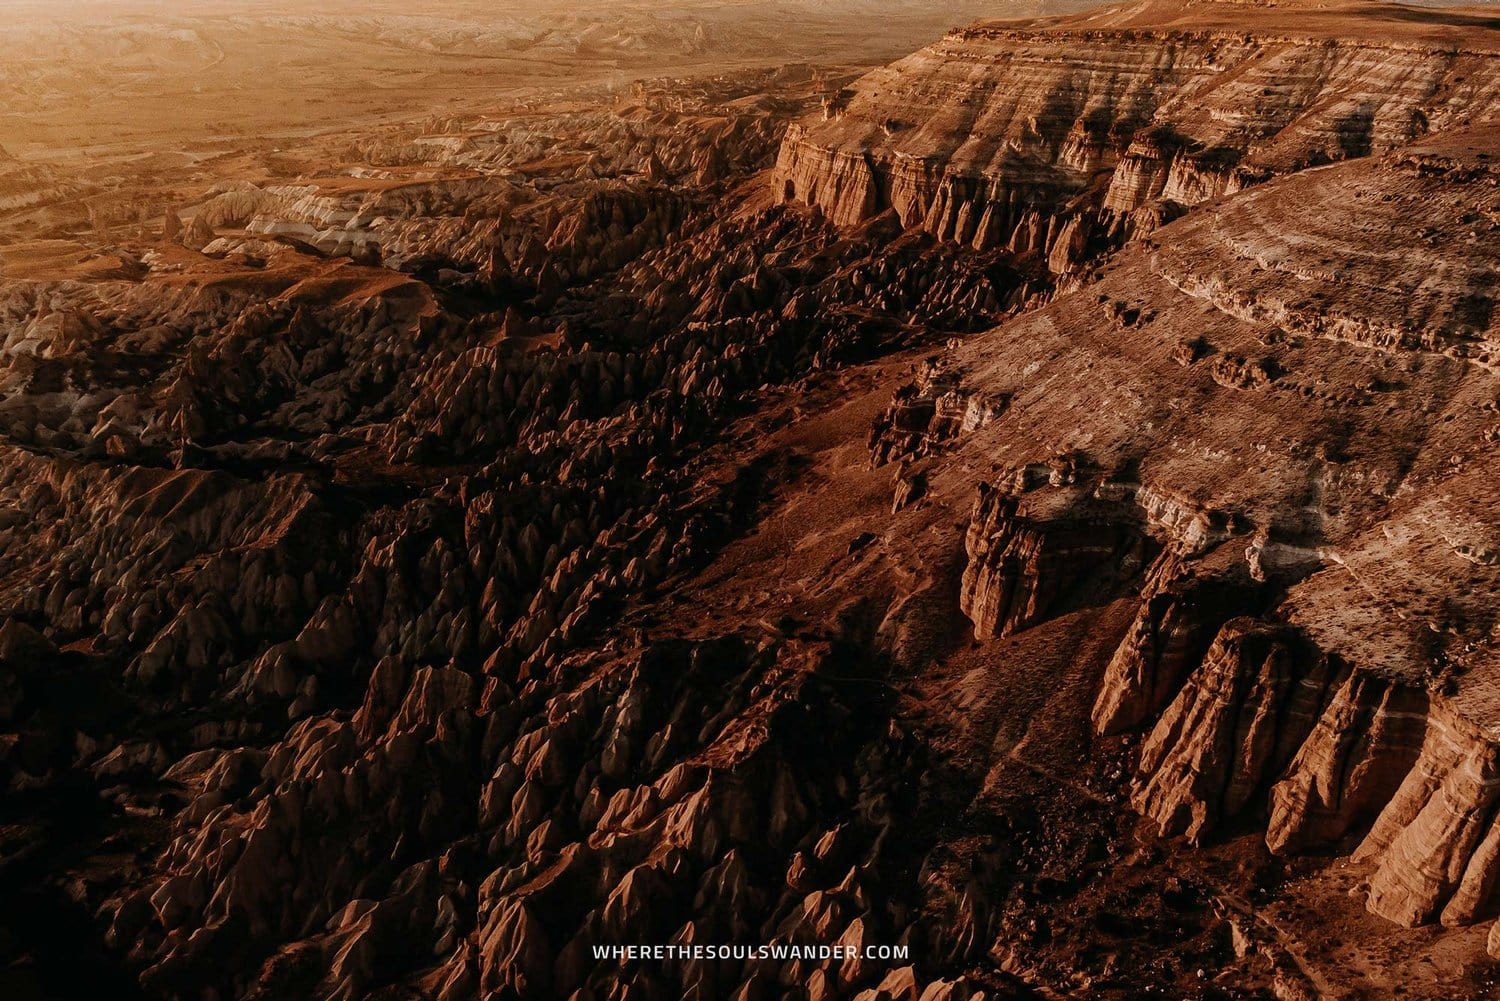
Red Valley Cappadocia
As soon as you make your way around the final loop of Rose Valley, you’ll end on the other side of the mountain range, this is where you officially enter the Red Valley.
From now on, the trail winds over the mountain ridge and takes you along impressive rock formations and several cave dwellings, before you’ll reach the final viewpoint of Red Valley.
After about 10 minutes into the valley, the path is carved out of the rock formations, which is pretty awesome if you’ve asked me.
Also, the journey up is slightly steeper in comparison to the Rose Valley and should take around 20 minutes.
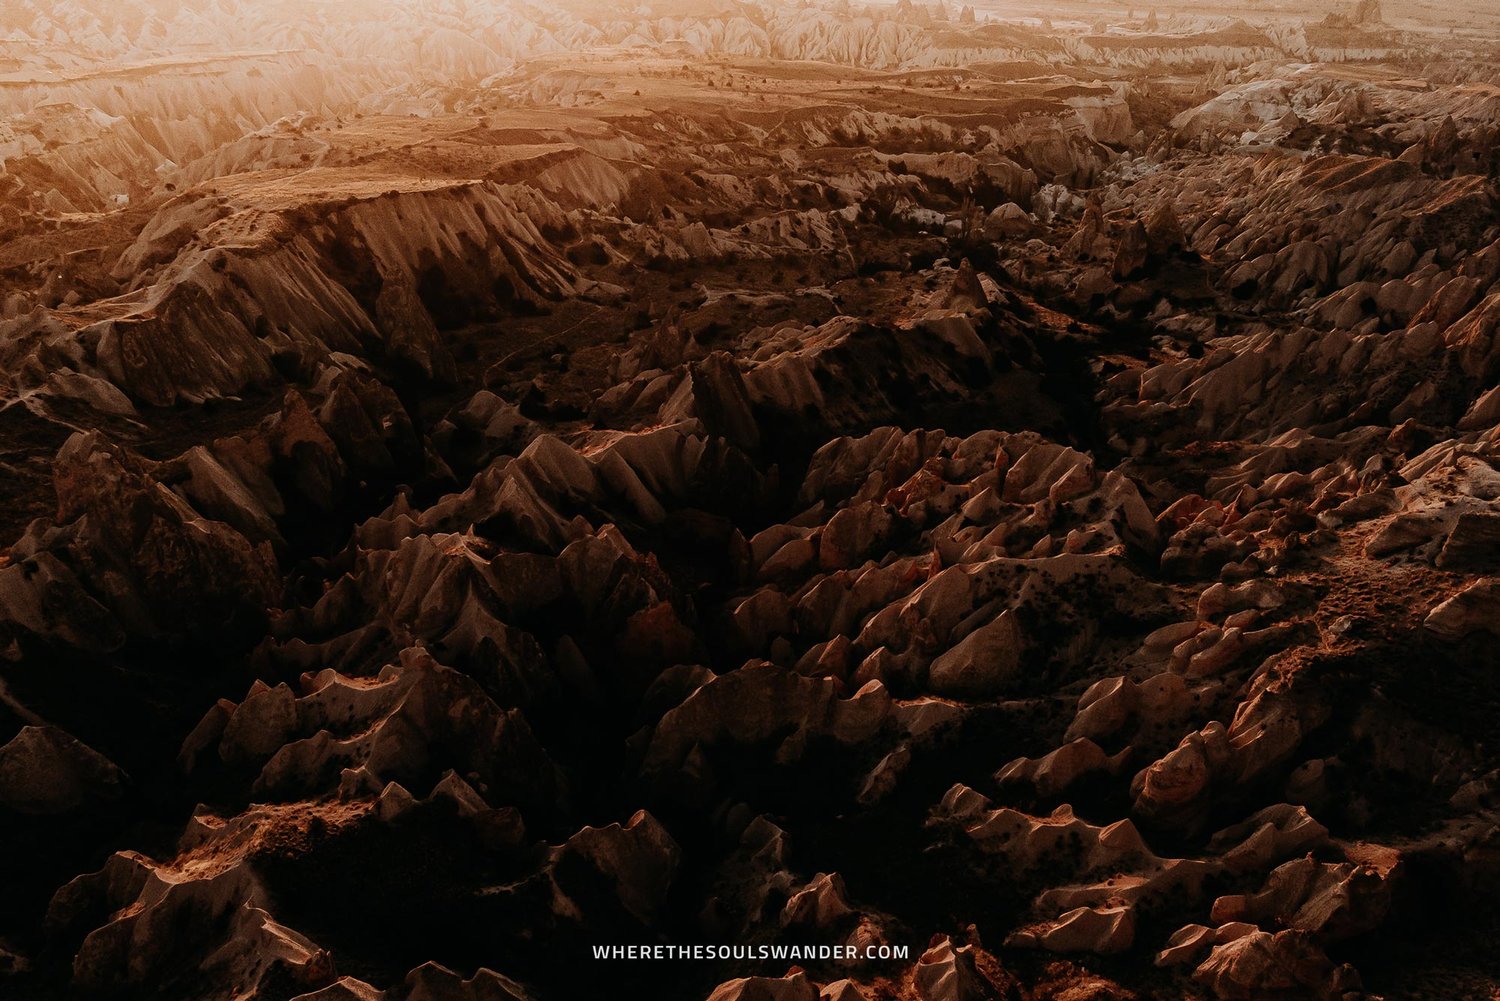
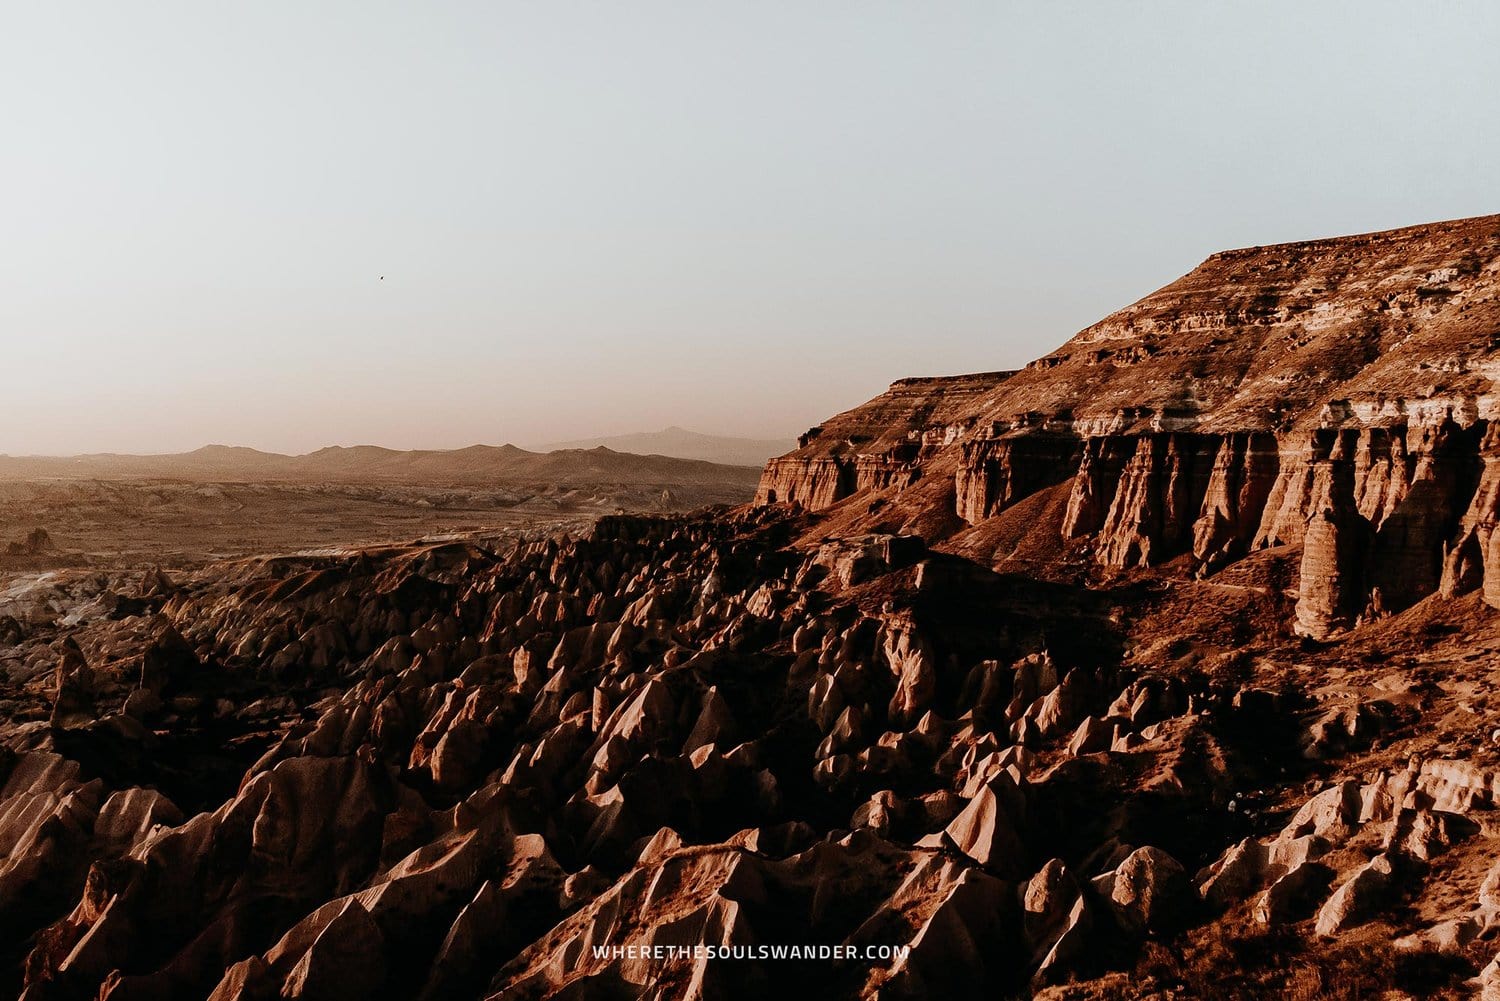
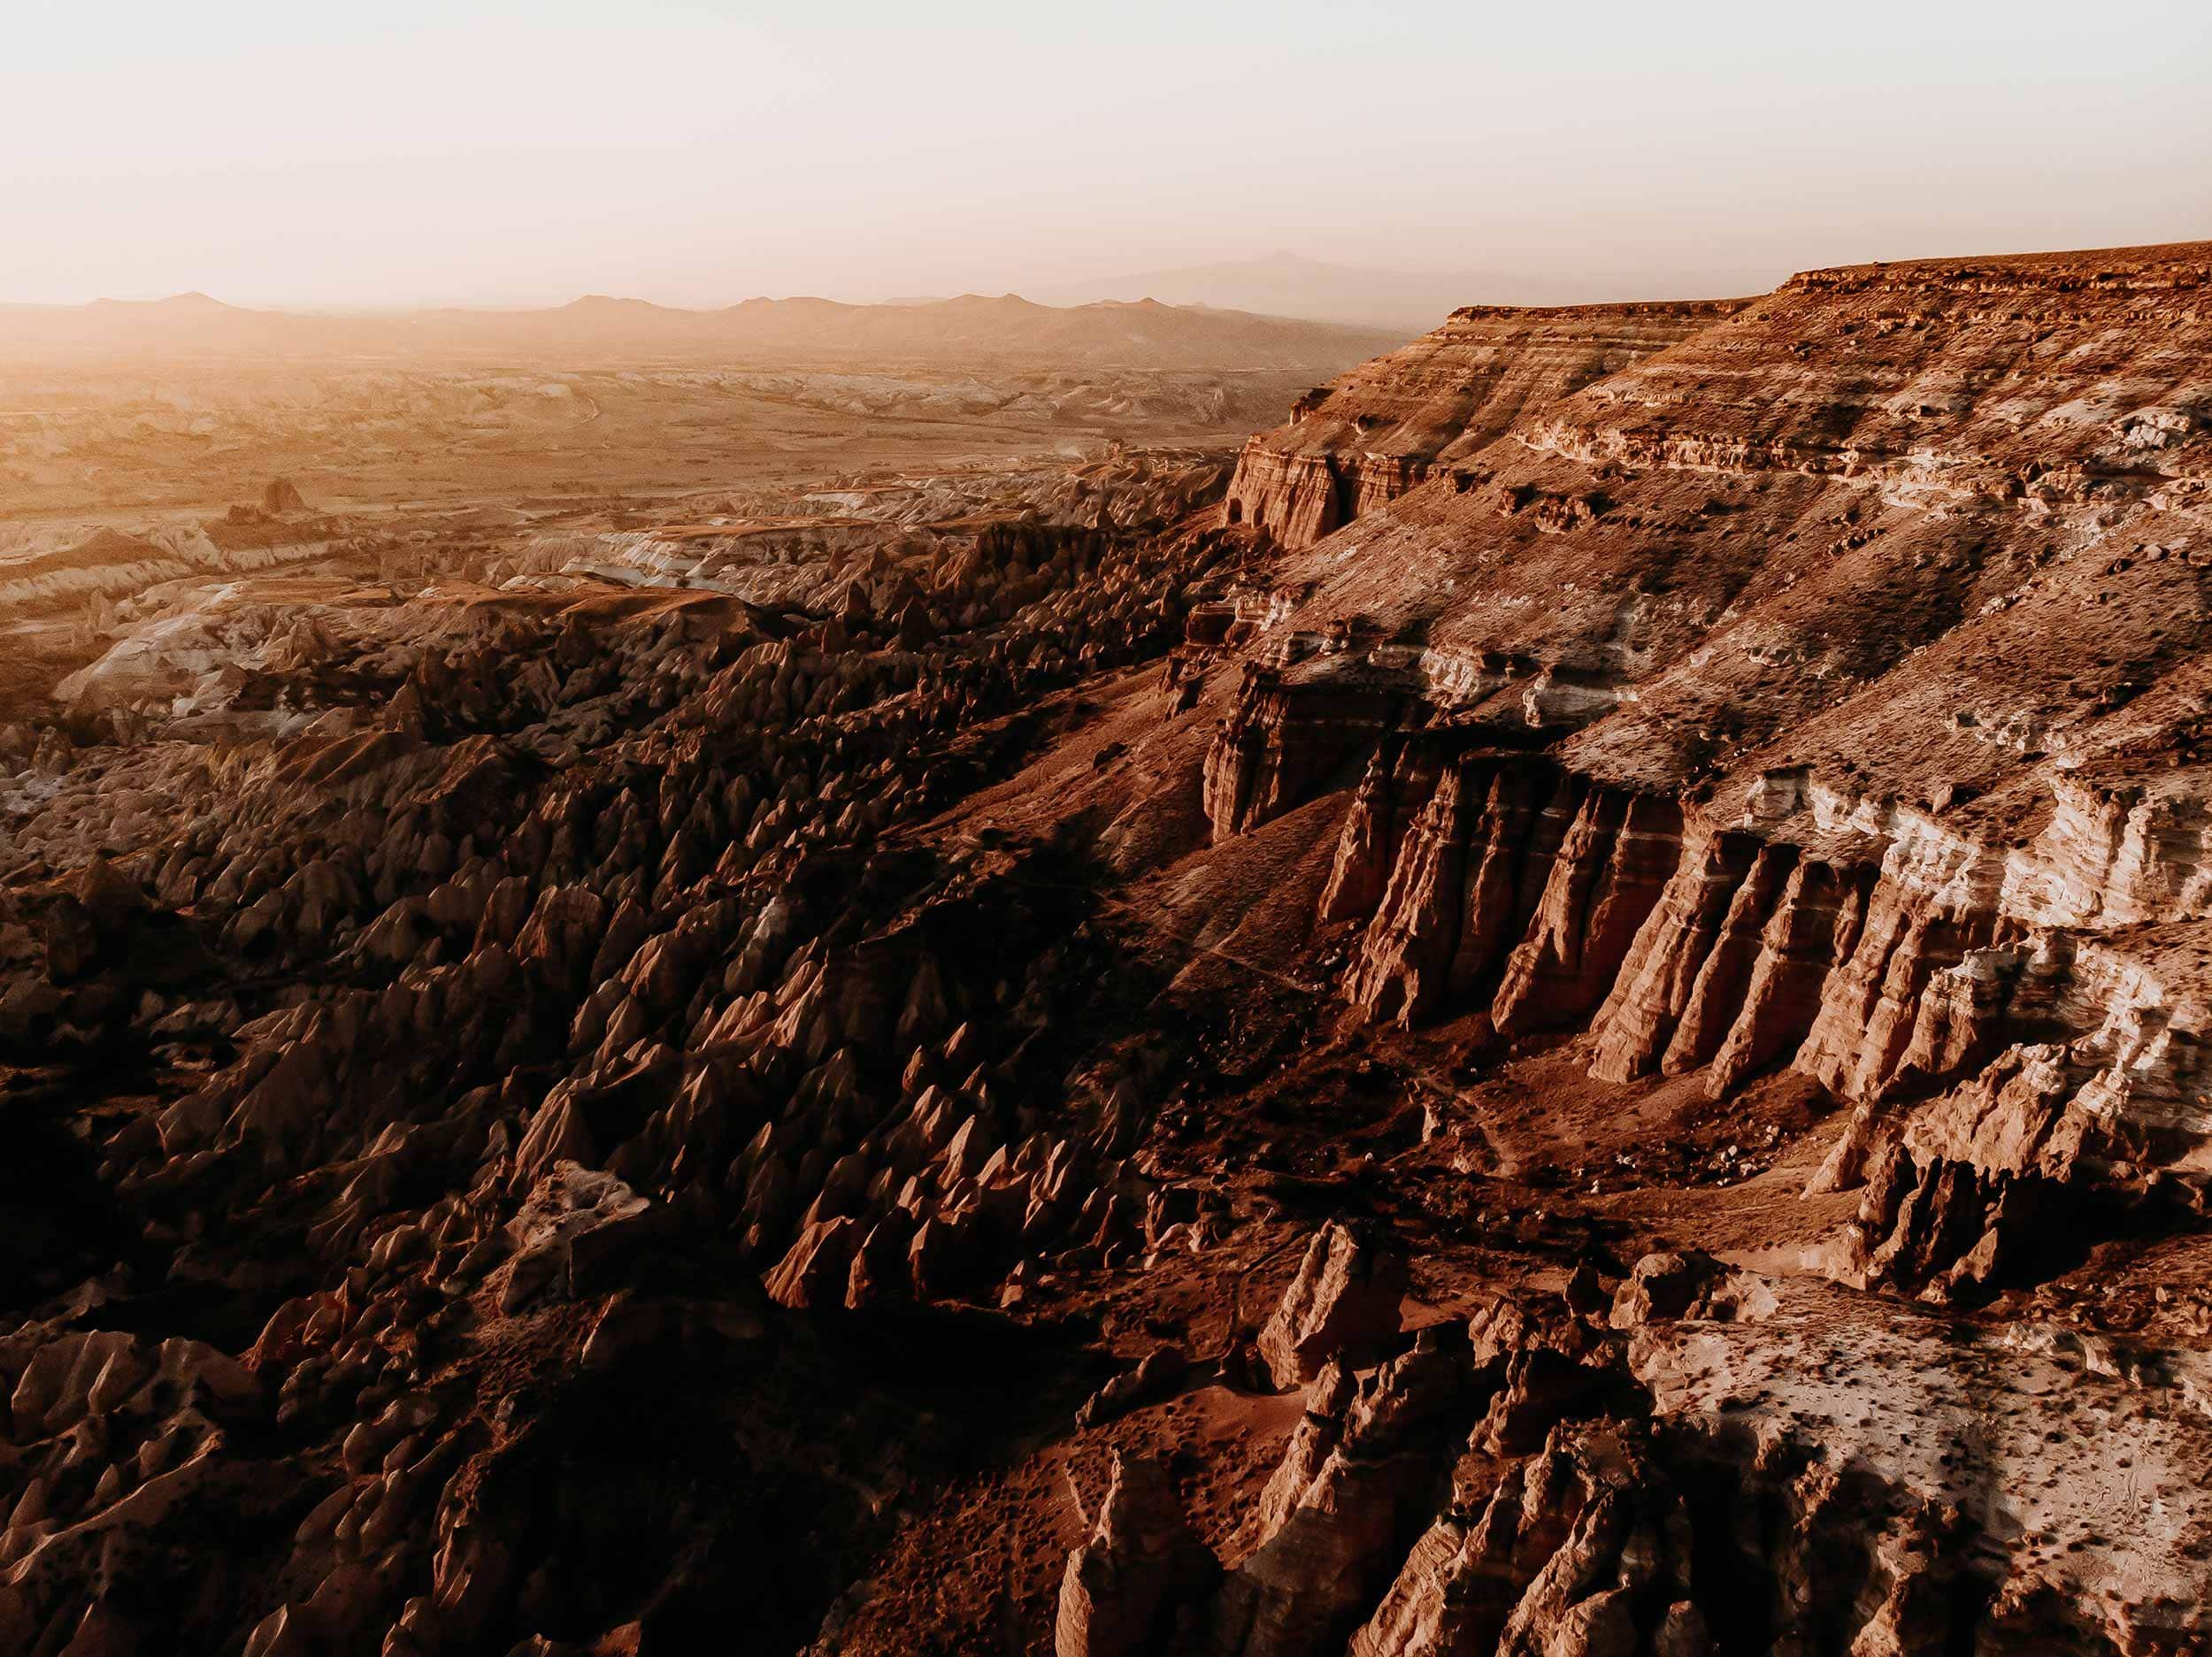
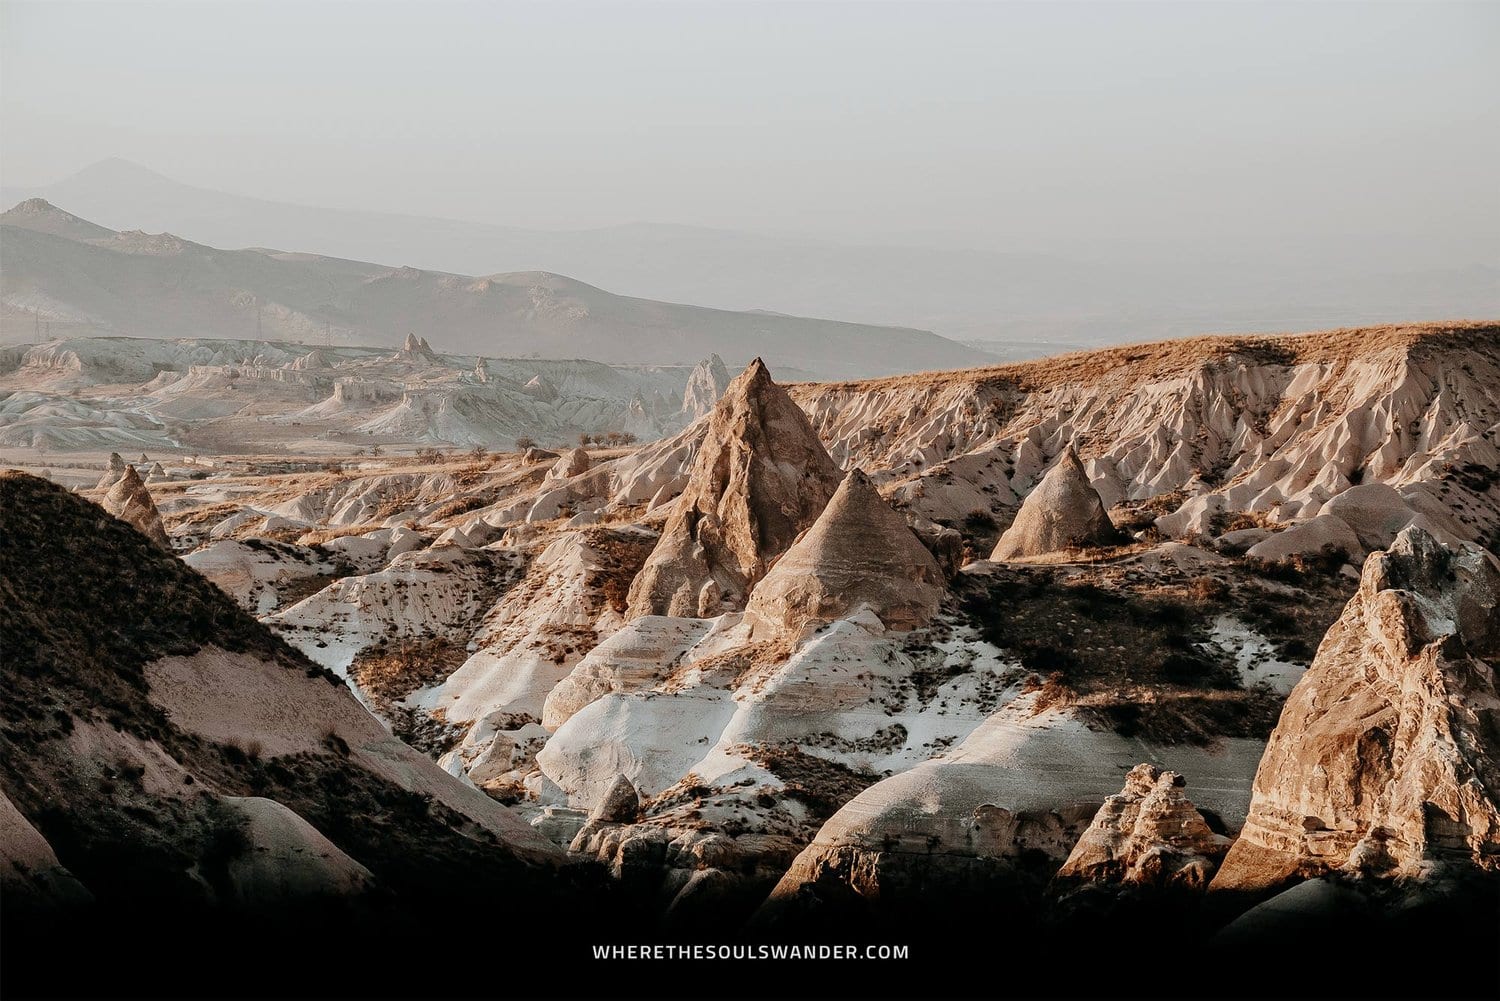
The Red Valley Sunset Viewpoint
Upon arrival at the Red Valley Sunset Viewpoint, you’ll immediately notice one thing; it’s a pretty touristic place, which makes sense as the Red Valley sunset viewpoint is easy to get to by car and offers some of the best views in the region.
While there are a handful of cafes and places to sit down, I’d highly recommend finding yourself a quiet place on the edge of the valley.
I walked back to the ridge on the right side of the cafe where I watched a stunning sunset unfold.
And trust me, once the last light of the day touches the rugged landscape of Red Valley, the landscape slowly transforms and truly becomes a spectacle – as if you have just set foot on Mars – otherworldly.
Red Valley Cappadocia | The essentials
The best time to hike Red & Rose Valley in Cappadocia
As with most highlights in Cappadocia, I believe the Red & Rose Valley hike is done best in the morning when it’s still relatively quiet and the temperature hasn’t reached its peak yet.
Alternatively, visiting in the late afternoon is great too – just make sure you avoid hiking around noon at all costs, as it gets extremely hot and there’s barely any shelter on the trail.
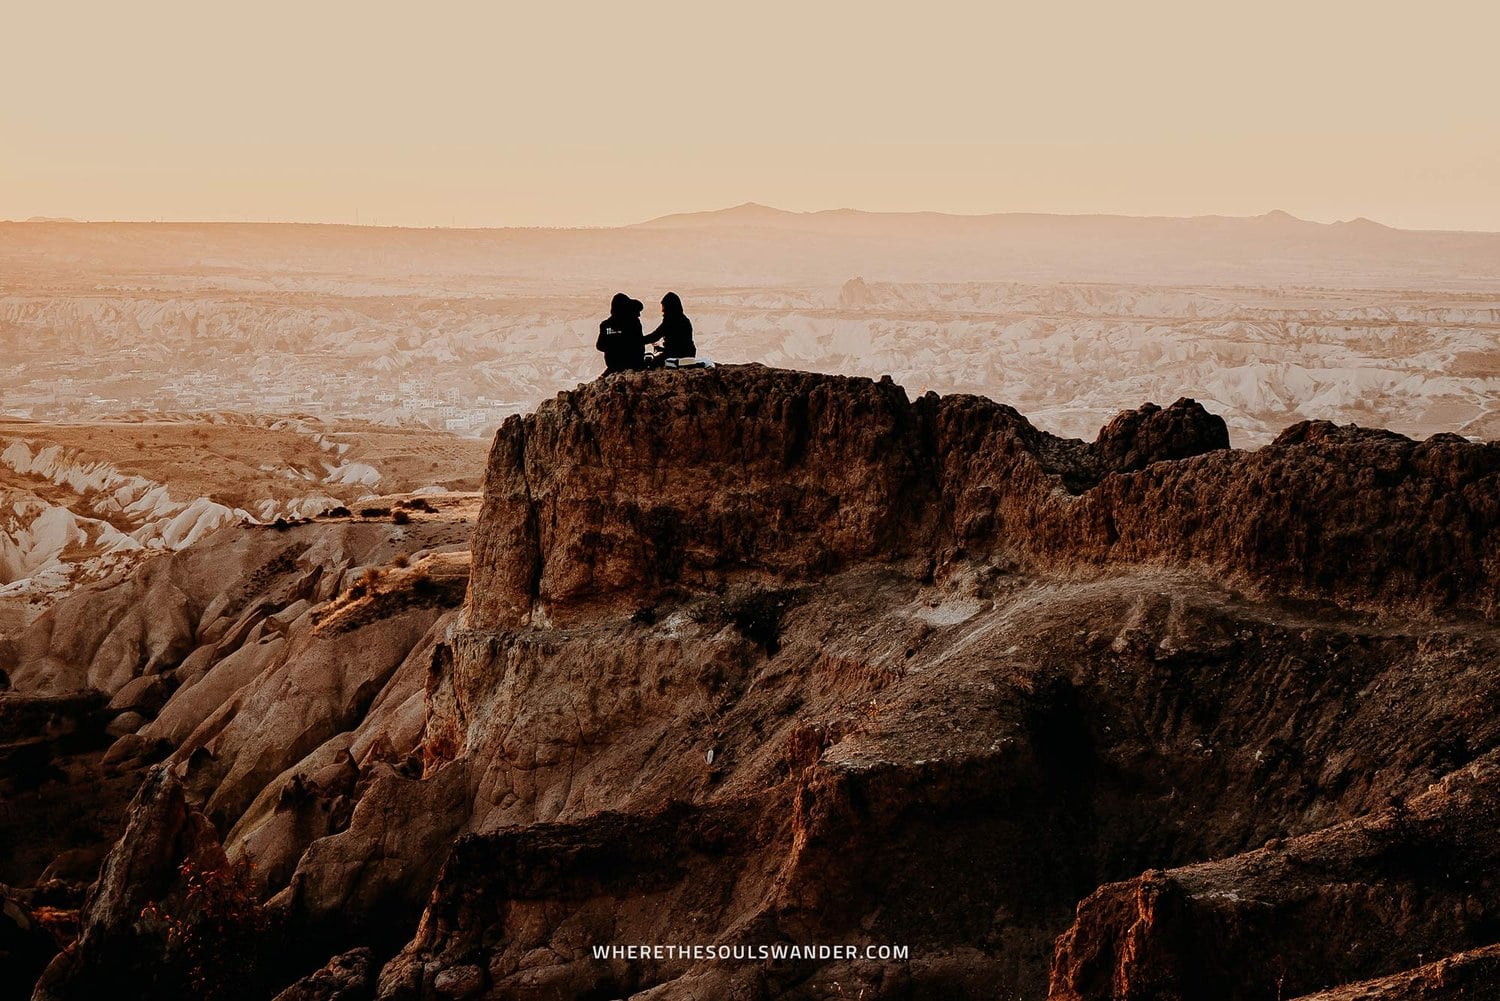
On top of that, I’d recommend visiting the Red Valley sunset viewpoint separately – trust me, watching an incredible sunset unfold over the unique landscape of Red Valley is one of the best experiences in Cappadocia
I’ve done both the hike and sunset viewpoint and have to admit; they have been some of my favourite experiences in Cappadocia.
What to pack for the Red & Rose Valley hike in Cappadocia
Before venturing out in the valleys, I believe it’s crucial that you’re well equipped. To help you have a comfortable journey, I’d advise bringing the following items:
Reusable Water Bottle | One travel gadget that I’ve taken with me at all times over the last few years is my Grayl Geopress. This reusable water purification bottle allows me to fill up water from nearly every water source, which makes it one of my best investments to date.
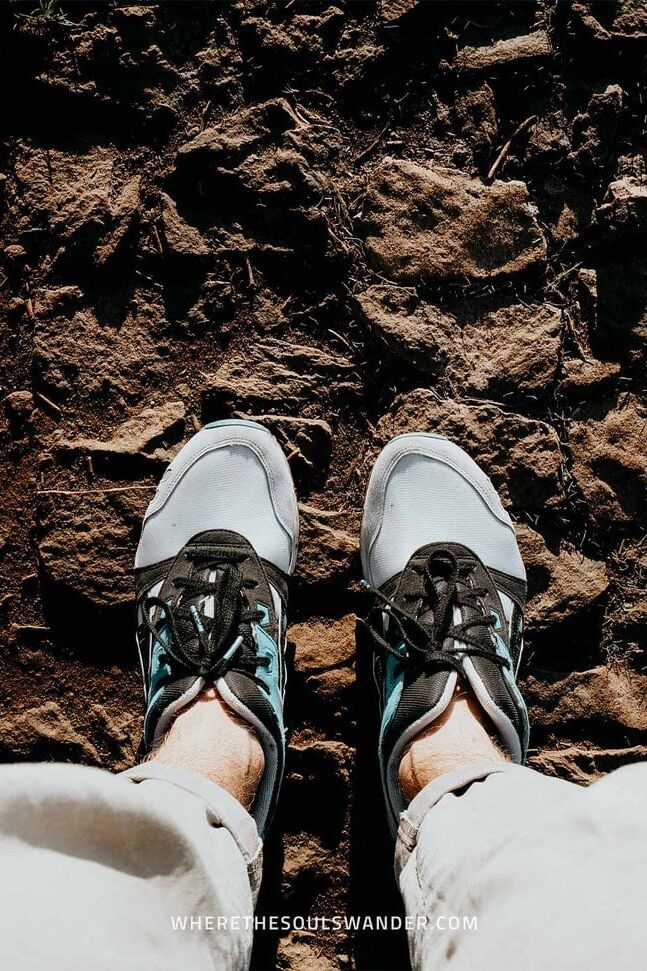
A sturdy pair of sneakers | The hikes in Cappadocia are relatively easy, meaning you can easily do them in a good pair of sneakers. However, since most of the trails include sand, it’s good to bring a pair that has firm soles that provide some extra grip. If you have a pair of hiking boots, I’d advise bringing those instead.
Sun protection | If you’re planning to hike in Cappadocia during the peak summer months, it’s essential to bring good sunscreen. Since the landscape provides little, to no shade, it’s also advisable to bring a hat that protects you from the fierce sun.
Snacks | While there are several small cafes dotted throughout the valleys, I recommend bringing some fruits, nuts or protein bars during your hike. It’s also handy to bring some cash to grab a coffee or some snacks from one of the cafes if necessary.
Safety in Turkey | Travel insurance
While Turkey is completely safe for travellers, I recommend everyone sort out good travel insurance before setting out on their own adventure.
Where we all prefer that things run smoothly during our travels, something unfortunate can happen at any moment, whether it’s an injury during a hike, a lost camera, or an accident on the road.
For travel insurance, I use Heymondo, as they offer full COVID-19 coverage, as well as a handy app with 24-hour medical assistance. Make sure you check it out – readers of WTSW receive 5% discount on any insurance policy too.
Cheers!
I’ve been on this travel blogging journey since 2019.
If you appreciate what I do here, these are some ways you can support me.
Cappadocia Hot Air Balloon Flight | A unique experience in Cappadocia - Updated 2024
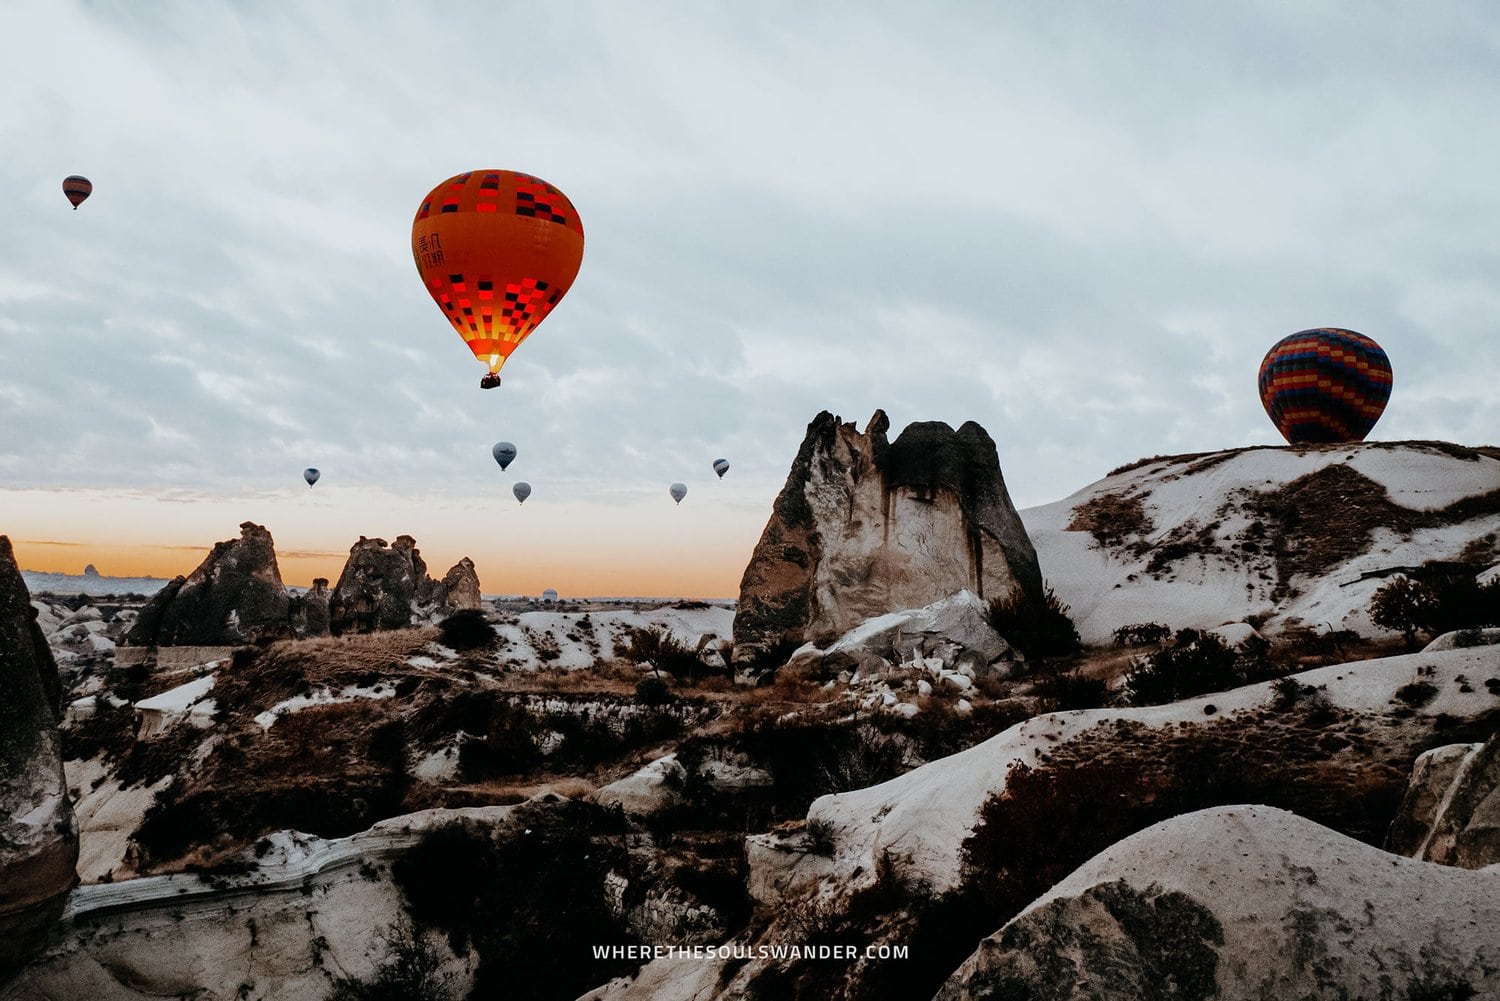
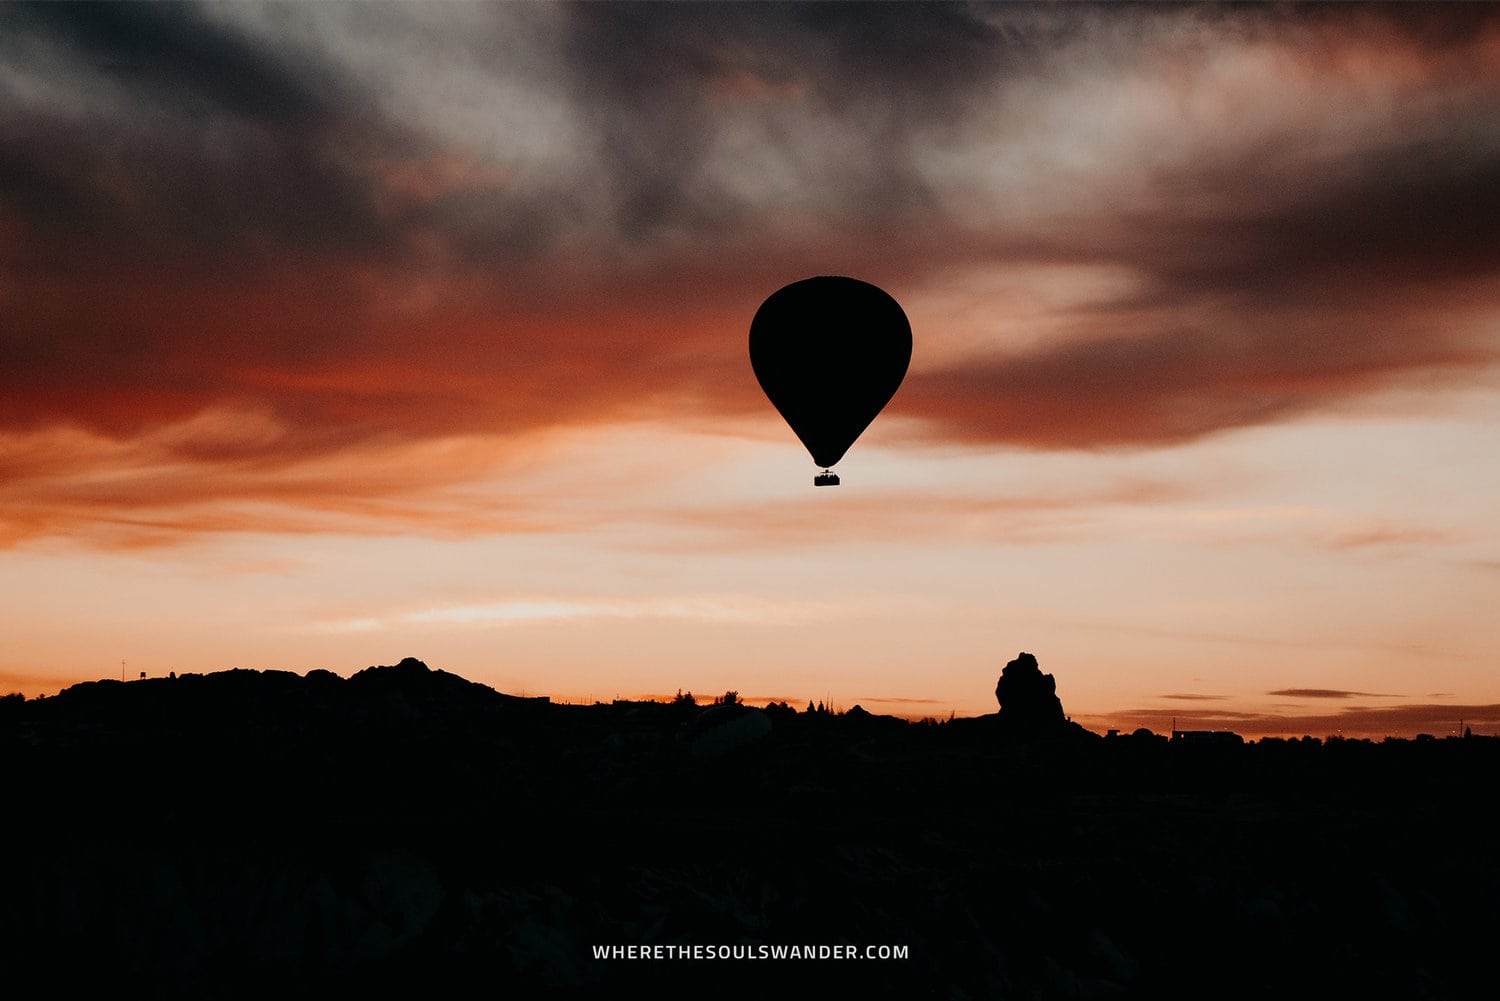
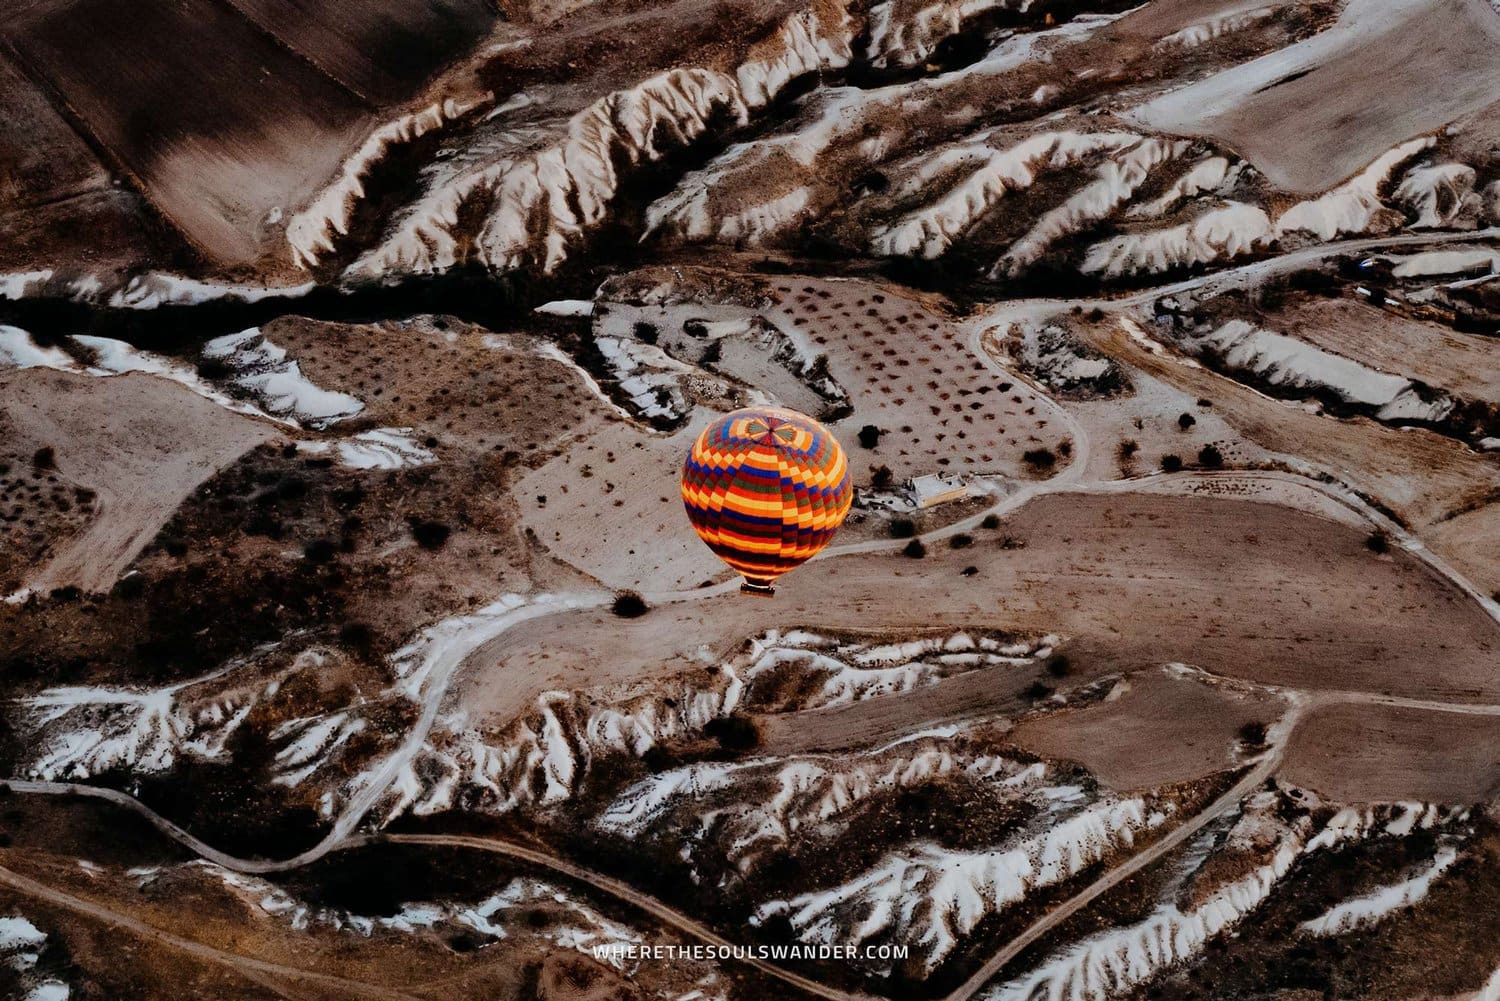
A Cappadocia Hot Air Balloon flight has quickly become one of the world’s most popular travel experiences.
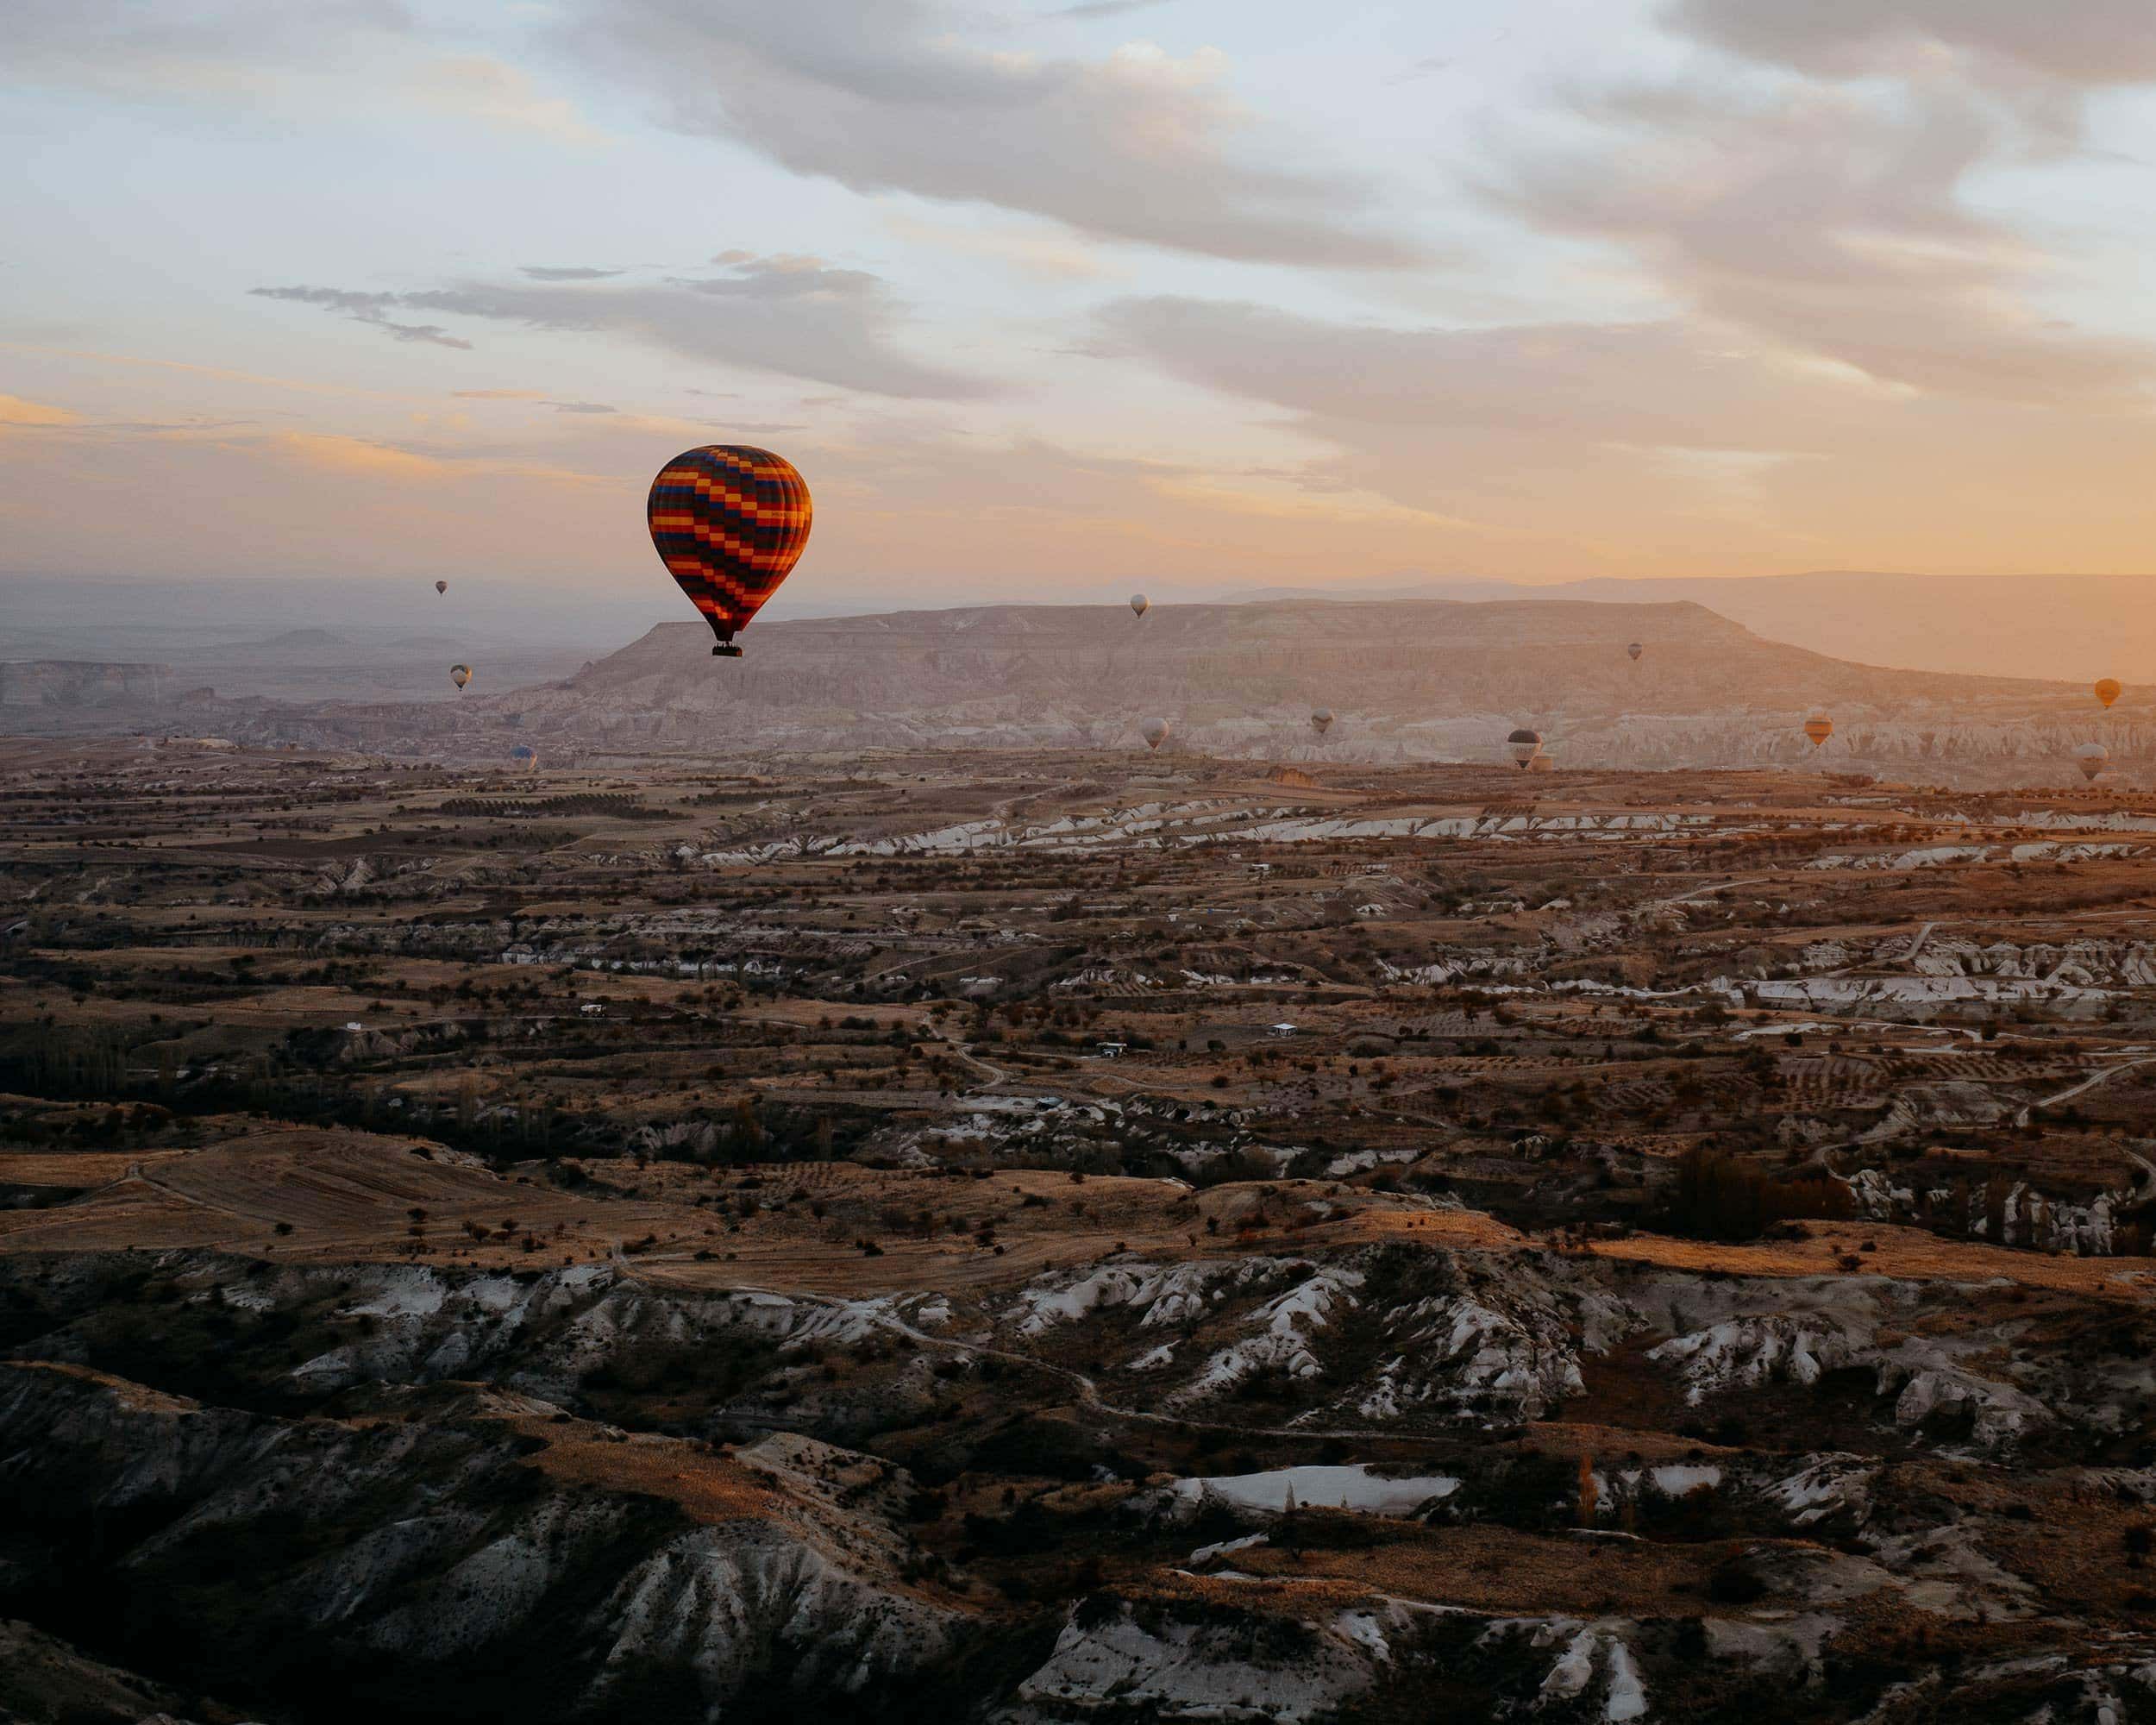
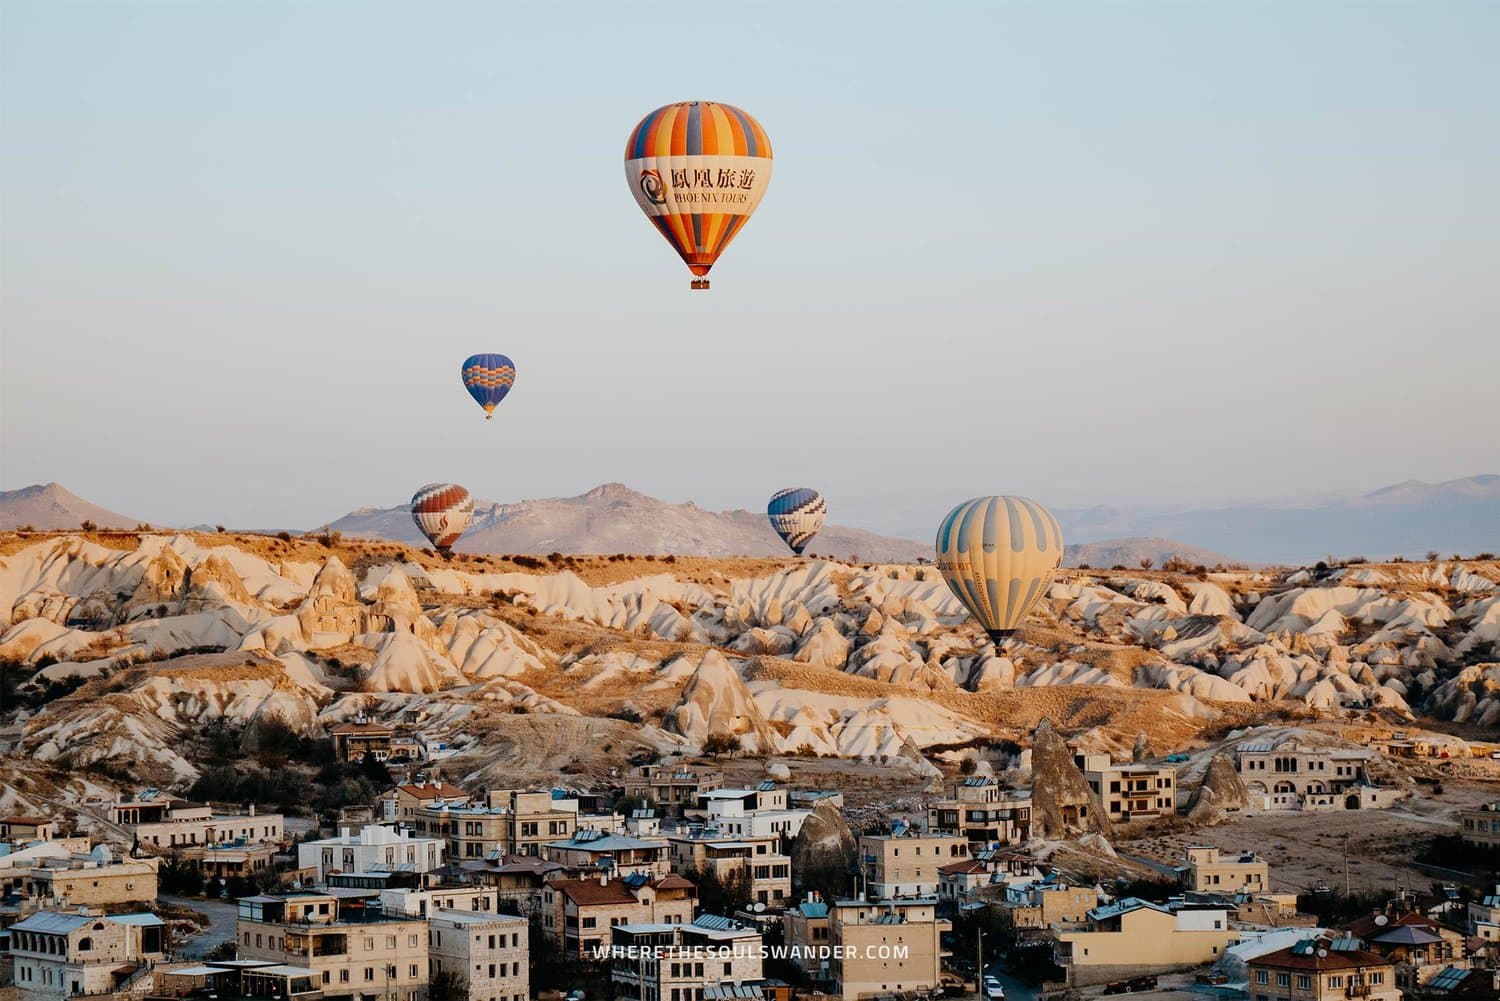
Every morning during sunrise, hundreds of hot air balloons float above Cappadocia’s unique fairytale-like landscape, creating the picture-perfect vista that initially gave Cappadocia its ‘bucket list’ worthy reputation.
As a result, roughly half a million people take part in a hot air balloon flight every year, making this amazing region in the heart of Turkey’s central Anatolia region the number one hot air balloon destination in the world.
After recently floating above the otherworldly landscape myself, it’s easy to understand why this incredible experience has been showing all over my Instagram feed for the last couple of years.
To help you have an incredible Cappadocia Hot Air Balloon flight experience too, I’ve put together this complete guide featuring everything you need to know before booking your balloon flight.
If you choose to use any of the links on this page, I receive a small commission at no extra cost to you. By using these links, you’ll have a direct impact on WTSW and support me to continue to create free insightful travel content for you. If you find any of my tips useful, you can support me by buying a virtual coffee here.
Things to know before arranging a Cappadocia Hot Air Balloon flight
1. Cappadocia Hot Air Balloon price – 2024
When it comes to the price, a hot air balloon flight in Cappadocia isn’t something that fits in the average travel budget, since a flight isn’t the most budget-friendly activity in Cappadocia.
Yet, I also believe that this incredible once-in-a-lifetime travel experience is absolutely worth the money.
The cost to take a Cappadocia Hot Air Balloon varies anywhere from €80,- to €350,- per person, depending on the size of the basket and the season in which you take part in the flight.
If your flight gets cancelled due to unforeseen weather conditions, the operators will arrange a new flight for the next day, or you will receive a full refund.

2. Spent at least three full days in Cappadocia
If you’d like to take part in a hot air balloon flight, make sure you’re planning to stay at least three days in Cappadocia, given there are two key factors that could sabotage your flight.
First, there is the weather – something that’s quite often overlooked by travellers who plan their trip to Cappadocia. Before every flight day, the hot air balloon companies need approval from the Turkish Civil Aviation Authority. If the weather predictions are bad, your flight will be cancelled and moved to the next day.
Secondly, it’s good to know that a hot air balloon flight is one of the hottest things to do in Cappadocia, so you should keep in mind that the availability of these hot air balloons is oftentimes limited. Jump to tip four if you want to make sure that you won’t miss out on this once-in-a-lifetime travel experience.
3. Bring, and use your camera strap
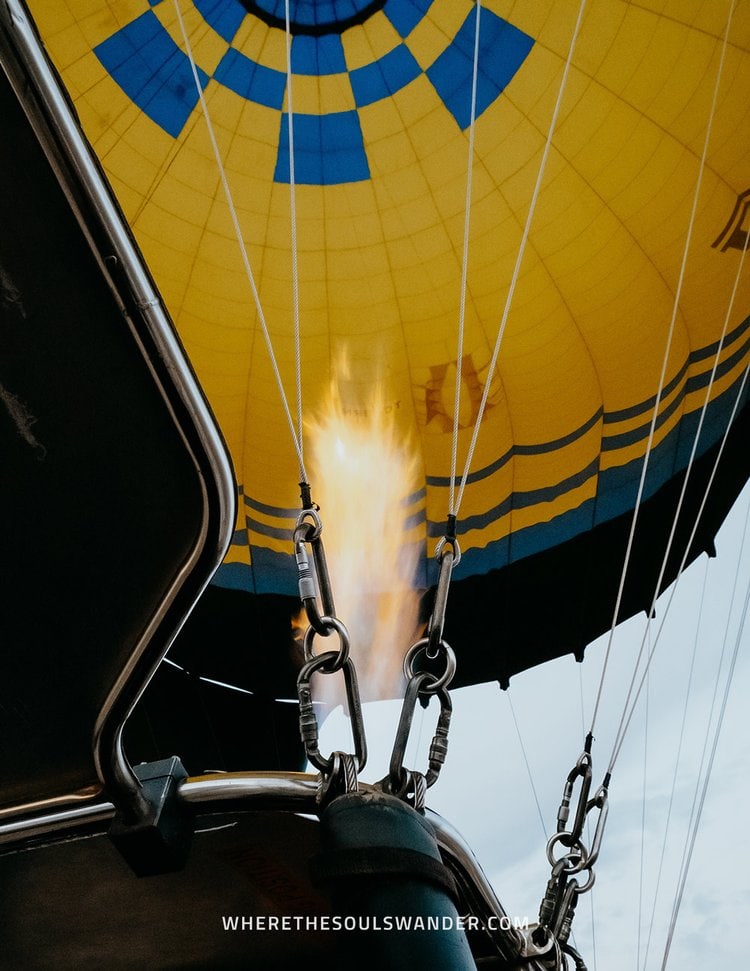
Since these hot air balloons take off to heights above the 700-metre mark, I highly advise bringing and using your camera strap.
Trust me, you don’t want your falling camera to be the centre point of your hot air balloon experience.
Jokes aside, when you’re floating high up in the sky, it’s a lot more relaxing to know that your expensive camera equipment is safe and securely strapped to your neck.
Using a camera strap is also way more convenient when you’re not using your camera, given your hands are free and you’re able to enjoy the experience to the fullest.

4. Book your Cappadocia Hot Air Balloon experience in advance
For the reasons mentioned in tip two, I highly advise booking your Cappadocia hot air balloon flight online and in advance. By doing so, you have the option to plan your flight for the first morning of your trip.
If the weather isn’t right on your first day, your flight will be instantly moved to the next day. Also, if you have unfortunate weather throughout your entire trip, you’ll receive a full refund.
I booked my Cappadocia Hot Air Balloon flight through GetYourGuide and had an awesome experience from start to end, as well as transparent communication about the weather conditions and pick-up time.
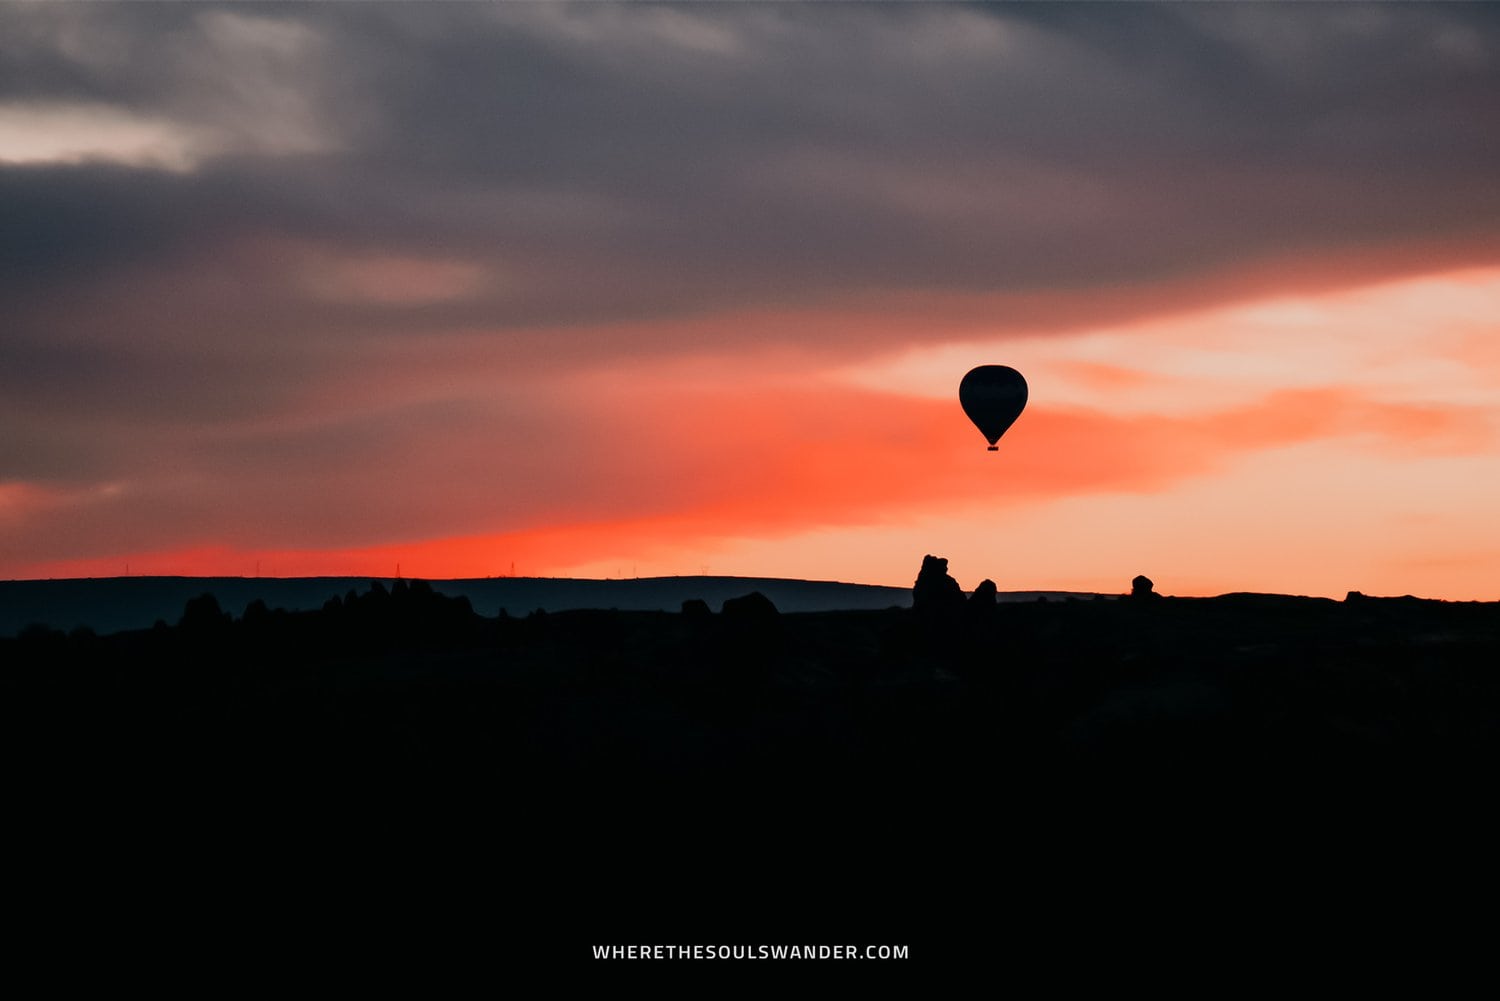
5. Be prepared for colder weather conditions
Given your adventure starts in the middle of the night, the weather conditions are slightly different than you are familiar with in Turkey. Meaning it’s often chilly during the balloon flight, especially if you’re visiting in the shoulder months.
For that reason, I’d highly recommend bringing a hoodie and a beanie to keep you warm before and during the flight. Even if you’re in Cappadocia during the peak summer months, it isn’t an unnecessary luxury to bring some extra layers of clothing.
6. Follow the safety precautions at all times
Upon arrival at the hot air balloon take-off zone, you’ll be informed about the safety precautions by your pilot and his flight crew.
I highly advise anyone who takes part in a hot air balloon flight to listen carefully, since they provide key information in terms of what you can and can’t do throughout the flight.
Also, what goes up, must come down.
So make sure you follow the instructions when the hot air balloon is about to land, as it can be a bit bumpy at times.
Cappadocia Hot Air Balloon | The essentials
How to arrange a Cappadocia Hot Air Balloon flight
As Cappadocia’s number-one attraction, you quickly find out that there’s no shortage of balloon operators within the town of Göreme. The hot air balloon flights on offer, usually include hotel pick-up and drop-off services and are easily arranged online or at the reception of your hotel.
Once you’ve sorted out your hot air balloon flight, the tour operator will keep you up-to-date in terms of the weather, cancellations and the time that they’ll pick you up at the hotel – which is between 04:00 and 04:45 in the summer months.
Unless you’re not entirely sure if you’d like to take part in a hot air balloon flight, I’d highly recommend booking your flight online and in advance on GetYourGuide.
Not only is it easy to choose your desired date, but you also have the benefit that your hot balloon flight is rescheduled if it gets cancelled due to unfortunate weather conditions.
How long does a Cappadocia Hot Air Balloon flight take?
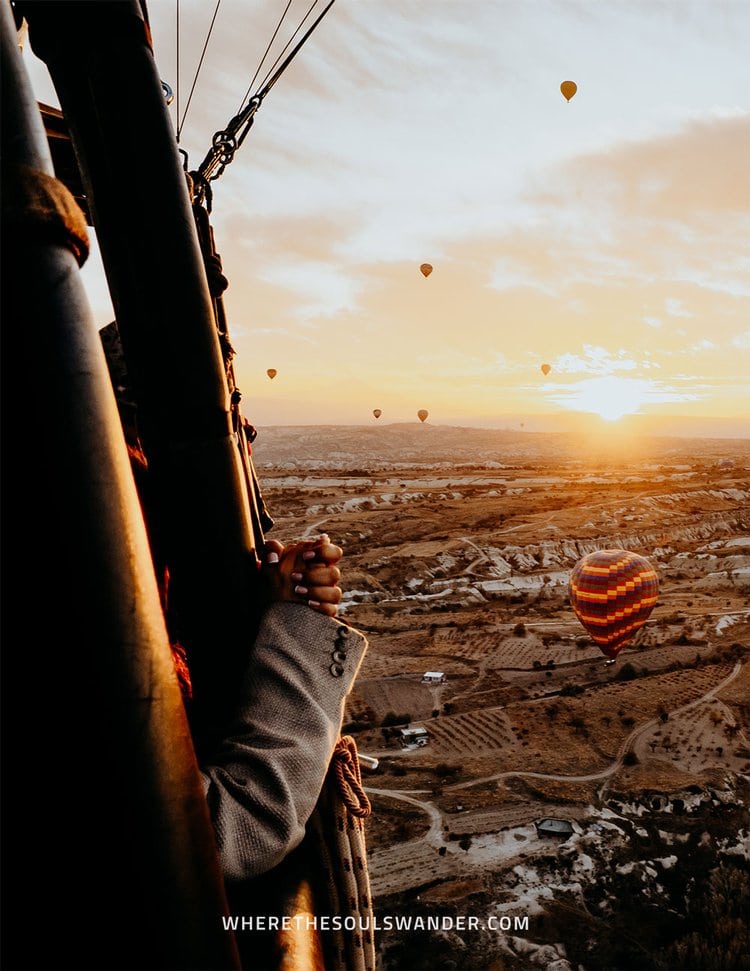
While the complete hot air balloon tour takes around 2,5 to 3 hours, the actual flight time is anywhere from 45 to 75 minutes, depending on factors such as the weather conditions and landing spaces.
I was picked up at my hotel at 05:00 in the morning, so I arrived at the take-off site about 30 minutes before sunrise time. After the hot air balloon landed, I received a flight certificate and a glass of champagne with a little snack on the side. From that moment, it took about an hour before I was back at the hotel, meaning my tour was over at around 08:00.
The best time to do a Cappadocia Hot Air Balloon flight
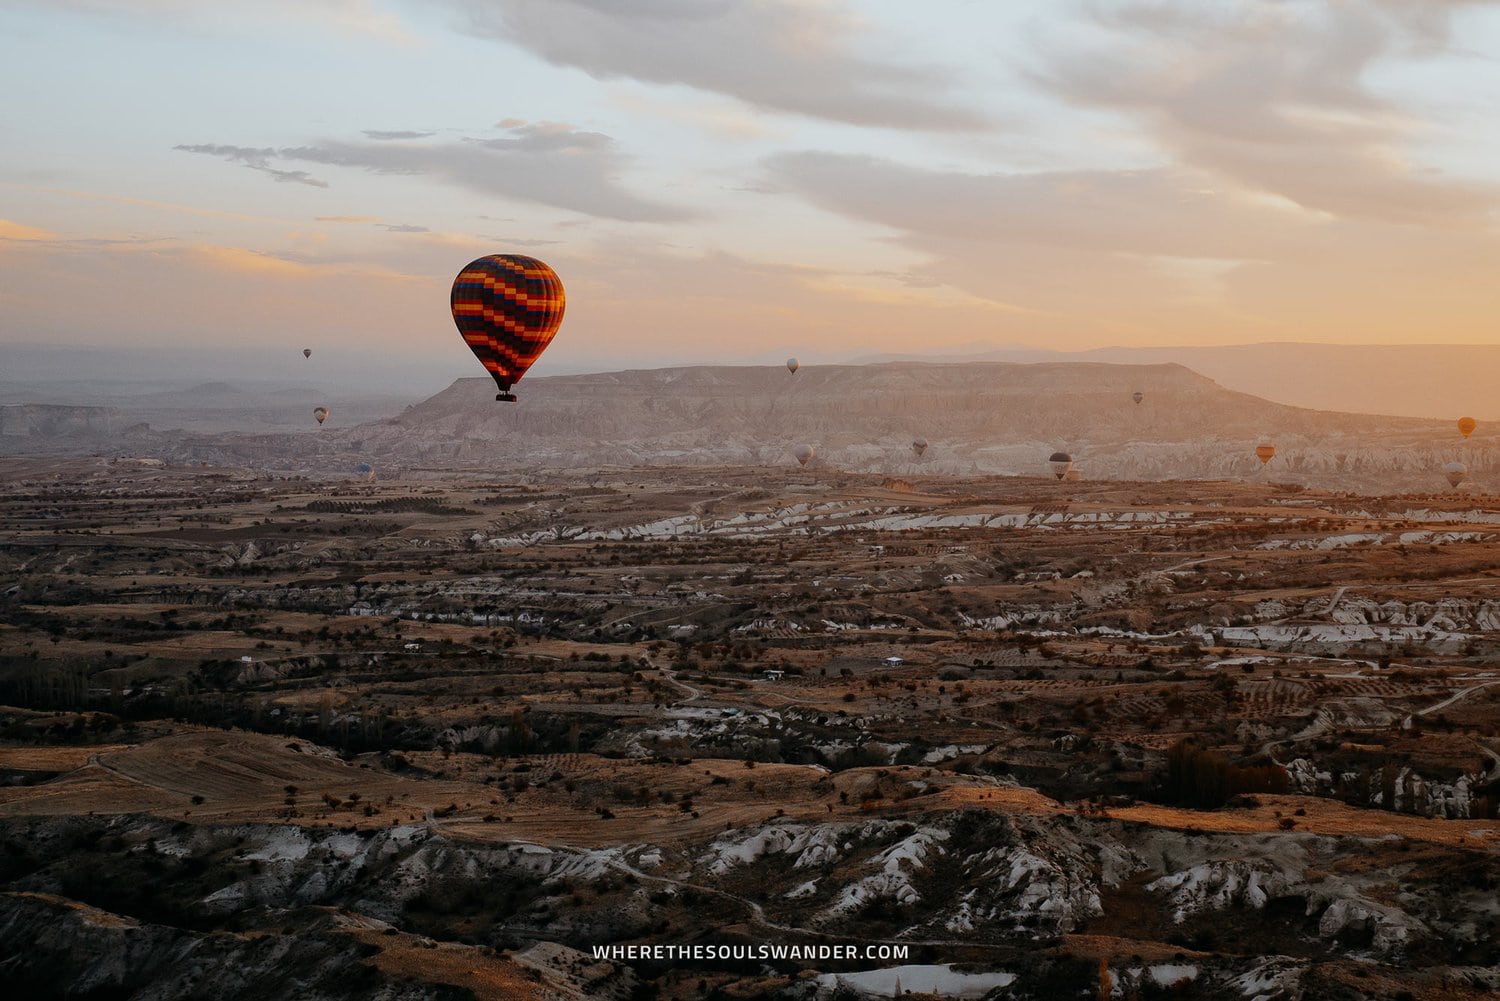
While I’m absolutely sure that Cappadocia will blow your mind at any time of year, I also firmly believe that the best time to jump aboard a hot air balloon flight is between May and October.
During these peak months, you’ll have the best conditions to take part in a Cappadocia Hot Air Balloon flight, while also having great weather for further explorations around the various towns and valleys.
I did a Cappadocia Hot Air Balloon flight in December and still had excellent weather conditions during my entire week in Cappadocia.
Where to stay in Cappadocia
When it comes to accommodation in Cappadocia, Göreme is by far the most popular town from which travellers start their explorations, and after staying there myself, it’s easy to see why.
The historic town is encircled by iconic fairy chimneys, has no shortage of brilliant cafes & restaurants, and is home to one of the world’s coolest accommodations ever; cave-style hotels.
To help you find the right accommodation, I’ve listed three of my favourite options below, one of which is marked – this is the hotel where I stayed.
+ Charming Cave Hotel | During my time in Cappadocia, I was fortunate enough to spend a total of 6 days in the Charming Cave Hotel, an authentic family-run hotel, situated at the heart of Göreme. Alongside a ‘picture-perfect’ rooftop terrace, this hotel offers a wide array of cave-style rooms, all marked by amazing design and elegant details. All bookings come with an incredibly delicious breakfast, and organizing a balloon flight is as easy as one, two three.
Kelebek Special Cave Hotel | One of the most luxurious options in Göreme, Kelebek Special Cave Hotel provides spacious cave-style suites, a traditional Turkish bath, and a large outdoor swimming pool. Although this extra luxury comes at a cost, I believe, it’s a great value for the money, especially for those who are looking to take it easy after an adventurous day of exploring.
Artemis Cave Suites & Spa | Right at the centre of Göreme Town, Artemis Cave Suites & Spa offers traditional-designed rooms, an authentic rooftop terrace, as well as excellent in-house spa facilities. Rooms starting at just €47,- a night make Artemis one of the best options in Göreme, Cappadocia.
Alternatively, search for accommodations in Cappadocia on booking.com.

How to get around Cappadocia
By car | If you wish to have the freedom to travel around Cappadocia on your own terms, you might want to consider renting a car. Not only is it easier to reach the highlights, but it also saves you time.
For car rental in Turkey, I’d recommend searching for options on Rentalcars.com. They offer excellent service, additional insurance, and a broad selection of cars, all at an affordable price.
How to get to Cappadocia
By Plane | Most travellers think Cappadocia is a town on its own, but in reality, it is an extensive region home to several big cities, including Nevsehir and Kayseri.
The reason why I name these specific cities is due to the fact that they’re both housing an airport, and hosting domestic, European and International flights alike.
The most convenient of these two is the Erkilet International Airport in Kayseri, situated about an hour’s drive North of Göreme. When I searched for a flight to Cappadocia, I noticed that Kayseri was the more flexible option, with more flights, and significantly cheaper prices.
Alternatively, there is the Nevsehir Kapadokya Airport in Nevsehir, at around 40 minutes drive from the Göreme town centre. I myself have no experience with this airport.
For flights to Cappadocia, I would recommend Skyscanner. Not only is their website easy to use, but they also offer a large variety of airlines – plus the possibility to find good rates.
In terms of transfers, I recommend booking in advance so you don’t have to stress after your flight.
A bus transfer | From the Erkilet International Airport in Kayseri, it is pretty easy to get to Göreme.
Most hotels in the tourist zones of Göreme, Uchisar and Urgup offer shuttle service from and to the airport. Just make sure you confirm this with your hotel during your booking.
Another great option is this shared airport transfer service from Kayseri to Göreme. This service doubles as a transfer to the airport and costs only €12,- for a one-way journey.
For those after some extra comfort, this air-conditioned private airport transfer from both Kayseri and Nevsehir comes at a great value for the price.
Safety in Turkey | Travel insurance
While Turkey is completely safe for travellers, I recommend everyone to sort out good travel insurance before setting out on their own adventure.
Although we all prefer that things run smoothly during our travels, something unfortunate can happen at any time, whether it’s an injury during a hike, a lost camera, or an accident on the road.
For travel insurance, I always use Heymondo, as they offer full COVID-19 coverage, as well as a handy app with 24-hour medical assistance. Make sure you check it out – readers of WTSW receive 5% discount on any insurance policy too.
Cheers!
I’ve been on this travel blogging journey since 2019.
If you appreciate what I do here, these are some ways you can support me.
A guide to Levada do Caldeirão Verde, the PR9 hike on Madeira
It’s no secret that Madeira is the dream destination for those into nature and hiking, given there’s plenty of adventurous levada walks dotted throughout the dense inland of the island.
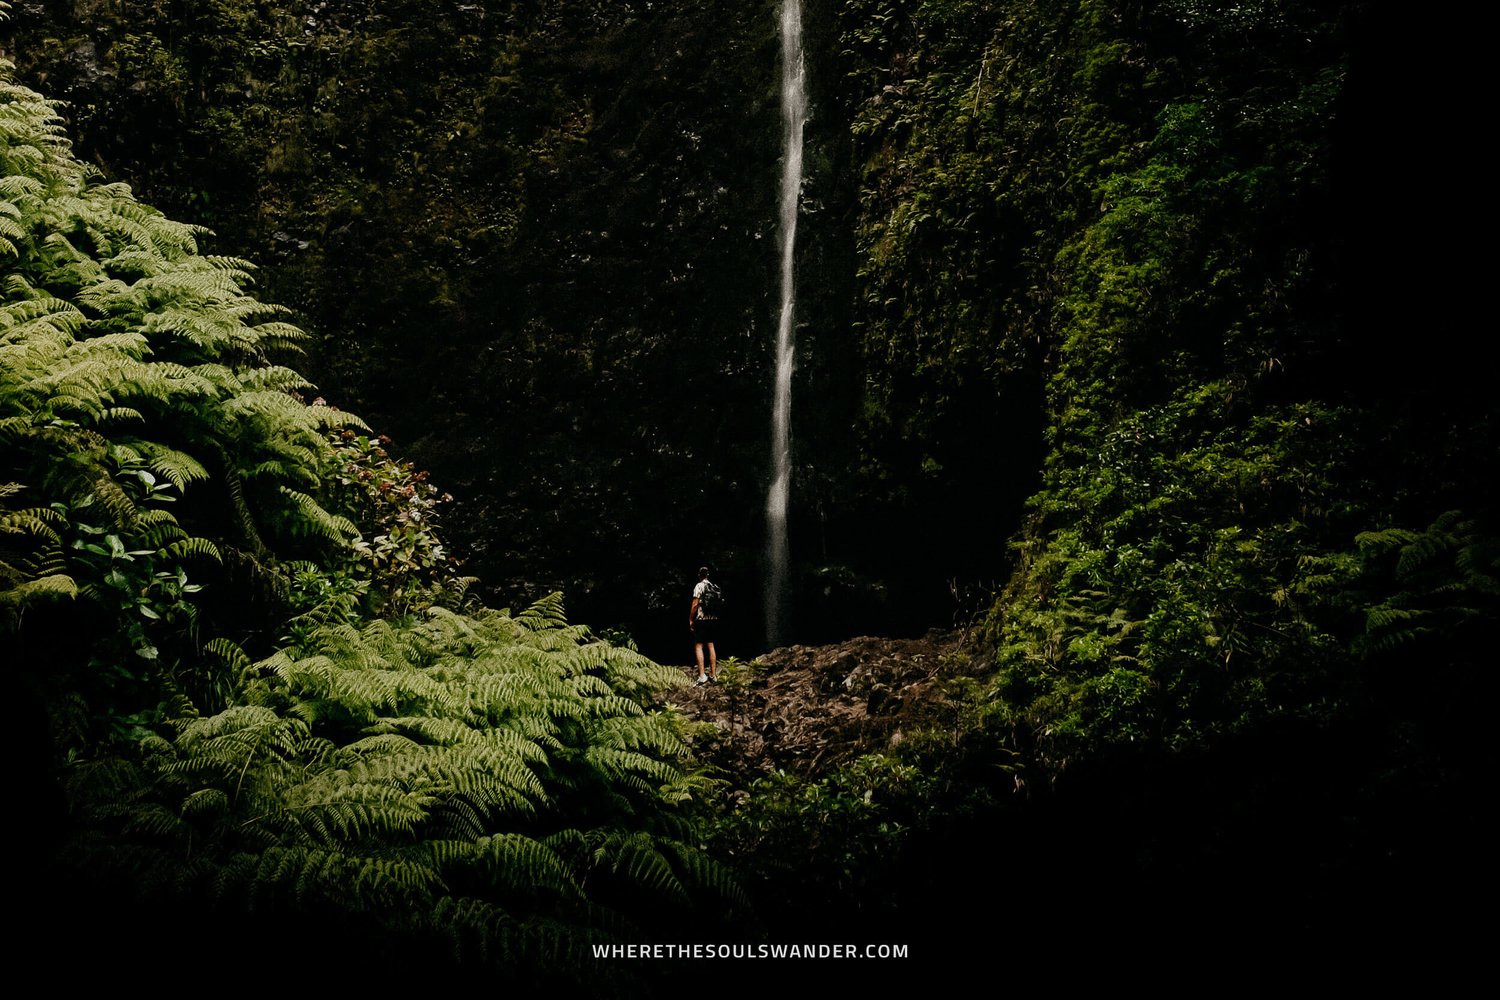
Located in the midst of the lush valley of São Jorge, the Levada do Caldeirão Verde is such a walk and in my opinion, an essential hike for anyone travelling to Madeira.
From distinctive tropical flora to gushing waterfalls to dense mountain hills tucked between beds of rolling clouds, the PR9 hike, with its stunning natural features, is truly one of the island’s most scenic levada walks.
After doing several levada walks and hikes on Madeira, I came to the conclusion that Levada do Caldeirão Verde is up there with my absolute favourites, and I’m pretty sure it will be yours too.
So if you’re planning to do the Levada do Caldeirão Verde PR9 hike, here’s my hiking guide featuring all the essential information, as well as some of my best hiking tips.
If you choose to use any of the links on this page, I may receive a small commission at no extra cost to you. By using these links, you’ll have a direct impact on WTSW and my ability to continue to create free insightful travel content for you. If you find any of my tips useful, you can support me by buying a virtual coffee here.
Where is Levada do Caldeirão Verde
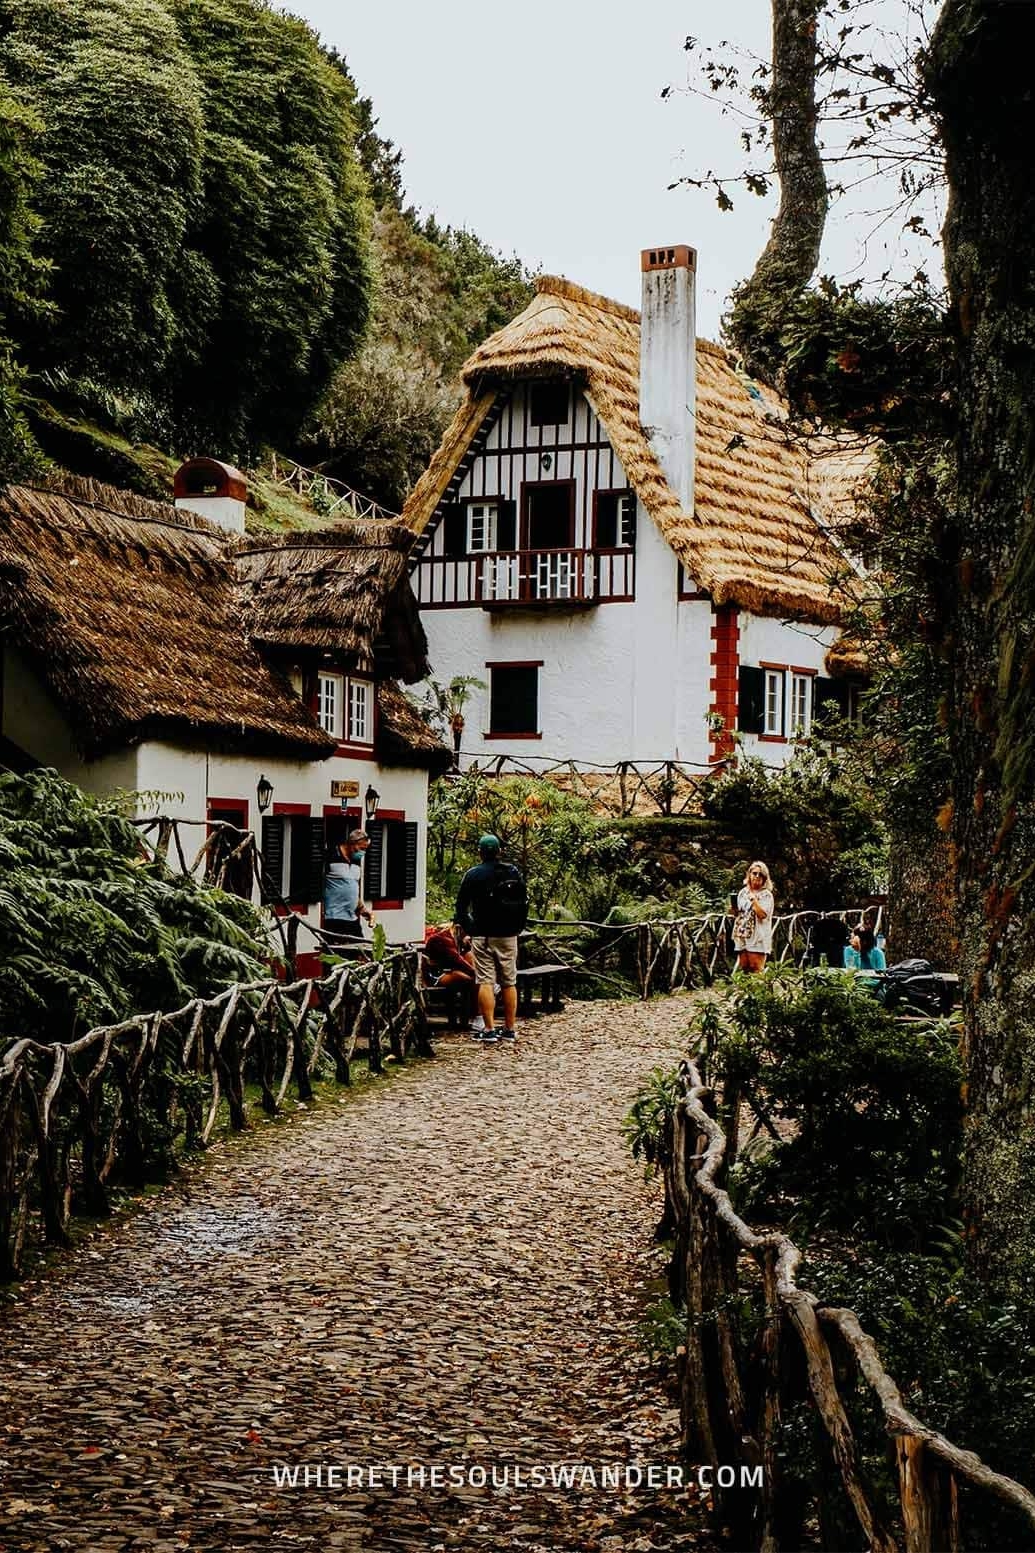
Situated just outside of the Santana municipality, the Levada do Caldeirão Verde hike starts at the Queimadas Forestry Park, before guiding you deep into the picturesque valley of São Jorge.
The Queimadas Forestry Park itself – the starting point of the popular PR9 hike, is easily accessible and about an hour’s drive from Funchal.

Levada do Caldeirão Verde hike details
Levada do Caldeirão Verde hike details
HIKE DIFFICULTY
EASY
HIKE DURATION
3 – 4 HOURS
HIKE DISTANCE
13KM ROUND TRIP
ELEVATION GAIN
100 METERS

How to get to Levada do Caldeirão
CAR | If you’ve read any of my other Madeira articles, you should likely already know that the best way to explore the island is by renting yourself a car for the duration of your trip.
From Funchal, it takes only an hour to get to the Queimadas Forestry Park, where you can park your car for just under €3,- a day. From the parking lot, it’s only a short walk until you reach the beginning of the Levada do Caldeirão Verde PR9 hike.
It is worth mentioning that the parking ticket should be paid at a cafe named Casa de Abrigo das Queimadas.
If you haven’t sorted out your rental car yet, make sure you explore the options at Rentalcars.com. Not only do they have a wide range of cars on offer, but they also provide brilliant service and extra insurance options. Additionally, I also highly recommend DiscoveryCars.
GUIDED TOUR | Another great option to do the Levada do Caldeirão Verde hike, is by joining this full-day guided group tour of the PR9 hike, as it offers an experienced local guide, as well as hotel pickup and dropoff service from both Funchal and Canico.
If you prefer going on a private tour, you might want to consider this private tour of Levada do Caldeirão Verde instead. This option offers the same services as the aforementioned tour, yet the group size is limited to you and you’re company. However, do note that the luxury of a private tour comes with a cost.
PUBLIC TRANSPORTATION | While it’s totally possible to get to Levada do Caldeirão Verde by public transportation, I would not necessarily recommend it, since it’s quite a long journey.
First, you’ll need to hop on either bus lines 56, 103 or 138 in the direction of Santana. Upon arrival at the bus station in Santana, you’ll notice a taxi stand, where you can grab a taxi for the remainder of the journey.
Altogether, this journey takes around 2 hours.

The Levada do Caldeirao Verde PR9 hike
Arrival at the Queimadas Forestry Park
As soon as you arrive at the parking lot of Queimadas Forestry Park, you notice a small cafe that goes by the name of Casa de Abrigo das Queimadas – this is basically the starting point of the Levada do Caldeirão Verde hike.
The cafe is the perfect place to start as they sell excellent coffee and several homemade cakes and cookies (make sure you try one of the cakes, you won’t regret it). I decided to do the hike first and had a short coffee break before driving back to Funchal.
Section I | Start of the trail and the first waterfall
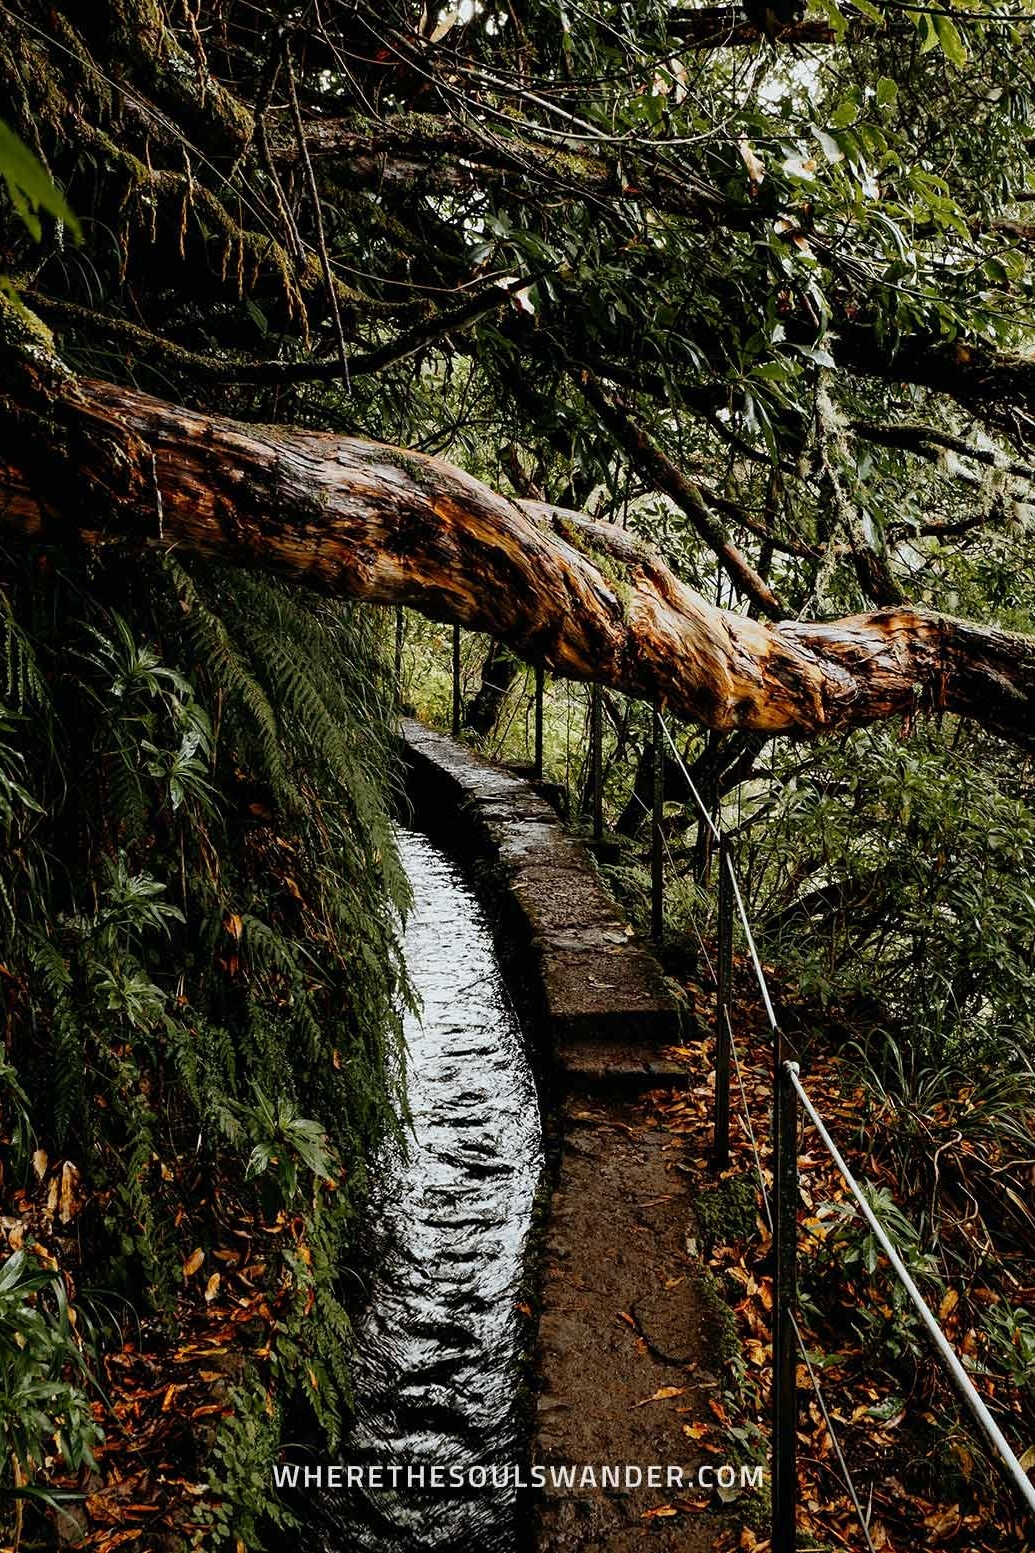
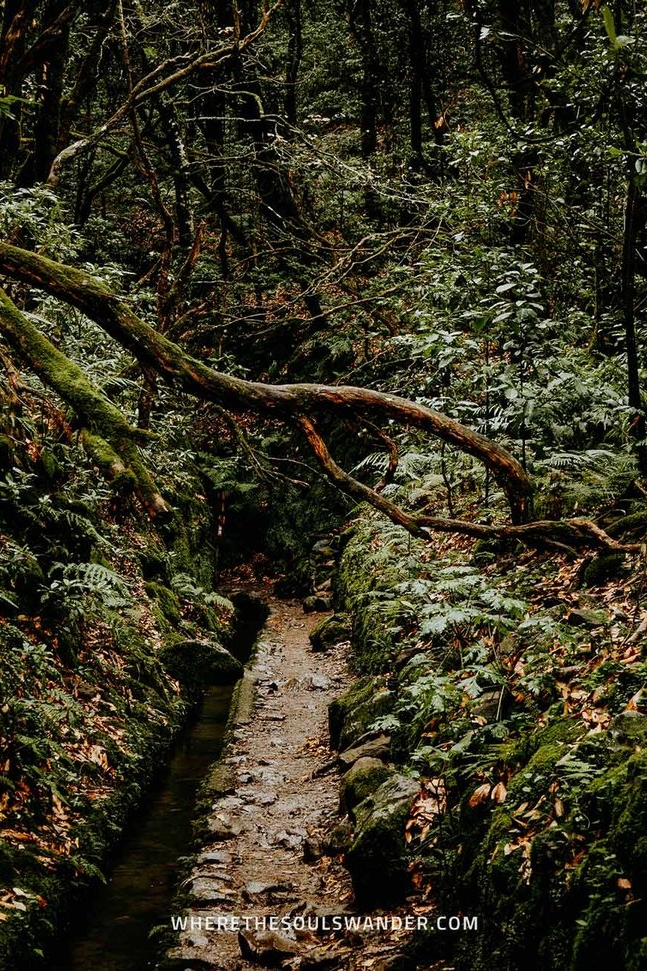
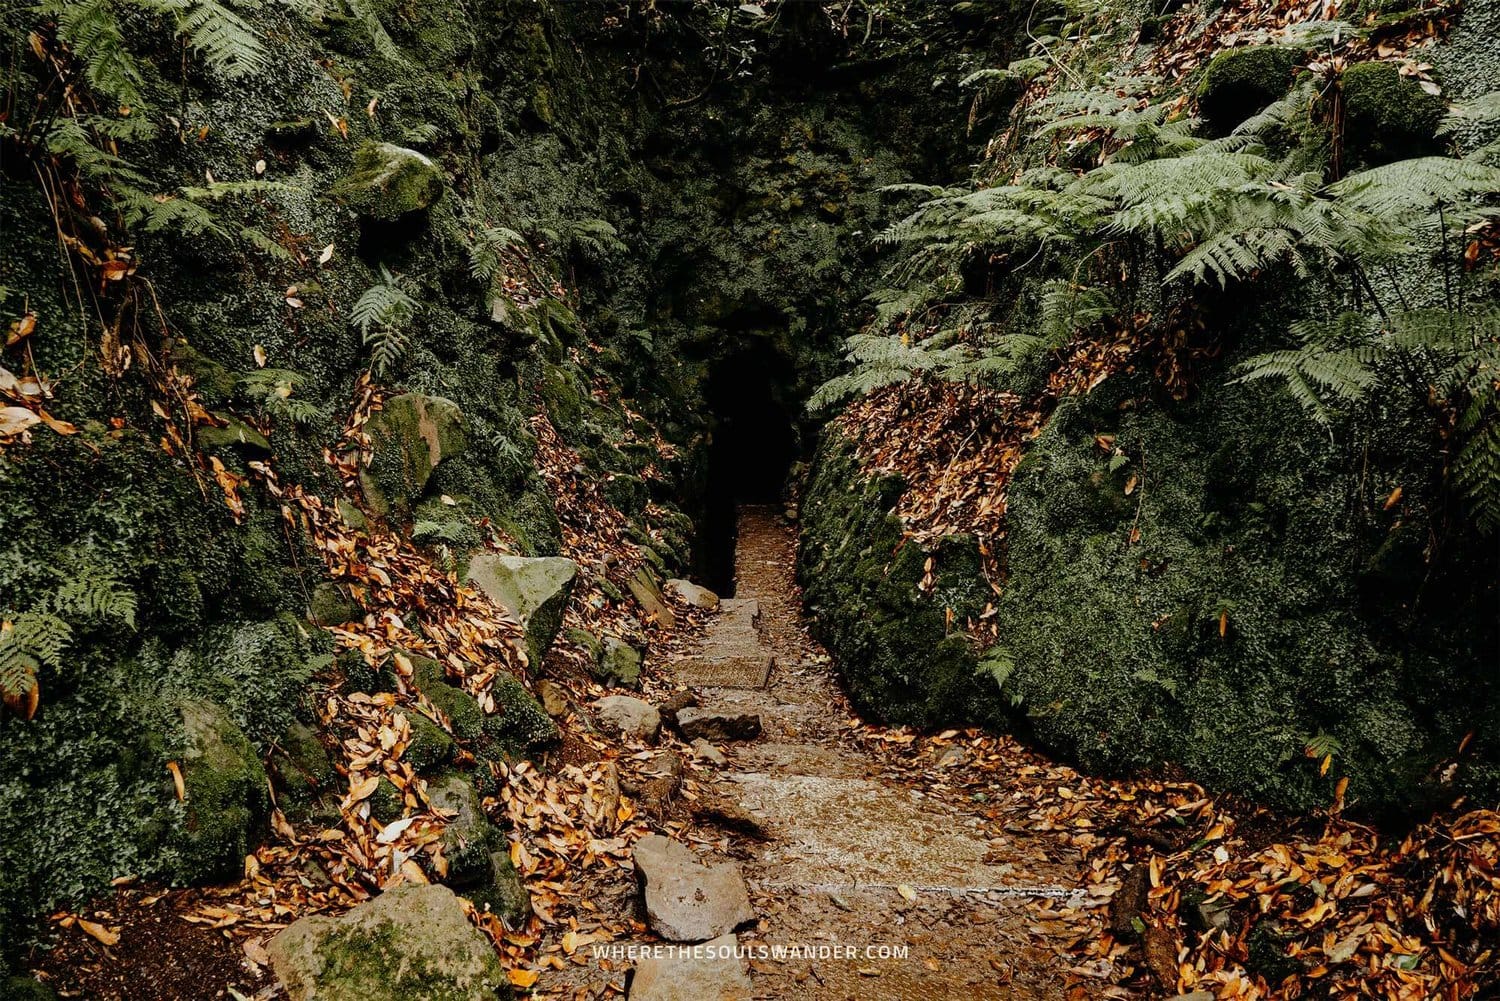
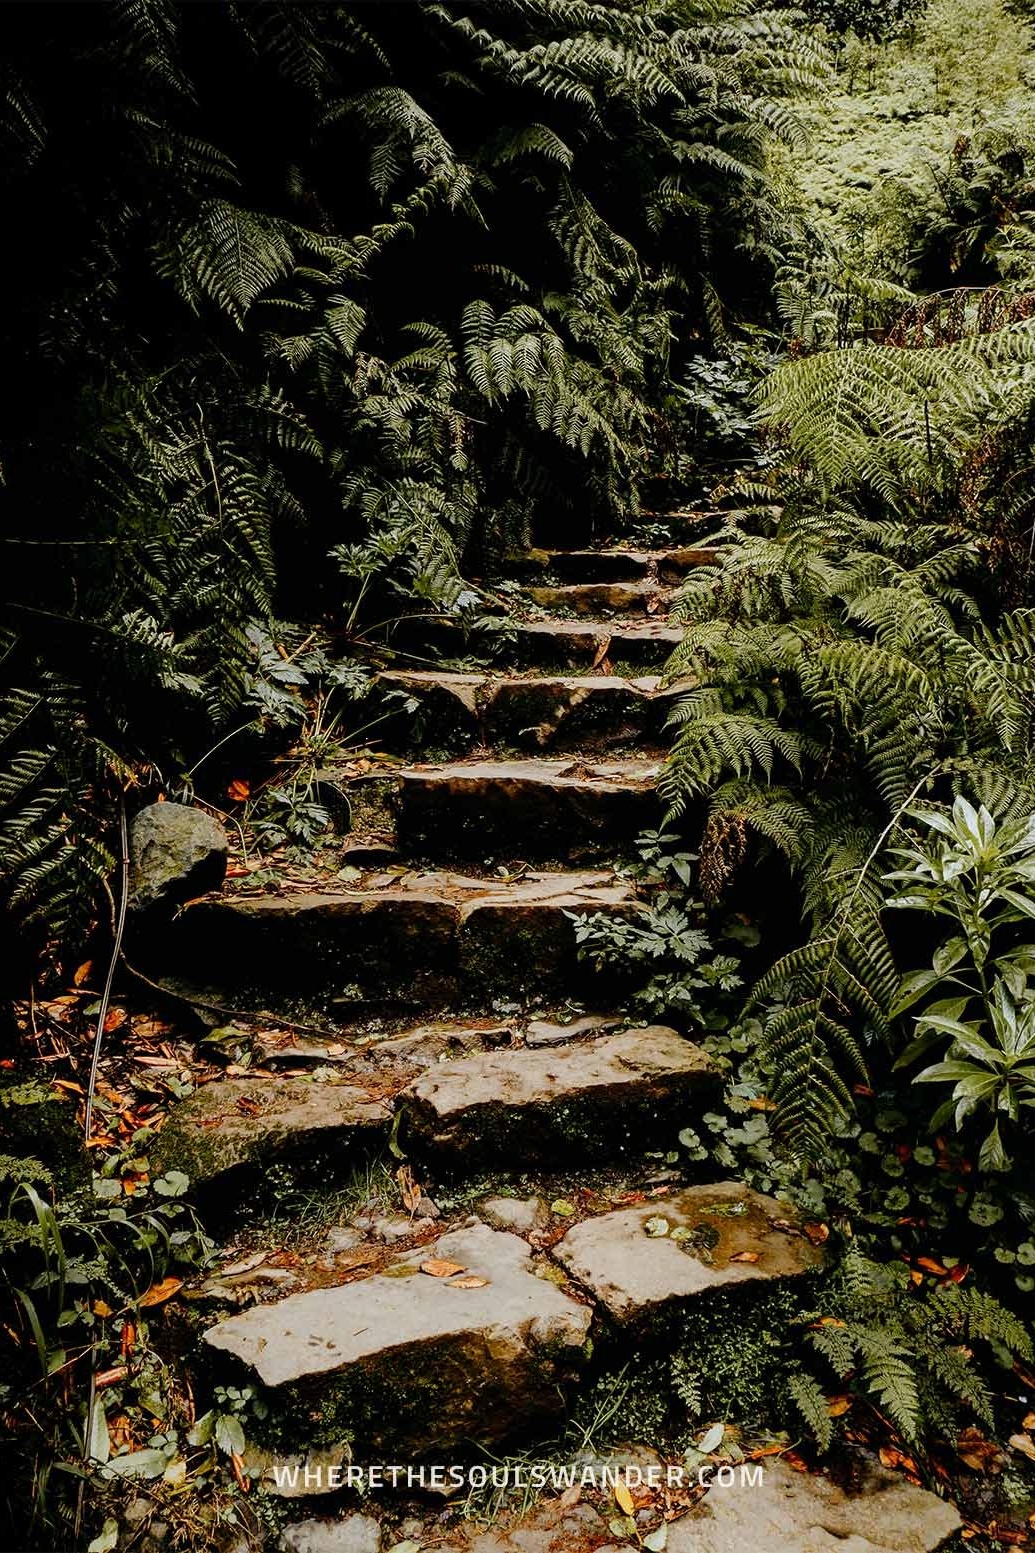
Once you’ve passed the cafe, you notice a signpost, followed by a clear winding pathway along the levada. The path itself is straightforward since there’s basically only one path to the Caldeirão Verde waterfall.
Once you’ve arrived on the path, you’ll be surrounded by impressive trees, wild-grown branches, and some of the most beautiful flowers found on Madeira. In some parts, the greenery is so dense that you can see only a few meters of the trail.
After about an hour into the hike, the path begins to narrow, and you’re about to arrive at the first waterfall. Though this waterfall is relatively small (and somewhat dried up during my visit), it’s a good teaser for what’s waiting for you at the end of the hike.
Section II | Tunnels and mountain views
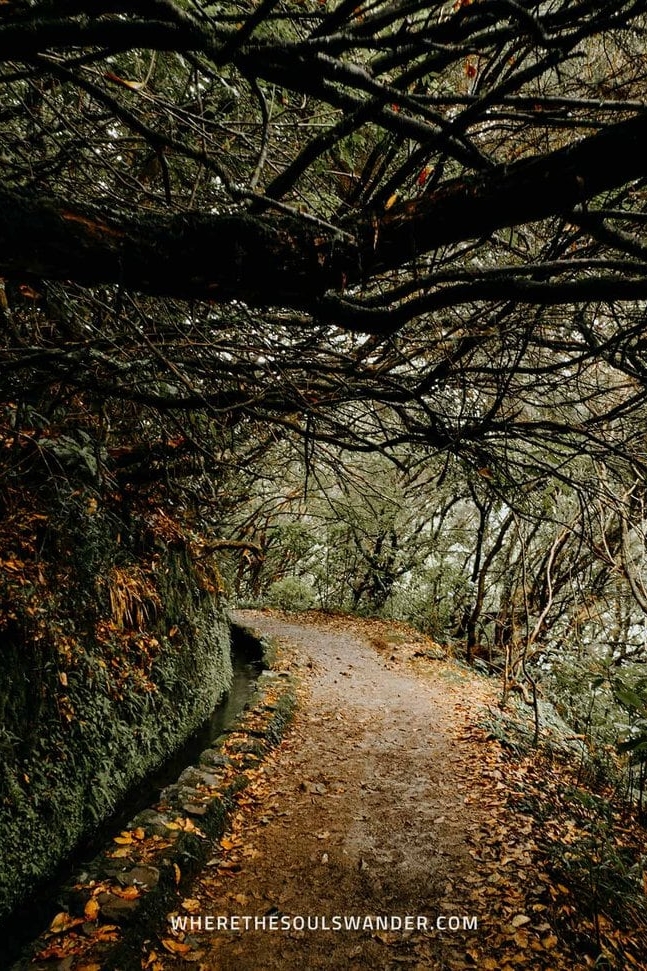
The second, and final section of the hike before reaching the Caldeirão Verde waterfall is marked by four tunnels and a scenic levada trail around a cliffside.
First of all, you’ll need to pass through the tunnels, which is quite an adventurous experience. Since some parts of the tunnels have low ceilings, it’s essential to bring a flashlight, headlamp or a fully charged phone.
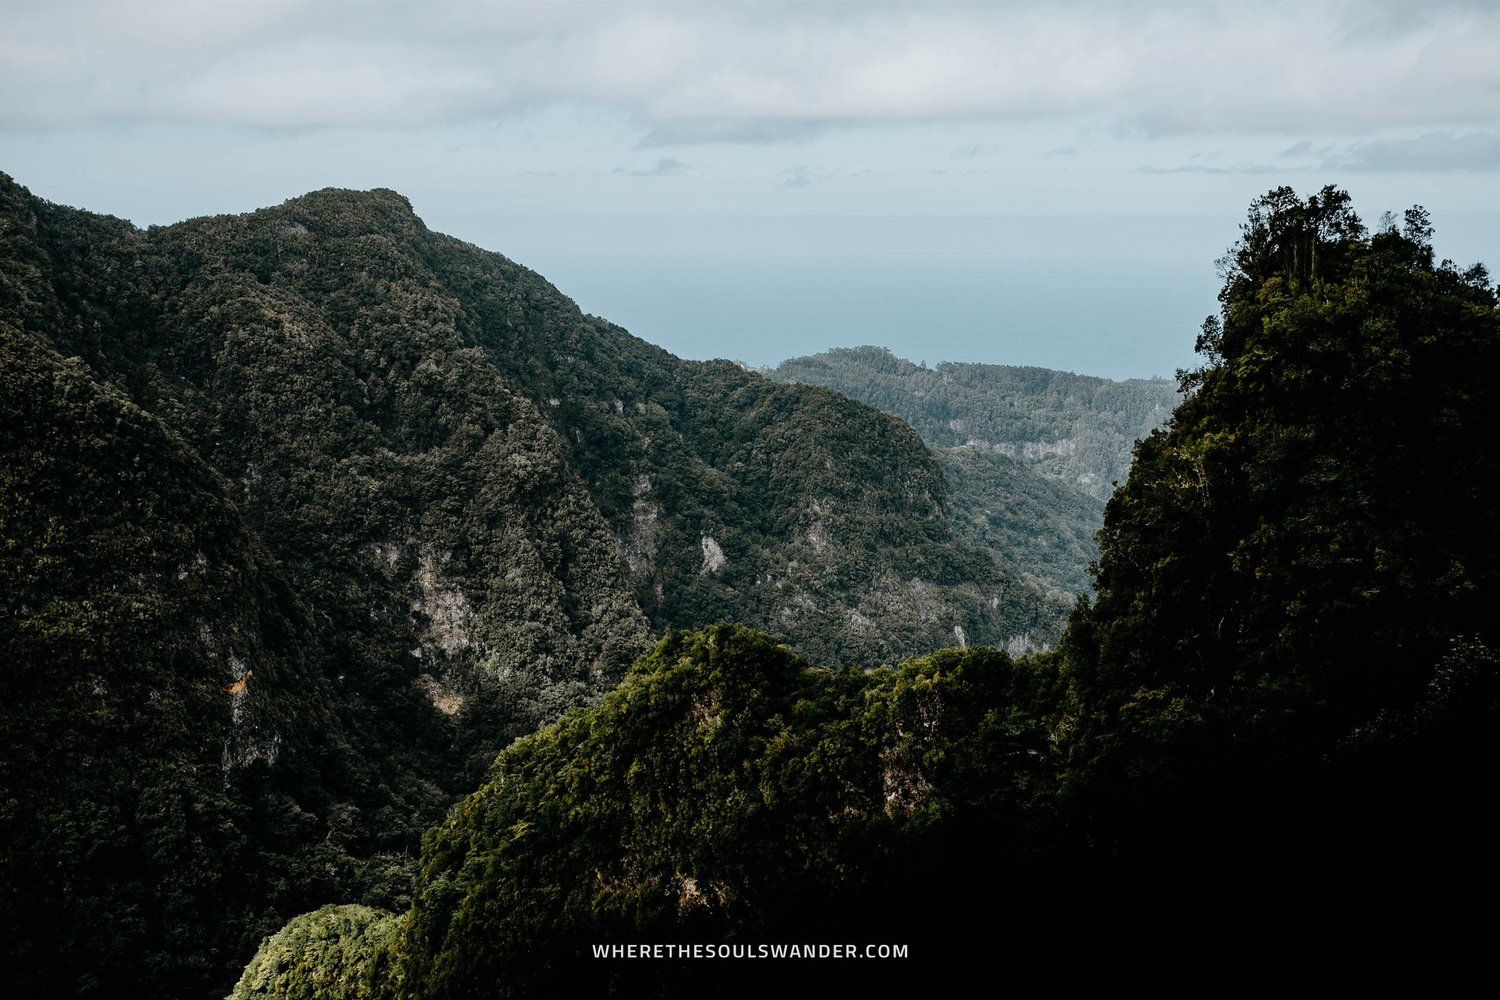
After you’ve made it through the last tunnel, the trail continues around a cliffside and will welcome you to stunning views of the surrounding mountains and the lush valley of São Jorge.
Though the path is completely fenced off, this part of the hike has quite a deep abyss on the right-hand side, so make sure you’re taking the right safety precautions.
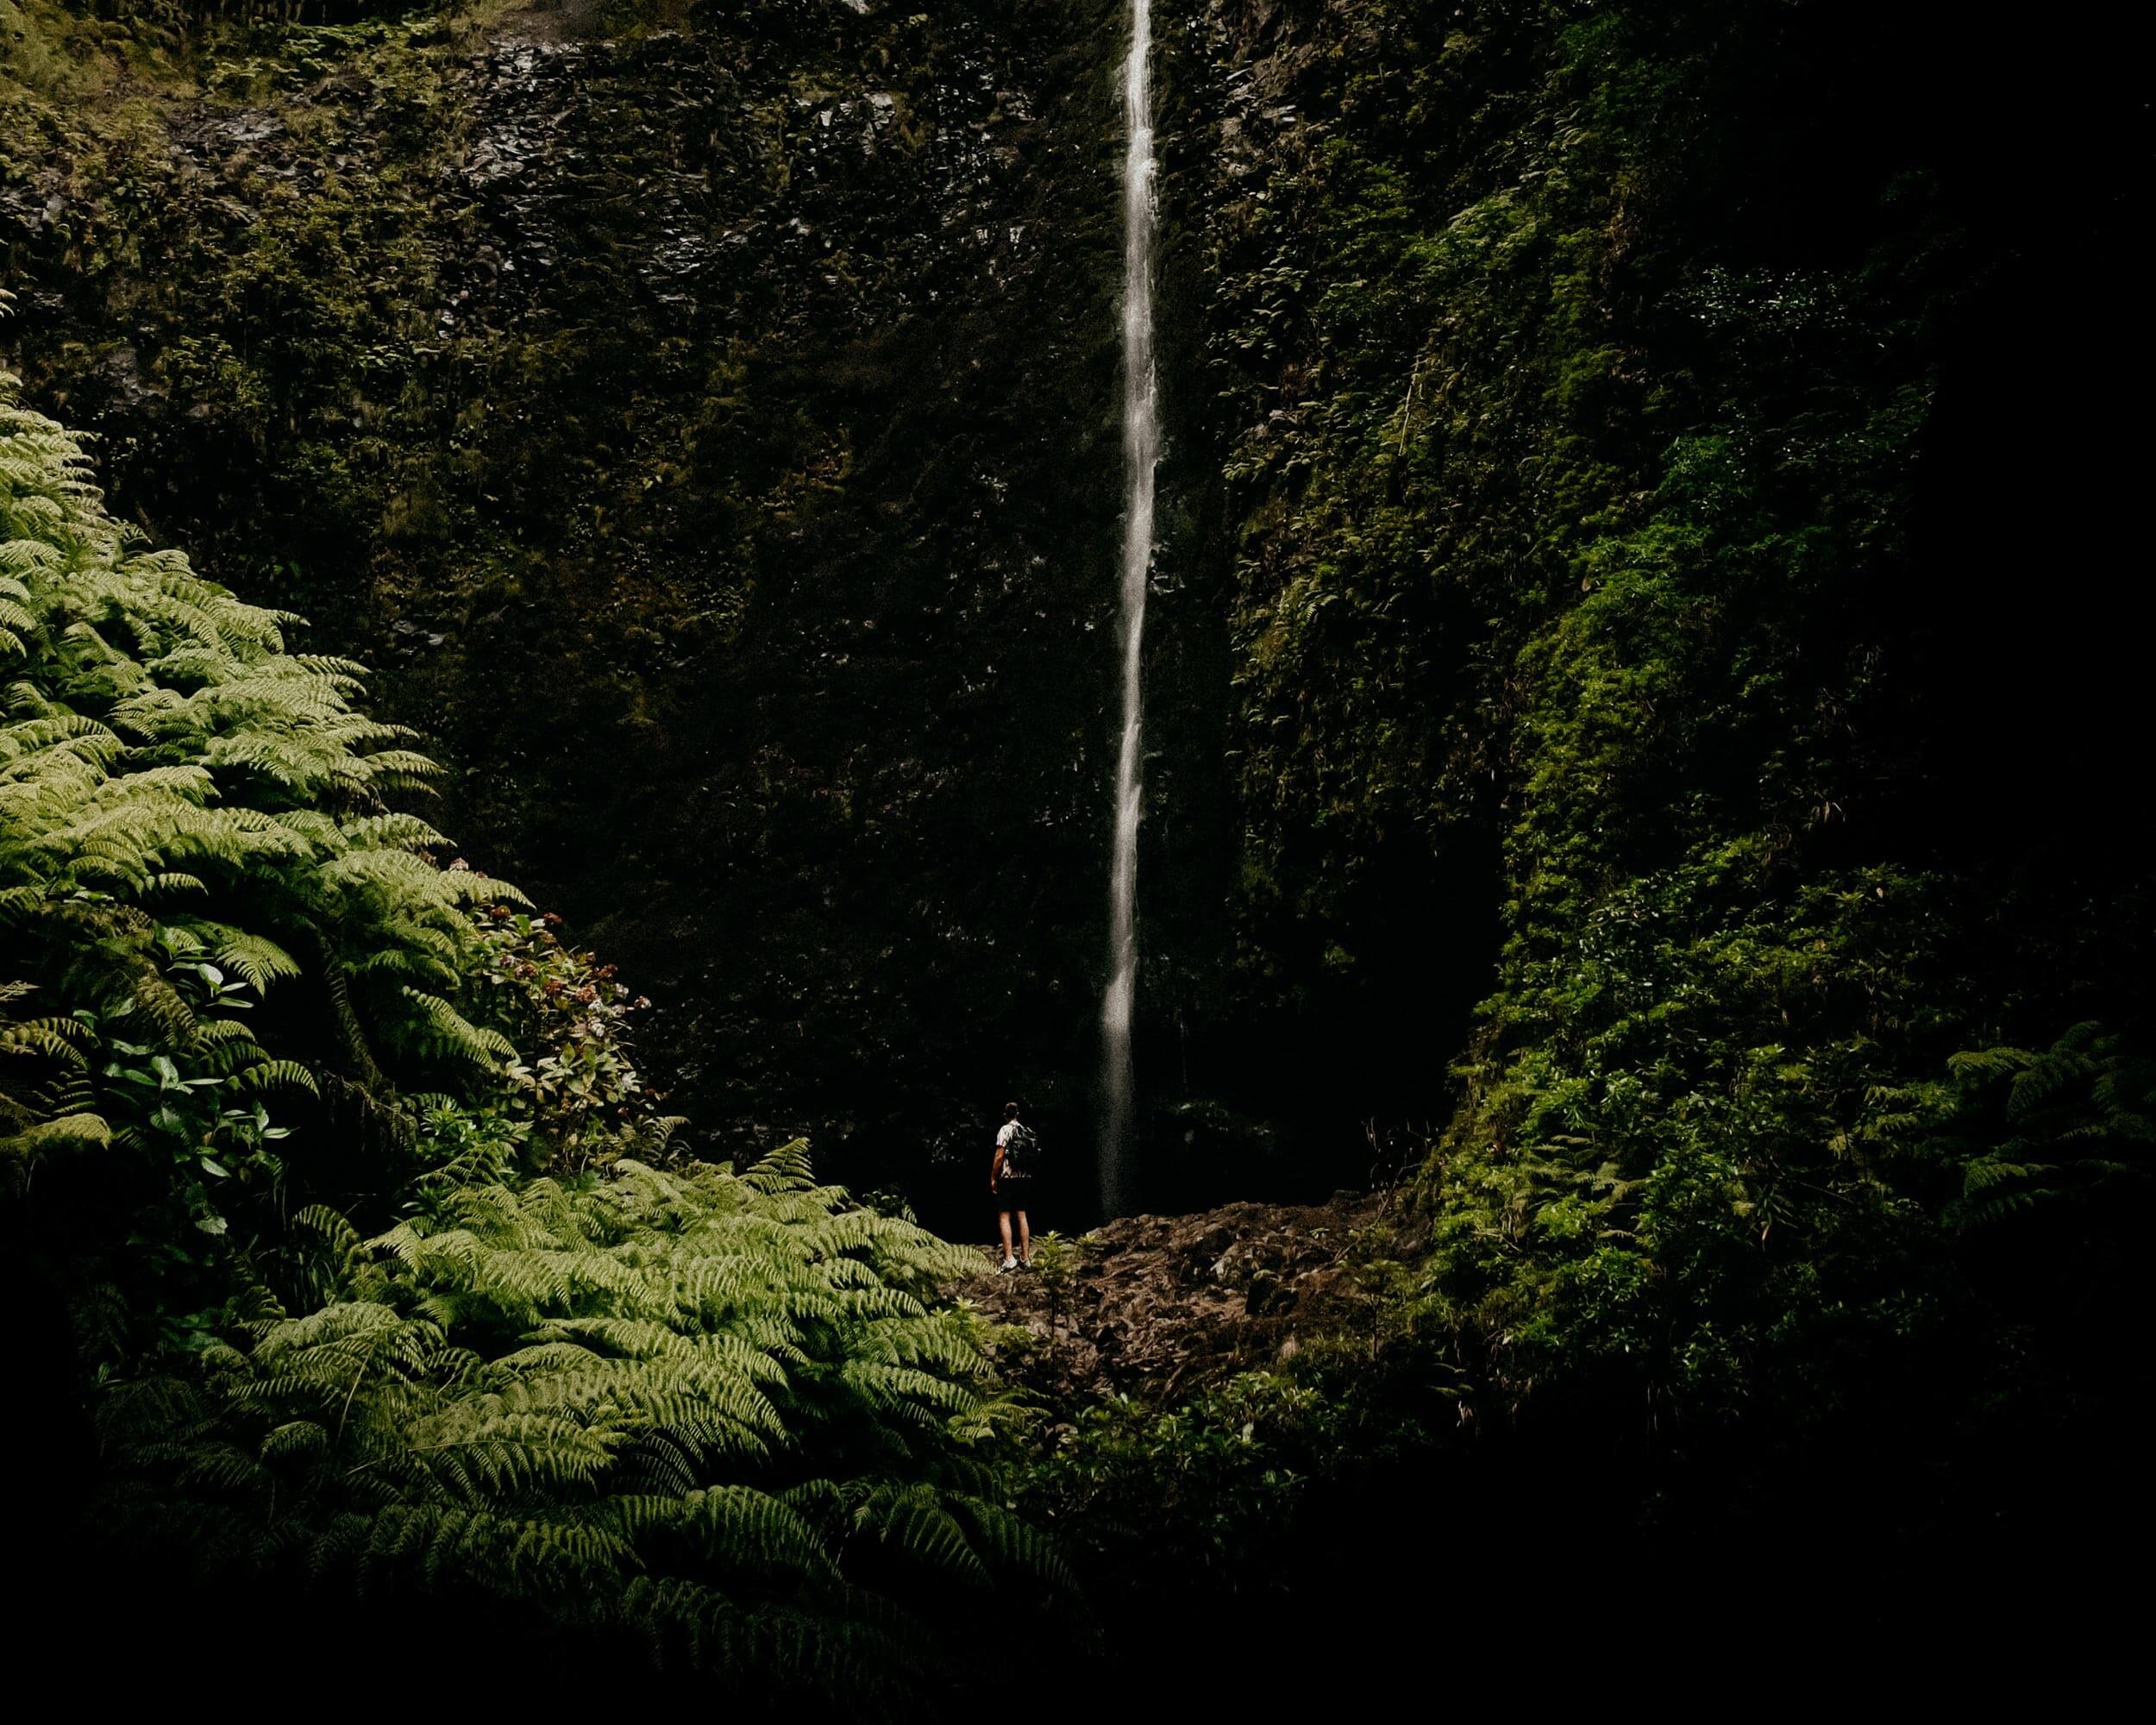
Section III | The Caldeirão Verde waterfall
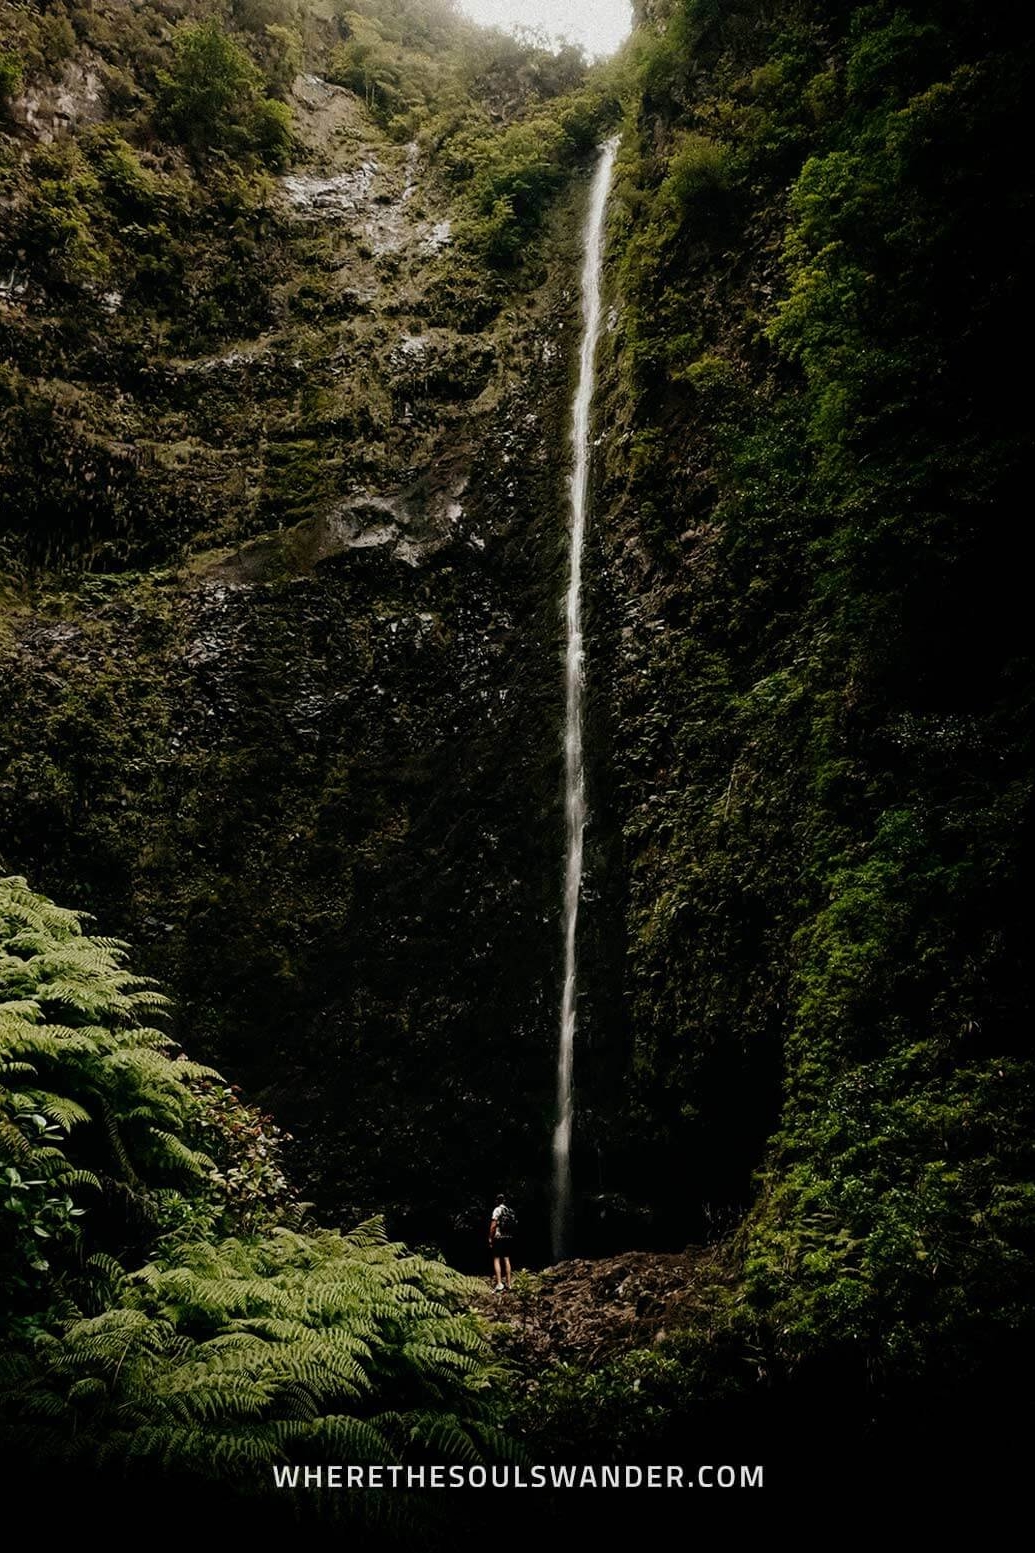
As you head deeper and deeper into the jungle, you’ll gradually begin to hear the sound of water falling down. After a few more steps you’ve arrived at one of the highest waterfalls on Madeira; the impressive Caldeirão Verde waterfall.
From around 100 metres, the waterfall gushes down into a perfectly shaped natural pool – which is truly a spectacular sight to behold.
Though it’s completely possible to take a dip into the ice-cold water, I’d highly advise being cautious, since landslides are pretty common near the waterfall.
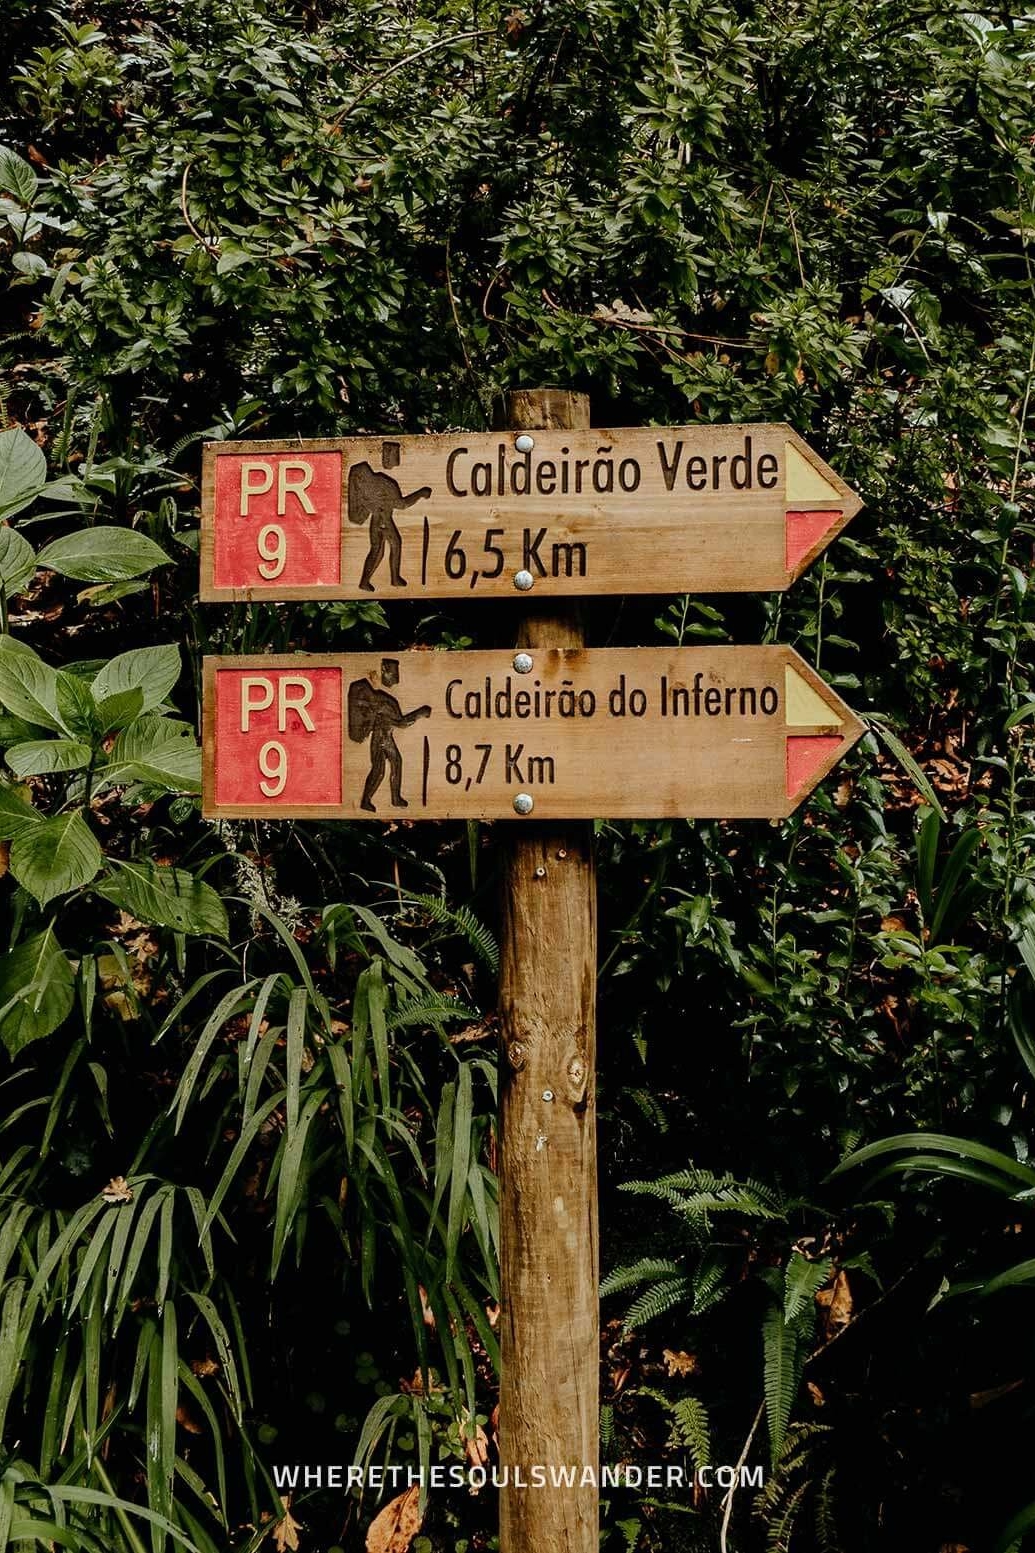
How to complete the Caldeirão Verde PR9 hike
After you’ve spent some time at the Caldeirão Verde waterfall, it’s time to continue.
From here, you can choose to hike back following the exact same path or opt to proceed with the hike to the neighbouring Caldeirão do Inferno waterfall.
Though I chose to turn back at this point, I definitely believe that combining the two waterfalls is a great option, especially if you have the time and energy.
However, this isn’t for the faint of heart, as the total hike will land around the 20km mark.
Levada do Caldeirão Verde | The essentials
The best time of day to do the Caldeirão Verde PR9 hike
Since Caldeirão Verde is one of Madeira’s most popular Levada walks, it does get pretty busy throughout the day, especially during the peak summer months.
Therefore, I believe the best time to start the PR9 hike is early in the morning. By doing so, you’ll be one of the first to arrive at the impressive Caldeirão Verde waterfall.
If you don’t necessarily feel the need to have the waterfall to yourself, then starting in the late morning or afternoon is fine too. Just make sure you get back to the trailhead before dark.
The best time of year to do the Caldeirão Verde PR9 hike
Though Madeira enjoys comfortable weather year-round, this area is known to experience significantly more rainfall than elsewhere on the island.
For that reason, the best time to do the Levada do Caldeirão Verde PR9 hike is during the peak summer months of June, July, or August, when the temperature is good, and less rainfall occurs.
Additionally, if you prefer fewer other people on the trail, opt for the shoulder months of May, September or October. During this period, you experience smaller crowds, yet still have comfortable weather conditions.
I did the Levada do Caldeirão Verde PR9 hike in early October and had excellent hiking circumstances – plus it was pretty quiet on the trail, which is awesome if you’re into photography.
What to pack for the Caldeirão Verde PR9 hike
As with any hike, I believe it’s essential that you’re well-equipped before setting out on your adventure.
For that reason, I recommend anyone who’s planning to hike the Levada do Caldeirão Verde PR9 hike to do the same. To help you have a comfortable journey, I’d highly suggest bringing the following items:
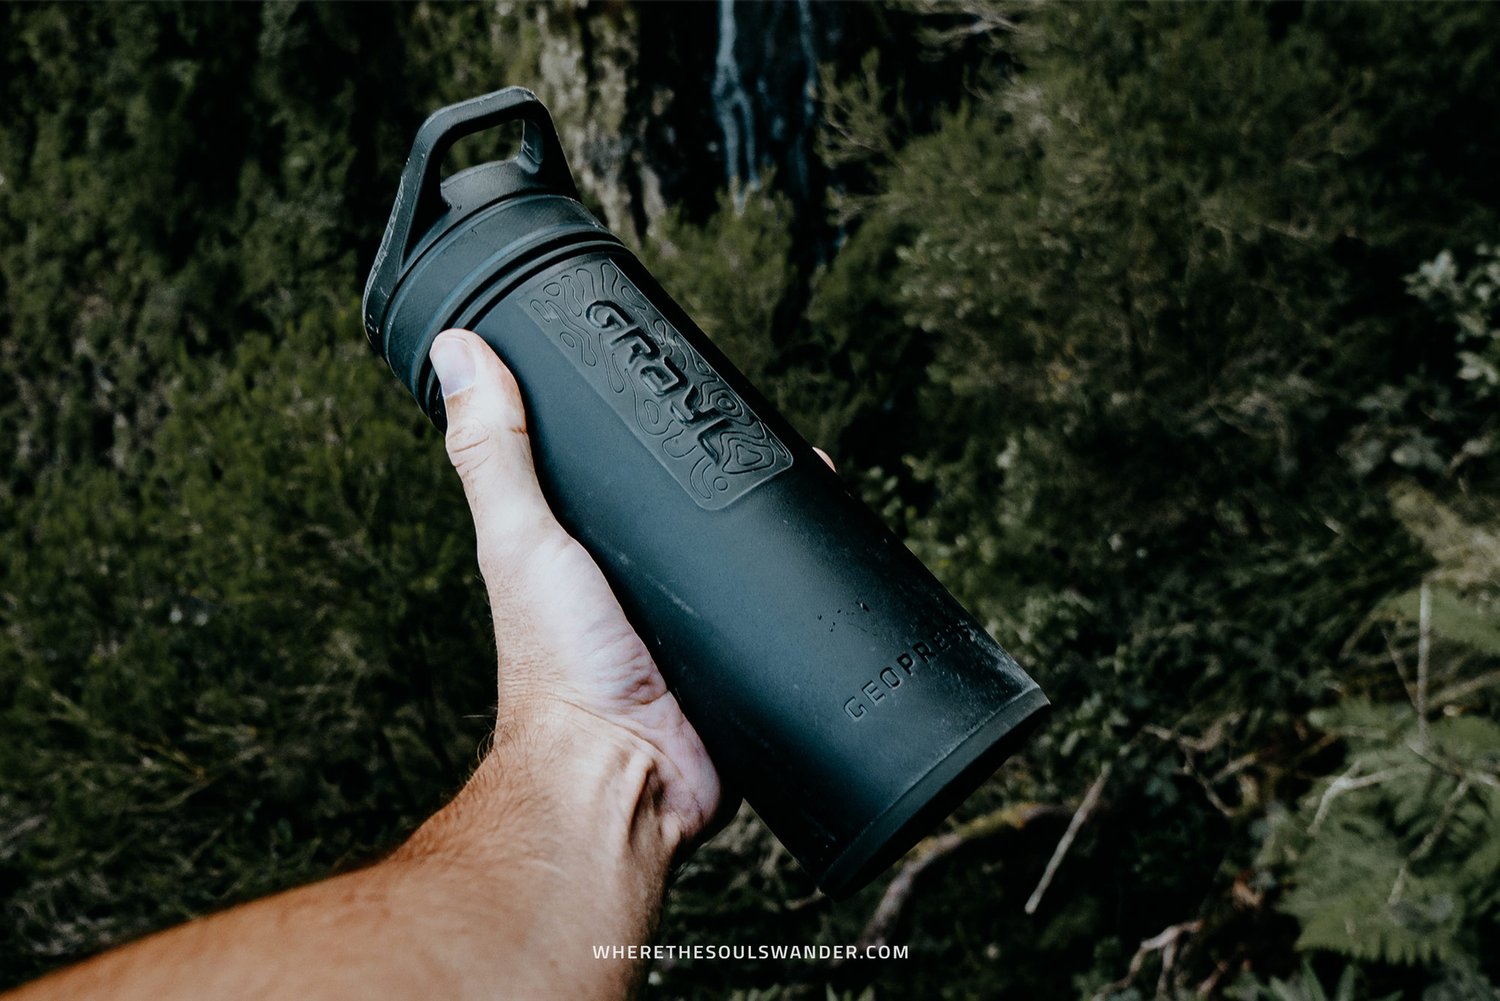
REUSABLE WATER BOTTLE | One travel essential that I carry with me at all times is the Grayl Geopress. This reusable water purification bottle allows me to fill up water from nearly every water source, making it one of my best investments to date.
HIKING BOOTS OR A GOOD PAIR OF SNEAKERS | While hiking boots definitely provide more stability to your ankles, I believe you could easily do the PR9 hike in a good pair of sneakers – just be sure that they have a firm sole with enough grip, so you’re supported when things get slippery.
HEADLAMP, FLASHLIGHT OR PHONE | The Levada do Caldeirão Verde PR9 hike is home to four tunnels, and for that reason, I’d advise you to bring one of the following light sources; a flashlight, headlamp or a fully charged phone.
SNACKS | Even though I practise intermittent fasting, and prefer to hike on an empty stomach, I always bring a few snacks to fuel me during my hikes. And I advise everyone to do the same, especially since you’ll only be able to buy something at the beginning or end of the hike. So, don’t mind bringing some fruits, nuts and a few protein bars. Also, bring enough cash to get a coffee or some snacks from the mountain hut if necessary.
HIKING POLES | I did the PR9 hike without hiking poles, but if you have poor knees or prefer a little support during the more strenuous parts of the trail, I highly advise bringing a set of quality hiking poles. These Montem Ultra Strong Hiking Poles are light, collapsible, and a great value for the price.
Where to stay on Madeira
Given Madeira is rather compact, I highly recommend anyone to base themselves in Funchal, Madeira’s vibrant capital city.
Funchal is an awesome city in its own right and is home to plenty of excellent accommodation options, is packed with history and culture, plus it has trendy restaurants and cafes at just about every corner.
To help you find suitable accommodation, I’ve listed three of my favourites below, one of which is marked – this is the place where I stayed.
+ Vila Baleira | This was my base for the whole of my trip, and if you’re seeking comfort without spending your entire budget straight away, Vila Baleira will be perfect for you too. Located within the popular Lido area, this hotel offers spacious rooms, comfortable beds, and a large rooftop terrace with a swimming pool. They also have a tasty breakfast spread, excellent wifi throughout the entire property, and a secured parking lot right under the property.
Hotel Cajú | Set within the heart of Funchal, Hotel Cajú is a great place to stay, with stylish double rooms, friendly staff, and a small yet excellent in-house fitness centre. All bookings come with an exceptional breakfast too. One small downside though, they don’t have private parking.
NEXT – Savoy Signature | This budget-friendly hotel in the centre of Funchal has spacious, modern-style rooms with comfortable double beds and a brilliant private bathroom with a rain shower. They also have an incredible rooftop swimming pool with amazing sea views. Double rooms at only €50,- per night make this place one of the best picks in Funchal.
Alternatively, search for accommodation in Funchal on booking.com.
Stay safe on Madeira | Travel insurance
Since travelling on Madeira is all about hiking and nature, I recommend everyone sort out good travel insurance before setting out on their own adventure.
Although we prefer that everything goes smoothly during our travels, something unfortunate can happen at any moment, whether it’s an injury during a hike or an accident on the road.
For travel insurance, I use Heymondo, as they offer full COVID-19 coverage, as well as a handy app with 24-hour medical assistance. Make sure you check it out – readers of WTSW receive 5% off any insurance policy too.
Cheers!
I’ve been on this travel blogging journey since 2019.
If you appreciate what I do here, these are some ways you can support me.
9 Incredible viewpoints on Madeira, Portugal's island paradise
Madeira, with its unrivalled natural beauty, is without question, one of the most picturesque islands I’ve ever laid eyes on.
With a myriad of waterfalls, rough mountain ranges, lush verdant valleys and impressive coastal cliffs, this tiny island in the Atlantic has lately reclaimed its position as one of the best travel destinations for those into nature and outdoor adventures.
I’ve recently spent ten days on Madeira, where I explored just about every inch of the island, in search of the best views of Madeira. It was a photographer’s dream!
After cruisin’ to just about every corner of the island, I’ve chosen to put together this guide to my absolute favourite viewpoints on Madeira.
So if you’re planning to visit Madeira, here’s my guide to the best viewpoints on Madeira.
If you choose to use any of the links on this page, I may receive a small commission at no extra cost to you. By using these links, you’ll have a direct impact on WTSW and my ability to continue to create free insightful travel content for you. If you find any of my tips useful, you can support me by buying a virtual coffee here.
9 Viewpoints on Madeira, Portugal
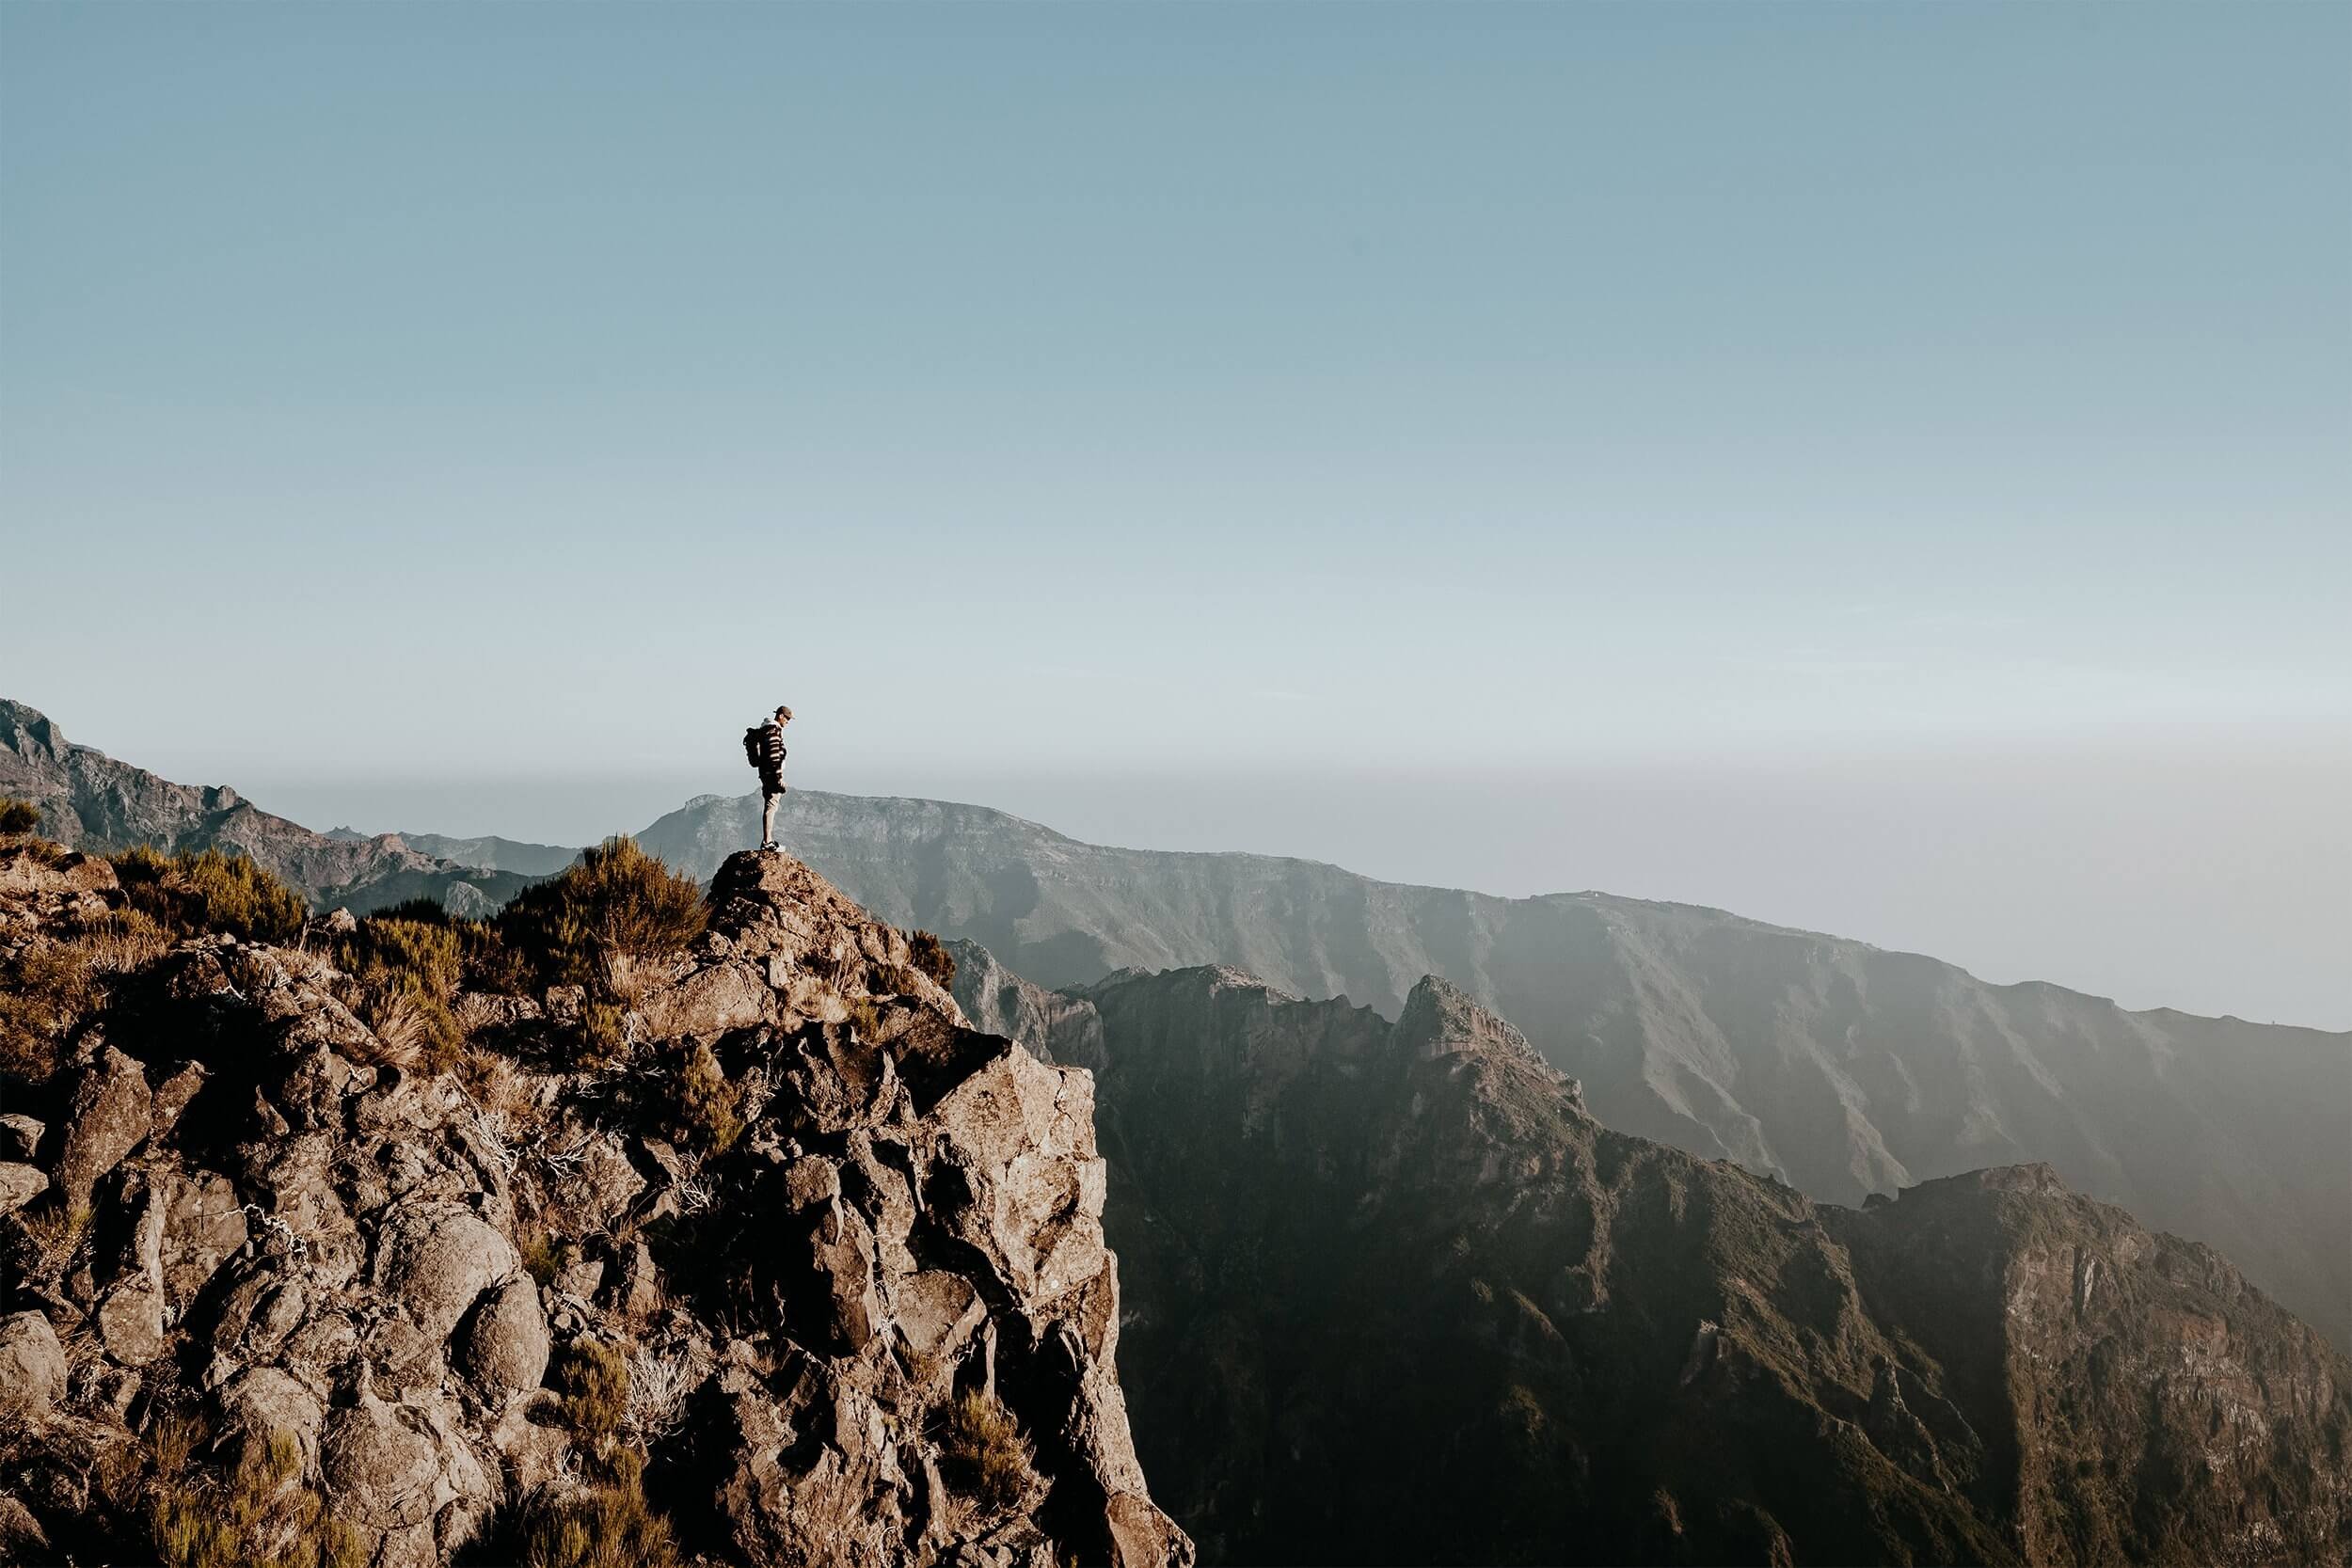
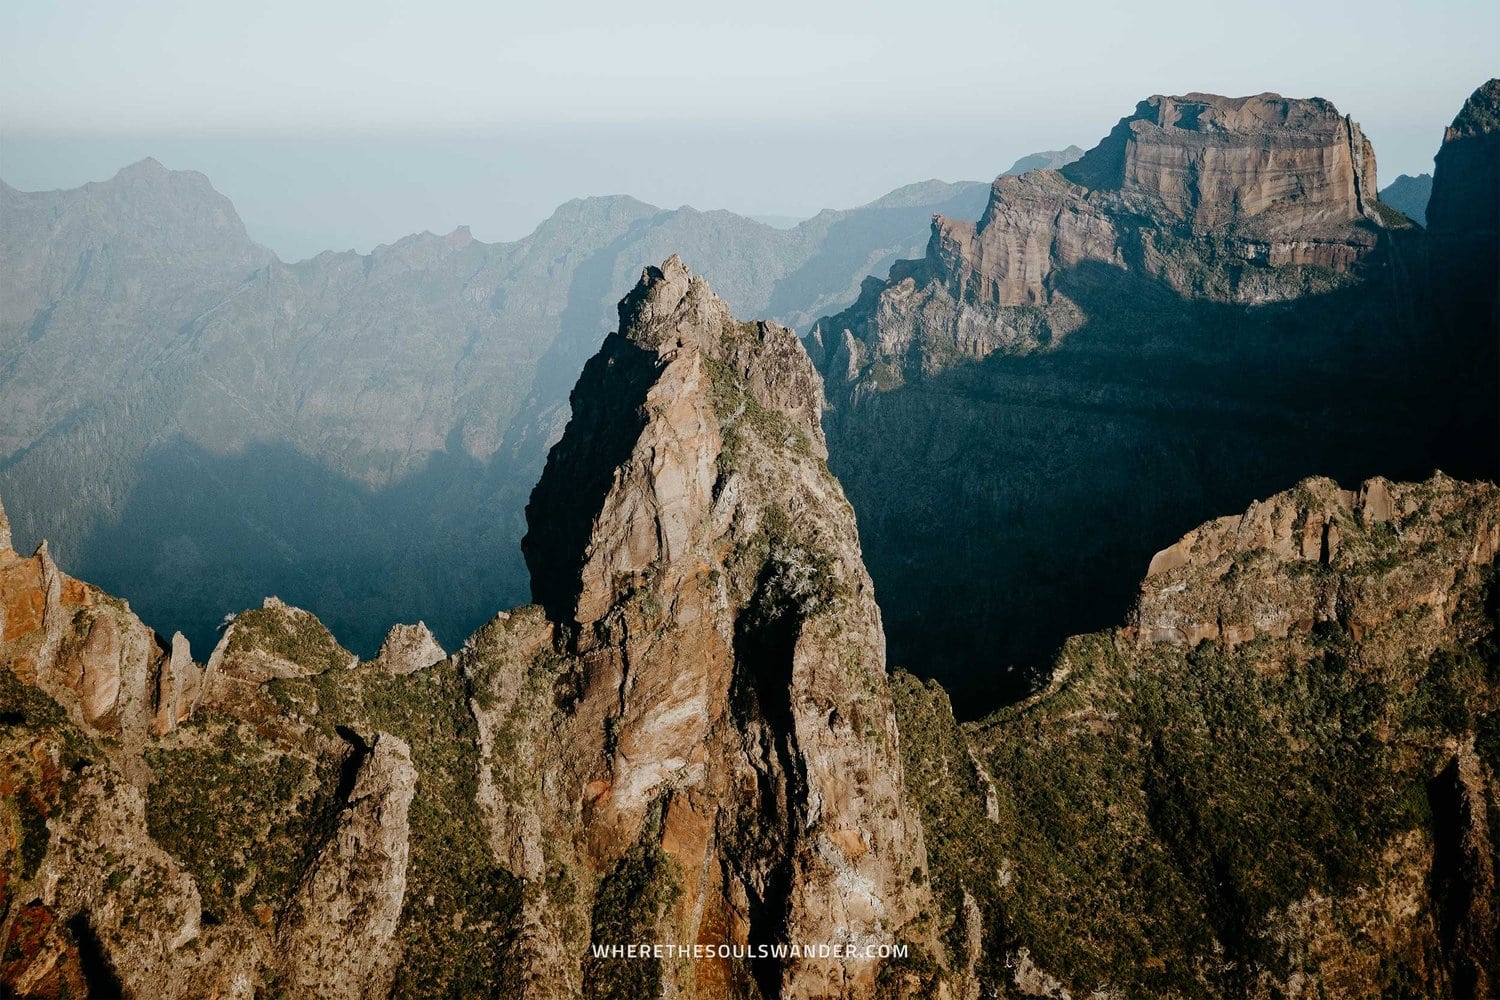
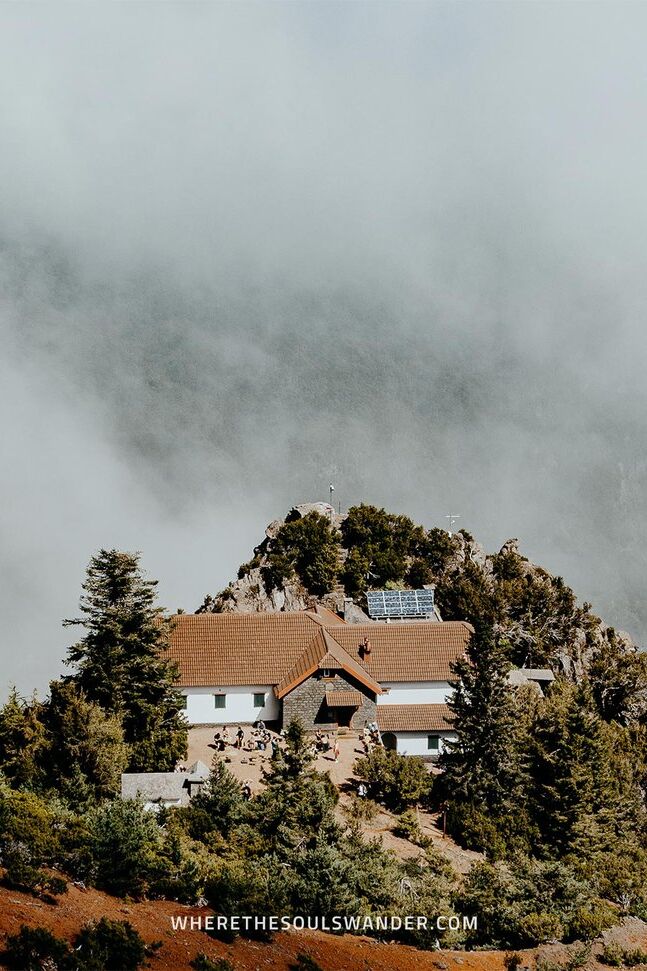
1. Pico do Arieiro viewpoint
A visit to Madeira wouldn’t be complete without watching the sunrise from Pico do Arieiro.
Set in the heart of Madeira’s Central Mountain Massif, is Pico do Arieiro (1,818m), one of the island’s highest peaks, and home to Madeira’s most iconic viewpoint.
While the main viewpoint of Miradouro Juncal is teeming with fellow travellers, the area itself is relatively extensive, which makes it easy to find a quiet spot to watch a stunning sunrise unfold.
Pico do Arieiro is also the starting point of the famous PR1 hike. If you’re keen to do the PR1 hike from Pico do Arieiro to Pico Ruivo, make sure you check out my guide for inspiration, and hiking advice.
Where | Pico do Arieiro viewpoint
Driving time from Funchal | About 45 minutes

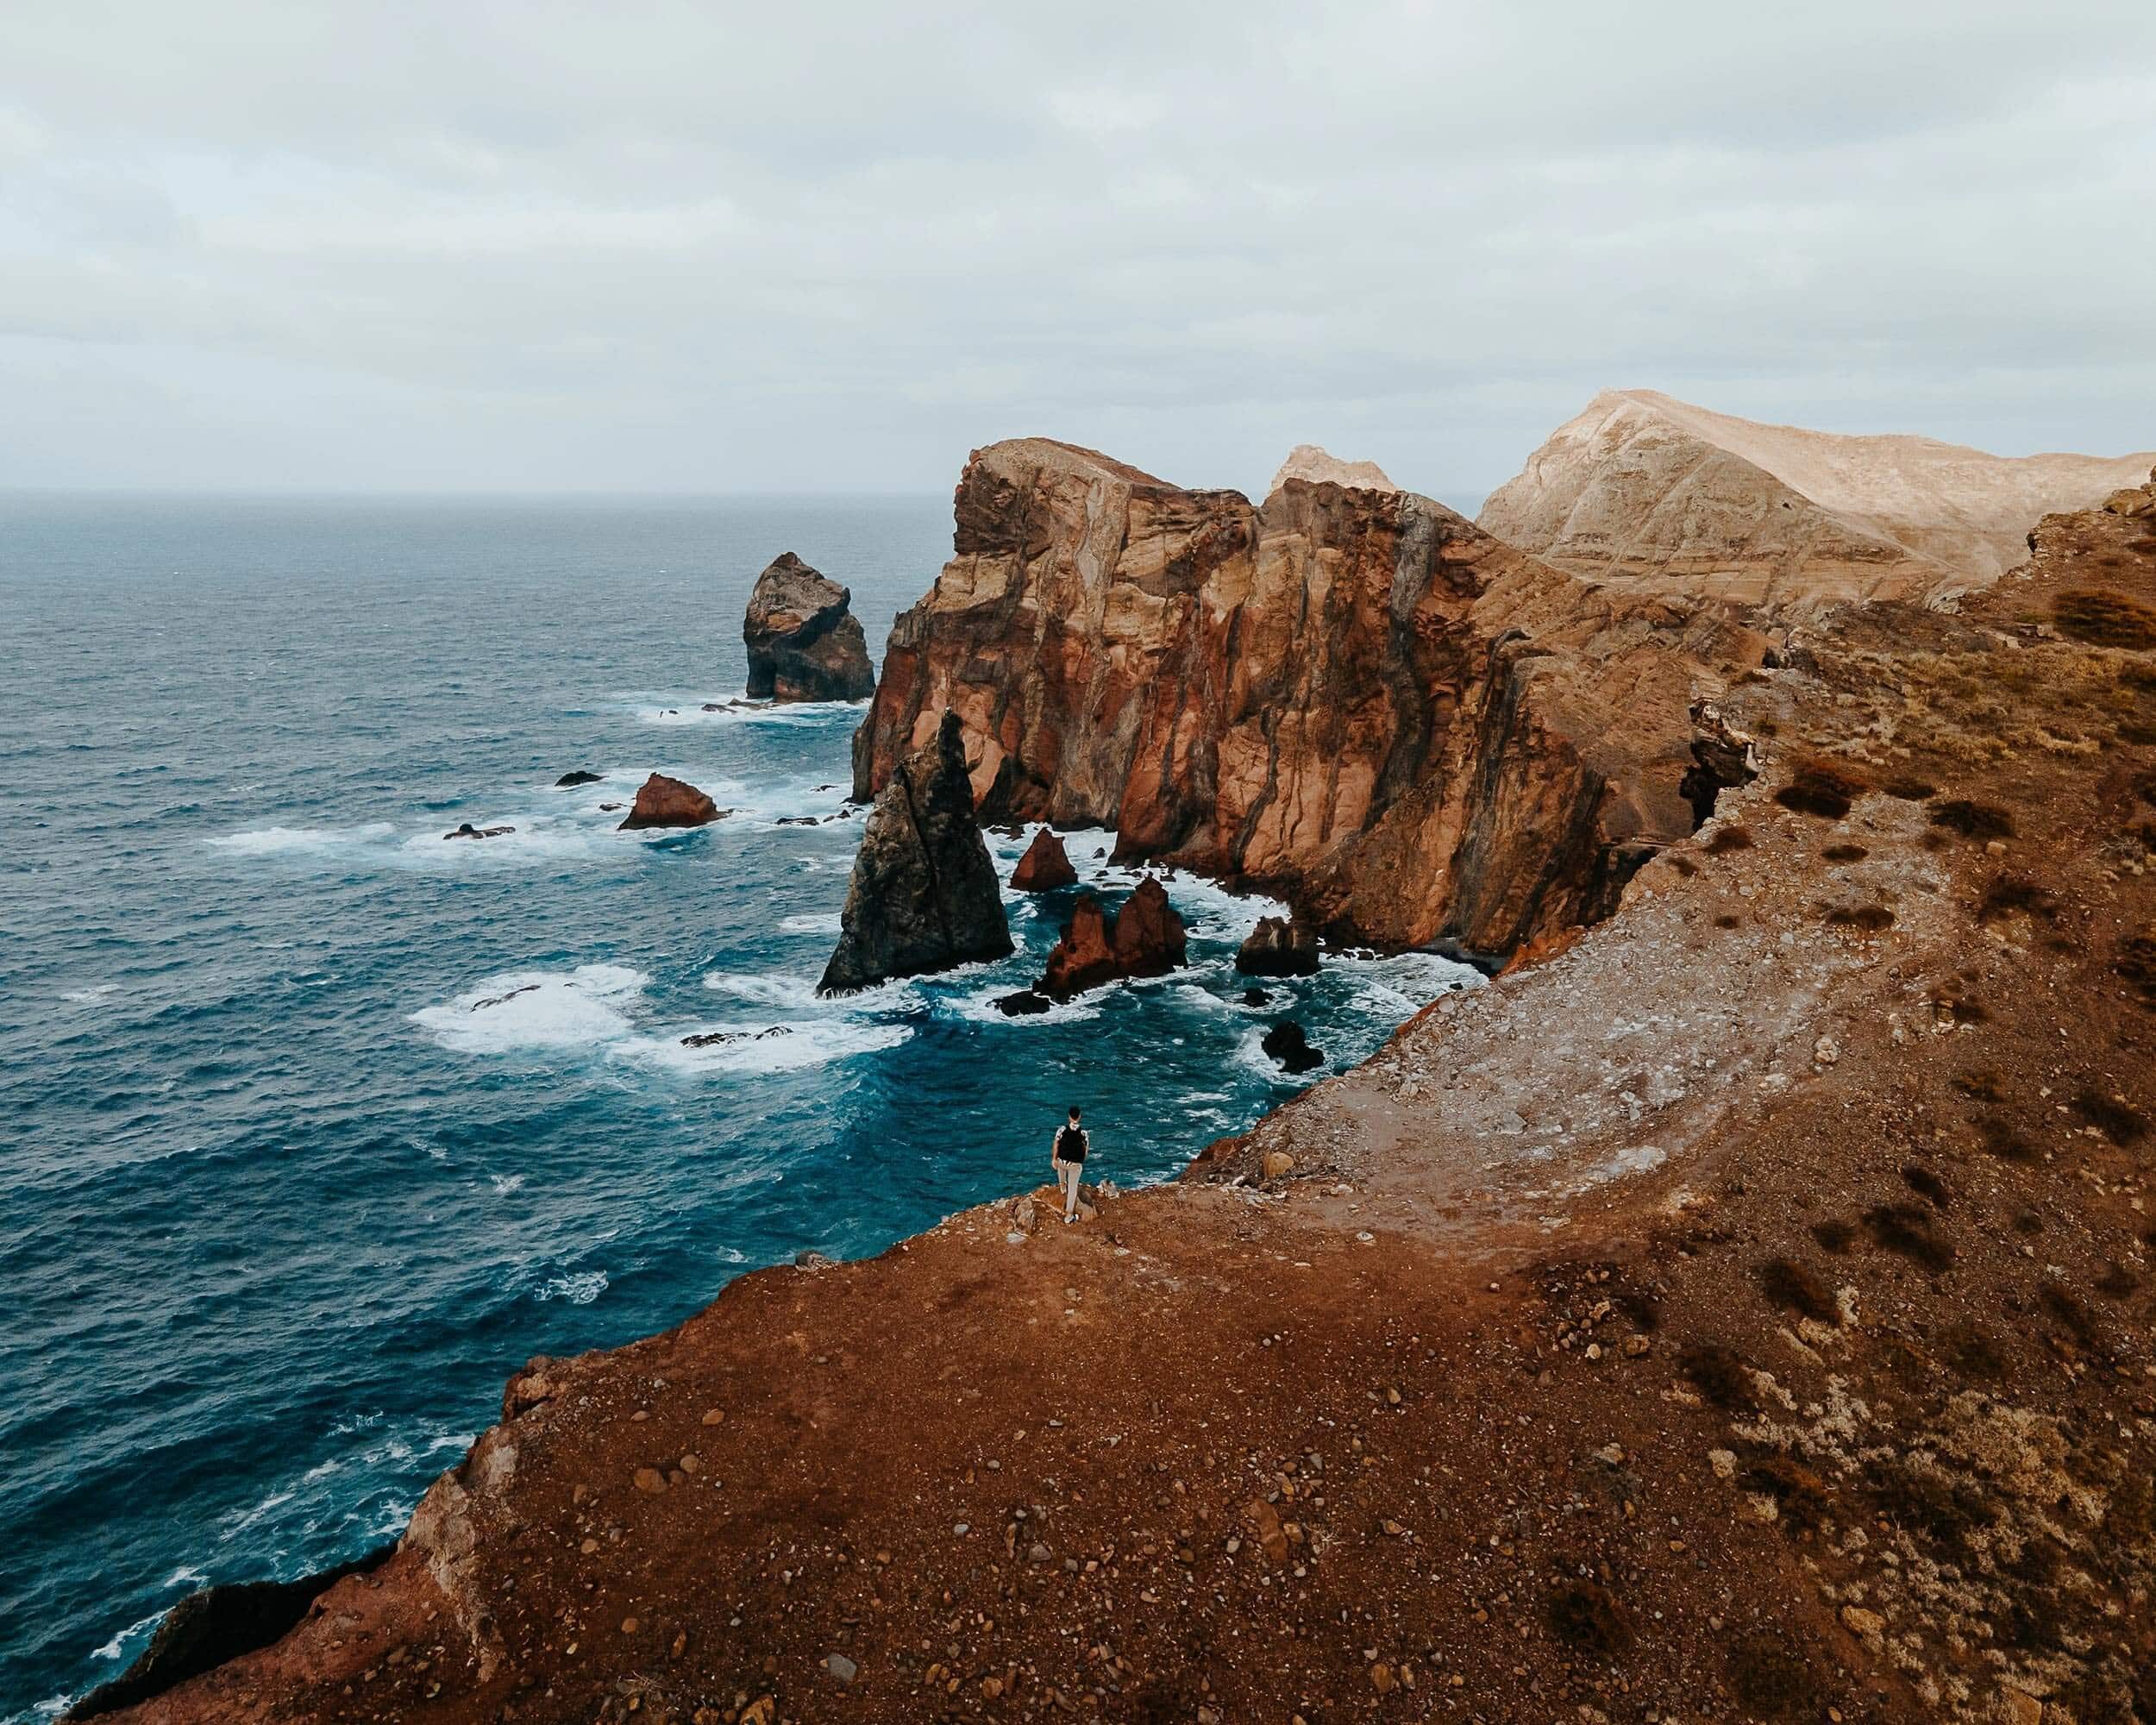
2. Miradouro Ponta do Rosto
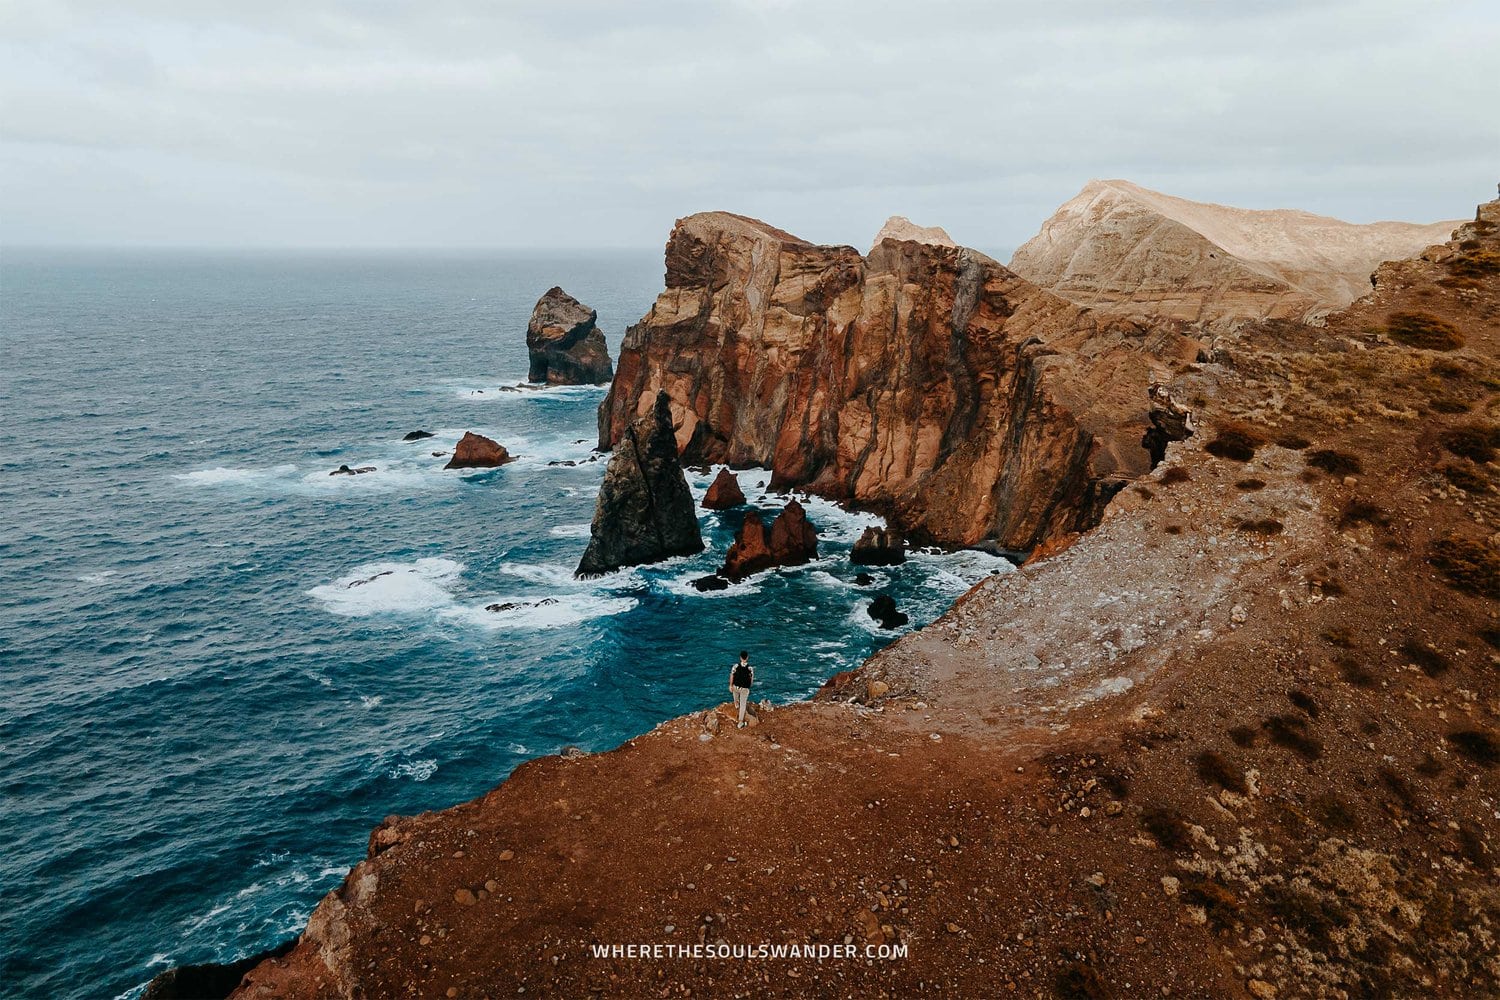
I have to admit, Miradouro Ponta do Rosto is without doubt up there with my favourite viewpoints on Madeira.
Situated on the far most Eastern corner of Madeira, this viewpoint provides the most spectacular views of the volcanic landscape of the unique São Lourenço Peninsula.
What makes Miradouro Ponta do Rosto one of the best viewpoints on Madeira, is that the main viewpoint is located directly after the parking lot, making it extremely easy to get to.
If you’re in for some more adventure, walk around the navigation station and go to the left until you reach the pilar atop the towering cliff. Since this isn’t an official path, make sure you stay safe by keeping your distance from the edge of the cliff.
Also, given Miradouro Ponta do Rosto is located on the São Lourenço Peninsula, I highly recommend combining this viewpoint with the PR8 hike on Vereda da Ponta de São Lourenço.
Where | Miradouro Ponta do Rosto
Driving time from Funchal | 45 minutes
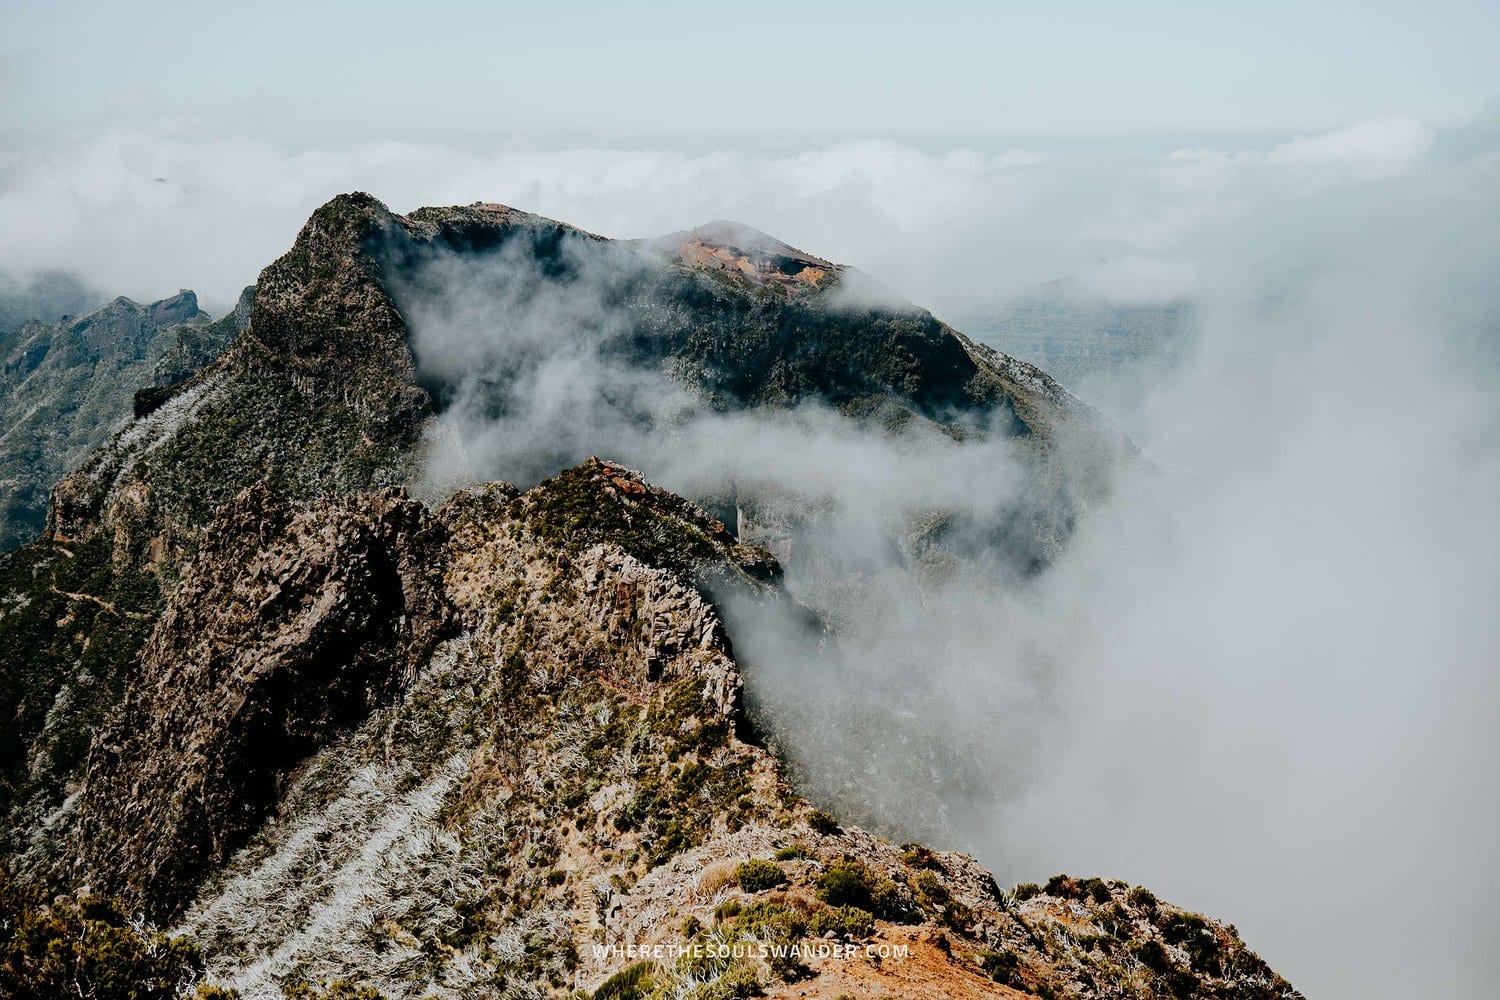
3. Miradouro Bica da Cana
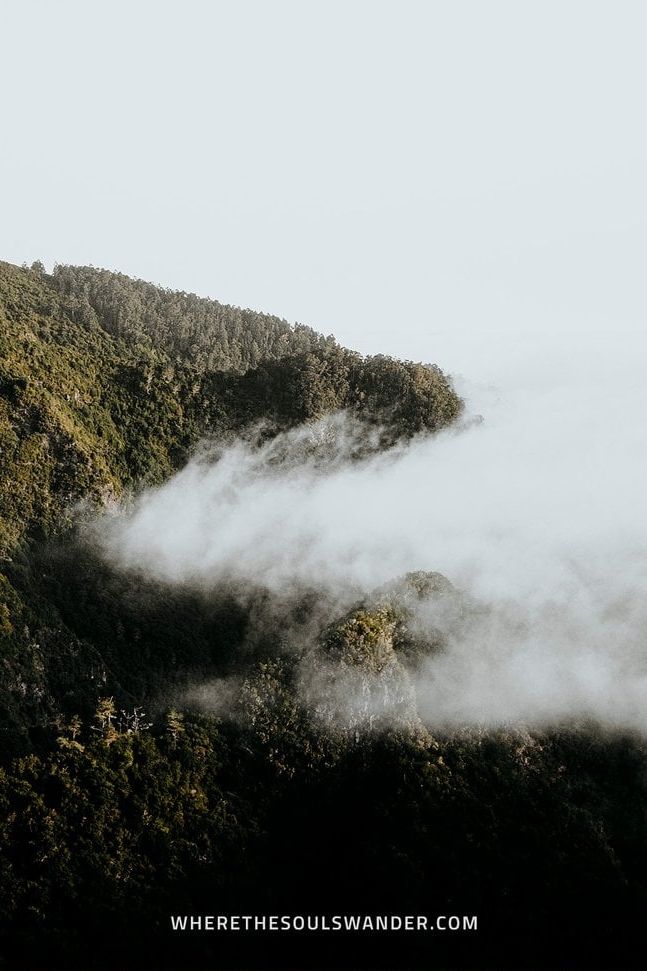
Perhaps the most underrated viewpoint on Madeira, the Bica da Cana viewpoint welcomes its visitors with stunning views of Pico Ruivo (1,862m) and Pico do Arieiro (1818m).
But it isn’t just the views of the surrounding mountains that make Miradouro Bica da Cana one of the best viewpoints on the island.
No, its most striking feature is that the summit of Bica da Cana (1,560m) is situated slightly lower than the clouds, meaning you will literally stand above the clouds.
Trust me, it’s a phenomenal experience to witness a sea of clouds roll over the mountains below, while the sun slowly rises above the highest peaks of Madeira.
Where | Miradouro Bica da Cana
Driving time from Funchal | About 45 minutes

4. Miradouro Lombo do Mouro
Located within only 5 minutes of Bica da Cana is Miradouro Lombo do Mouro, a striking viewpoint that is relatively unknown, yet very much worthy of your time.
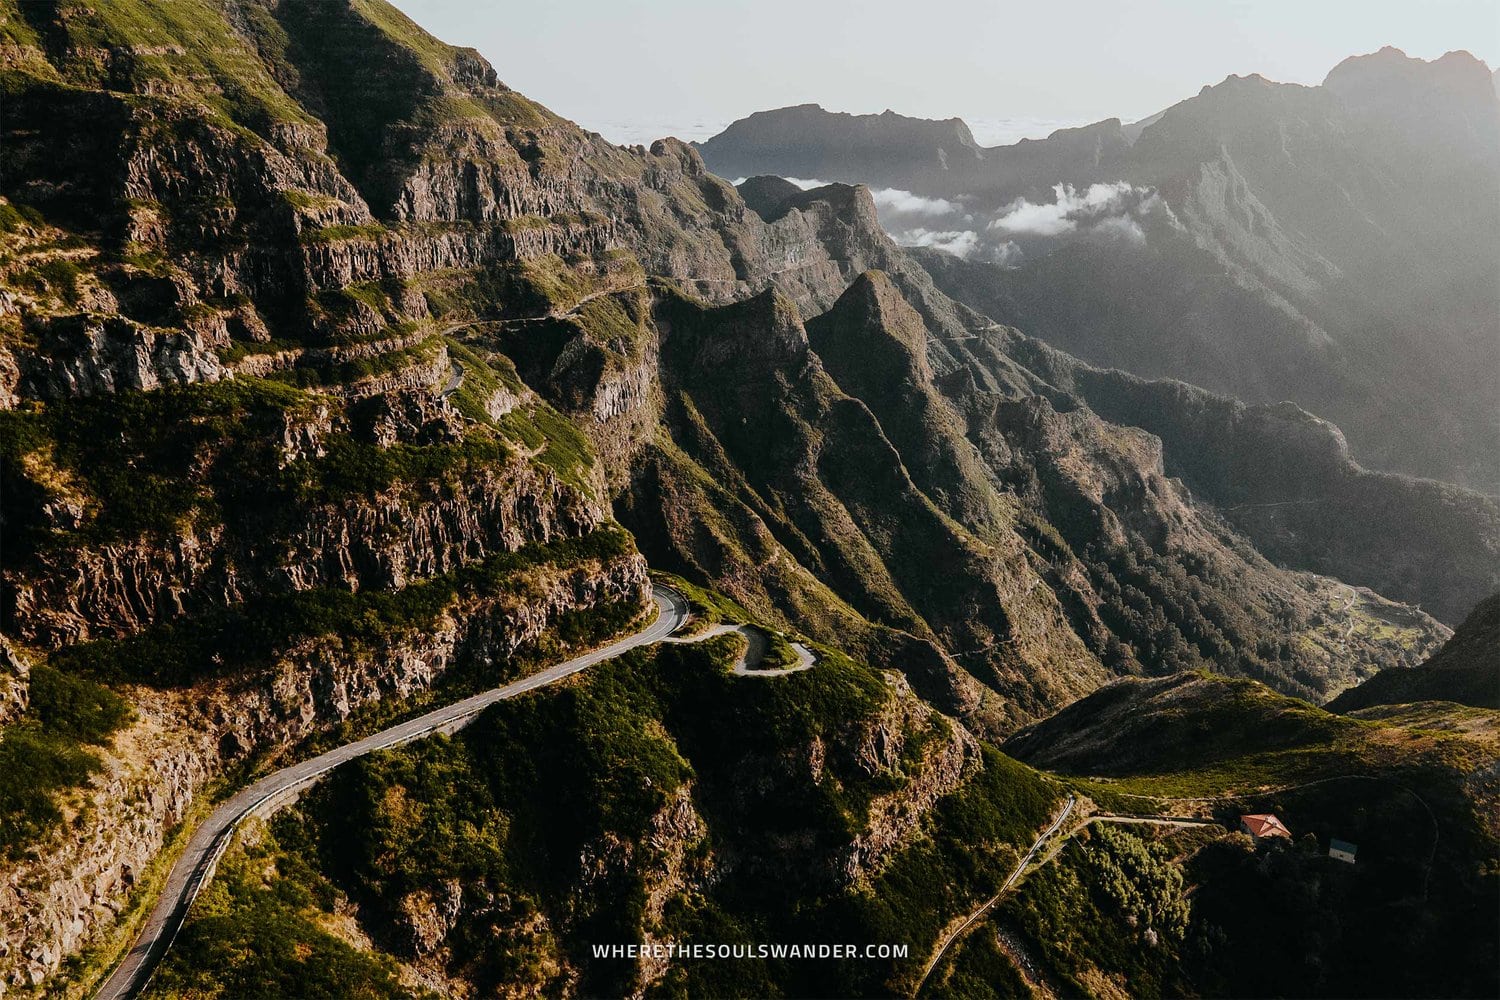
Miradouro Lombo do Mouro is situated directly on the side of the road and provides stunning views of one of the most scenic roads on Madeira, as well as the surrounding Encumeada valley.
Given its location, this viewpoint is easily combined with the Bica da Cana viewpoint.
Where | Miradouro Lombo do Mouro
Driving time from Funchal | About 45 minutes
5. Miradouro Do Guindaste – Crane viewpoint
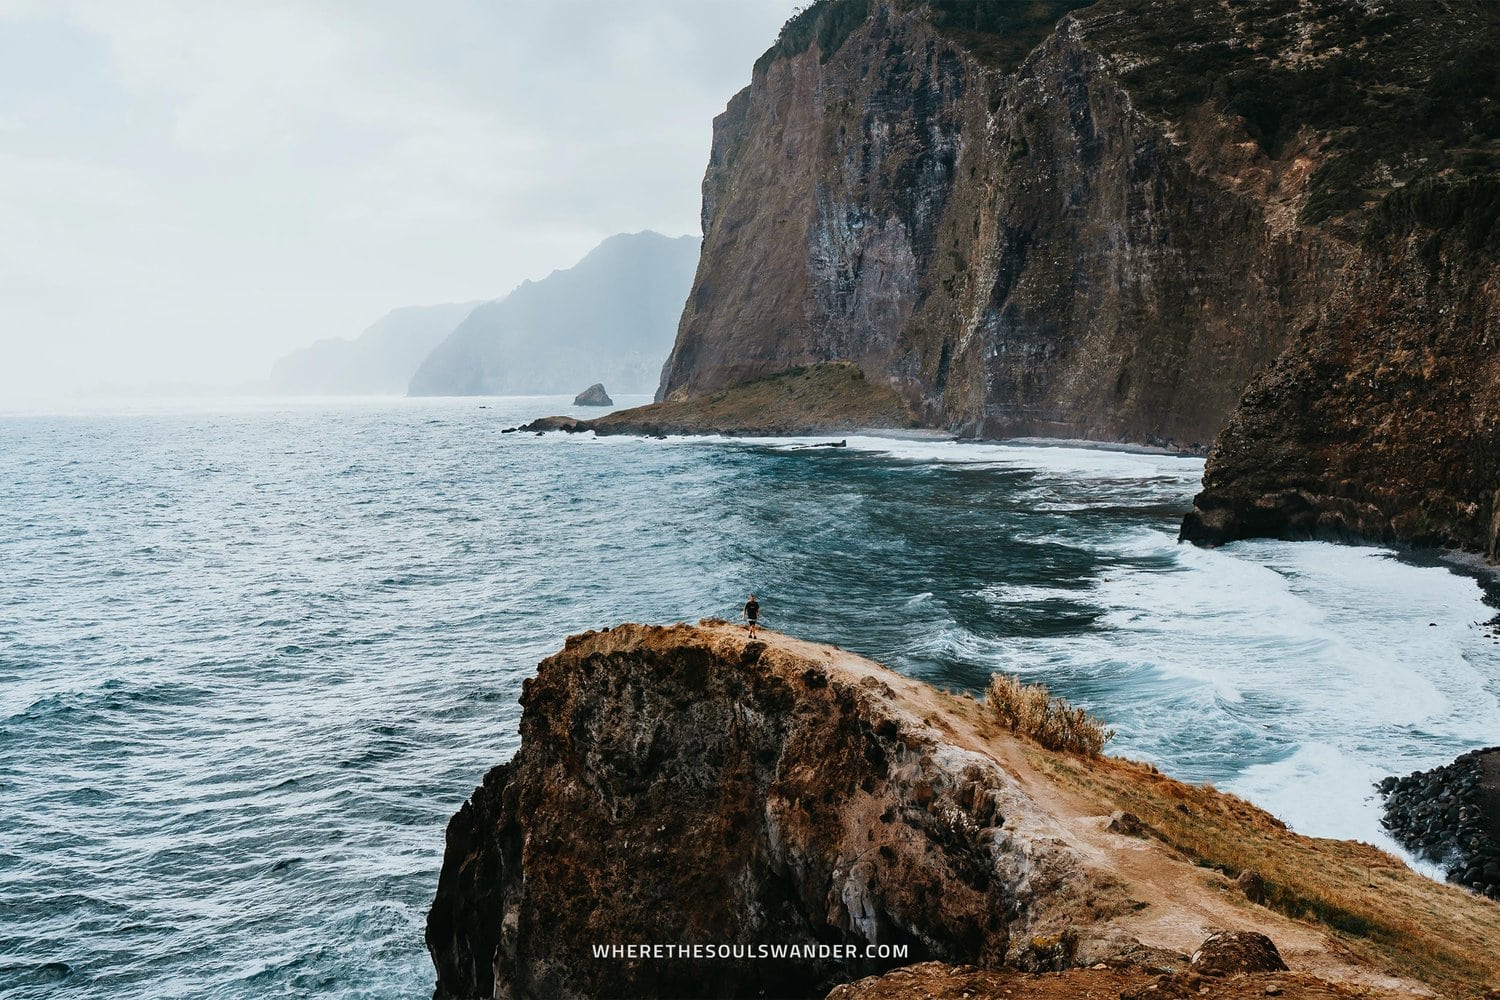
Perched on the Northeastern coastline of Madeira is Miradouro Do Guindaste, an otherworldly viewpoint that is without question one of my favourite viewpoints on the island.
This viewpoint – also known as Crane viewpoint – provides a unique plateau, with striking views of the rough Atlantic, as well as the rugged mountain cliffs of Porto da Cruz in the distance.
While Miradouro Do Guindaste is beautiful at every time of day, I advise visiting either at sunrise or sunset, especially if it’s your goal to nail the perfect photo for your Instagram feed.
Where | Miradouro Do Guindaste
Driving time from Funchal | About 40 minutes
6. Vereda Dos Balcões viewpoint
One of the most popular viewpoints on Madeira, and certainly worthy of your occasion is Vereda Dos Balcões, a stunning viewpoint in the heart of the picturesque Satana municipality.
While it takes only 10 minutes to hike to the viewpoint, it still feels as though it’s completely hidden in the lush mountain ranges of Madeira.
Upon arrival, you’ll notice a small balcony that offers panoramic views of the valley of the Ribeira da Metade, Faial parish and the Central Mountains of Madeira island.
This viewpoint is also considered a bird-watching paradise, with plenty of indigenous and endemic species. If you’re lucky, you may witness a Madeira firecrest, chaffinch, buzzard or a very rare Madeira Laurel Pigeon.
Where | Vereda Dos Balcões viewpoint
Driving time from Funchal | Around 1 hour

7. Miradouro do Véu da Noiva
Imagine a waterfall gushing from towering cliffs straight into the ocean, the Véu da Noiva waterfall is exactly that – and for that reason, an unmissable stop for anyone travelling to Madeira.
Perched between Seixal and São Vicente on Madeira’s breathtaking North coast is Miradouro do Véu da Noiva, an easy-to-get-to viewpoint that is undisputedly the most surreal place I’ve uncovered on Madeira.
There is a parking lot right next to the viewpoint, as well as a small cafe to grab some beverages or a snack. However, since this viewpoint is super accessible, it does get super busy during the day.
Also, If you’re into serious photography, I advise visiting at sunrise, or in the late afternoon, as the harsh light and reflection on the water might stand in your way of pulling off the perfect shot.
Where | Miradouro do Véu da Noiva
Driving time from Funchal | About 45 minutes

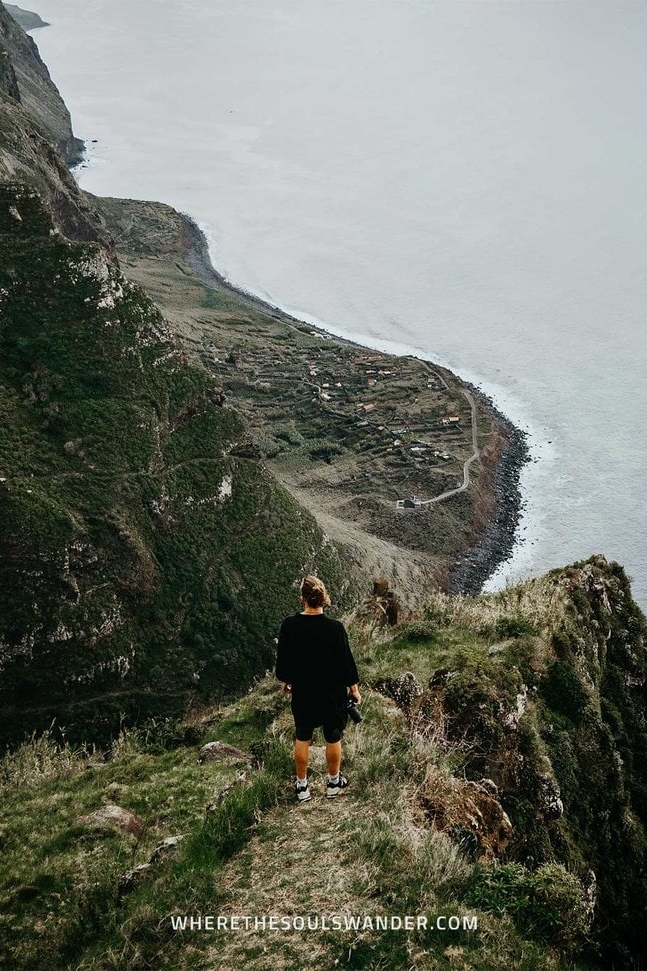
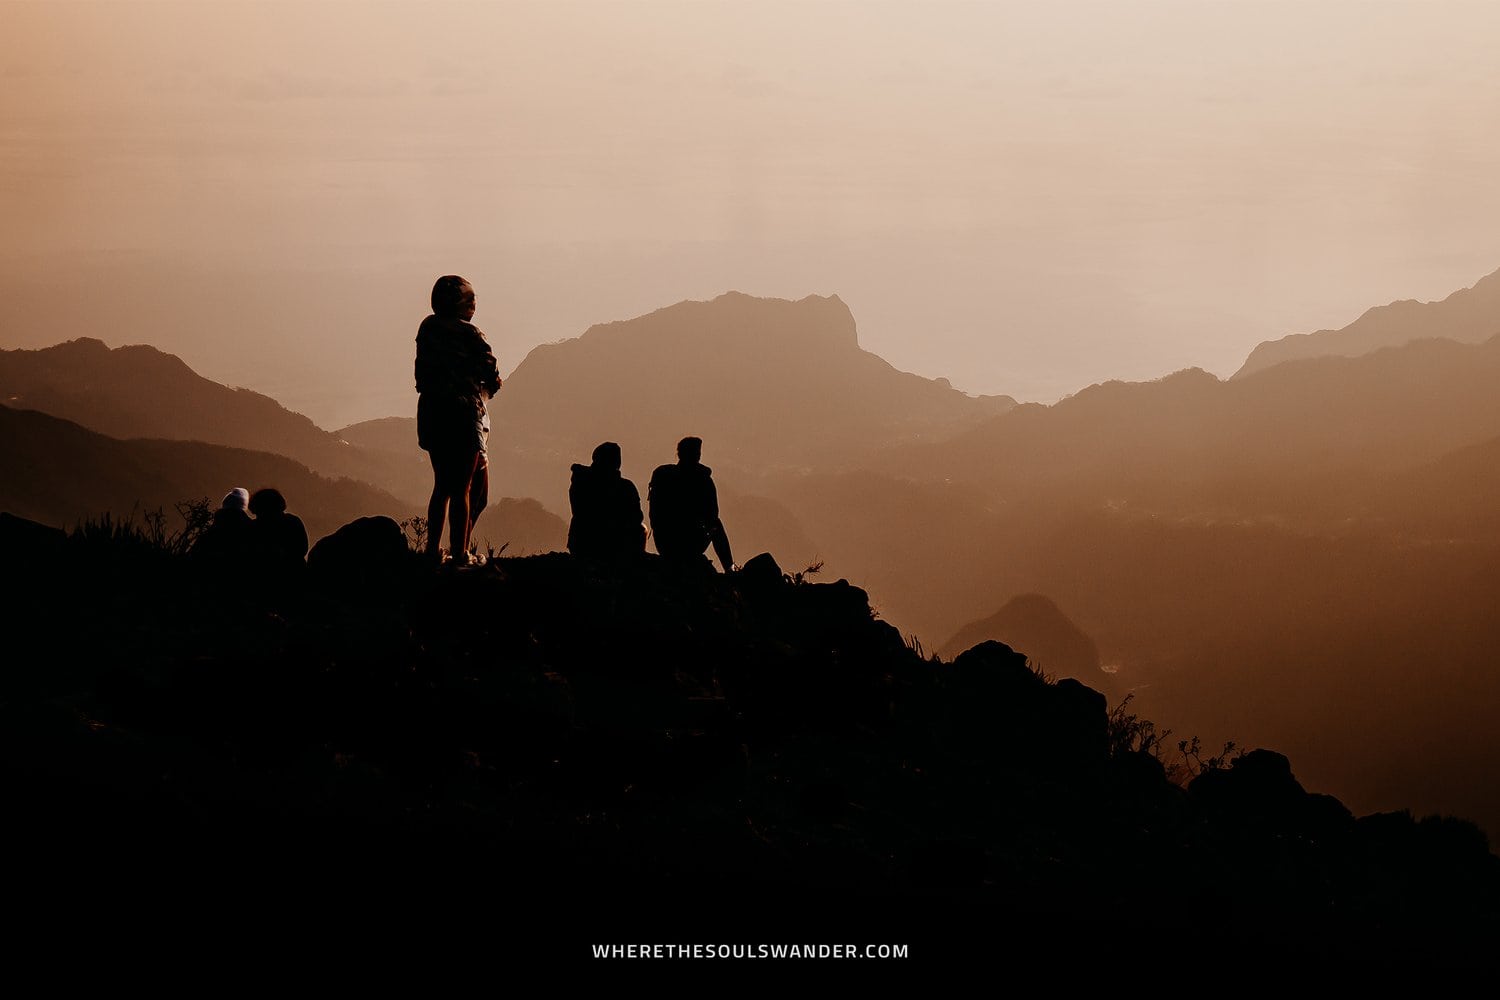
8. Miradouro Ponta da Ladeira
Found on Madeira’s less popular North-western coast, Miradouro Ponta da Ladeira is probably the best viewpoint from where to experience a sunset on Madeira.
Dramatic cliffs, the infinite Atlantic ocean, and the last light of the day illuminating the sky cause for an epic scene, making it the perfect spot for nature lovers and photographers alike.
Add to that, that you’re most likely alone at this viewpoint, and you’re in for a unique, off the beaten path adventure on Madeira.
However, it is good to know that once you’ve reached the parking lot, you need to head to the left-hand side and take a couple of steps down a dirt pathway, before getting to the actual viewpoint of Ponta da Ladeira.
Though it may sound a little more challenging, it’s absolutely worth the extra effort.
Where | Miradouro Ponta da Ladeira
Driving time from Funchal | About 1 hour and 15 minutes
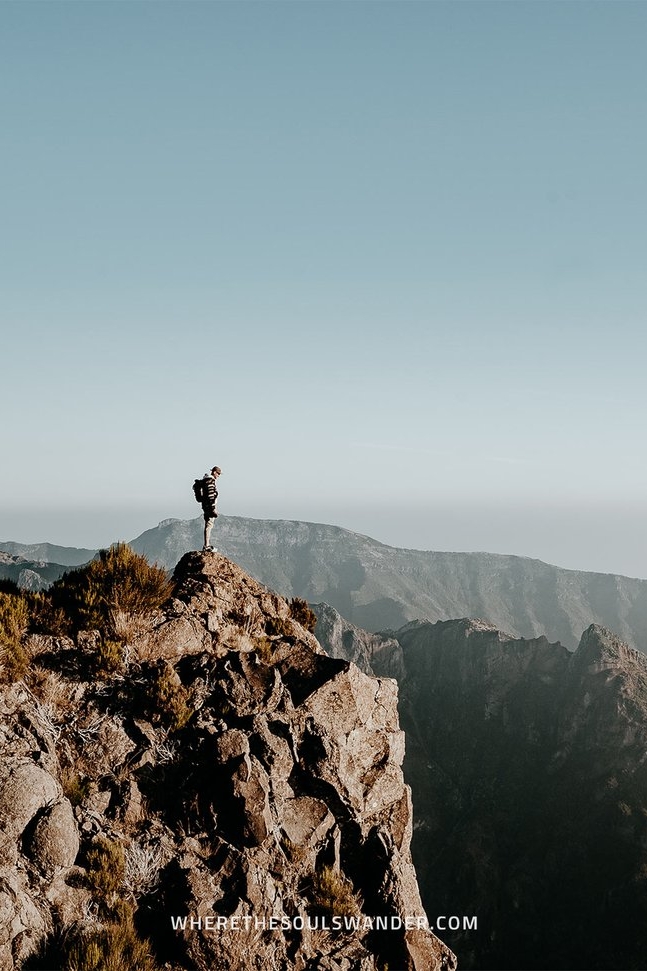
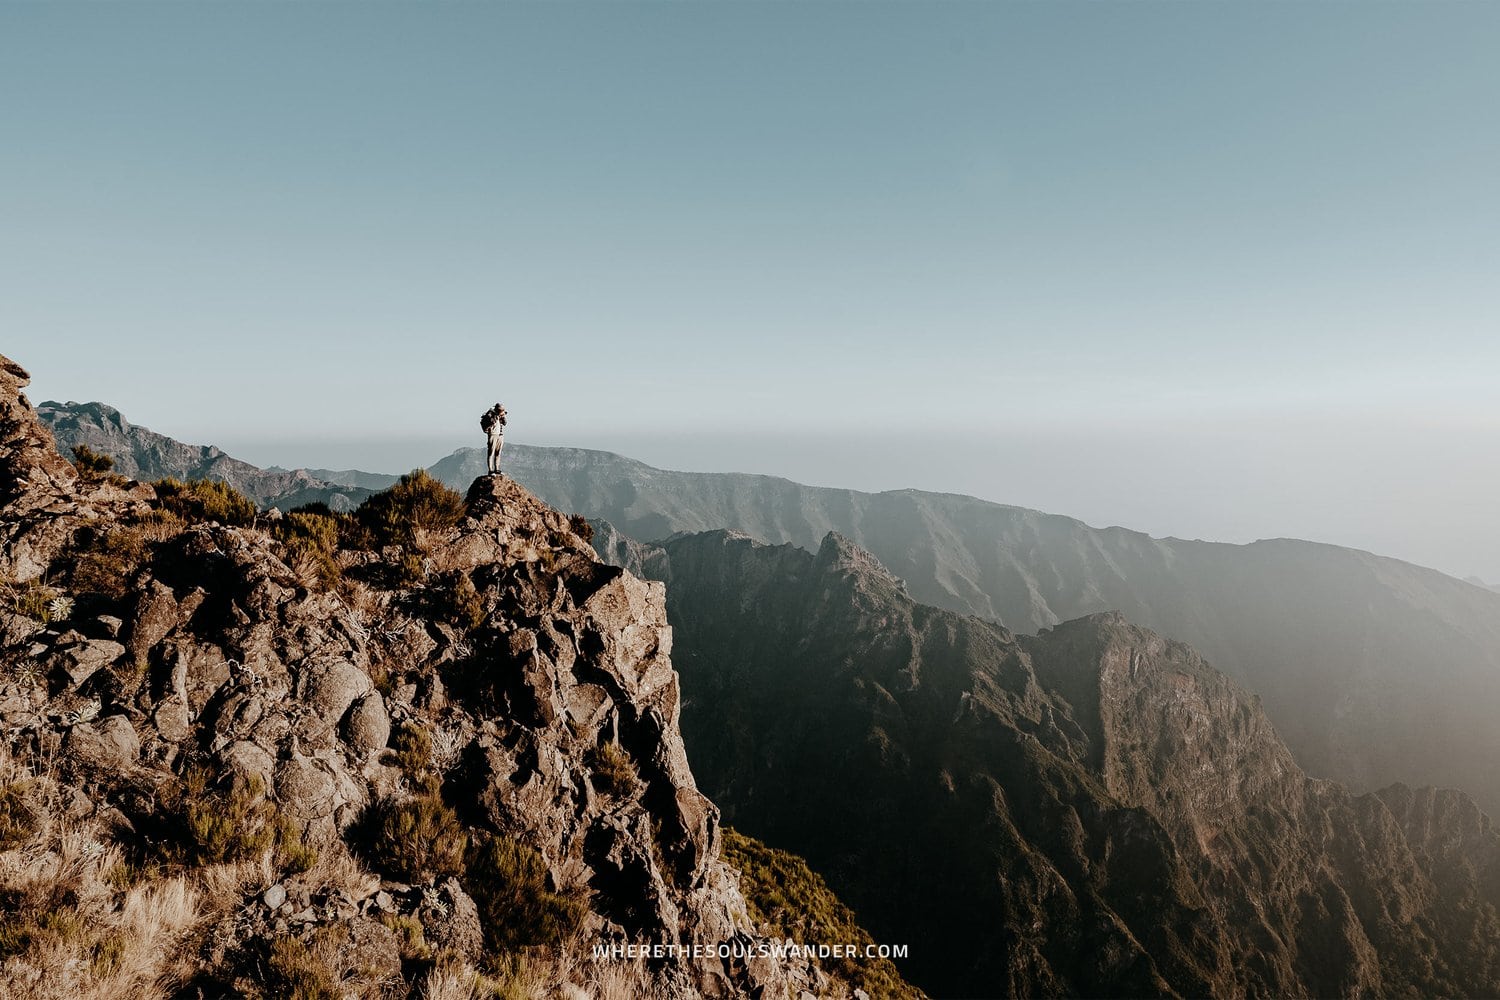
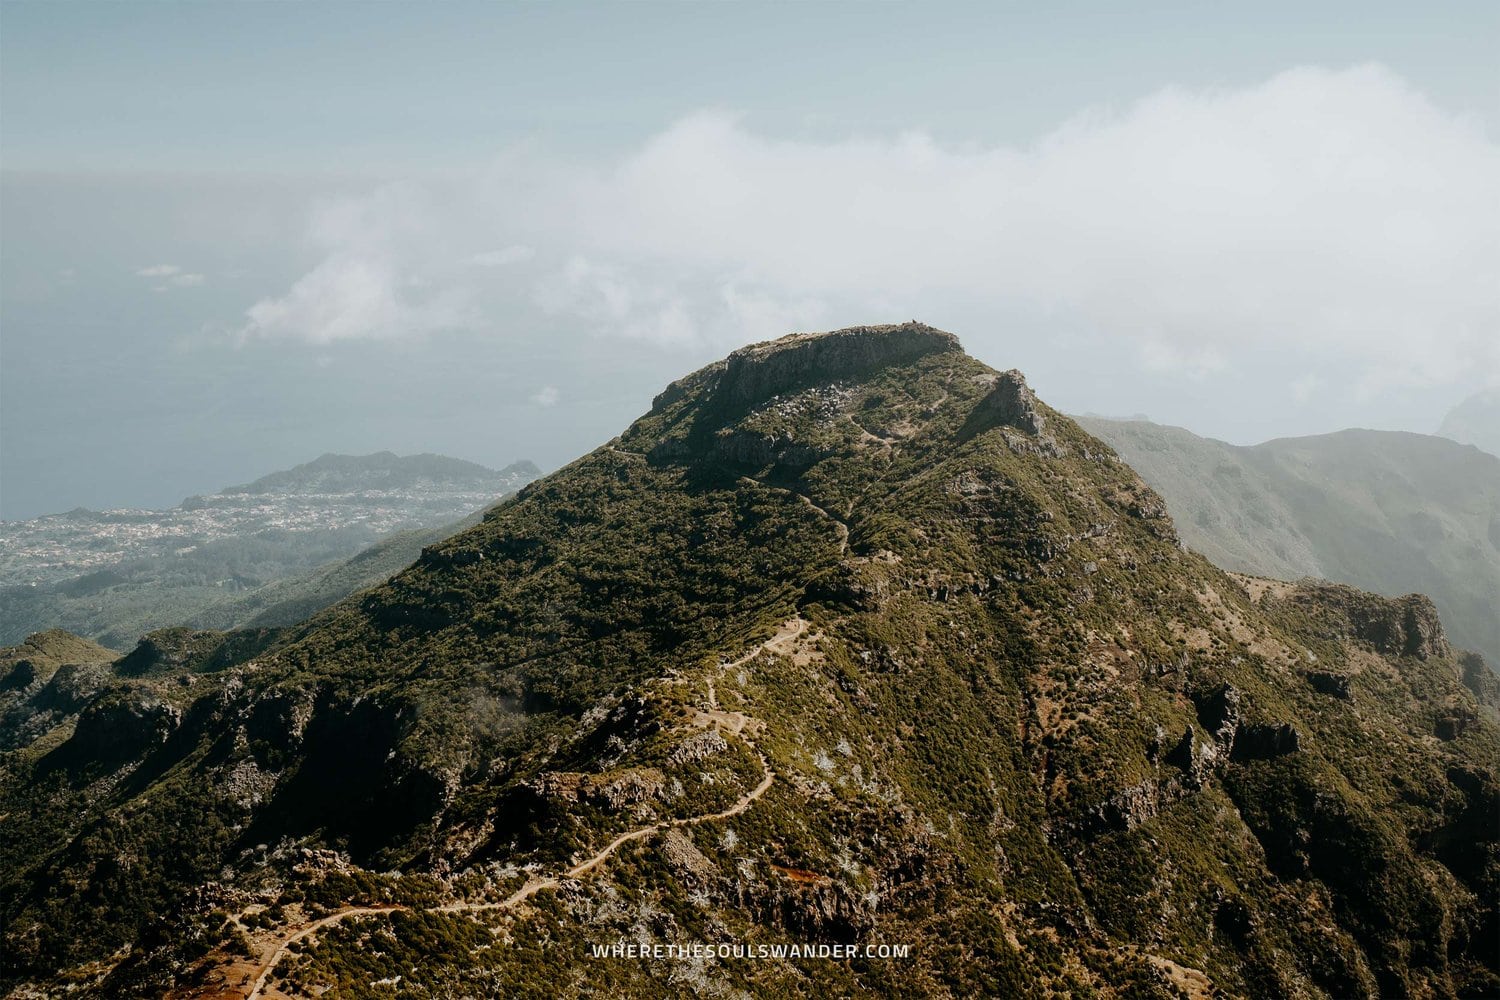
9. Pico Ruivo viewpoint
At 1,862m above sea level, Pico Ruivo has been deemed the highest point of Madeira, which makes it one of the best viewpoints on the island, providing incredible panoramic views of the surrounding mountain ranges.
As a result, there are several hiking trails that will bring you to the summit of Pico Ruivo, including the famous PR1 hike from Pico do Arieiro to Pico Ruivo.
If you’re not into hiking but do want to admire the views from Pico Ruivo, your best option is to start at Achada do Teixeira, as it’s relatively flat and takes only a half-hour to hike to the summit.
Pico Ruivo does get very busy during the day, so I advise visiting at sunrise or sunset.
Where | Pico Ruivo viewpoint
Driving time from Funchal | About 1 hour and 15 minutes
9 viewpoints on Madeira | The essentials
Where to stay on Madeira
Since Madeira is relatively compact, I highly recommend anyone to base themselves in Funchal, the island’s lively capital city.
Funchal is an incredible city and houses plenty of excellent accommodation options, while it’s also packed with history and culture, as well as trendy restaurants and cafes at just about every corner.
To help you find the right accommodation, I’ve listed three of my favourite options below, one of which is marked with a plus – this is the place where I stayed.
+ Vila Baleira | This was my base for the whole of my trip, and if you’re seeking comfort without spending your entire budget straight away, Vila Baleira will be perfect for you too. Located within the popular Lido area, this hotel offers spacious rooms, comfortable beds, a large rooftop terrace with a swimming pool. They also have a tasty breakfast spread, excellent wifi throughout the entire property, and a secured parking lot right under the property.
Hotel Cajú | Set within the heart of Funchal, Hotel Cajú is a great place to stay, with stylish double rooms, friendly staff, and a small yet excellent in-house fitness centre. All bookings come with exceptional breakfast too. One small downside though, they don’t have private parking.
NEXT – Savoy Signature | This budget-friendly hotel in the centre of Funchal has spacious modern-style rooms with comfortable double beds and a brilliant private bathroom with a rain shower. They also have an incredible rooftop swimming pool with amazing sea views. Double rooms at only €50,- per night make this place one of the best picks in Funchal.
Alternatively, search for accommodation in Funchal on booking.com.
Stay safe on Madeira | Travel insurance
Since travelling on Madeira is all about hiking and nature, I recommend everyone to sort out good travel insurance before setting out on their own adventure.
Where we prefer that everything goes smoothly during our travels, something unfortunate can happen at any moment, whether it’s an injury during a hike or an accident on the road.
For travel insurance, I use Heymondo, as they offer full COVID-19 coverage, as well as a handy app with 24-hour medical assistance. Make sure you check it out – readers of WTSW receive 5% off any insurance policy too.
Cheers!
I’ve been on this travel blogging journey since 2019.
If you appreciate what I do here, these are some ways you can support me.
A complete guide to the PR1 hike from Pico Do Arieiro to Pico Ruivo
When going to an island that is famous for its insane natural highlights, it can be rather overwhelming to determine which exact hikes you should include in your Madeira itinerary.
Nevertheless, I’m of the firm belief that the PR1 hike from Pico do Arieiro to Pico Ruivo should be included at all times.
Running straight through the heart of Madeira’s Central Mountain Massif, the Vereda do Arieiro hike connects two of Madeira’s highest peaks; Pico do Arieiro and Pico Ruivo.
The hike itself – which is known as the PR1 hike too – has blown up in popularity over the last few years and has accordingly become the number one tourist attraction on Madeira.
Home to arguably some of the most iconic views of Madeira, this hike is simply up there with the very best of ‘em, making it one of my absolute favourite hikes, ever!
But it isn’t only one of the most picturesque hikes on Madeira, no, it’s also one of the toughest, with an overall inclination of approximately 1,000 metres.
To help you have a comfortable hike, I’ve put together this in-depth guide on the PR1 hike from Pico do Arieiro to Pico Ruivo, including all the essentials and plenty of my best hiking tips too.
If you choose to use any of the links on this page, I may receive a small commission at no extra cost to you. By using these links, you’ll have a direct impact on WTSW and my ability to continue to create free insightful travel content for you. If you find any of my tips useful, you can support me by buying a virtual coffee here.
A complete guide to the PR1 hike from Pico do Arieiro to Pico Ruivo
Where is the PR1 hike from Pico do Arieiro to Pico Ruivo
Vereda do Arieiro connects two of Madeira’s highest peaks; Pico do Arieiro (1,818m) and Pico Ruivo (1,862m), and is situated in the heart of the Central Mountain Massif, at roughly an hour’s drive from Funchal.
Integrated within the Natura 2000 Network, this area is famous for its fascinating hiking trails, with the incredibly popular PR1 Vereda do Arieiro hike as its undisputed highlight.
Pico do Arieiro to Pico Ruivo hike details
Pico do Arieiro to Pico Ruivo hike details
HIKE DIFFICULTY
MODERATE – HARD
HIKE DURATION
5 – 7 HOURS
HIKE DISTANCE
12KM ROUND TRIP
ELEVATION GAIN
800 – 1,200 METERS

How to get to the Pico do Arieiro to Pico Ruivo hike
CAR | As with most of the highlights on Madeira, the starting point of the PR1 hike on Vereda do Arieiro is best reached by car, so I highly advise visiting as part of your own Madeira road trip.
From Funchal, it takes about 30 to 60 minutes to reach the car park of Pico do Arieiro. From here, it’s only two more minutes until you reach the iconic sunset viewpoint.
To me, the journey to Vereda do Arieiro adds a great dose of extra adventure to the overall experience, especially if you’re planning to start the hike before sunrise.
The road up is packed with hairpin bends, and you will also drive on some of the steepest bits of the island, so if you haven’t driven in a long time, be cautious! I’ve written this guide about driving on Madeira, so make sure you give that a read too.
For car rental on Madeira, I highly advise Rentalcars.com. Not only do they have a wide range of cars to choose from, but they also provide brilliant service and additional insurance options.
Additionally, I also highly recommend DiscoveryCars.
TOUR | If you’re not entirely sure if you want to rent a car, that’s okay, there are quite a few tours of the popular PR1 hike from Pico Do Arieiro to Pico Ruivo too.
For those keen to start the hike with sunrise, I highly recommend this guided hike of Vereda do Arieiro organised by a certified mountain guide. Not only does this tour offer hotel pickup and dropoff service from Caniço or Funchal, but the group size is also limited to only 8 people.
Not a morning person, opt for this full-day guided tour. With pickup time from your hotel at 08:30, this tour is perfect for those who prefer to sleep in during their holidays.
TRANSFER | While I’m of the firm belief that renting a car is the best way to explore Madeira, you can also choose to be driven to the starting point of the hike by Pico Transfers.
This budget-friendly option offers pickup and drop off in Funchal and Caniço, and is brilliant if you haven’t rented a car, or are looking to do the hike in one direction.
Once you arrive at Pico Do Arieiro, you can enjoy an epic sunrise before starting the hike to Pico Ruivo at your own pace. After the hike, you will be picked up at Achada Do Teixeira at the pre-arranged time. The transfer takes around 45 minutes and costs €33 per person.
The PR1 hike from Pico do Arieiro to Pico Ruivo
Sunrise at Pico do Arieiro
Upon arrival, I advise you to head directly to Miradouro Juncal, Pico Do Arieiro’s main sunrise point, and without question one of the best places to watch the sunrise on Madeira.
While the main viewpoint of Miradouro Juncal is usually overrun by fellow travellers, the area itself is relatively vast, which makes it easy to find a quiet space to watch an epic sunrise unfold.

Section I
The starting point of the hike is situated on the left-hand side of the weather station, right after the parking area. The trail begins fairly easy with plenty of signposts and a clear paved pathway.
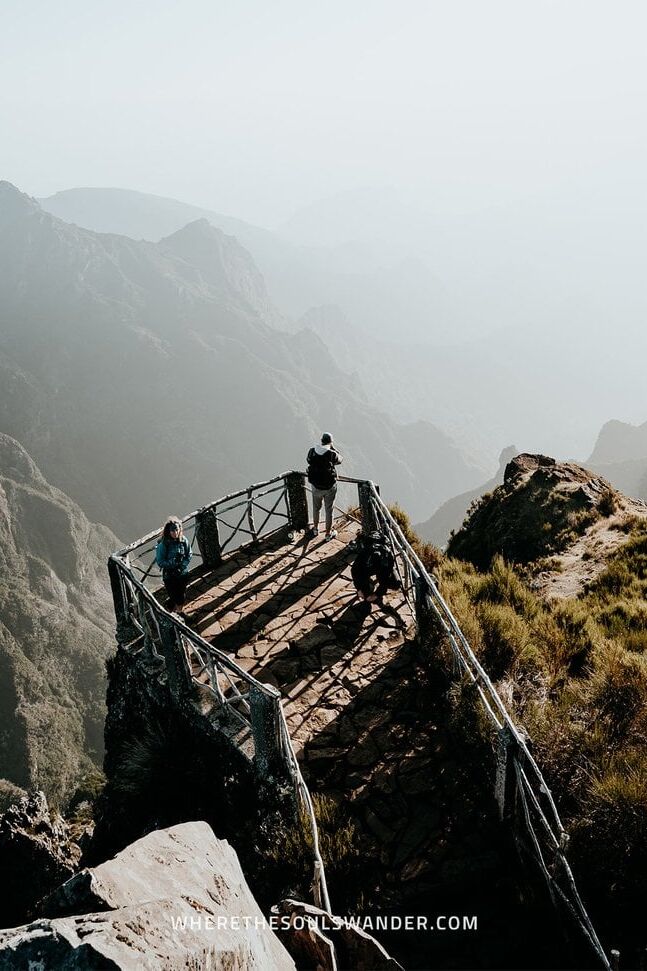
After about 15 minutes, you’ll reach the first real highlight; Miradouro do Ninho da Manta, a panorama viewpoint that is also known as the Buzzard’s Nest. Here you’ll find a small balcony that welcomes you to some of the best views of the surrounding valley.
After a short stop at Miradouro do Ninho da Manta, it is time to head in the direction of Miradouro Pedra Rija, where you will find the incredible Stairway to Heaven.
On a cloudy day, this section of the hike is incredibly moody and dramatic, which is why it has become my absolute favourite part of the PR1 hike from Pico Do Arieiro to Pico Ruivo.
Section II
Once you’ve passed Miradouro Pedra Rija, it is all about descending, with plenty of stairs down until you reach the first of a series of tunnels, with the longest being roughly 150 metres long.
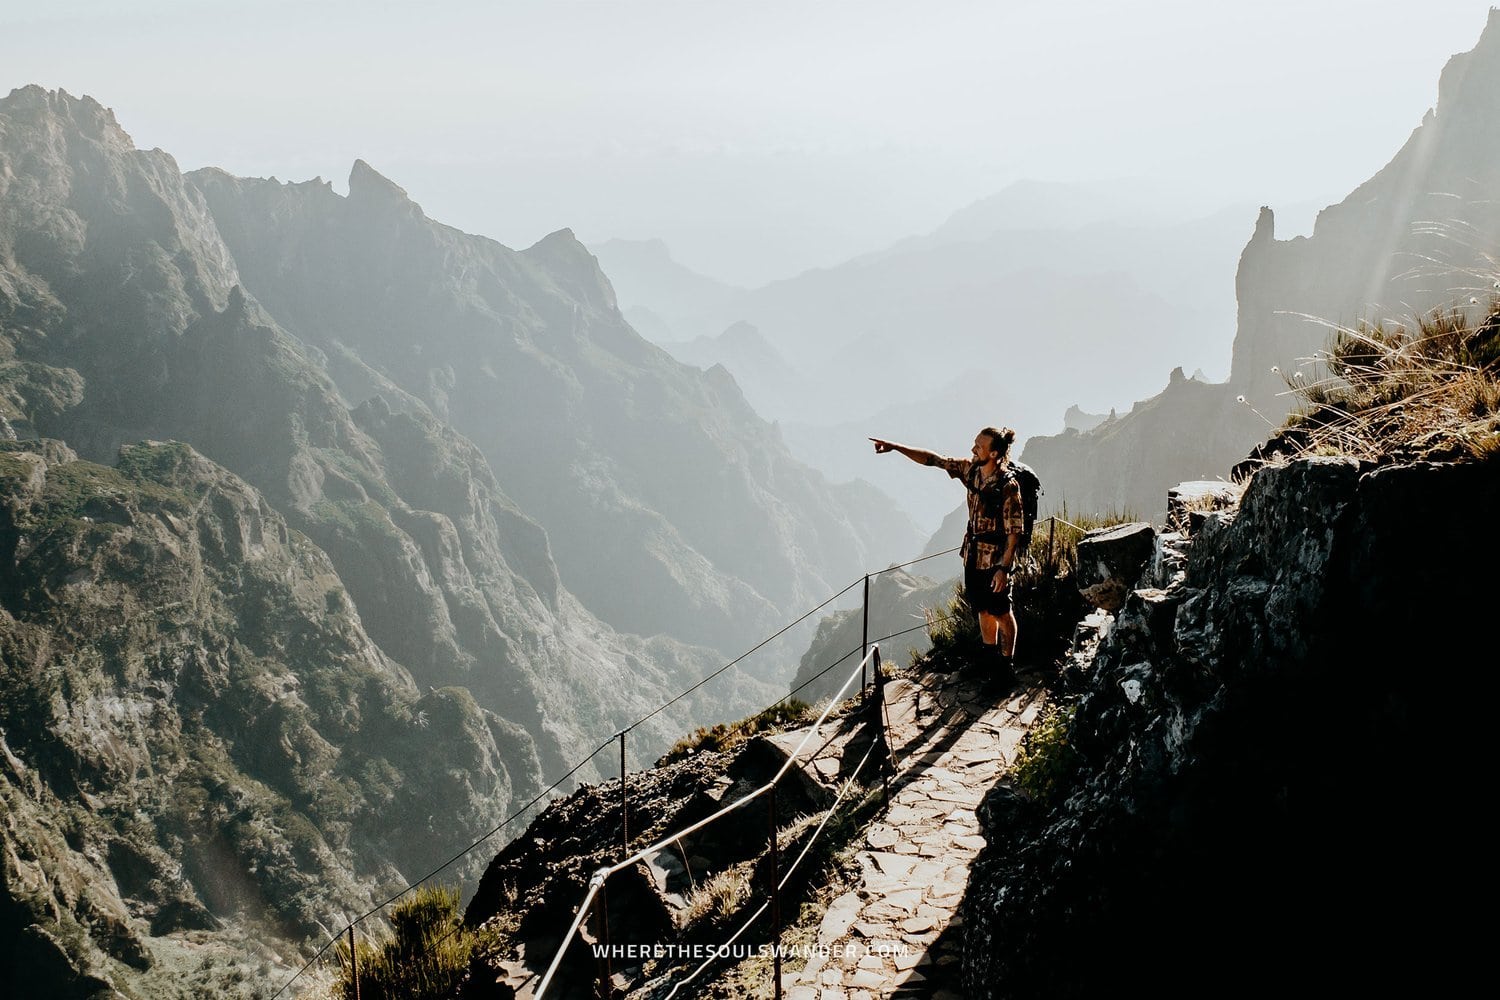
After a short while, the trail becomes flat and is literally carved out of the side of a mountain. Though this part isn’t the most picturesque, it was excellent to catch a good breather before the steep climb up ahead.
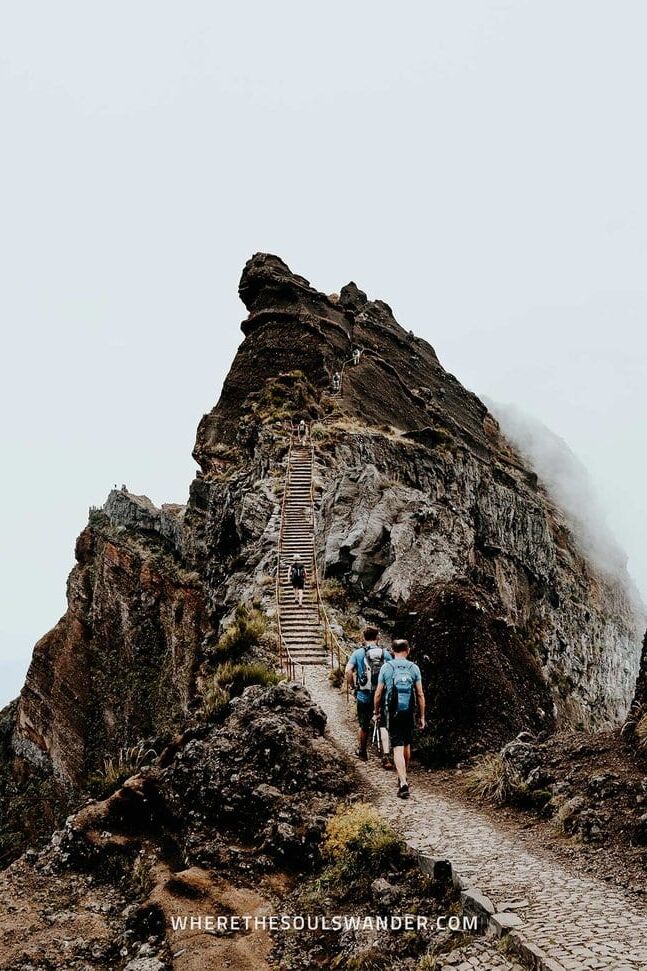
As mentioned above, it isn’t all fun and games. After following the narrow path for around 20 minutes, it is time to climb up a steep sequence of stairways, some of which are nearly completely vertical.
To me, this part is without question the toughest part of the entire hike, as it requires quite a bit of stamina to get to the other side of the mountain.
But as soon as you’ve reached the top, you will be greeted by stunning views of the entire region. I chose to have a short break here before I started the final section of the hike.
Section III
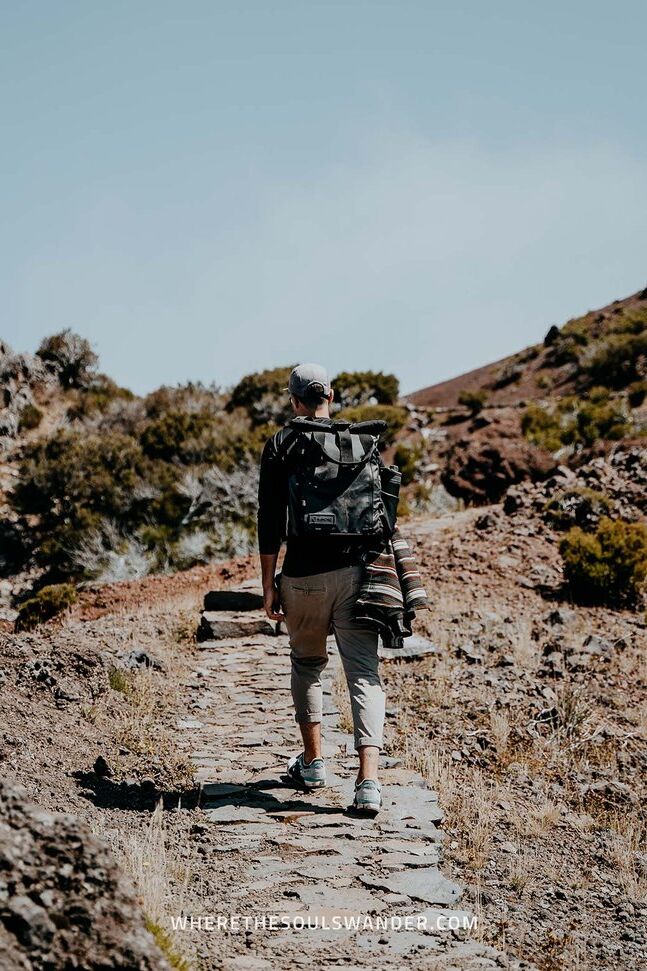
The third and final section of the hike begins with an easy, yet scenic path along a group of white dead trees. It’s pretty picturesque and relatively flat for nearly 25 minutes.
Right before the final climb, you stumble upon Casa do Abrigo Mountain Hut, a small cafe where you can get several beverages and snacks. After a quick stop and a coffee, it was finally time for the last climb up.
From the cafe, It took me only 10 minutes uphill until I reached the summit of Pico Ruivo
The Pico Ruivo summit
Upon arriving at the Pico Ruivo summit, you will be greeted by some of the best views of the island. On a clear day, you’ll have breathtaking views as far as the eye can see.
That, and you have now officially set foot upon the highest point on Madeira at 1,862m above sea level.
I’ve spent around an hour exploring the various corners and viewpoints of Pico Ruivo before making my way back to the trail.
How to wrap up the hike
While I personally chose to hike back to the starting point at Pico Do Arieiro, it’s also completely possible to do the hike in one direction.
Though it is worth saying that the hike out and back is rather intense, I also believe it’s an awesome experience, since the route back showcases the landscape from a totally different perspective.
For those looking to do the PR1 hike in one direction, I’d highly advise checking out Pico Transfers, as they offer affordable transfer services to the beginning and endpoint of the hike.
Additionally, if you’re an advanced hiker, it is also possible to combine the PR1 Vereda do Arieiro hike with either the PR1.2 Achada do Teixeira hike or the PR1.3 Vereda da Encumeada hike – but I’ll leave that up to you!
The best time of day to hike from Pico do Arieiro to Pico Ruivo
Given sunrise at Pico Do Arieiro is one of the absolute highlights on the island, I’d recommend arriving far before the iconic ‘golden hour’ starts.
However, with the weather being a tad unpredictable on Madeira, I’d highly suggest checking the weather conditions at Pico Do Arieiro before your visit via this convenient webcam.
If you’ve already experienced the sunrise at Pico Do Arieiro, you could also choose to start the hike a little later in the day. For me, this shouldn’t even be an option, since sunrise at Pico Do Arieiro is simply too good to miss out on!
The best time of year to hike from Pico do Arieiro to Pico Ruivo
Since Madeira enjoys comfortable weather year-round, I believe the PR1 hike from Pico Do Arieiro to Pico Ruivo isn’t necessarily subject to a particular time or season.
In terms of weather, June, Juli and August are considered the best months to explore the island. One thing worth mentioning is that you will be sharing your experience with bigger crowds during these summer months.
To me, the best time to visit Madeira and hike Vereda do Arieiro is during the shoulder months of May, September and October.
I hiked from Pico Do Arieiro to Pico Ruivo at the beginning of October and had excellent circumstances throughout the entire hike.
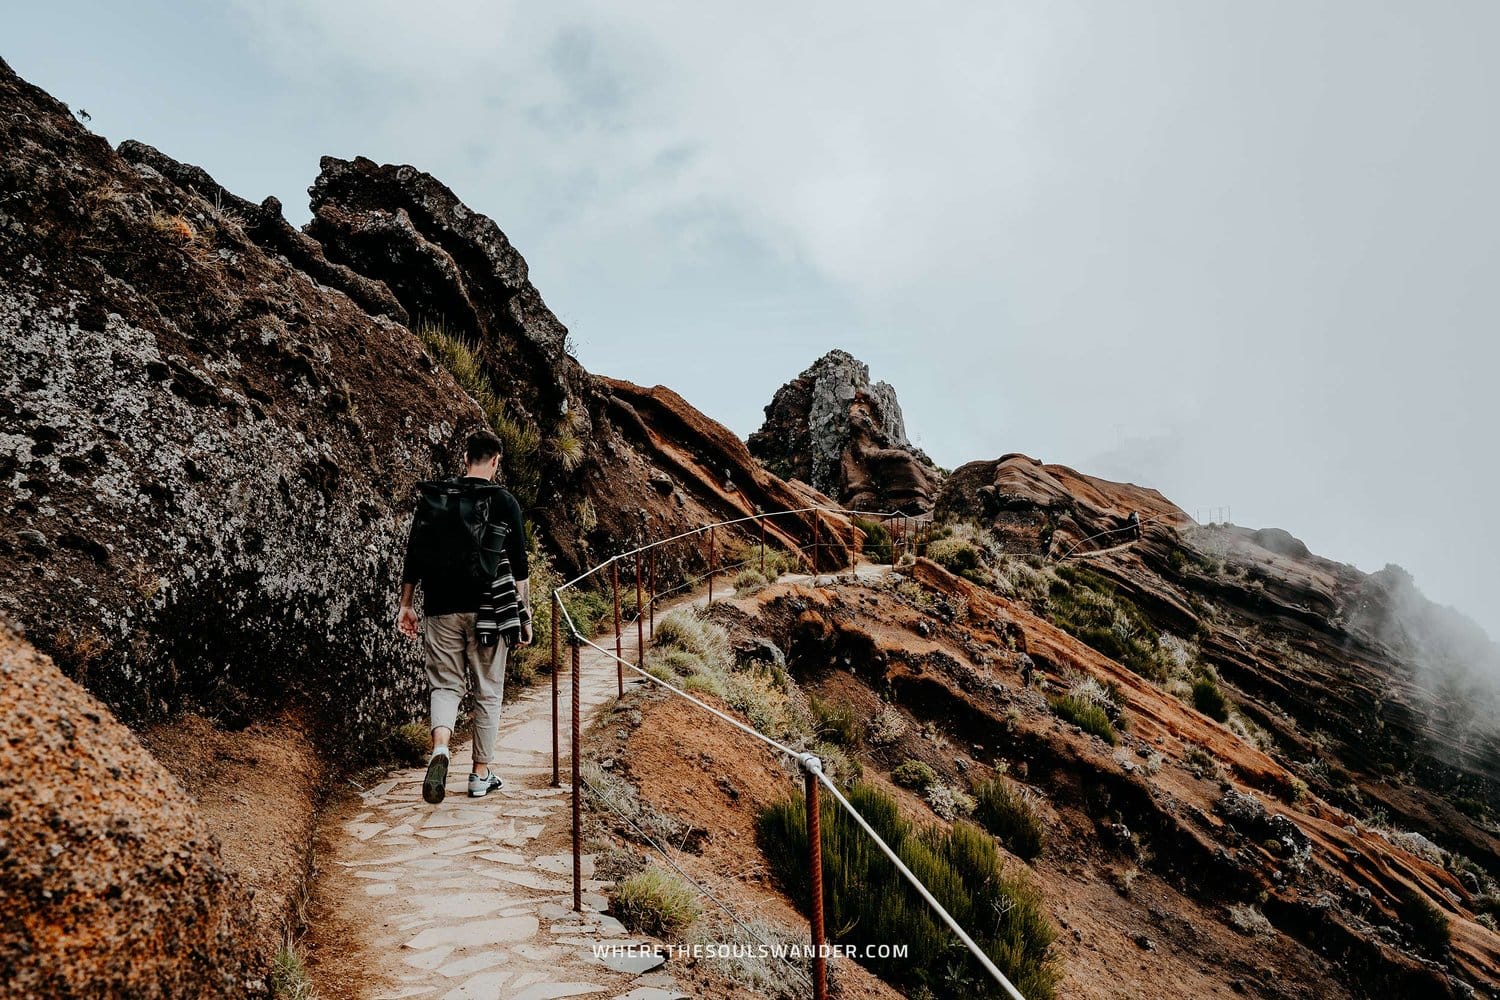
What to pack for the PR1 Verada do Arieiro hike
As with any hike, I believe it’s crucial that you’re well-equipped before you begin the PR1 hike from Pico Do Arieiro to Pico Ruivo.
To help you have a stress-free journey, I’d highly suggest packing the following items:
A REUSABLE WATER BOTTLE | One travel essential that I carry with me at all times is the Grayl Geopress. This reusable water purification bottle allows me to fill up water from nearly every water source, making it one of my best investments to date.
LAYERS | Since this hike is best started before sunrise, I highly recommend wearing layers. I took a hoodie with me, which was much needed, especially in the early morning. Also, given that the temperature can change dramatically at various points of the hike, it’s not a bad thing to bring a raincoat too.
HIKING BOOTS OR A GOOD PAIR OF SNEAKERS | While hiking boots definitely provide more stability to your ankles, I believe you could easily get the job done in a good pair of sneakers – just be sure that they have a firm sole with enough grip, so you’re supported when things get slippery. I recently bought the New Balance Hierro v7, and am really happy with them, as they offer all the feats of a hiking boot, while still looking like a dope sneaker.
SUN PROTECTION | Given that there is hardly any shelter throughout the hike, it is wise to bring good sunscreen and a hat. Even when the sun hides behind the clouds, it is still possible to get burnt.
SNACKS | Even though I practise intermittent fasting, and prefer to hike on an empty stomach, I always bring a few snacks to fuel me during my hikes. And I advise everyone to do the same, especially since you’ll only be able to buy something at the beginning or end of the hike. So, don’t mind bringing some fruits, nuts and a few protein bars. Also, bring enough cash to get a coffee or some snacks from the mountain hut if necessary.
HIKING POLES | I did the PR1 hike without hiking poles, but if you have poor knees or prefer a little support during the more strenuous parts of the trail, I highly suggest/advise bringing a set of quality hiking poles. These Montem Ultra Strong Hiking Poles are light, collapsible, and a great value for the price.
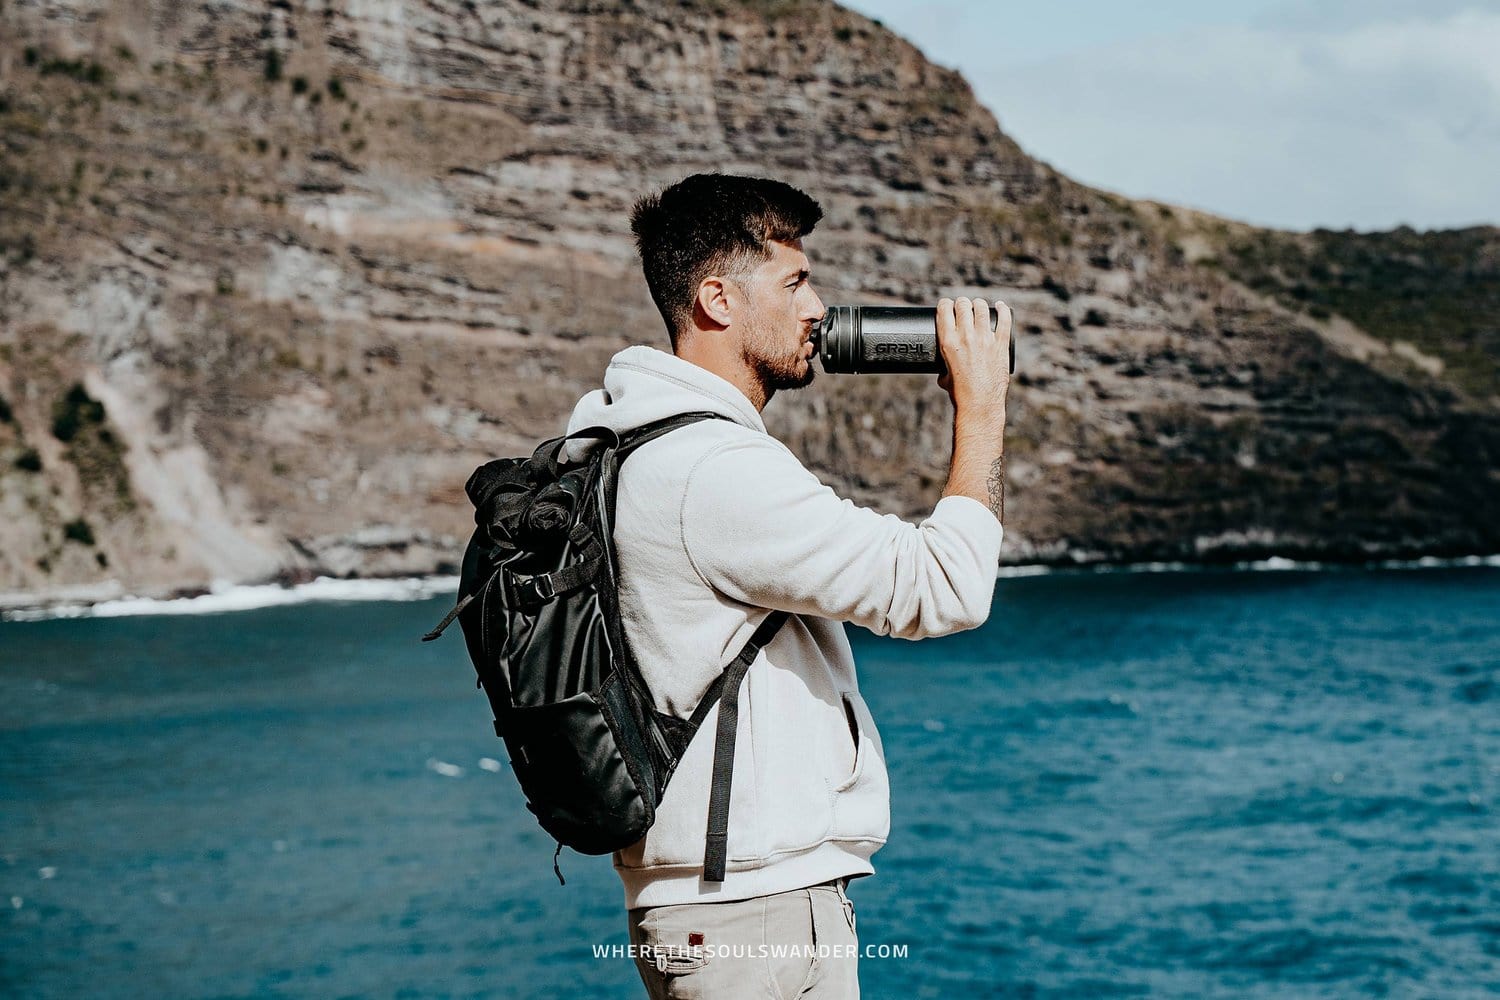
Where to stay on Madeira
Given Madeira is rather compact, I highly recommend anyone to base themselves in Funchal, Madeira’s vibrant capital city.
Funchal is an awesome city in its own right and is home to plenty of excellent accommodation options, is packed with history and culture, plus it has trendy restaurants and cafes at just about every corner.
To help you find suitable accommodation, I’ve listed three of my favourites below, one of which is marked – this is the place where I stayed.
+ Vila Baleira | This was my base for the whole of my trip, and if you’re seeking comfort without spending your entire budget straight away, Vila Baleira will be perfect for you too. Located within the popular Lido area, this hotel offers spacious rooms, comfortable beds, and a large rooftop terrace with a swimming pool. They also have a tasty breakfast spread, excellent wifi throughout the entire property, and a secured parking lot right under the property.
NEXT – Savoy Signature | This budget-friendly hotel in the centre of Funchal has spacious modern-style rooms with comfortable double beds and a brilliant private bathroom with a rain shower. They also have an incredible rooftop swimming pool with amazing sea views. Double rooms at only €50,- per night make this place one of the best picks in Funchal.
Hotel Cajú | Set within the heart of Funchal, Hotel Cajú is a great place to stay, with stylish double rooms, friendly staff, and a small yet excellent in-house fitness centre. All bookings come with exceptional breakfast too. One small downside though, they don’t have private parking.
Stay safe on Madeira | Travel insurance
Since travelling on Madeira is all about hiking and nature, I recommend everyone to sort out good travel insurance before setting out on their own adventure.
Where we prefer that everything goes smoothly during our travels, something unfortunate can happen at any moment, whether it’s an injury during a hike or an accident on the road.
For travel insurance, I use Heymondo, as they offer full covid-19 coverage, as well as a handy app with 24-hour medical assistance. Make sure you check it out – readers of WTSW receive 5% off any insurance policy too.
Cheers!
I’ve been on this travel blogging journey since 2019.
If you appreciate what I do here, these are some ways you can support me.
Some photographs in this guide are captured by my dear friend Andre Smits – make sure you will have a look at his insane work here.
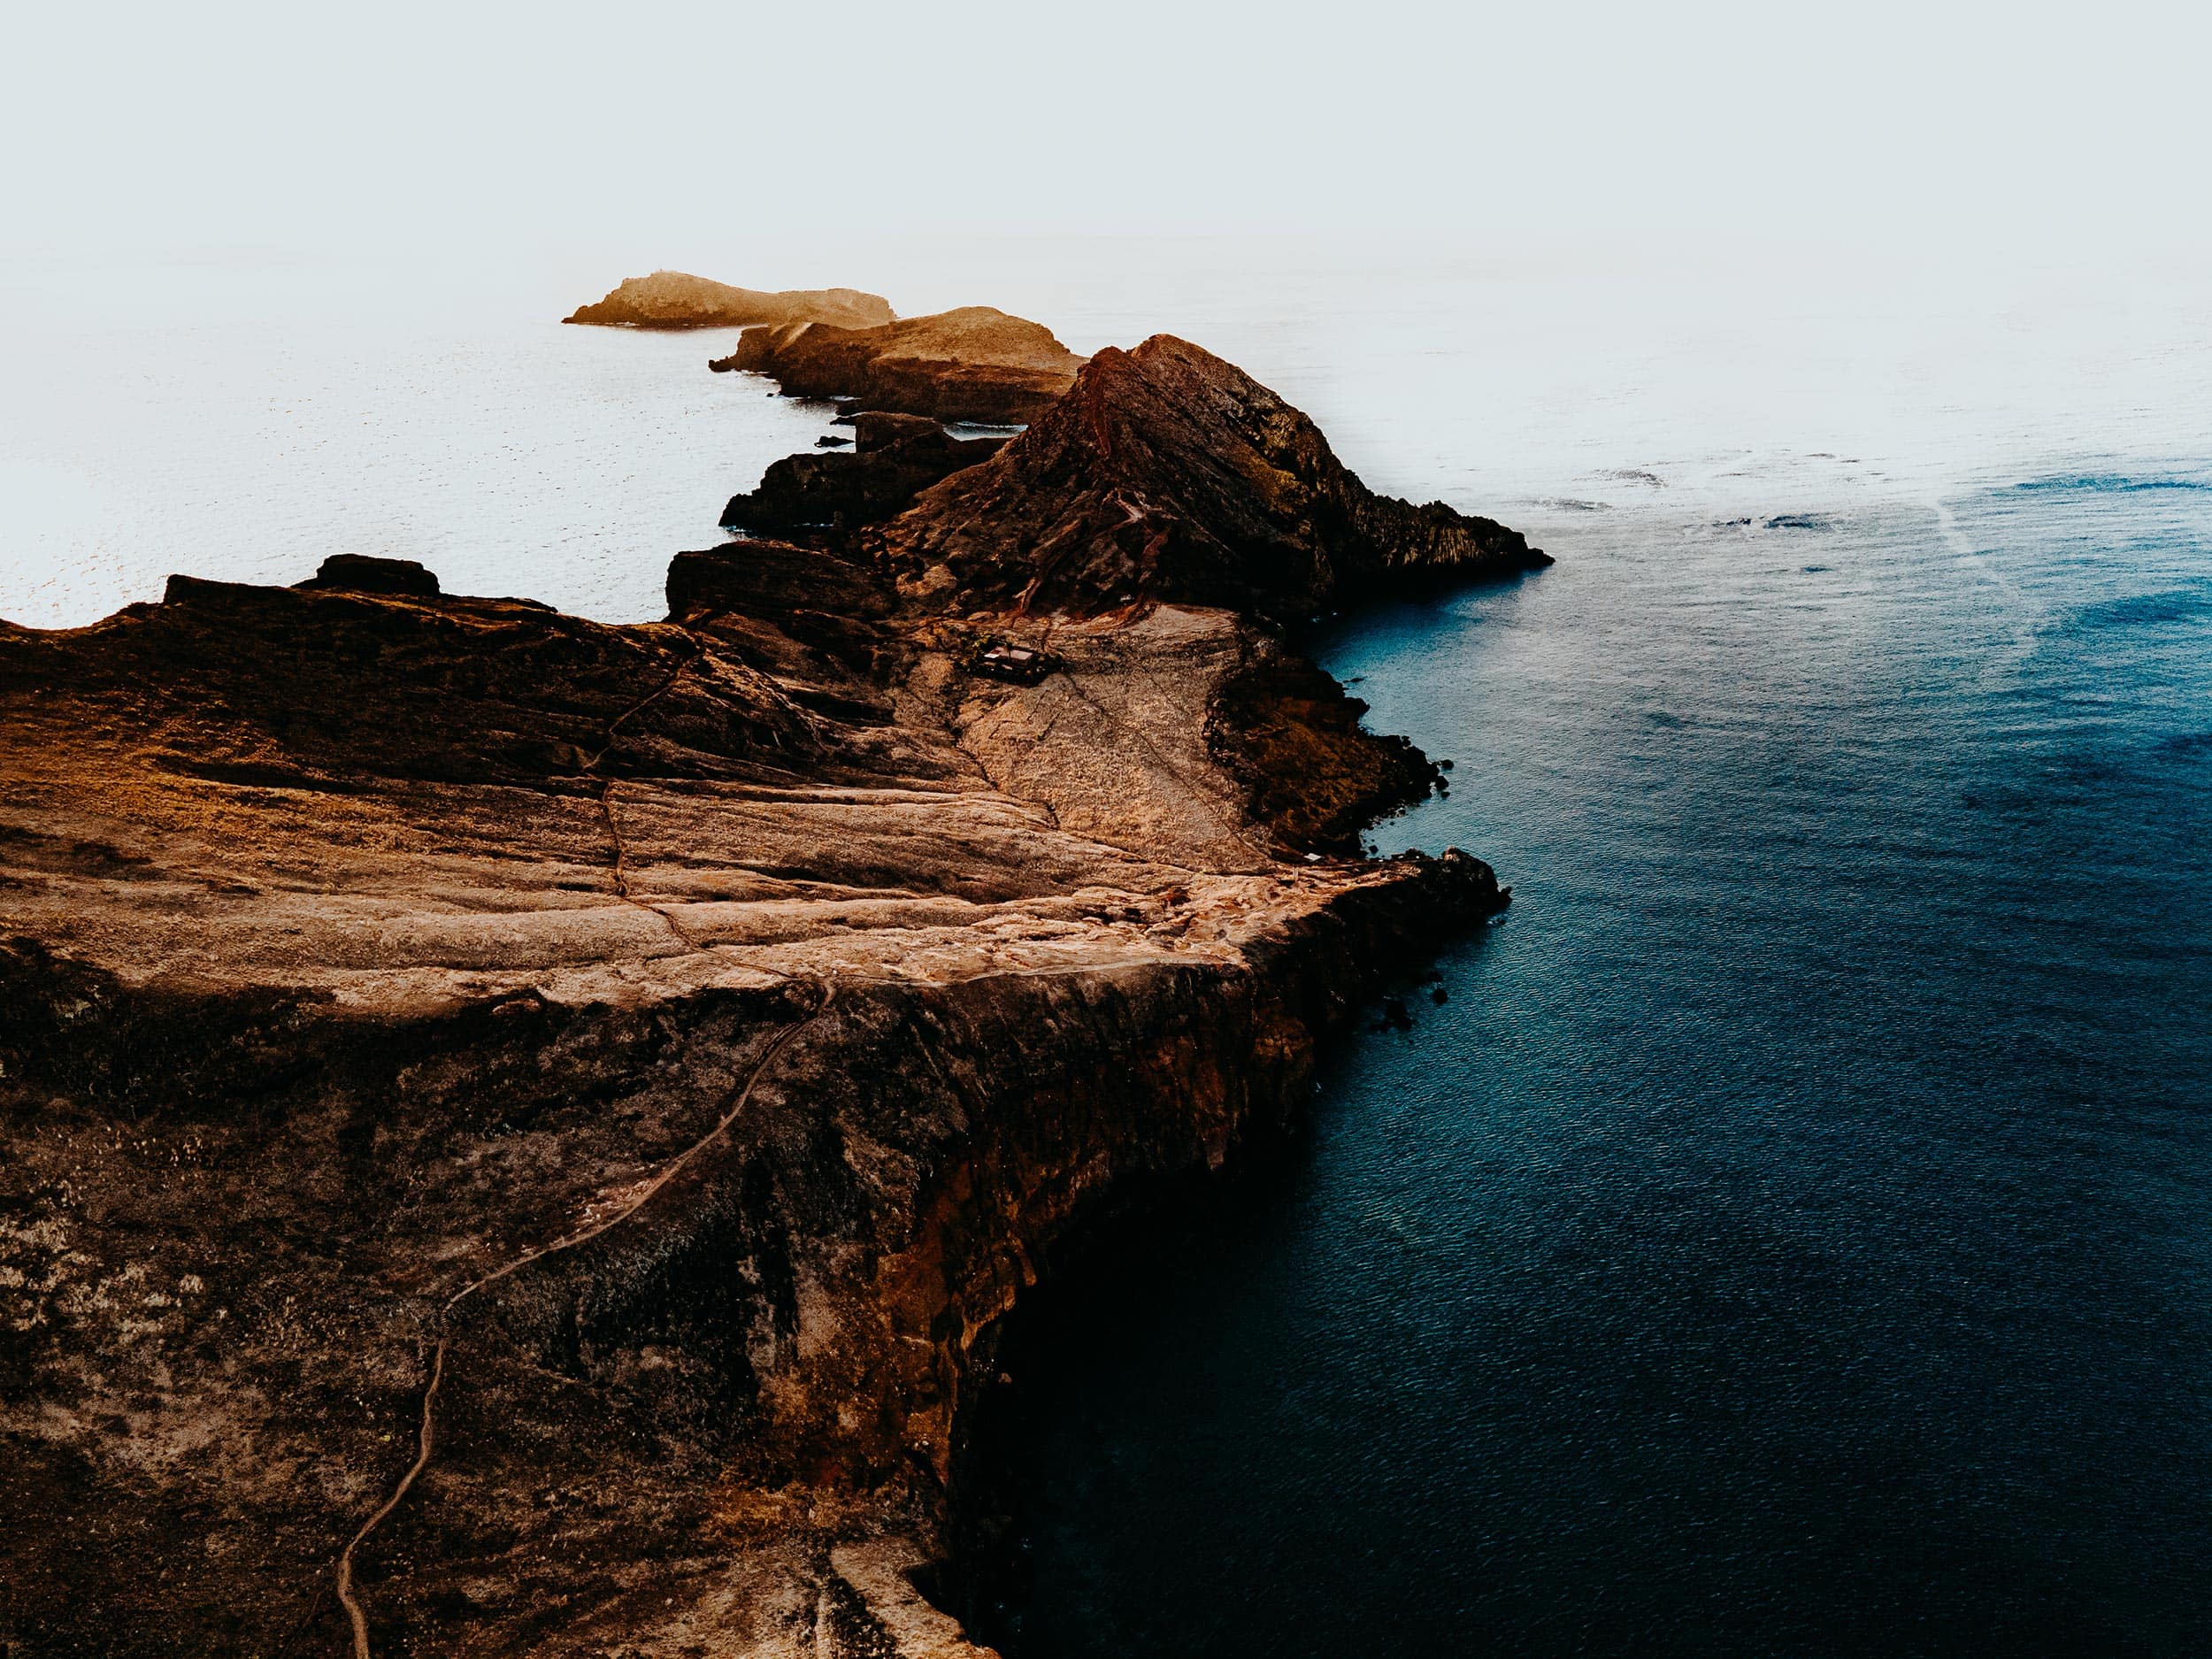
The PR8 hike on Vereda da Ponta de São Lourenço: Madeira's unique volcanic peninsula
The PR8 hike on Vereda da Ponta de São Lourenço: Madeira's unique volcanic peninsula - Updated 2024
My first impression of Vereda da Ponta de São Lourenço came from the window of my plane as it slowly descended to the Cristiano Ronaldo International Airport in Funchal.
As I was welcomed by these incredible views, I instantly remembered why I’d put Vereda da Ponta de São Lourenço atop my list with things to do on Madeira.
Situated on the easternmost point of Madeira, the Vereda da Ponta de São is volcanic in origin, which makes it utterly unique in comparison to landscapes elsewhere on the island.
Accordingly, the PR8 hike on Ponta de São Lourenço has become one of the most popular hiking trails on Madeira. Though it’s relatively easy and only seven kilometres round trip, the area’s scenery is hard to outrival. For me, it was definitely one of my favourite hikes on Madeira.
In this guide, I’ve covered everything you need to know before hiking Vereda da Ponta de São Lourenço, including how to get to the trailhead, the best time to visit, insights on a cool extra viewpoint and more.
If you choose to use any of the links on this page, I may receive a small commission at no extra cost to you. By using these links, you’ll have a direct impact on WTSW and my ability to continue to create free insightful travel content for you. If you find any of my tips useful, you can support me by buying a virtual coffee here.
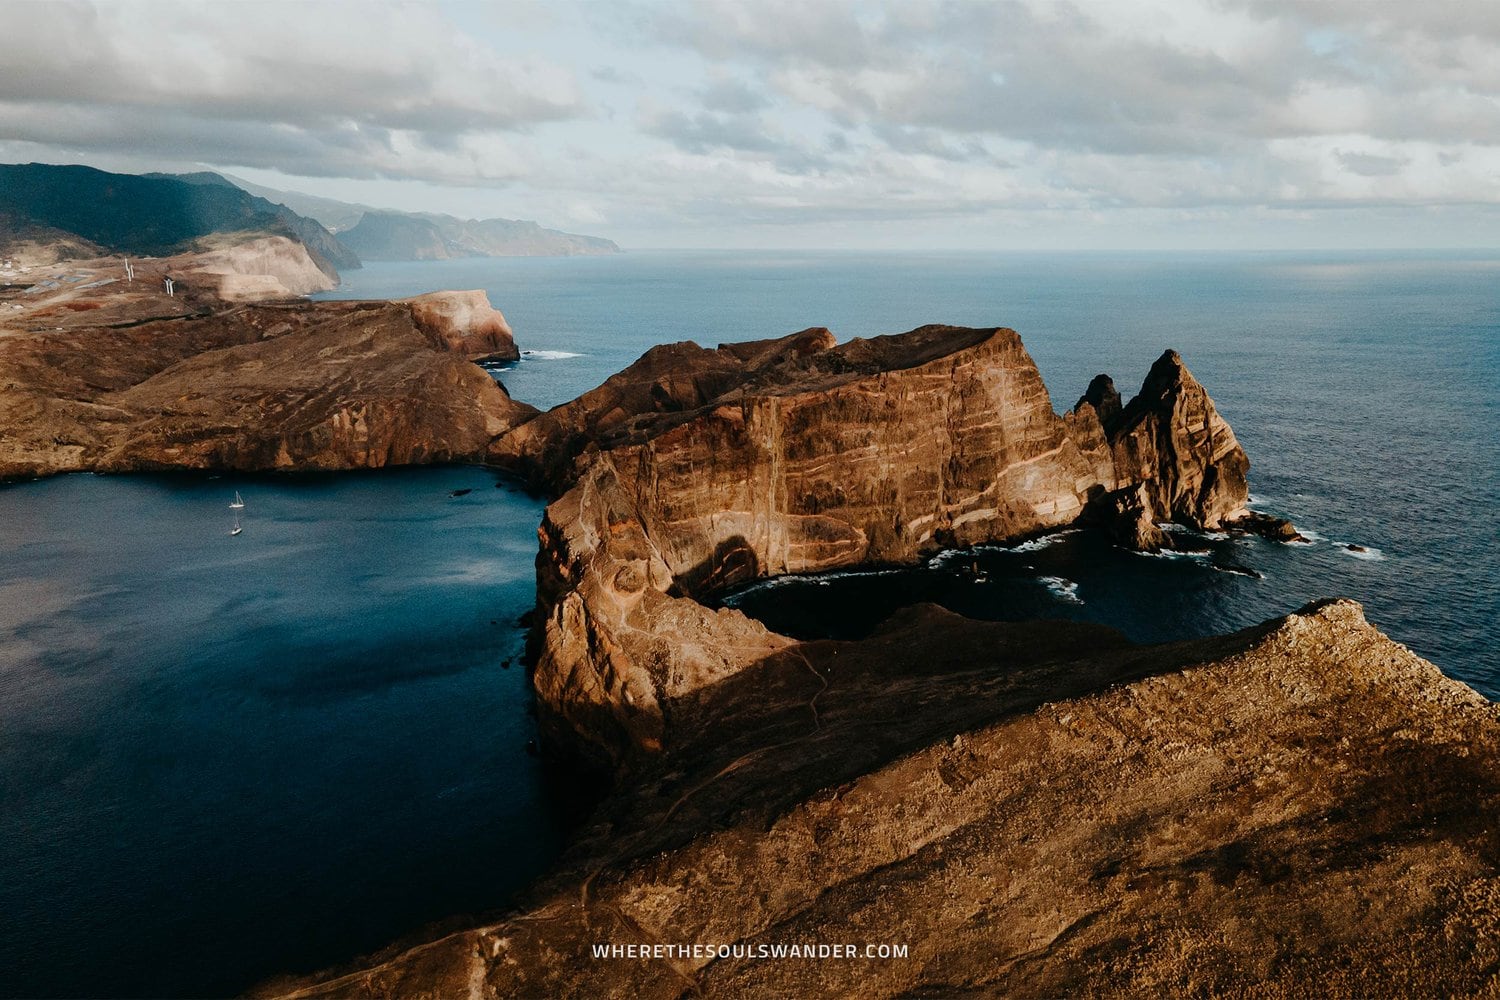
Where is Ponta de São Lourenço
Ponta de São Lourenço is a spectacular peninsula, situated on the easternmost point of Madeira’s rugged coastline, at about half an hour drive from Funchal.
Named after the vessel sailed by João Gonçalves de Zarco, this extraordinary peninsula is volcanic in origin and is now home to one of the most popular hiking trails on Madeira.
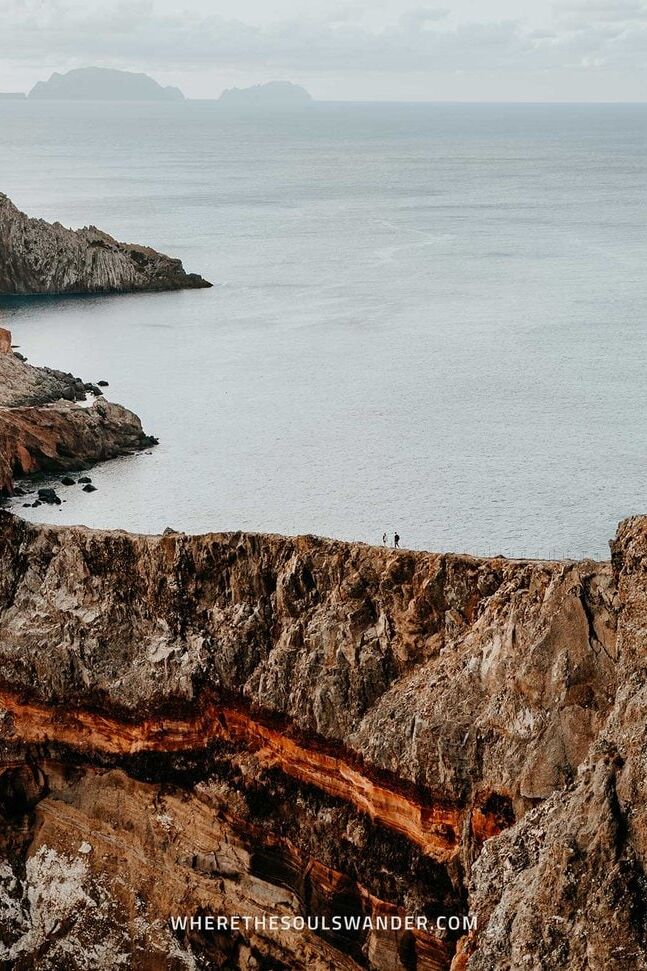

Vereda da Ponta de São Lourenço hike overview
HIKE DIFFICULTY
EASY
HIKE DURATION
2 TO 3 HOURS
HIKE DISTANCE
7 KM ROUND TRIP
ELEVATION GAIN
400 TO 450 METERS
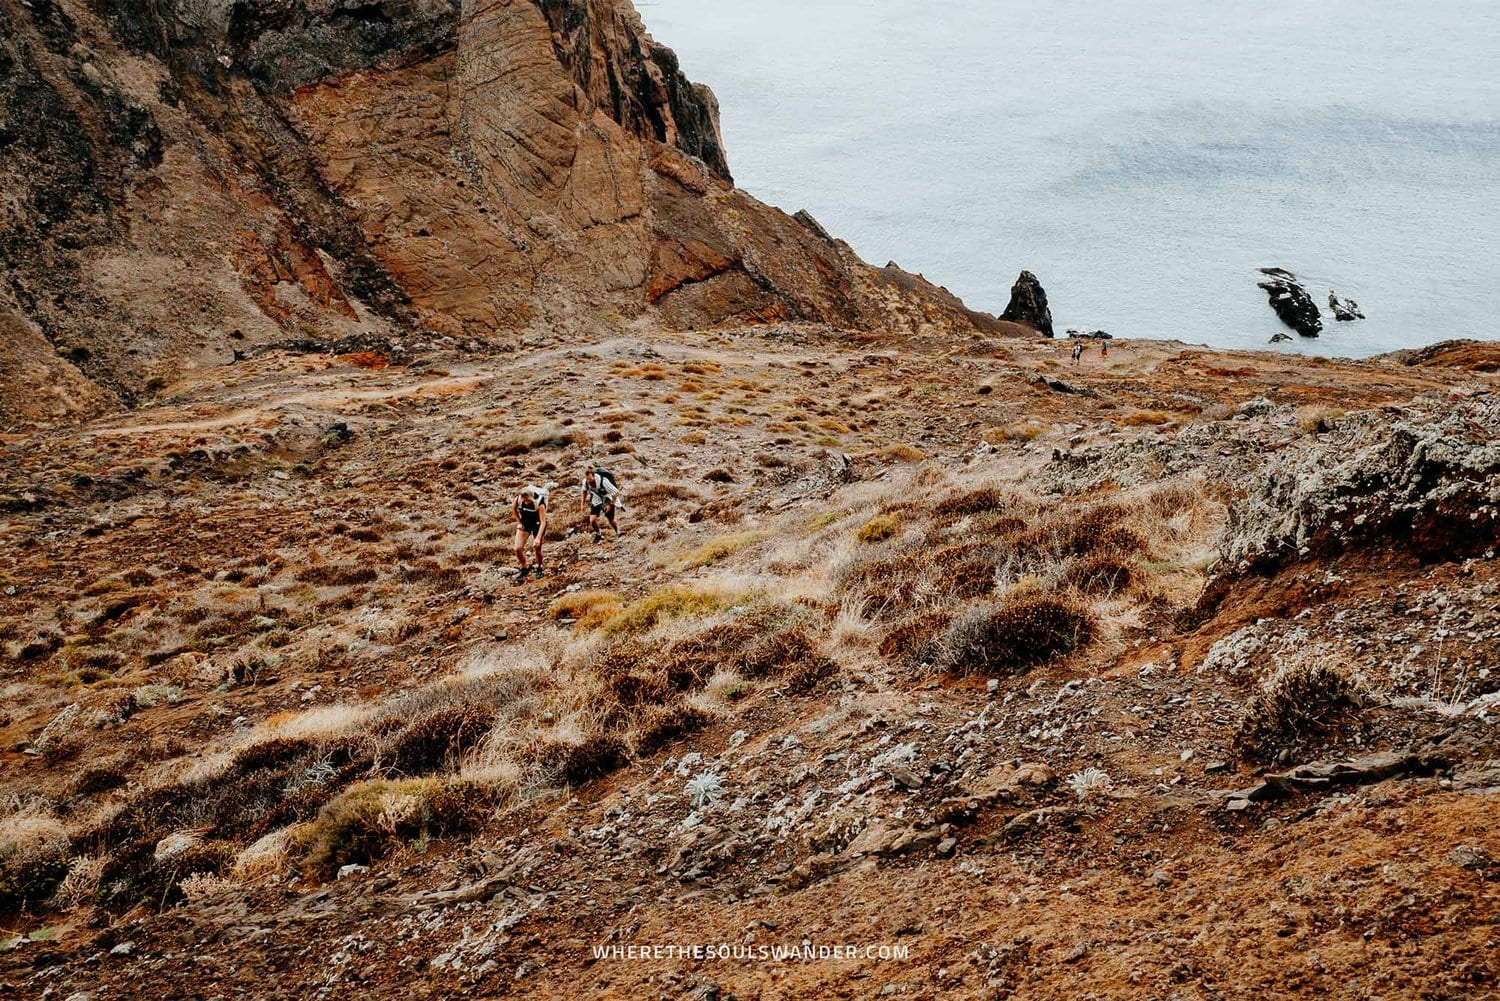
How to get to Vereda da Ponta de São Lourenço
CAR | As mentioned before, Vereda da Ponta de São Lourenço is located just 30 minutes from Funchal, which makes it one of the easiest hikes to reach by car.
The drive itself is pretty straightforward, and as with most of the highlights on Madeira, you’ll find lots of parking space at the beginning of the trail.
If visiting Vereda da Ponta de São Lourenço is just one of the many activities you plan to do on the island, I highly recommend renting a car for the entire duration of your stay. I booked my car for Madeira at Rentalcars and can highly recommend their service. Additionally, I also highly recommend DiscoveryCars.
I’ve also written a complete guide about driving on Madeira, so make sure you give that one a shot too.
TOUR | Another great way to hike the PR8 trail on Vereda da Ponta de São Lourenço is by joining a tour.
Having said that, I would recommend this tour of Vereda da Ponta de São Lourenço, as it’s organized by an expert local guide who shares lots of entertaining facts about the island and its ecosystems.
On top of that, this tour includes pickup and dropoff service at your hotel in Funchal, Caniço or Machico – plus it’s limited to 15 people per tour, which, to me is quite an important factor if I’m considering joining a tour.
BUS | Alternatively, if you prefer to visit on your own terms, yet not sure if you want to rent a car, there’s also the option to go by public transport from Funchal.
The SAM 113 bus leaves from Funchal Edificio 2000 and stops at Baia D’Abra, which is situated directly at the start of the trail. Costing €3,- per person, the travel time should take around 1 hour and 15 minutes.
For the latest bus schedules, make sure you check the official SAM website.
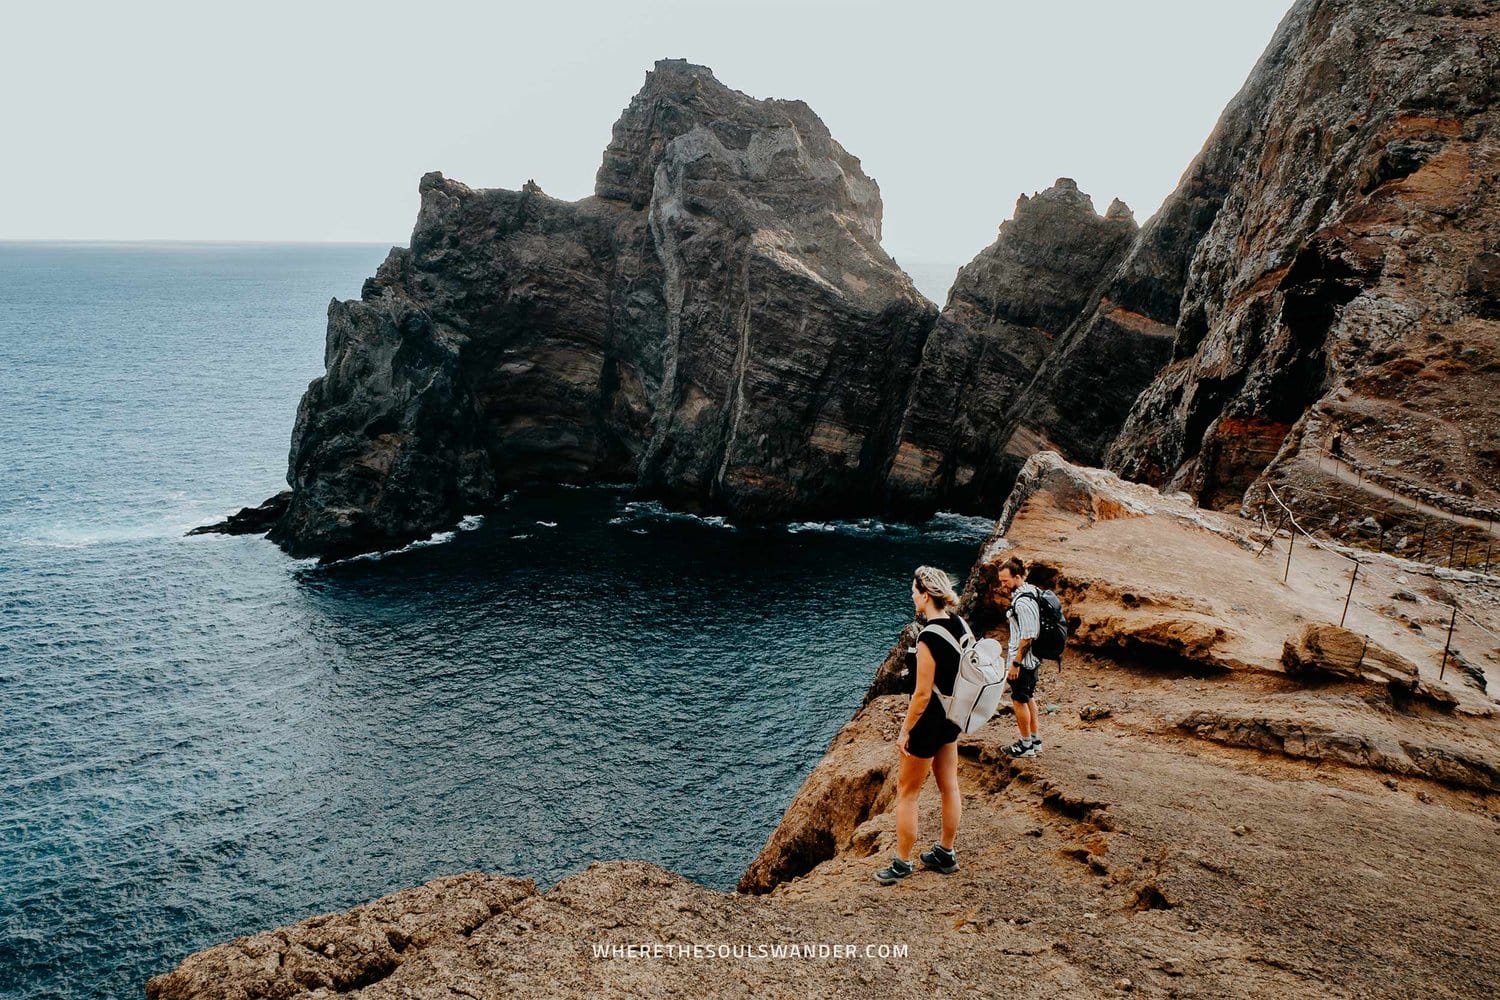
The PR8 hike on Vereda da Ponta de Sao Lourenço
The PR8 hike on Vereda da Ponta de São Lourenço is without question one of the most popular hikes on Madeira since it is quite easy, with a well-defined path throughout the entire hike.
The starting point of the hike is not to be missed, since it’s located at the roundabout immediately after the parking area.
From the roundabout, walk down the paved steps on the left and follow the wooden boardwalk until you reach a well-defined dirt path. From here, the path is clear and easy to follow since it’s wrapped around the first section of the peninsula.
After following the path for roughly 10 minutes, you’ll reach the first viewpoint; Miradouro de São Lourenço. Depending on the time of your visit, you have two options here: one, have a short break to rest and take some photo’s, or two, head straight for Ponta do Castelo or Ponta do Furado.
Since I went before sunrise, I opted for the second option and climbed to the Ponta do Castelo viewpoint, where I waited for the sunrise to unfold, which was quite a dope experience.
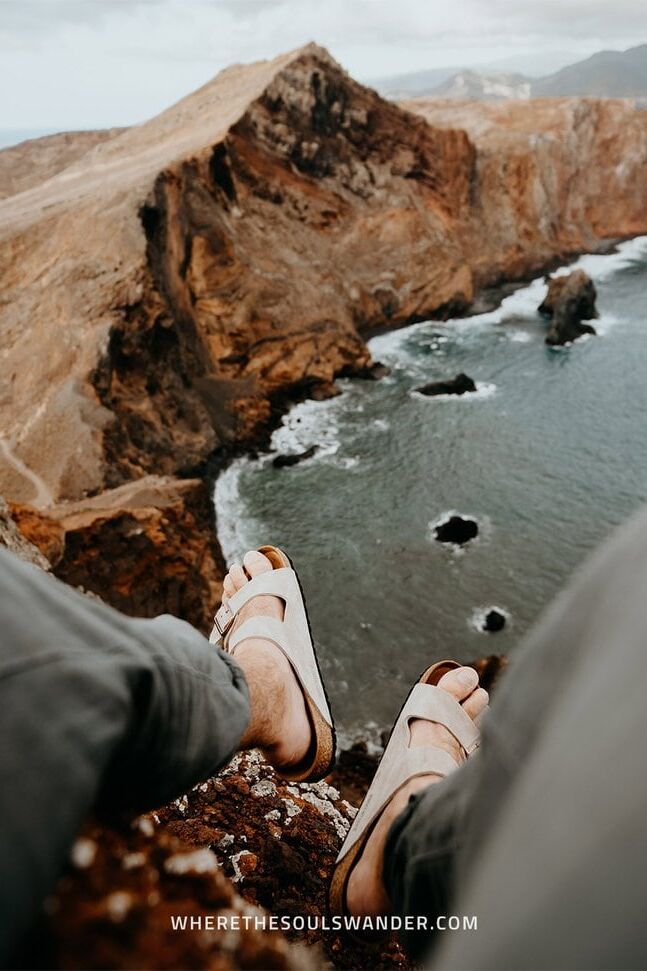
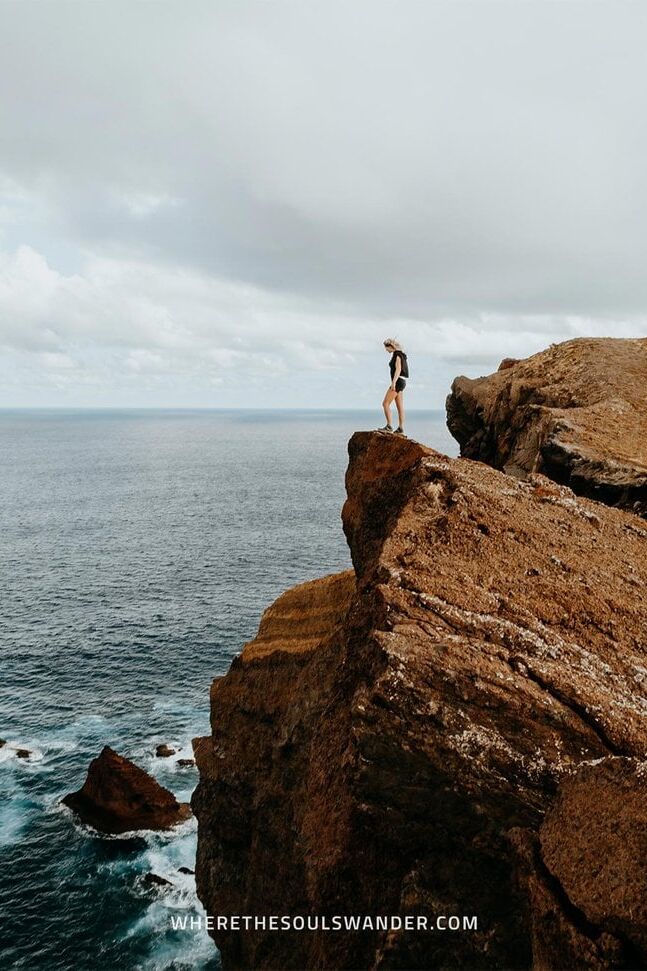
From the Ponta do Castelo viewpoint, it takes another 30 minutes before you reach the stairs to the final viewpoint named Miradouro Ponta do Furado.
Once you reach the end of the trail, you’ll notice a warning sign that says it’s not allowed to climb to the viewpoint. Despite the sign, there isn’t actually a reason to be worried. Yeah, the climb is sort of steep, but in overall the way up is more than safe.
However, there must be a valid reason for the sign – so being extra cautious doesn’t hurt you.
Though I believe this section of the trail isn’t nearly as impressive as the first section, the fascinating views that you’ll get at the Miradouro Ponta do Furado viewpoint make up for a lot.
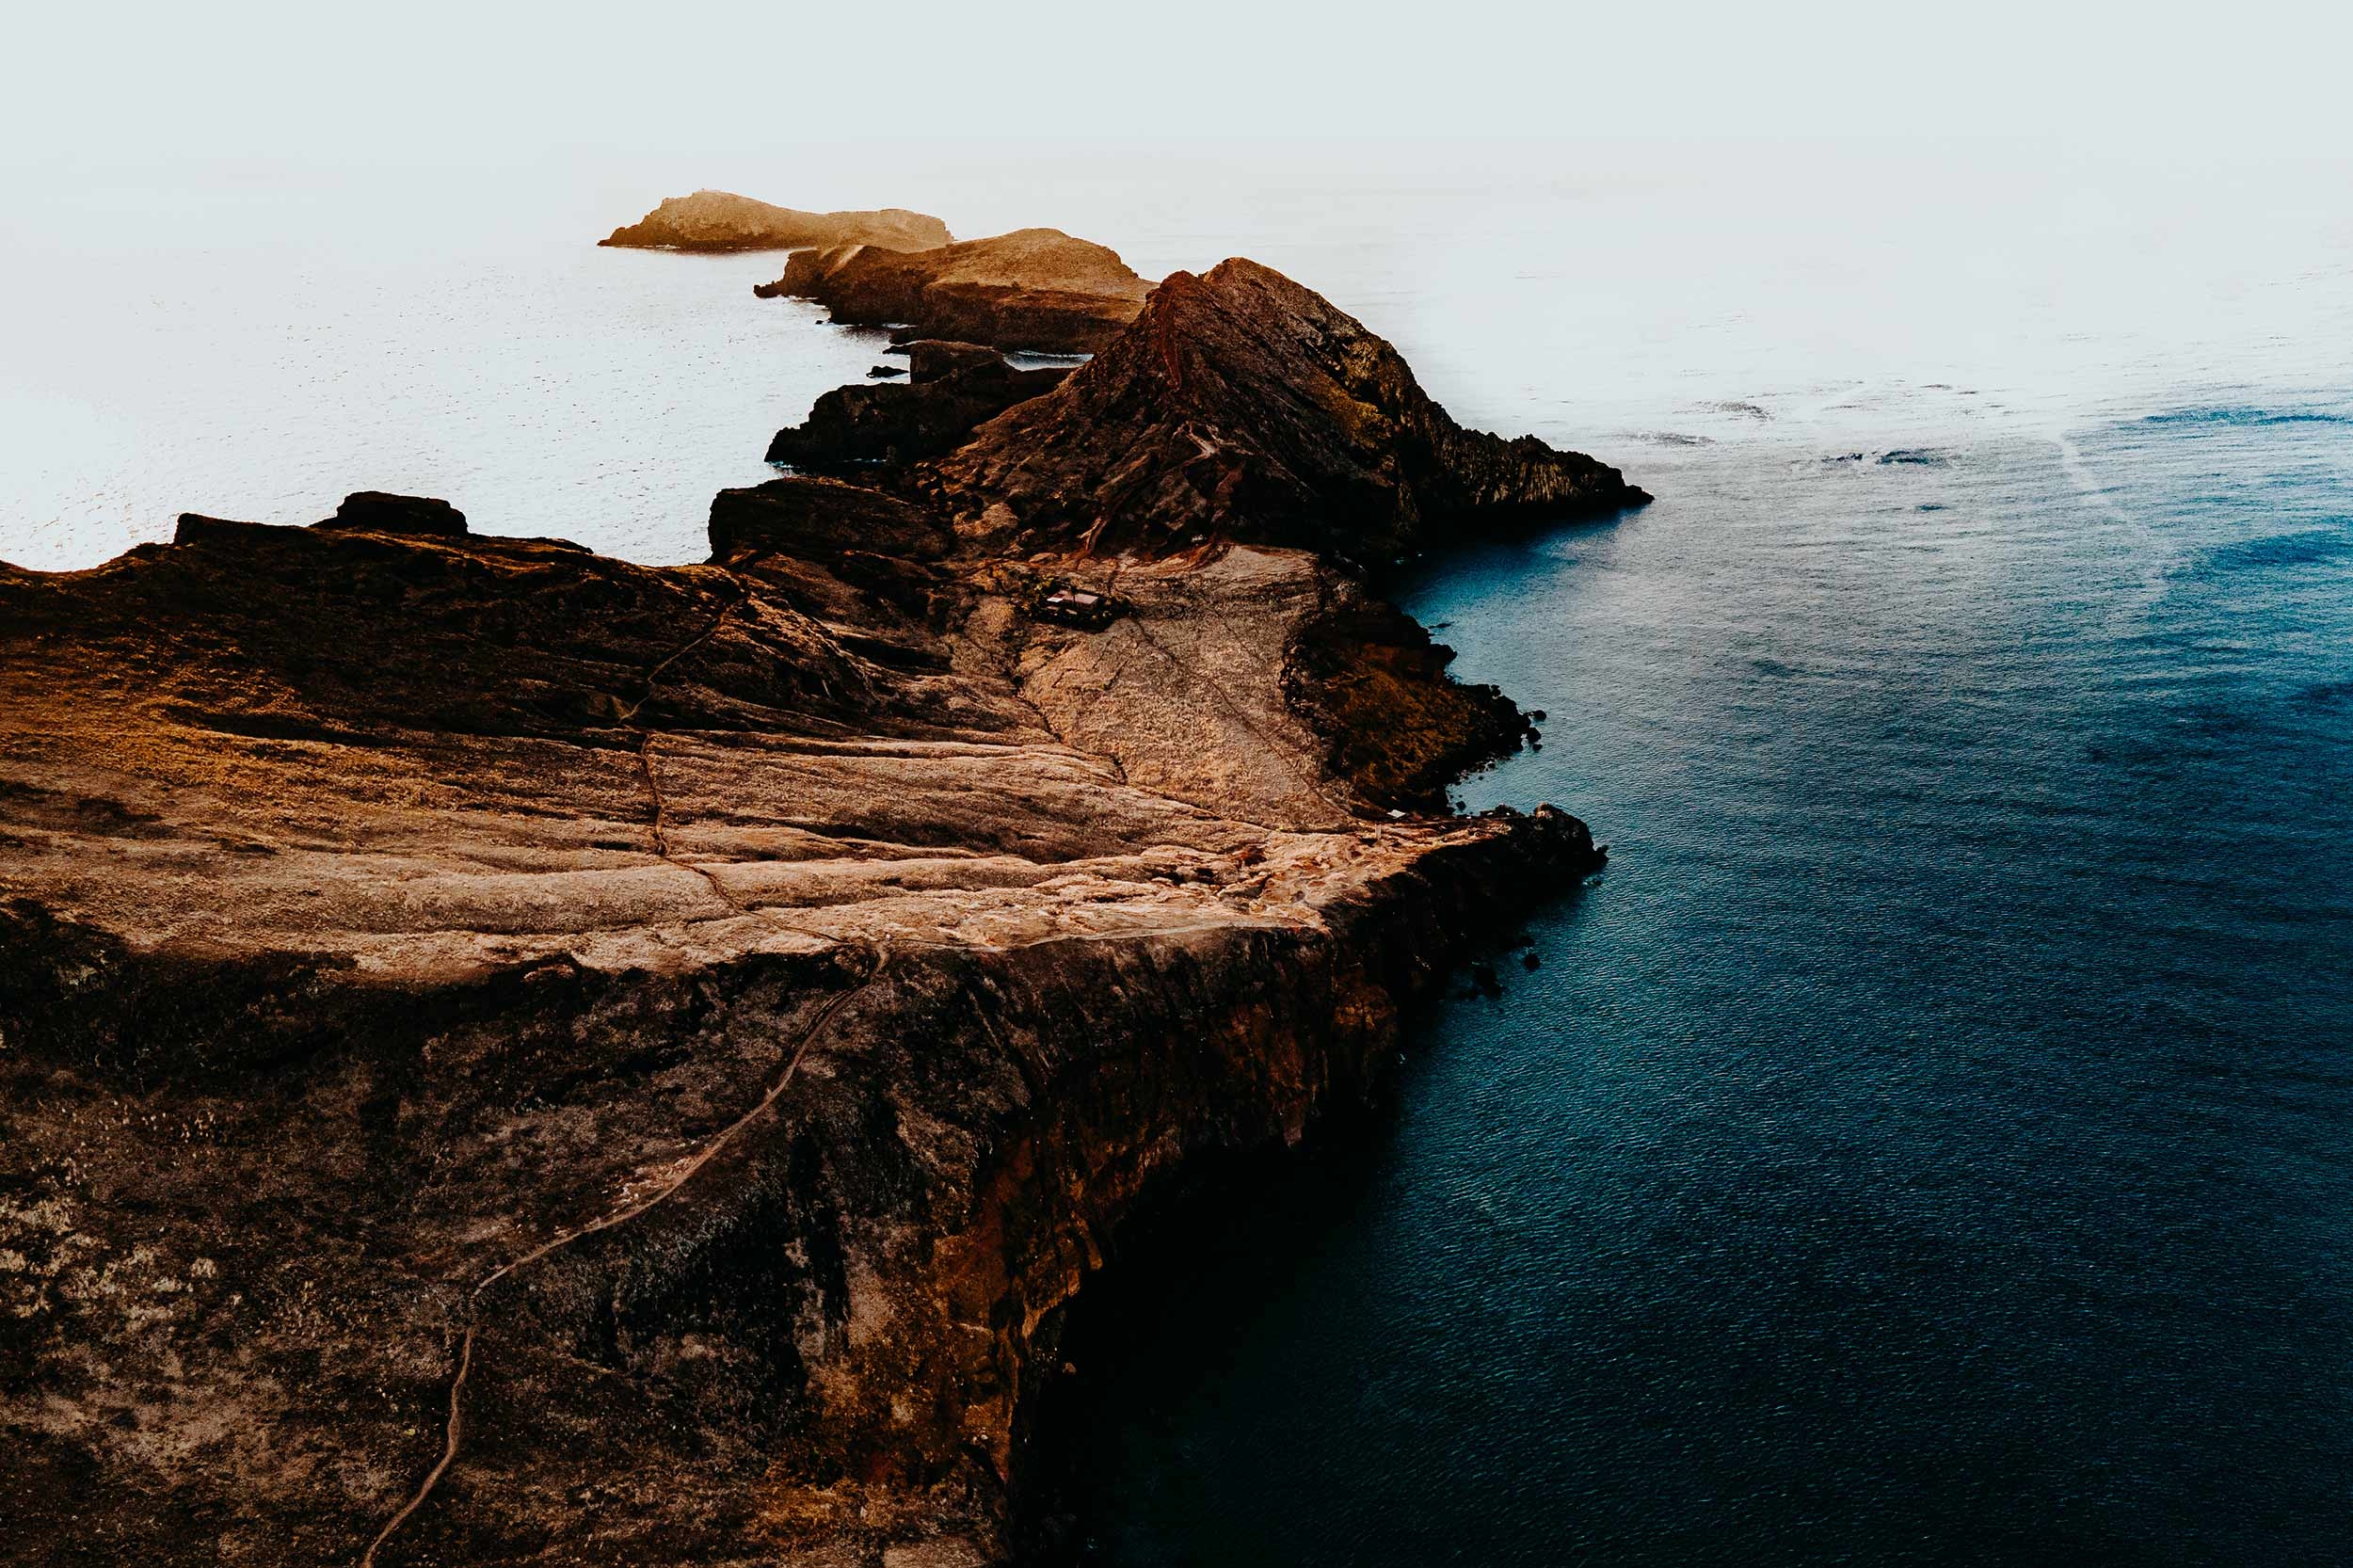
On your way back you’ll notice a small cafe named Casa do Sardinha, where you can have a short coffee break before heading back out on the trail. From here, you basically follow the same path back to the beginning of the PR8 trail. If you did the hike before sunrise, make sure you add an extra stop at the Miradouro de São Lourenço viewpoint on your way back.
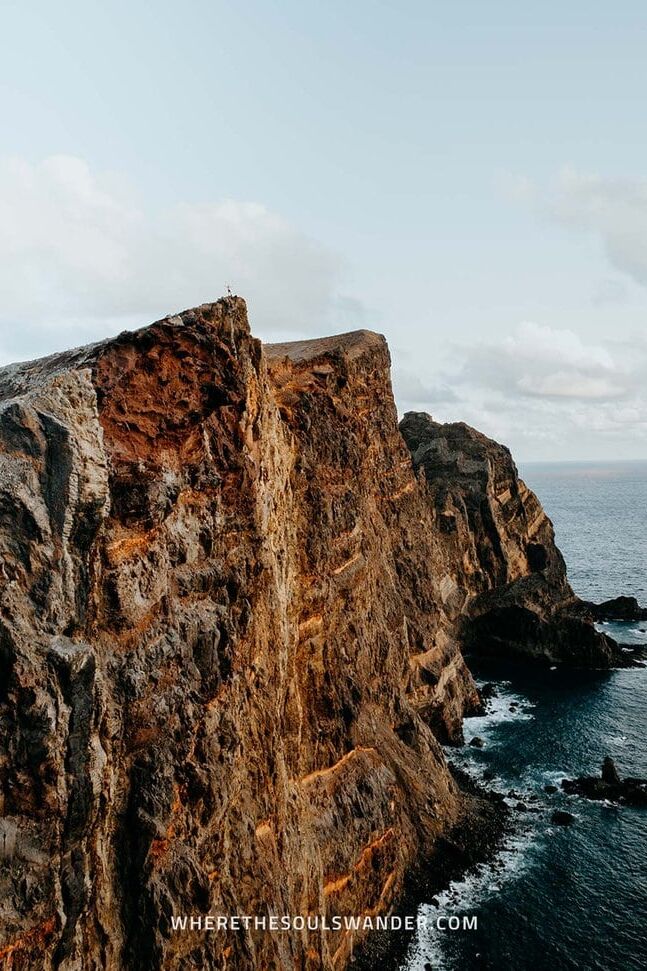
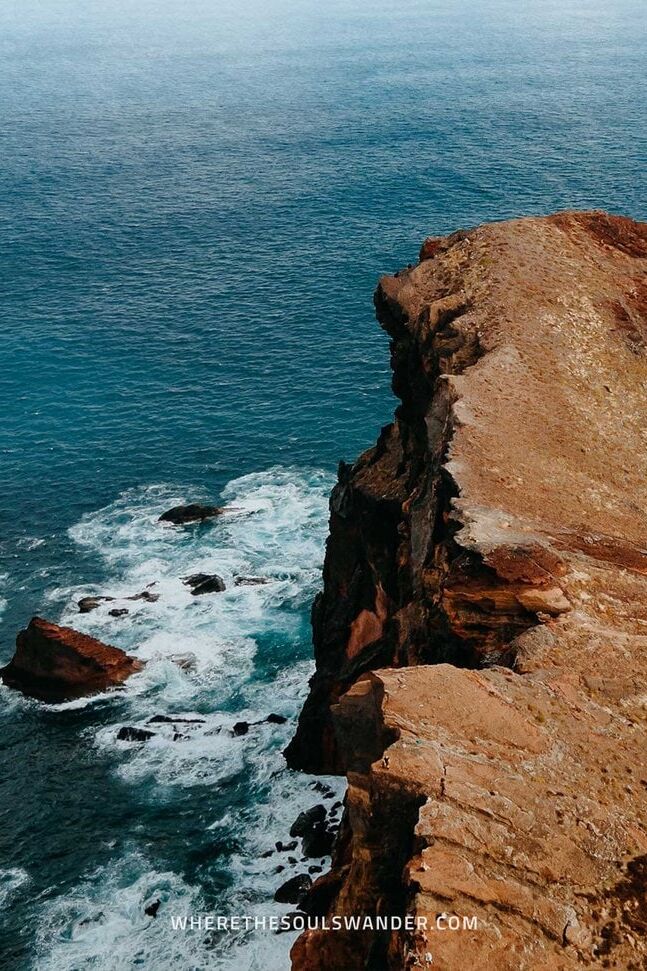
Ponta de Sao Lourenço | The essentials
The best time of day to hike Vereda da Ponta de São Lourenço
As with most hikes on Madeira, the Vereda da Ponta de São Lourenço is magnificent at sunrise, meaning the best time to start your hike is about one hour before the sun comes up.
While it’s possible to visit Ponta de São Lourenço at every time of day, I wouldn’t advise visiting during noon, as the light will probably be too harsh for photography – plus it can get really hot here during the day, and there’s no shelter on the trail.
Additionally, Vereda da Ponta de São Lourenço makes for an excellent afternoon or sunset hike, making it perfect for those that opted for another hike in the morning or simply don’t like waking up early during the holidays.
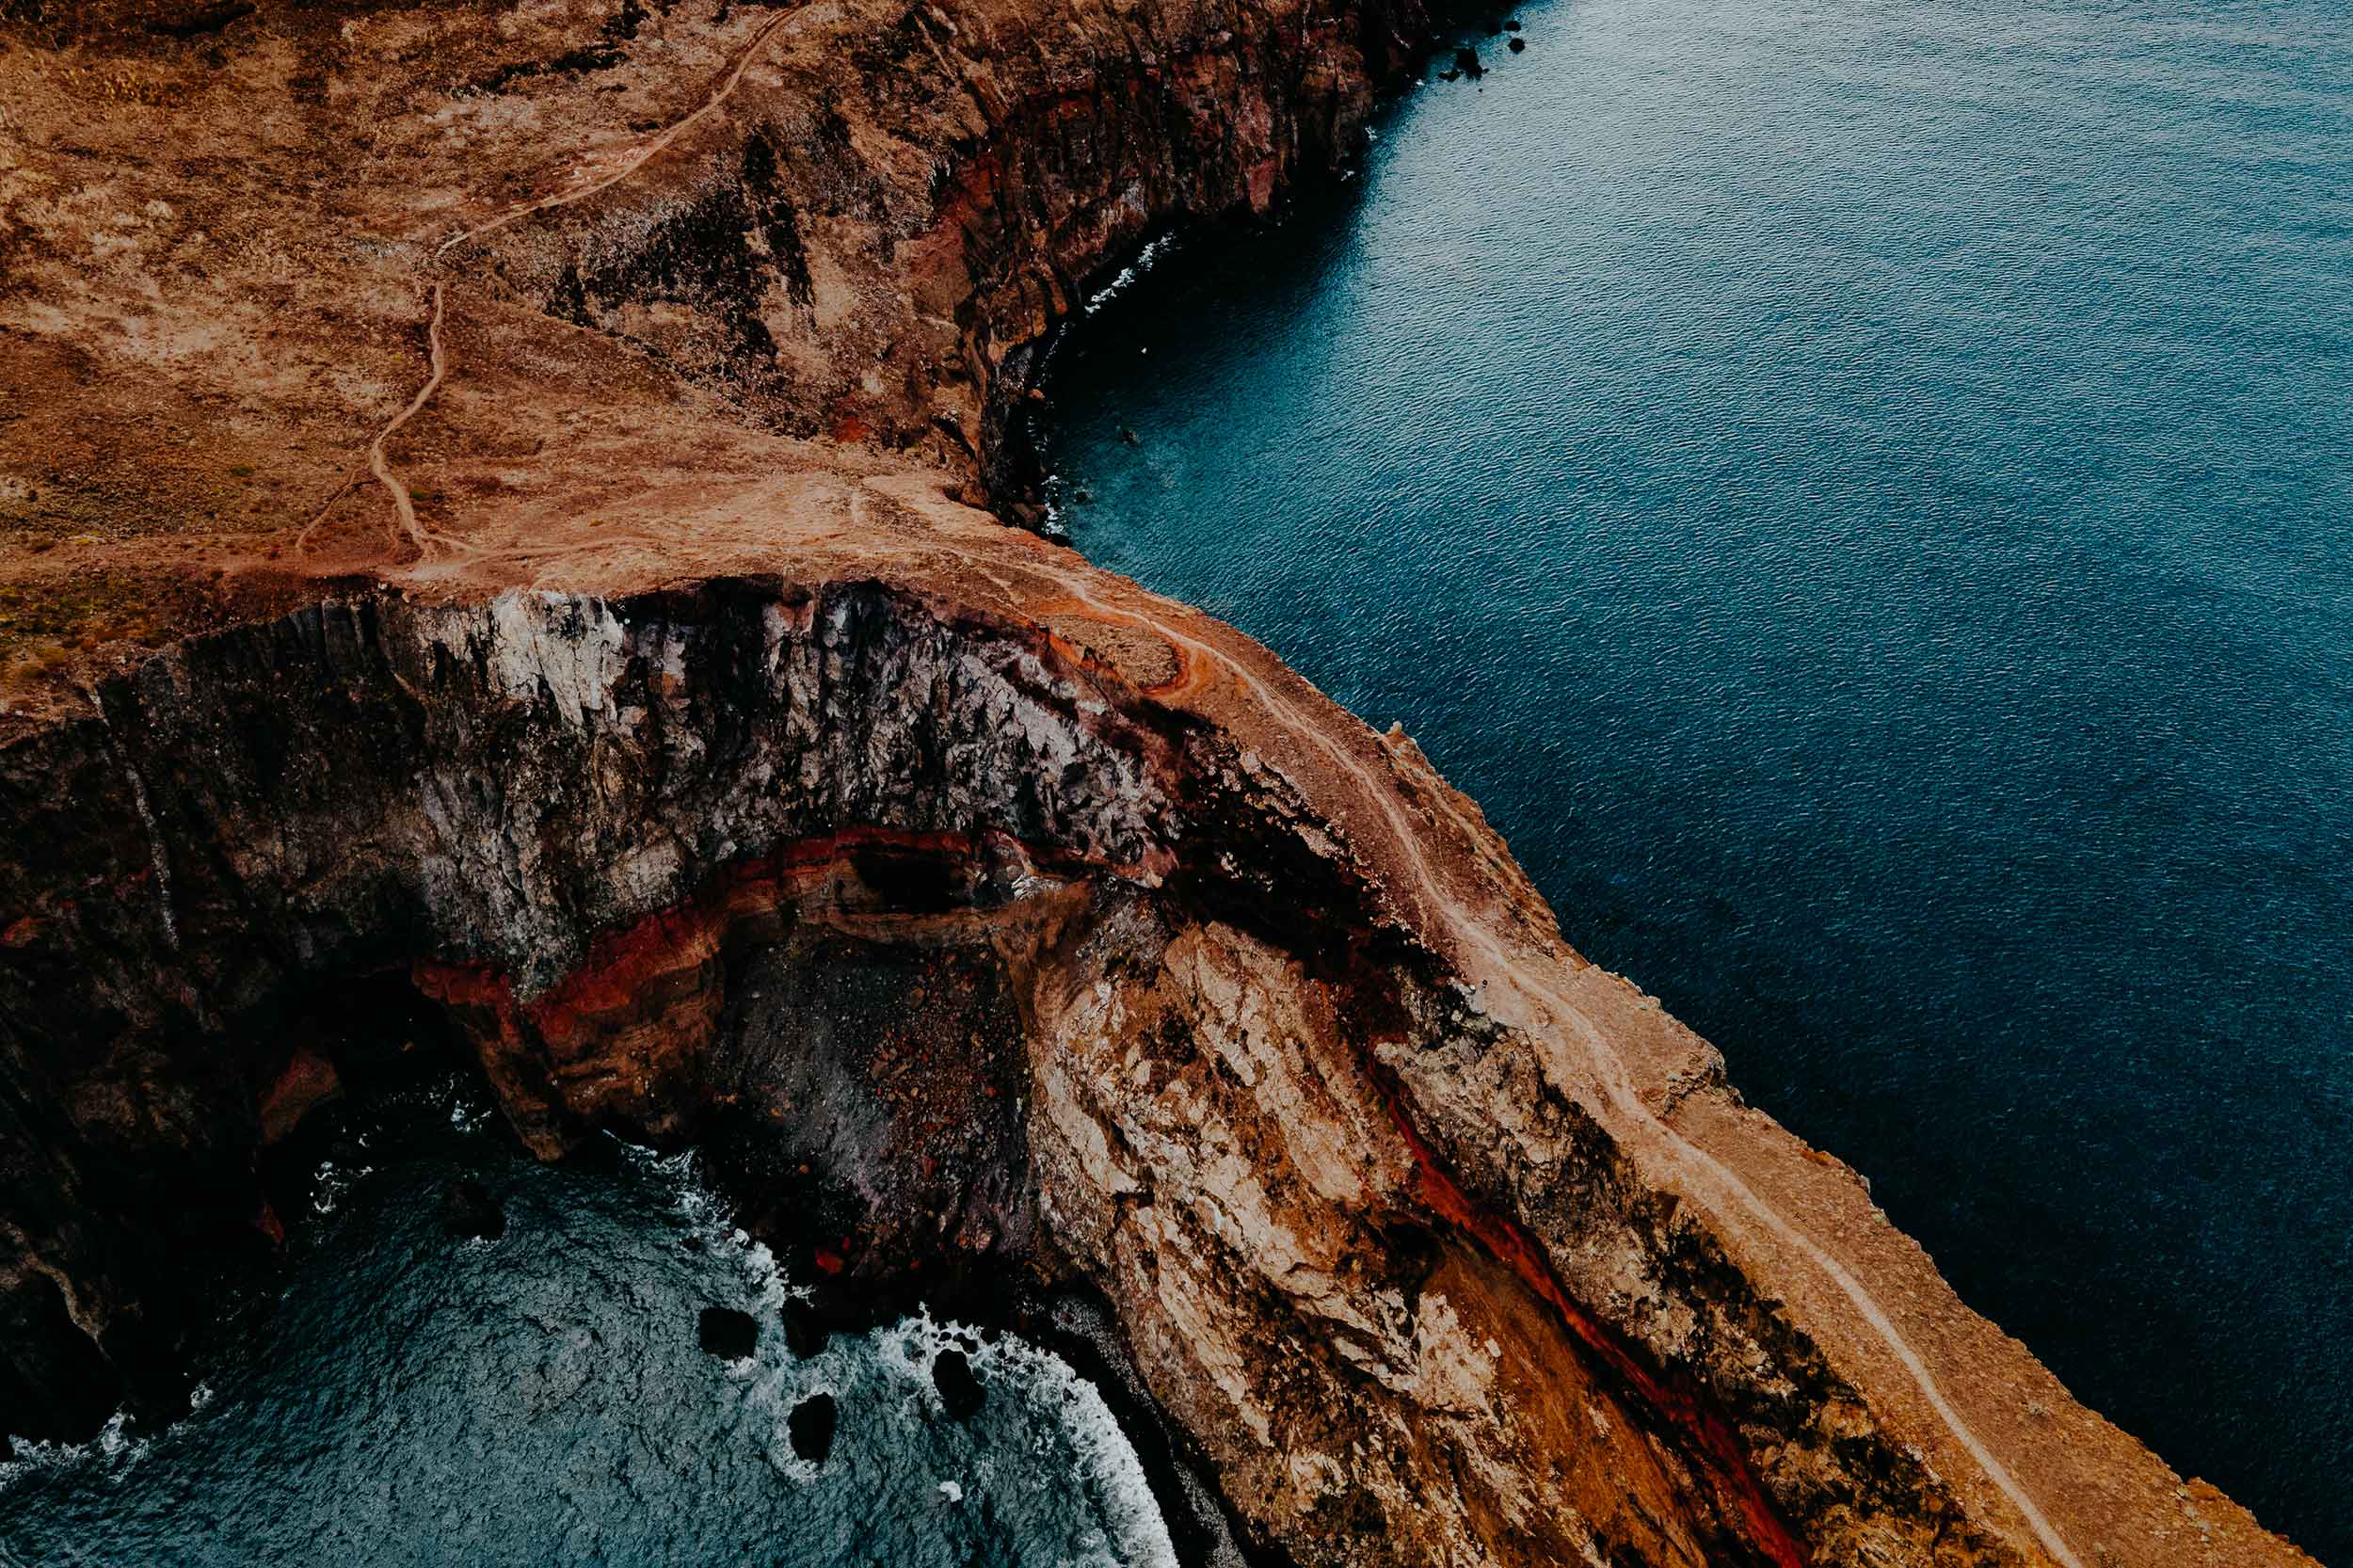
The best time of year to hike Vereda da Ponta de São Lourenço
The PR8 hike on Vereda da Ponta de São Lourenço can be done year-round, however, I believe the best time to visit is during the drier months of April to October. Not only will there be little to no rainfall, but you will also experience the characteristic landscape in its otherworldly burnt-orange colourway.
If you opt for a winter getaway on Madeira, the rugged cliffs of Ponta de São Lourenço will most likely be covered by a green blanket of grass due to rainfall that occurs during the offseason.
I did the PR8 hike on Vereda da Ponta de São Lourenço at the start of October and had warm and comfortable weather, despite a short rainshower halfway through the hike.
What to pack for the PR8 hike on Vereda da Ponta de São Lourenço
As with any hike, I believe it’s crucial that you’re well-equipped before you begin the PR8 hike on Vereda da Ponta de São Lourenço.
To help you have a stress-free journey, I’d highly suggest packing the following items:
A REUSABLE WATER BOTTLE | One travel essential that I carry with me at all times is the Grayl Geopress. This reusable water purification bottle allows me to fill up water from nearly every water source, making it one of my best investments to date.
LAYERS | Since this hike is best started before sunrise, I highly recommend wearing layers. I took a hoodie with me, which was much needed, especially in the early morning. Also, given that the temperature can change dramatically at various points of the hike, it’s not a bad thing to bring a raincoat too.
HIKING BOOTS OR A GOOD PAIR OF SNEAKERS | While hiking boots definitely provide more stability to your ankles, I believe you could easily get the job done in a good pair of sneakers – just be sure that they have a firm sole with enough grip, so you’re supported when things get slippery. I recently bought the New Balance Hierro v7, and am really happy with them, as they offer all the feats of a hiking boot, while still looking like a dope sneaker.
SUN PROTECTION | Given that there is hardly any shelter throughout the hike, it is wise to bring good sunscreen and a hat. Even when the sun hides behind the clouds, it is still possible to get burnt.
SNACKS | Even though I practise intermittent fasting, and prefer to hike on an empty stomach, I always bring a few snacks to fuel me during my hikes. And I advise everyone to do the same, especially since you’ll only be able to buy something at the starting point of the PR8 hike. So, don’t mind bringing some fruits, nuts and a few protein bars. Also, bring enough cash to get a coffee or some snacks from the food truck if necessary.
HIKING POLES | I did the PR8 hike without hiking poles, but if you have poor knees or prefer a little support during the more strenuous parts of the trail, I highly advise bringing a set of quality hiking poles. These Montem Ultra Strong Hiking Poles are light, collapsible, and a great value for the price.

Where to stay near Ponta de São Lourenço
Given Madeira is rather compact, I highly recommend anyone to base themselves in Funchal, Madeira’s vibrant capital city.
Funchal is an awesome city in its own right and is home to plenty of excellent accommodation options, is packed with history and culture, plus has trendy restaurants and cafes at just about every corner.
To help you find a suitable place, I’ve listed three of my favourites below, one of which is marked – this is where I stayed.
+ Vila Baleira | This was my base for the whole of my trip, and if you’re seeking comfort without spending your entire budget straight away, Vila Baleira will be perfect for you too. Located within the popular Lido area, this hotel offers spacious rooms, comfortable beds, and a large rooftop terrace with a swimming pool. They also have a tasty breakfast spread, excellent wifi throughout the entire property, and a secured parking lot right under the property.
Hotel Cajú | Set within the heart of Funchal, Hotel Cajú is a great place to stay, with stylish double rooms, friendly staff, and a small yet excellent in-house fitness centre. All bookings come with an exceptional breakfast too. One small downside though, they don’t have private parking.
NEXT – Savoy Signature | This budget-friendly hotel in the centre of Funchal has spacious, modern-style rooms with comfortable double beds and a brilliant private bathroom with a rain shower. They also have an incredible rooftop swimming pool with amazing sea views. Double rooms at only €50,- per night make this place one of the best picks in Funchal.

Stay safe on Madeira | Travel insurance
Since travelling on Madeira is all about hiking and nature, I recommend everyone to sort out good travel insurance before setting out on their own adventure.
Where we prefer that everything goes smoothly during our travels, something unfortunate can happen at any moment, whether it’s an injury during a hike or an accident on the road.
For travel insurance, I always use Heymondo, as they offer full covid-19 coverage, as well as a handy app with 24-hour medical assistance. Make sure you check it out – readers of WTSW receive 5% off any insurance policy too.
Cheers!
I’ve been on this travel blogging journey since 2019.
If you appreciate what I do here, these are some ways you can support me.

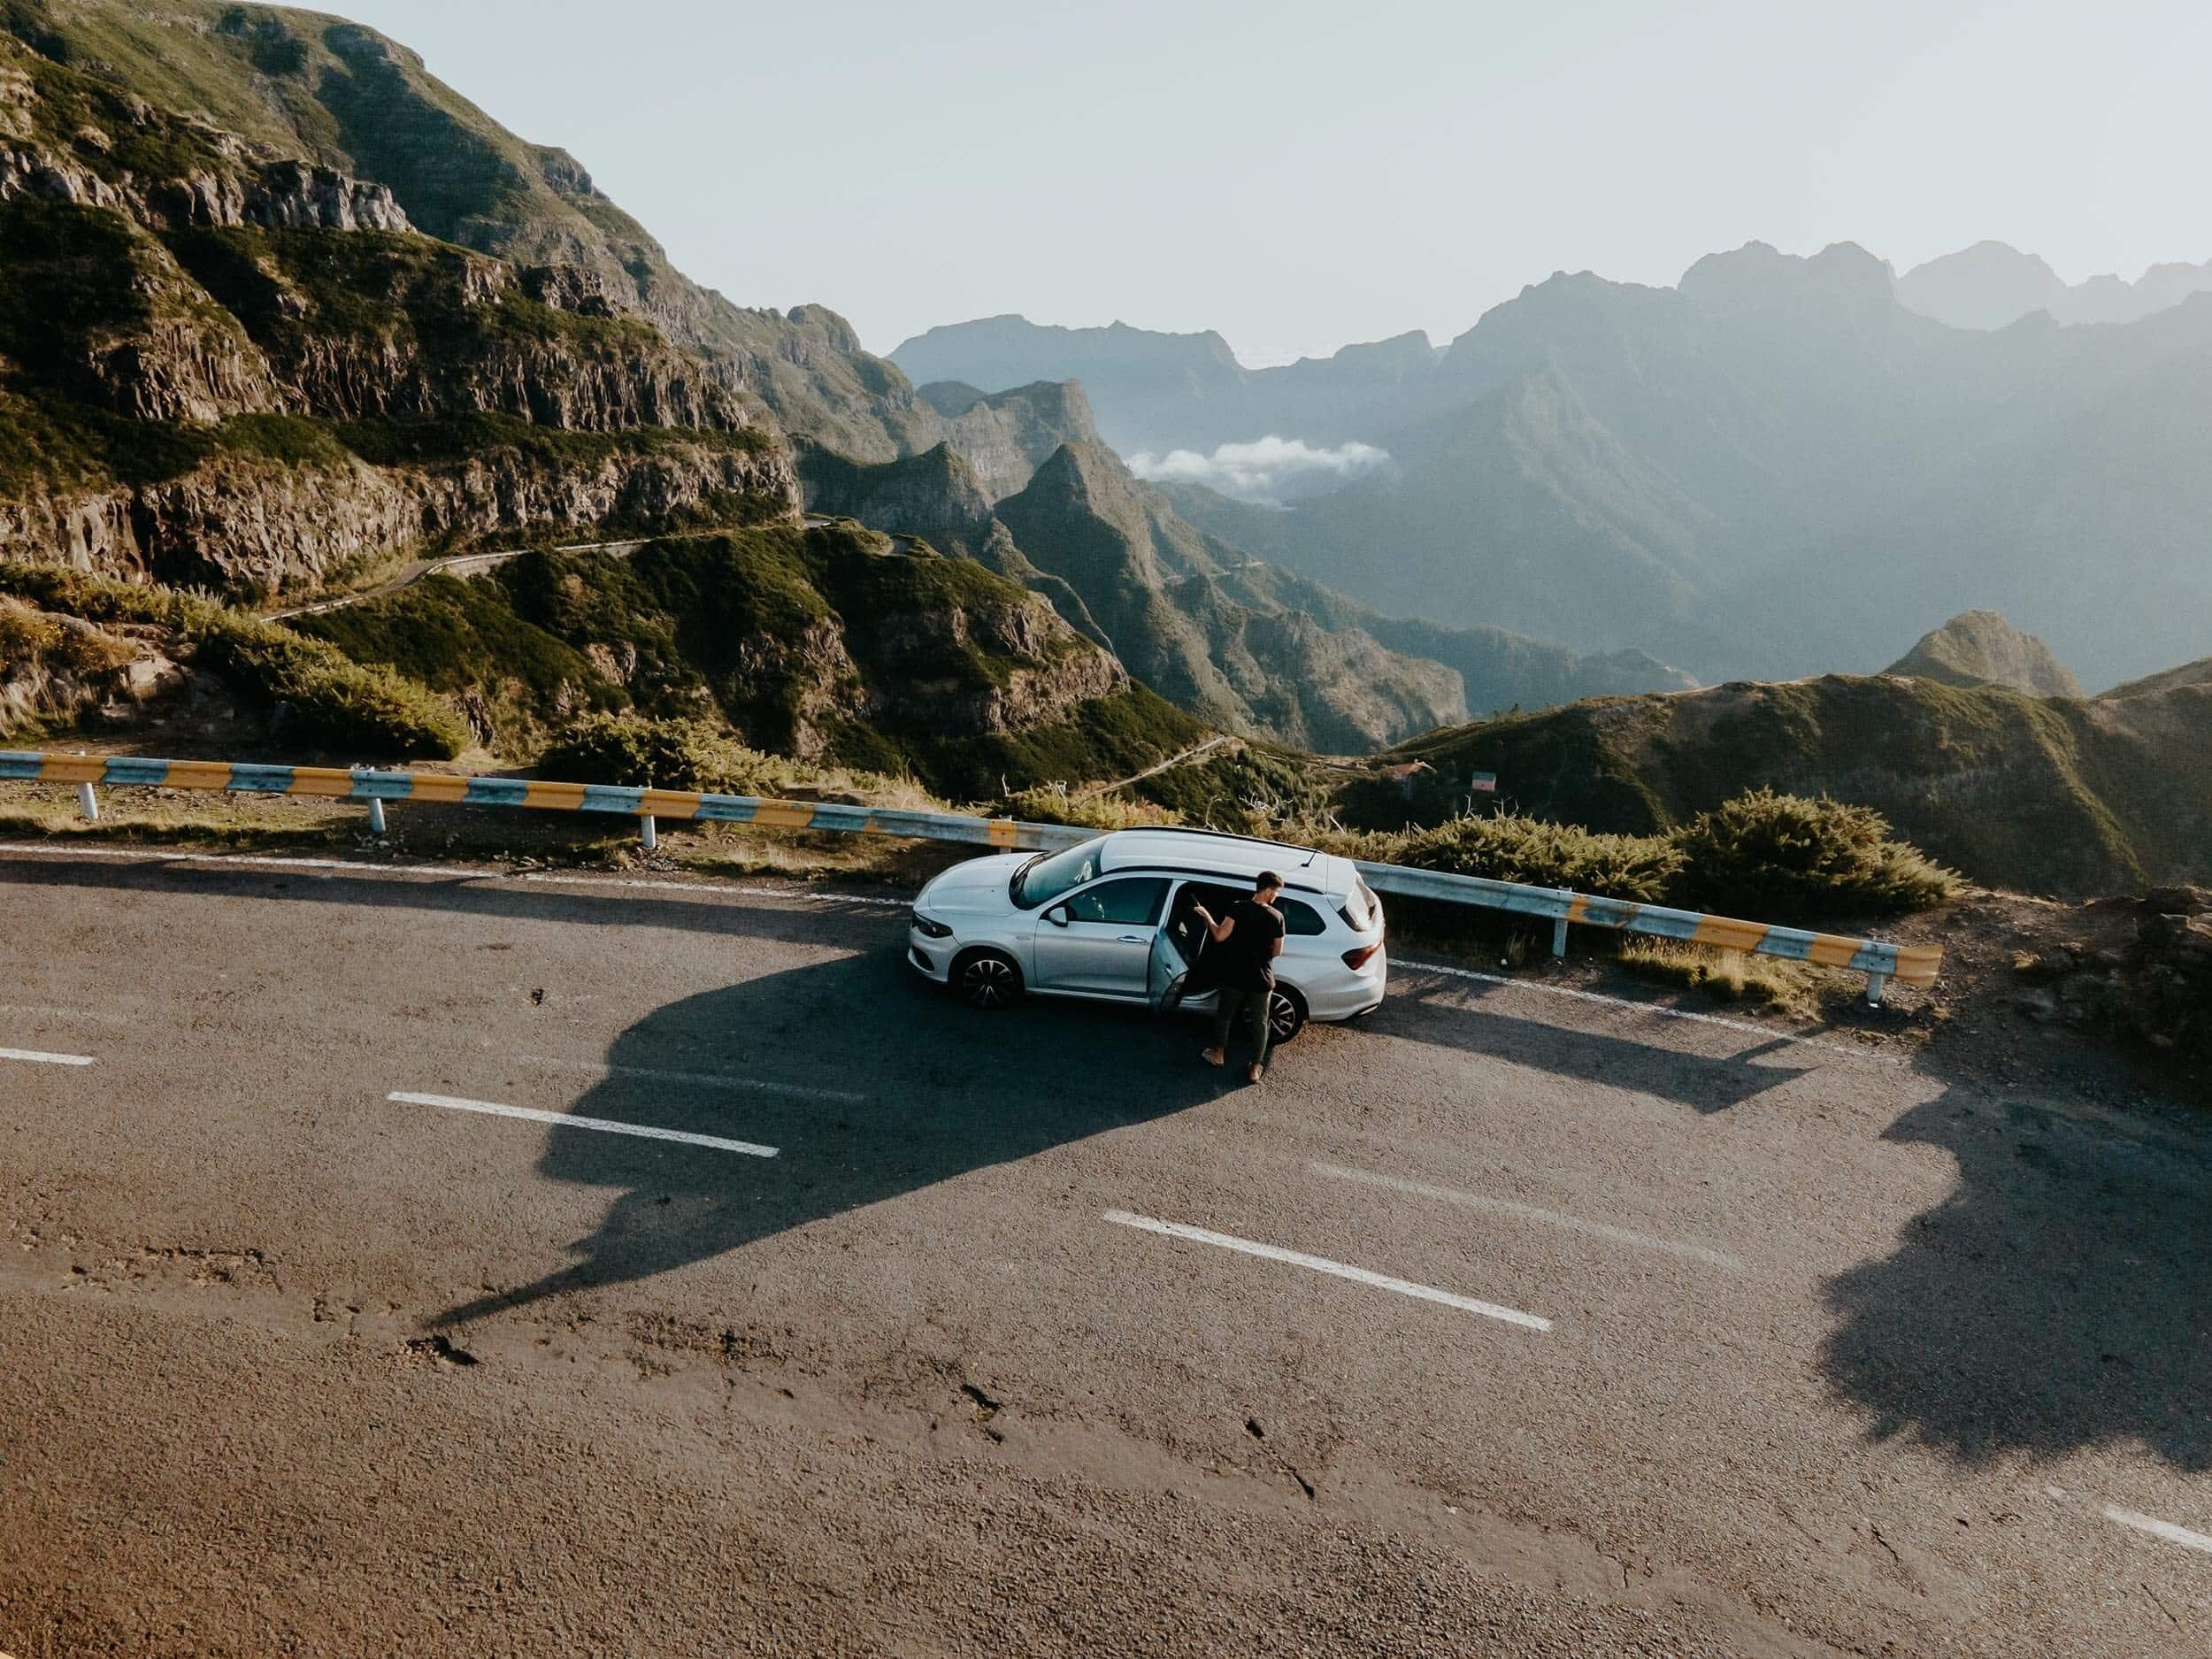
A guide to driving on Madeira: 12 useful tips to get you going
Madeira, with its many natural highlights, is a marvellous island in the North Atlantic Ocean, perfect for those who like to cruise freely in their own set of wheels.
From stunning coastlines flanked by rugged cliffs on the one hand and the ocean on the other to magnificent mountains teeming with dense woodlands and gushing waterfalls; Madeira is stunningly beautiful and driving a car is by far the best way to experience this bit-sized paradise.
But it isn’t all fun and games, as driving in Madeira can be pretty challenging at times, especially if you’re not used to navigating through steep mountain roads and sharp hairpin bends.
To get you going, I’ve curated a comprehensive list of useful tips for driving on Madeira – plus all the essentials in terms of car rental, money-saving, insurance and more!
If you choose to use any of the links on this page, I may receive a small commission at no extra cost to you. By using these links, you’ll have a direct impact on WTSW and my ability to continue to create free insightful travel content for you. If you find any of my tips useful, you can support me by buying a virtual coffee here.
A guide to driving on Madeira: 12 useful tips
1 | Rent and drop off your car at Funchal Airport
While it’s totally possible to rent a car in the Funchal city centre, I would highly recommend picking up your rental car at the Funchal airport, directly after your flight.
By doing so, you’re not only saving quite some time, but you also save nearly €80,- worth of taxi rides, which is quite expensive considering that the Funchal city centre is only a 20-minute drive from the airport.
Also, the majority of car rental companies are situated directly at the airport, which makes it pretty convenient to rent and drop off your car here.
Nevertheless, I wouldn’t risk renting a car upon arrival, since it’s likely that the availability is limited. For that reason, I highly advise booking a car in advance (more on that later).
2 | Save money by renting your car in advance
I assume we all prefer to keep the cost of our trips low, and one of the easiest ways to do so is by sorting out your rental car in advance through a trusted online car supplier.
For car rental on Madeira, I would highly recommend the use of RentalCars; an excellent online car rental service that holds over 900 of the world’s leading rental car suppliers. Additionally, I also highly recommend DiscoveryCars.
However, my best advice for car rental on Madeira is to book your car as soon as you confirm your flights since last-minute rates are remarkably higher than when you book in advance, especially during the peak summer months.
Additionally, if you want to book a rental car spontaneously when already on the island, make sure you ask at the reception of your hotel, they will most likely fix you a cheaper rate.
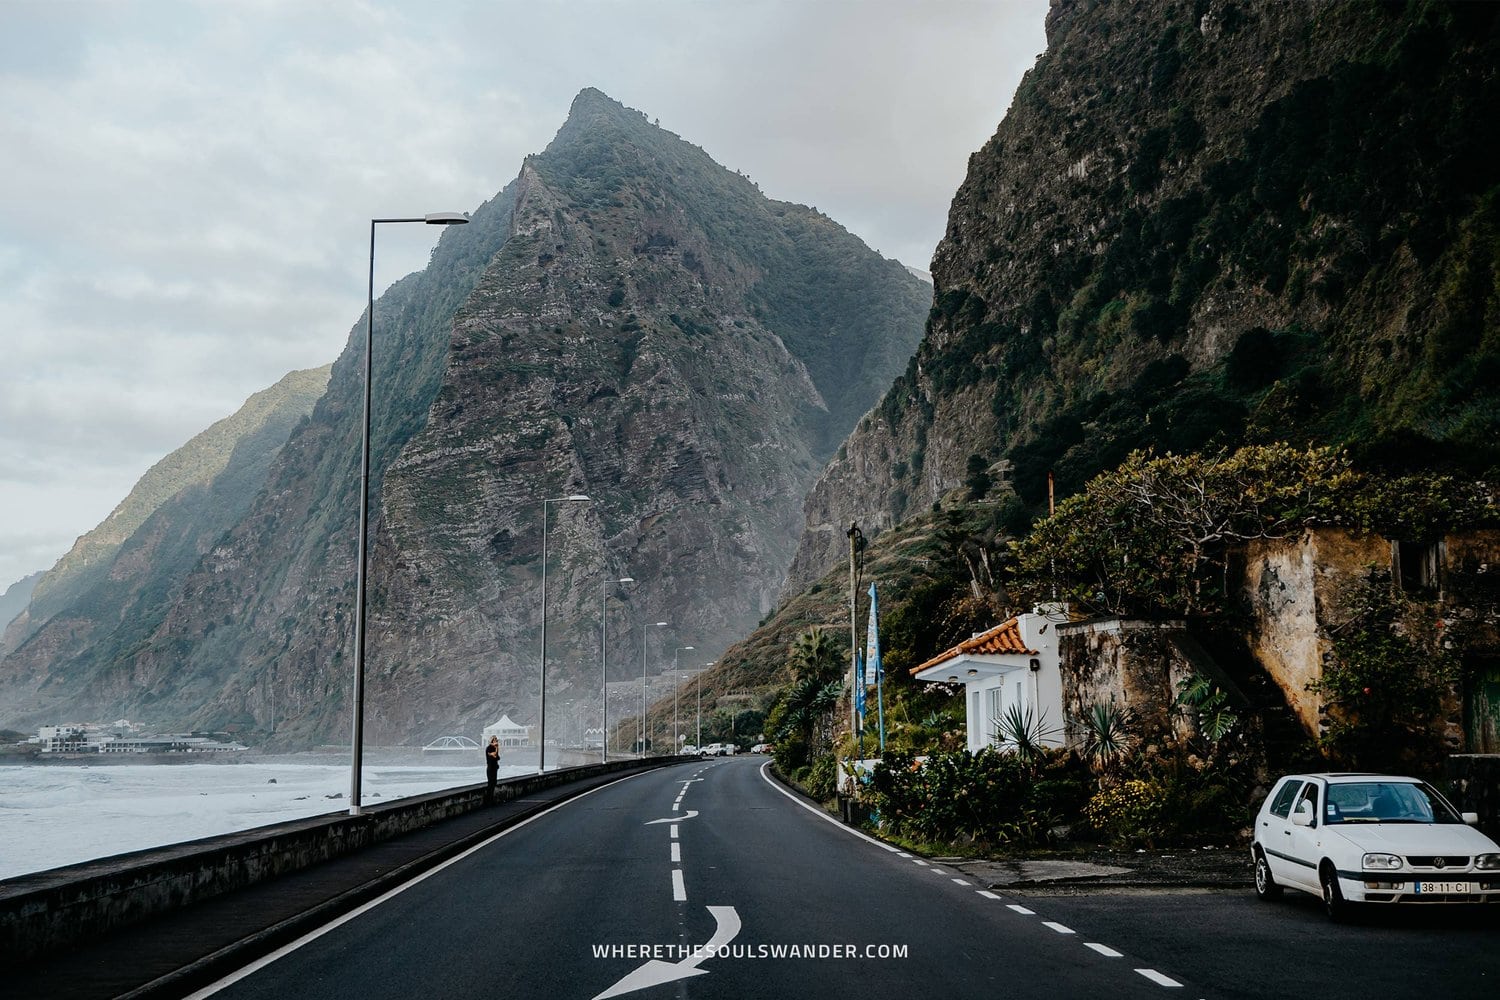
3 | Drive on the right-hand side of the road
Like most places in the world, you’ll be driving your car on the right side of the road. So unless you’re from the United Kingdom, Australia, New Zealand, South Africa or a former British colony, there isn’t really a big adjustment for you
However, if you are from a left-driving country, and it’s your first time driving on the right side, allow yourself a few days to get used to handling the car in the complete opposite way.
Though I’ve never driven on the opposite side of the road myself, I can totally understand if only the thoughts of driving on the other side stressing you out already.
If that’s the case, hiring an automatic car will make things a lot easier, as you don’t have to worry about changing the gears constantly.
4 | Drive one gear lower in the mountains
Madeira is famed for its extremely picturesque mountains and the steep roads that run through them, making driving here one of the absolute highlights on the island.
However, driving these roads can be quite a challenge at times. It also requires a slightly different approach than most of us are used to, including me.
When driving uphill, I would always advise downshifting to a lower gear so your car has the extra power to handle the incline.
This rule also applies when driving downhill, as driving in a lower gear causes your car to brake on the engine, which means there’s significantly less pressure on the brakes.
Of course, this doesn’t mean you shouldn’t use your brakes at all. In most cases, it is still necessary to use them, but just be a little more cautious to prevent overheated brake discs.
Also, make sure you live by this rule; don’t drive down a mountain road any faster than you drove up to it.
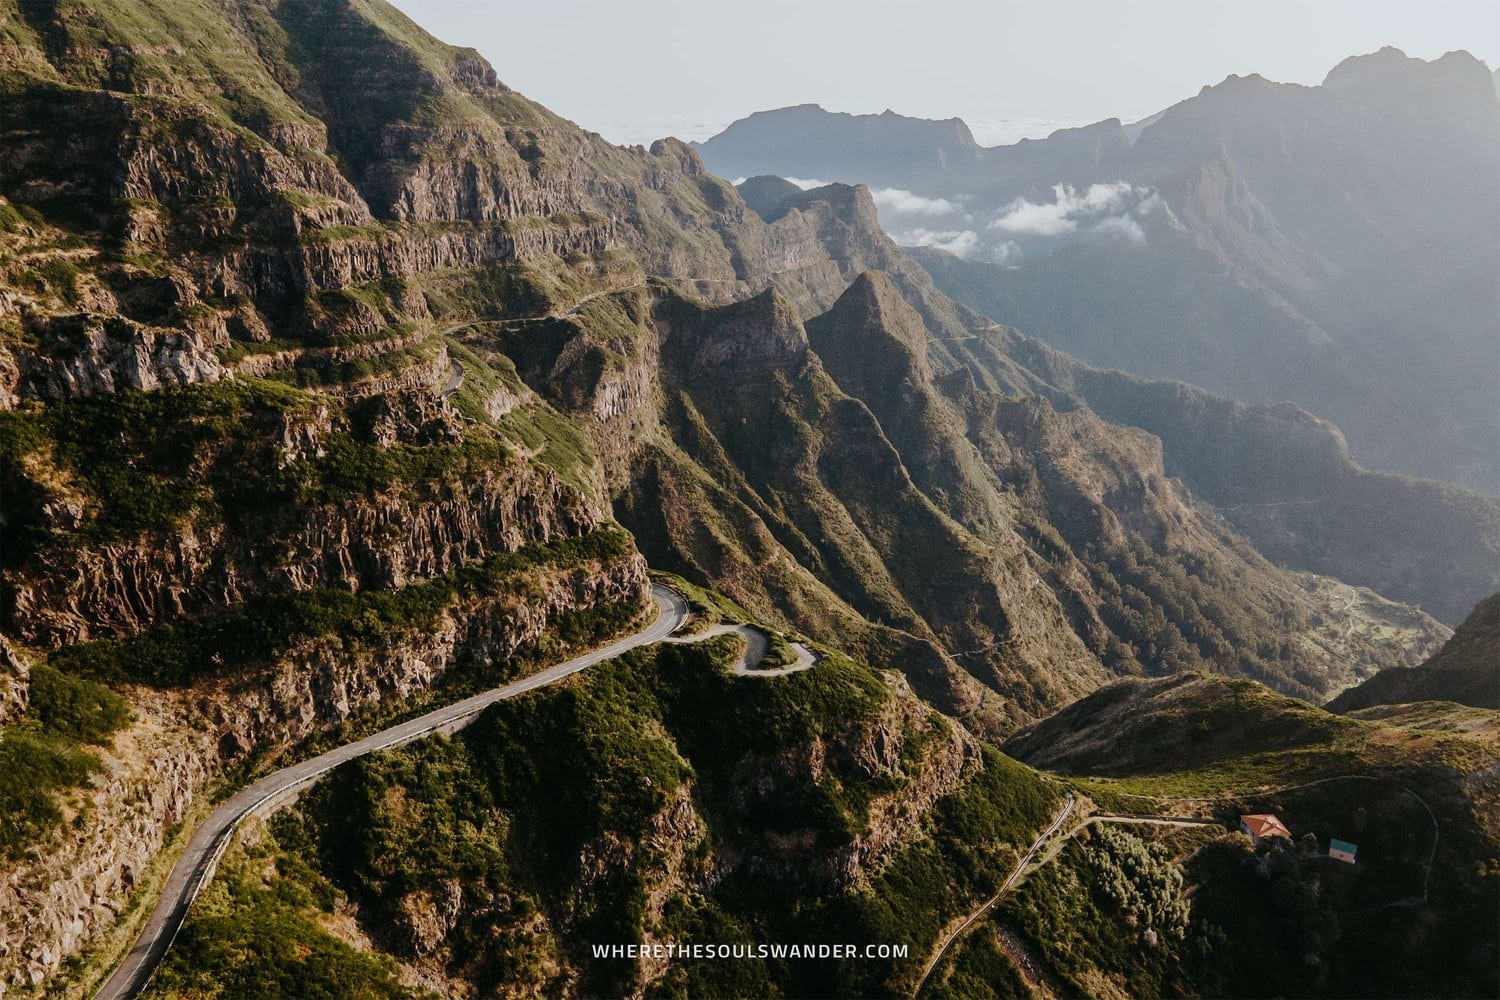
5 | Be extra cautious when leaving the access roads
One thing that quickly caught my attention when picking up my rental, was the fact that the access roads on Madeira were notably shorter compared to other countries I had driven.
The reason for this is that the road rules on Madeira imply that you stop your car on the access road, where you should wait until the lane is completely clear of passing cars, before inserting your own car.
Though it takes some time to get used to, I believe this rule is actually pretty good for the flow of traffic, as well as general road safety.
6 | Always fill up your tank before hitting the mountains
Winding through steep mountain roads requires significantly more fuel than your ordinary ride through the city, and filling up your car should be an absolute no-brainer before hitting the mountains.
Pair that with the absence of gas stations in the mountains, insufficient mobile services, and often only a few other people around, and you have yourself a blueprint to prevent stranding along the roadside.
So if you’re heading fort the mountains, live by this rule; fill up your car – and don’t say that I didn’t warn you!
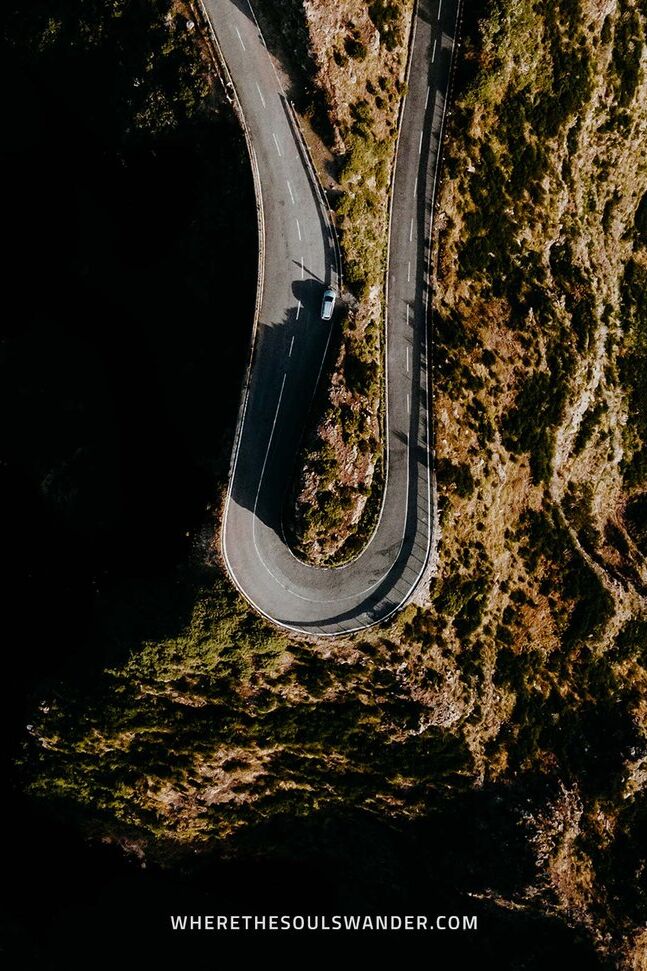

7 | Don’t get confused by Gasolina and Gasóleo
One thing I can’t stress enough is that the Portuguese language can be quite misleading for those renting a car on Madeira.
As soon as you need to fill up your tank for the first time, you’ll notice that the words gasoline and diesel are only a few letters different from each other.
I hope this will clear up the confusion; Gasoline is Gasolina. | Diesel is Gasóleo.
If you’re not sure, don’t worry, it’s nearly always possible to quickly check with one of the gas station attendants to avoid filling up your car with the wrong fuel.
8 | Study the maps and download them to your phone
Before your road trip adventures, I advise downloading the offline map of Madeira on your Google Maps app, so you can also navigate the island when you lose phone services.
Believe me, this will happen quite often when driving in the mountains or through a tunnel.
Additionally, I would also recommend investing some time to research the best routes to take, as well as the duration to get to the highlights of your itinerary – more on that later.
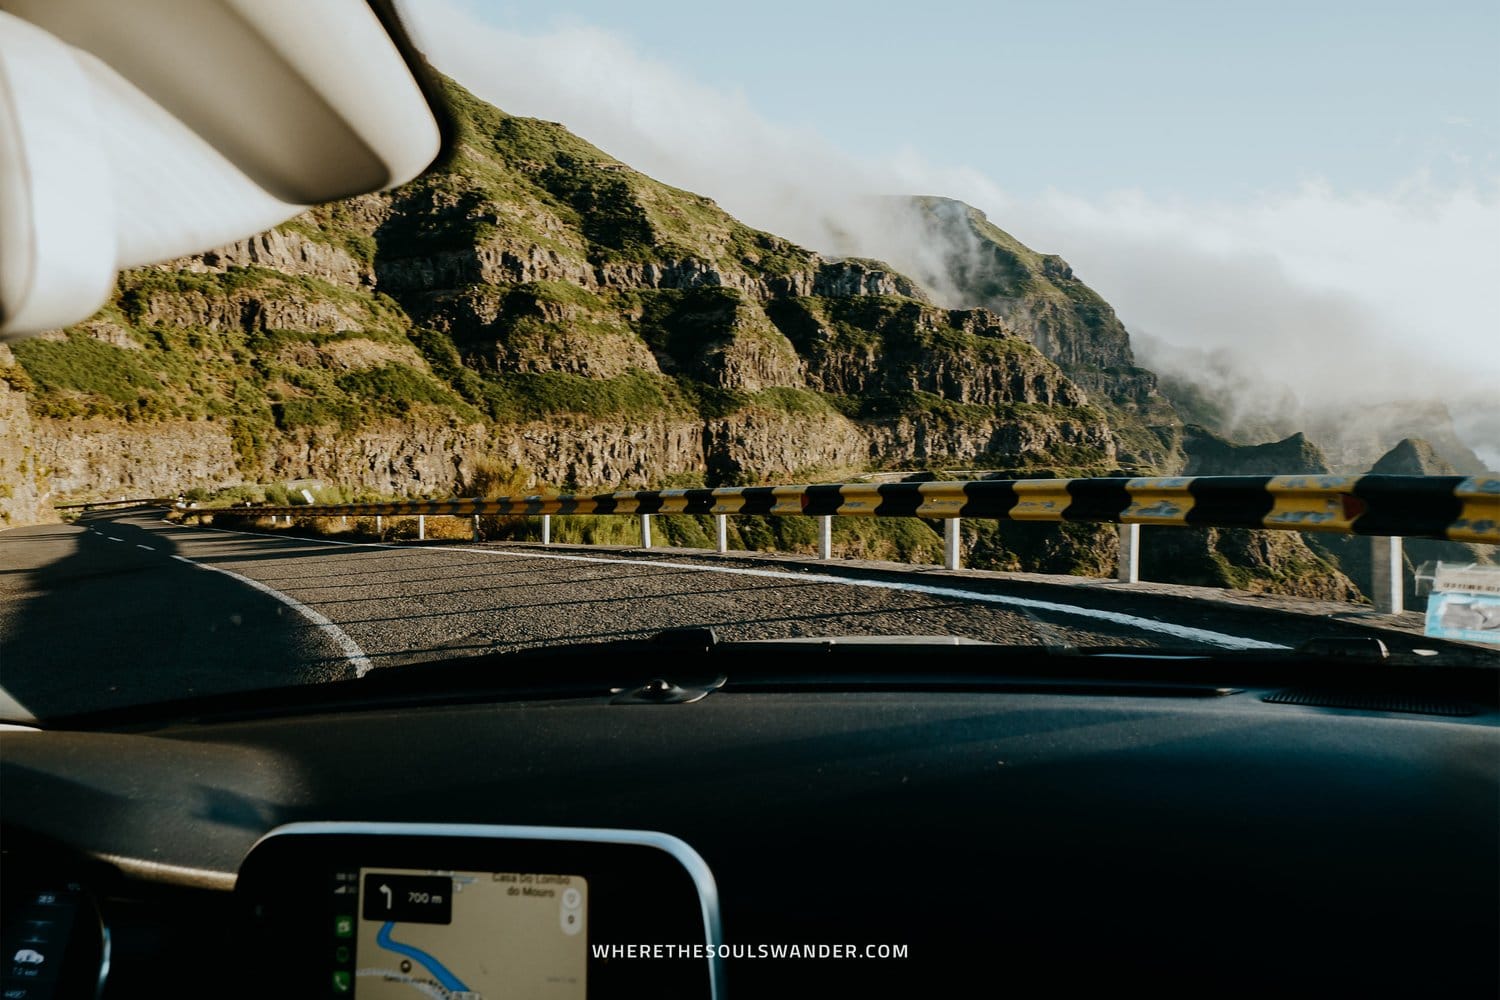
9 | Plan your route in advance
Even though Madeira is pretty compact in size, you’ll be surprised how much time you could actually lose when driving from A to B.
While this obviously isn’t a problem, considering the stunning scenery along the way (trust me, you will stop a lot during your first days), it isn’t really useful if you want to make the most out of your time on Madeira.
Therefore, it’s wise to thoroughly research the highlights, and then bundle them in a logical day-to-day itinerary. I personally bundled my highlights per area. But I quickly noticed that I was a bit too enthusiastic, given the driving part took more time than I thought beforehand.
If you’re not from the logistics side of things, that’s ok. I’ve put together an easy-to-follow 10-day Madeira road trip itinerary, so make sure you check that one out too.
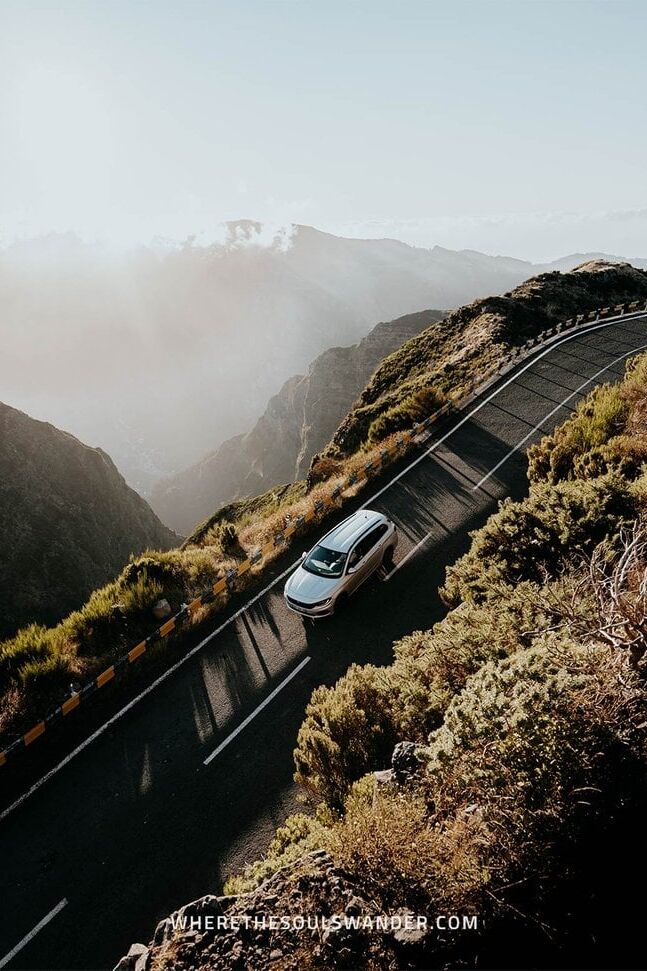
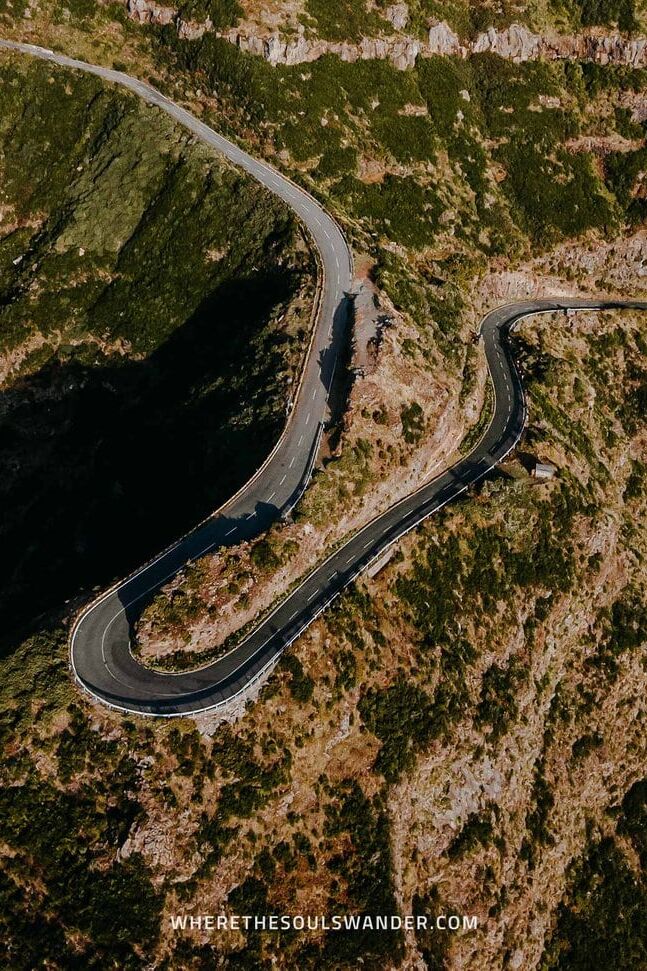
10 | Pick a hotel with free parking
One thing that is often overlooked when renting a car on Madeira, is the hidden expenses. One of those expenses is parking, especially if you choose to base yourself in the city centre of Funchal.
For that reason, I’d highly recommend finding accommodation with a free parking service before planning out your Madeira road trip itinerary.
I’ve stayed at the newly renovated Vila Baleira, an excellent hotel that provides its guests with a spacious and secure parking lot right under the property.
Add to that brilliant rooms, and a large rooftop terrace with a bar and swimming pool, and you understand why I chose Vila Baleira as my base.
Additionally, if you choose to select one of the fancy hotels in the heart of Funchal Old Town (these often don’t include parking), make sure you check out Almirante Reis Parking, where you can find a relatively cheap parking space too.
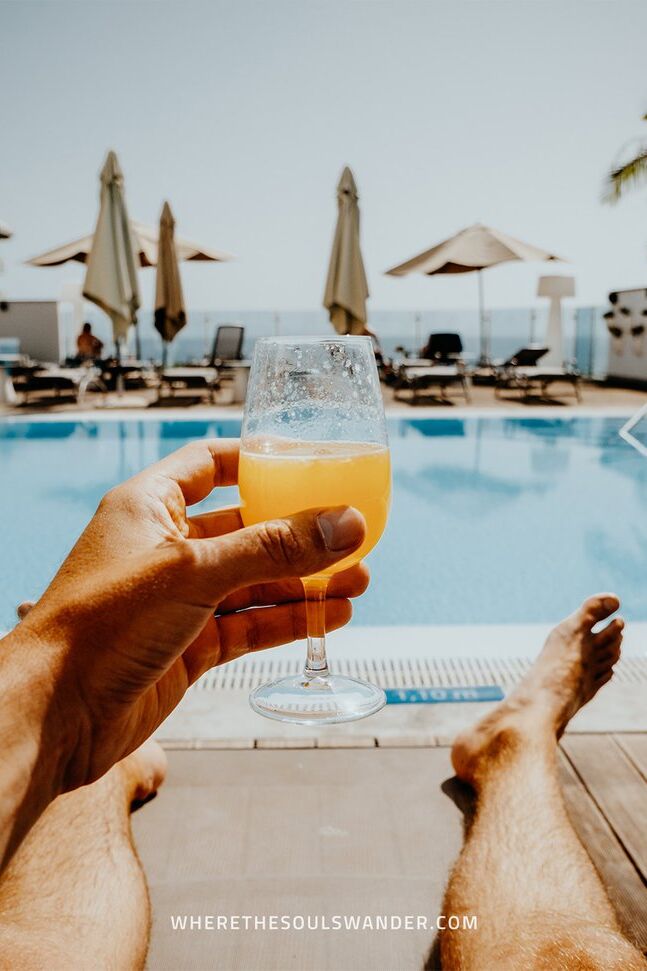

11 | Sort out your insurance
Even though I never felt unsafe throughout my Madeira road trip, I wouldn’t advise anyone to travel without having their necessary insurance sorted out.
First of all, I believe it’s quite unwise to leave out the full insurance option just to lower the cost of your car rental. By adding this, in my opinion, an essential option, the supplier will fully cover the car’s excess – plus the possible damage to the windows, mirrors, wheels and tyres.
Of course, full insurance comes at a price, but with Madeira’s fluctuating driving conditions, an accident may happen far more likely too. So I would say; it’s better to be safe than sorry!
Then there is your travel insurance, which, I believe, you should always purchase when travelling abroad, especially if you’re planning a road trip on Madeira.
For travel insurance, I use Heymondo, as they offer full COVID-19 coverage, as well as a handy app with 24-hour medical assistance. Make sure you check it out – readers of WTSW receive 5% off any insurance policy.
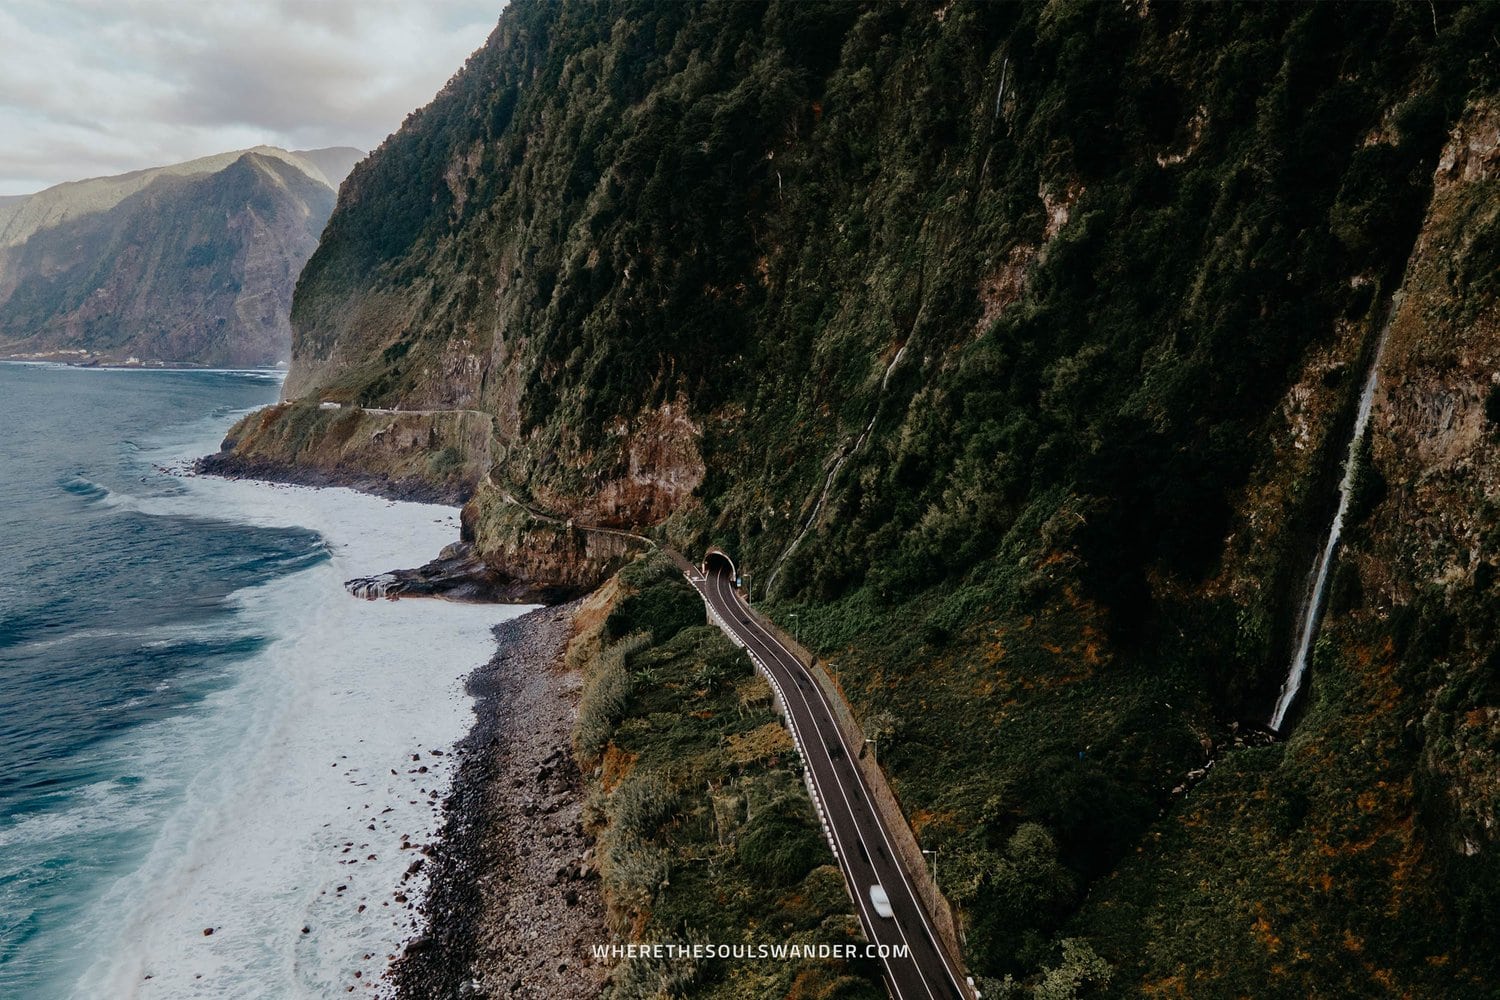
12 | Prepare for quickly changing weather conditions
Given that Madeira is made almost entirely out of rugged mountains, the island is home to several different microclimates.
During my 10 days on Madeira, the roads took me to sunny coastal towns, misty forests, mountain passages above the clouds, and everything in between.
For road-trippers, it’s therefore important to know that the weather conditions could change extremely quickly on Madeira – and I mean zero to one hundred, real quick.
As you drive around the island you will have to adjust to all sorts of unpredictable weather circumstances, and it’s exactly this that makes a road trip on Madeira unique.
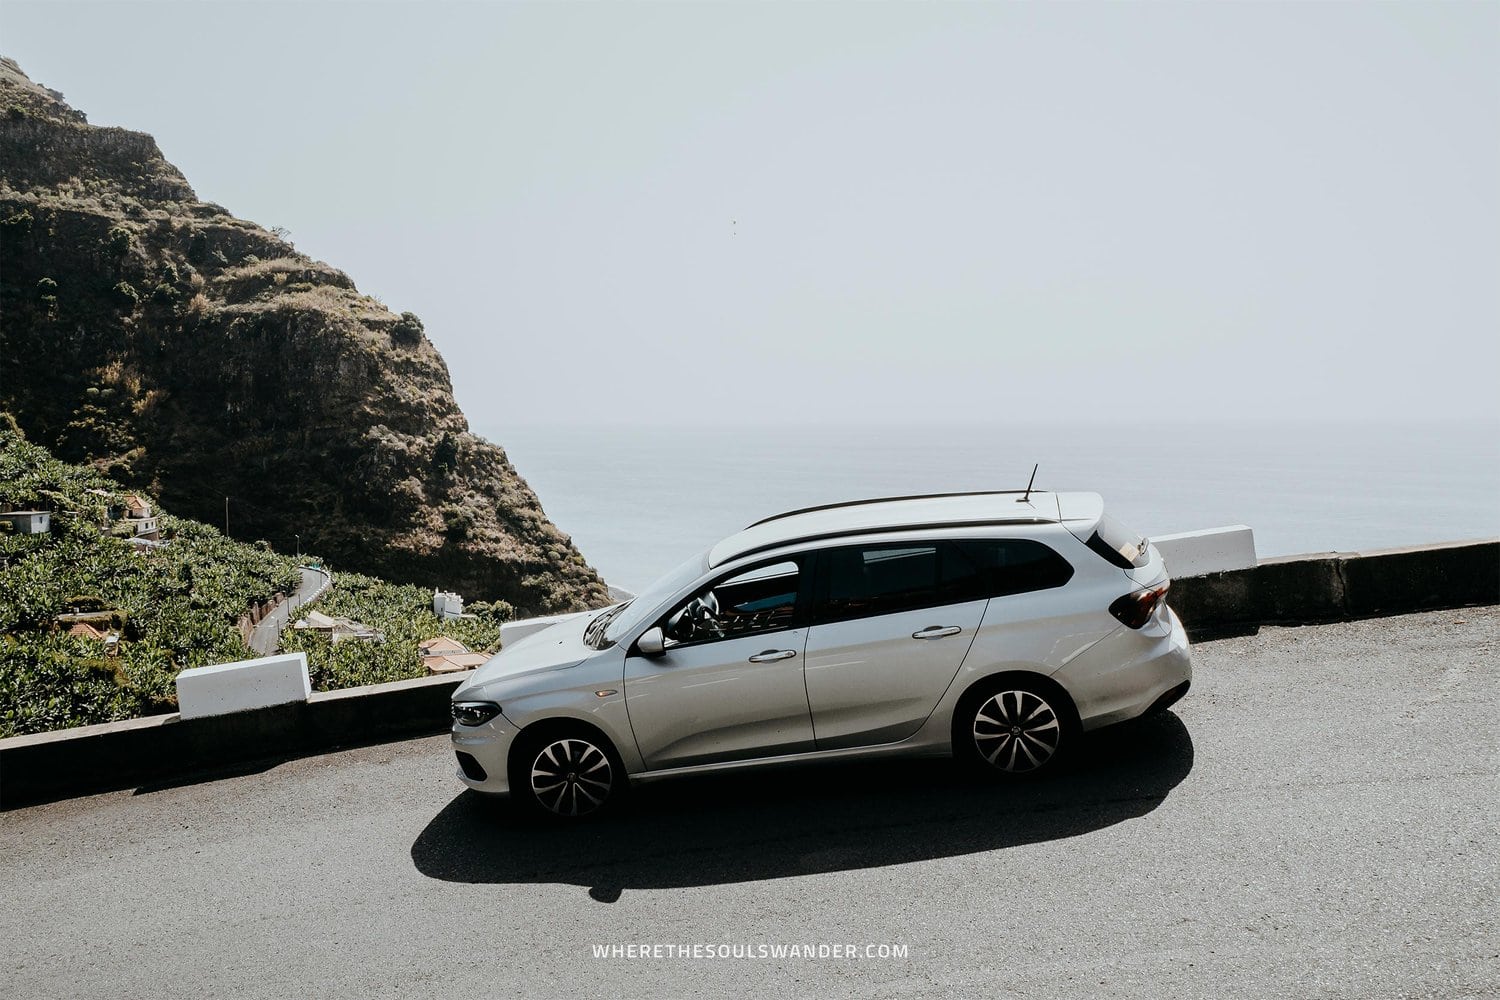
Where to stay on Madeira
Since Madeira is rather compact, I highly recommend anyone to base themselves in Funchal, Madeira’s vibrant capital city.
Funchal is an awesome city in its own right and is home to plenty of excellent accommodation options, is packed with history and culture, plus it has trendy restaurants and cafes at just about every corner.
To help you find suitable accommodation, I’ve listed three of my favourites below, one of which is marked – this is the place where I stayed.
+ Vila Baleira | This was my base for the whole of my trip, and if you’re seeking comfort without spending your entire budget straight away, Vila Baleira will be perfect for you too. Located within the popular Lido area, this hotel offers spacious rooms, comfortable beds, and a large rooftop terrace with a swimming pool. They also have a tasty breakfast spread, excellent wifi throughout the entire property, and a secured parking lot right under the property.
NEXT – Savoy Signature |This budget-friendly hotel in the centre of Funchal has spacious, modern-style rooms with comfortable double beds and a brilliant private bathroom with a rain shower. They also have an incredible rooftop swimming pool with amazing sea views. Double rooms are only €50 per night, which makes this place one of the best picks in Funchal.
Hotel Cajú | Set within the heart of Funchal, Hotel Cajú is a great place to stay, with stylish double rooms, friendly staff, and a small yet excellent in-house fitness centre. All bookings come with an exceptional breakfast too. One small downside though, they don’t have private parking.
Stay safe on Madeira | Travel insurance
Since a trip to Madeira is all about hiking and nature, I recommend everyone sort out good travel insurance before setting out on their own adventure.
Where we prefer that everything goes smoothly during our travels, something unfortunate can happen at any moment, whether it’s an injury during a hike or an accident on the road.
For travel insurance, I use Heymondo, as they offer full COVID-19 coverage, as well as a handy app with 24-hour medical assistance. Make sure you check it out – readers of WTSW receive 5% off any insurance policy too.
Cheers!
I’ve been on this travel blogging journey since 2019.
If you appreciate what I do here, these are some ways you can support me.