

9 Awesome things to do in Amman, Jordan (update 2023)
Situated in the north of Jordan is Amman, the country’s lively capital city and for many the starting point of their Jordan itinerary.
It’s a city that marches to the beat of its own drum, and therefore it’s often said that you either like it or not.
In my opinion, Amman is dangerously underrated, and one of the most authentic destinations in the country. So when I noticed that Amman is often skipped in favour of other highlights in Jordan, I was actually pretty surprised.
Amman combines the hustle and bustle of a large modern city with a unique history and exceptional architecture, and when roaming around downtown you will be mesmerized instantly.
From souks teeming with locals to ancient Roman architecture, exceptional luxurious hotels (make sure you check out W Amman) to opulent mosques, Amman is without question the perfect place to get a feel for today’s Jordan.
For the above reasons, this vibrant capital deserves at least two days of your itinerary.
To help you uncover the absolute best of Amman, I’ve put together this in-depth guide, including the city’s highlights – plus advice on where to stay, when to visit and more.
These are my absolute favourite things to do in Amman and surrounds.
If you choose to use any of the links on this page, I receive a small commission at no extra cost to you. By using these links, you’ll have a direct impact on WTSW and support me to continue to create free insightful travel content for you. If you find any of my tips useful, you can support me by buying a virtual coffee here.
Where is Amman
Amman, also known as the capital of Jordan is a lively city that is built upon 19 hills in the northwest of Jordan.
Considered the largest city in the Hashemite Kingdom of Jordan, Amman is named the ninth-largest metropolitan area in the Middle East, with a population of roughly 4 million as of 2022.
All of this makes Amman the country’s centre of all things economic, political, and culture.
Where to stay in Amman
As with most capital cities, Amman is teeming with excellent accommodation options, catering to any budget or travel style.
Whether you’re after a cheap stay in a hostel, wish to splurge on a luxury boutique hotel or looking for something in between, I’m pretty confident that you’ll find what you’re looking for.
To help you find your stay, I’ve put together my favourite accommodation in Amman.
Budget
Luckily for us, it’s rather easy to find affordable accommodation in the city centre of Amman – these are my favourite out of the bunch.
Nomads Hotel | Another surprisingly affordable option, Nomads Hotel is situated only a stone’s throw away from Rainbow Street and offers excellent minimal-style rooms that won’t break the bank. Double rooms at €50 a night make this one of the best budget hotels in Amman.
Mid-range
Most accommodations in Amman are categorized in the mid-range category, meaning you’ll likely find great options in this range. These are some of my personal favourites:
Coral Tower Hotel by Hansa | Located within walking distance of all the best things to do in Amman, this 4-star hotel offers spacious airconditioned rooms, free private parking, and a shared lounge and a terrace.
Harir Palace Hotel | This boutique-style hotel boasts beautifully decorated rooms, a large rooftop pool, and an in-house health club, making it one of the highest-rated in this price range. Doubles start at €80 per night.
Luxury
Based on first-hand experience, Amman has no shortage of Luxury stays, offering top-notch experiences for those willing to splurge. These are two of my favourites:
+ W Amman | This is where I stayed, and I really had an incredible time here. W Amman provides spacious modern-style rooms with all the luxuries to unwind after a long day of explorations around downtown Amman. So, if you’re looking for top-notch comfort and high-quality hospitality, make sure you click the link to see how awesome this hotel is.
Mövenpick Hotel Amman | Situated around 8 kilometres away from the hustle and bustle of downtown Amman, this gorgeous hotel has well-designed rooms, world-class service and a stunning outdoor pool with views over the city. If you’re willing to spend a little extra, you won’t be disappointed, so make sure you have a look at this one.
9 Awesome things to do in Amman, Jordan
1 | Take in the views from the Amman Citadel
Nestled on Jabal al-Qal’a in the heart of downtown Amman, the Amman Citadel provides the most stunning views of the city, with stunning panoramic views as far as the eye can see.
Home to several of Amman’s most noteworthy historical sites – including the Temple of Hercules, Umayyad Palace and the Jordan Archaeological Museum, this area is easily one of the best things to do in Amman, as it displays the rich and diverse history of the city.
On top of that, the views over the Roman Theatre with the characteristic houses built against the encircling hills make for an epic scene, especially when visiting during the golden hour.
As a result, this place is teeming with local families and tourists alike, all gathering here to watch the sunset illuminate the iconic hills of Amman – and believe me, it’s truly an unforgettable experience.
THE ESSENTIALS
Where | Amman Citadel
Cost | Entrance fee 3 JOD (€3,90) per person
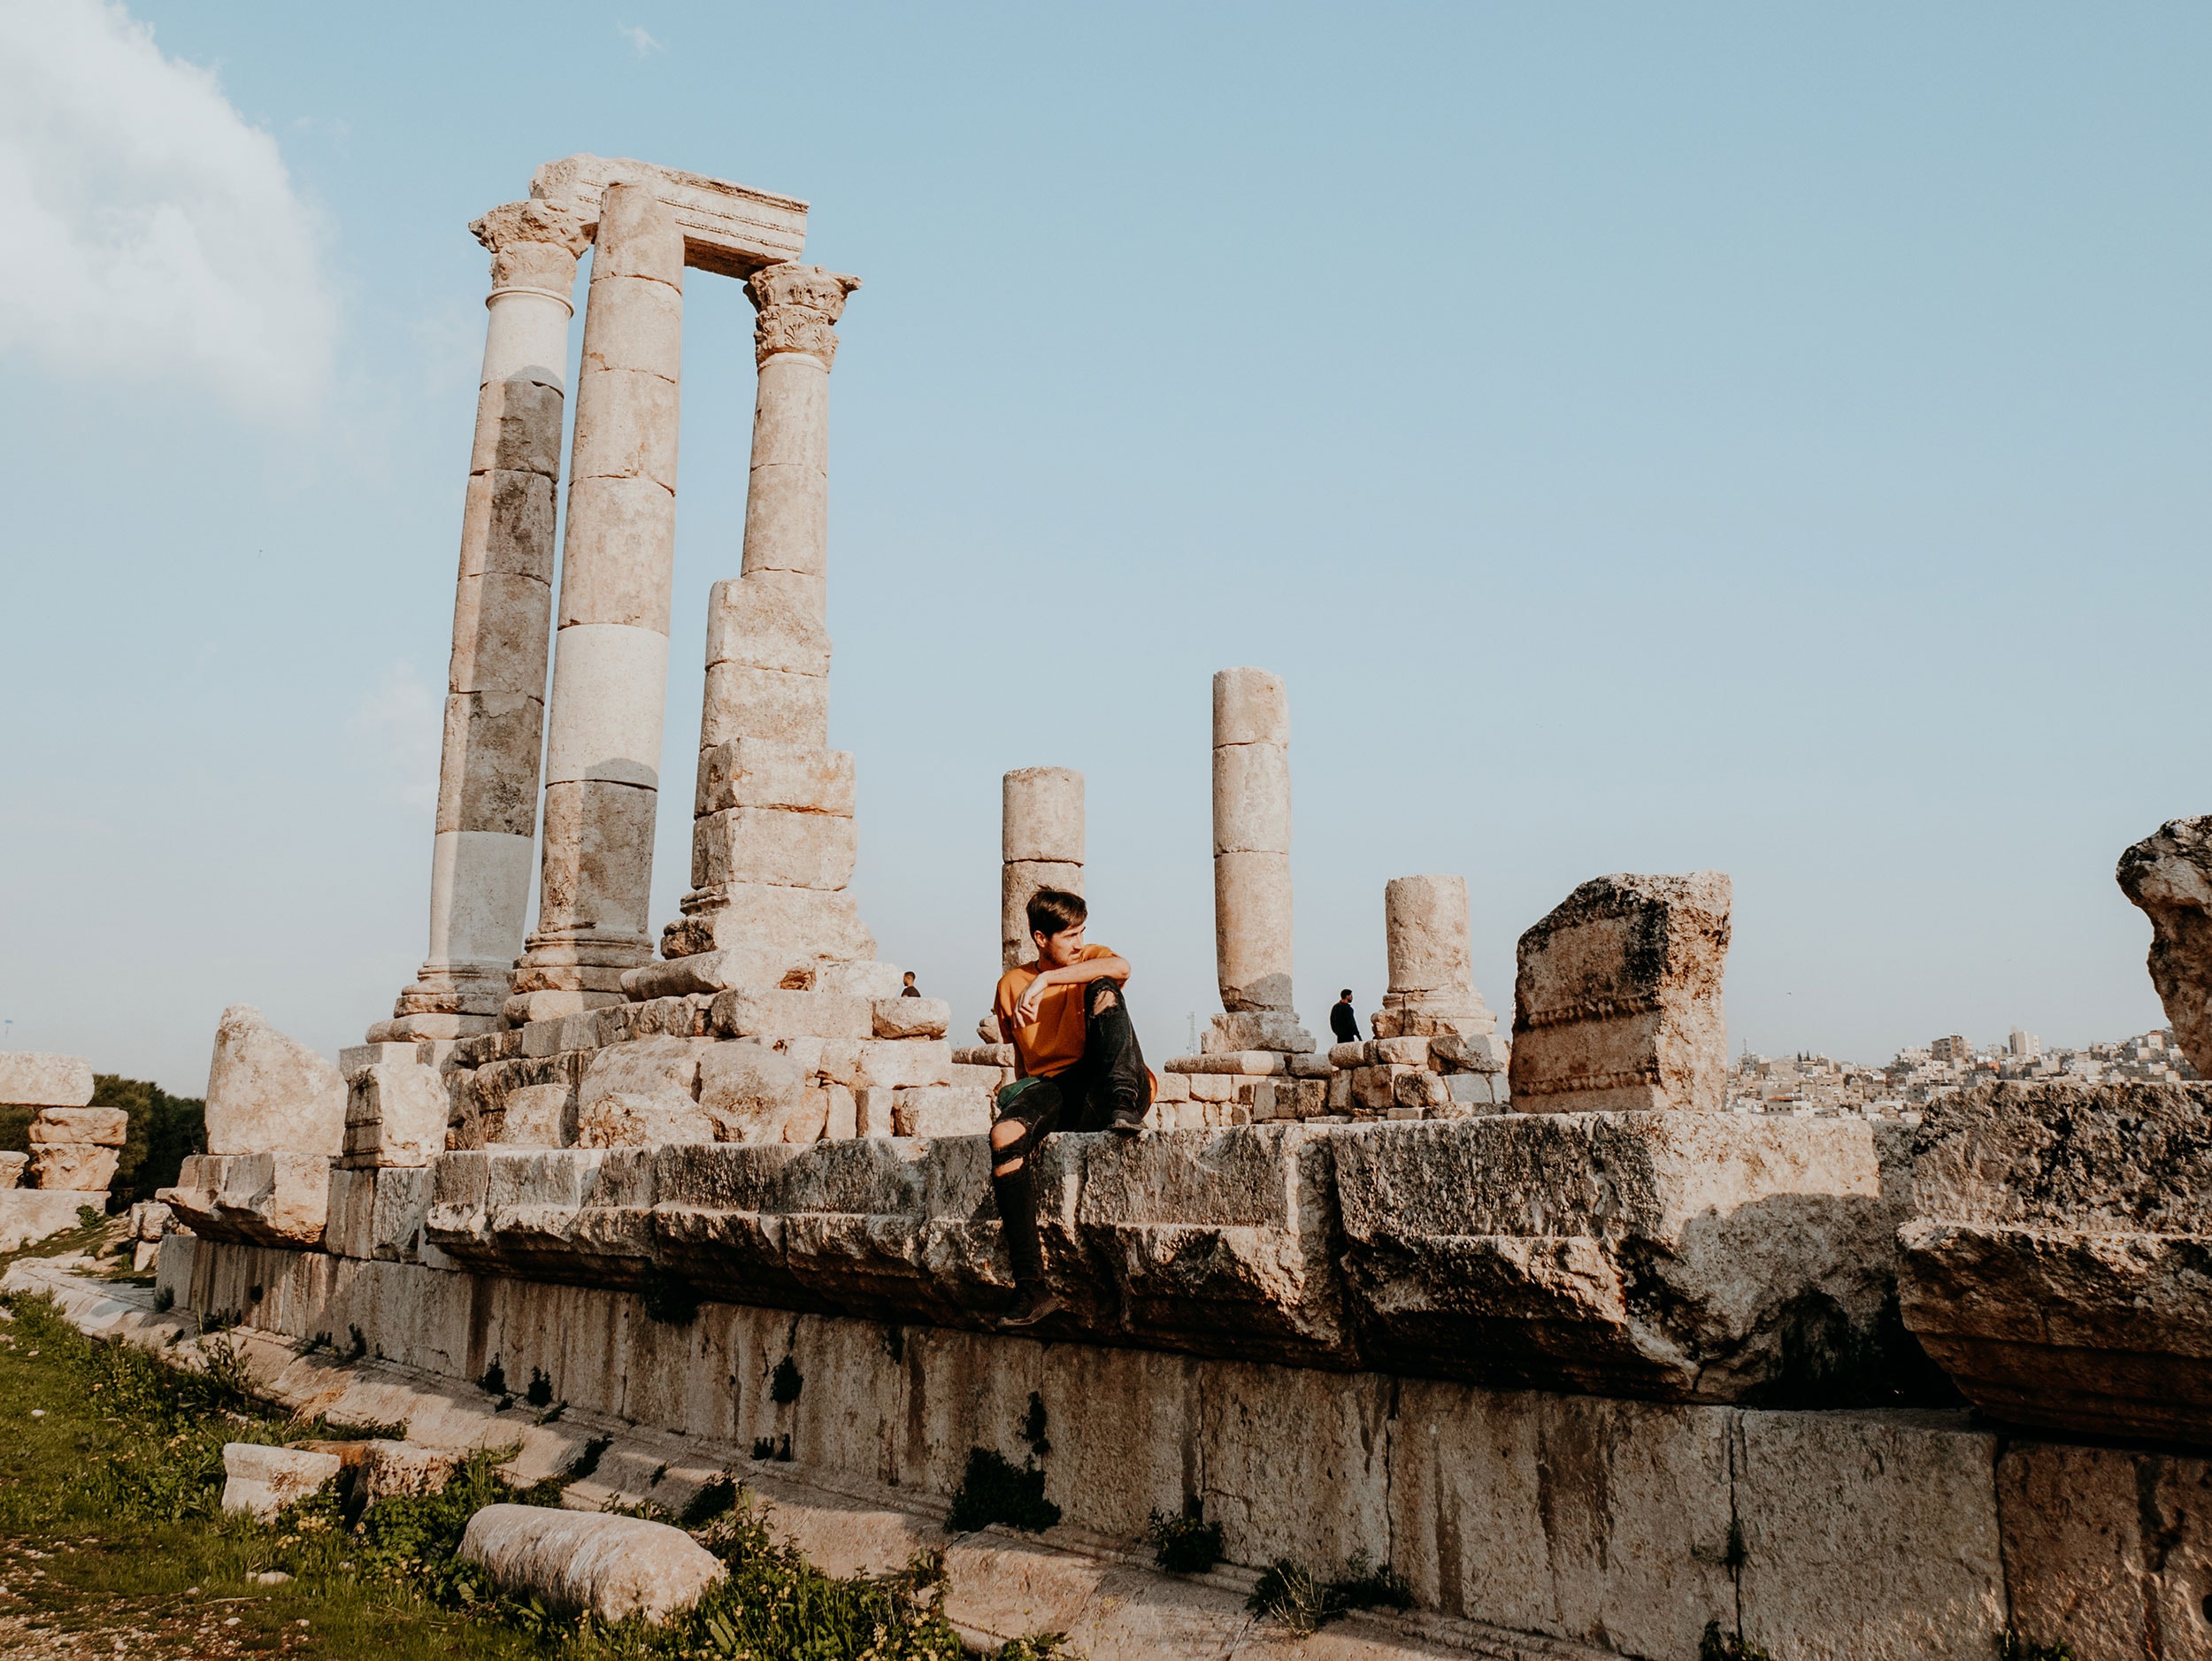
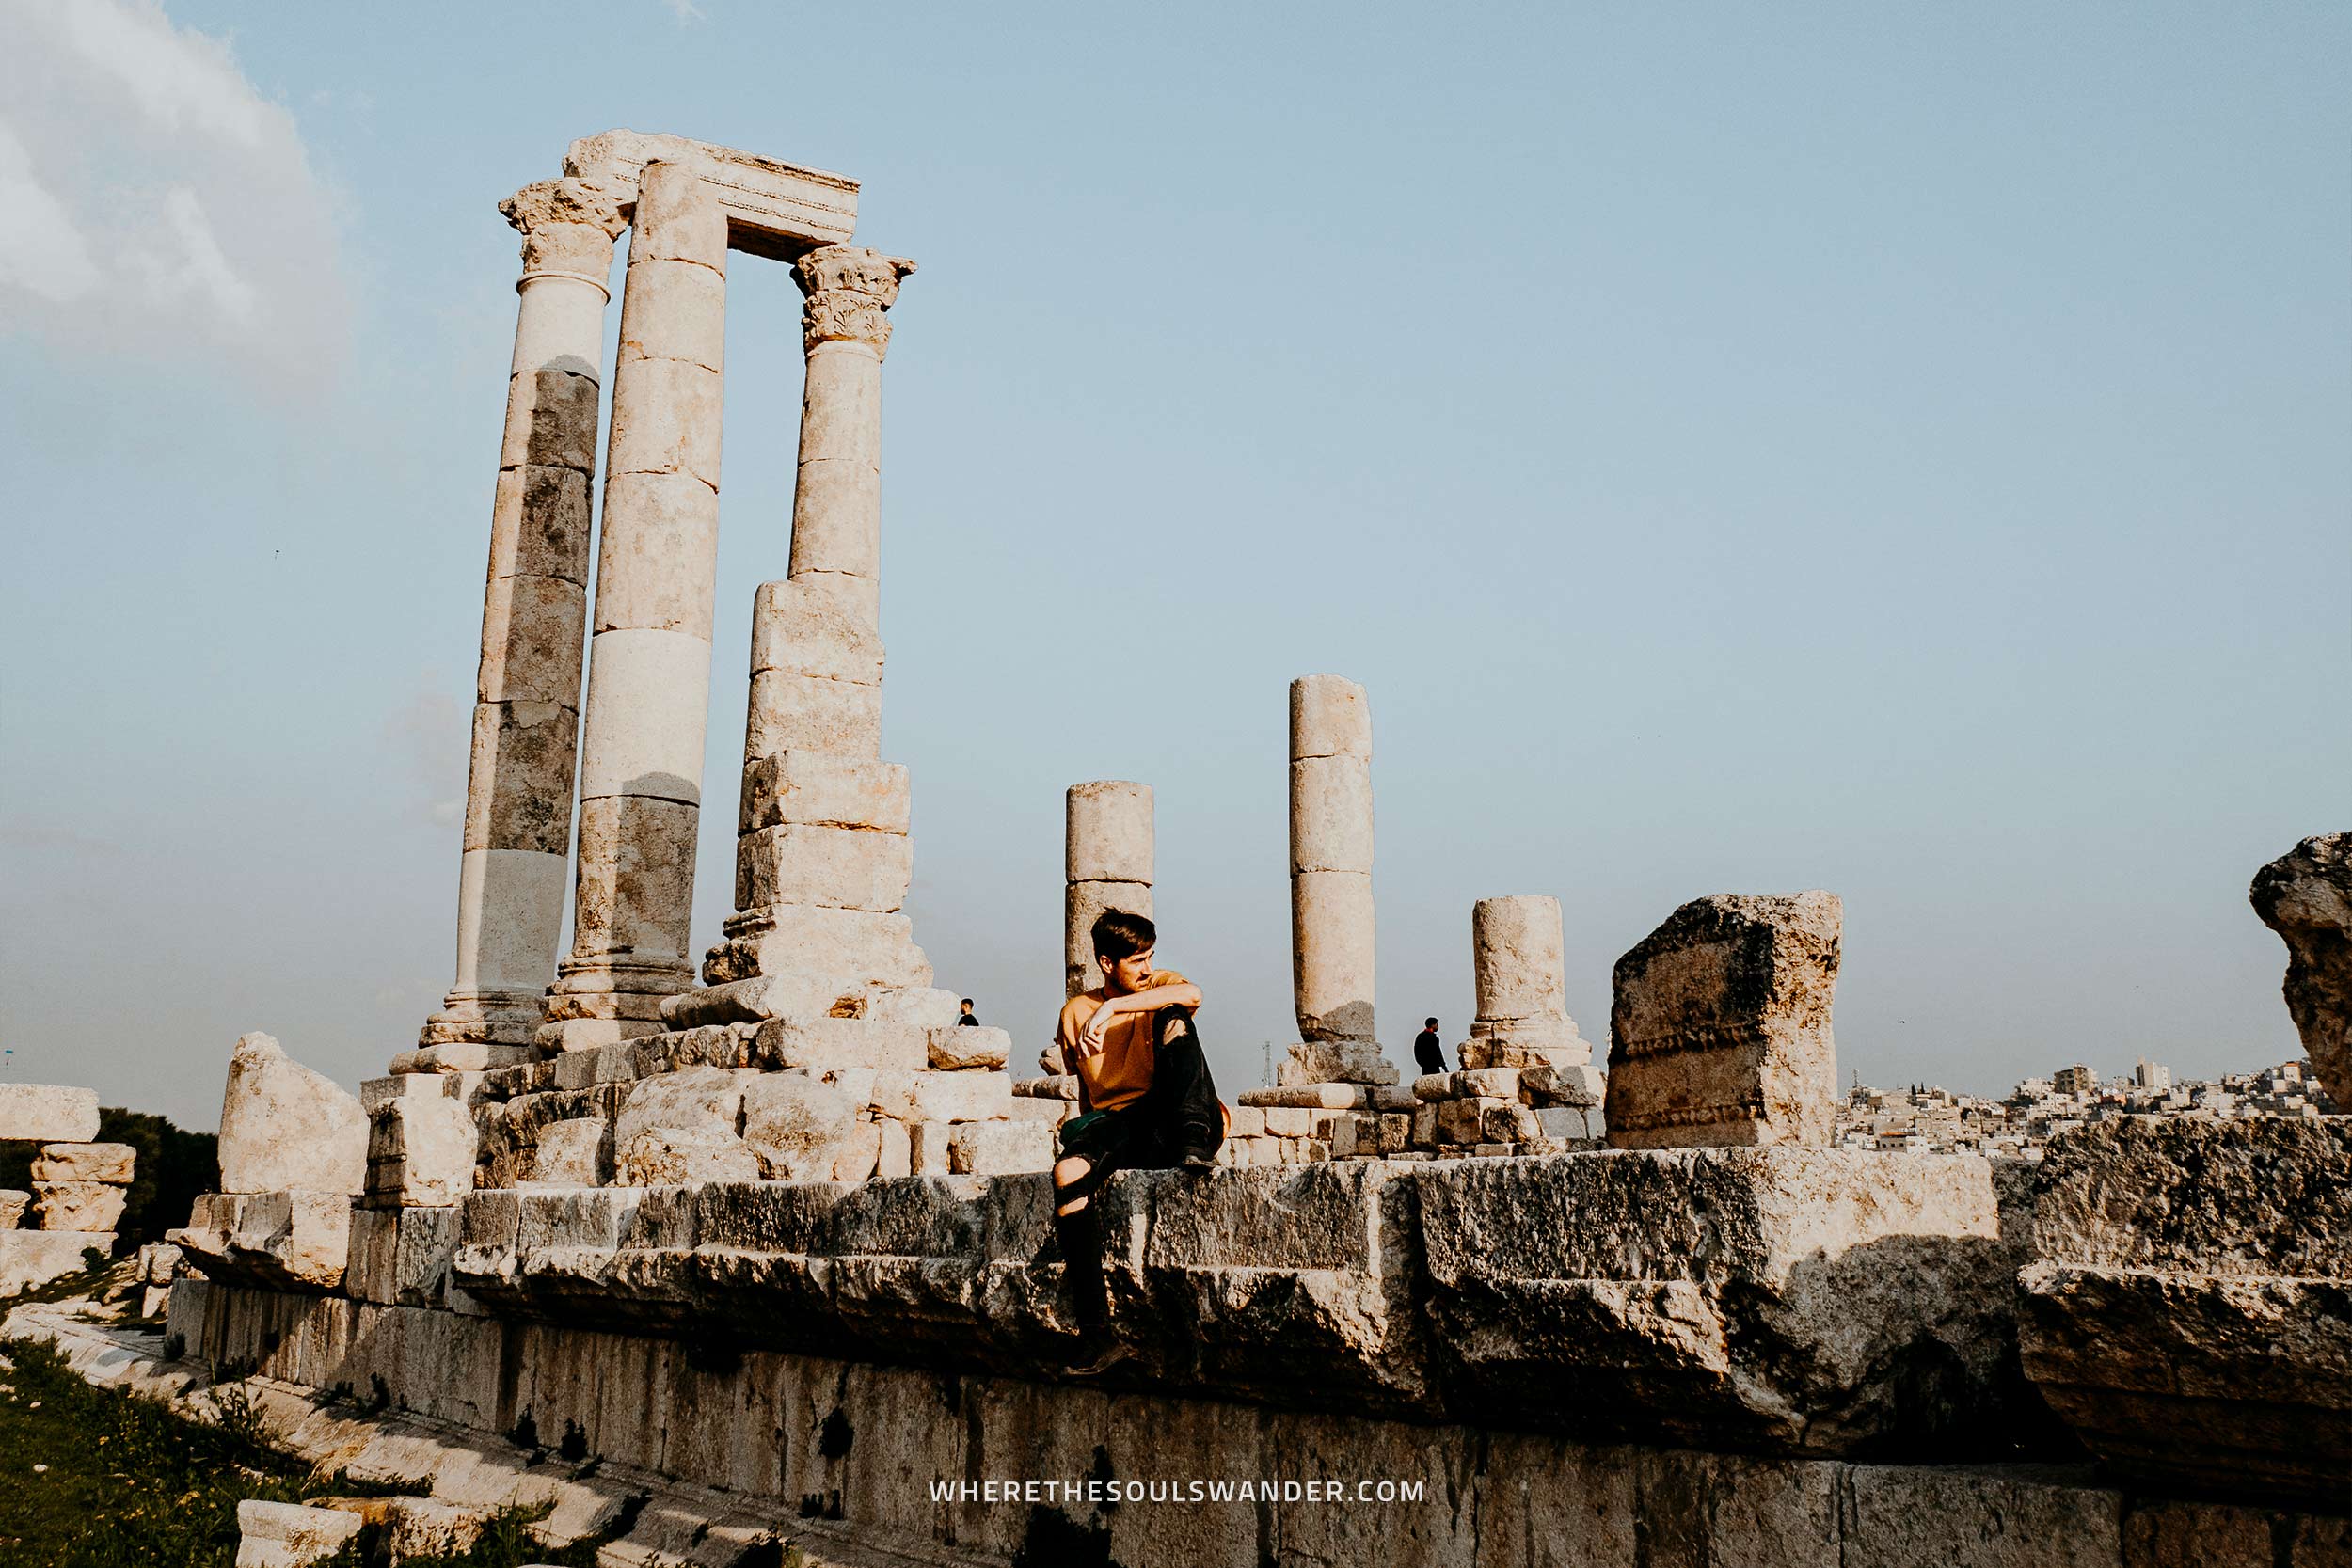
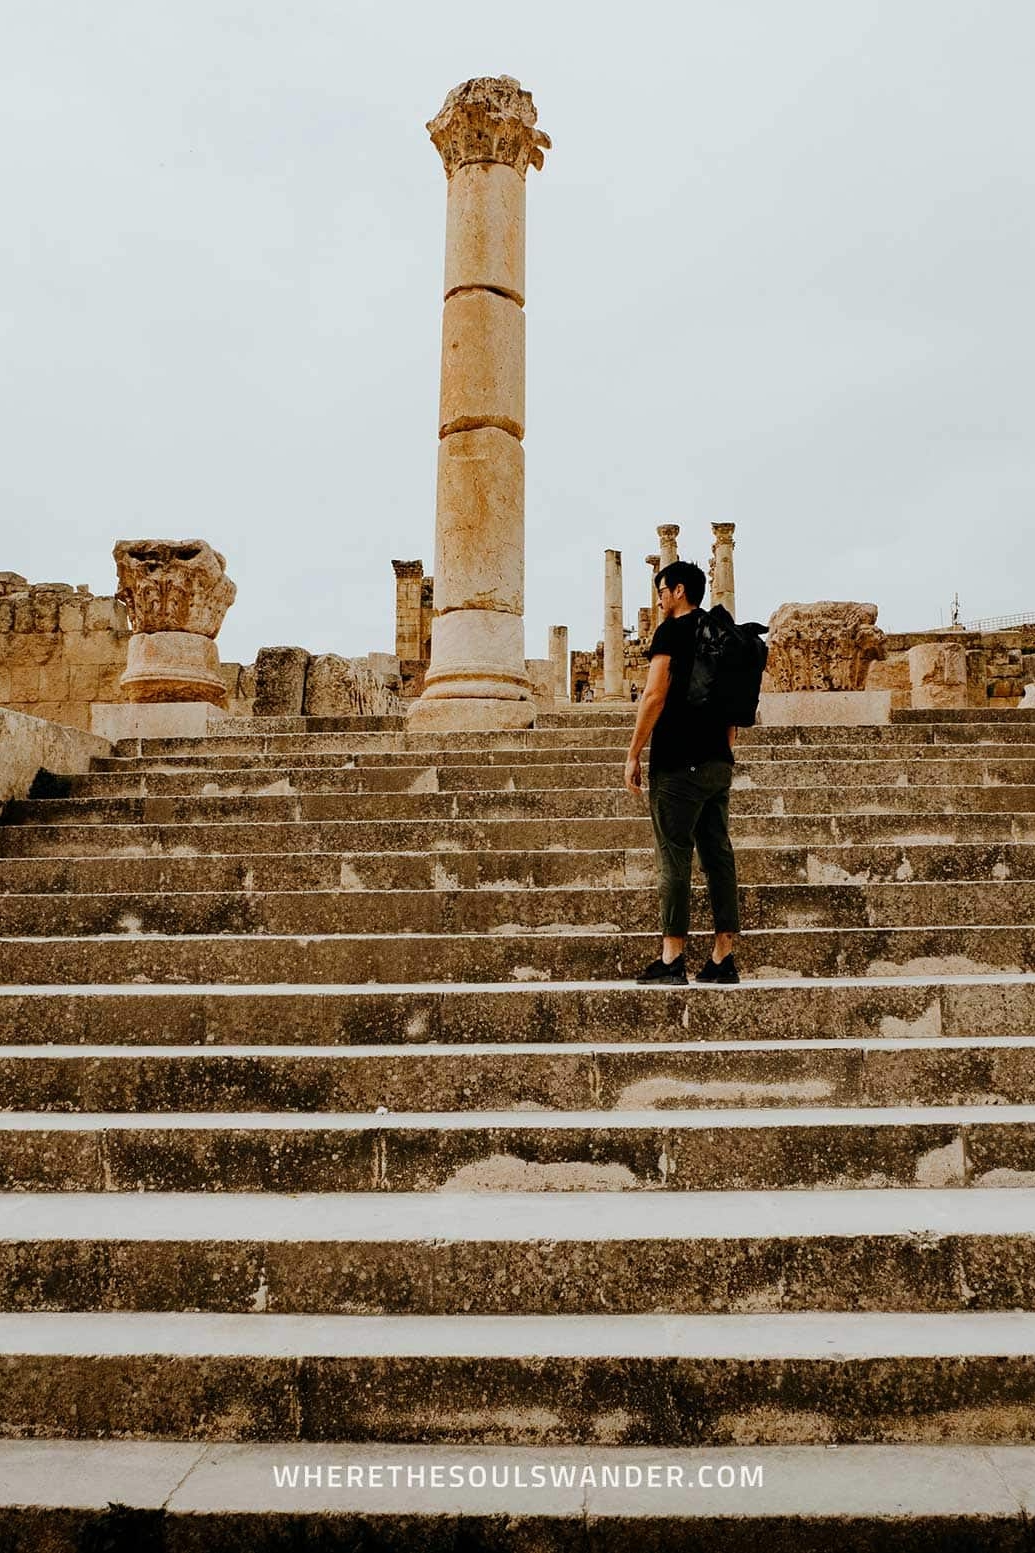
2 | Visit the Temple of Hercules
Set within the heart of the Amman Citadel are the imposing remains of the Temple of Hercules.
Though it is said that the construction has never been fully completed, the temple of Hercules was built in typical Roman style under the rule of Roman senator and general Geminius Marcianus between 162 and 166 AD.
Whilst the temple is far from what it once used to be – or intended to be, the Temple of Hercules is still the most significant landmark found within the grounds of the Amman Citadel.
Furthermore, you can also stumble upon the remnants of a large stone-carved hand, which was once part of an enormous statue of the ancient Roman god Hercules.
Strolling around the imposing ruins was in many ways one of my favourite things to do in Amman, so make sure you drop by at least once while exploring the time-worn citadel.
THE ESSENTIALS
Where | The Temple of Hercules
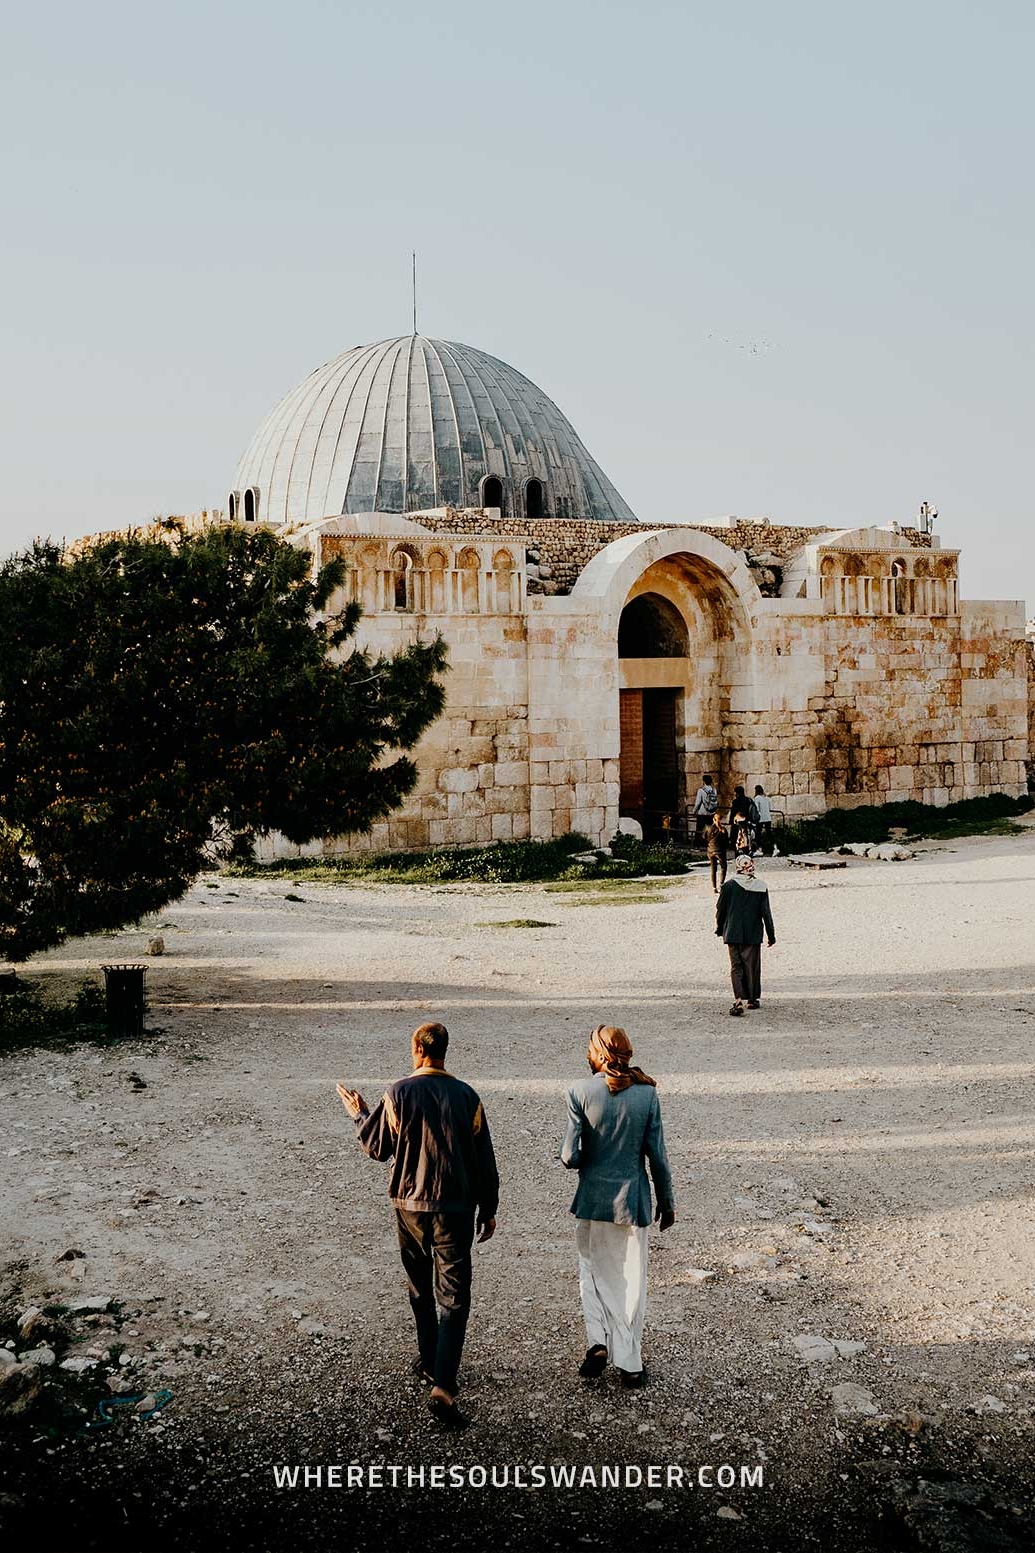
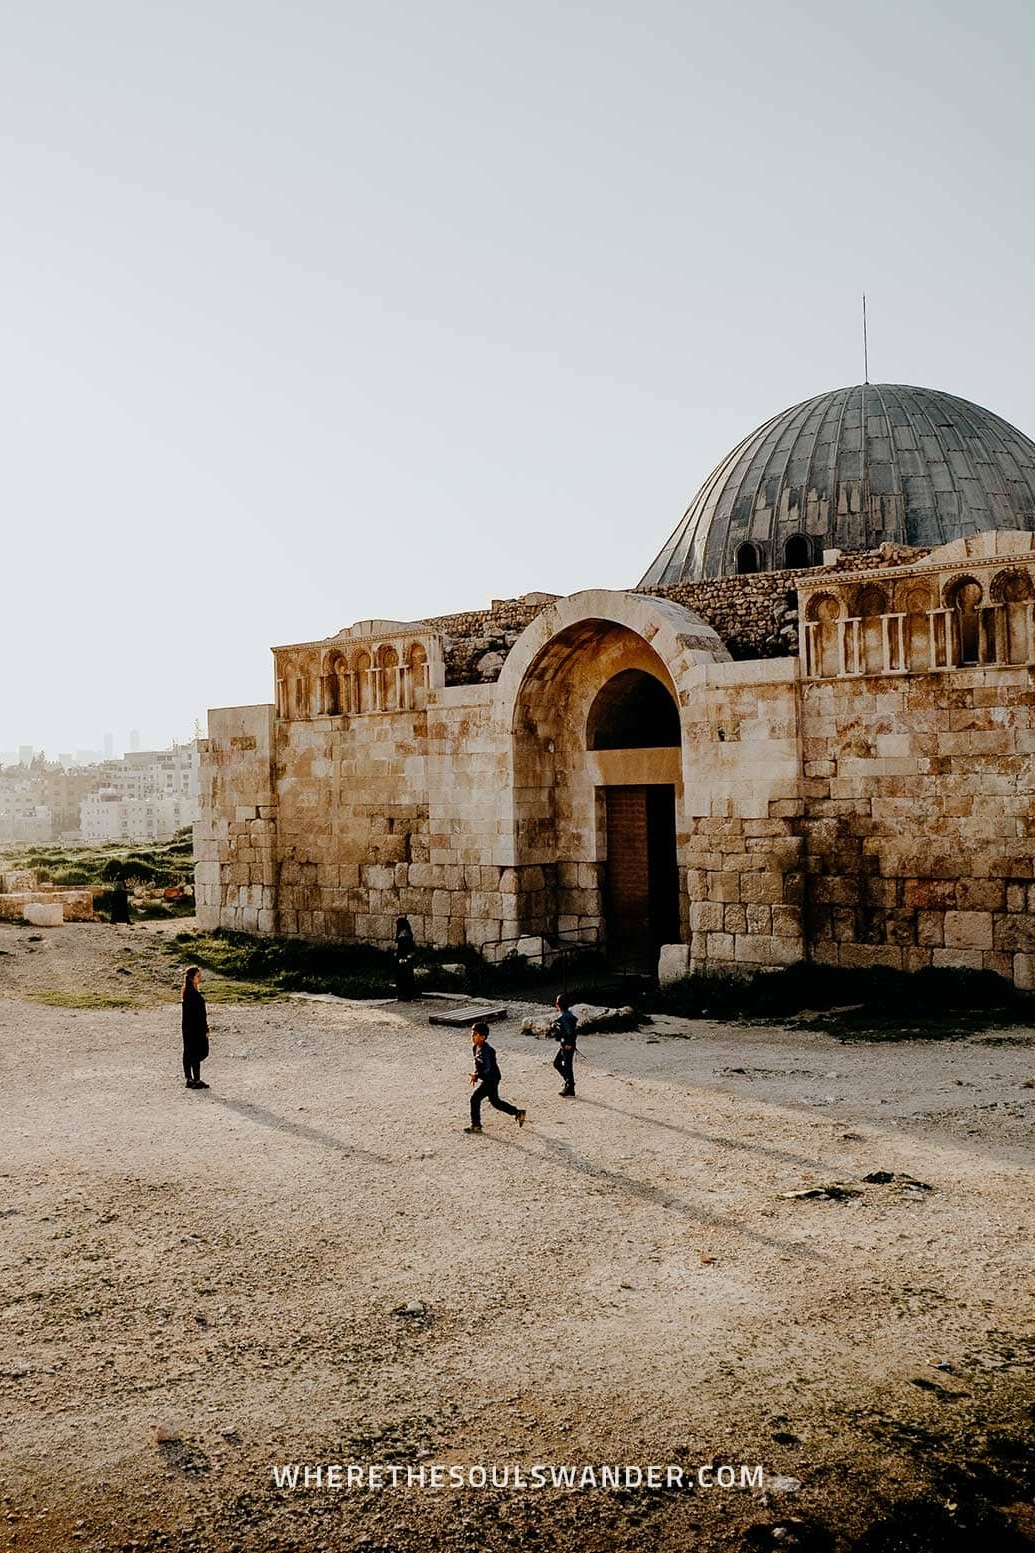
3 | Admire the Umayyad Palace
Established on the Northern part of Amman’s Jabal al-Qal’a, the ancient Umayyad Palace is a large complex that dates back as far as the Umayyad period.
Now largely ruined, the palace was built over the remainders of Roman constructions in the years between 724 and 743 AD by Abd al-Malik ibn Marwan, also known as ‘The Dew of the Stone’.
At present, the magnificent Umayyad Palace gives its visitors a glimpse into the life of the Umayyad era, making it one of the most interesting structures in the Amman Citadel.
The intriguing architecture makes this palace extremely unique, and for a photographer like me, it created the perfect backdrop for some of my favourite photos I took in Jordan.
THE ESSENTIALS
Where | The Umayyad Palace
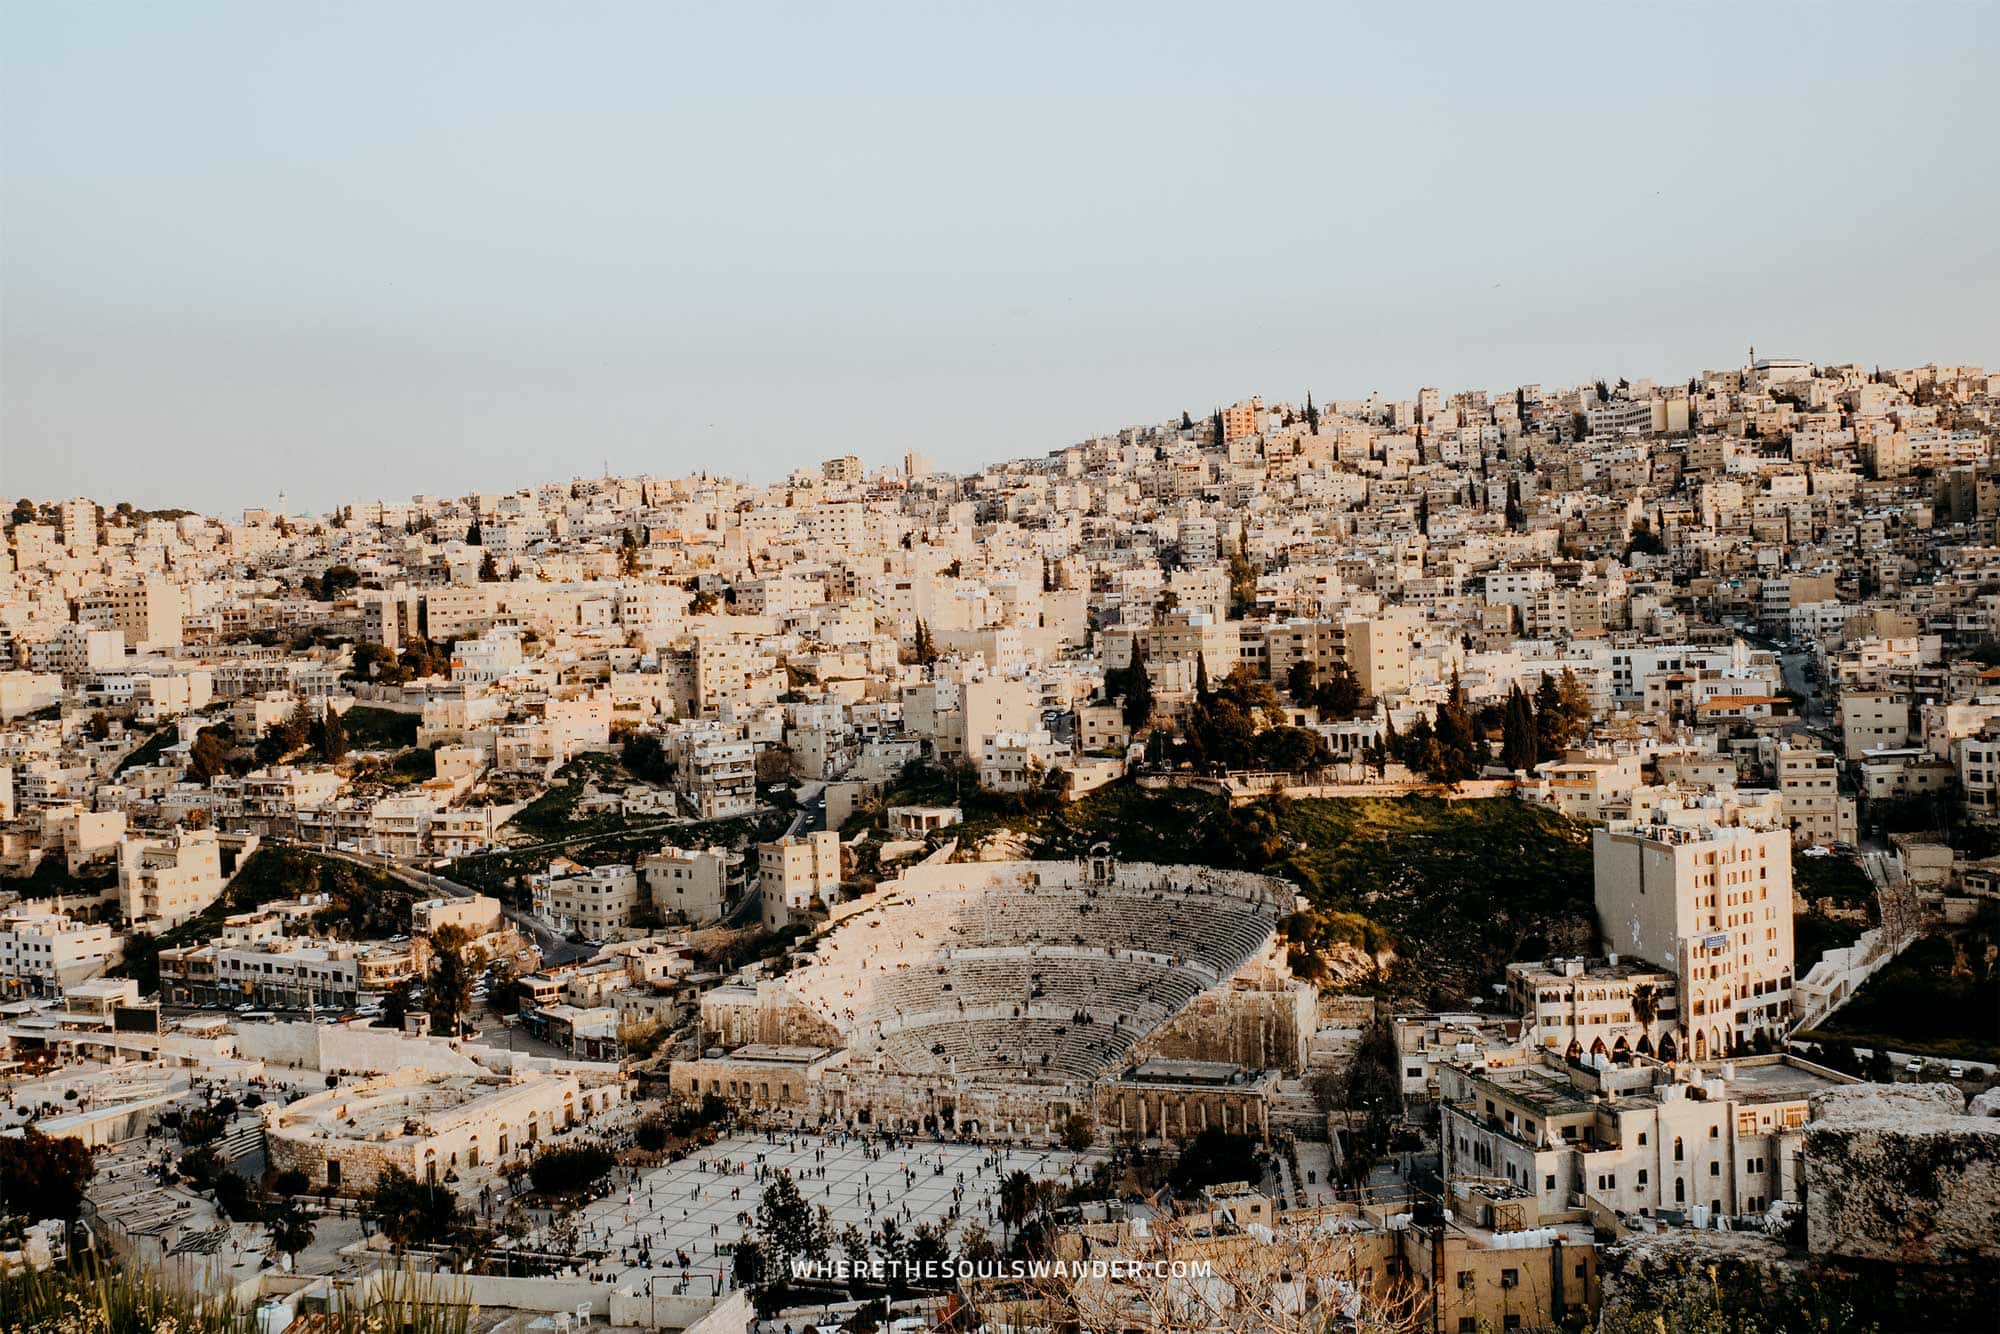
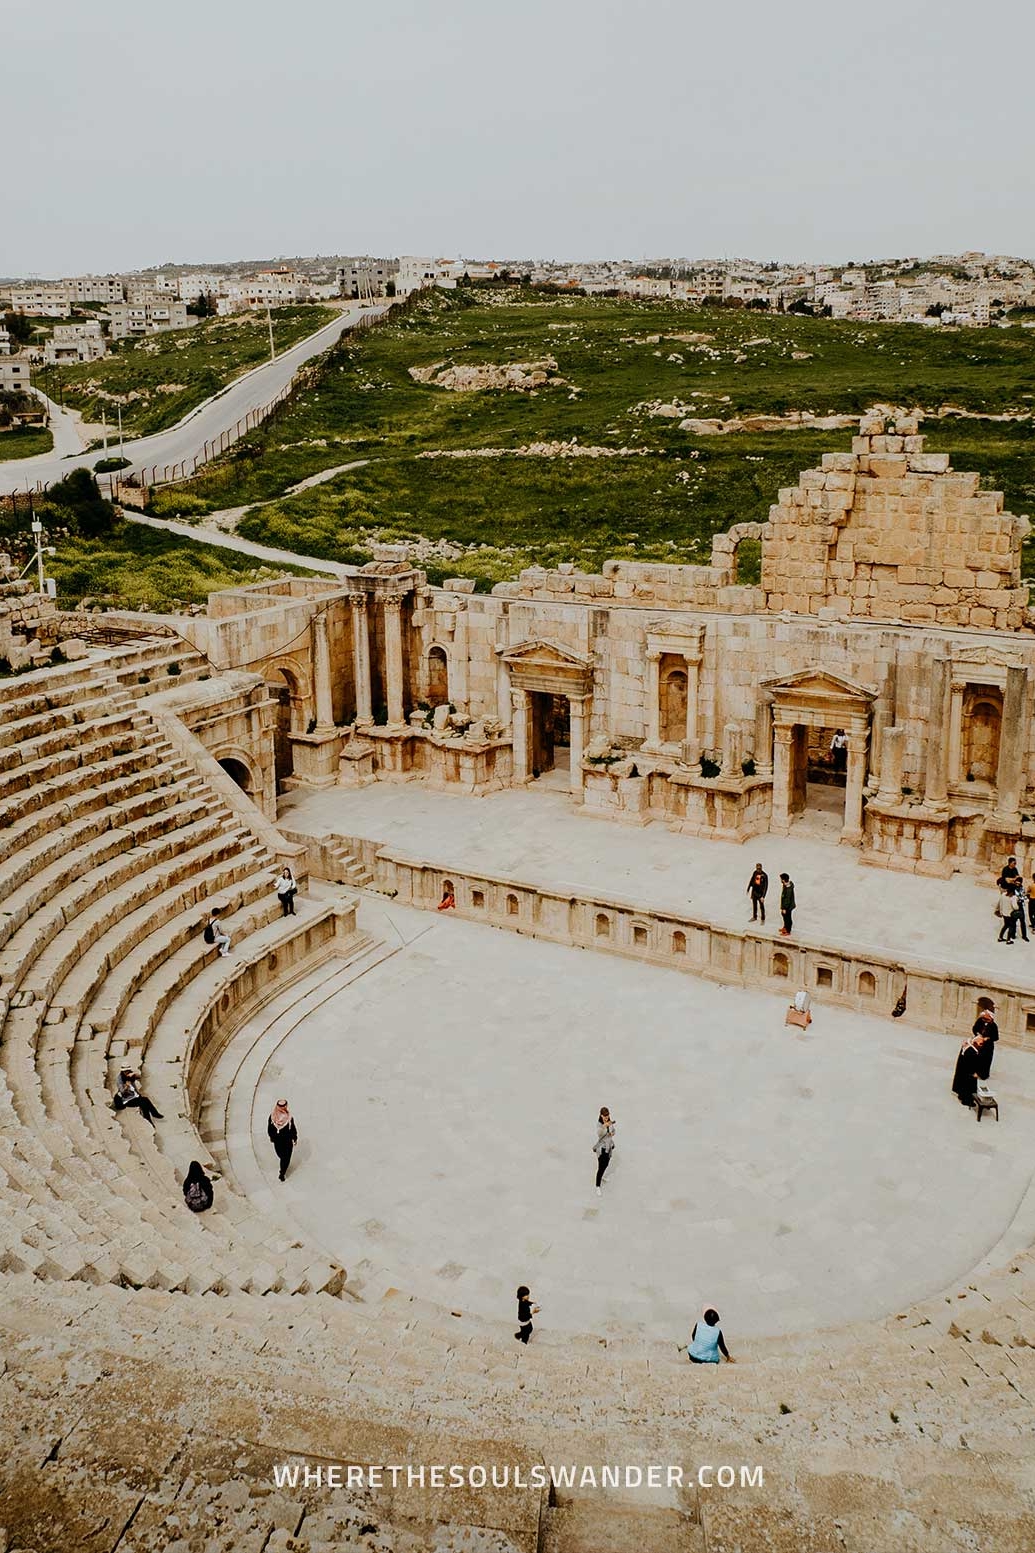
4 | Behold the Roman Theatre
Built in the 2nd century, the Roman Theatre can seat up to 6,000 people and dates back as far as the Roman Era, when Amman was still known as Philadelphia.
Whether seen from atop of the Amman Citadel or up close and personal, the Roman Theatre is an impressive sight to behold and still reflects the greatness of the once-thriving Roman Empire.
Besides the theatre, there are also two small museums, one on either side of the theatre; the Folklore Museum and the Museum of Popular Traditions – both displaying plenty of interesting ancient artefacts and costumes.
So whether you’re a history buff, or keen to tick off the best things to do in Amman, I believe a visit to the Roman Theatre is essential for anyone travelling here, as it allows you to really understand the history and culture of the city.
THE ESSENTIALS
Where | The Roman Theatre
Cost | 2 JOD ( €2,60) per person
Opening hours | Daily 0800 – 1830

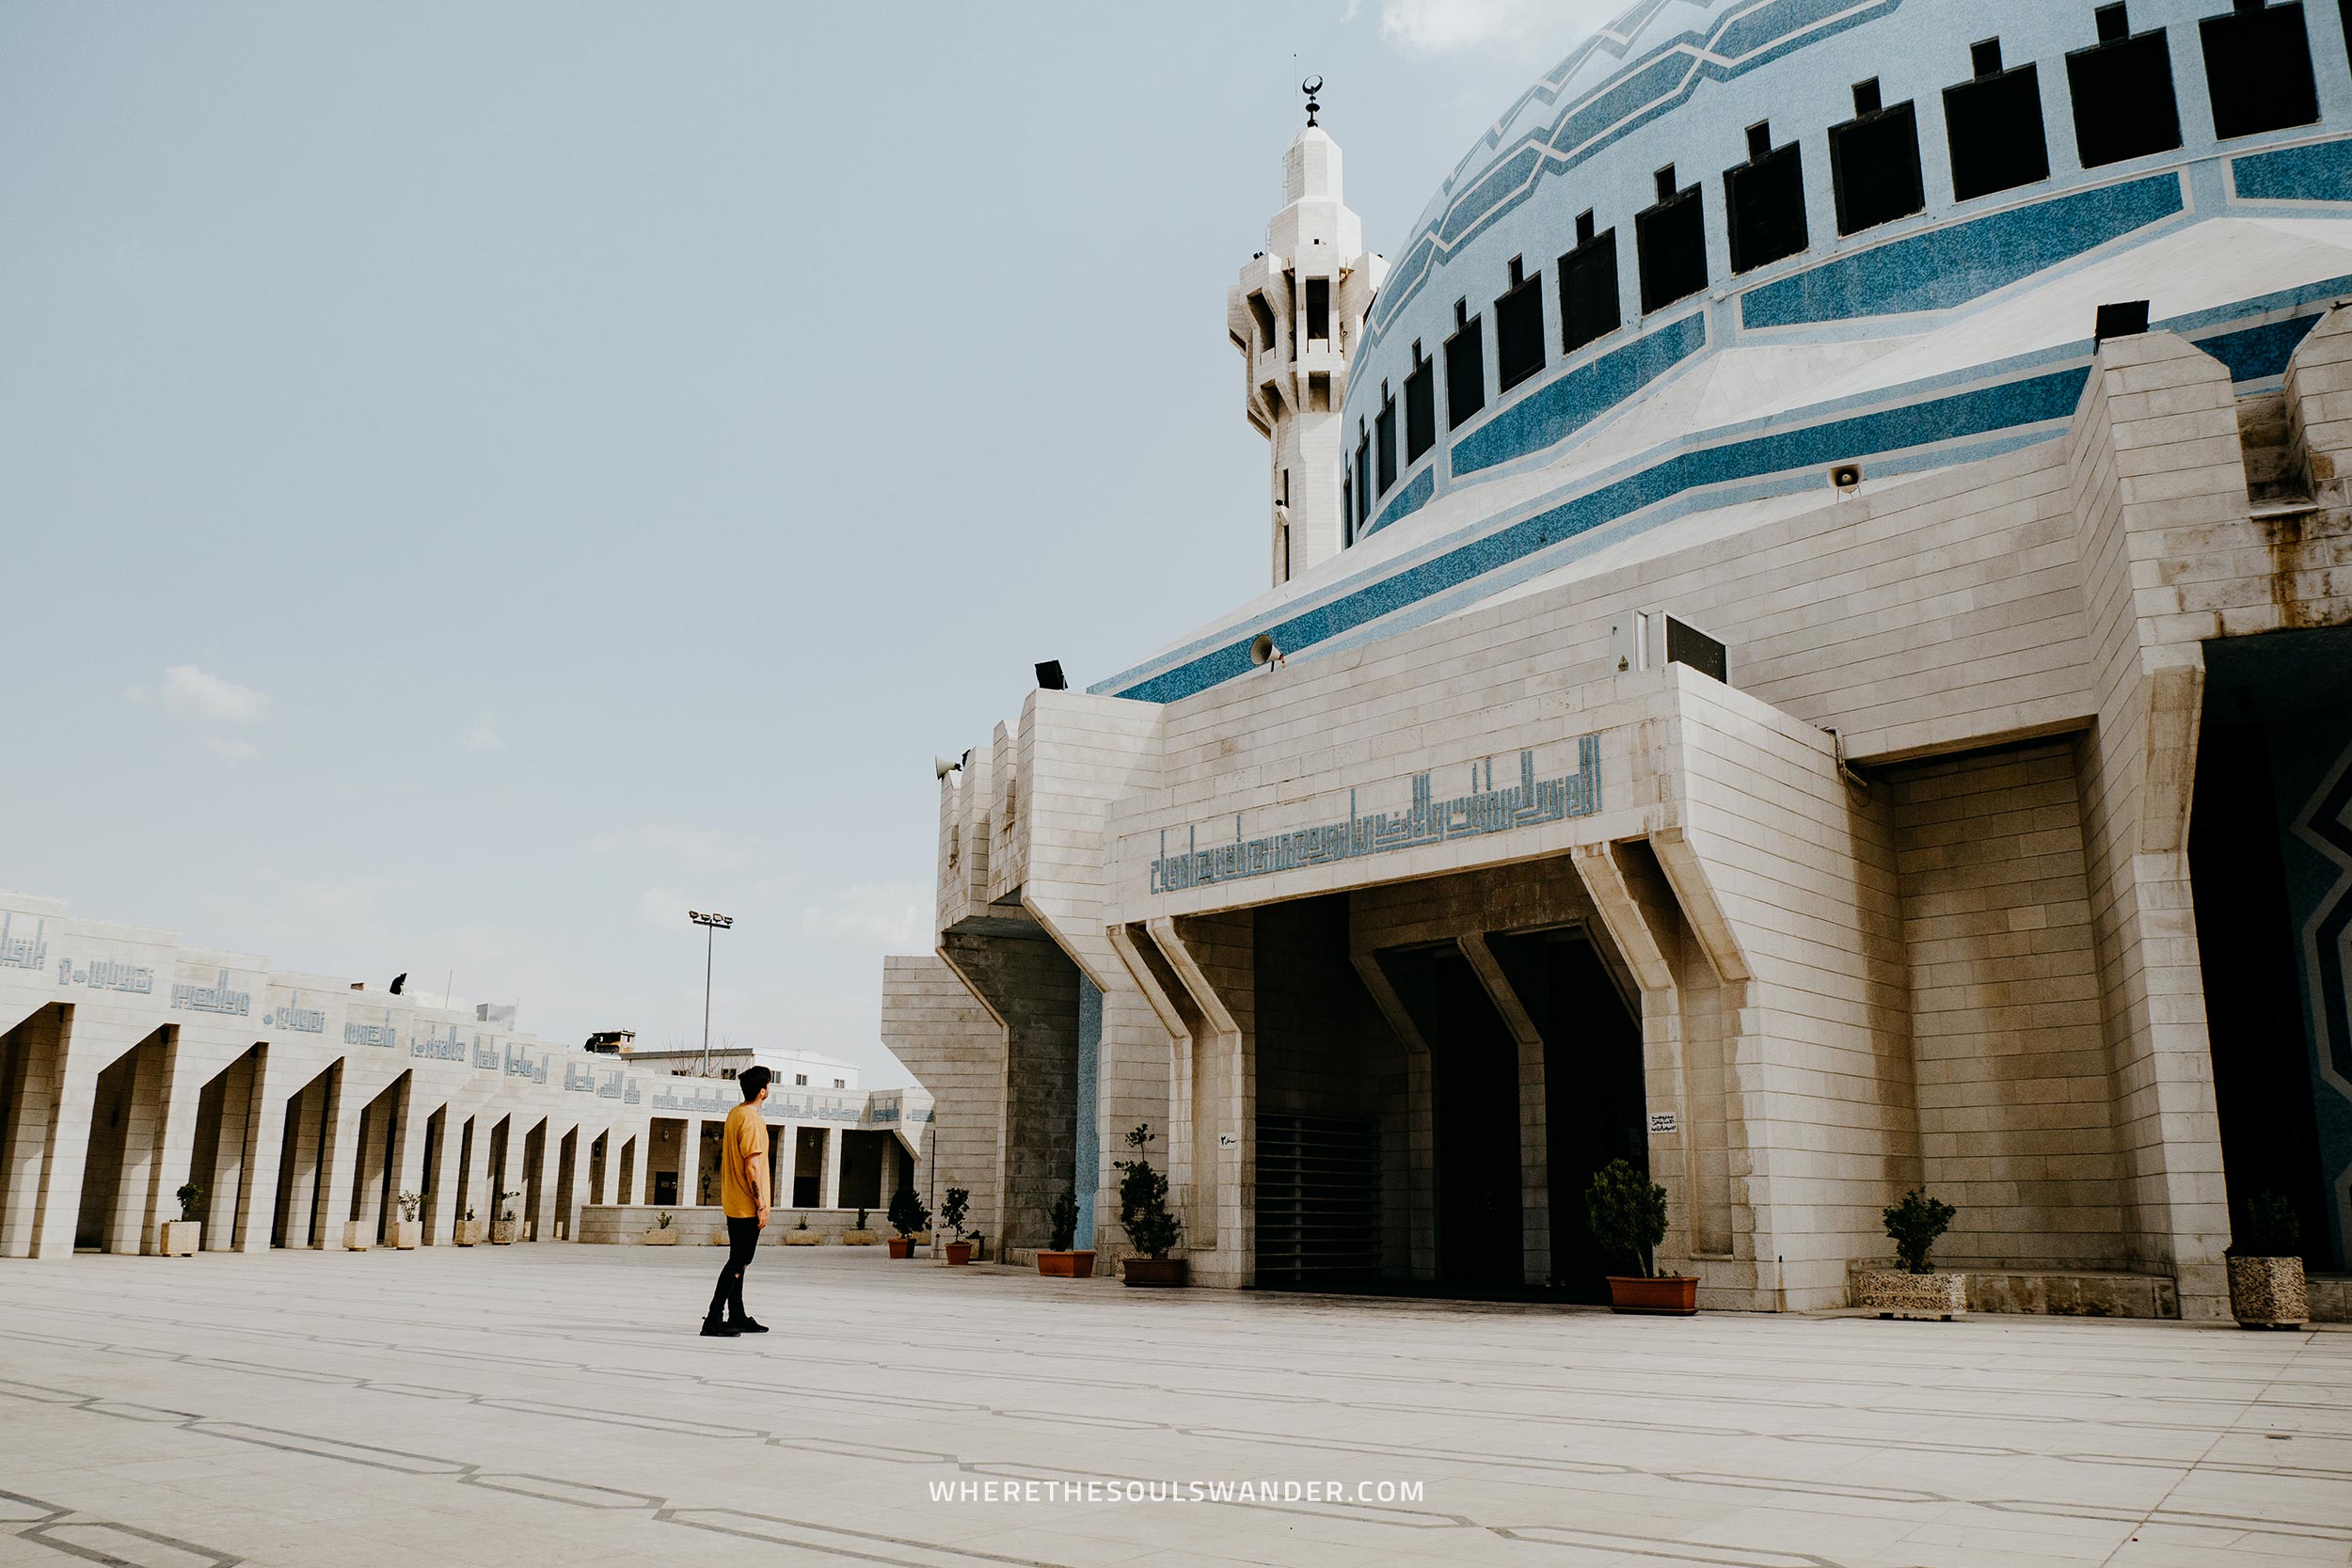
5 | Behold the exquisite King Abdullah I Mosque
One of the best things to do in Amman, and also one of the more unique if you ask me, is bringing a visit to the exquisite mosque of King Abdullah I.
Defined by its characteristic blue domes, King Abdullah I Mosque can hold over 7.000 worshippers, making it one of the largest mosques in Jordan.
On top of that, the mosque is also accessible to non-Muslim visitors, which isn’t very common in the country. Do note, that it requires a small entrance fee of 2 Jod – plus the rule that you dress appropriately, meaning men wear to cover their knees and women their heads.
The mosque is truly a spectacular place to behold, both inside and out, and after my visit, I believe it’s a must-see for anyone visiting Amman, so make sure you take notes, especially if you’re keen to visit authentic places that are rich in culture.
While it is located slightly off Downtown Amman, I believe that visiting King Abdullah I Mosque is absolutely worth the short detour.
THE ESSENTIALS
Where | King Abdullah I Mosque
Cost | 2 JOD (€2,60) per person
6 | Visit the Dead Sea
While I recommend visiting as part of a road trip, Amman makes for an excellent base from which to explore one of Jordan’s most unique natural highlights; the Dead Sea.
Situated at roughly an hour’s drive from Amman is the Dead Sea, a unique natural phenomenon that is marked by its incredibly high concentration of salt, which allows visitors to float atop the water.
It’s also the perfect place to relax an afternoon away, with plenty of luxurious hotels offering pools and mud baths dotted along the salty beach shores.
Apart from that, the with salt formation flanked beaches make for a unique and picture-perfect backdrop, ideal for those looking to shoot some astonishing photography.
Whether you visit as part of a Jordan road trip, or as a day trip from Amman, the Dead Sea is one of the absolute highlights of any trip to Jordan.
THE ESSENTIALS
Where | The Dead Sea

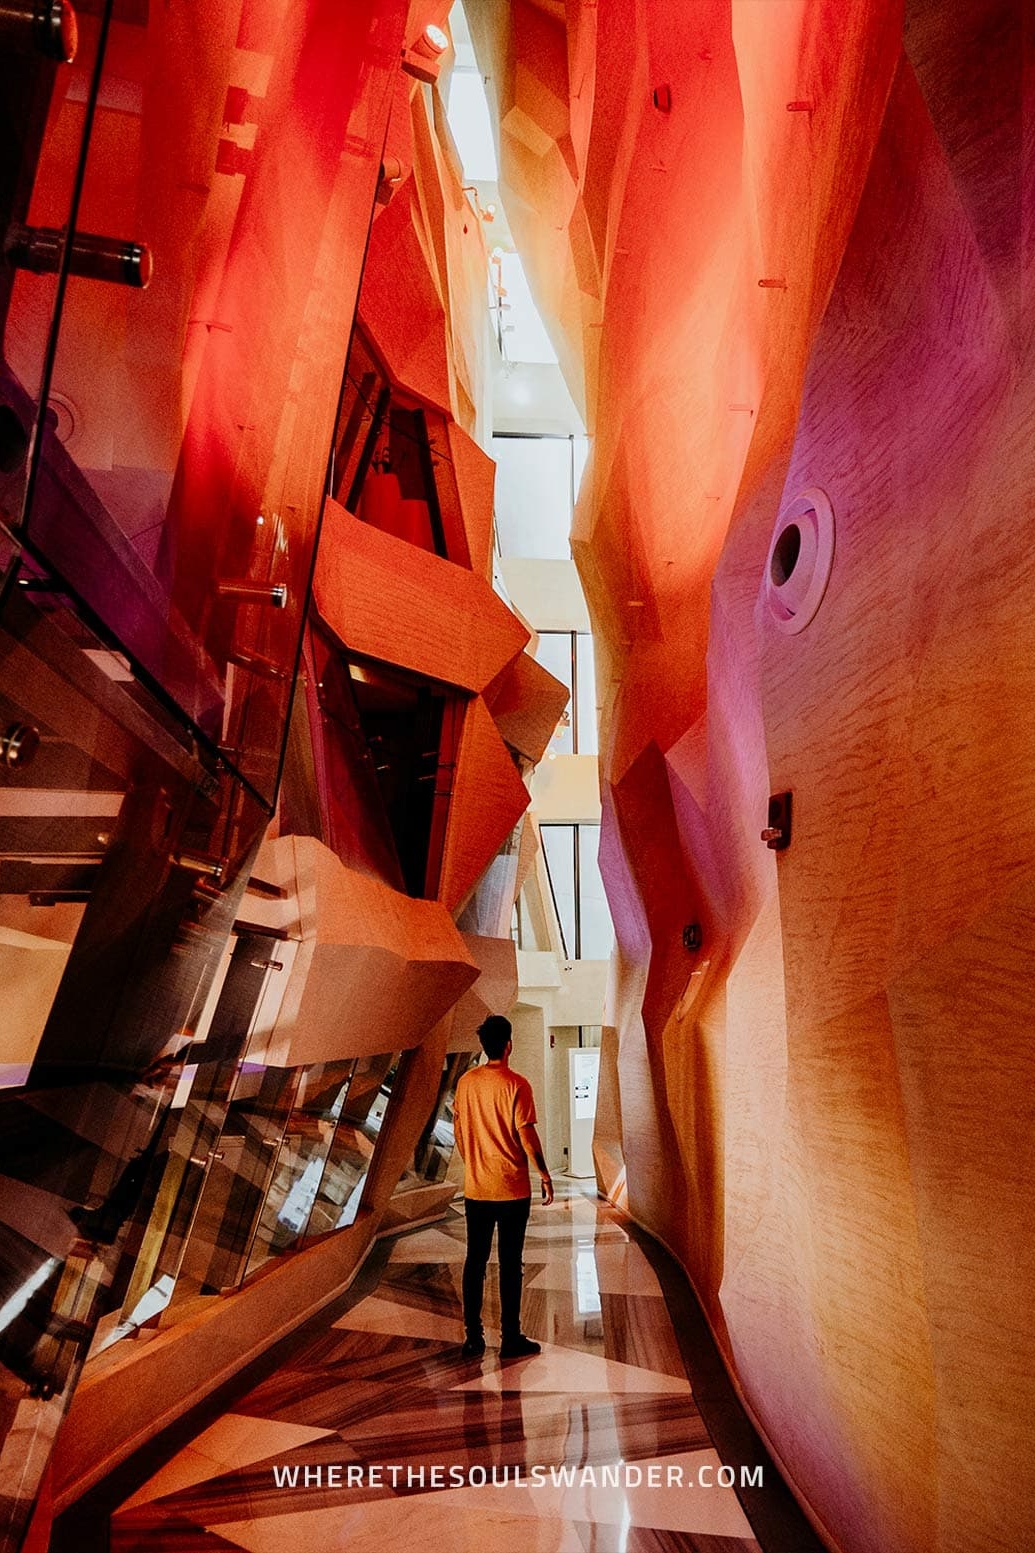
7 | Spent the night at W Amman
Quite frankly, Jordan has no shortage of luxurious hotels, and the stylish W Amman hotel is without question the best option for those looking for a splurge in Amman.
To me, there’s no better place to be after a long day of exploring, than the elegant W Hotel, with its astonishing contemporary rooms, top-notch in-house restaurants, and all the essential luxuries for an otherworldly stay.
During my time in Amman, I was lucky enough to spend one night in the Cool Corner Suite that boasts stunning views over the Amman Skyline and had a more than brilliant time, with an excellent dinner in their in-house restaurant Enso as the absolute highlight.
So, if you’re looking for a unique place to unwind after experiencing the hustle and bustle of Amman, I would highly recommend W Amman – it truly was one of the best accommodation experiences I’ve ever had!
THE ESSENTIALS
Where | W Amman
Book | Prices and availability here

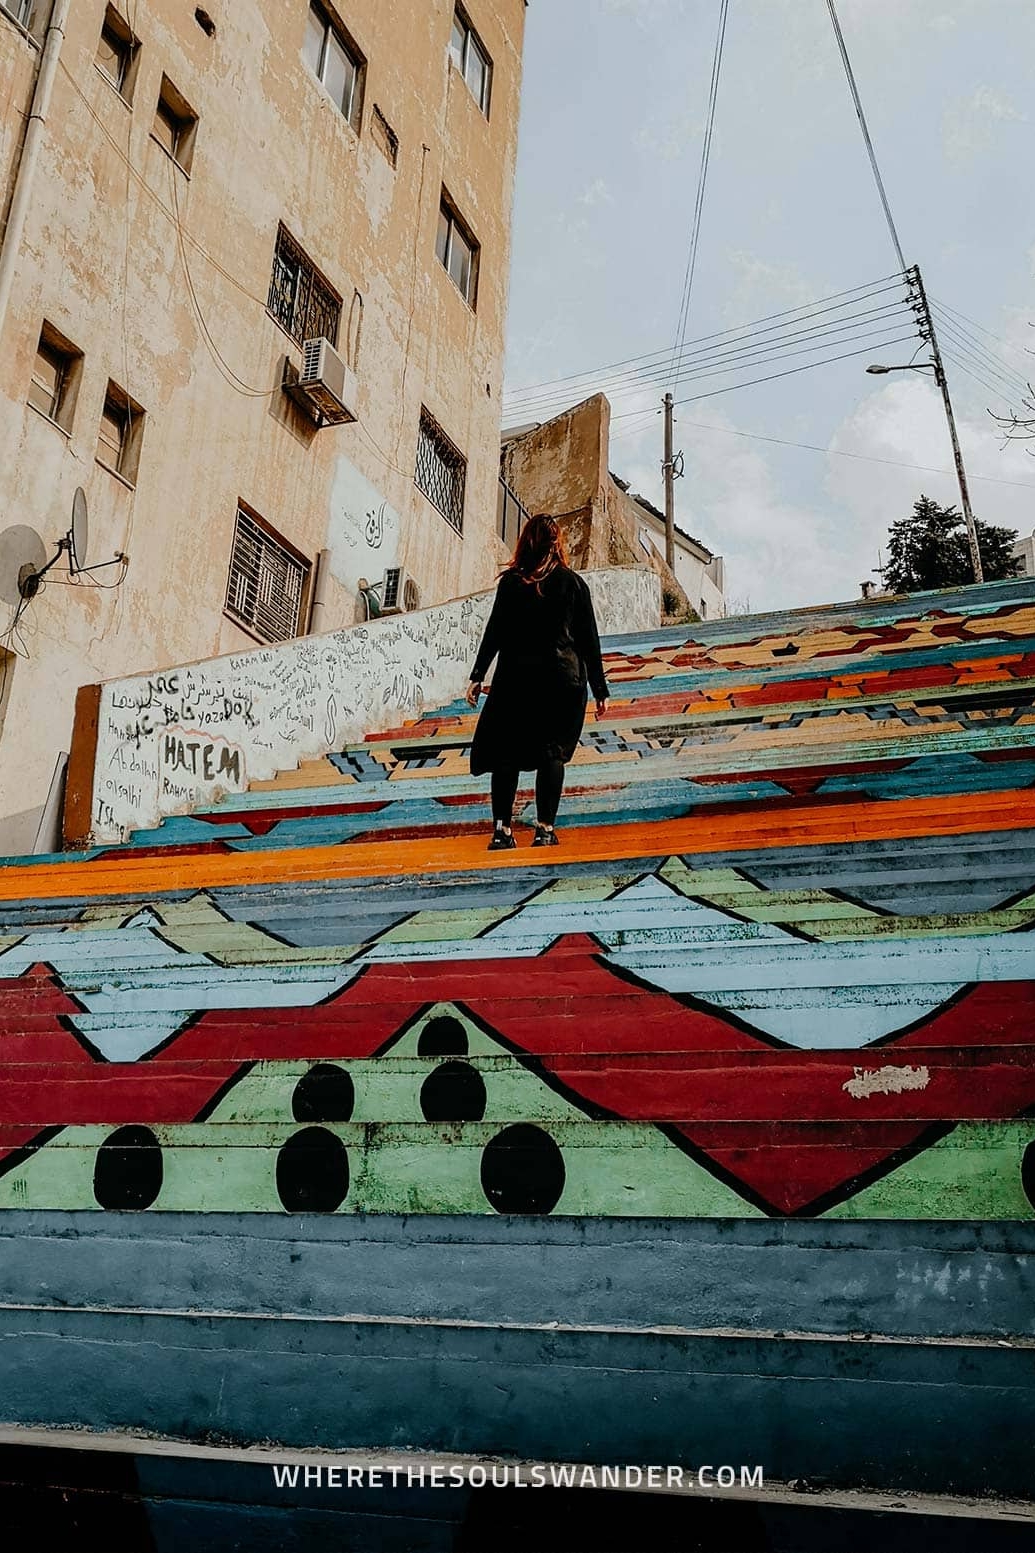
8 | Roam around Rainbow Street
Famed for its trendy bars, restaurants and cafes, Rainbow Street is a vibrant area away from the hustle and bustle of downtown Amman.
The colourful street has no shortage of graffiti and is marked by a relaxing atmosphere, with plenty of souvenir shops too, selling everything from artisanal crafts to jewellery and pottery.
To me though, Rainbow Street felt a bit overhyped, as it was far from what I expected it to be.
However, if you have the time, I suggest taking a short walk around the colourful streets to experience the area yourself – as you might have a completely different experience after all.
Having said that, I just enjoyed other parts of Amman more, as they’re teeming with cultural and historical landmarks that piqued my interest.
THE ESSENTIALS
Where | Rainbow Street

9 | Visit the Roman ruins of Jerash
Given Amman is only 50 kilometres away from the Roman ruins of Jerash, visiting them as part of a day trip is considered one of the best things to do in Amman – and trust me, it truly is.
Coming in right after Petra in terms of the most popular tourist attractions in Jordan, the ruins of Jerash are actually quite famous, as it’s regarded as one of the best-preserved Roman sites outside of Italy.
Home to a dozen of temples, theatres, triumphal gates, and collonaded streets, Jerash is an extensive area that showcases some of the best Roman architecture in the world, making it a must-visit for anyone travelling to Jordan.
It’s worth noting that Jerash is fully exposed, meaning the ruins are very hot to explore around noon – so I’d highly recommend bringing a hat and some sun protection.
THE ESSENTIALS
Where | Jerash
Cost | 10 JOD (€13,30) per person. Jerash is free of the entrance with the Jordan Pass
Opening hours | Daily 0800 – 1830 in summer, 0800 – 1730 in April and May
Recommend tour | This excellent private day tour takes you to Jerash, Ajloun Castle, and Umm Qais
Things to do in Amman | The essentials
The best time to visit Amman | Weather in Amman
First things first; summers in Jordan will be scorching hot, with temperatures reaching heights of 40 degrees Celsius.
For that reason, I believe the best time to visit Amman is during the spring months of March to May, when the average temperature is significantly more pleasant for explorations around town.
Alternatively, the shoulder months of September to November are great too.
During this time, the days are still long and somewhat hot, yet the afternoons cool down quickly, which makes it extremely pleasant to go out and explore.
How to get around Amman
Walk
Amman is a relatively compact city and most of the best things to do in Amman are situated fairly close to each other in the downtown area.
For that reason, I believe the absolute best way to uncover the city is by foot.
Bus
Since most accommodations are located slightly off Downtown Amman, using the bus is often necessary to reach the city centre.
However, it’s kinda confusing that the busses don’t follow a strict time schedule, and leave as soon as they’re full with passengers – which doesn’t take long in Amman.
If travelling by local bus sounds a tad too adventurous, opt for a taxi to Downtown Amman instead.
How to get to Amman
Flights
The Queen Alia International Airport is located just half an hour from Amman, and hosts flights from roughly 40 airlines from all over the world, making it the country’s main international airport.
For flights to Amman, I would highly recommend Skyscanner. Not only is their website incredibly user-friendly, but it also holds a large variety of airlines, and grants the possibility to find good rates.
From the airport, it’s pretty straightforward to get to the city centre, with two shuttle busses servicing the area – the Sariya Shuttle Bus or the Airport Express Bus. The busses leave every 30 minutes and a one-way ticket will cost you around 3,5 JOD (€4,70) per person. For more information visit the official Amman airport website.
Car
Like most places in Jordan, Amman is easily reached by car, which makes Jordan the perfect destination for a scenic road trip.
If you’re looking to rent a car in Jordan you will have all the freedom to travel at your own pace – plus getting to Jordan’s many highlights will be as easy as it gets.
For car rental in Jordan, I would recommend Rentalcars.com, as they offer excellent service, additional insurance, and a broad selection of cars, all at an affordable price.
It’s worth noting that the parking fees in Amman can add up quickly, so I advise finding accommodation with private parking or park just outside of downtown.
Safety in Jordan| Travel insurance
When travelling this big wide world, I never go on an adventure without my essential travel insurance sorted out, and though I felt completely safe in Jordan, I recommend anyone travelling here to do the same.
Though you would rather not think about the things that could go wrong, there’s always a chance that it might happen, and when that’s the case, it is better to be safe than sorry.
To help you find the right policy, I’ve listed two of my favourite options below:
Heymondo | Whether you’re going on a 3-week backpacking trip or planning a long stay somewhere abroad, Heymondo has excellent insurance options either way – plus full COVID-19 coverage and a handy app with 24-hour medical assistance. Readers of WTSW receive 5% off any insurance policy.
Cheers!
I’ve been on this travel blogging journey since 2019.
If you appreciate what I do here, these are some ways you can support me.

What do things cost in Ireland
First things first; travelling in Ireland isn’t by any means cheap.
Whether you’re planning an adventurous road trip or solely a city break to Dublin, I’m pretty sure that this question crossed your mind; What do things cost in Ireland?
So for those planning a trip to Ireland, I wanted to show you a detailed insight in my daily budget and the average cost of the everyday expenses, such as accommodation, transport, food and activities to name a few.
To help you figure out your own travel budget, I’ve put together this short guide with all the essentials information, so you know exactly what to save for an incredible trip to Ireland.
My Ireland daily travel budget
After visiting Ireland recently (Januari 2022), it is safe to say that Ireland isn’t the most appealing country for those travelling on a strict budget.
Of course, it’s possible to find cheap stays and budget-friendly restaurants, but keep in mind that the average cost of basically everything is notably higher than elsewhere in Europe.
The good news is that the largest expenses are limited to accommodation and car rental.
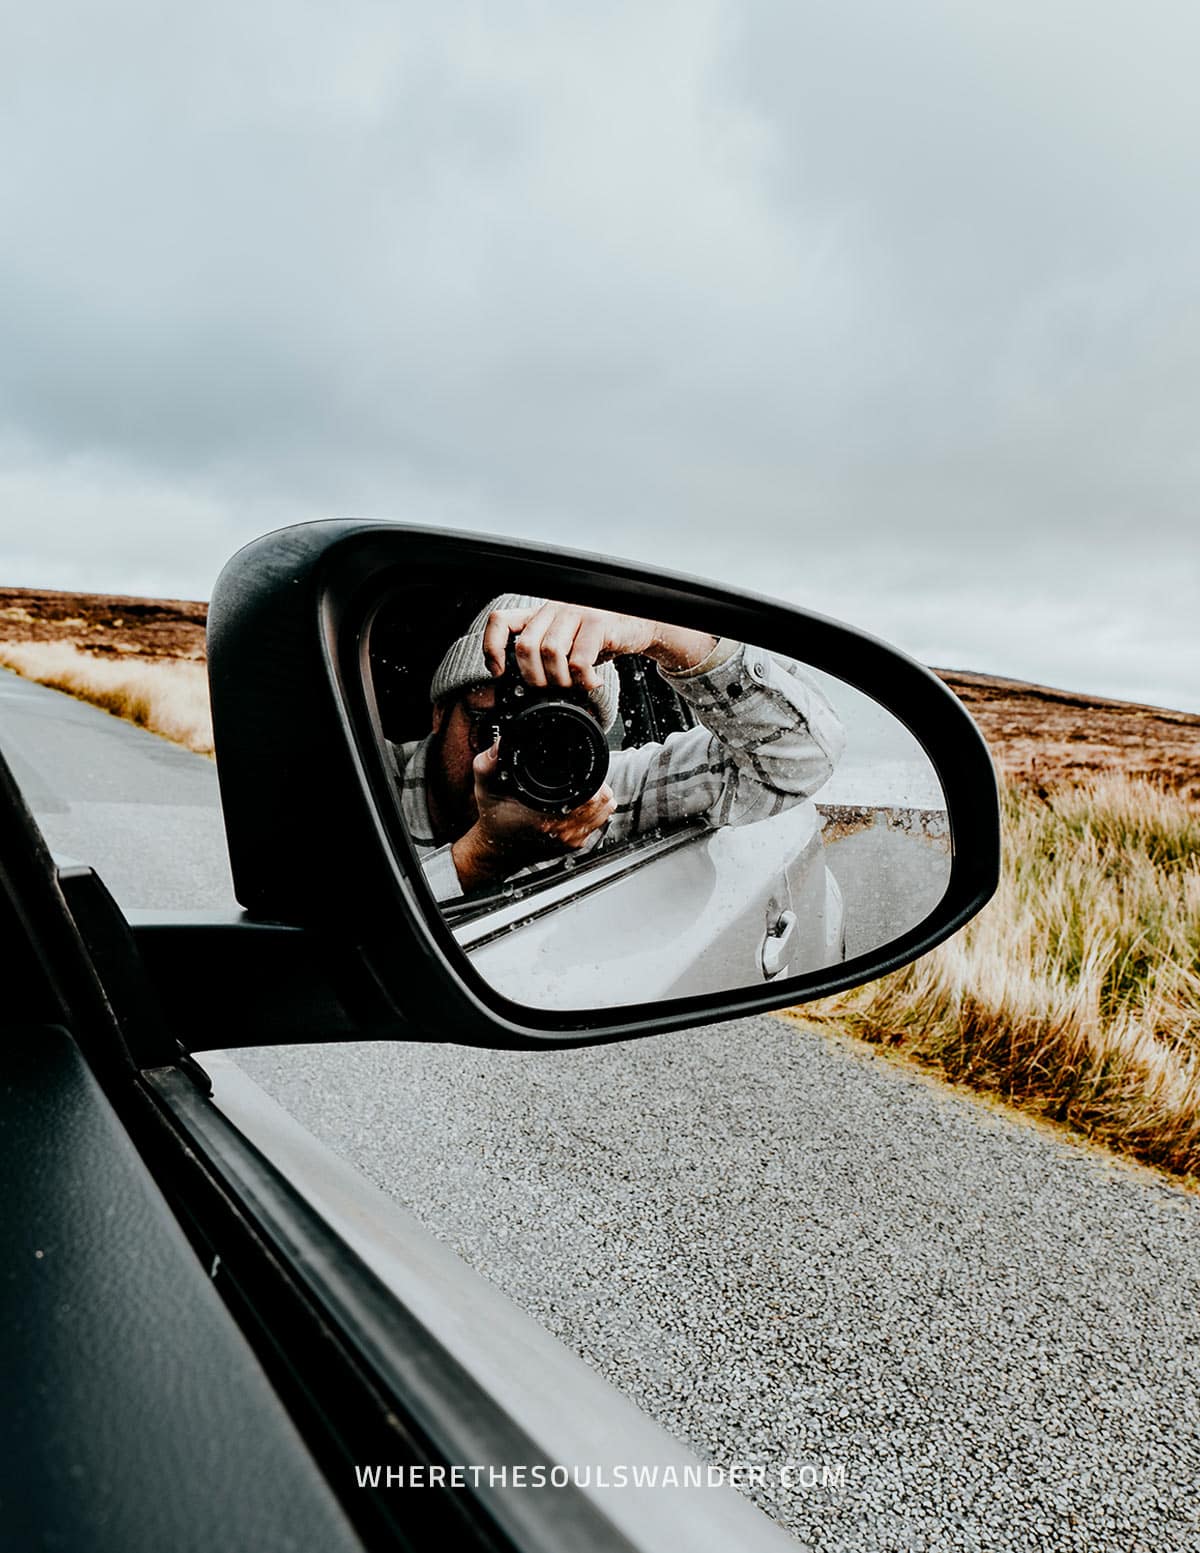
For my 9-day road trip through Ireland, I averaged out at a budget of around €150 per day.
To stick to that budget, I didn’t have to watch every single penny, yet I still chose to search for affordable double rooms, especially in cities such as Dublin, Galway and Sligo.
Also, this budget is based on a solo traveller who rented a car with full insurance coverage (this is by far the biggest expense when travelling in Ireland), stayed in private rooms, and dined out at least twice a day.
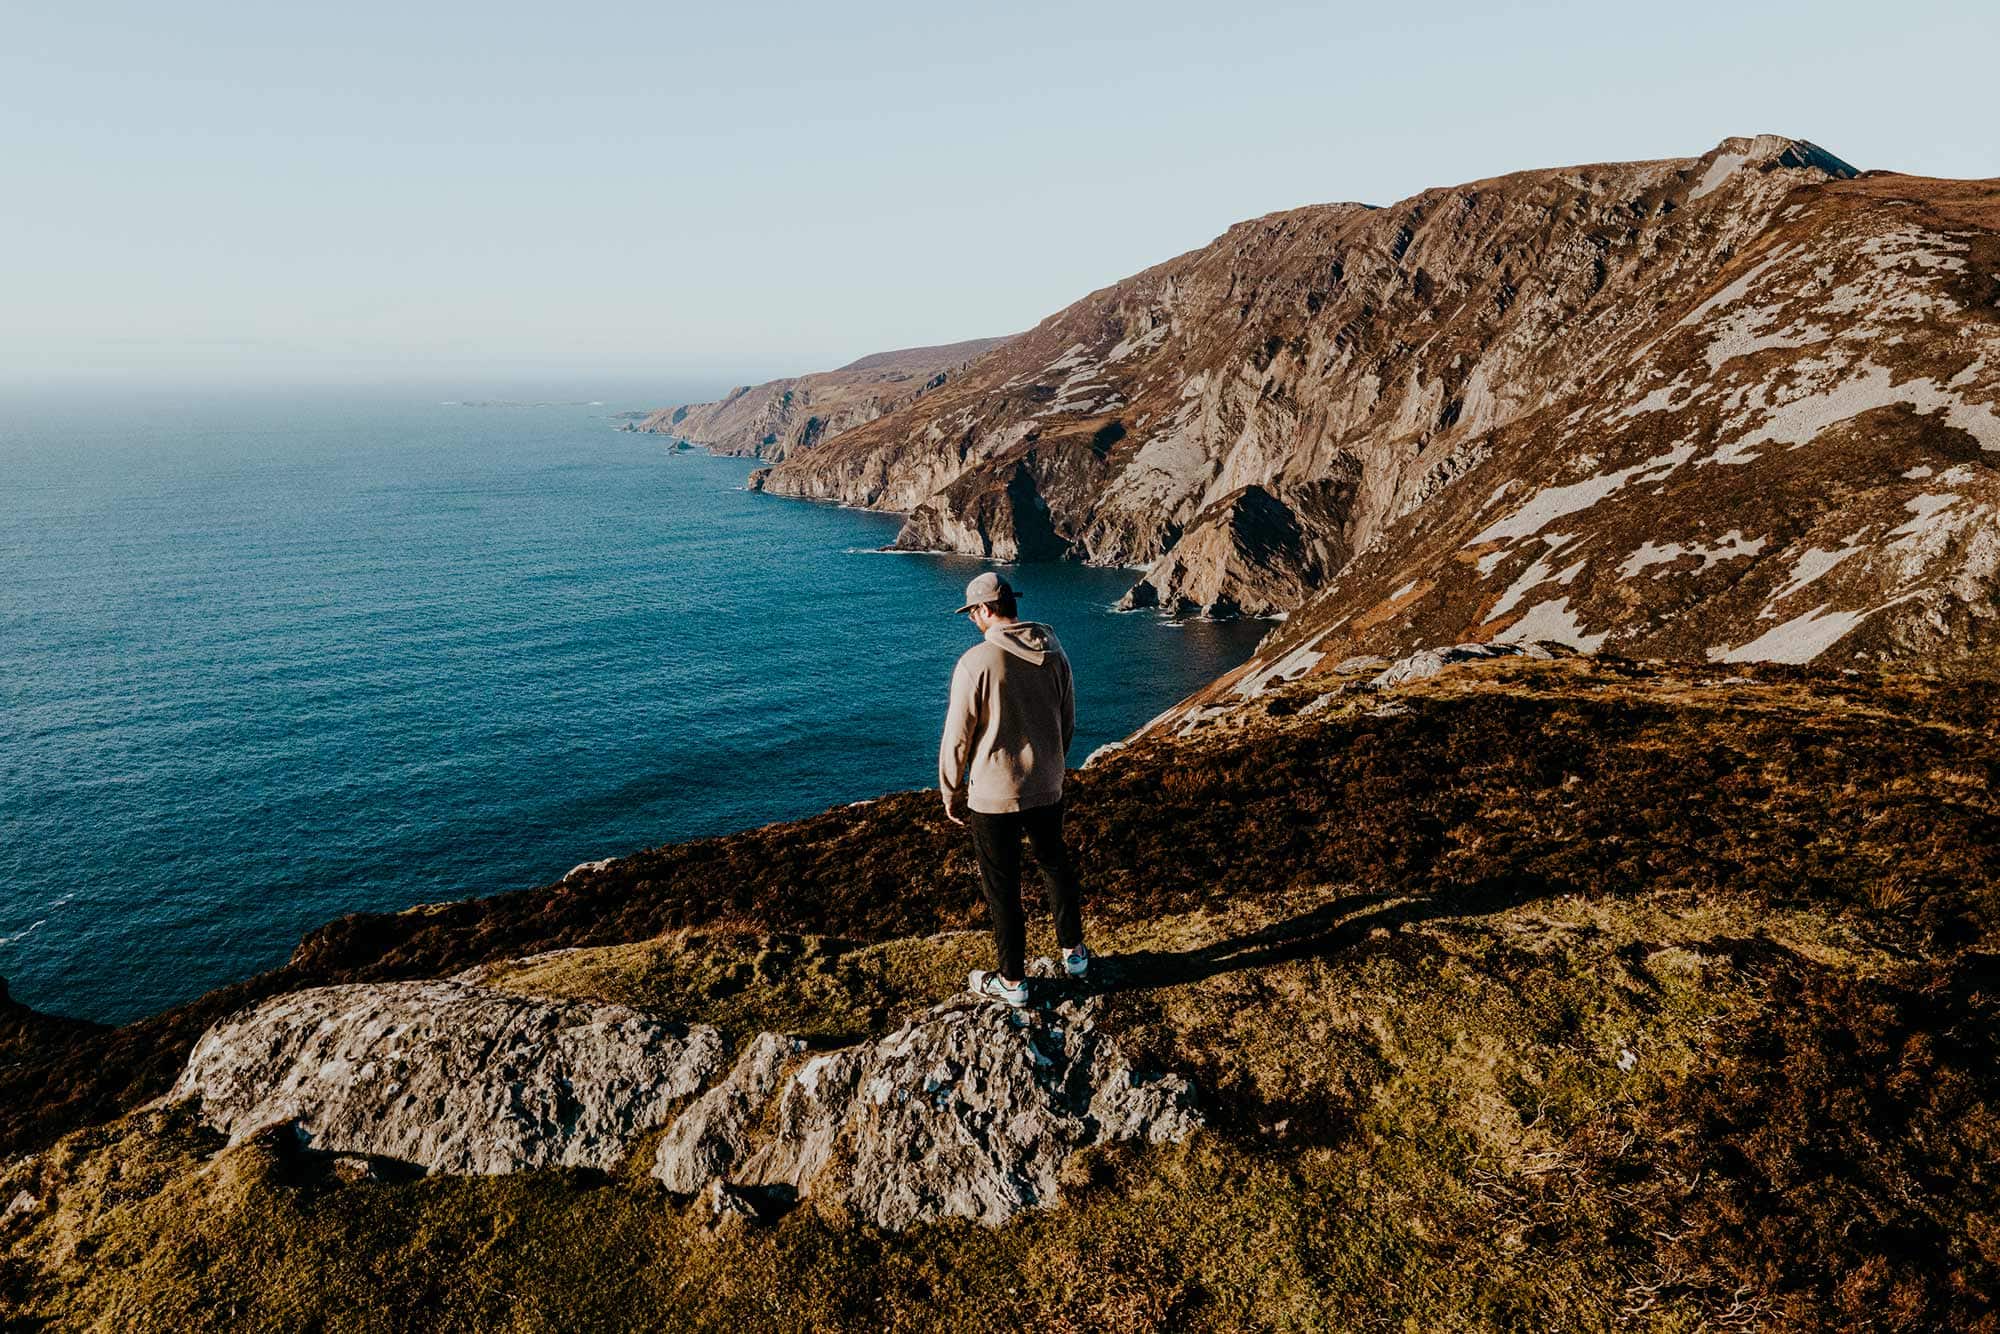
On top of that, this budget allowed me to visit everything I planned to visit during my road trip in Ireland, including the Cliffs of Moher, Sleeve League Cliffs, and many of the musea in Dublin too.
Accommodation | What do things cost in Ireland
An average double room in a hotel | €60 to €90 a night
Having now spent 9 days in Ireland, I noticed that private hotel rooms are rather expensive compared to other countries in Europe.
The good news though, is that there is no shortage of incredible luxurious hotels, with prices averaging out at €60 to €90 a night.
In Dublin however, prices are slightly lower, given there’s significantly more competition.
A dorm bed in a hostel | €25 to €40 a night
Ireland is incredibly popular among backpackers, and accordingly, there’s no shortage of affordable hostels.
While I haven’t stayed in a hostel myself, a dorm bed in a hostel will cost you around €25 to €40 a night in Ireland, which is slightly above the average hostel price elsewhere in Europe.
Food | What do things cost in Ireland
A Meal out | €10 to €25 person
Contrary to other expenses in Ireland, I noticed that dining out was fairly affordable.
I had an excellent burger with fries at Featherblade in Dublin for under €15, and ate one of the best pizzas ever at the Dough Bros in Galway for only €10 – so make sure you check them out both.
Whilst prices still vary significantly from place to place, you can have an excellent meal out for anywhere from €10 to €25 per person.

A good cup of coffee | €2,5 to €4,5
During my road trip in Ireland, I have savoured quite a few cups of brilliant coffee, especially at Brother Hubbard in Dublin, and Coffeewerk + Press in Galway.
Depending on how you prefer your coffee (there are plenty of non-dairy options available), you should take into account that a cup of rocket fuel will cost you anywhere from €2,5 to €4,5 each.
A pint of beer | €5
If there’s one thing Ireland is known for, it will be its lively pub scene and the alcoholic beverages that are served here – for that reason, you should definitely stop by at a traditional Irish pub.
Most pubs will serve large pints at a cost of roughly €5 apiece. However, if you’re in Dublin and decide to go to Temple Bar, prepare to pay significantly higher prices.
Also, it’s good to note, that since 2013, the happy hour specials in terms of alcoholic beverages were forbidden by the Irish government.


Entrance fee to museums or national parks | Around €15 per activity
Ireland had plenty of awesome things to see and do, and luckily for us, the average prices for a museum or national park are relatively low or free of charge, with an average price of €15 per activity.
Some examples include;
€10 | Cliffs of Moher
€22 | Guinness Storehouse
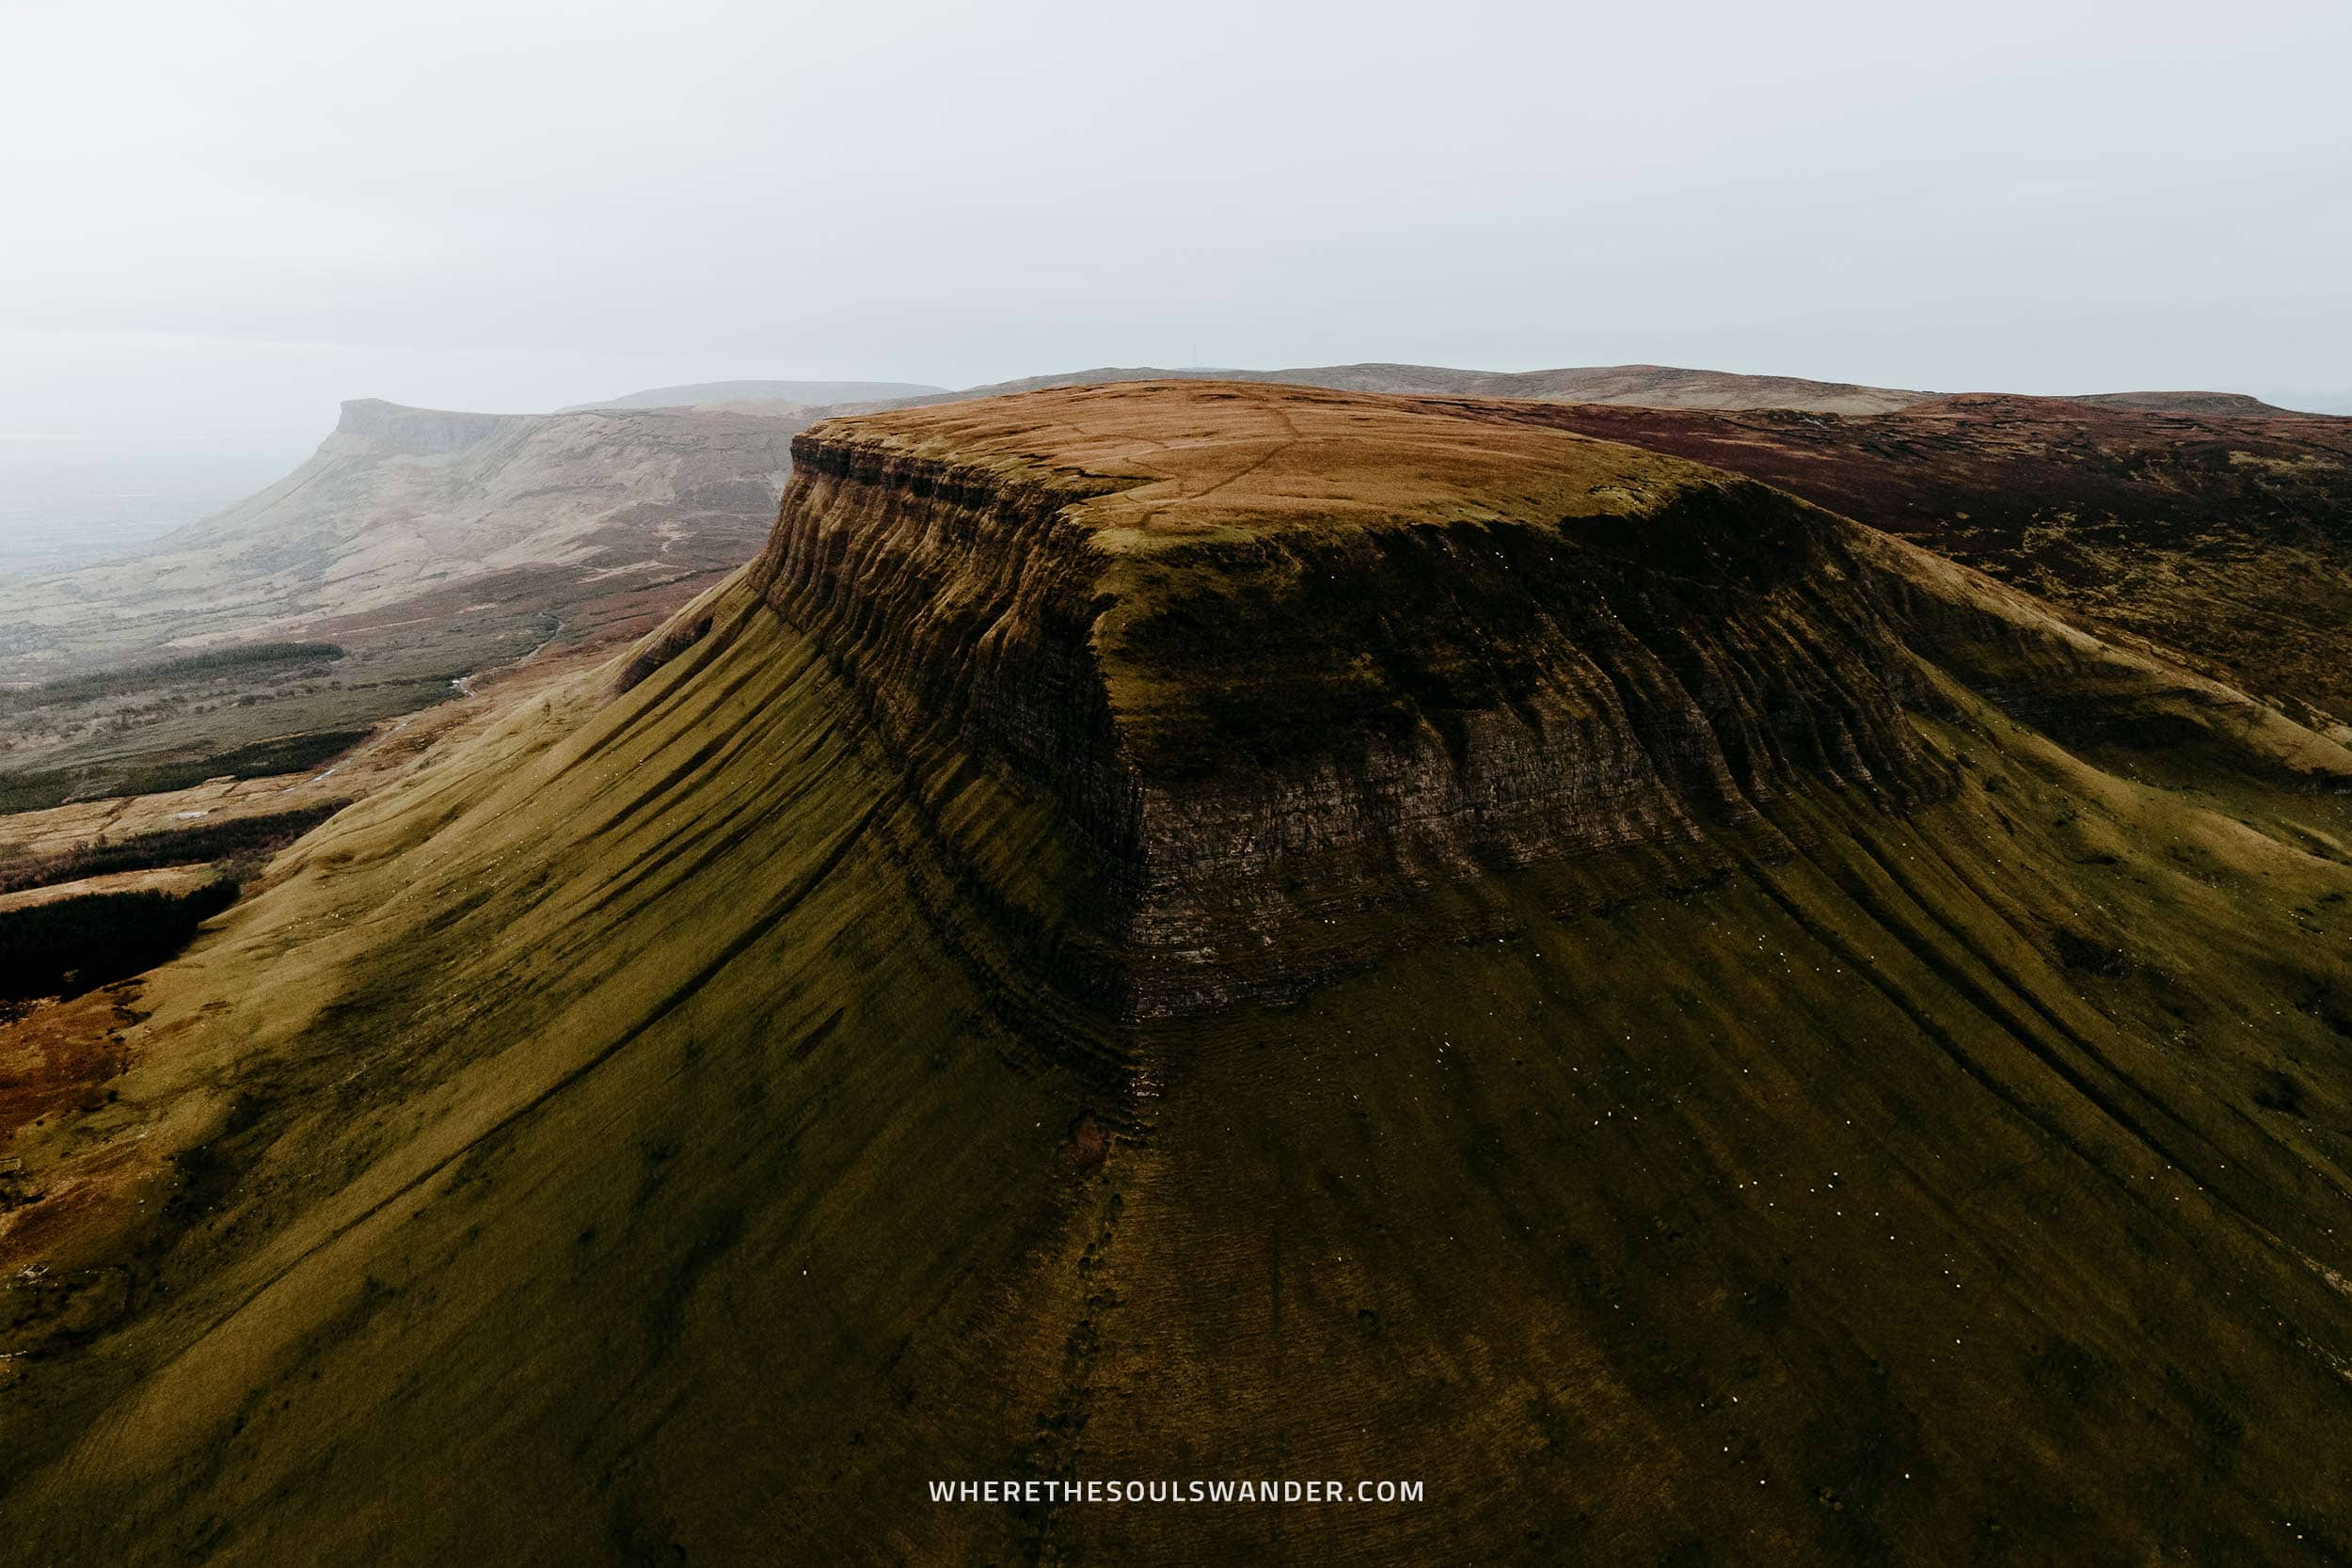
Free | Benbulben Forest Walk
€18 | The Book of Kells and Trinity College Dublin
Free | Slieve League Cliffs
Free | Connemara National Park
€25 | Jameson Distillery
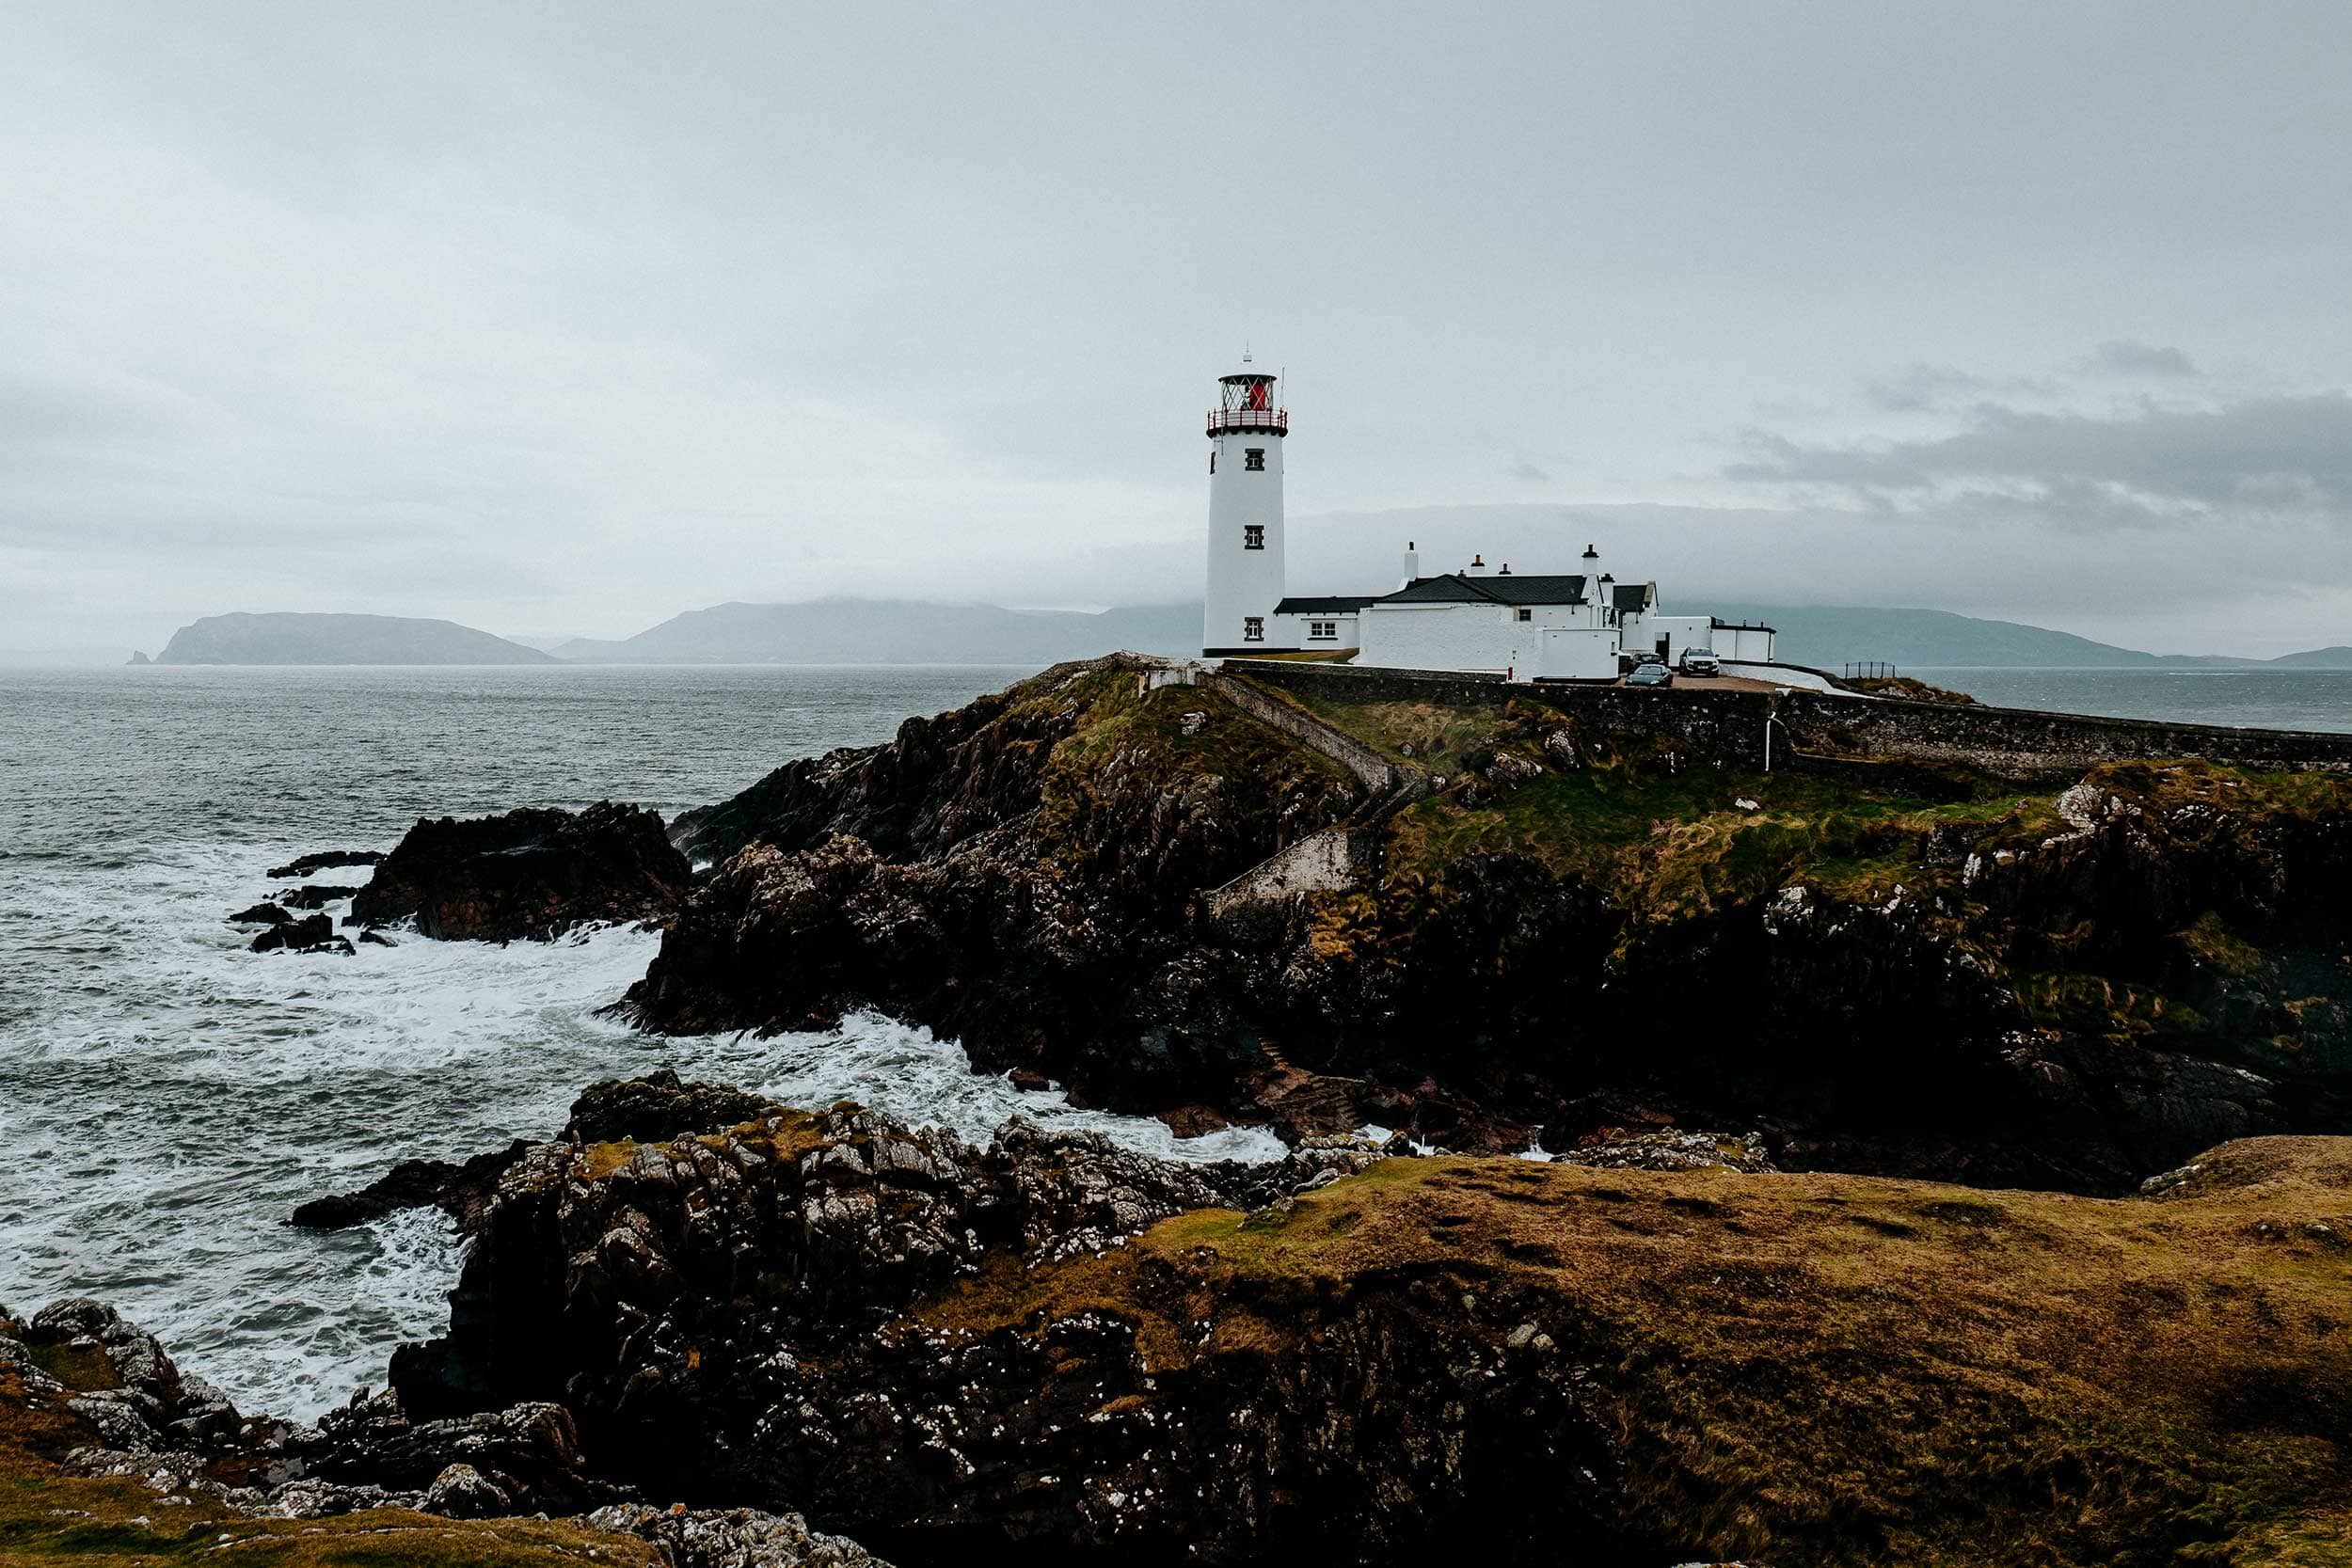
Free | Fanad Lighthouse
Free | Downpatrick Head
Transport | What do things cost in Ireland
Car rental | €60 to €90 per day
All in all, a road trip in Ireland is far from cheap, and with the above in mind, I’d advise booking your rental car well in advance to save a significant amount of money.
Whilst car rental is clearly the largest expense when travelling in Ireland, I noticed that it is still the most affordable, convenient, and fastest manner of transport here.
The price for car rental in Ireland ranges from €60 to €90 per day – this includes free cancellation, theft protection and collision damage waiver.
For car rental in Ireland, I’d highly recommend Rentalcars.com. They offer brilliant service, additional insurance options, as well as a wide selection of cars to choose from. Prices and availability here.
Continue reading | A guide to driving in Ireland: 11 tips to kick-start your road trip
Fuel | €1,84 per litre
As with car rental, the fuel in Ireland isn’t cheap either.
At the moment of writing (April 2022), the fuel price in Ireland is slightly below average in Europe, with gasoline at €1,84 per litre and diesel at €1,94 per litre.
If you follow my Ireland road trip, which involves a lot of driving, taking you to plenty of the country’s absolute highlights, you will use around €150 to €200 worth of fuel.
Toll charges | +/- €2,50
Another expense that you will most likely overlook when planning a trip to Ireland, are the toll charges that you’re required to pay on certain roads.
Depending on your route, you will cross several toll roads, with different rates, depending on your vehicle. For more information about the rates, check the official EToll website here.
Parking | €35 to €40 per day
If you somehow choose to rent a car before visiting Dublin, note that the cost of parking in the city centre will add up relatively quickly.
I had my rental car parked in one of the many parking lots for the night and paid around €25, which if you ask me now, is a waste of money.
On average, the parking in Dublin will cost around €35 to €40 per day.
If you’re keen to see my best tips on driving in Ireland, make sure you read my detailed guide here.

Bus from the airport to Dublin | €10
Whether you’re going solely on a city trip to Dublin or planning out an in-depth itinerary, I highly advise starting your Ireland journey in Dublin either way.
The best way to get there is by jumping aboard the Dublin express, which will take you to the city centre in under half an hour – a return ticket will cost you only €10.
After you’re done in Dublin, head back to the airport where you will either catch your flight back home or pick up your rental car.
Stay safe in Ireland | Travel insurance
Given that travelling in Ireland is all about the outdoors, I recommend everyone to sort out good travel insurance before setting out on their own road trip adventure.
Although we prefer that everything goes smoothly during our travels, something unfortunate can happen at any moment, whether it’s an injury during a hike, a stolen camera, or an accident on the road.
For travel insurance, I use Heymondo, as they offer full COVID-19 coverage, as well as a handy app with 24-hour medical assistance. Make sure you check it out – readers of WTSW receive 5% off any insurance policy too. Additionally, I also recommend World Nomads.
Cheers!
I’ve been on this travel blogging journey since 2019.
If you appreciate what I do here, these are some ways you can support me.

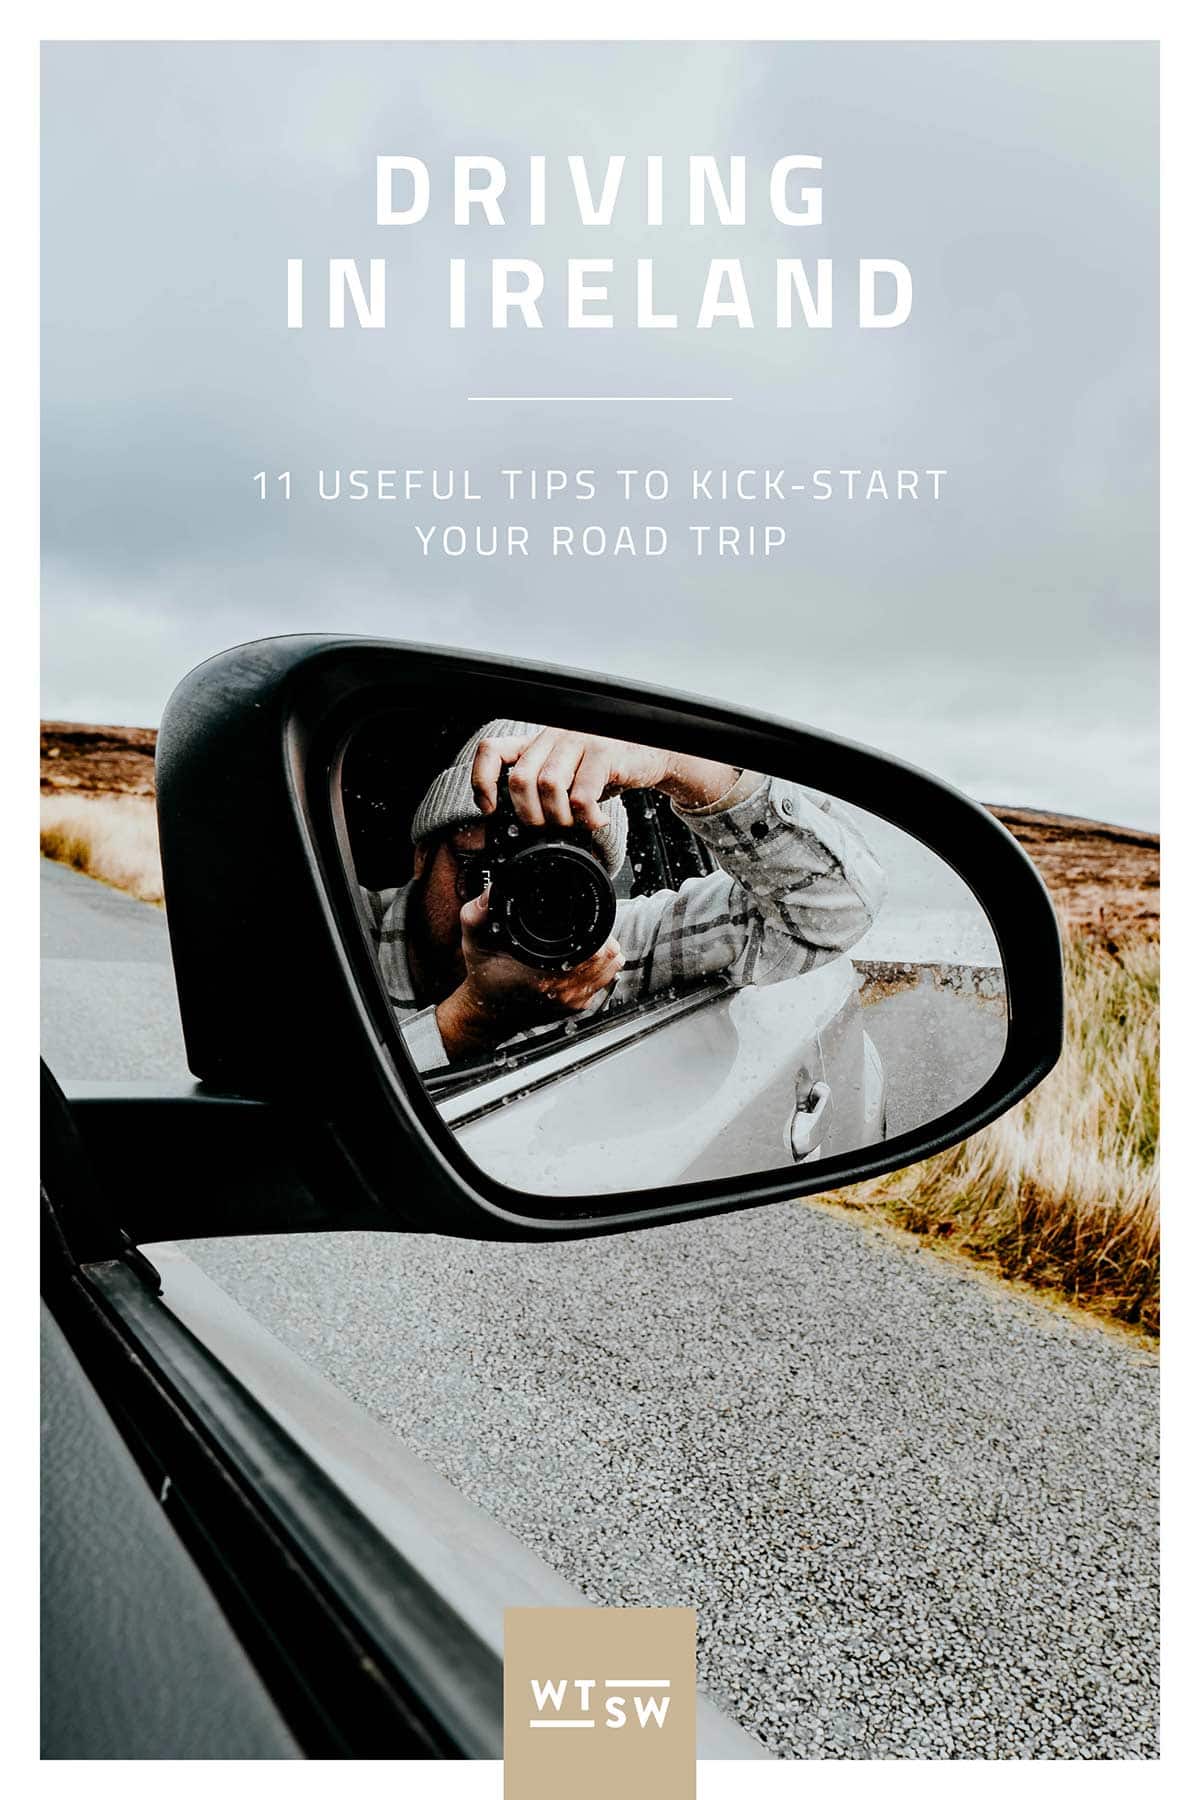
A guide to driving in Ireland: 11 useful tips to kick-start your road trip
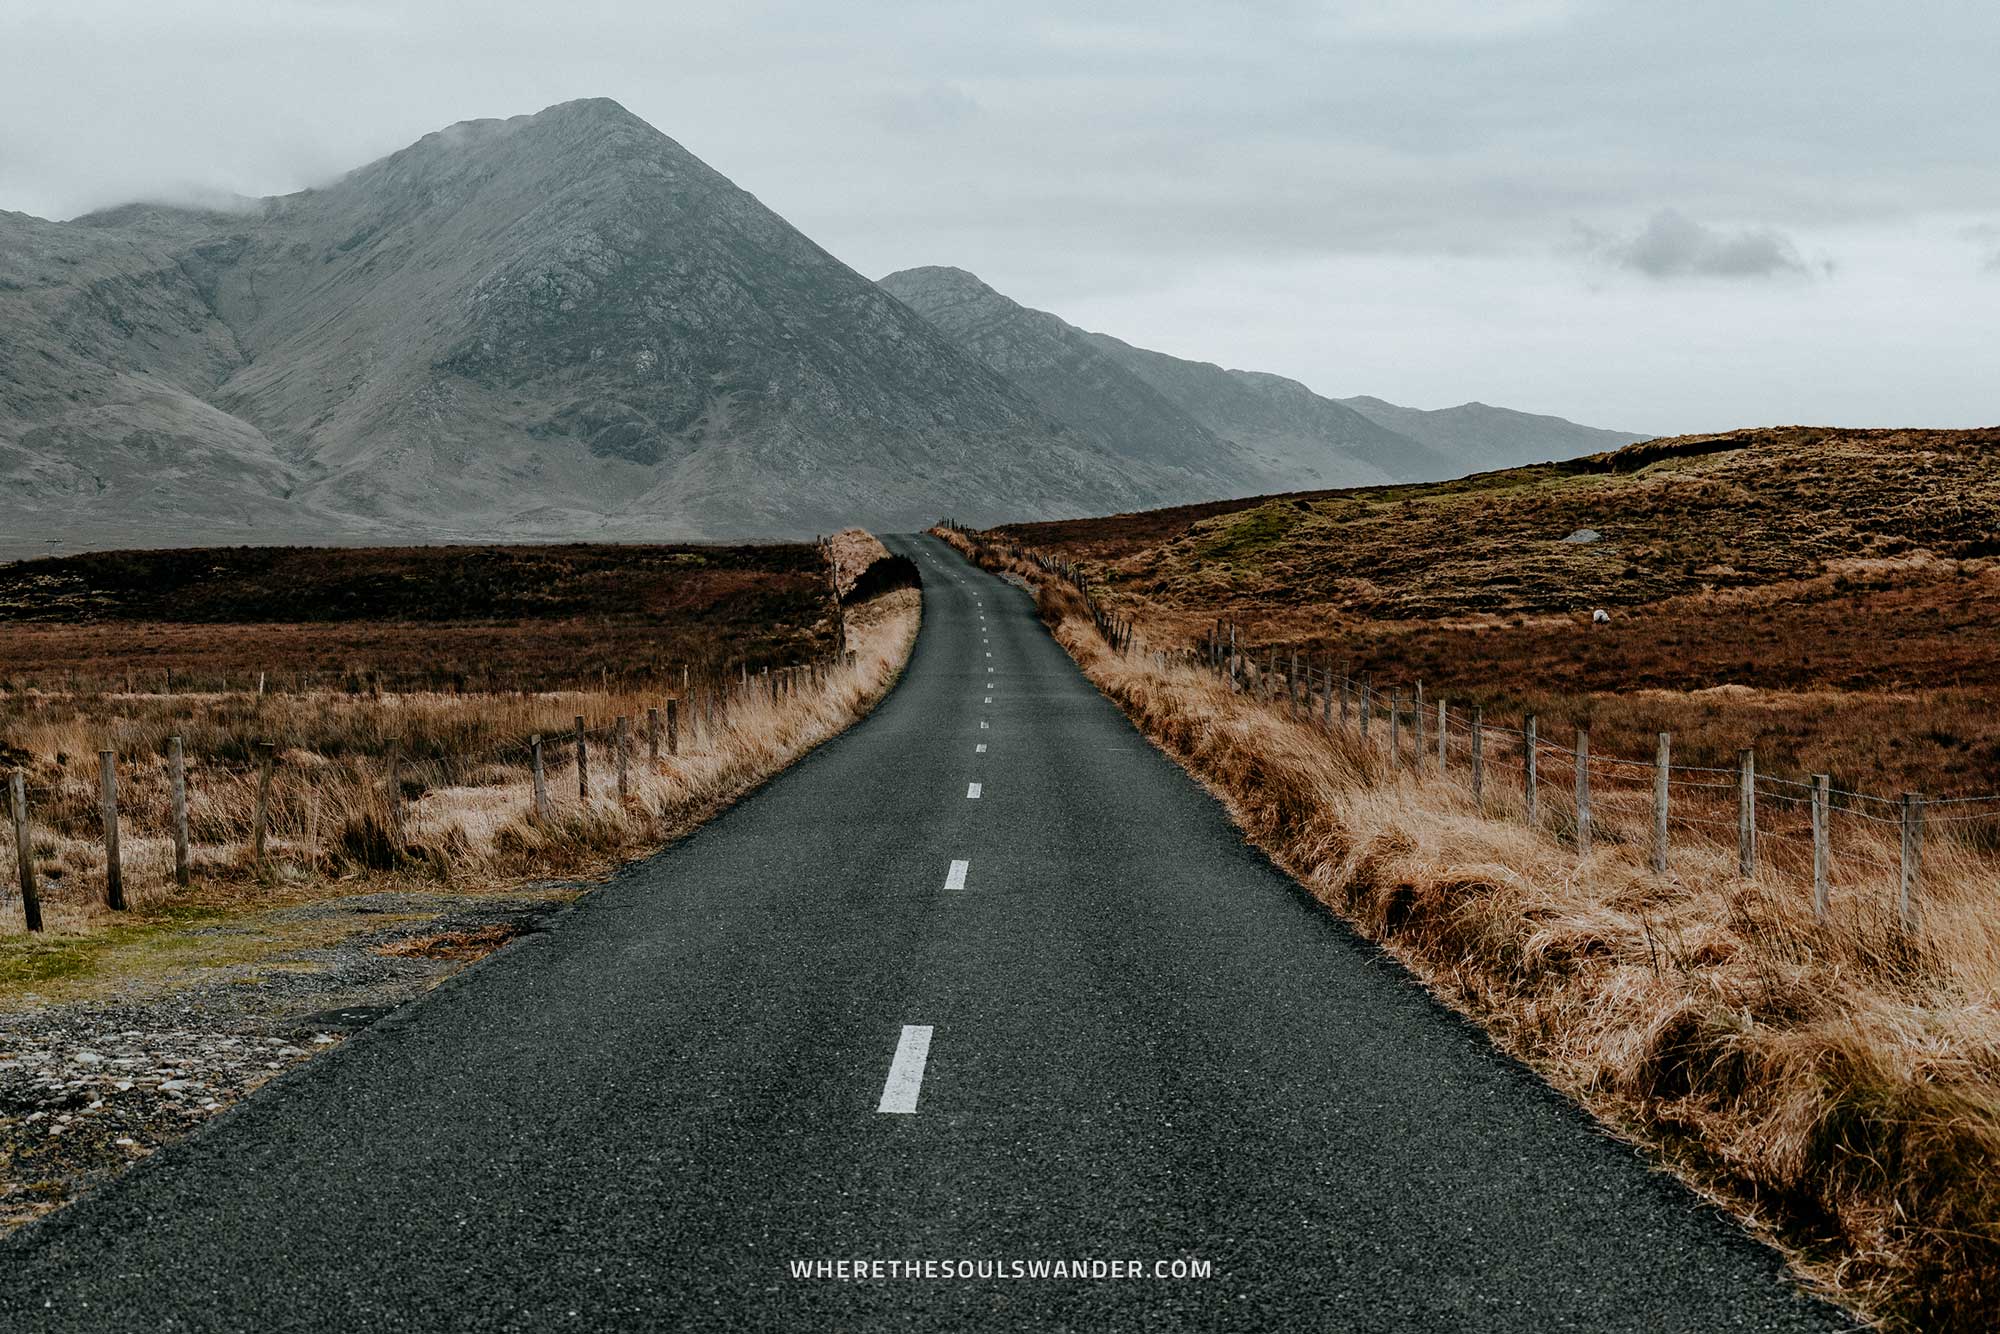
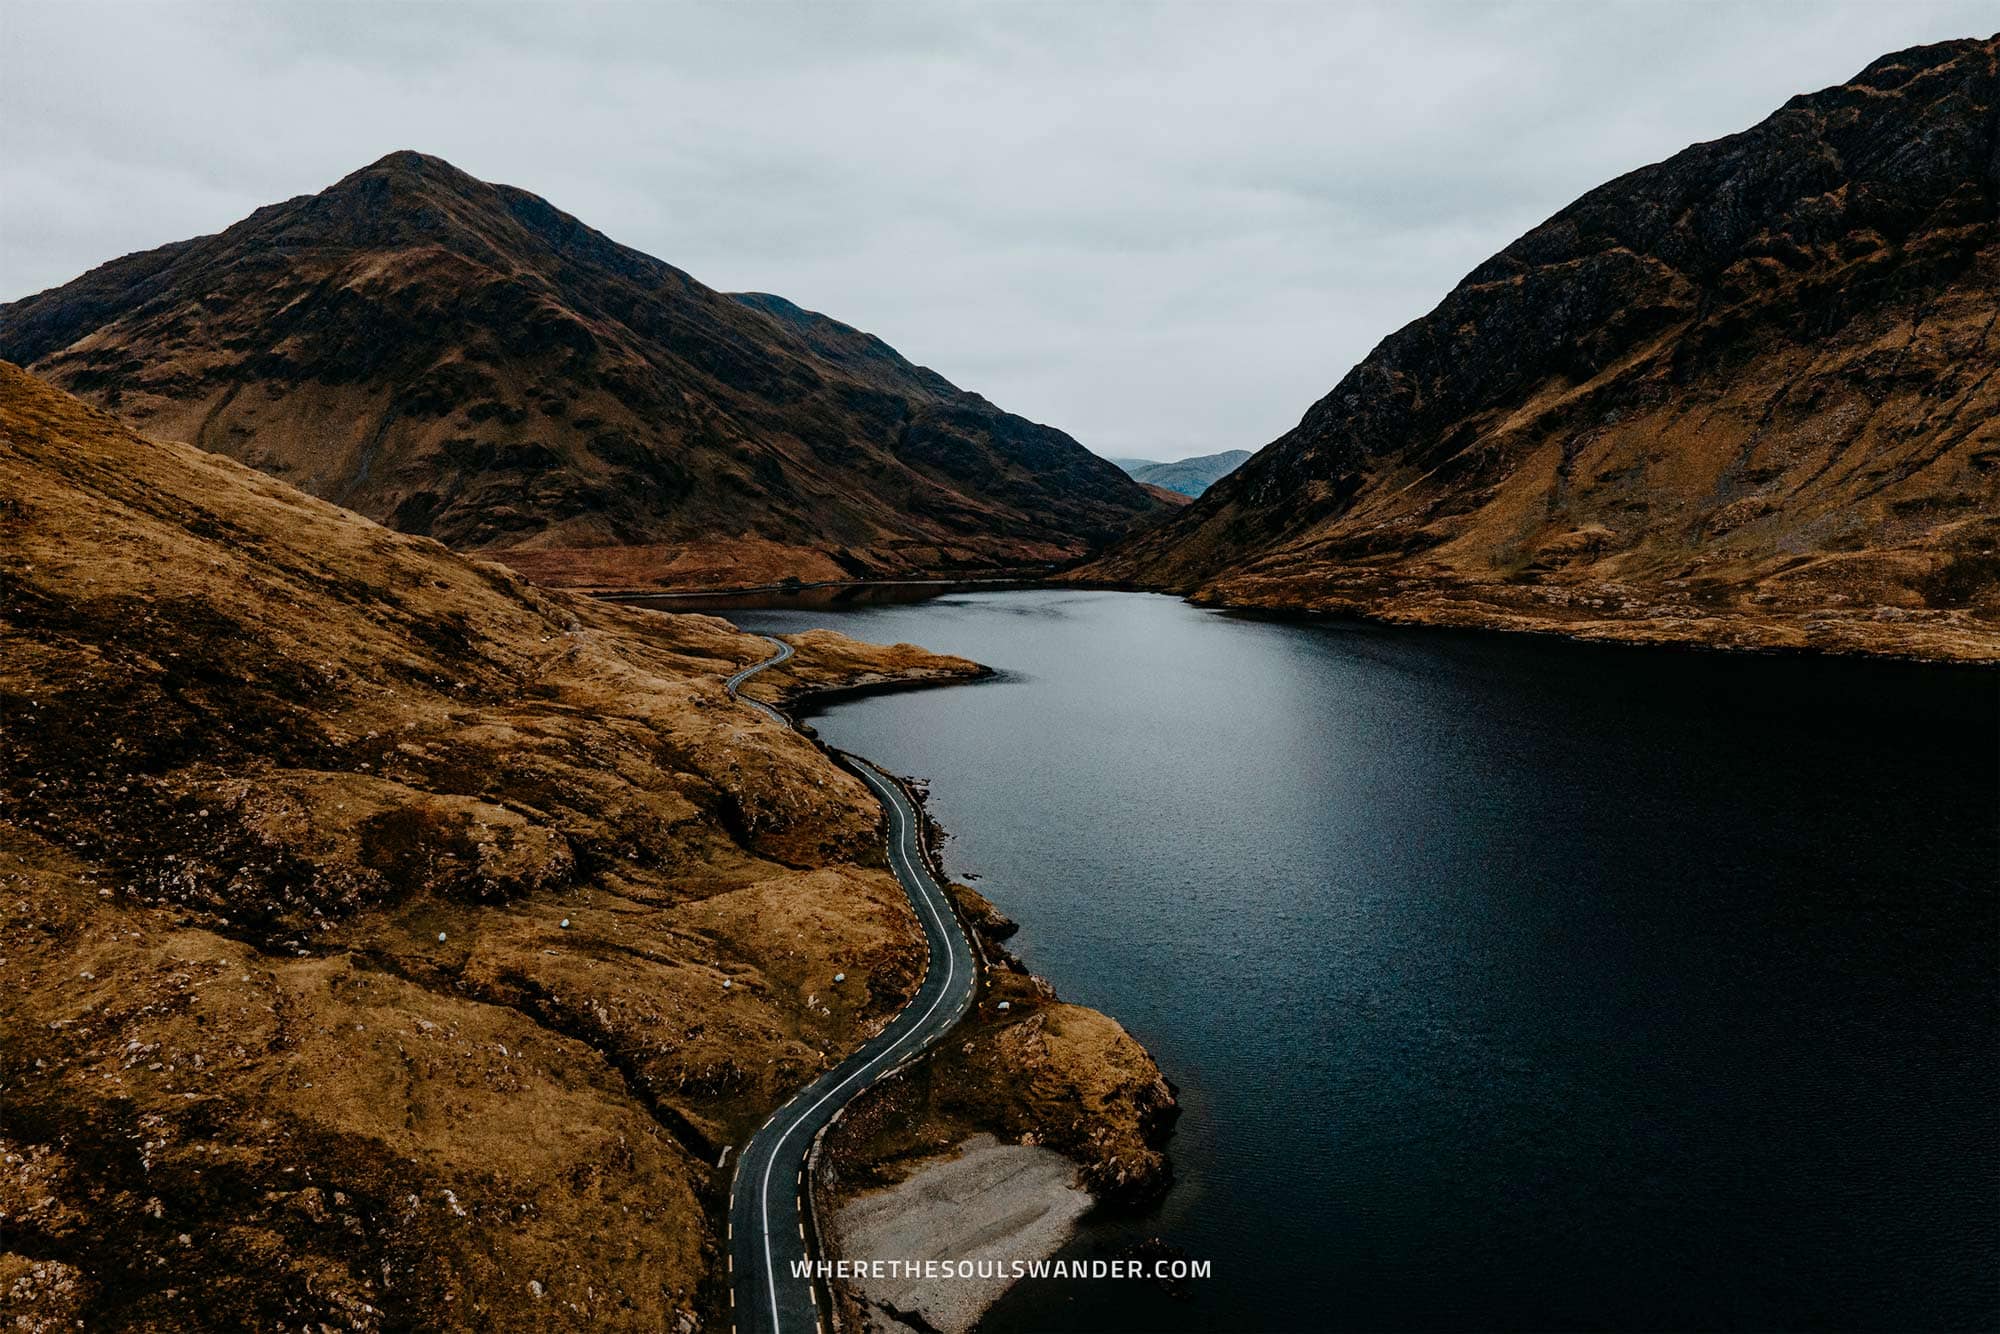
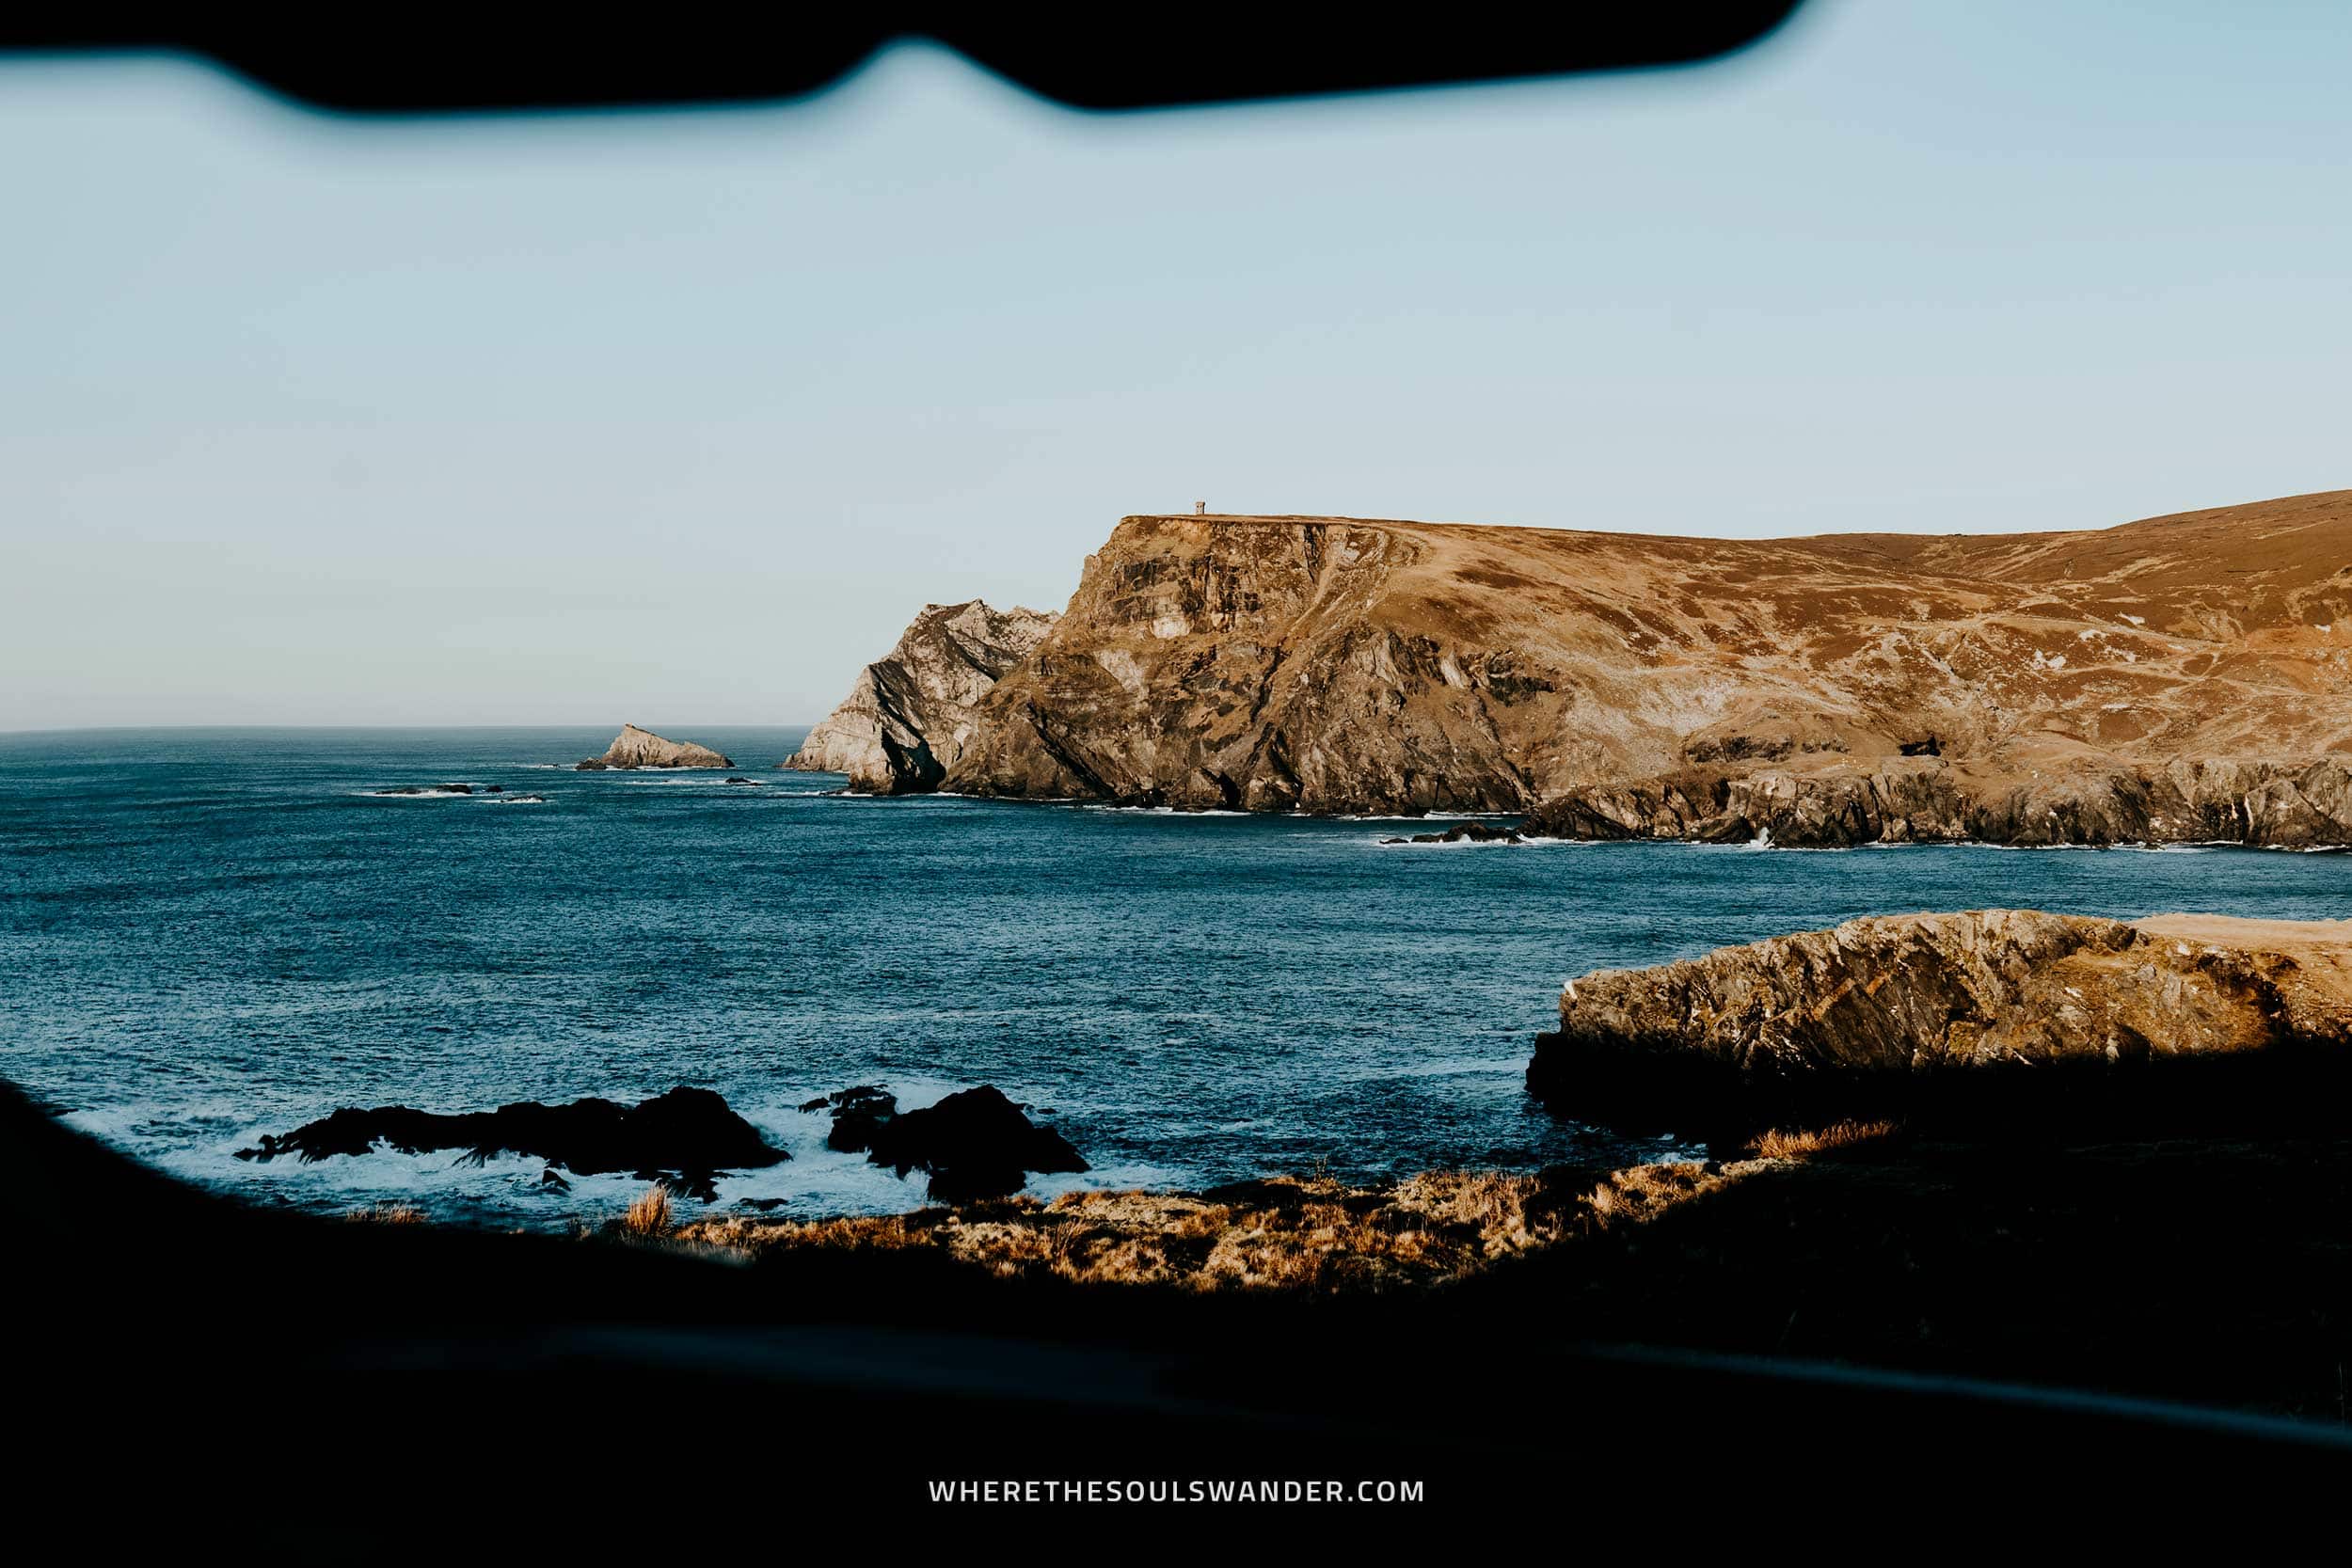
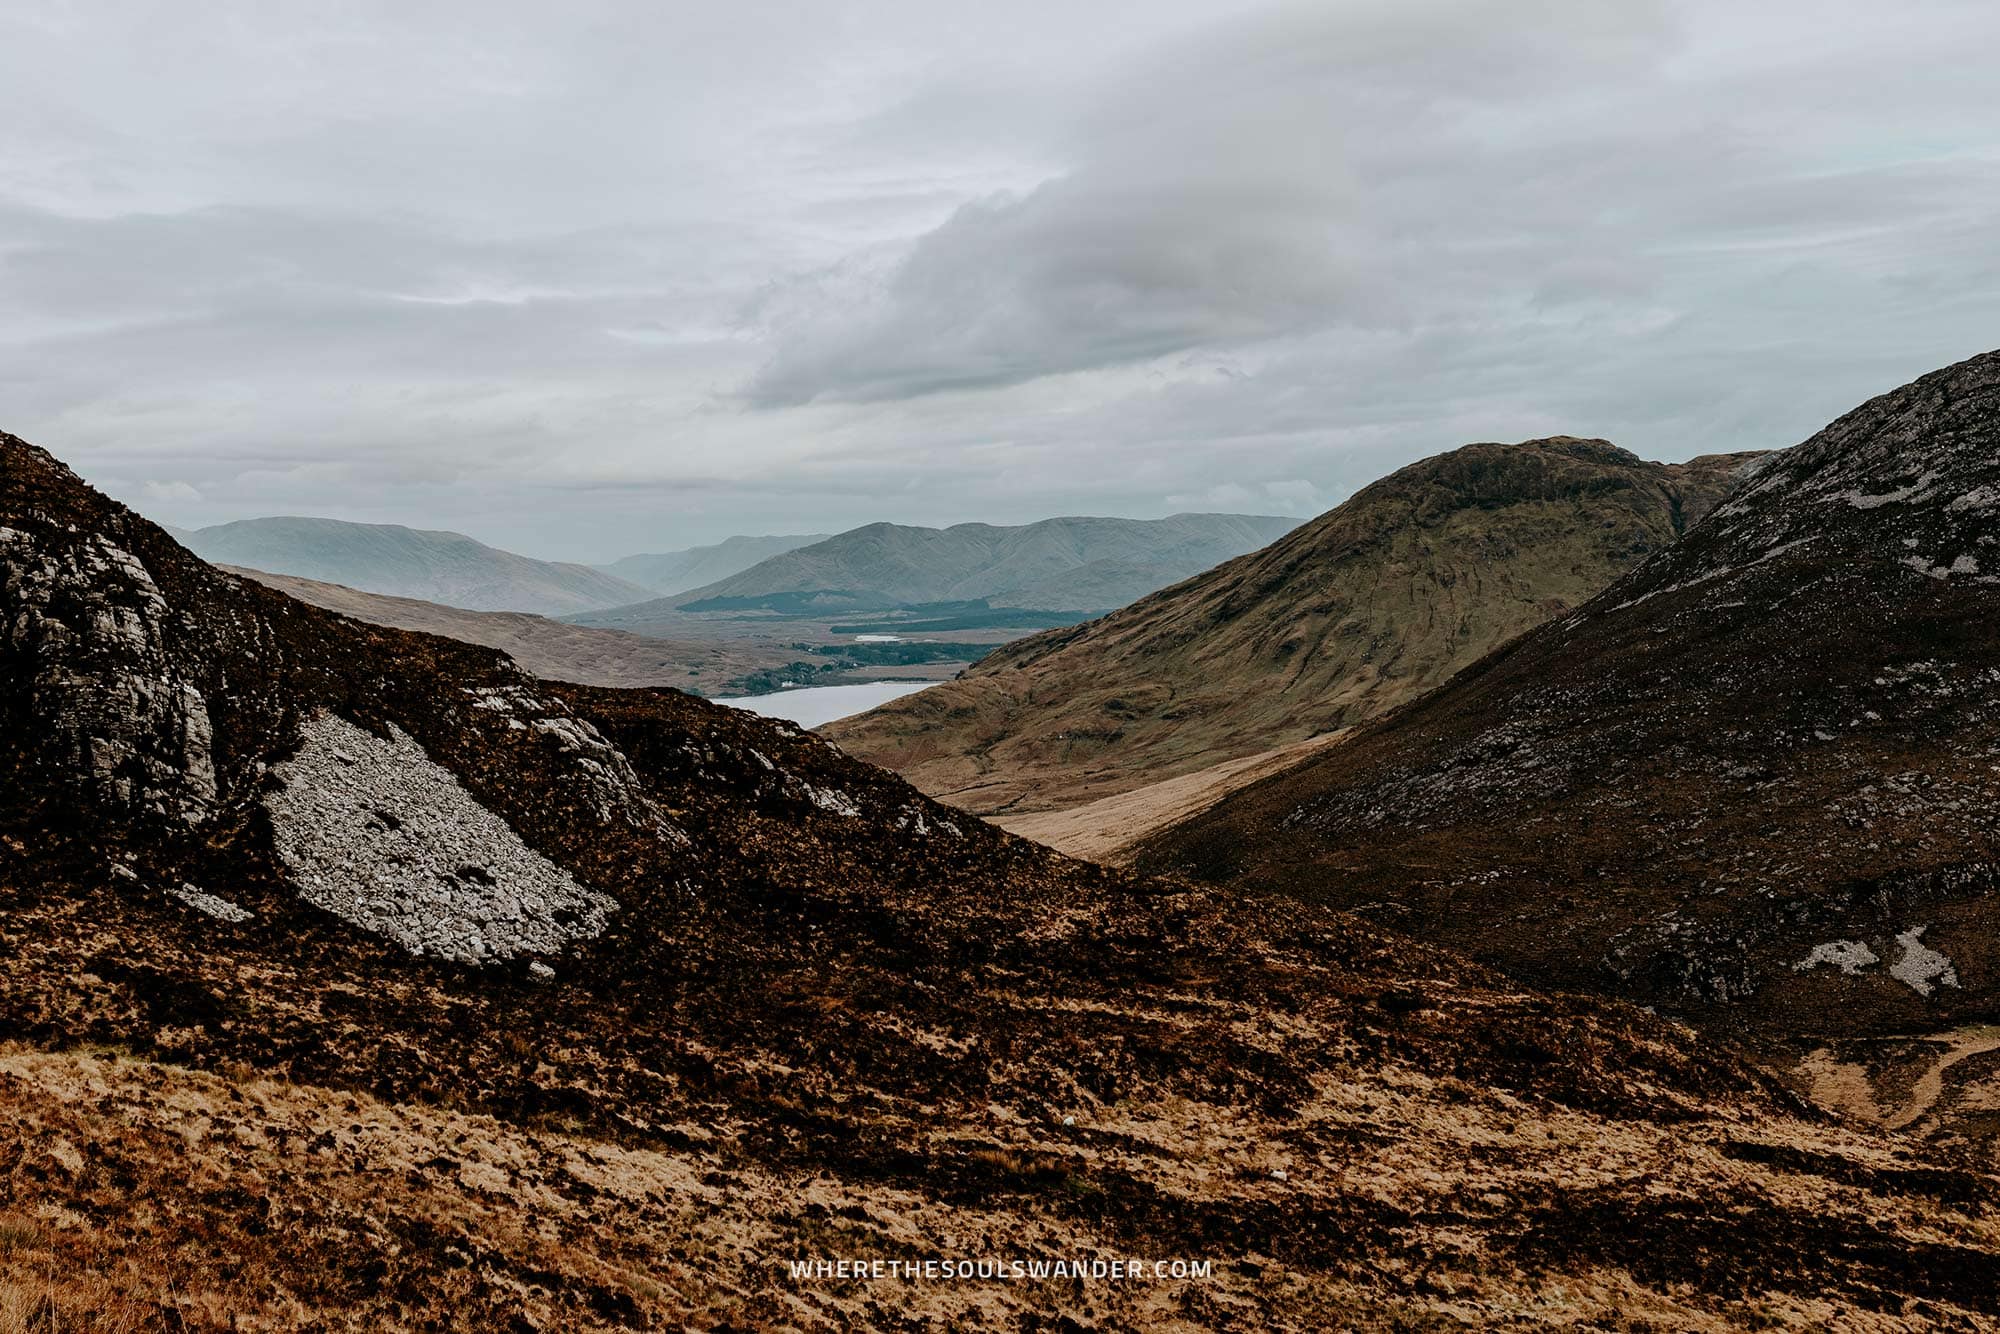
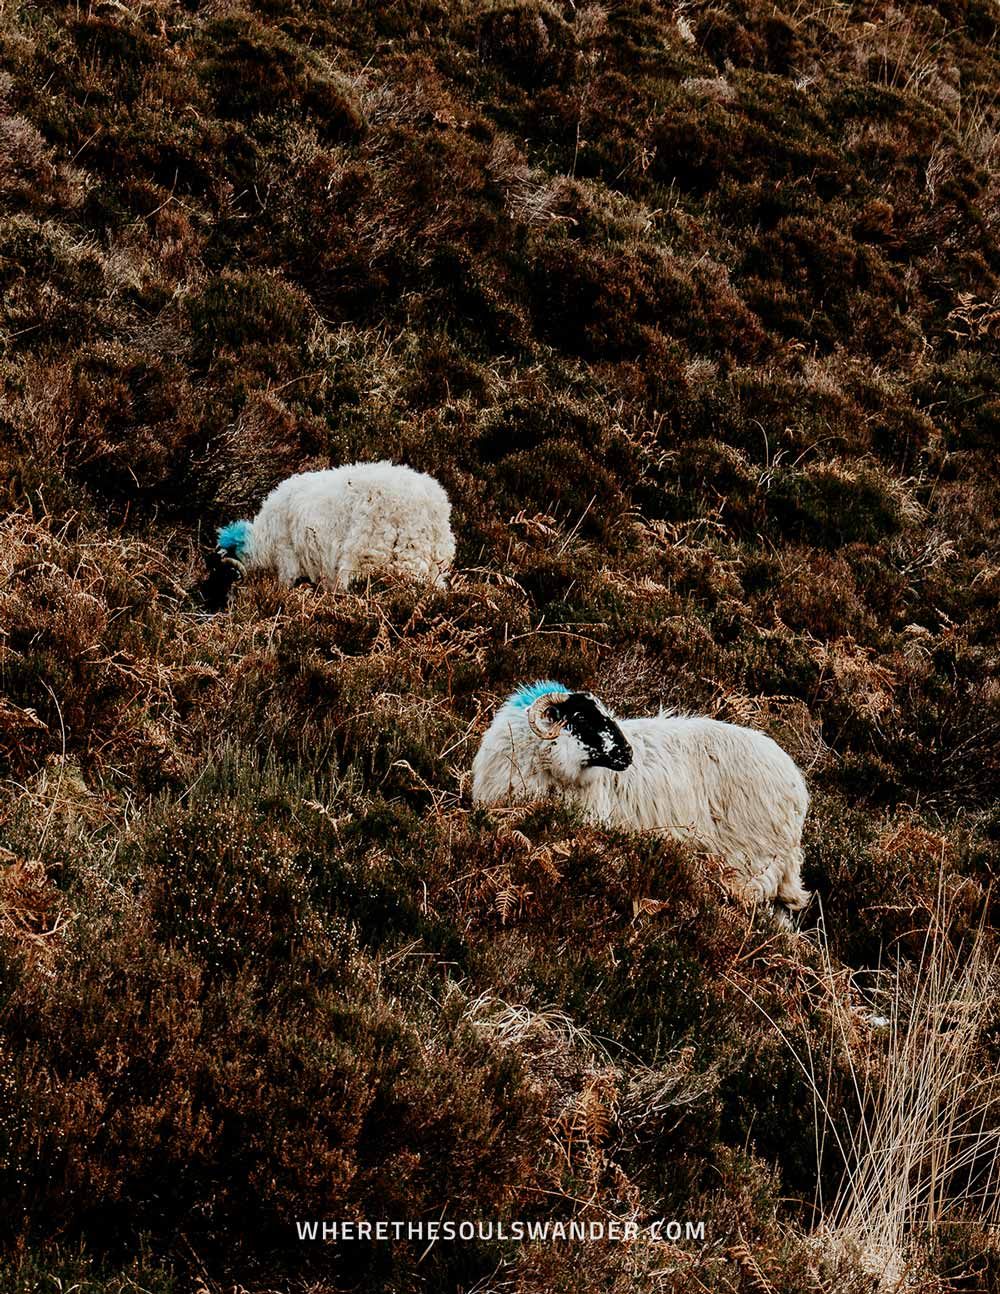
With driving on the left-hand side, narrow country roads, and 5.5 million sheep to dodge, driving in Ireland can be quite an adventure.
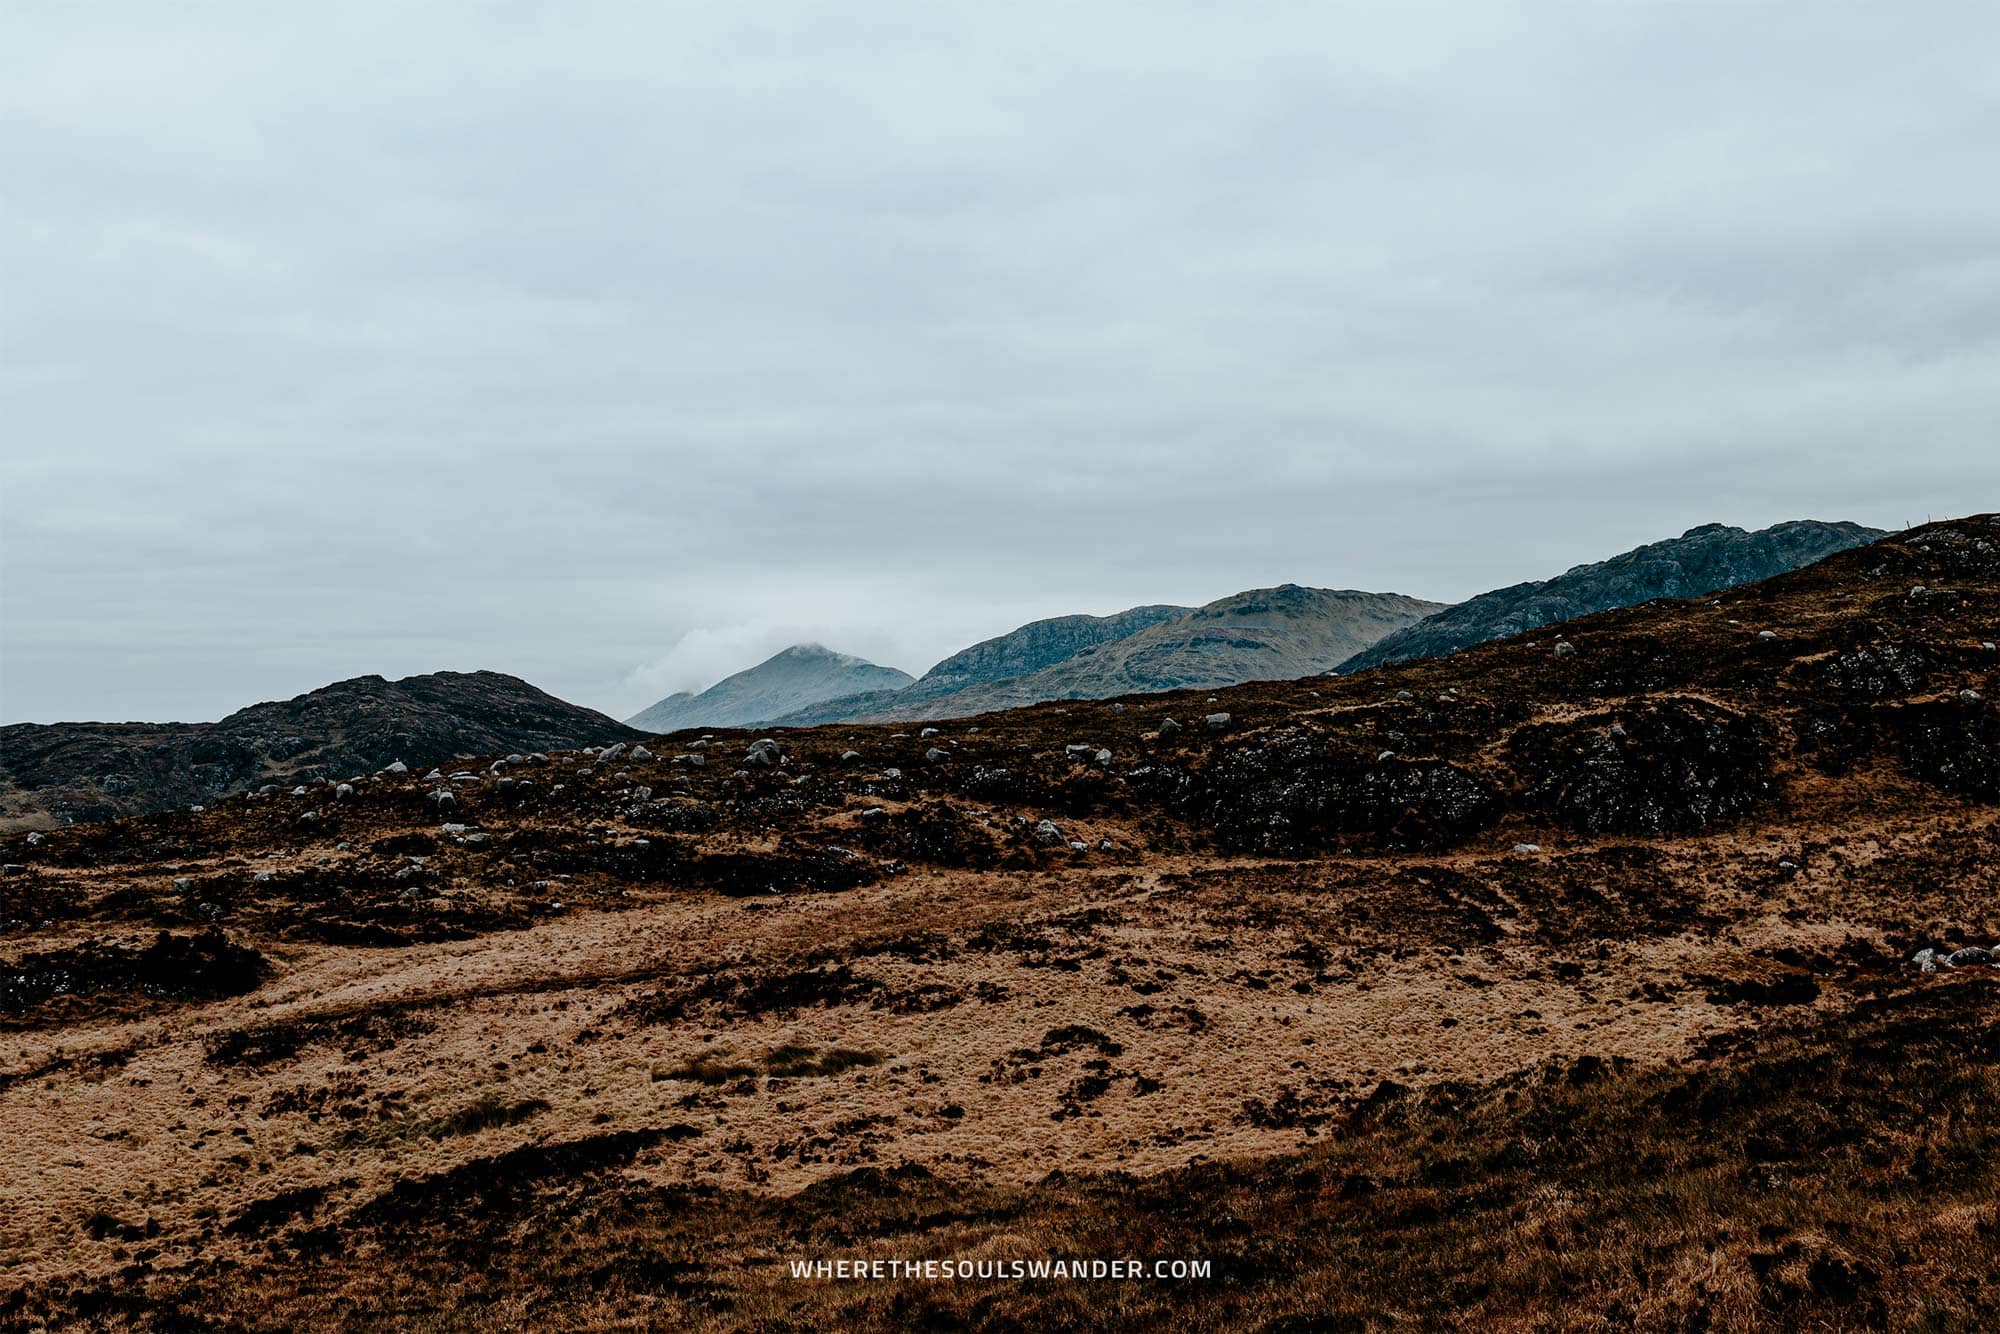
At the same time, this adventure is extremely convenient, stunningly picturesque, and by far the best way to experience this exceptional country and the spectacular scenery it has to offer.
After driving to some of Ireland’s absolute highlights and some of the hidden gems too, I’ve come to the conclusion that there are only a few places more suitable for an adventurous road trip than Ireland.
It’s rugged, a tad unpredictable, and most of all, exceptionally beautiful, making it a dream destination for those who crave off-the-beaten-path adventure and untouched wilderness.
Add to that that the roads are easy to navigate and in excellent condition, and Ireland is the road trip destination you’ve been searching for all along.
To kick-start your own road trip, I’ve curated a list of useful tips for driving in Ireland – plus all the essentials in terms of car rental, costs, insurance and more.
If you choose to use any of the links on this page, I may receive a small commission at no extra cost to you. By using these links, you’ll have a direct impact on WTSW and my ability to continue to create free insightful travel content for you. If you find any of my tips useful, you can support me by buying a virtual coffee here.
Why rent a car in Ireland?
Ireland is an incredibly picturesque country and exploring it as part of a road trip is easily the best way to see everything it has to offer.
By renting your own car, you also have the possibility to cruise to some of the most secluded areas of the country, which to me, is an absolute must for anyone road-tripping Ireland.
Add to that, that you have all the freedom to explore at your own pace, and that public transport is slightly limited in some bits of the country, and it’s easy to understand why a road trip is the best way to experience this amazing island in the North Atlantic Ocean.
Cost of renting a car in Ireland
First things first; renting a car in Ireland isn’t by any means cheap.
I’ve rented cars in many different countries over the last few years, and the costs of renting a car in Ireland were some of the highest I’ve ever seen – which kinda shocked me at first.
However, after doing some proper research, I noticed that renting a car is still the cheapest, fastest and most convenient means of transport in Ireland.
Having said that, the price for car rental ranges from €400 to €600 per week in the high season, which comes to approximately €60 – €90 per day. This includes free cancellation, theft protection and collision damage waiver.
If you choose to opt for a car with automatic transmission (which I highly recommend if you haven’t driven on the left before), the costs of car rental will average out at €600 to €800 per week.
All in all, a road trip in Ireland is far from cheap, and with the above in mind, I’d advise booking your rental car well in advance to save a few bucks.
For car rental in Ireland, I’d highly recommend Rentalcars.com. They offer brilliant service, additional insurance options, as well as a wide selection of cars to choose from. Prices and availability here.

Driving in Ireland | 11 Useful tips to kick-start your Ireland road trip
1. Drive on the left-hand side of the road
To me, the idea of driving on the left-hand side of the road sounded kinda frightening at first, but after a short phase of acclimatisation, it actually felt quite logical.
But it isn’t like this for everyone, so I’d highly recommend anyone to take it slow since it takes at least a couple of days to become fully accustomed to your new driving situation.
If it’s your first time driving on the left, make sure you do some test drives at the parking lot of your rental car supplier, as it will give you some time to get a feel for the car, while you also practice your new driving habits.
If you’re not completely comfortable with driving on the left, hiring an automatic car will make things a lot less complicated, as you don’t have to stress about changing the gears all the time.
Those preferring to drive automatic, be sure to book a car in advance since renting an automatic car is wildly popular within Ireland.
2. Rent and drop off your car at Dublin Airport
Since there’s plenty of rental car companies established in Dublin Airport, there’s also significantly more competition, meaning you could find a rental at notably cheaper rates here.
However, it’s essential that you reserve your rental car online and in advance, and pick it up as soon as your flight touches down on Irish soil.
For the above reasons, I’d advise anyone to sort out their own rental car as soon as their flight confirmation pops up in their mail inbox – given that last-minute rates can be quite a shock, especially during the peak summer months.
When it comes to international car rental, I always make use of RentalCars; an excellent online car rental service that holds over 900 of the world’s leading rental car suppliers.
Additionally, if you do however wish to book a rental car spontaneously, make sure you check at the reception of your hotel, as it’s likely that they can offer your a small discount.
3. Try to avoid parking your car in Dublin
If there’s one thing I’ve learned during my time in Ireland, it will be that you should try to avoid parking your car in Dublin at all times.
While some of the best day trips from Dublin are reached by car, I’d highly recommend bringing back your car to the rental car company before exploring the city itself.
Simply put, the parking fees in Dublin can add up quickly, especially if you park around museums or in one of the parking garages in the city centre.
I had my rental car in the garage for one night and paid around €25, which is a complete waste of money in my eyes.

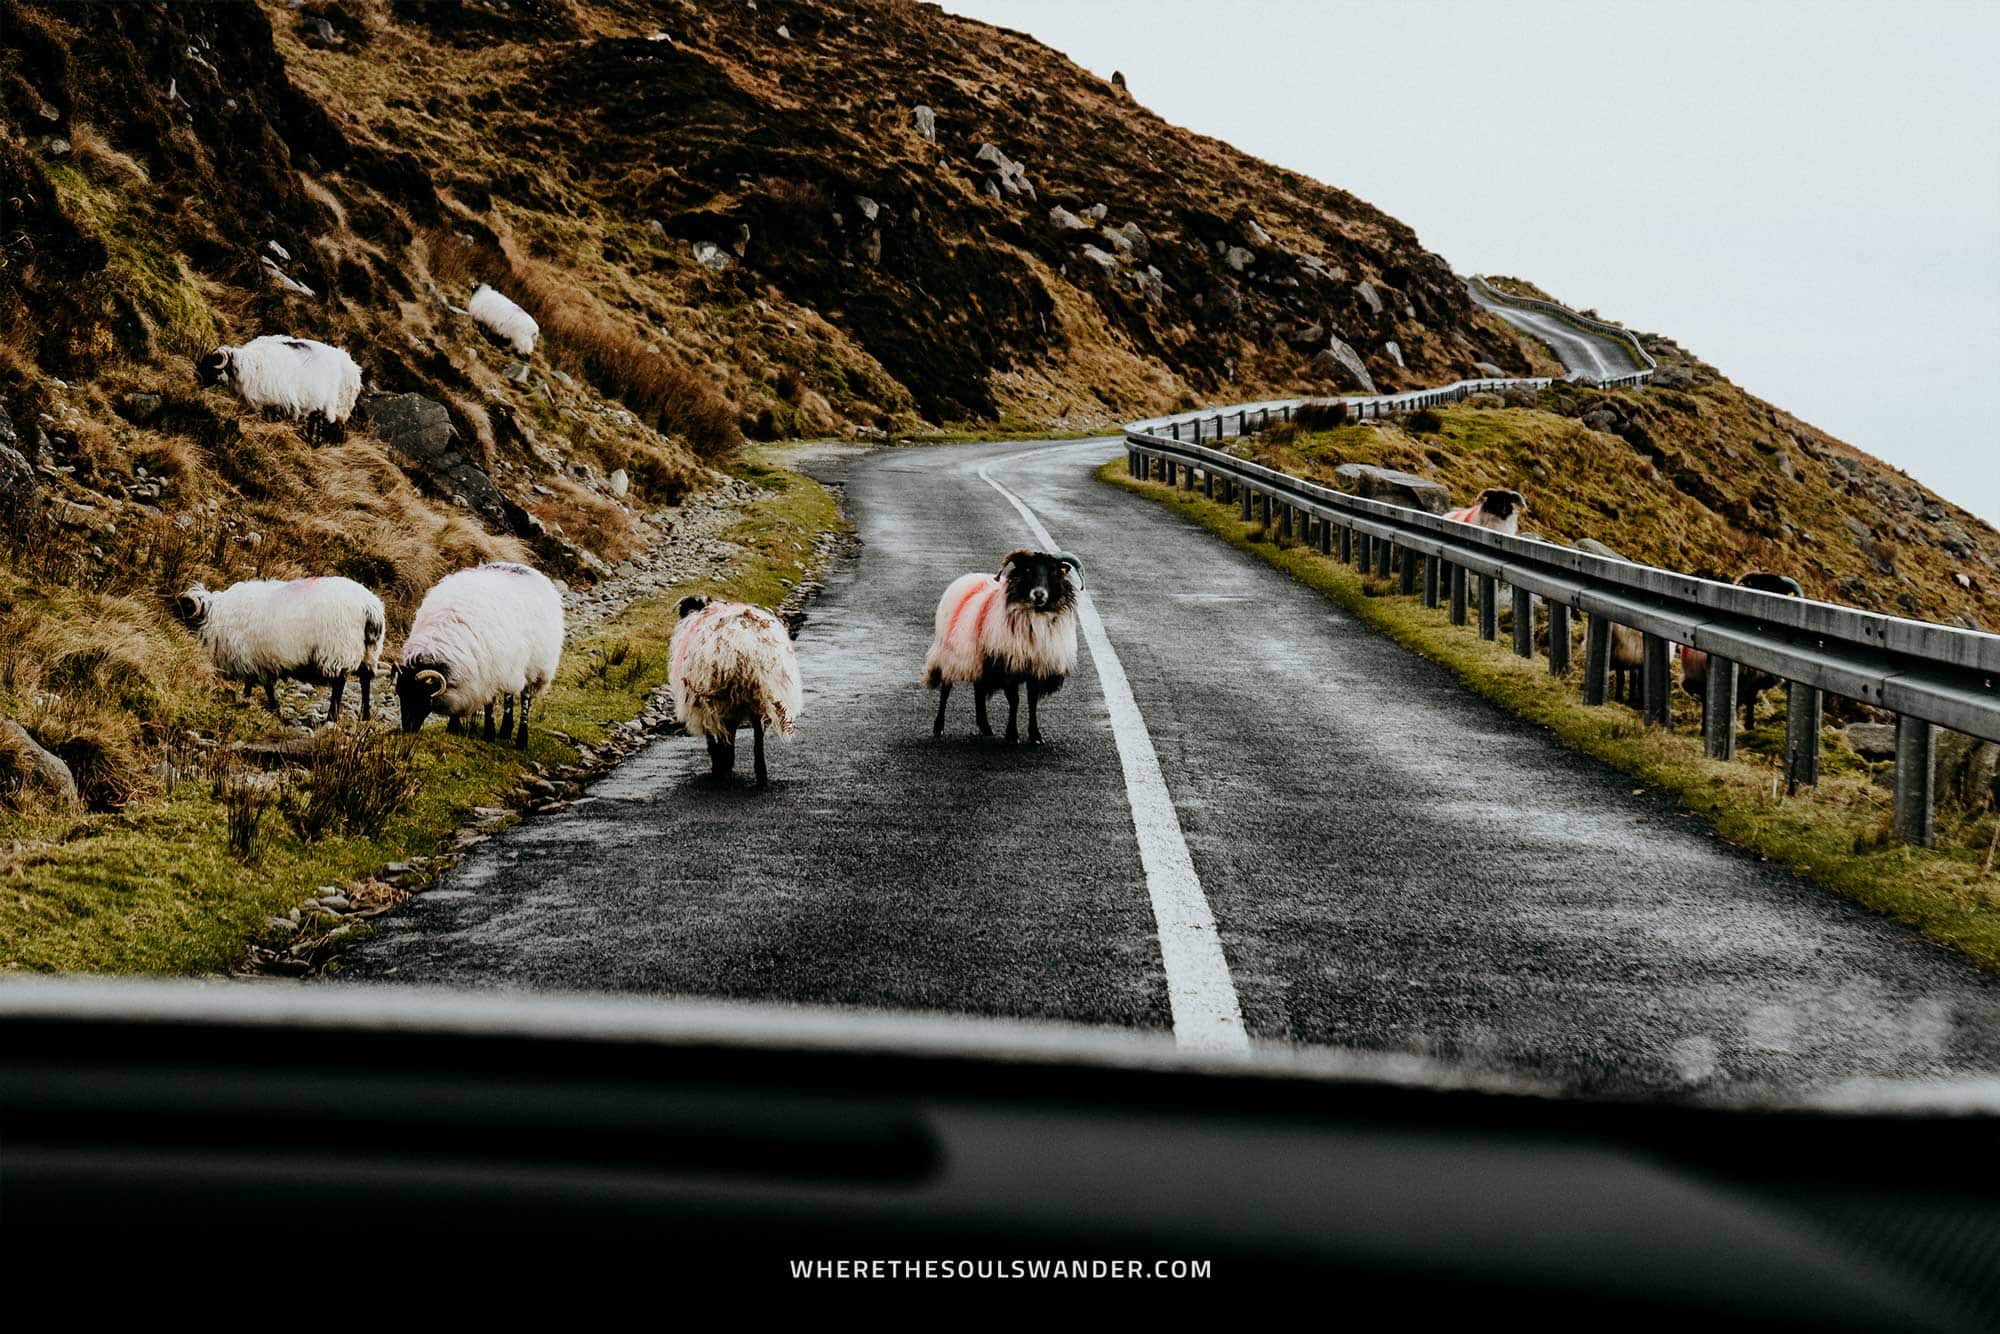
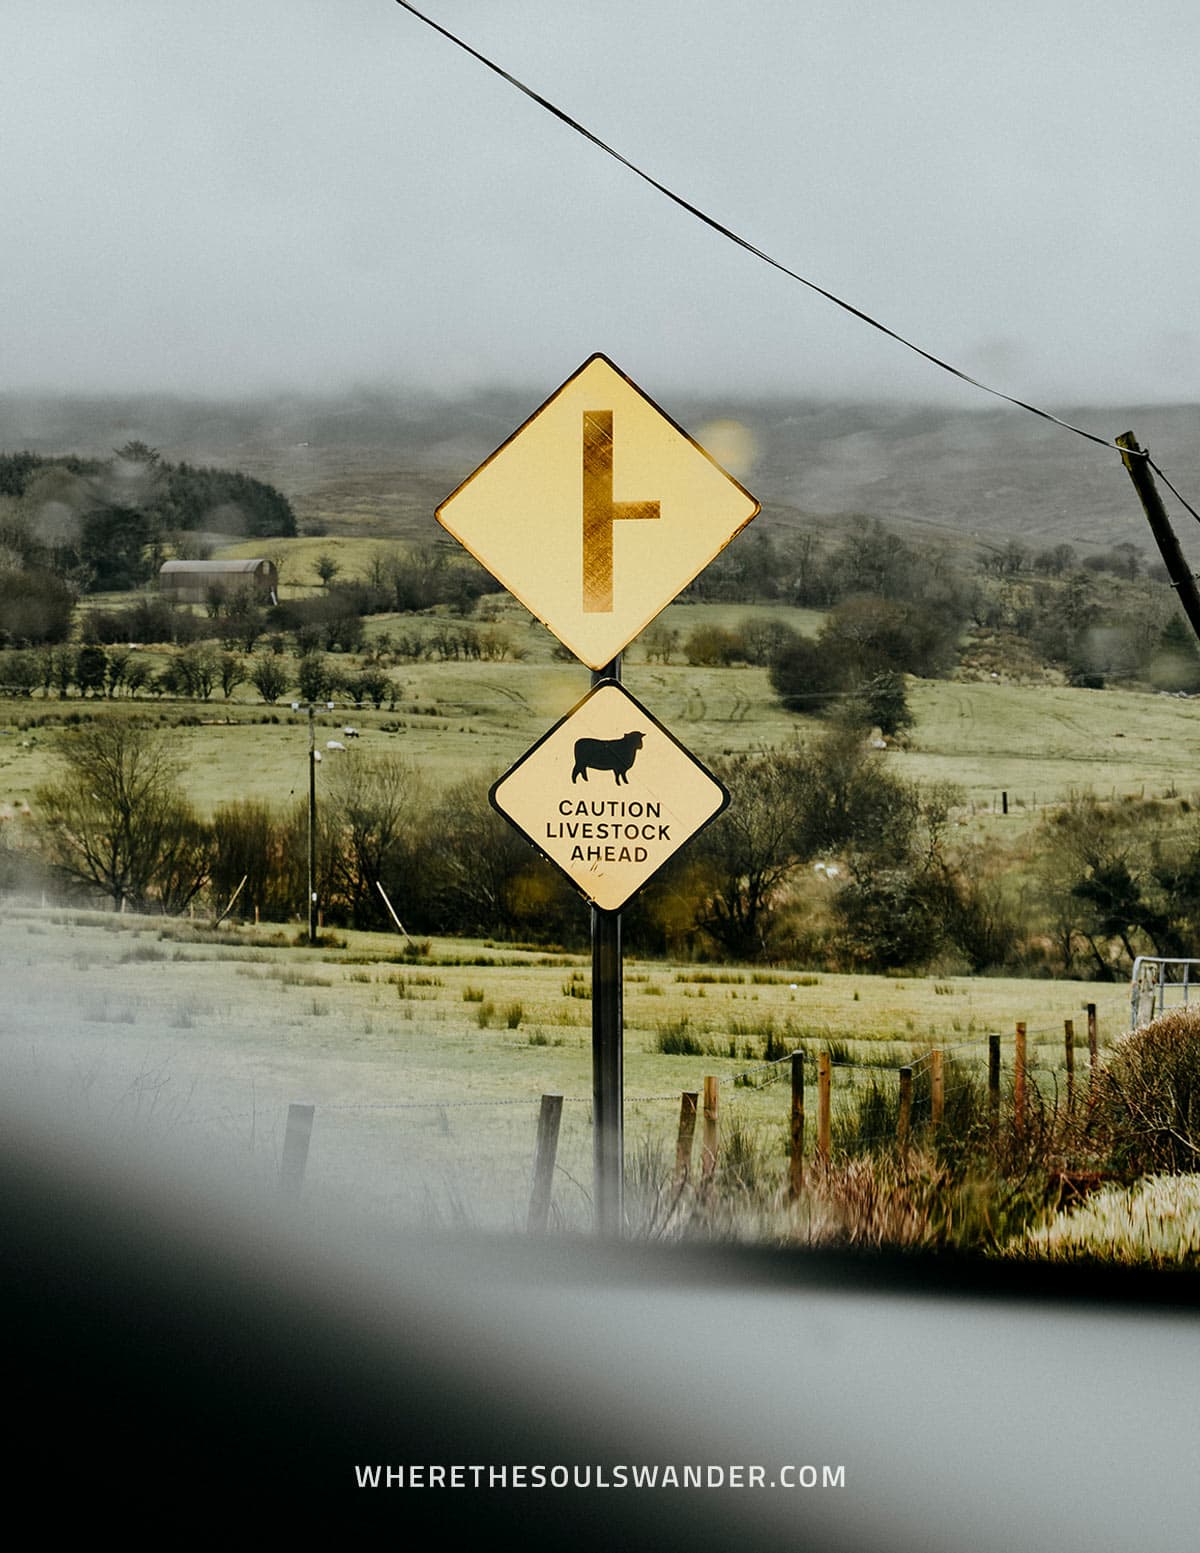
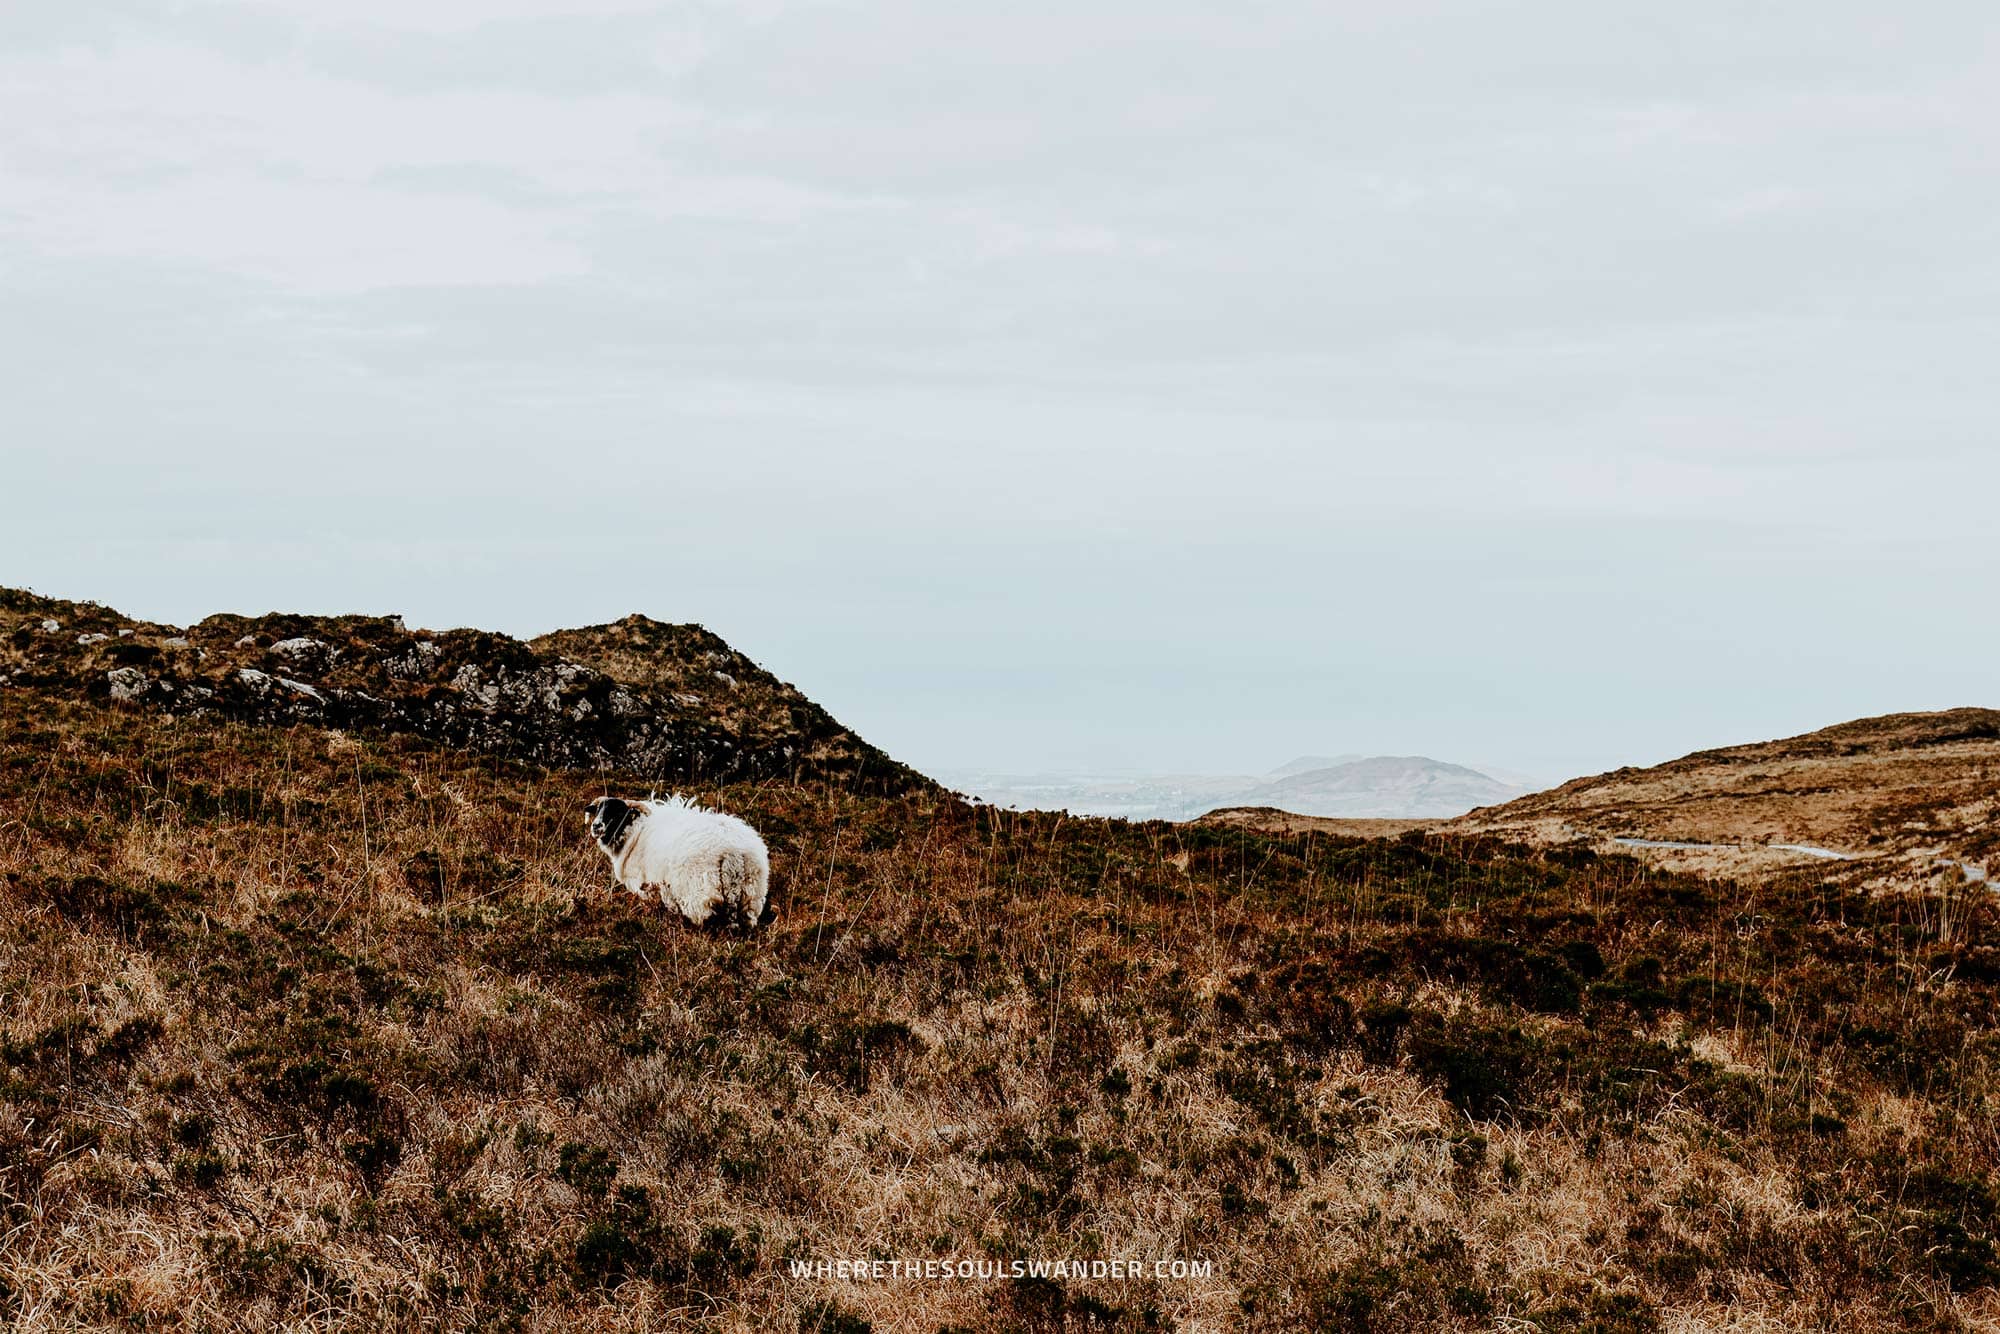
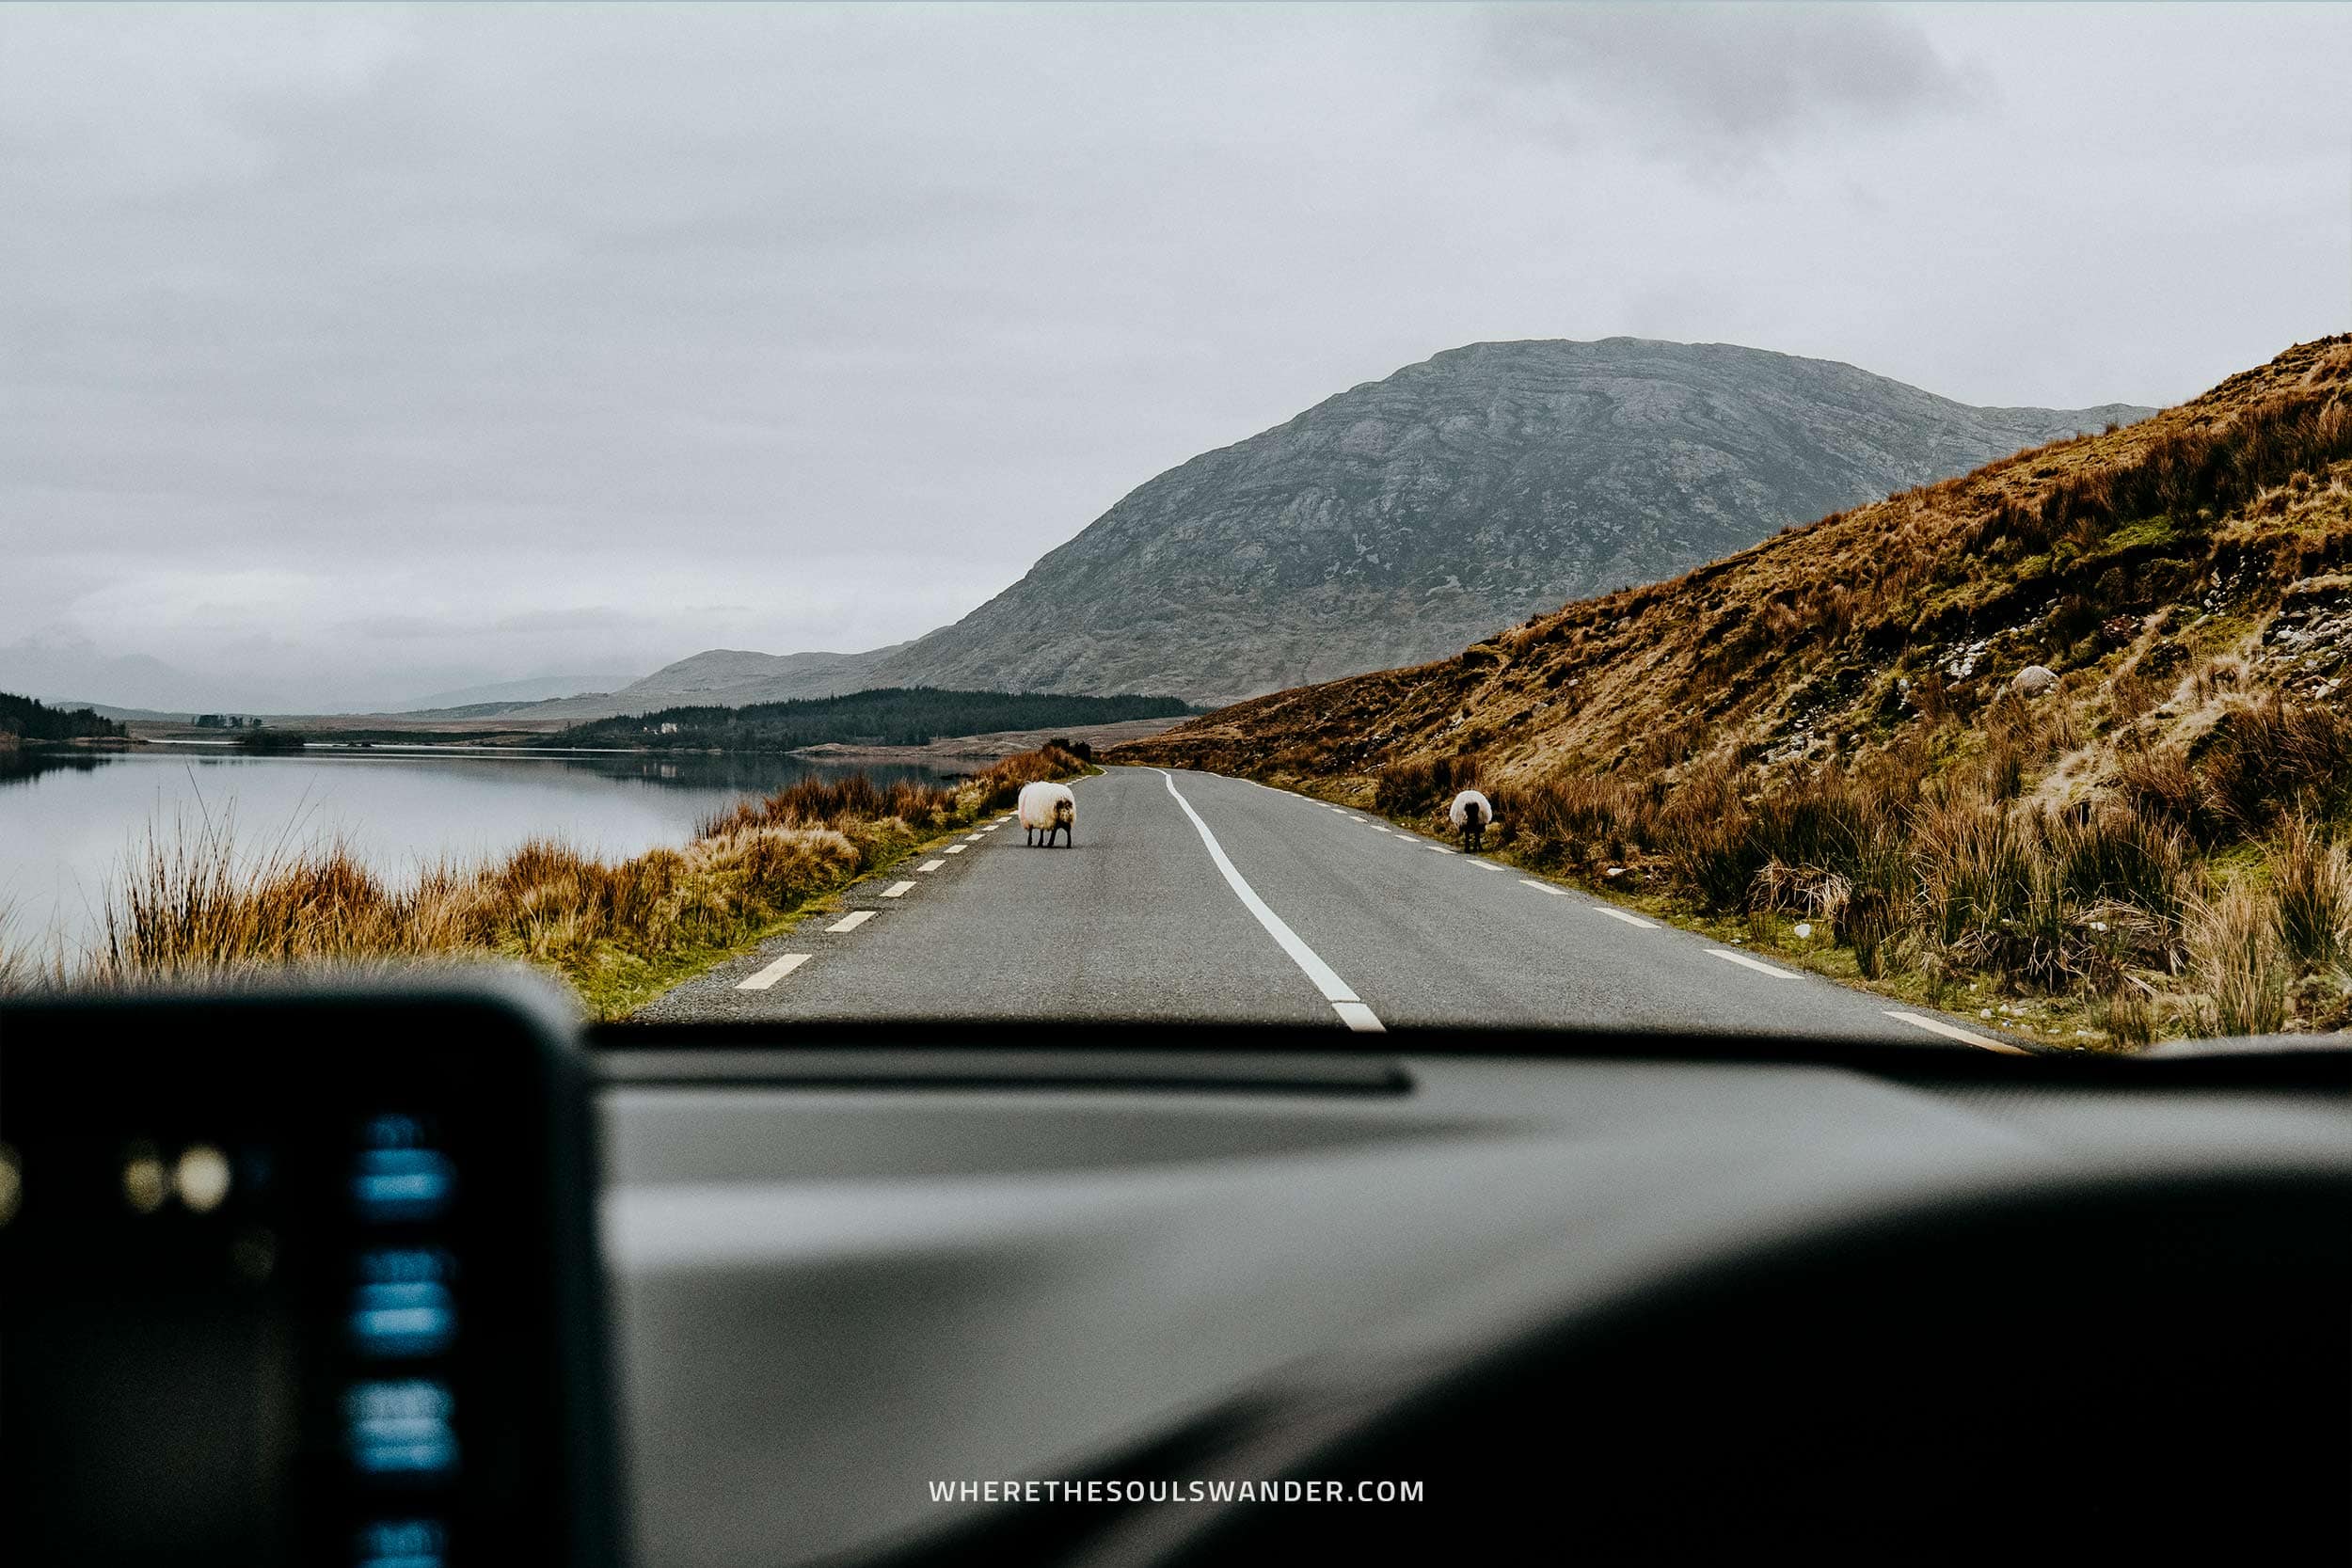
4. Mind the sheep
As you’ve likely seen on the cover of my Ireland itinerary, Ireland is teeming with sheep, and they often don’t give a damn about the traffic.
Instead, these sheep tend to wander on the side of the road, so make sure you keep an eye out when passing a herd – they have a tendency to cross the road without warning.
Lastly, with over 5.5 million sheep, Ireland is home to more sheep than humans, meaning there’s simply no way around this fact when driving through the Irish countryside yourself.
5. Don’t forget to pay the M50 toll
First things first, make sure you put a reminder on your phone now to pay the M50 toll.
When renting a car from the Dublin Airport (which I’d highly advise you to do), odds are that you will pass the barrier-free tolling system on Dublin’s M50 motorway.
This innovative system grants drivers the ability to simply pass through, instead of stopping over to pay the toll at the booth, which makes the journey along this crowded area significantly faster.
The only thing that you’ll have to do is pay the toll online at Eflow by 8 PM the next day.
While this sounds pretty straightforward, I can tell from first-hand experience that it’s extremely easy to forget about the toll – I paid mine at home since I totally overlooked it.
If you forget to pay in time like me, don’t worry, you’re still able to pay it a few days later, just be aware that you will pay a small fine atop the initial toll.
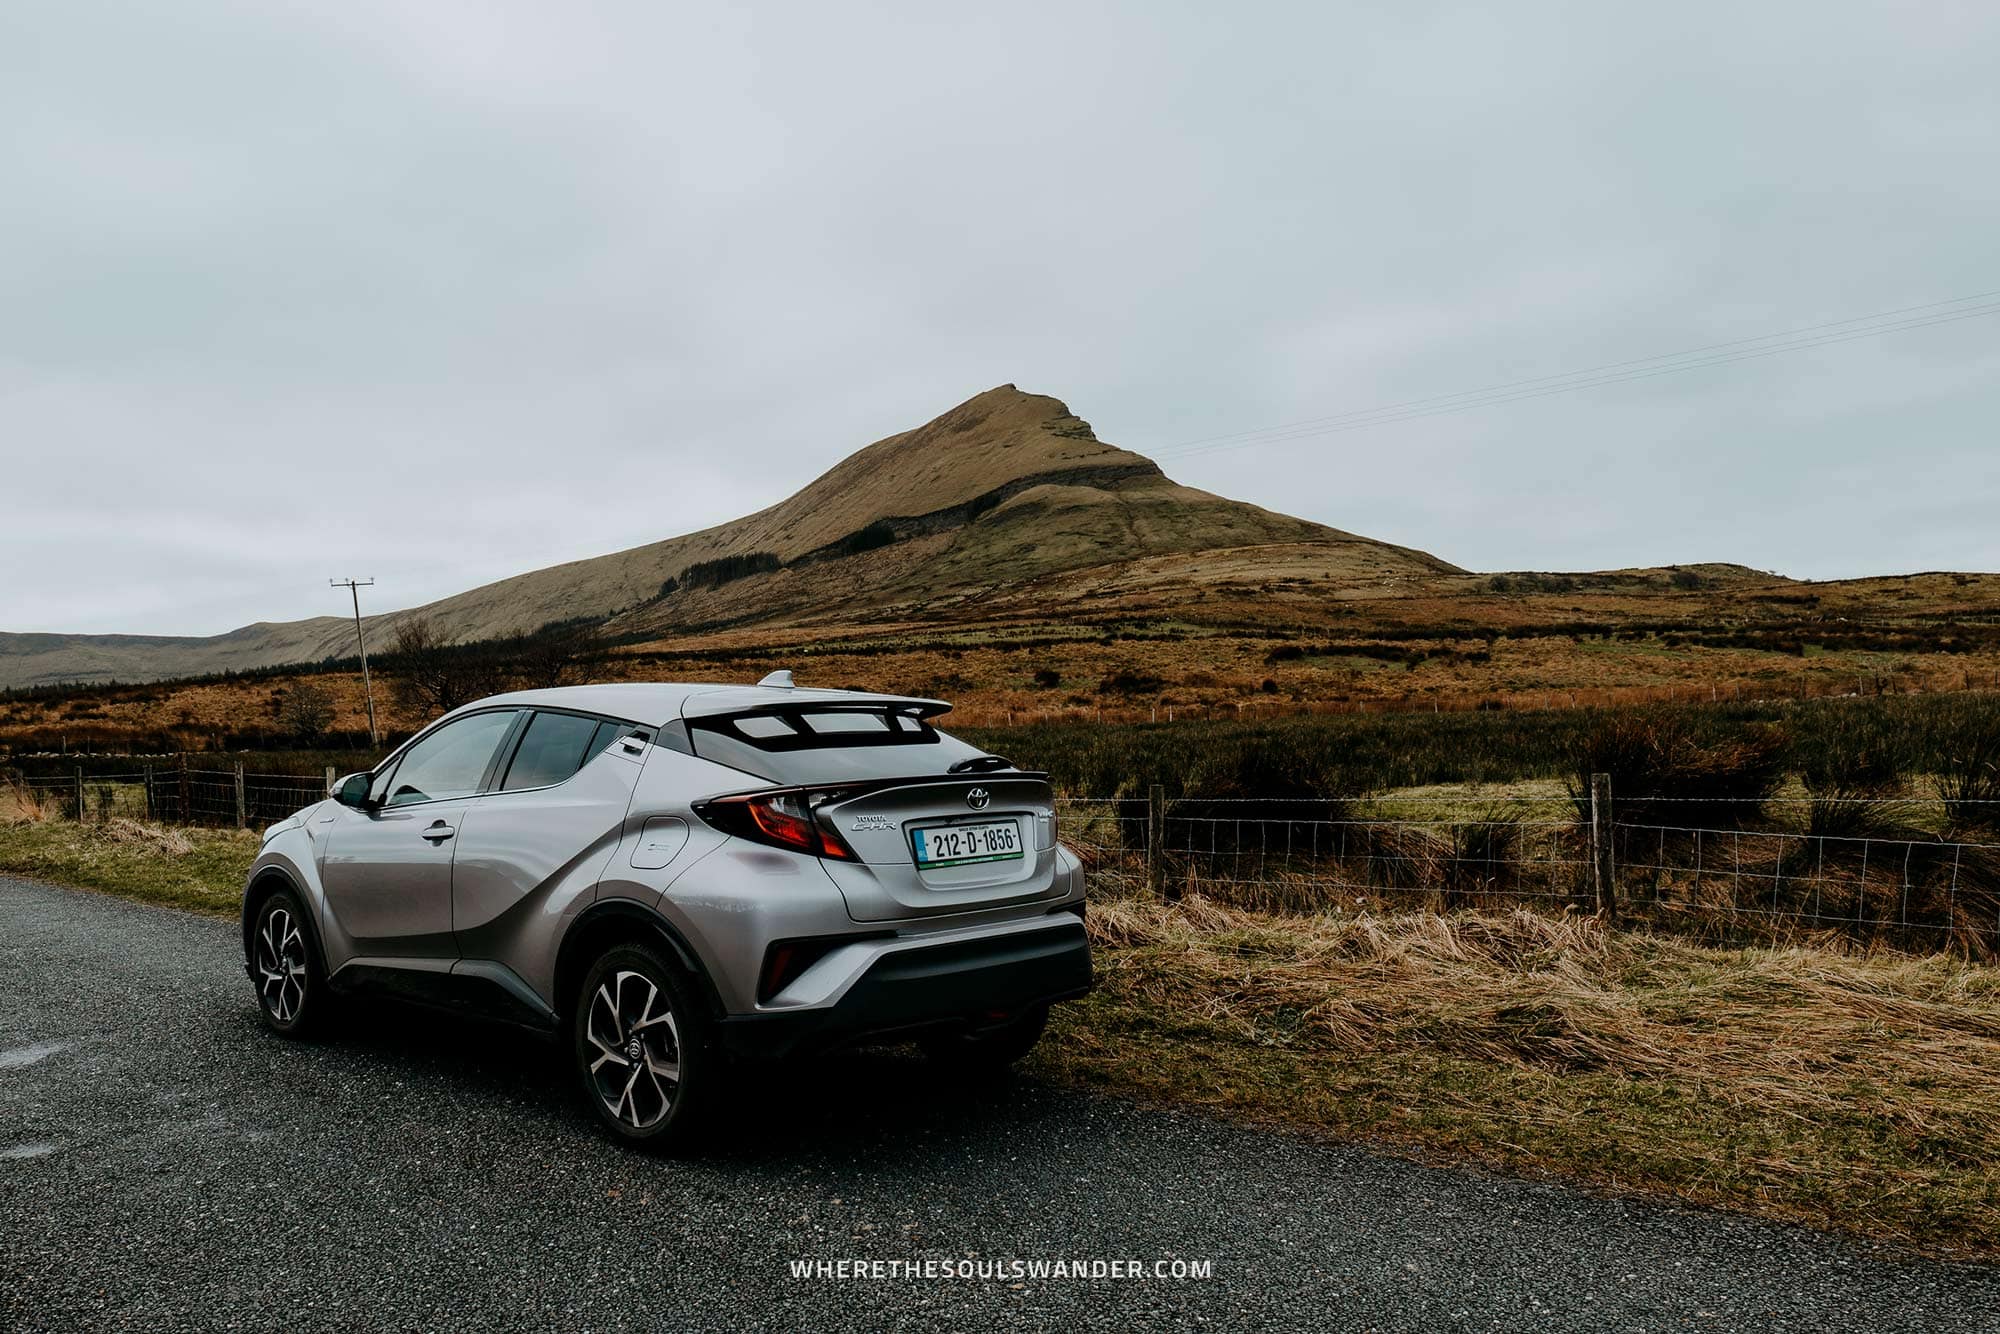
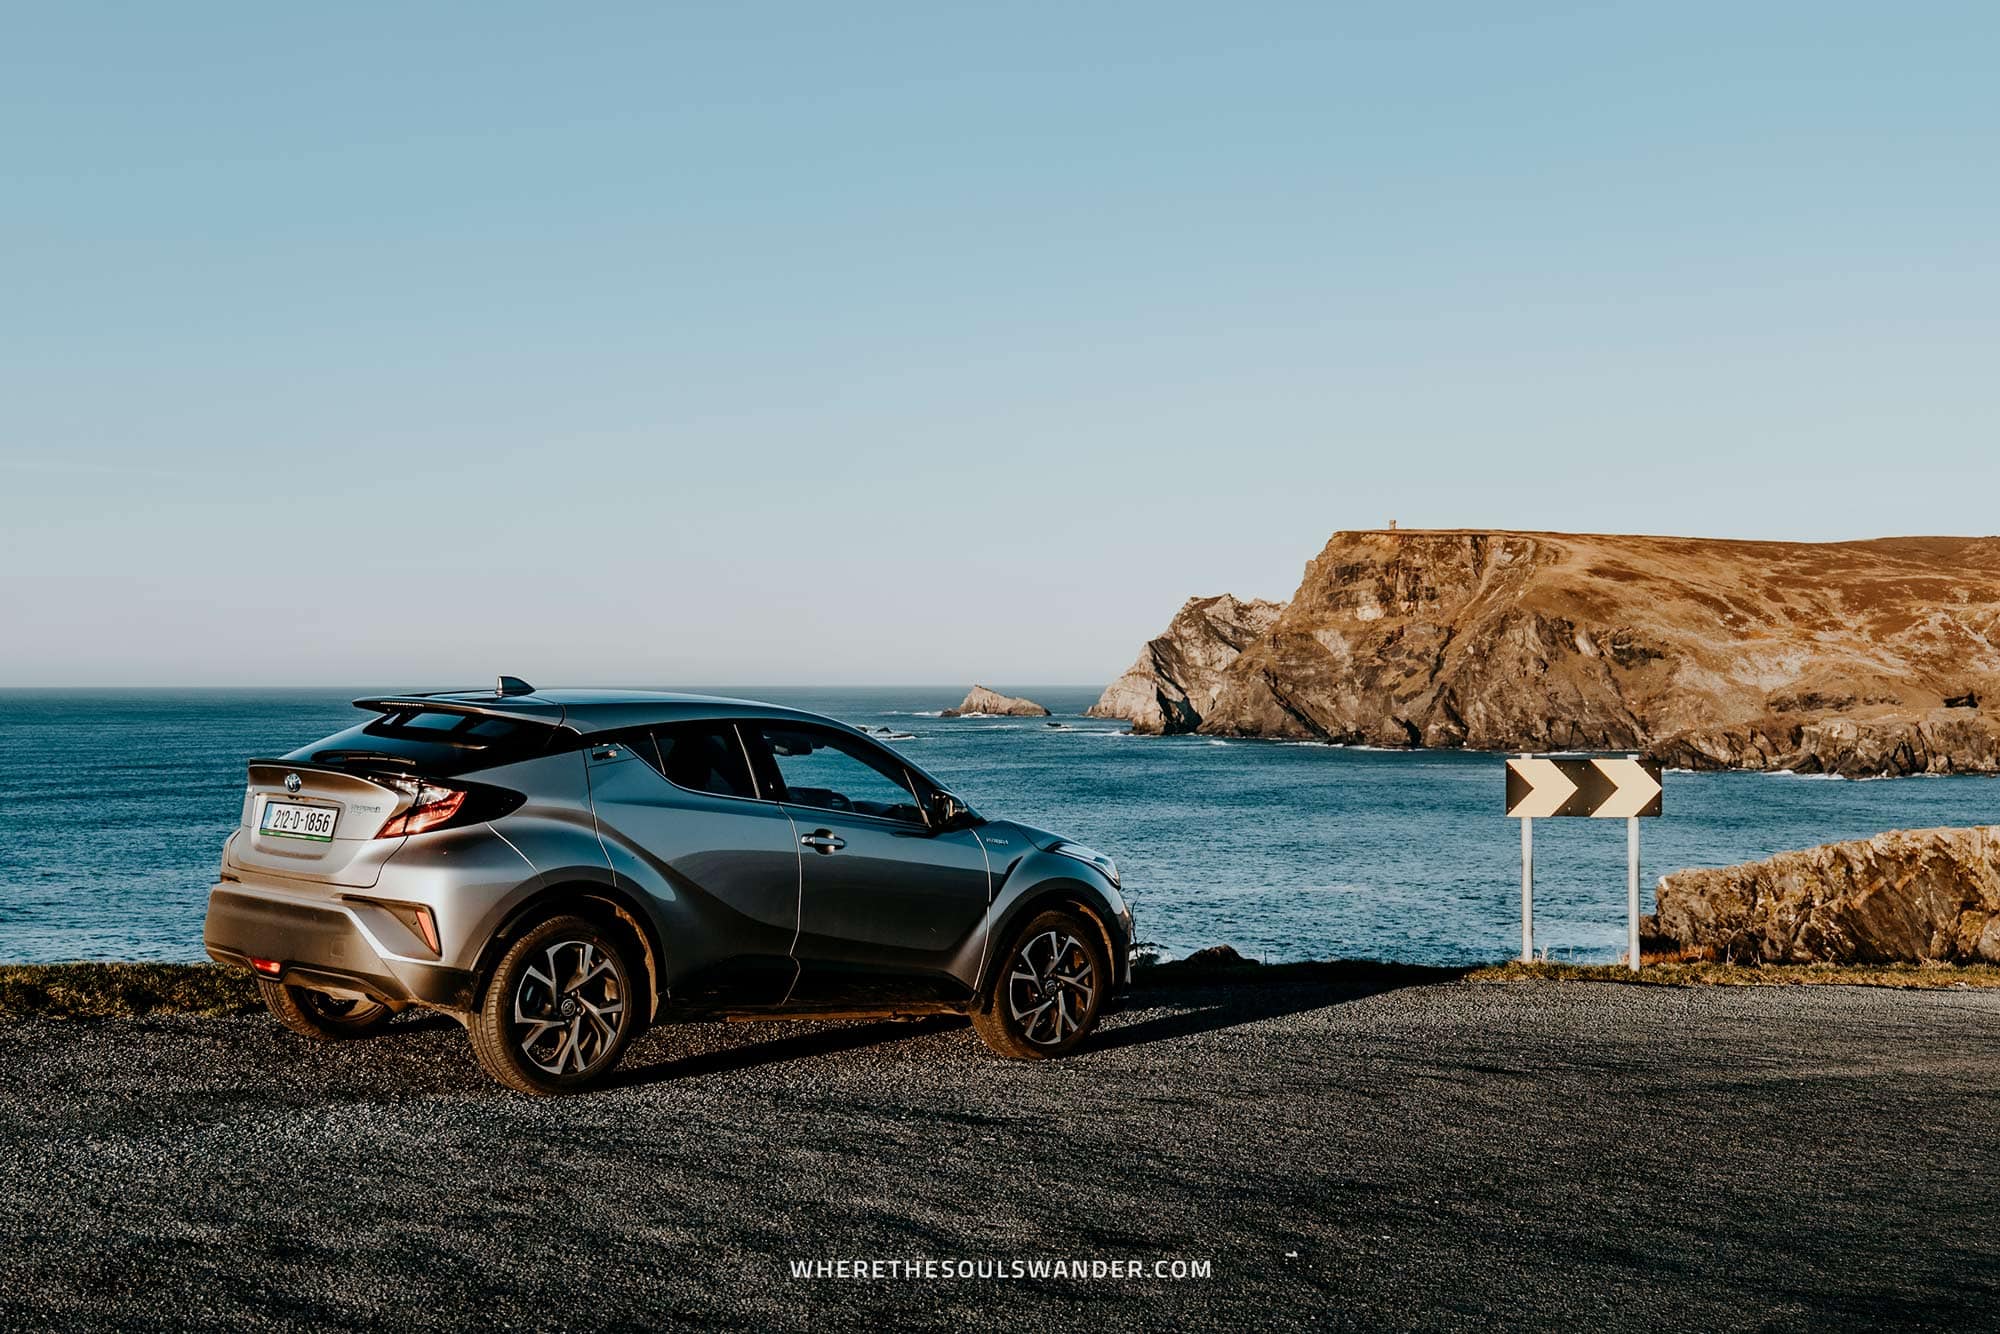
6. Consider renting a smaller car
While your rental car supplier will most likely present you with an upgrade that offers extra comfort when driving bumpy roads, I’m here to say that it’s better to stay with a slightly smaller car.
I say this because Ireland has no shortage of narrow country roads, and navigating these is far easier in a smaller car rather than a huge SUV.
I opted for the Toyota C-HR, a medium-sized hybrid car, and had an easy time navigating the narrow country roads, while also having enough power to handle the steeper parts of my road trip through Ireland.
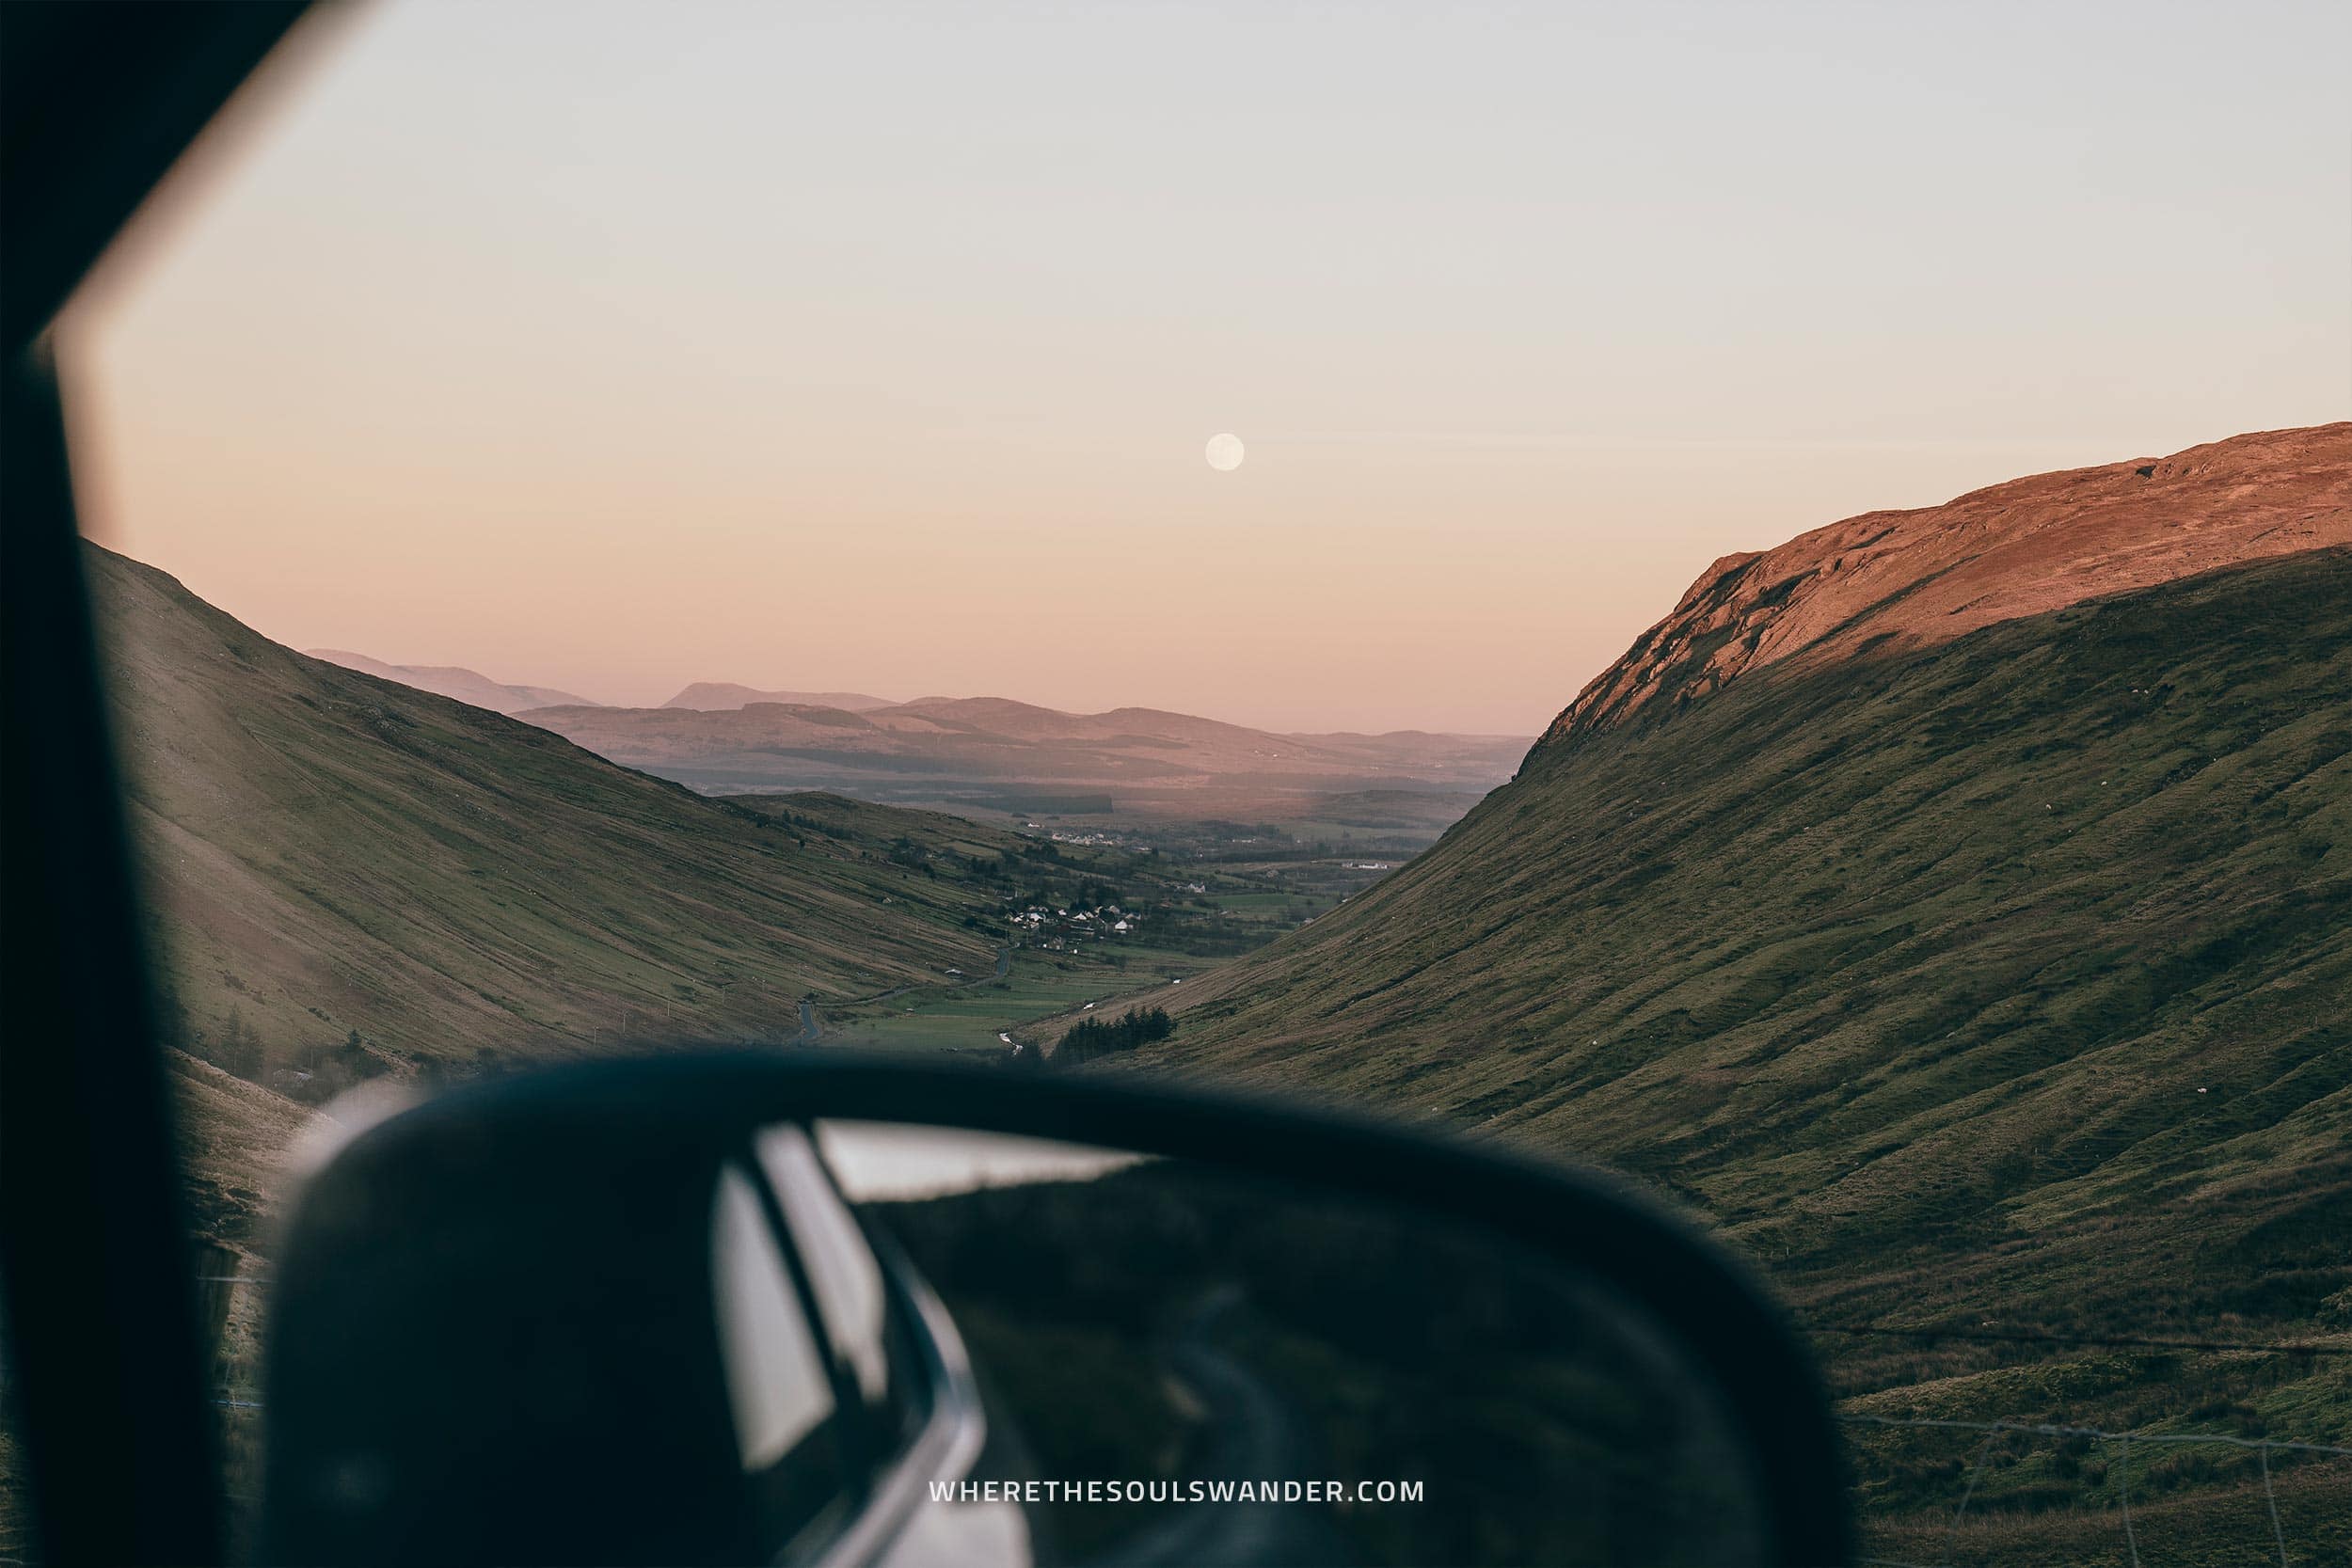
7. The famous Irish weather conditions
Given Ireland’s position in the North Atlantic Ocean, the weather conditions can change rapidly, meaning all four seasons could occur in the blink of an eye.
One moment the sun is out and blazing, and the other moment, the rain is pouring from the skies.
While it doesn’t necessarily sound like an issue when sitting inside your car, it does requires some adjustment in the way you approach the roads.
For that reason, I’d highly recommend driving with your lights on at all times, since unpredicted rain or fog can easily restrict the sight of you and your fellow road users.
Lastly, when it starts raining or turns foggy, make sure you adjust your speed limits accordingly.
8. Know your limits
Throughout Ireland, the speed limits include 50 km/h within urban areas, 80 km/h on secondary or regional roads, 100 km/h on national primary routes, and 120 km/h on motorways.
While it’s allowed to drive 80 km/h or faster on most roads, I highly suggest you slow down a tad, especially when driving along narrow country roads.
Secondly, if it’s your first time driving on the left-hand side of the road, take your time and don’t mind letting local drivers pass you – your Ireland road trip isn’t a race.
9. Plan your route in advance
As with all road trips, the best thing to do is plan out your route in advance, so you have a clear overview of how many kilometres you be driving each day.
While you should always keep some time and space for spontaneous stops, it is pretty damn convenient (and time-saving) if you thoroughly research the highlights, and then bundle them in a logical day-to-day itinerary.
However, if you’re not from the planning side of things, don’t worry – I’ve put together a pretty awesome 9-day Ireland road trip itinerary, so be sure you give that a read too.
10. Fill up often
While the distances in Ireland are completely manageable, keep in mind that a lot of Ireland is merely countryside with not a single petrol station in sight.
To avoid stranding on the side of the road, make sure you live by the following rule of thumb: always fill up your car when driving long distances or stretches that take you through the countryside.
Not only is running out of gas a bummer, but ending up on the side of the road in the middle of nowhere, waiting for another car to pass is simply a waste of time.
By filling up on time, you will also never disrespect the golden road trip rule – never let your fuel tank go lower than ⅓.
11. Sort out your insurance
As I would mention in all my road trip guides, it is wise to travel with your essential insurance sorted out, which also involves the full coverage of your rental car.
Though you might save some money when leaving out the full insurance of your car, these few bucks wouldn’t outweigh the benefits of the full insurance option, as it fully covers the car’s excess, as well as damage to the windows, mirrors, wheels and tyres.
On top of that, I also advise you to do a thorough inspection of the car afore taking it out on the road. If you don’t do this, chances are that you have to pay for pre-existing damage and that would be a pity.
Then there is your travel insurance, which, I believe, you should always purchase when travelling abroad, this is also highly recommended when doing a road trip in Ireland.
For travel insurance, I use Heymondo, as they offer full covid-19 coverage, as well as a handy app with 24-hour medical assistance. Make sure you check it out – readers of WTSW receive 5% off any insurance policy. Additionally, I also recommend World Nomads.
Cheers!
I’ve been on this travel blogging journey since 2019.
If you appreciate what I do here, these are some ways you can support me.

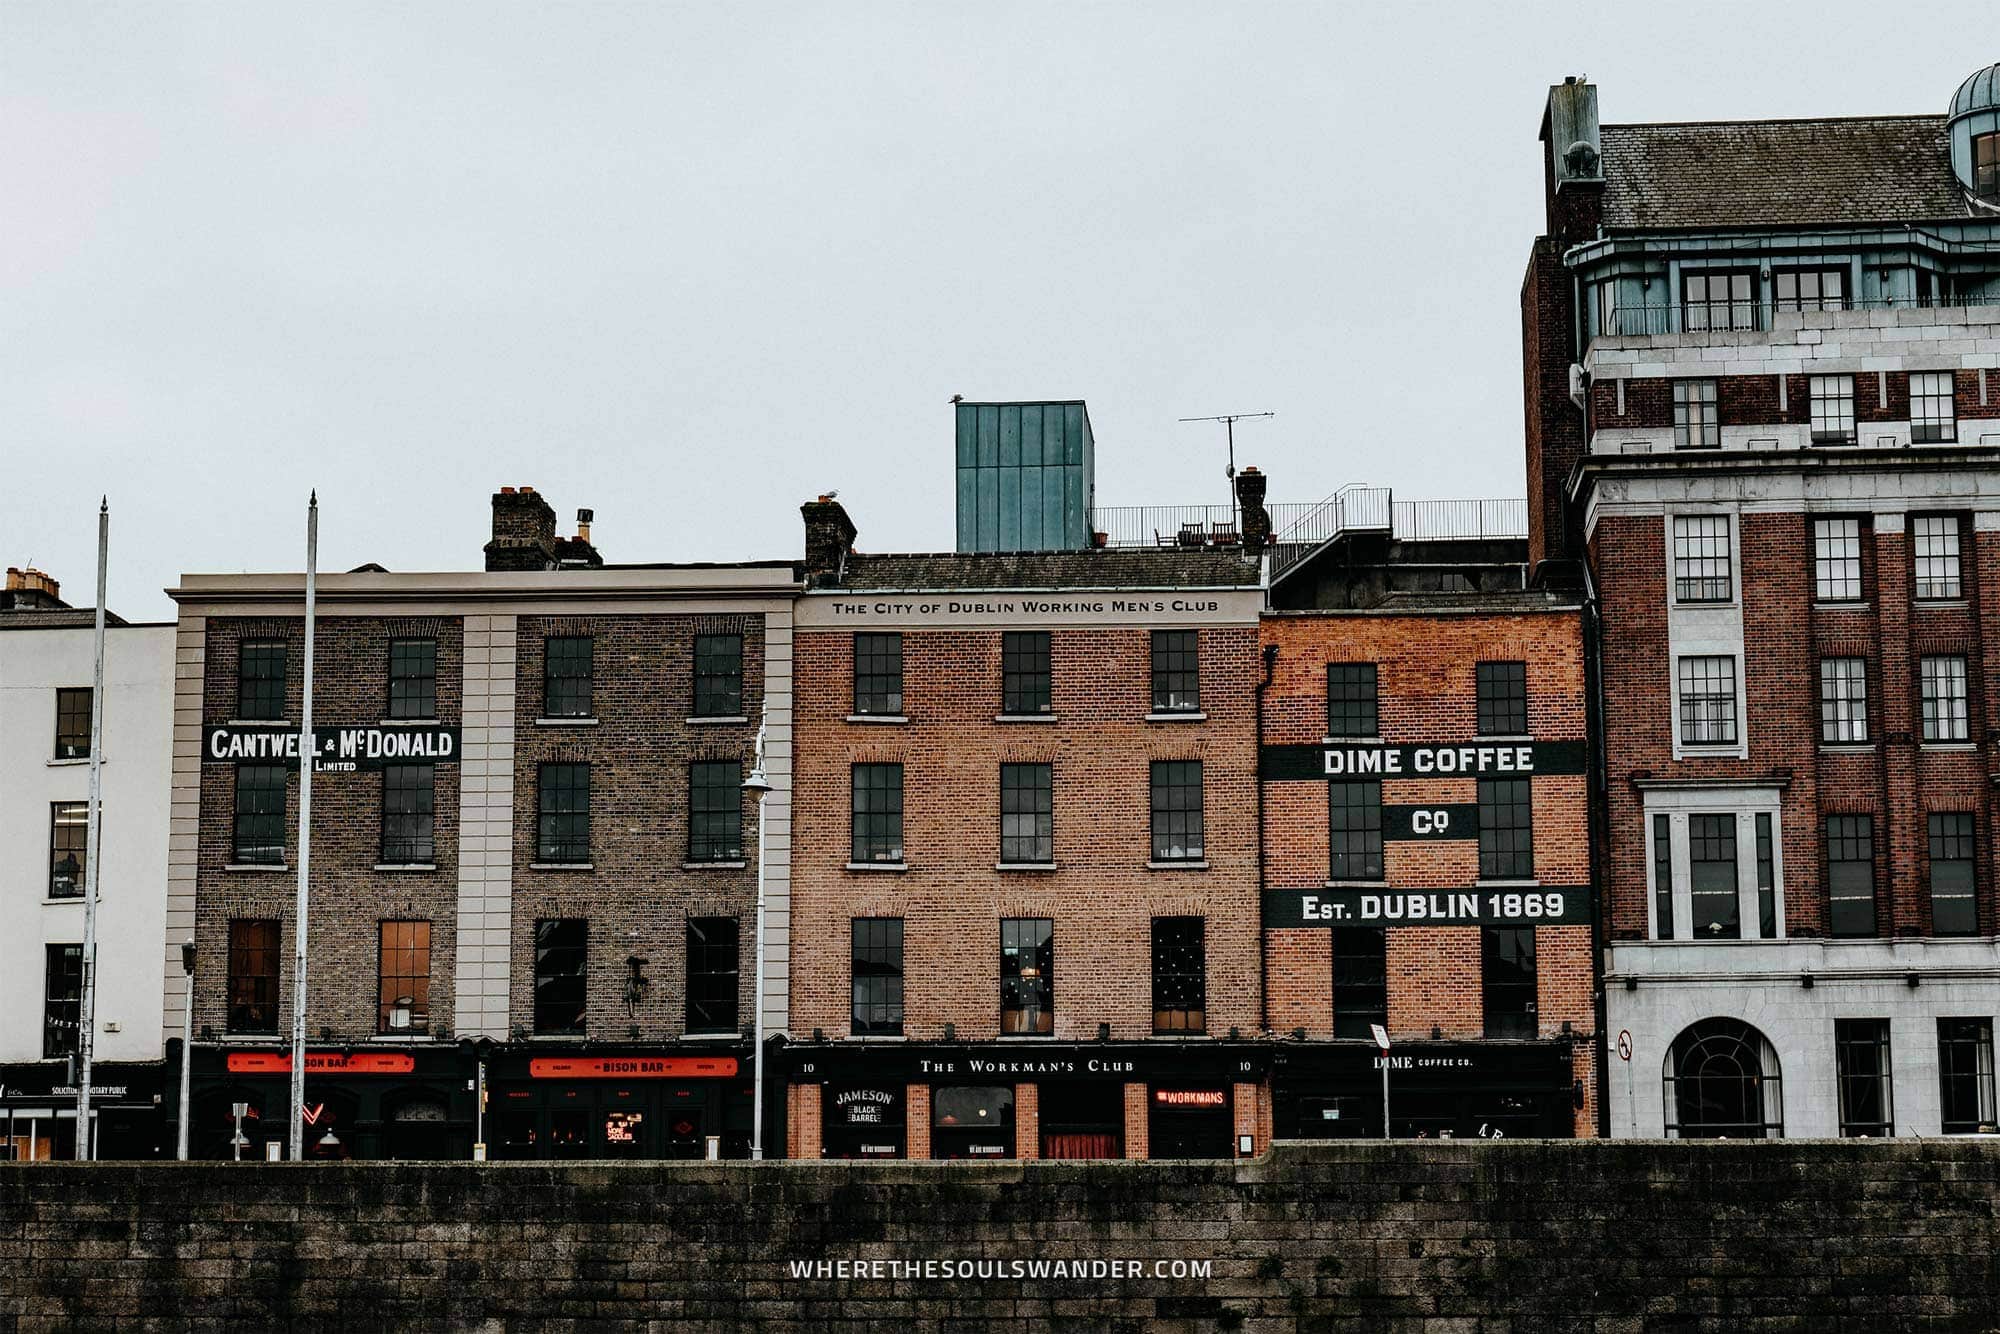
13 Incredible things to do in Dublin, Ireland's vibrant capital
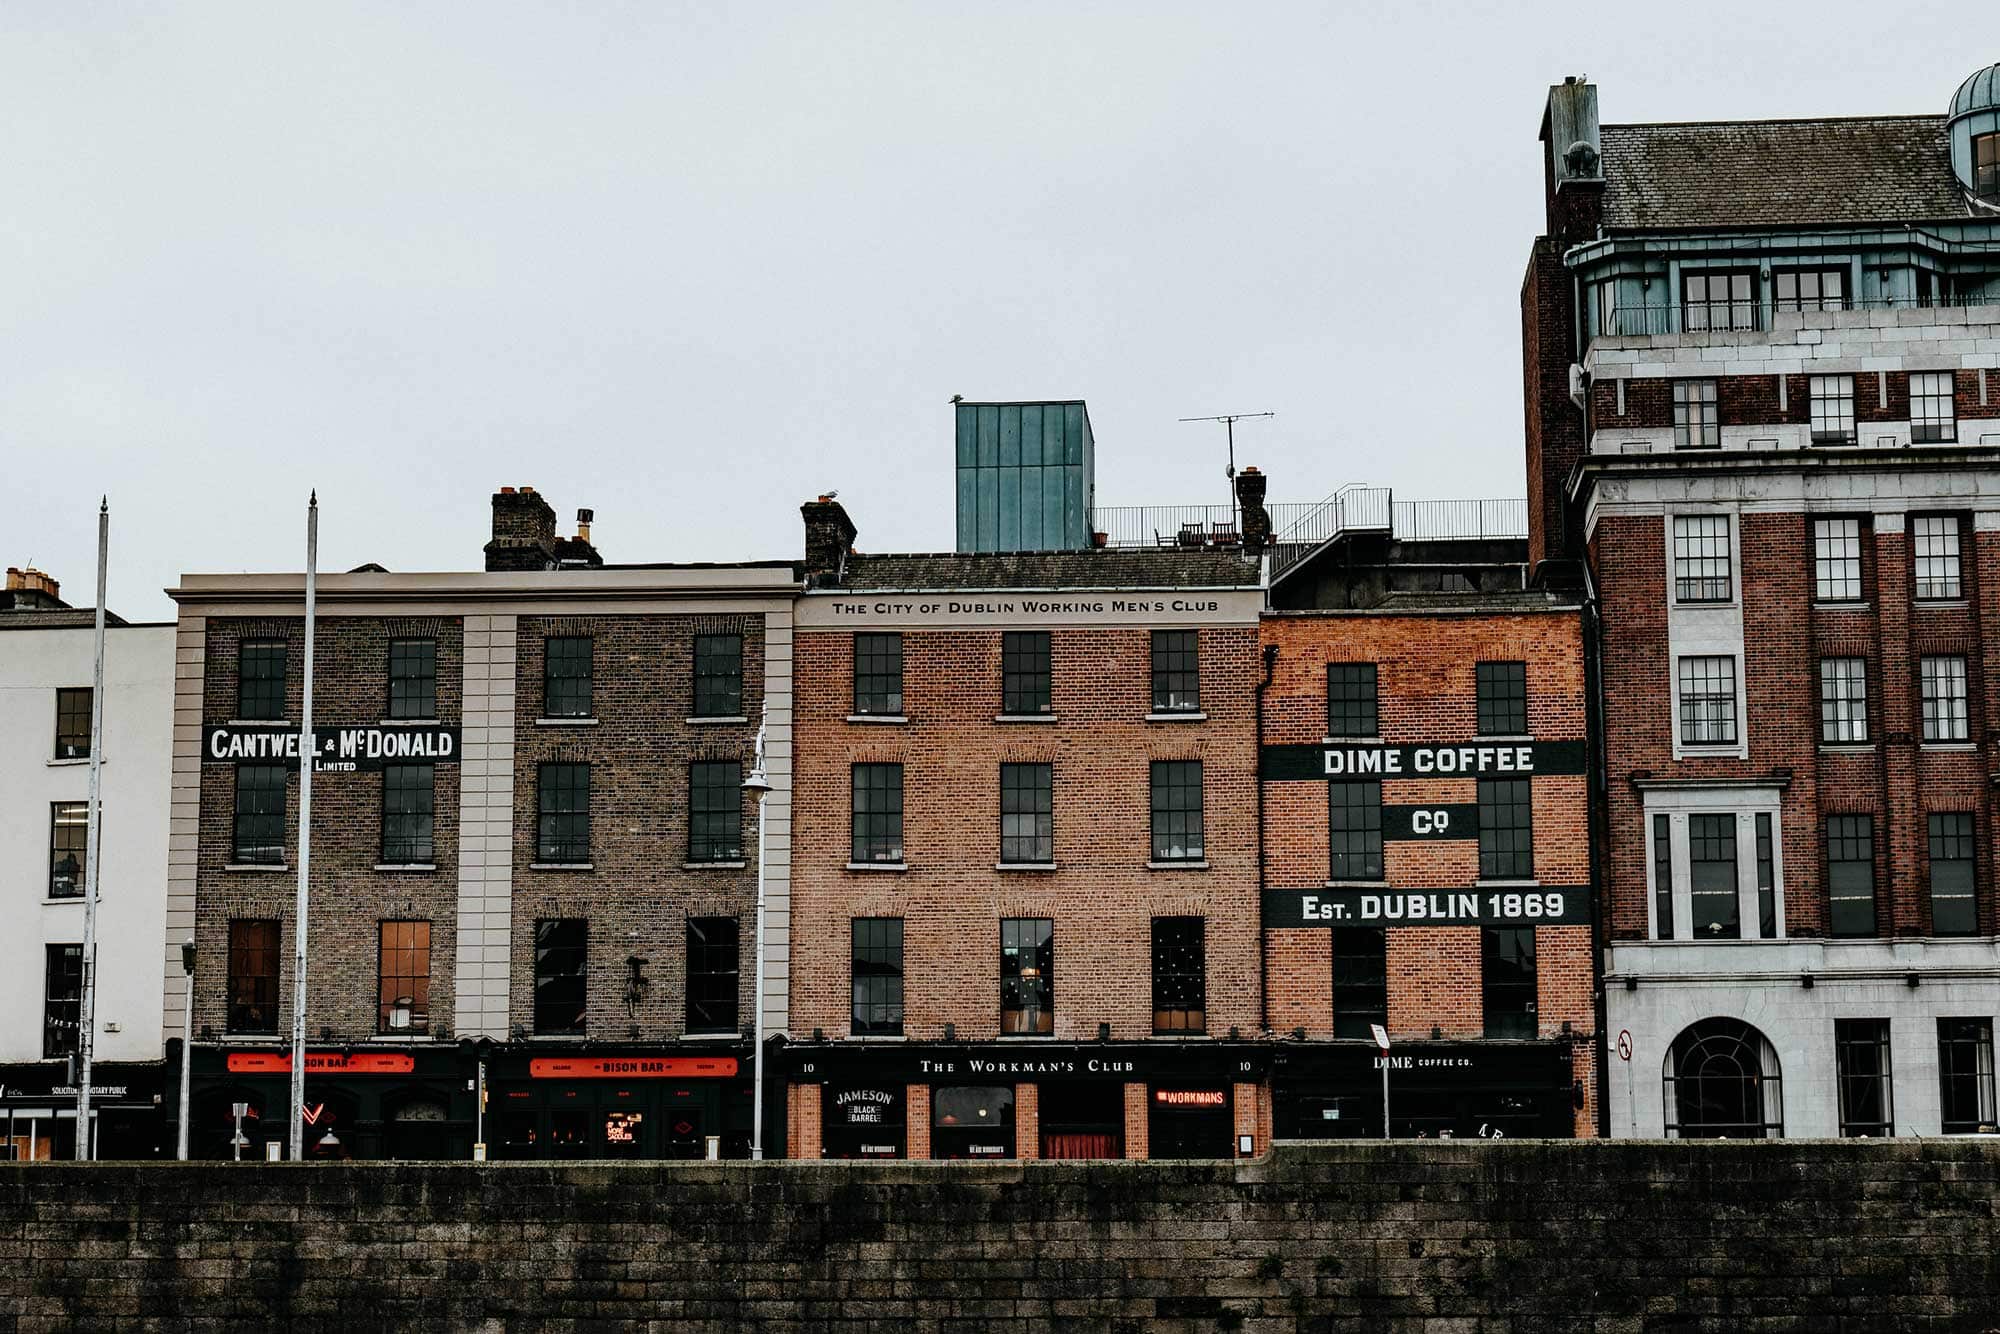
When it comes to unique city trip destinations in Europe, I believe Dublin should always be a topic of conversation.
Nestled at the mouth of the River Liffey that splits the city in two, is Dublin, Ireland’s vibrant capital city and for many travellers the starting point of their Ireland itinerary.
From cobbled streets filled with vibrant art and historic buildings to trendy cafes and traditional ‘Old Man Pubs’; the whiskey-inspired museums to enchanting literature and opulent libraries, Dublin is simply put, the perfect place to get a feel for Irish culture and its ways.
A city of its own accord, given its rich history and cultural diversity, Dublin is packed with impressive things to see and do, while it’s also surrounded by some of Ireland’s most striking natural sceneries, including the rough mountains of Wicklow – Vikings fans, this one’s for you!
What’s more, is that the streets of Dublin are slightly less overrun by foreign travellers in comparison to other cities in Europe, which adds even more authenticity to the experience.
To help you have a wonderful time here, I’ve put together this guide, including my favourite things to do in Dublin – plus my personal accommodation suggestions, advice on the Dublin Pass and more.
If you choose to use any of the links on this page, I may receive a small commission at no extra cost to you. By using these links, you’ll have a direct impact on WTSW and my ability to continue to create free insightful travel content for you. If you find any of my tips useful, you can support me by buying a virtual coffee here.

The Dublin Pass
While I realise that you’re here for my list of things to do in Dublin, there’s one particular thing that I want to inform you about first: the Dublin Pass, a digital tourist pass that grants access to over 35 attractions.
Since Dublin is home to a great number of things to see and do, you might want to get your hands on this pass, especially if you’re planning to visit most of the highlights.
Benefits of the card include free entrance to some of Dublin’s major sights, including the Guinness Storehouse, Jameson Distillery, and the Saint Patrick’s Cathedral, as well as a 1-day ticket for the Dublin hop-on hop-off bus tour.
The Dublin Pass | Book your Dublin Pass here.
Where to stay In Dublin
For a relatively small capital, Dublin is packed with excellent accommodation options catering to all travel styles – from luxury hotels to family-run apartments to budget-friendly hostels.
Since there’s plenty of accommodation to choose from, I have narrowed it down to a few of my favourites, two of which are marked; these are the ones where I stayed.
+ Cassidys Hotel | Set within the heart of Dublin, Cassidys Hotel offers spacious boutique-style rooms, large double beds and an excellent ensuite bathroom with a rain shower. Given its excellent price-to-quality ratio and its prime location, you might want to book this one ahead.
Wren Urban Nest | Located only a stone’s throw away from Dublin’s popular Temple Bar, this brilliant hotel offers stylish modern rooms with a touch of minimalism. All rooms come with comfy double beds, air conditioning and an excellent private bathroom. If you value sustainable design or some extra comfort, make sure you check out their innovative rooms here.
+ Templebar Rooms | This is where I stayed, and I really had a pleasant stay here. This hotel provides comfortable rooms with stylish design right at the heart of the action. Double rooms at only €90,- a night make this one of the best options in the city centre of Dublin.
Marlin Hotel Stephens Green | Another great hotel at walking distance from all the best things to do in Dublin, Marlin Hotel Stephens Green is a great pick for those after some extra comfort. Think of a variety of stylish rooms, a prime location and all the modern-day luxuries to have a comfy. So, if you’re looking for a bit of splurge, be sure to check out the stunning Marlin Hotel.
13 Things to do in Dublin, Ireland
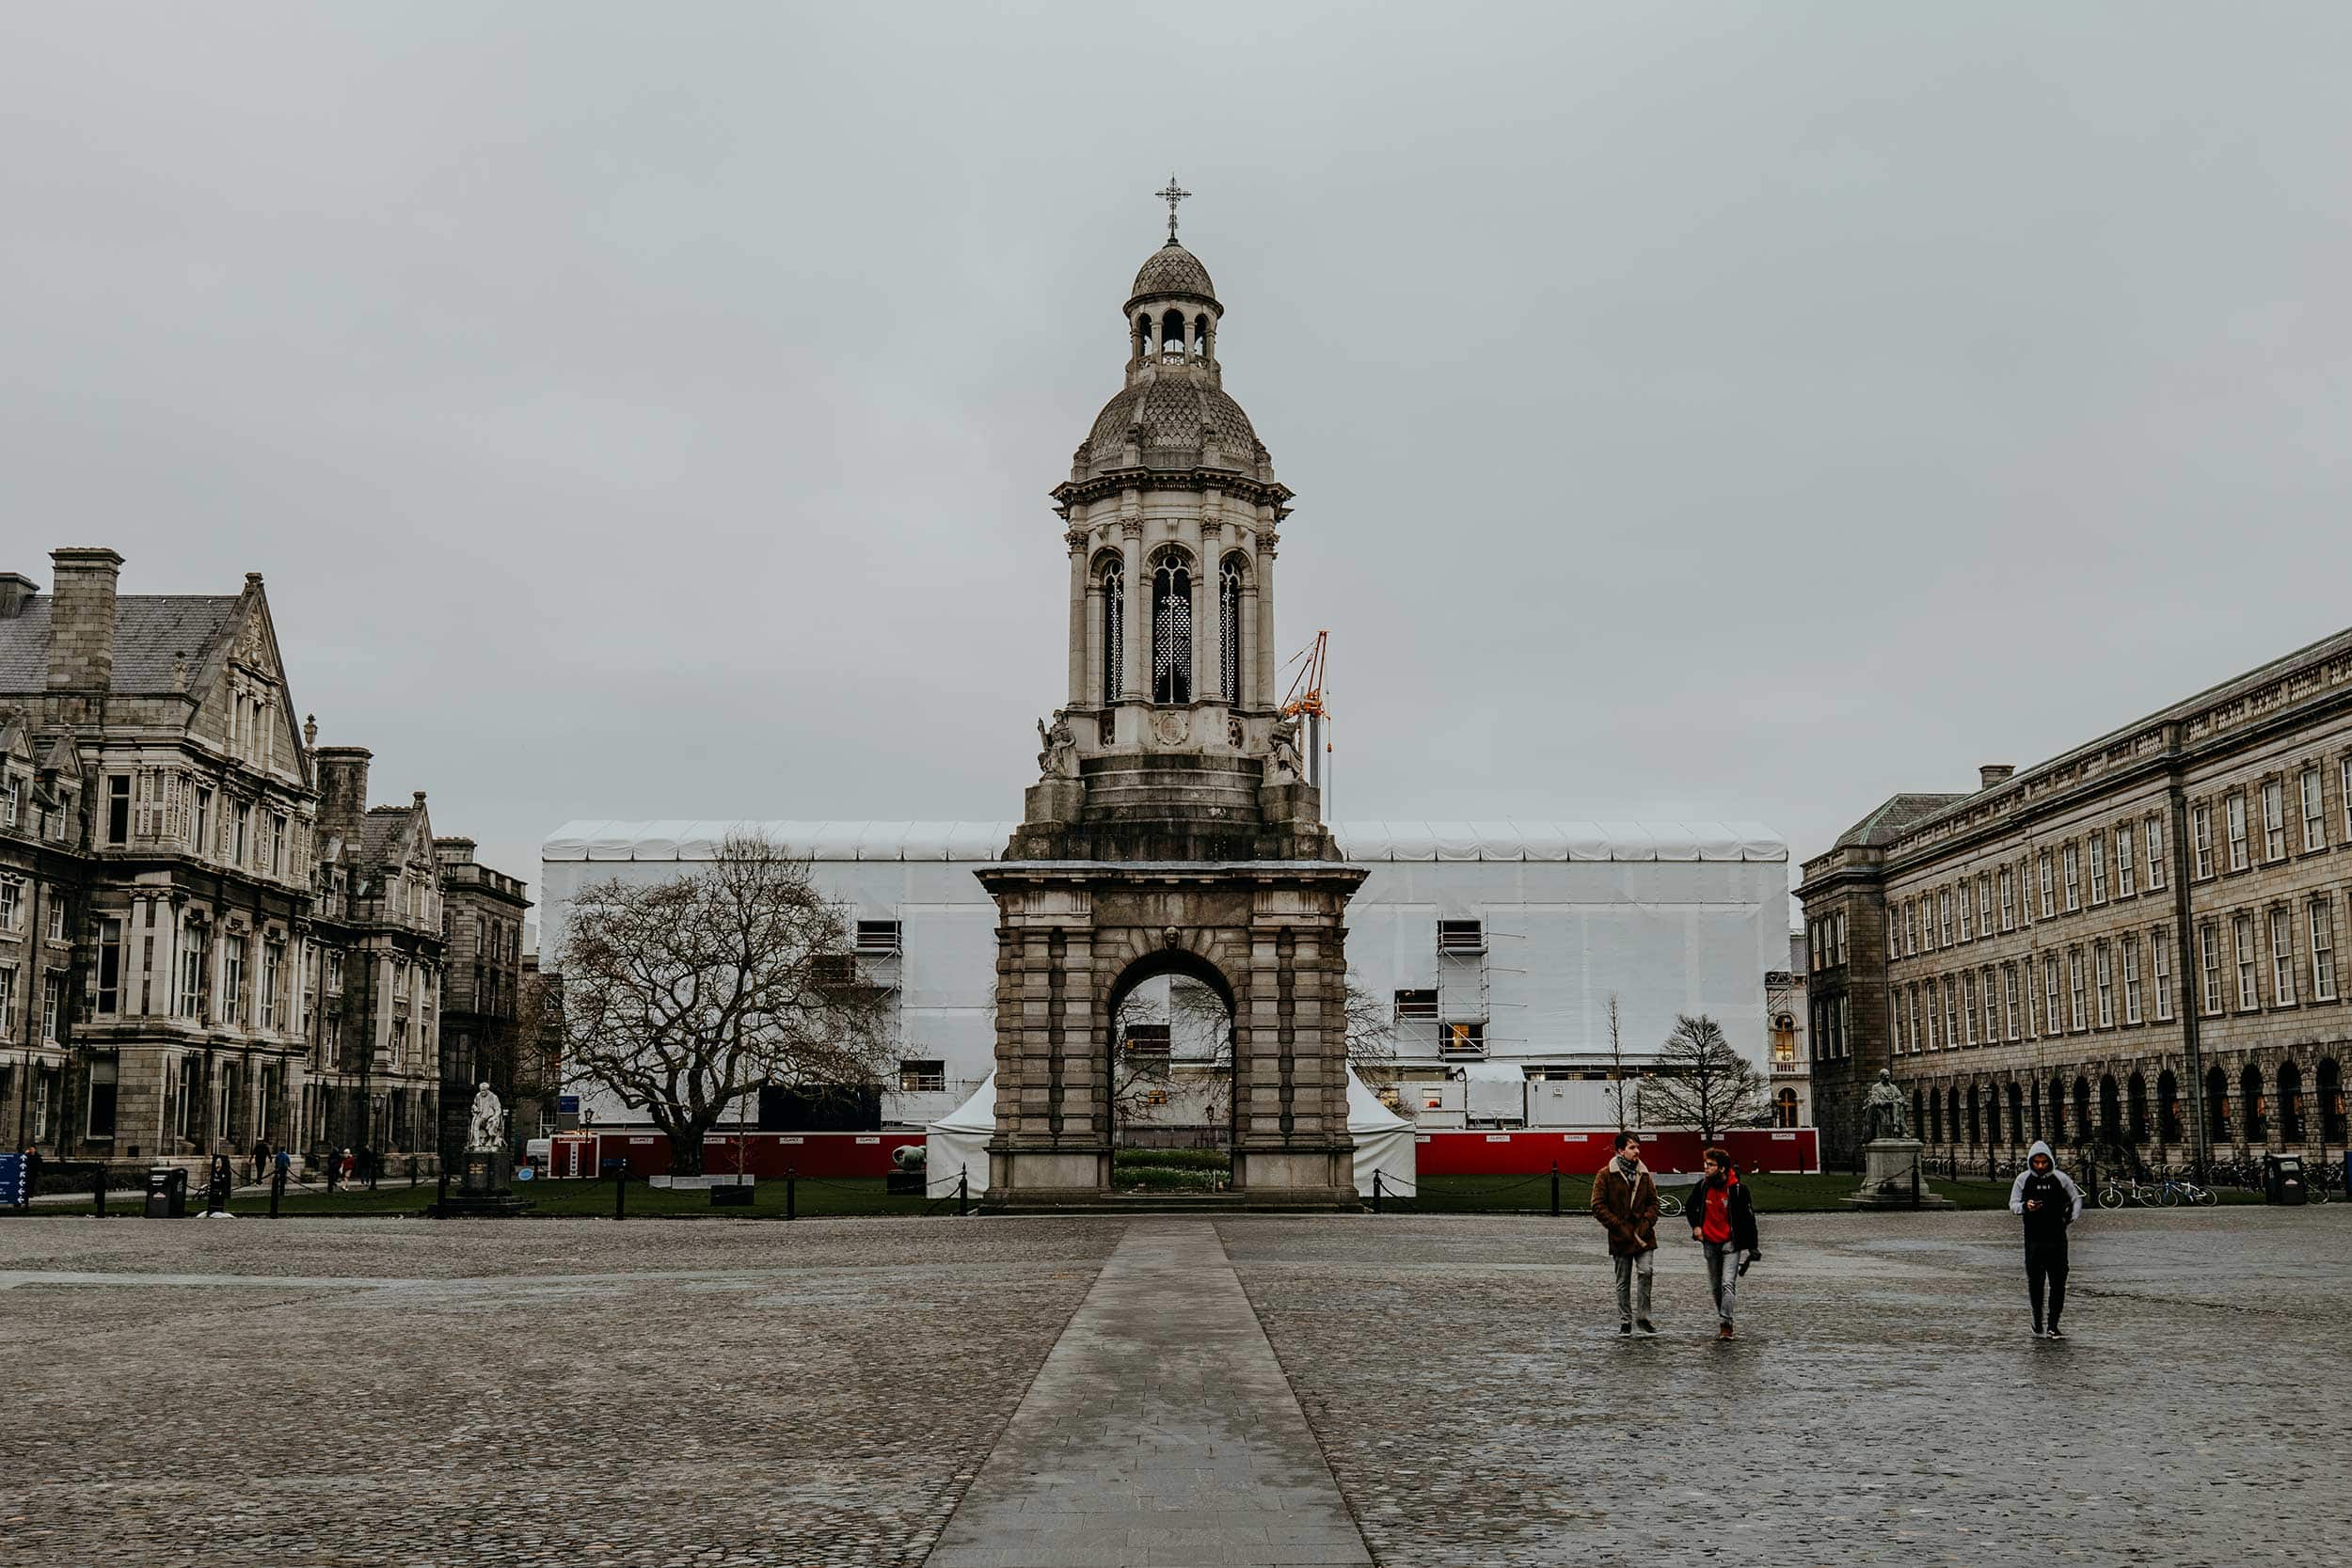
1. Roam around at Trinity College
As if lifted straight out of a Harry Potter movie, Trinity College is Ireland’s oldest university and captivates its visitors with its enchanting appearance.
Established in 1592, the university schooled several renowned authors and poets, including Oscar Wilde, Bram Stoker and Jonathan Swift to name but a few.
At present, Trinity College is home to the famous Book of Kells, a 9th century illuminated manuscript that contains all four Gospels of the New Testament.
But the real attraction is the Long Room, an opulent library marked by gorgeous oak bookcases and the roughly 200,000 ancient books that fill up the shelves.
After wandering around the library myself, it’s easy to understand why J.K. Rowling got excited to use it as an inspiration for Hogwarts in Harry Potter.
Where | Trinity College
Opening hours | Monday to Saturday 0830 – 1700, Sunday 0930 – 1700
Cost | €18,- per person
Tickets | Buy your tickets online here

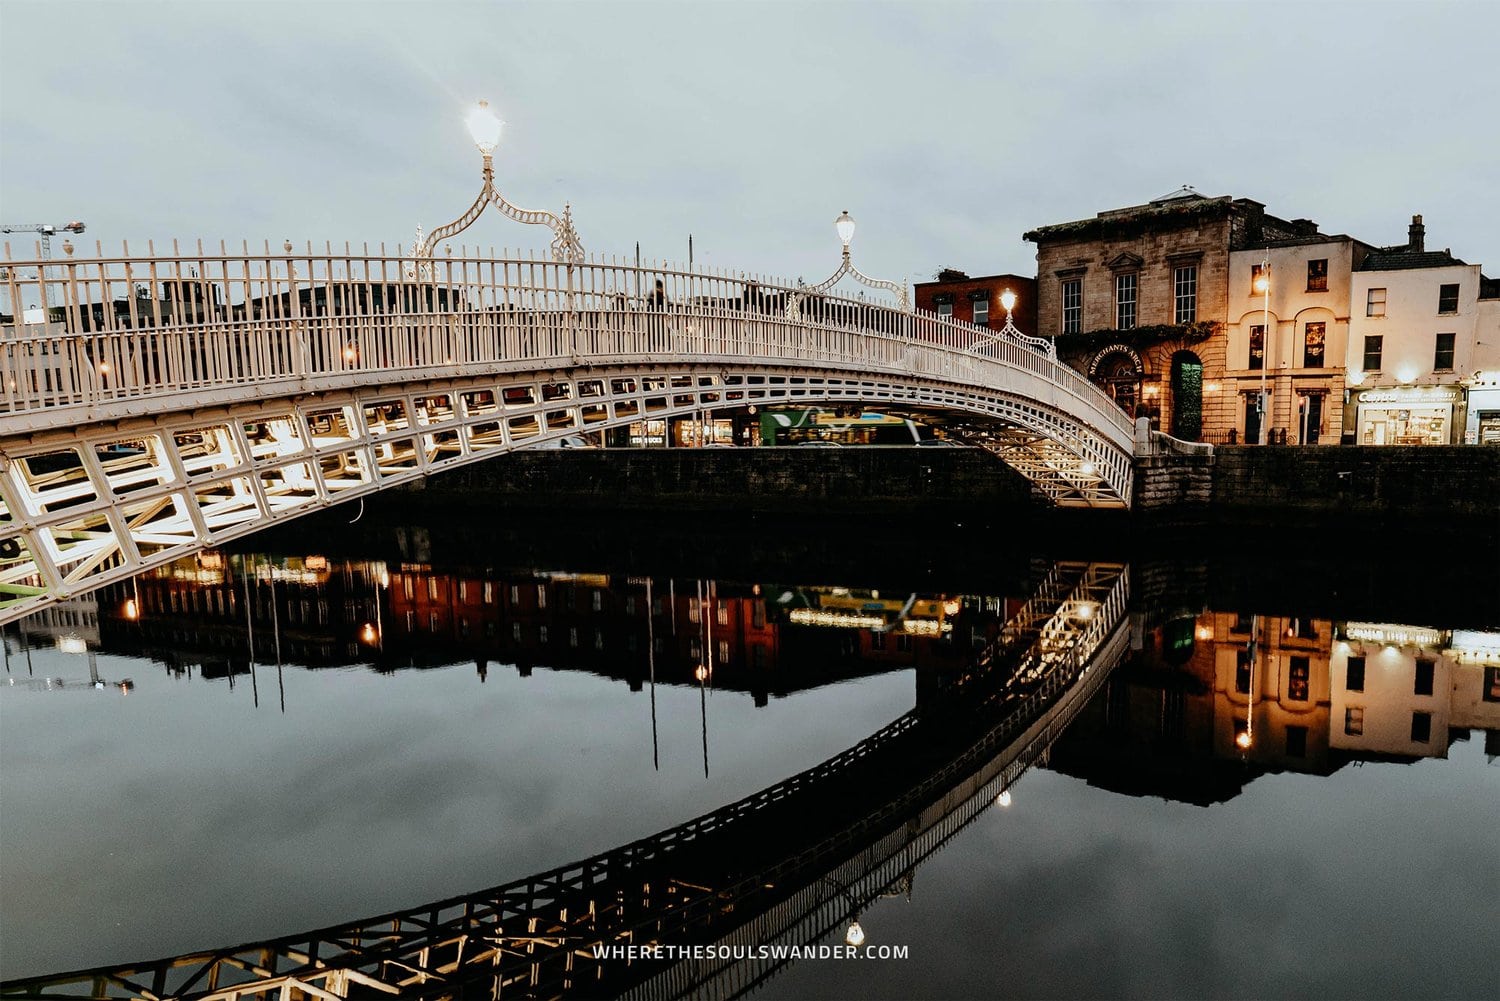
2. Take a walk over the Ha’Penny Bridge
There are only a few places in Dublin as iconic as the Ha’Penny Bridge.
Built back in 1816, this white-picketed bridge was the first-ever pedestrian bridge to span over the River Liffey, which came as a welcome relief for those living on either side of the river.
It’s also worth mentioning that the bridge owes its name to the toll that was required to cross it, namely half a penny.
At present, the Ha’Penny Bridge has become an absolute must-see attraction in Dublin, and I believe, every visitor should cross the bridge at least once while in Dublin.
Where | Ha’Penny Bridge
3. Sample Dublin’s best burger at Feather Blade
As soon as I heard SpottieOttieDopaliscious by Outkast bumping through the speakers, I realised that I had arrived in the right place.
Situated smack bang in the middle of Dublin, Featherblade is a trendy burger joint that I would consider the number one spot if you’re after a top-notch burger in Dublin.
Their signature bacon cheeseburger is crafted to perfection, with top-notch quality from Irish beef Patty to artisan bun, with its crisp and juicy bacon pieces as the absolute centrepiece.
Seriously, this burger, which was voted ‘best burger’ in 2020, was so tasty that it’s up there with the best burgers I’ve ever eaten.
Add to that a trendy atmosphere, good music and a great overall dining experience, and Featherblade has become a must-visit for anyone spending time in Dublin.
Where | Feather blade

4. Take a tour of the Guinness Storehouse Factory
Ireland is known as the motherland of Guinness, and therefore there’s no better place to taste this than in the country’s bustling capital city.
Situated in the heart of the St. James’ Gate Brewery, the Guinness Storehouse Factory is where the origin of one of Ireland’s national pride; Guinness beer, or as the Irish would say; a pint of gat.
Today, the storehouse factory accommodates a fun and informative museum that tells the tale of one of Ireland’s most famous alcoholic beverages, which makes it one of the most popular tourist attractions in the country.
The Guinness Storehouse Factory is only visited as part of a self-guided tour and takes you through seven floors of Irish brewing history, where you learn all about the brewing process, as well as the history of this cherished stout beer.
At the end of the tour, you’ll reach the 7th, and last floor, where it’s finally time to sample a pint of Guinness while enjoying an epic panoramic view of the Dublin skyline.
Where | Guinness Storehouse Factory
Opening hours | Monday to Friday 1000 – 1700, Sunday 1200 – 1700
Recommended tour | Get your Guinness Storehouse Entrance Ticket here


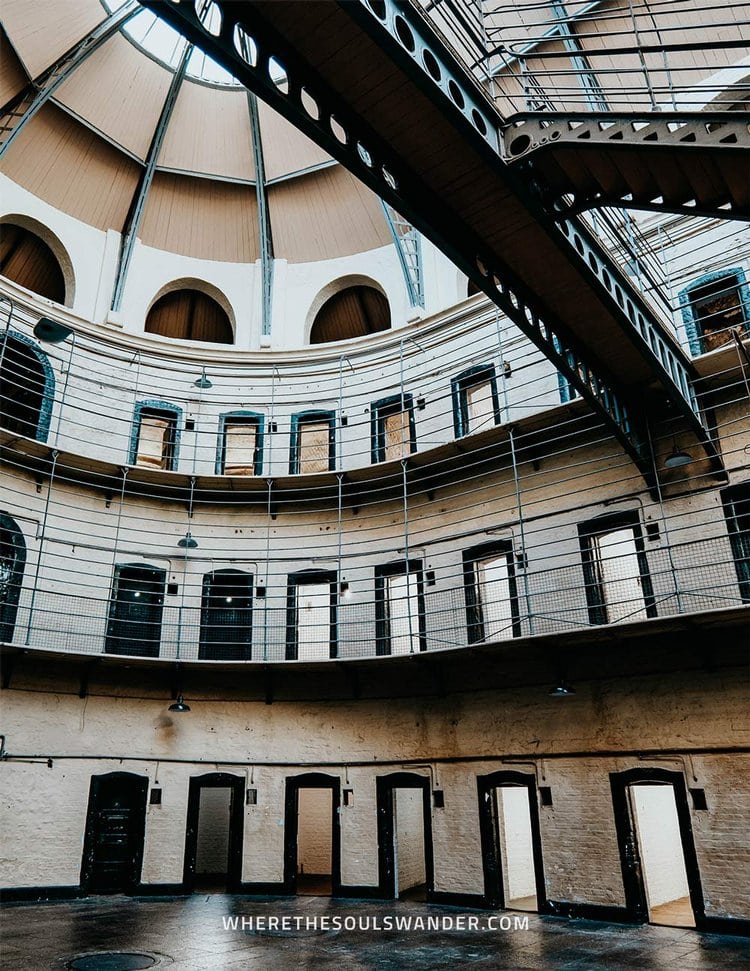
5. Visit the Kilmainham Gaol Prison
When I prepared for my trip to Ireland, I knew I wanted to learn more about Ireland’s fight for independence, so the first thing I did was place the Kilmainham Gaol Museum at the top of my list of things to do in Dublin.
Situated just a few kilometres outside Dublin, the Kilmainham Gaol Prison is now turned into a museum, with one clear goal; to educate and inform those who visit this former jail.
It’s good to note, that you should purchase your ticket in advance, since visiting the Kilmainham Gaol Museum is only possible in the form of a guided tour.
During the 1-hour tour, the guide will take you through the former prison blocks, courtyard and old chapel, while he also informs you about the prison’s gruelling history.
Do be aware though, it can be pretty upsetting to hear how many revolutionaries and prisoners were executed between 1796 and 1924, including the famous political and military leaders Robert Emmet and Charles Stewart Parnell.
After the prison tour, you will have time to look at an impressive exhibition that covers three levels, each telling the stories of different periods of time. I’d highly recommend taking your time to see what’s on display, as it holds more than 10.000 objects.
Since Kilmainham Gaol houses some aesthetically pleasing features, the prison has also been used as a set for several films, including the original ‘Italian Job’, and more recently so; Paddington 2.
Where | Kilmainham Gaol Museum
Opening hours | Daily 0930 – 1800
Recommended tour | The Kilmainham Gaol Museum can only be visited as part of a guided tour. Prices and availability here

6. Have breakie or lunch at Brother Hubbard
After seeing Brother Hubbard featured in an episode of Somebody Feed Phill, I instantly realised I had to drop by for some coffee and lunch.
Now renowned throughout the whole of Dublin, Brother Hubbard opened its doors in 2012, which initiated the transformation of Dublin’s somewhat dull café culture.
Situated at different locations throughout the city, Brother Hubbard is a trendy cafe that serves excellent dishes with a subtle Middle Eastern touch to it.
I opted for the basic; two eggs, grilled bacon and a chunky warm roast tomato sauce, served with homemade Georgian-style sourdough toast and the most flavoursome Irish butter on the side – it was indeed basic, yet incredibly delicious.
While the menu is relatively small, it is extremely creative, with a focus on freshness, quality and local produce, which is always a good thing.
So if you’re seeking a trendy lunch or brunch spot that serves excellent coffee too, look no further, you have just stumbled upon the right place.
Where | Brother Hubbard North
Opening Hours | See opening hours here

7. Admire St. Patrick’s Cathedral
Founded in 1191, St. Patrick’s Cathedral is the largest Church in the whole of Ireland and is therefore named the National Cathedral of the Church of Ireland.
Part of Ireland’s history for over 800 years, St. Patrick’s Cathedral remains one of the most fascinating buildings in Dublin, and strolling through its lush gardens is certainly a must when visiting the city.
It’s truly a stunning place from the inside and out, and the opulent interior reflects various periods of its lengthy historical timeline – so be sure to have a peek inside too.
One thing worth mentioning is that it isn’t the only cathedral on Dublin soil, no, it shares this reputation with the neighbouring Christ Church Cathedral, which was initially built just outside of Dublin.
Where | St. Patrick’s Cathedral
Opening hours | Monday to Saturday 0930 – 1630, Sunday 0845 – 1015 and 1300 – 1700
Cost | €8,- per person – St. Patrick’s Cathedral is also included in the Dublin Pass.
Recommended tour | This self-guided tour of St. Patrick’s Cathedral. Prices and availability here

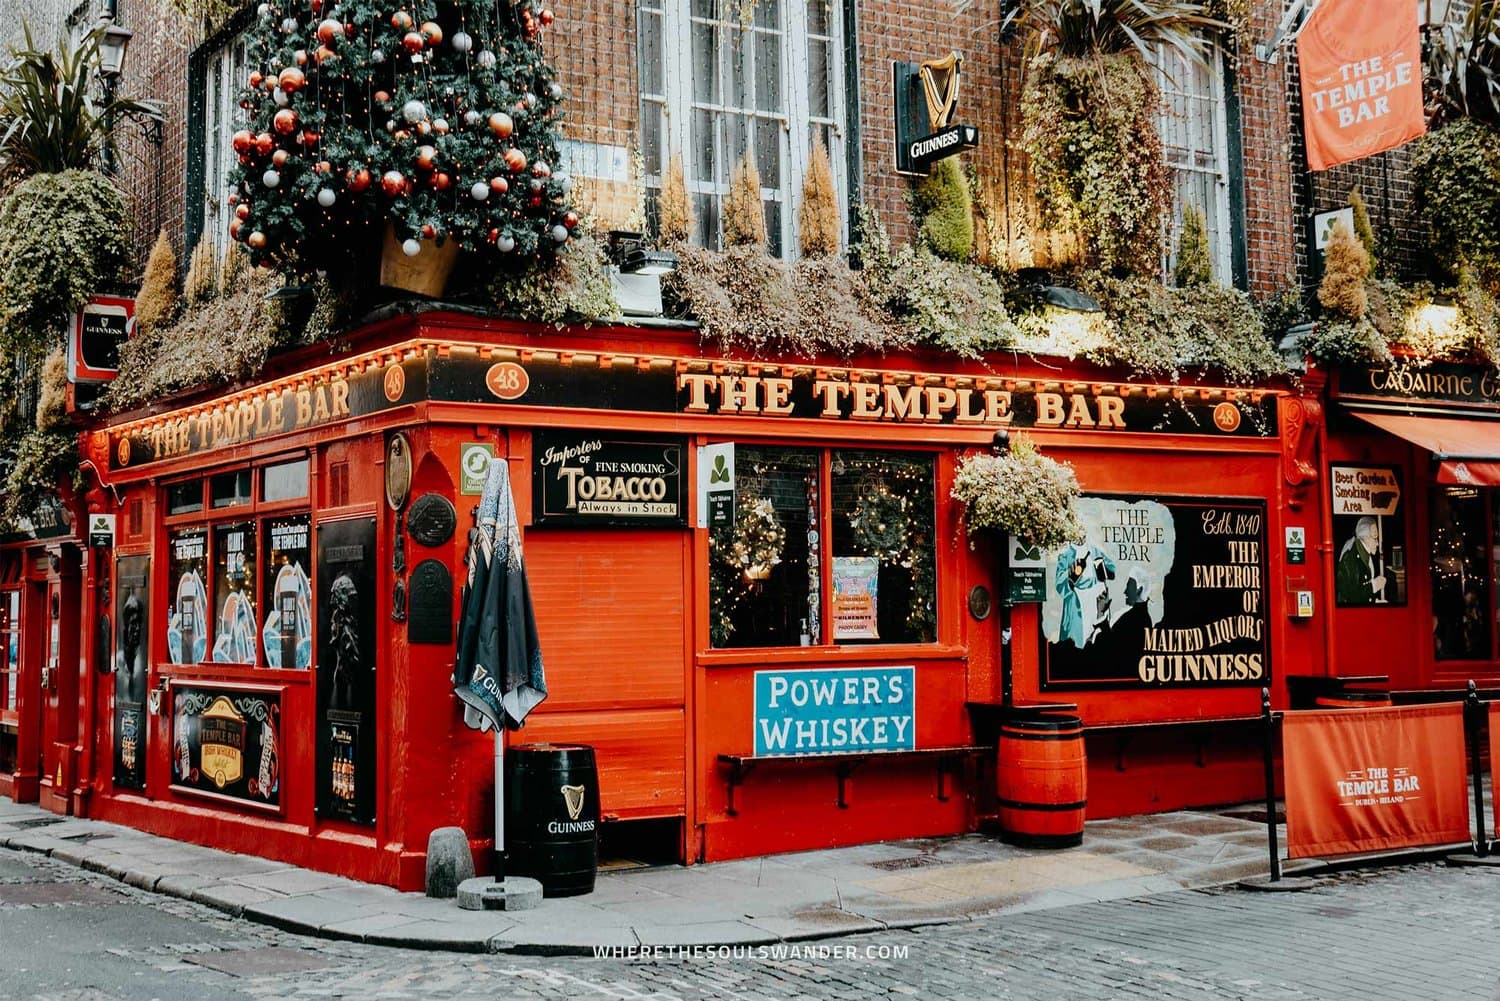
8. Have a pint at Dublin’s iconic Temple Bar
When people talk about Dublin, the iconic Temple Bar will always be a topic of conversation.
Nestled in the eponymous Temple Bar District, this iconic bar on the south side of the River Liffey is one of the oldest areas in Dublin and is often high on the bucket list of those visiting the city.
The district itself is a maze of cobbled streets with heaps of lively pubs, hosting some of the country’s best musicians, which makes it a must-see for those who want to experience Dublin’s buzzing nightlife.
The pubs come alive after 5, when both locals and travellers gather to sample a pint of Guinness or a good glass of Irish whiskey while enjoying live music and an authentic atmosphere – it’s a successful combination for a unique travel experience.
Ooh, and be cautious, the locals are capable of drinking you under the table too – just kidding!
Where | The Temple Bar
Opening hours | Daily 1030 – 0100
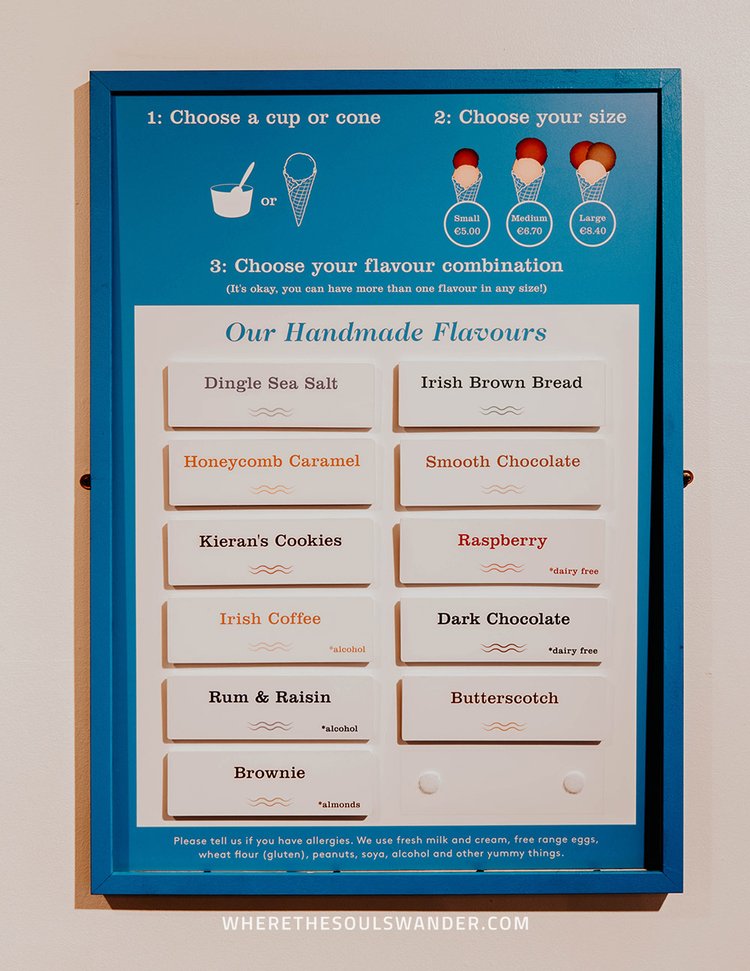
9. Have a scoop or two at Murphy’s ice cream
Originated in Dingle, Co. Kerry in 2000 is Murphy’s ice cream, an artisanal ice cream shop that started with one clear goal; making the best ice cream in the world – and believe me, they’ve come pretty close!
Luckily for us, Murphy also opened its doors in Dublin.
Set within Wicklow Street, Murphy’s serves a great variety of ice cream, made from Ireland’s finest local produce, including the milk of the rare, indigenous Kerry cow.
I opted for 3 scoops of the following flavours; Dingle Sea Salt, Irish Brown Bread and Honeycomb Caramel and was blown away not only by their flavours but also by their exceptional texture and creaminess.
If you’re looking for something more adventurous, Murphy’s also serves uncommon flavours such as Dingle Gin and Pink Peppercorn, Irish Coffee and Rum Raisin.
I’m not gonna lie, it can be quite the struggle to choose from their unique and inviting flavours. Fortunately, this shop is so awesome, that they let you sample the flavours before making your final selection – winner!
Where | Murphy’s ice cream
Opening hours | Daily 1200 – 2200

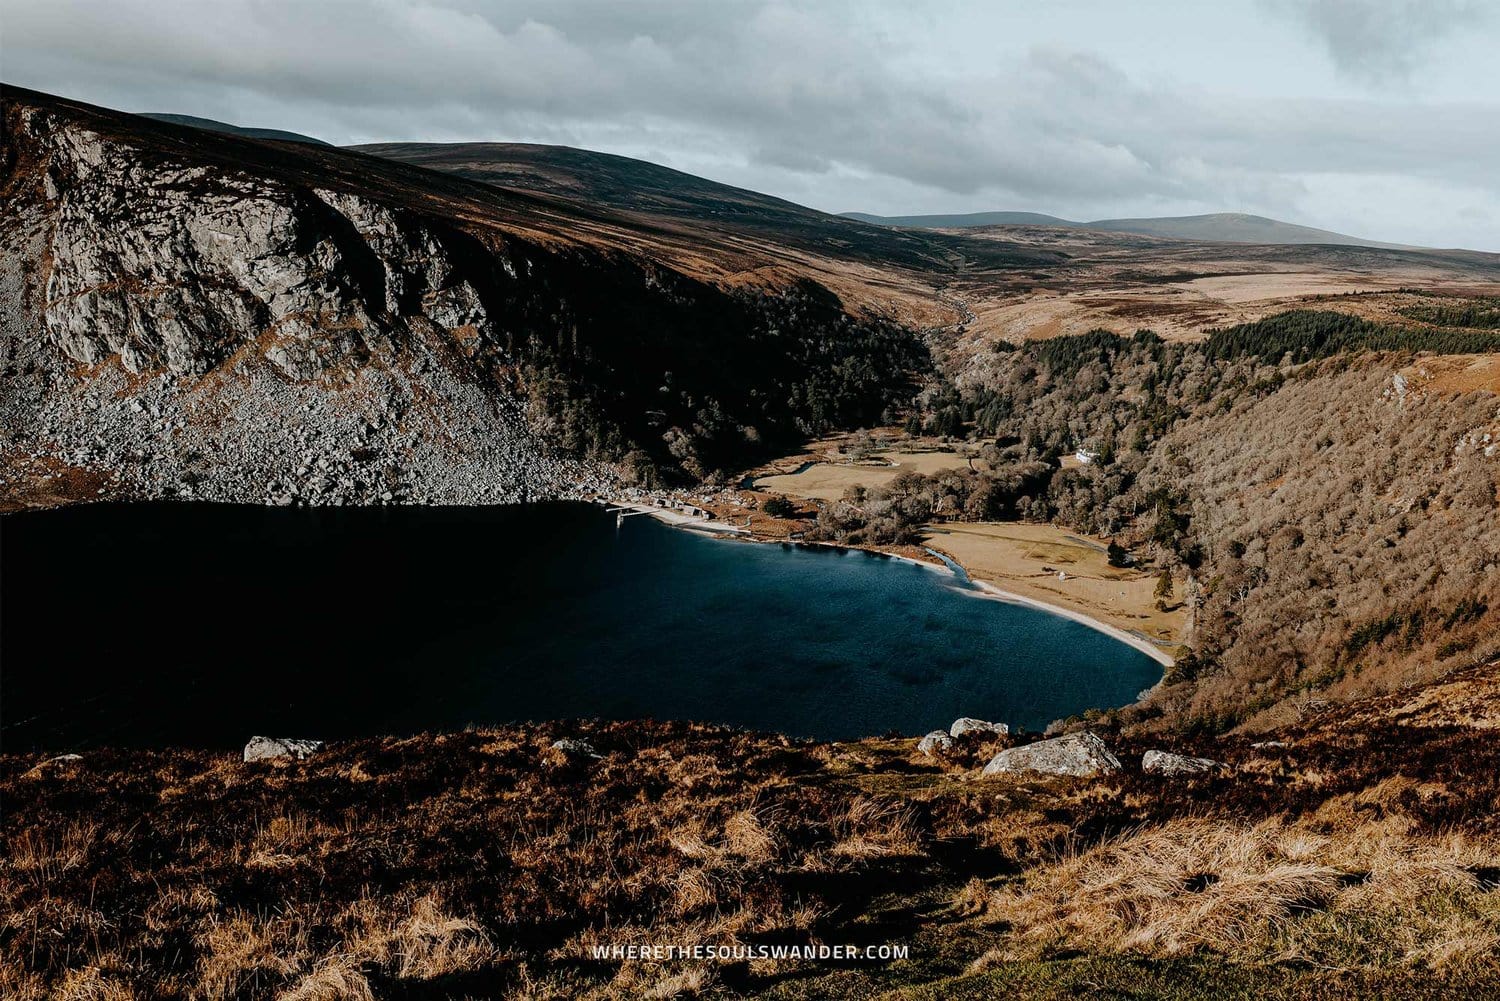
10. Visit Lough Tay and the Wicklow Mountains
Nestled in the heart of the Wicklow Mountains, Lough Tay is a stunning lake that has become famous for its appearance as ‘Kattegat’ in History’s blockbuster series ‘Vikings’.
While its shores are now private property, and therefore no longer accessible by the public, you will stumble upon plenty of interesting viewpoints, all offering the iconic views that made the ‘Guinness Lake’ famous.
With a whopping 20,483 hectares of ground, the Wicklow Mountains National Park is a true natural paradise and that at only a stone’s throw away from the hustle and bustle of Dublin.
Also, the Wicklow Mountains National Park is considered the number one national park in the whole of Ireland, which isn’t a surprise to me given its untouched nature and endless tranquillity.
Visiting the Wicklow Mountains is in many ways one of the best day trips out of the city – and easily one of the most exciting things to do in Dublin.
Where | Lough Tay, County Wicklow
Recommended tour | This full-day Wicklow Mountains Tour takes you to the Wicklow Mountains, as well as the 6th-century monastery complex of Glendalough. Prices and availability here
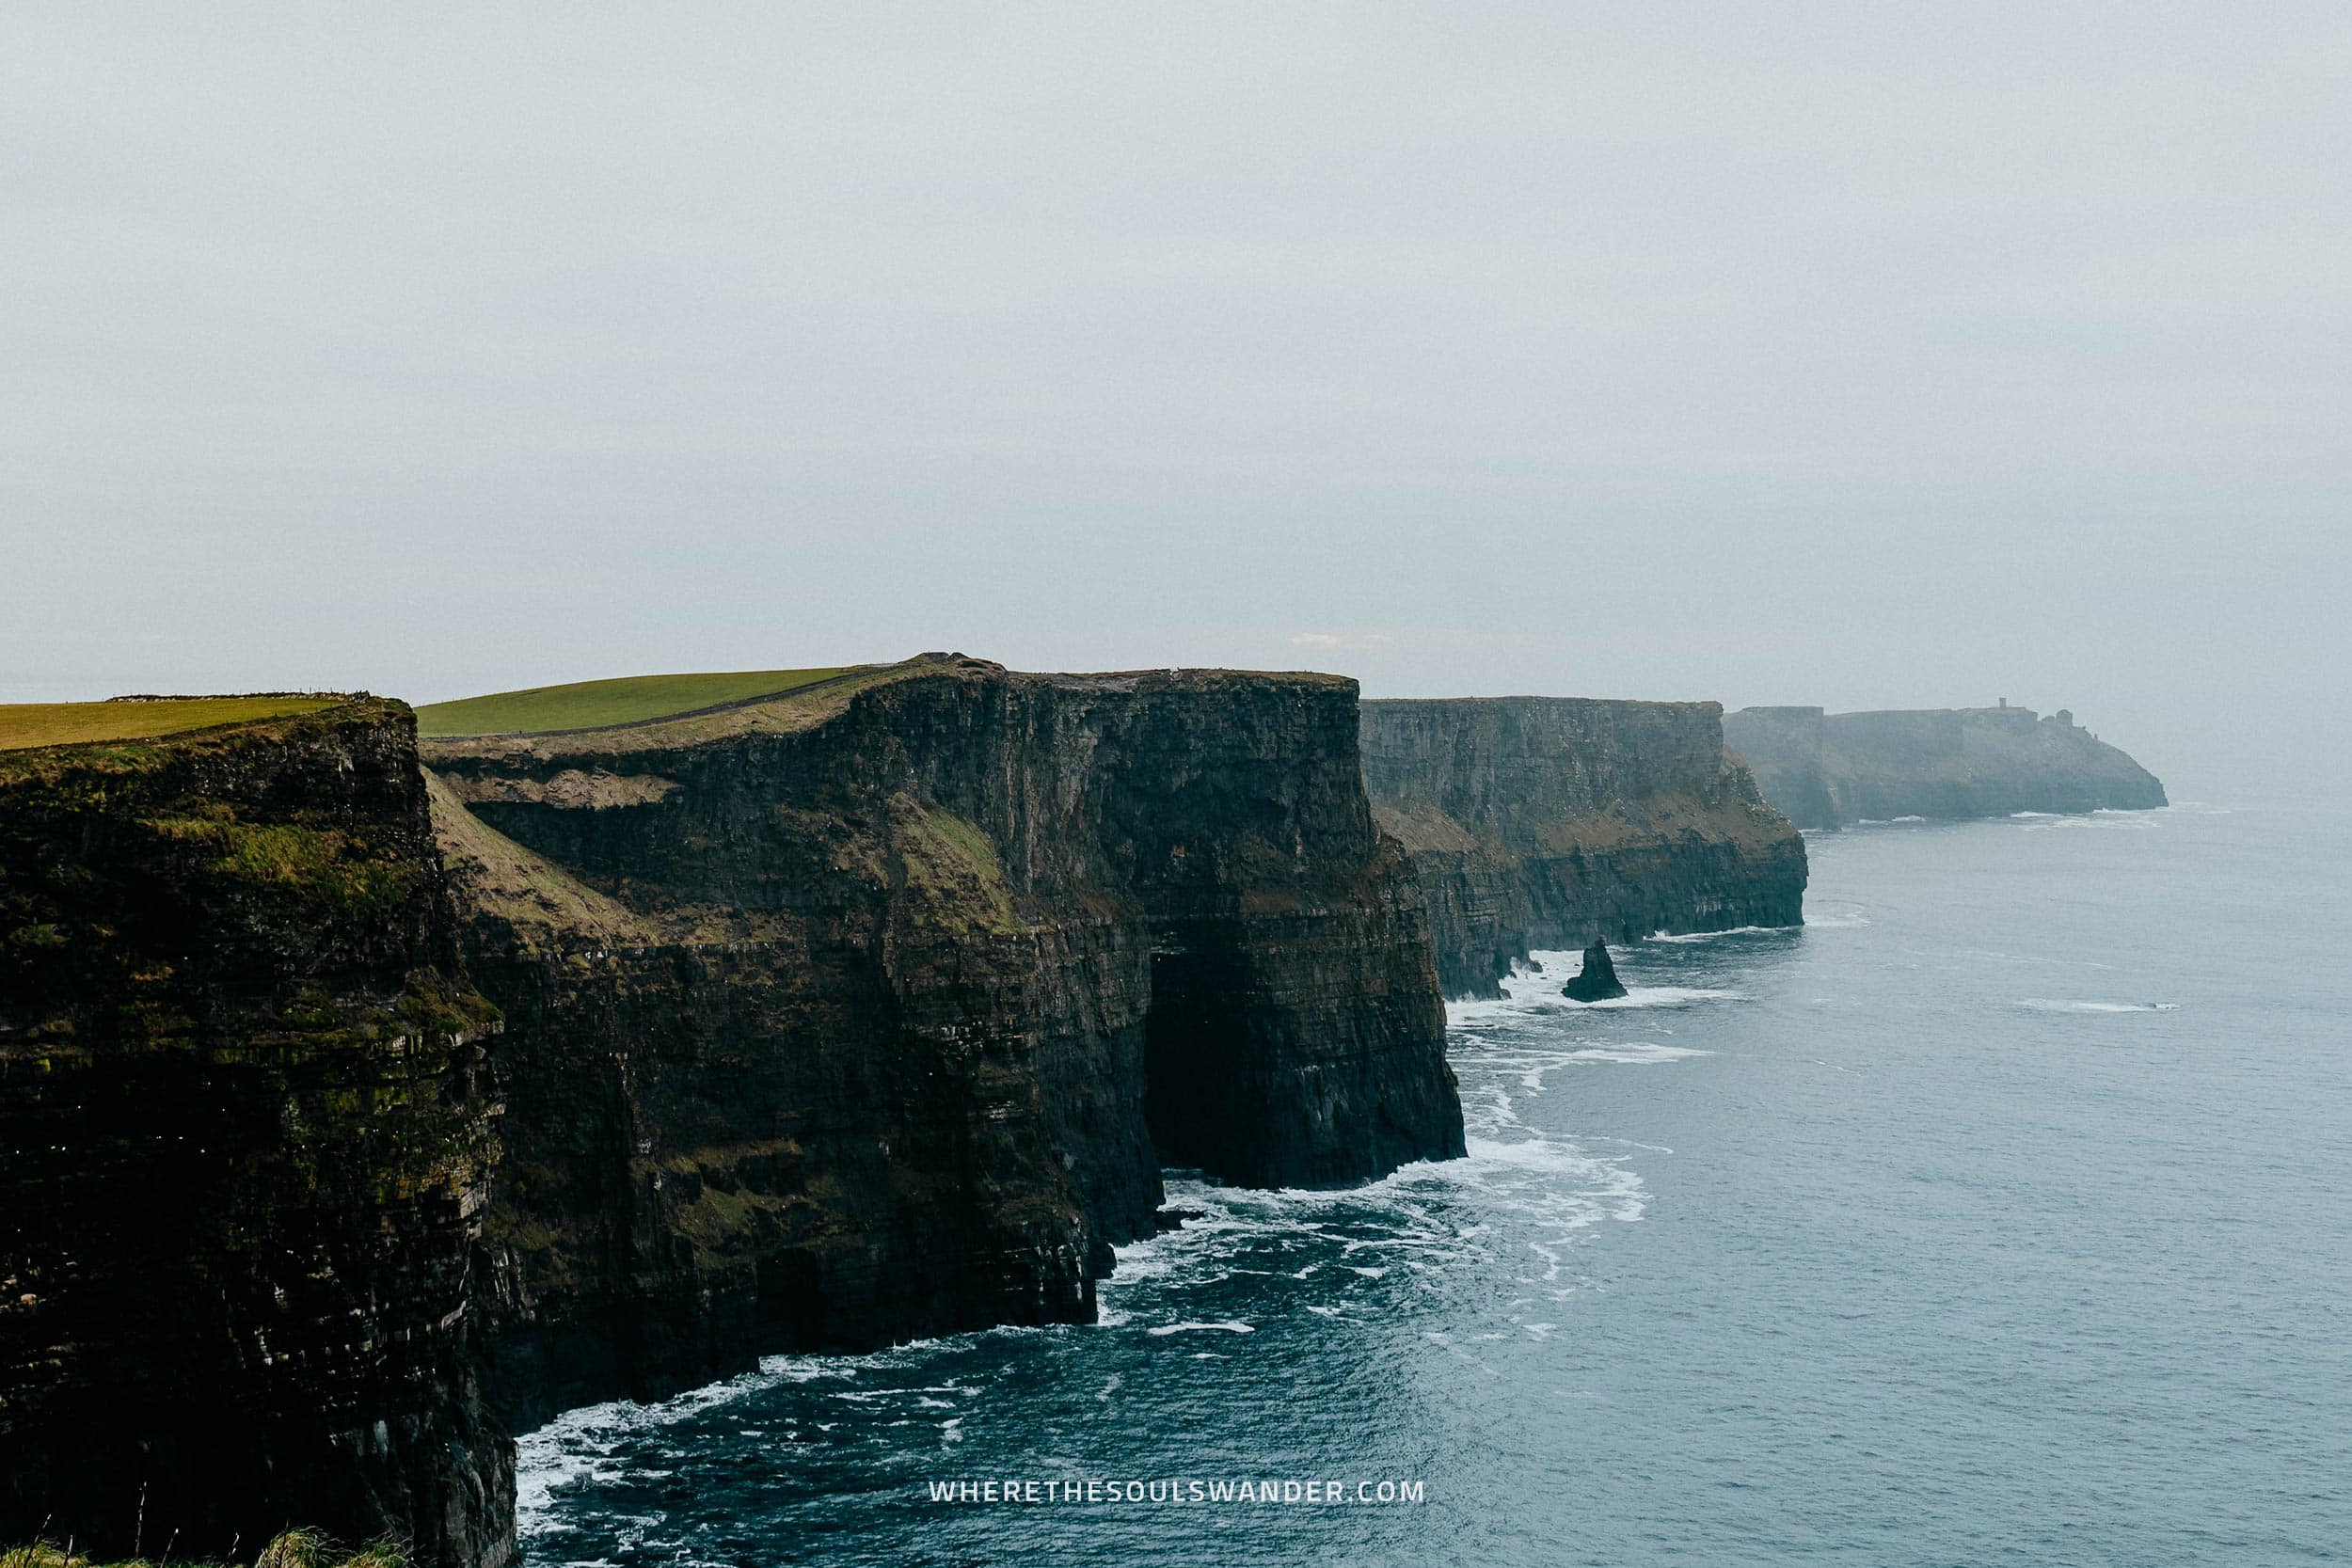
11. Go on a day trip to the Cliffs of Moher
From the moment I started preparing for my travels to Ireland, I told myself that I wanted to see the insanely stunning Cliffs of Moher at all costs.
Located roughly 3,5 hours’ drive from Dublin, the Cliffs of Moher are considered the most famous cliffs in Ireland, reaching a whopping height of 214m at their highest point.
With safe, paved pathways, several incredible viewpoints and an award-winning Visitor Centre, the famous Cliffs of Moher have now become the country’s second most visited tourist attraction.
While there are lots of popular day trips to the Cliffs of Moher, I would highly recommend visiting them as part of a road trip through Ireland. If you’re in Dublin on a city trip, opt for this full-day trip to the Cliffs of Moher instead.
Where | The Cliffs of Moher
Opening hours | See opening hours here
Recommended tour | This full-day guided tour of the Cliffs of Moher is an excellent way to behold the impressive landscape that defines the area.
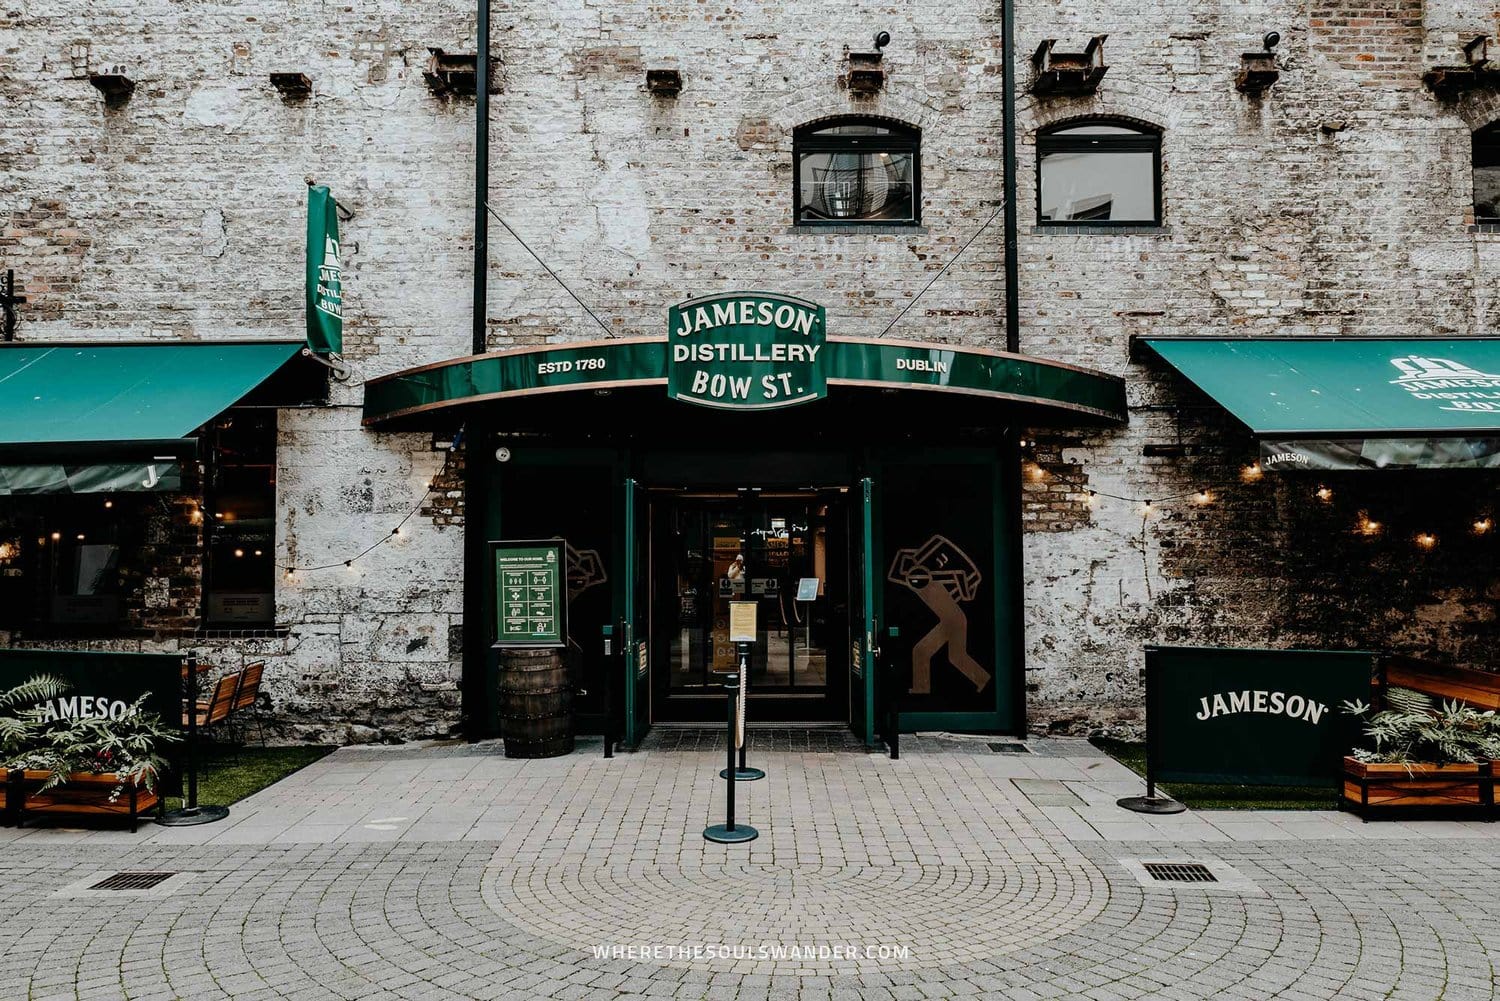
12. Taste Irish whiskey at the Jameson Distillery
Besides Guinness, there’s one other thing that the Irish produce exceptionally well – whiskey!
Hands down, the best way to learn about Irish whiskey and its rich and captivating history (Ireland has been making whiskey for well over 200 years), is by joining the famous Bow Street Experience Tour in the Jameson Distillery.
Awarded ‘The World’s Leading Distillery Tour Award’ three years in a row, the Jameson Distillery offers visitors a unique experience by giving them a peek inside the production process of one of the world’s most famous whiskey brands.
The tour also includes a unique comparative whiskey-tasting experience, learning you to understand the differences between Scotch whisky, American bourbon, and Irish whiskey.
On top of that, you’ll receive a Jameson Whiskey tasting certificate, so you can show off your whisky knowledge to family and friends at home.
Where | Jameson Distillery
Opening hours | Monday to Thursday 1100 – 1800, Saturday 1100 – 1900, Sunday 1200 – 1800
Cost | €25,- per person
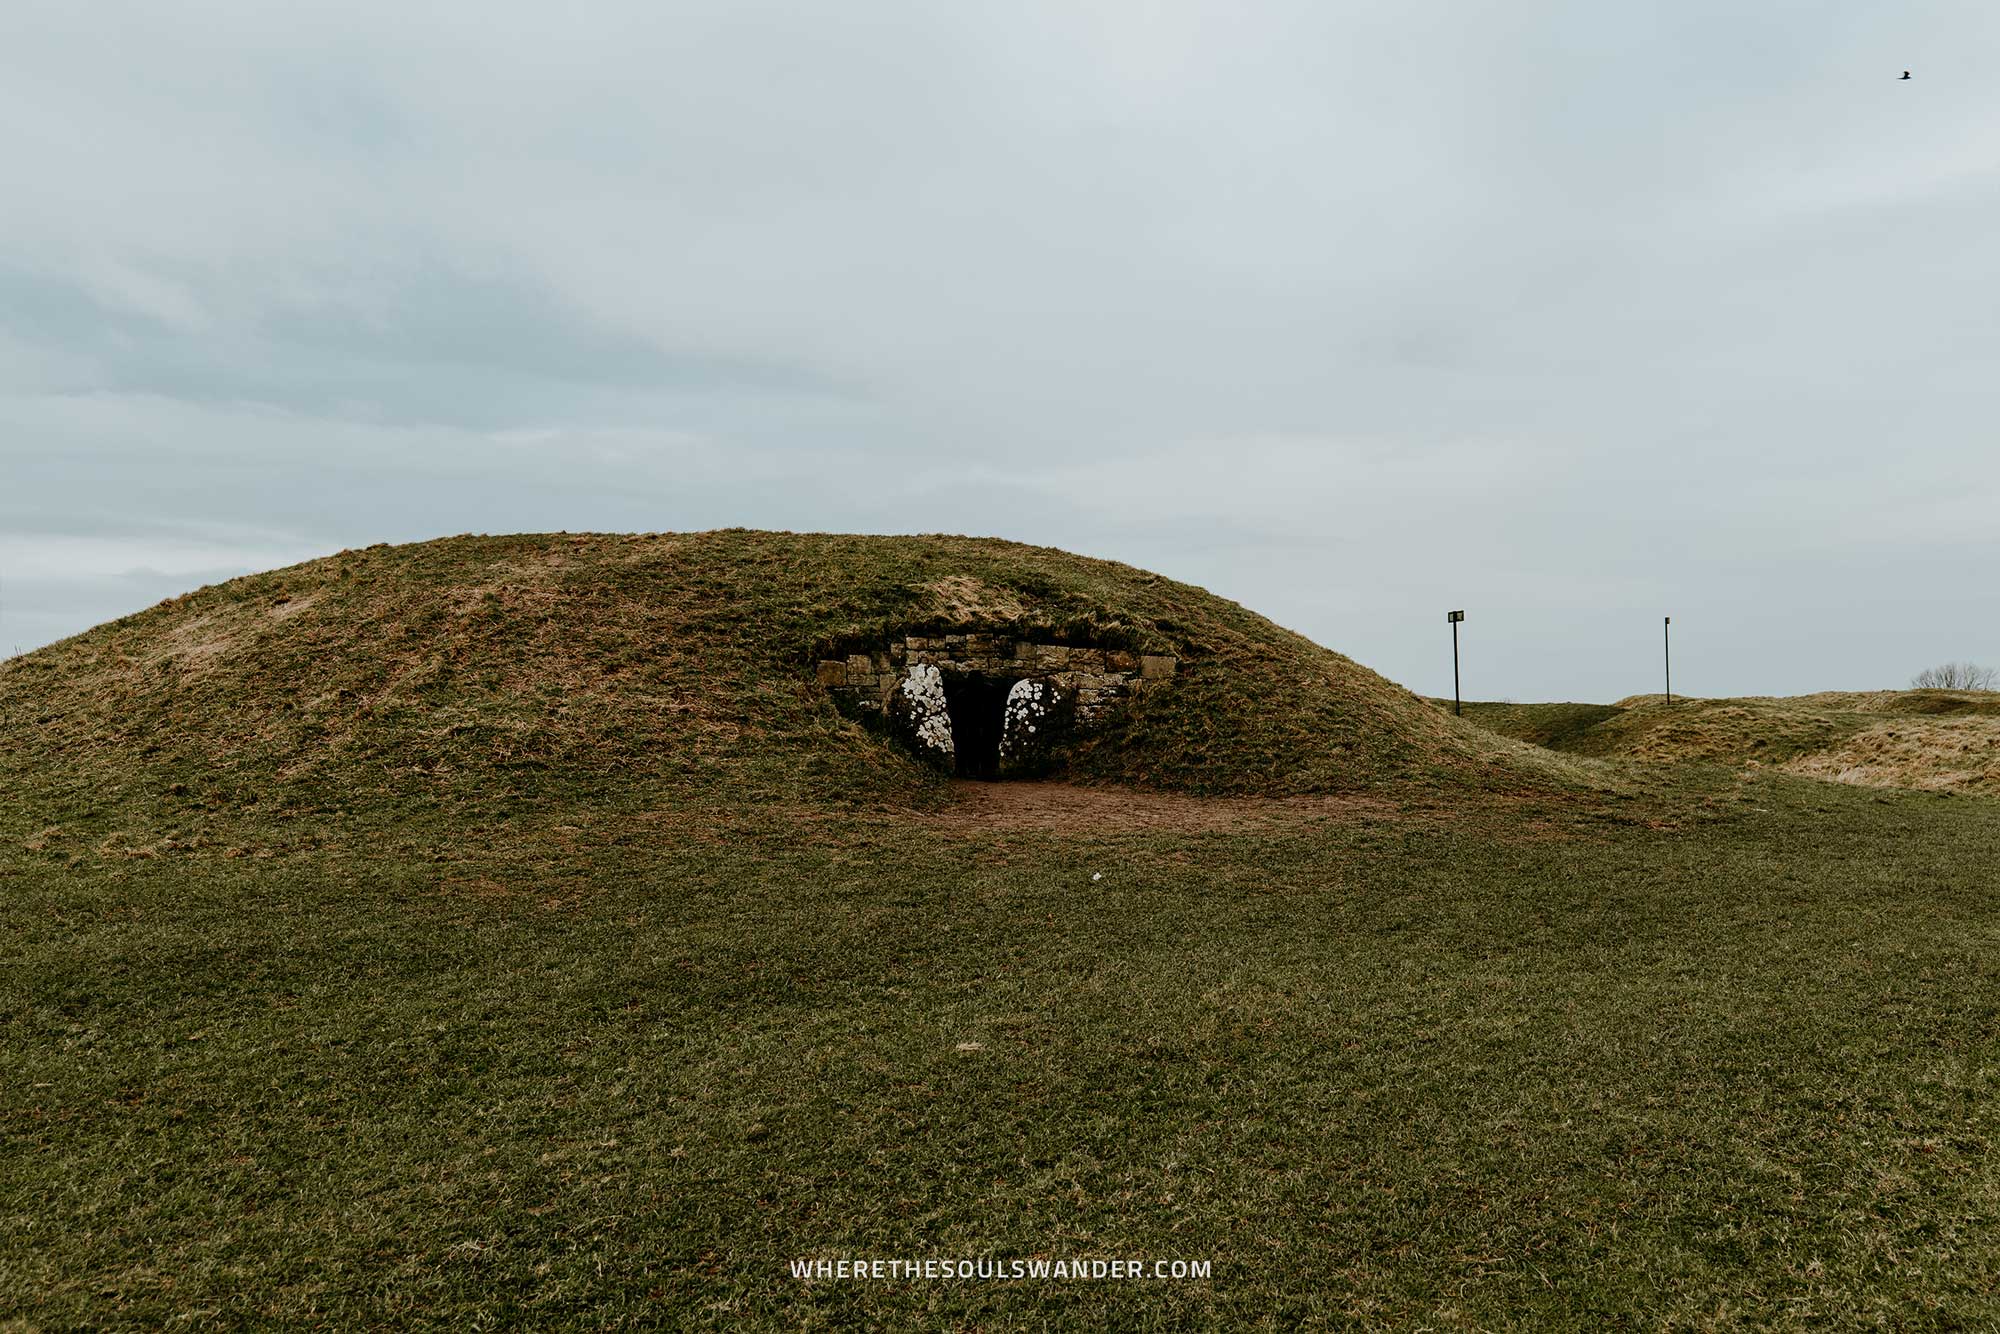
13. Visit the Hill of Tara
Situated a roughly 45-minute drive from Dublin, the Hill of Tara is considered Ireland’s most sacred stretch of land and the soul of Ireland’s history, legend and folklore.
Legend has it that the site has been in use for more than 5.000 years, and that it was once the ancient seat of power in Ireland.
It is also said that during both prehistoric and historic times, a total of 142 kings reigned over the Hill of Tara, which makes this place even more impressive
While I’d have to admit that it’s not the most scenic place, I believe its captivating history is enough reason to include the Hill of Tara in this guide of things to do in Dublin.
Where | The Hill of Tara
Things to do in Dublin | The essentials
The best time to visit Dublin
The weather in Dublin, like all of Ireland, can be rather complicated – meaning all seasons could occur in one single day.
At one moment the sun is out, and half an hour later the skies are pouring with rain, so preparing yourself for these quickly fluctuating weather conditions is an absolute must when visiting Dublin.
In terms of the weather, I’d highly recommend the peak summer months of June till August, when the weather is way more steady and the streets buzzing with festivities.
If you prefer to avoid some of the crowds, while still enjoying relatively good weather, I’d suggest opting for the shoulder months of April, May, September and October instead.
During this time, the accommodation will be slightly more affordable too, which is another great upside of travelling during the shoulder period.
How to get to Dublin
PLANE | Dublin Airport is located only 20 minutes from the city centre, and hosts both European and International flights, meaning you will probably enter Ireland here.
For flights to Dublin, I would suggest you check out Skyscanner as they have a user-friendly website that makes it pretty straightforward to find good cheap flights.
From the airport, hop aboard the Dublin Express for a quick transfer to the city. The journey takes about 20 minutes and leaves every 30 minutes. A return ticket will cost you only €10.
Stay safe in Ireland | Travel insurance
While Ireland is totally safe for travellers, I always strive to have my travel insurance sorted out before going on a new adventure, and I highly suggest anyone else do the same.
While we prefer to assume that everything runs smoothly during our travels, in reality, an accident can happen at any moment. When that happens, it is better to be safe than sorry.
Heymondo | Whether you’re going on a 3-week backpacking trip, or planning a long stay somewhere abroad, Heymondo has excellent insurance options either way – plus full COVID-19 coverage and a handy app with 24-hour medical assistance. Readers of WTSW receive 5% off any insurance policy.
Cheers!
I’ve been on this travel blogging journey since 2019.
If you appreciate what I do here, these are some ways you can support me.

A complete guide to the Connemara National Park, Ireland
When doing research for my Ireland road trip itinerary, one of the experiences I was looking forward to the most was the Diamond Hill hike in the Connemara National Park.
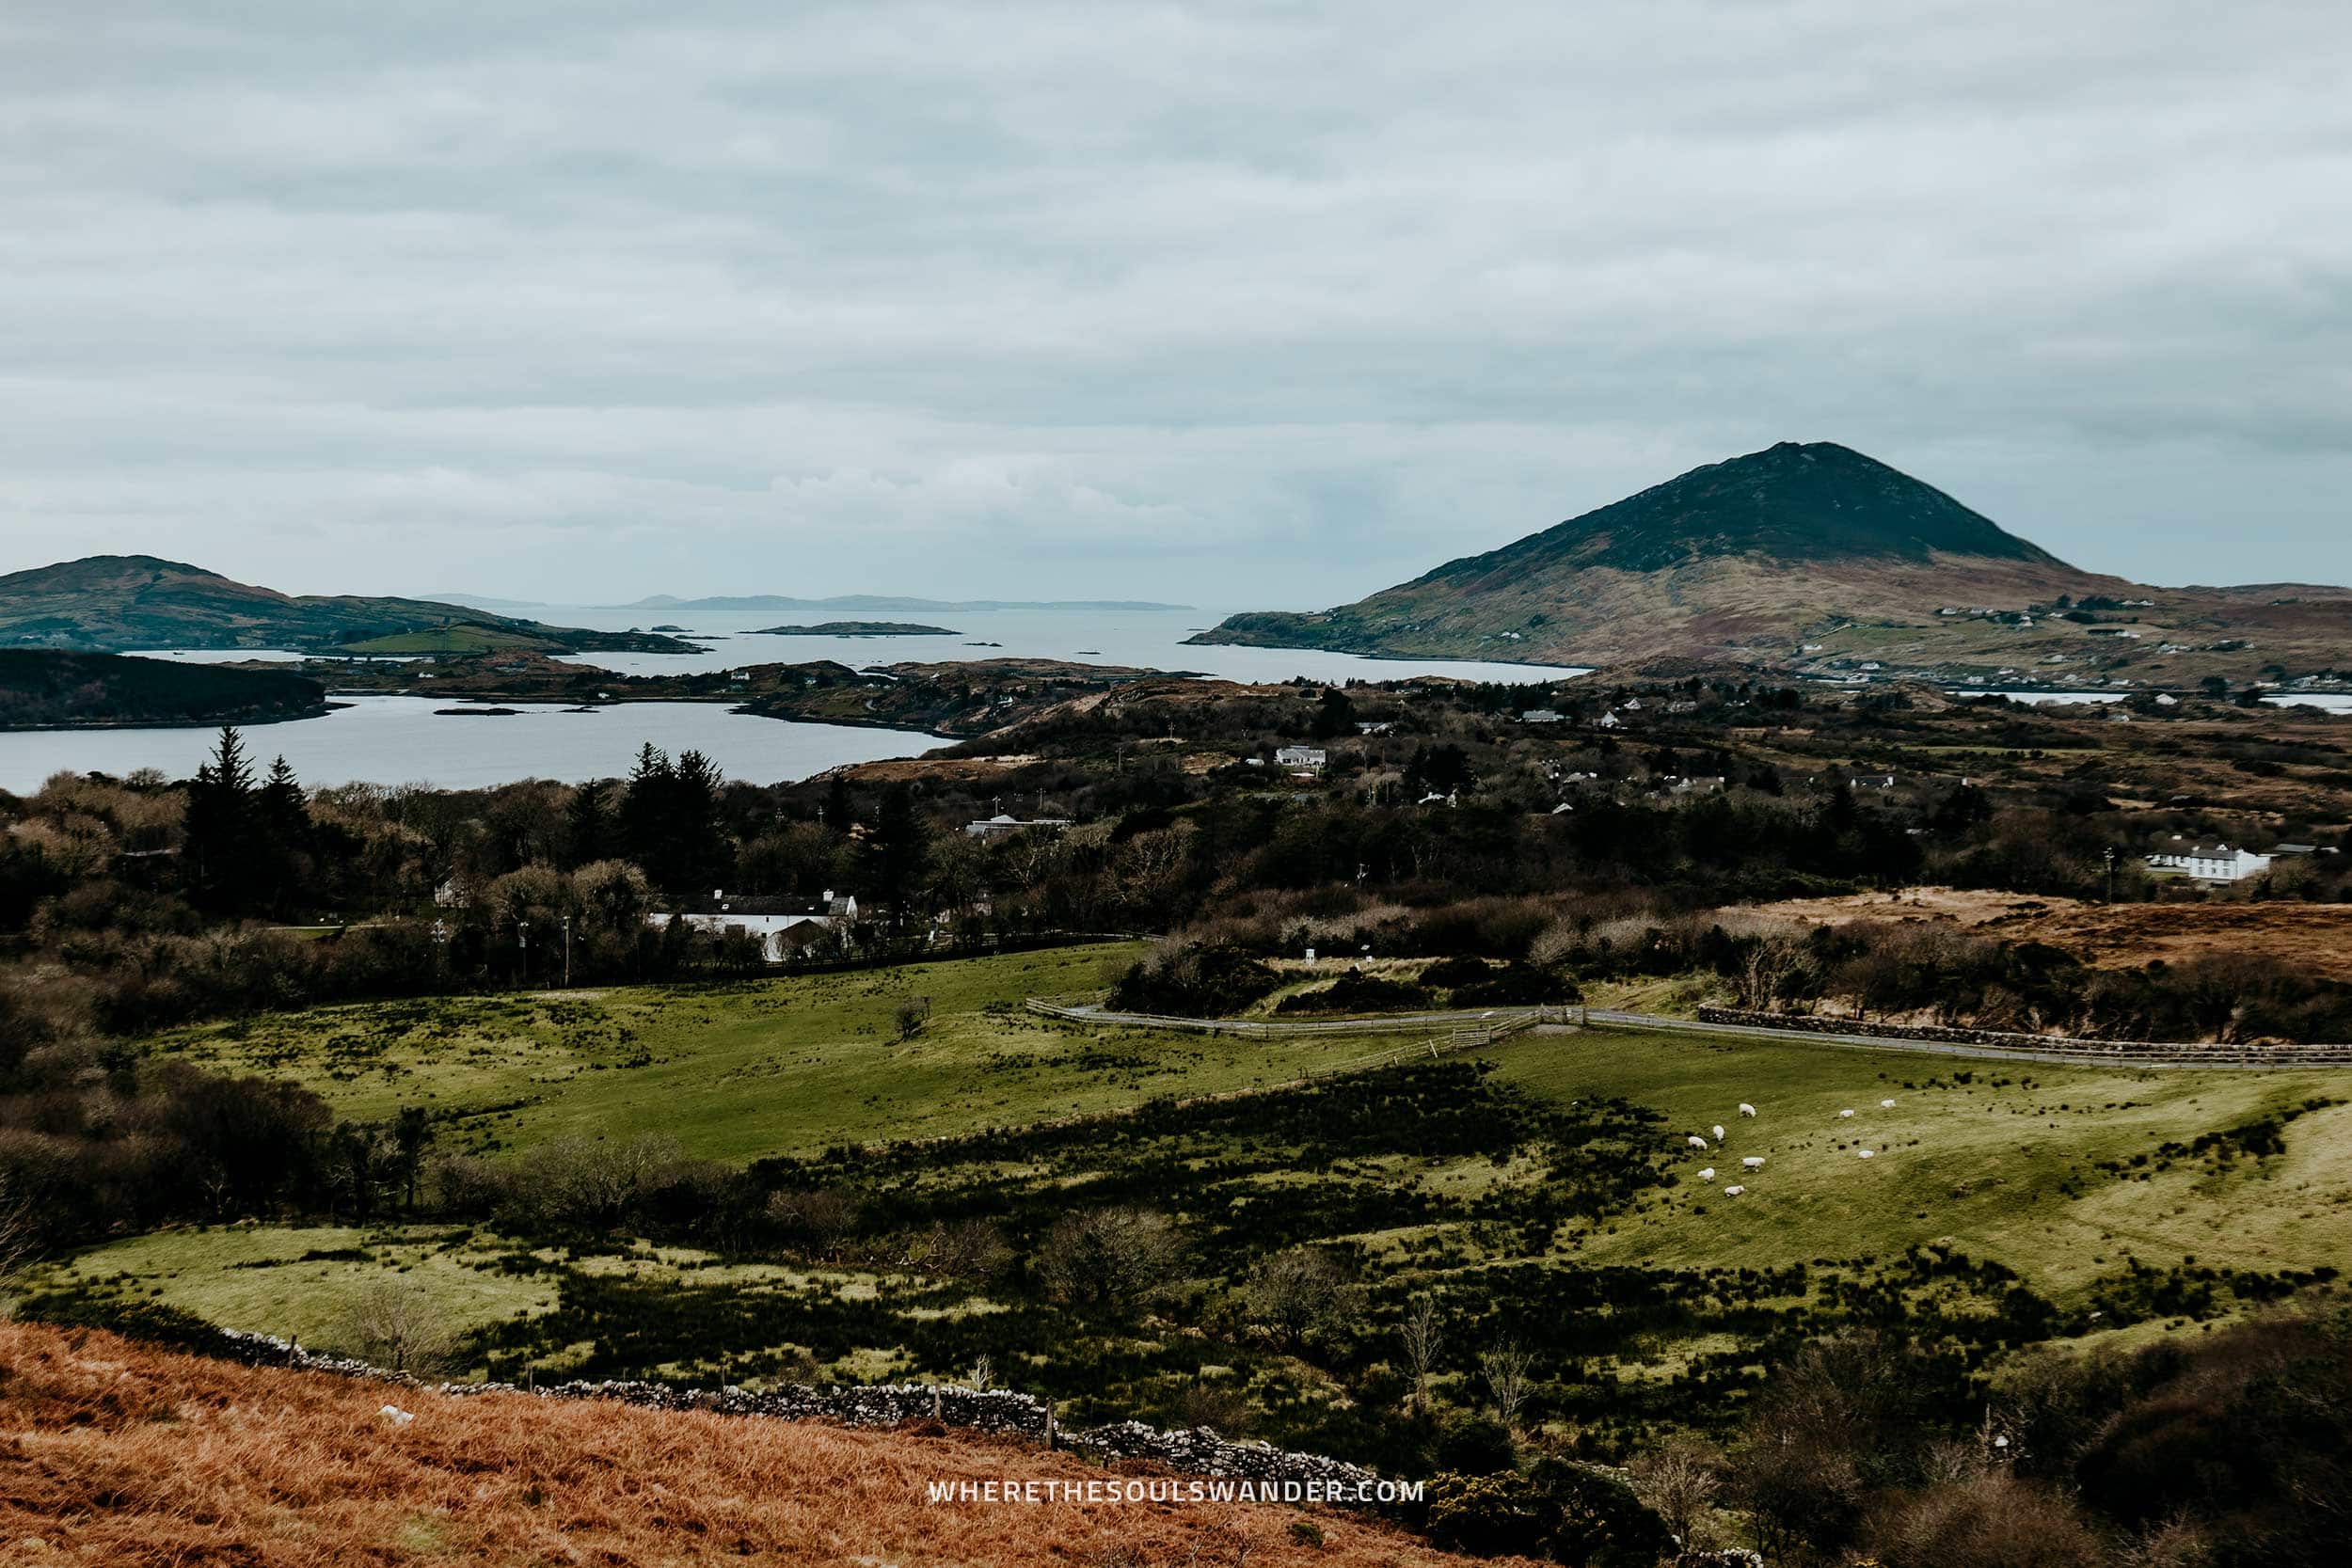
Nestled in the heart of County Galway lies the Connemara National Park, one of the six natural parks in Ireland and home to some of the best hiking trails in the country, including the scenic Lower and Upper Diamond Hill trails.
Covering a whopping 2.000 hectares, the park houses a wide variety of natural features, including bogs, rolling hills, heathland and rocky mountain ranges, with Diamond Hill and the stunning Twelve Bens range at the core of it all.
By far the best way to sample all these stunning and diverse landscapes is by taking on the manageable 7,6-kilometre hiking trail to the summit of Diamond Hill.
My in-depth guide to the Diamond Hill hike in the Connemara National Park offers all the essentials to have an unforgettable experience – plus some of my favourite hiking tips too.
Where is the Connemara National Park
Covering a total of 2.000 hectares, the Connemara National Park is nestled in the heart of County Galway in the West of Ireland.
The entrance of the park itself is located on the Clifden side of Letterfrack, about 1,5 hour drive away from Galway.
Connemara National Park entrance fee
Situated in Letterfrack, a small village just off the N59, is the Connemara National Park visitor centre, your first point of call when it comes to information about the park.
At the moment of writing (March 22’), there’s no entrance fee for those visiting the Connemara National Park. On top of that, the parking area is also completely free of use.
Opening hours of the Connemara National Park
In general, the Connemara National Park is open every day with no fixed opening hours.
However, given the ever-changing weather conditions in Ireland, the park closes for safety purposes when the weather warnings turn orange or red.
To avoid unexpected surprises, I’d highly recommend keeping an eye on the weather warnings, before planning a trip to the park.
How to get to Connemara National Park
CAR | As with most tourist highlights in Ireland, the best way to get to the Connemara National Park is as part of a road trip.
By renting a car, you’ll have all the freedom to get to the park on your own terms, while it’s also significantly easier to get around the country in general.
If you’re thinking of renting a car yourself, make sure you check out DiscoveryCars, as they have a broad range of cars on offer, additional insurance options, and brilliant overall service.
Upon arrival at the Connemara National Park, you’ll have free parking facilities
TOUR | Another great way to visit the Connemara National Park is by joining this full-day guided tour from Galway.
What makes this tour interesting is that you’ll be guided by an experienced local guide, who tells you about the region’s intriguing traditions, music, and language.
Add to that that you have enough free time to explore the park and hike to the summit of Diamond Hill, and this tour is a great option for those without a rental car.
BUS | Alternatively, the Connemara National Park is also reached by public bus from both Galway and Westport.
For the route from Galway, jump aboard bus 923 in the direction of Letterfrack. For tickets and timetables, visit the official Citylink website. The journey takes around 1 hour and 50 minutes.
From Westport, opt for bus 423 operated by Bus Eireann with end destination Letterfrack. For tickets and timetables, visit the official Bus Eireann website. The journey takes around 1 hour and 10 minutes.
The details of the Diamond Hill Trail
Difficulty | Easy
Hike distance | 7,6 Kilometre
Hike duration | 3 hours
Elevation gain | 411 meters
Things to do in Connemara National Park
Lower Diamond Hill Trail
The first section of the famous Diamond Hill hike starts with the Lower Diamond Hill Trail, an easy-to-follow path that brings you along bogs, heaths, grasslands and forest.
Starting at the Connemara National Park visitor centre, the Lower Diamond Hill Trail is relatively short and it takes only 1,5 kilometres before it blends with the Upper Diamond Hill trail.
Depending on your fitness level, you can choose to continue the loop back in the direction of the visitor centre, or opt for a challenge, and hike to the summit of Diamond Hill via the Upper trail.
Upper Diamond Hill Trail
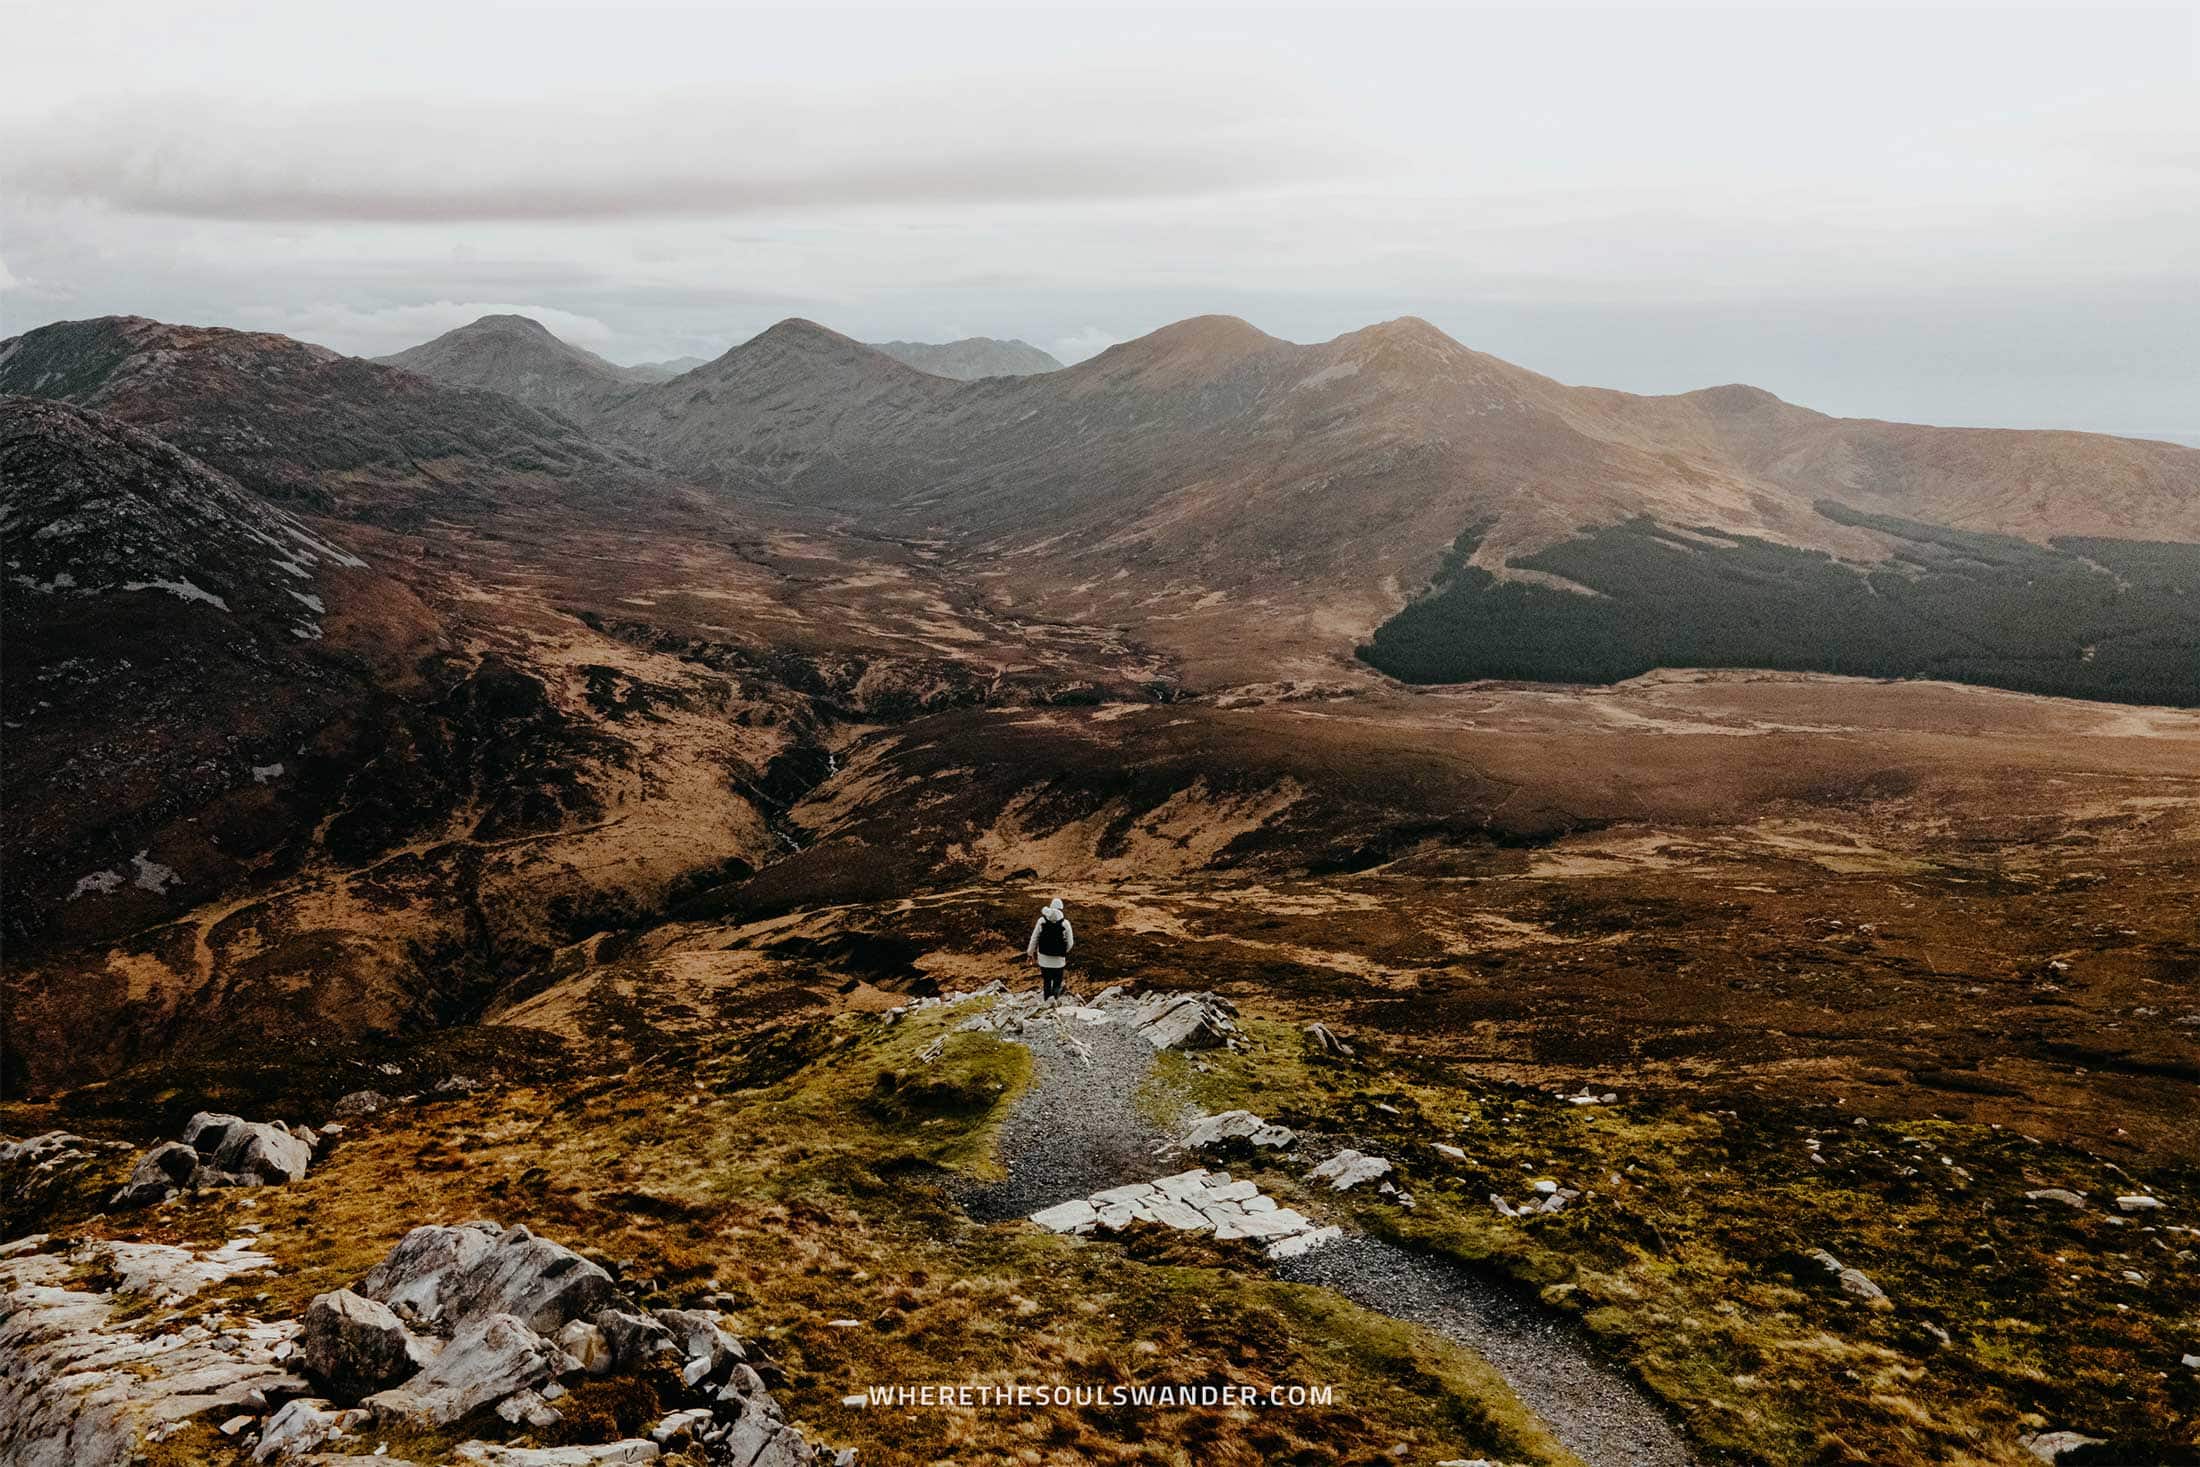
Upon arrival at the Upper Diamond Hill Trail, you’ll immediately notice the views, as they get better and better with stunning panoramic views of the surrounding region.
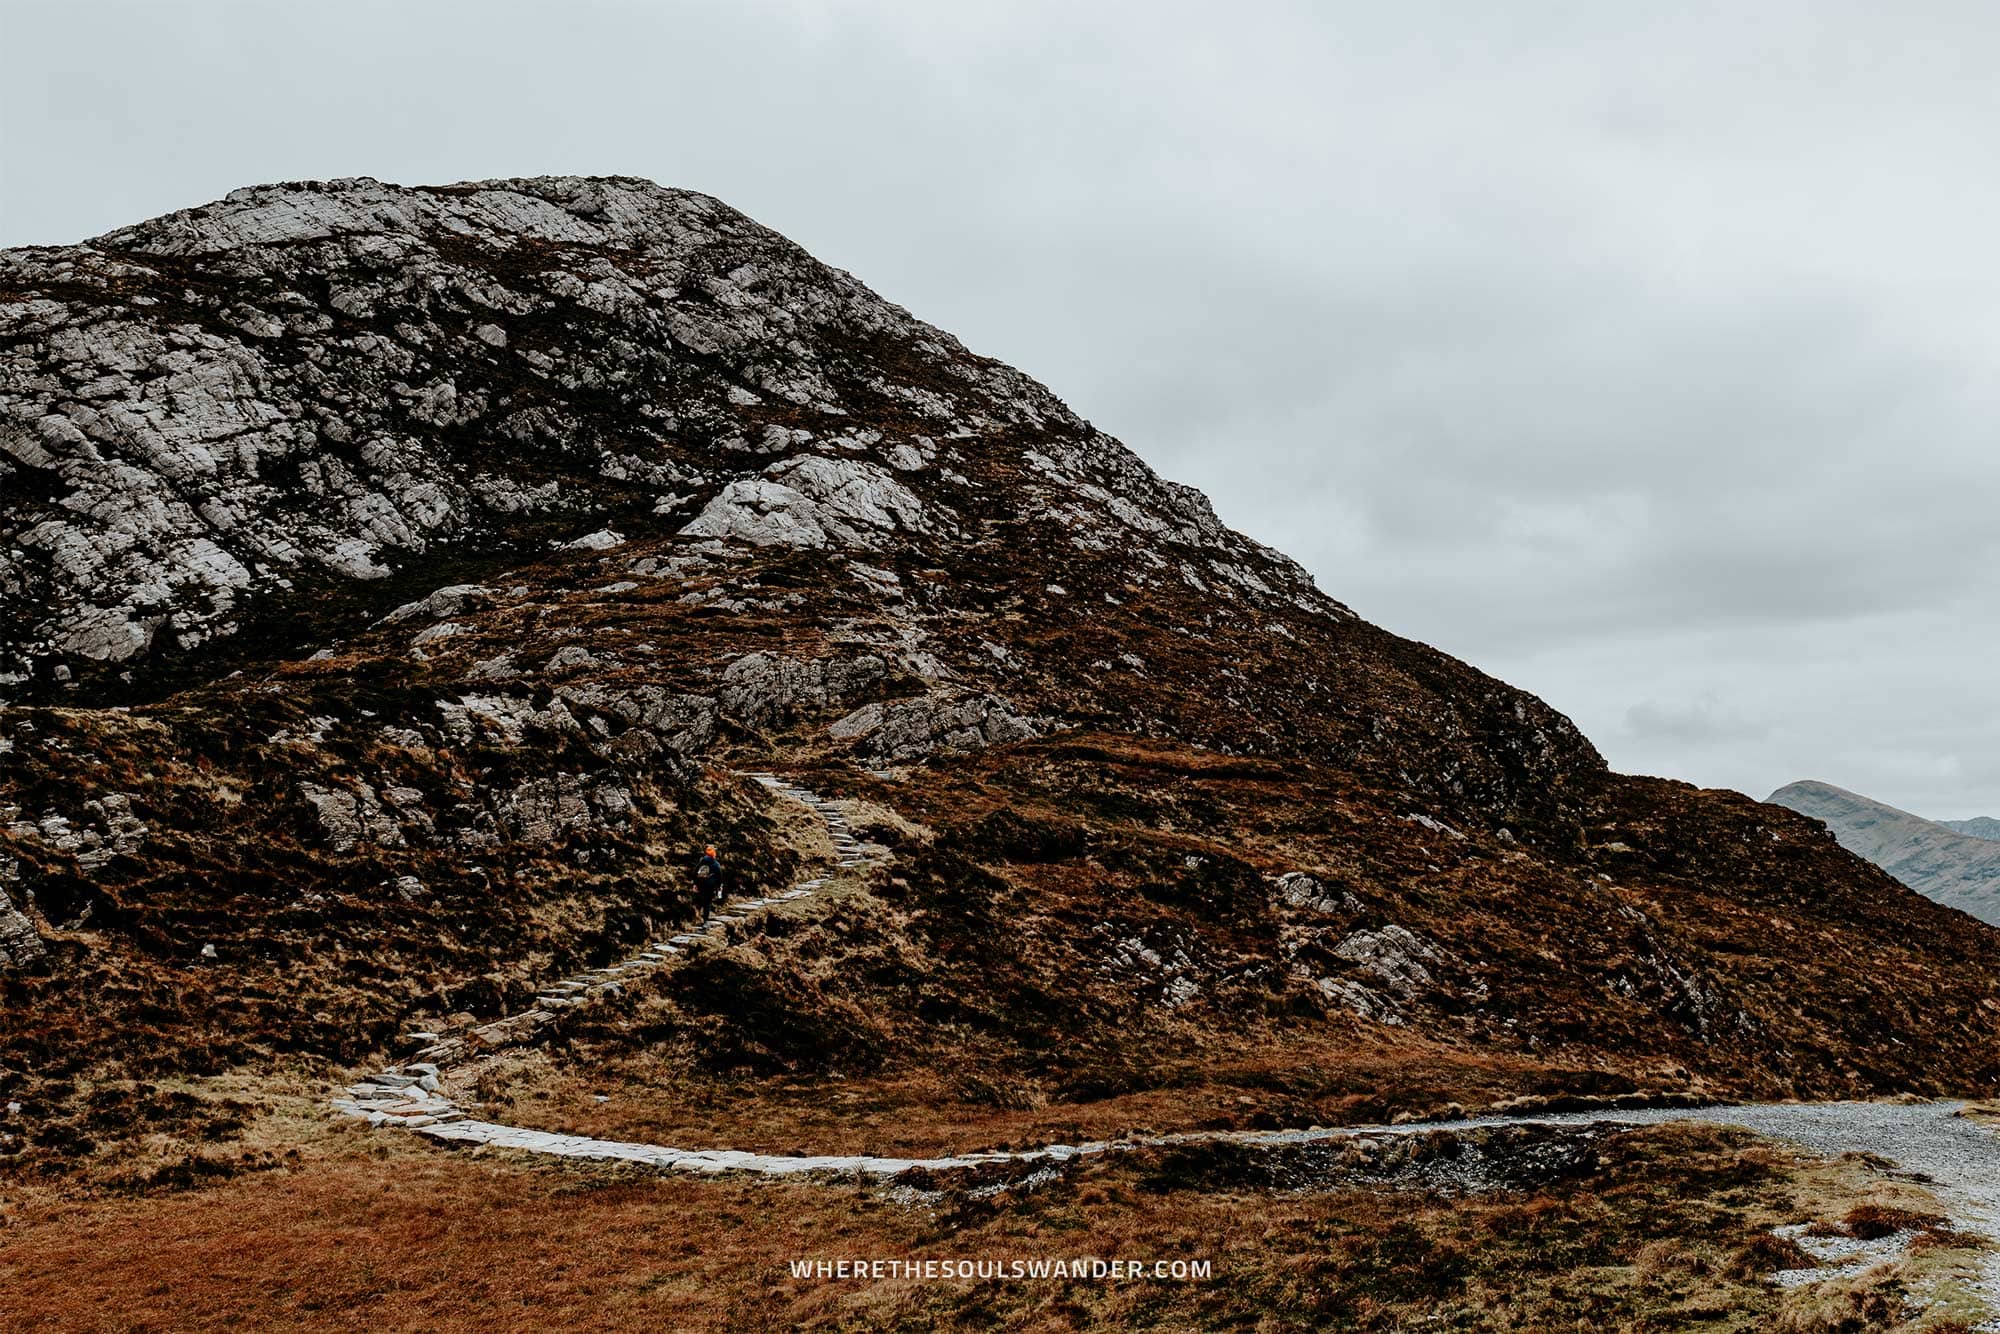
Though this part of the trail starts relatively easy, with comfortable boardwalks, it doesn’t take long before you stumble upon a dusty road that prepares you for the first real climb of the hike.
After about 20 minutes, you’ll come to the point where rocky stairs will lead you to the summit of Diamond Hill at 442m above sea level.
The final section of the trail is pretty steep and a tad sketchy, so make sure you take proper safety precautions, especially if it’s windy. Also, the summit is completely exposed, so be careful at all times.
Once arrived at the summit of Diamond Hill, you’ll be welcomed by the most stunning views of the Twelve Bens, a stunningly beautiful mountain range, with the Benbaun (729m) as its highest point.
How to wrap up the Diamond Hill trail
After taking a short lunch break while taking in the incredible views from the top of Diamond Hill, it’s time to continue the hike.
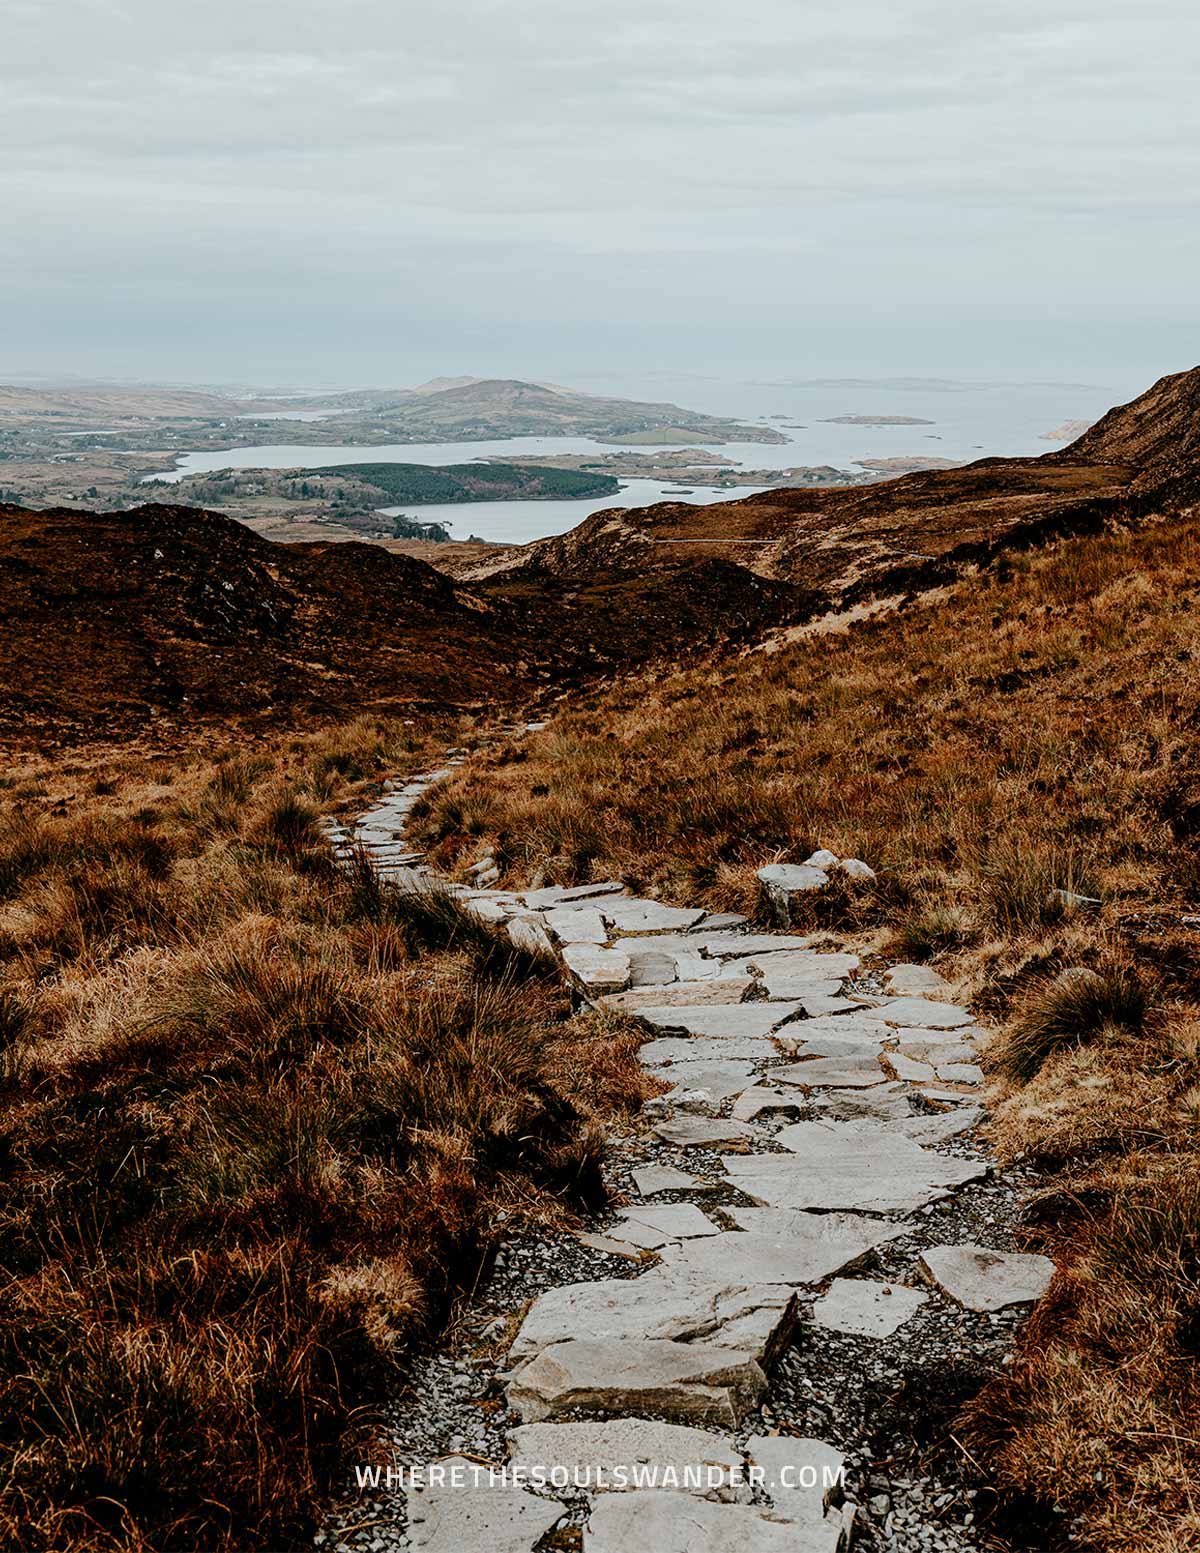
Since the Diamond Hill trail is a loop walk, it’s pretty straightforward to get back to the visitors centre with a clear paved path down the backside of the hill.
Once you’ve finished the descent, the trail flattens out and takes you back to the visitors centre in Letterfrack in about 3,5 kilometres.
While this section of the hike sounds like a quick go-to-your-car route, it actually offers some insane views of the Atlantic, as well as the encircling surroundings.
Connemara National Park | The essentials
Where to stay near Connemara National Park
While visiting the Connemara National Park is an absolute must, there isn’t necessarily much else to do near the park.
For that reason, the Connemara National Park is best visited as part of a road trip through Ireland, meaning I’d recommend basing yourself in one of the region’s more popular cities of Galway or Westport, depending on the direction of your road trip itinerary.
To help you find the right accommodation, I’ve listed two excellent options per city below;
Galway
The Continental Boutique Residence | An excellent hotel suitable for solo travellers and families alike. Rooms are modern, clean and spacious, and are equipt with all the necessities. Continental Boutique Residence is also located only a stone’s throw away from the Galway city centre, which makes it one of the best budget-friendly picks in Galway.
The Lane – Boutique Residence | Another excellent budget-friendly option, the Lane – Boutique Residence is situated in the heart of Galway at only a 2-minute walk from Eyre Square. With spacious boutique-style rooms, comfortable double beds and a private bathroom with rainshower, this hotel is an excellent value for the money.
Westport
Westport Country Lodge Hotel | Situated in the historic village of Aughagower, at a 5-minute drive from Westport, this hotel combines elegant design with modern-day luxury and comfort. Doubles starting at only €81,- per night make this one of the best options nearby Connemara.
The Wyatt Hotel | This excellent hotel is set within the heart of Westport and offers stylish and comfortable rooms, as well as free access to the Westport Leisure Park, where you can use the swimming pool, hot tub and sauna. So, if you’re after a tad more comfort, look no further.
The best time of day to visit the Connemara National Park
Though you could visit the Connemara National Park at any time of day, I’d highly recommend visiting in the morning, especially if you’re planning to hike up to the summit of Diamond Hill.
As with any hike, the best time to start is usually about an hour before the sun rises.
I hiked Diamond Hill in Connemara in the morning and arrived at the summit just before the sun enlightened the Twelve Bens range in the distance – it was magnificent.
If you’re not quite an early bird, don’t worry, the Connemara National Park is also perfectly suitable for an afternoon visit.
The best time of year to visit the Connemara National Park
This one is rather tricky/though, given the weather conditions tend to change relatively quickly in Ireland, meaning all four seasons could occur in one day, no matter the time of year.
Having said that, I believe the best time to visit the Connemara National Park is from May to Augustus, when the weather is great and the days lengthy for explorations around the park.
Additionally, opt for the shoulder months of March to May or September to November. During this time it’s significantly less crowded in comparison to the peak summer months, but still comfortable enough to do the hike to the summit of Diamond Hill.
What to pack for the Connemara National Park hike
Before you start the Diamond Hill trail in the Connemara National Park, I believe it’s essential that you’re well prepared. For that reason, I’d highly suggest bringing the following equipment:
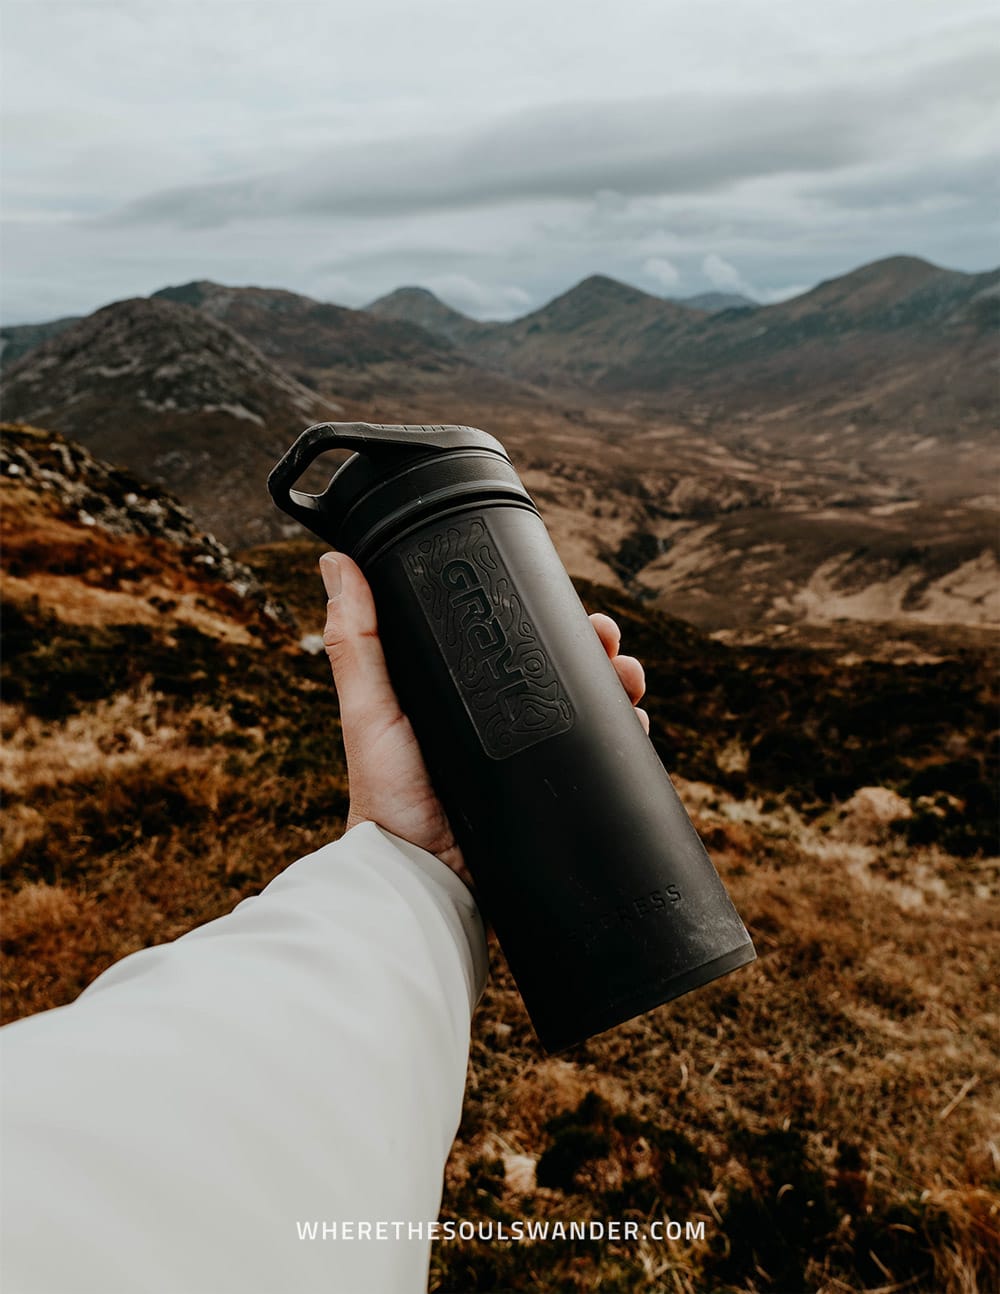
A REUSABLE WATER BOTTLE | One travel item that I carry with me at all times is the Grayl Geopress. This reusable water purification bottle allows me to fill up water from almost every water source, which makes it one of my best investments to date.
HIKING BOOTS OR A GOOD PAIR OF SNEAKERS | While hiking boots definitely provide more stability to your ankles, I believe you could easily hike Diamond Hill Connemara in a good pair of sneakers – just be sure that they have a firm sole with enough grip, so you’re supported when things get slippery.
LAYERS | Since the weather in Ireland is rather unpredictable, wearing layers is essential. While I had excellent weather during my visit, my hoodie and raincoat weren’t an unnecessary luxury, especially at the windy summit of Diamond Hill.
SNACKS | Whilst you can buy snacks and drinks at the Connemara Visitors Centre, I’d highly recommend bringing some fruits, nuts and protein bars to fuel yourself during the hike. Additionally, take enough cash to grab a coffee or a few snacks after the hike.
HIKING POLES | I did the Diamond Hill hike without hiking poles, but if you have weaker knees or prefer a little support during the more ascents and descents of the trail, I’d highly advise bringing a set of quality hiking poles. These Montem Ultra Strong Hiking Poles are light, collapsible, and a great value for the price.
CAMERA GEAR | If you’re into photography like me, don’t mind bringing your camera gear, as the Connemara National Park offers some of the best scenery in the region. I was glad I took my drone with me, as I captured some stunning shots – PS, see what’s in my camera bag.

Safety in Ireland | Travel insurance
Since travelling in Ireland is all about the outdoors, I recommend everyone to sort out good travel insurance before setting out on their own road trip adventure.
Although we prefer that everything goes smoothly during our travels, something unfortunate can happen at any moment, whether it’s an injury during a hike, a stolen camera, or an accident on the road.
For travel insurance, I use Heymondo, as they offer full COVID-19 coverage, as well as a handy app with 24-hour medical assistance. Make sure you check it out – readers of WTSW receive 5% off any insurance policy.
Cheers!
I’ve been on this travel blogging journey since 2019.
If you appreciate what I do here, these are some ways you can support me.
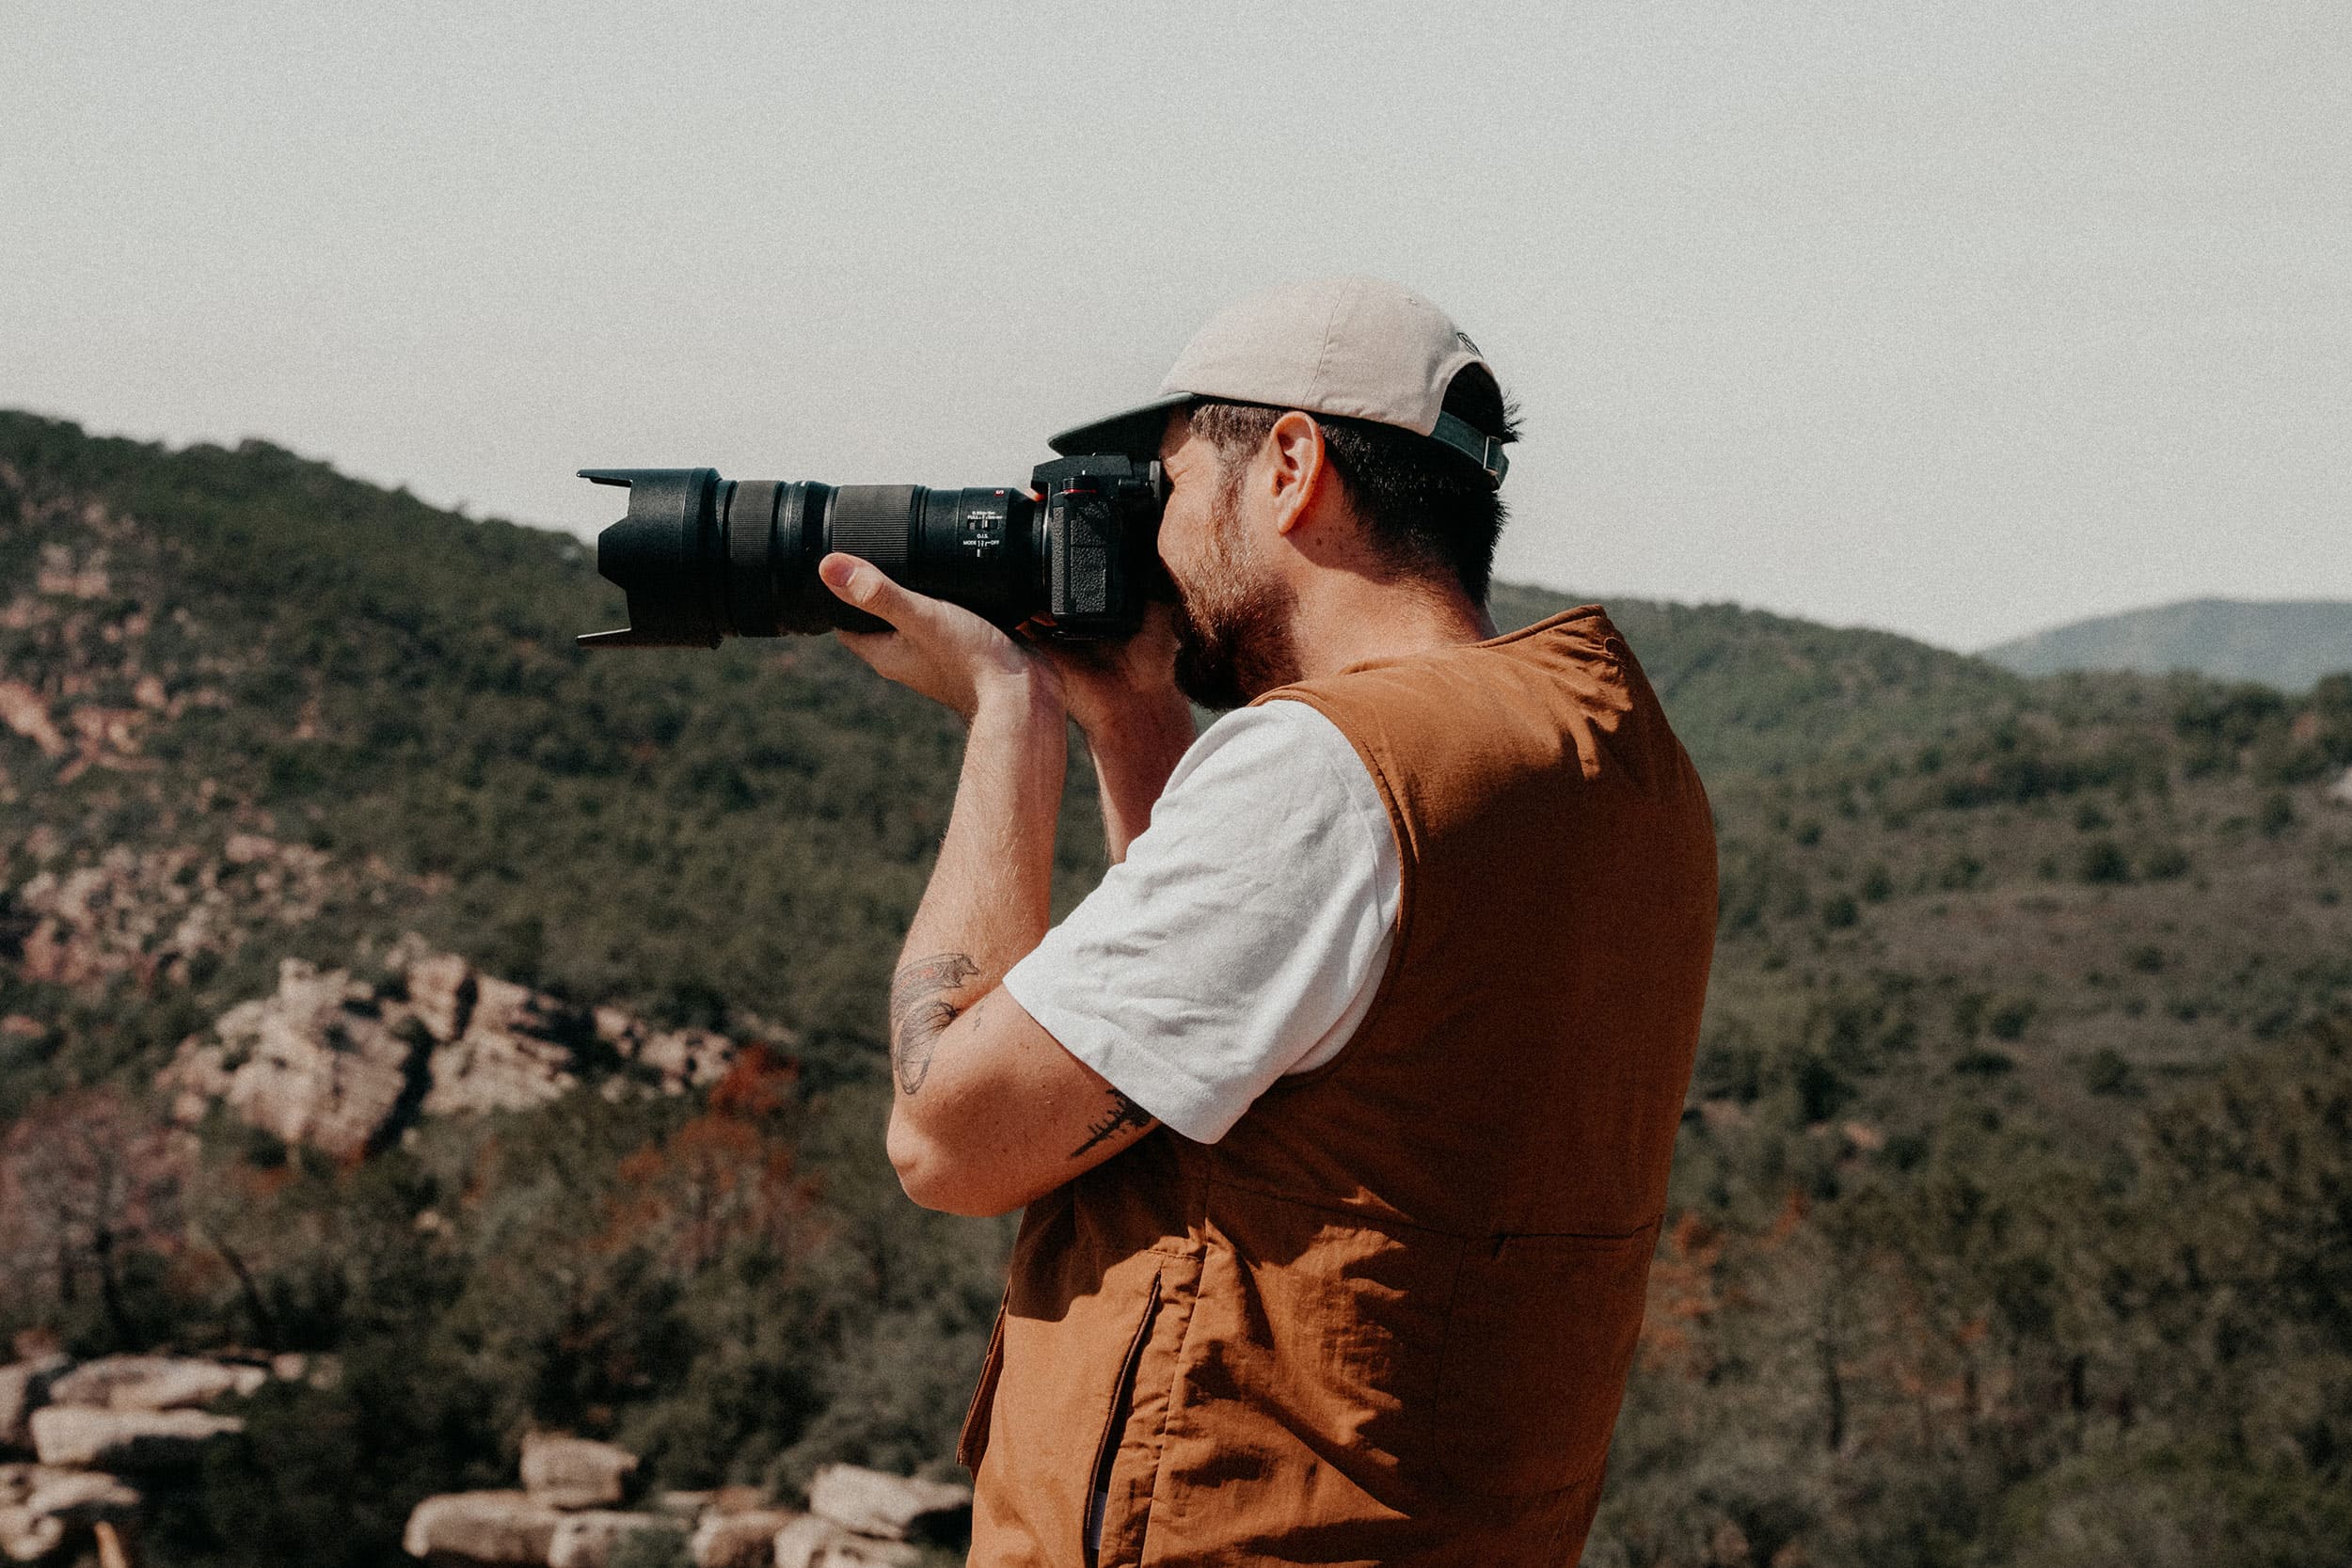
What’s in my camera bag | My travel photography gear 2026
I’ve recently received quite a few Instagram DM’s with the following question; what camera do you use for your travel photography.
After updating just about every piece of gear I owned, I decided it was finally time to write an in-depth guide around the topic – what’s in my camera bag.
With a burning passion for photography, I always aim to find the most innovative camera gear, and it’s thus my goal to update this post as soon as I discover better alternatives.
What I’ll show you in this post are the camera, drone and lenses that I use right now – plus all the ingenious accessories that enable me to shoot and edit stunning photography.
It took me 4 years to balance out this setup, and I’m pretty satisfied with the result.
With this guide, I want to give you a good insight into my camera gear, and I hope it inspires you to create an epic photography setup that suits your needs.
If you choose to use any of the links on this page, I receive a small commission at no extra cost to you. By using these links, you’ll have a direct impact on WTSW and support me to continue to create free insightful travel content for you. If you find any of my tips useful, you can support me by buying a virtual coffee here.

What's in my camera bag as a travel photographer in 2024
My cameras
The Panasonic LUMIX S5II
Ever since I bought my first Panasonic Lumix G80, I’ve been hooked to the Panasonic LUMIX camera line-up, and I’m always eagerly awaiting the next big thing coming from them.
So when Lumix decided to create a full-frame line, I was excited to get my hands on their S5.
Recently, after years of heavy use and lots of travel adventures with my S5, I decided to upgrade to the Lumix S5II, which has significantly improved autofocus, an even better in-body image stabilization, and a new processor with L² Technology created in cooperation with Leica.
While top-notch technical capabilities are definitely important when looking to invest in a camera, I believe it is easy to be blinded if you’re looking solely at high numbers and fancy words in the specs sheets of a camera.
One thing I like most about all the LUMIX models that I’ve worked with, is the fact that both the design of the camera body and the menu interface are so neatly put together, that working with LUMIX becomes super intuitive and straightforward – which is exactly what I look for in a camera.
Ever since I upgraded to the Lumix S5II, the quality of my content advanced to a higher level, and with the 24.2 megapixel sensor, I’m able to print bigger and higher-quality fine art prints too.

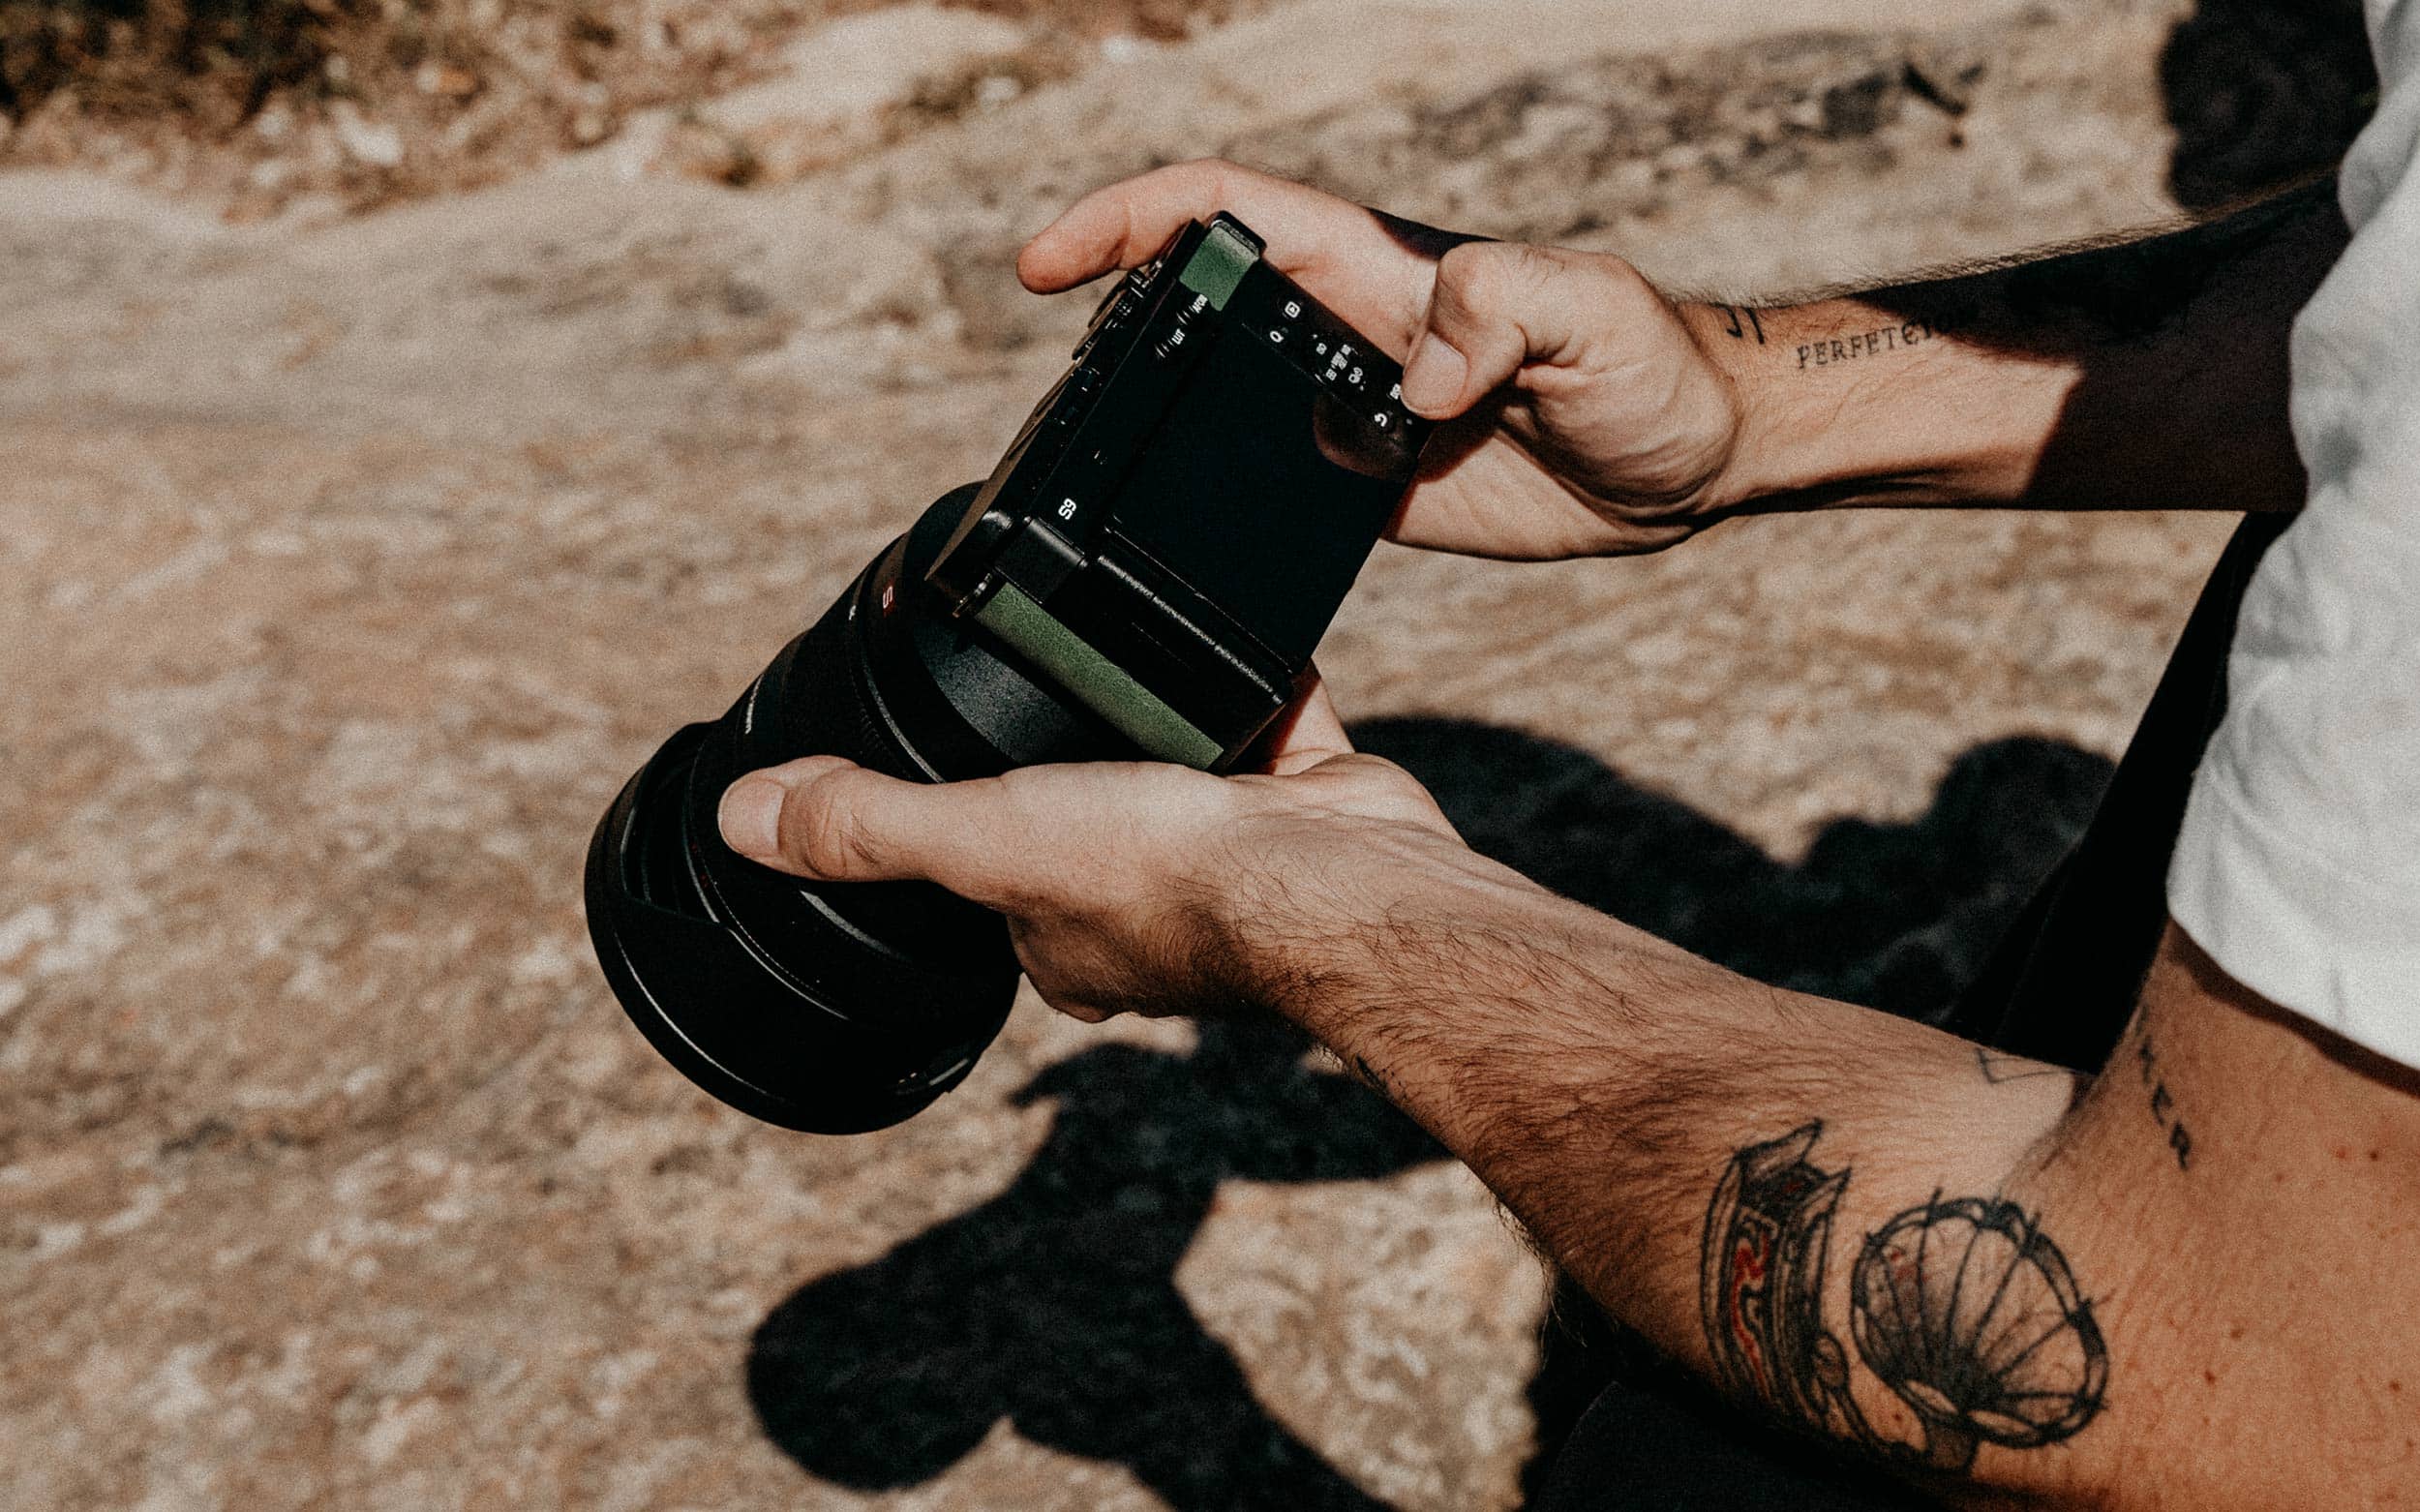
The Panasonic LUMIX S9
Compact, super sleek design, lightweight, and razor-sharp, the LUMIX S9 is the newest addition to my camera gear setup, and instantly became my weapon of choice when going for a roam around a yet-to-discover place and don’t want to take out loads of heavy camera gear.
The reason for this is the fact that it is super easy to carry around, and extremely straightforward to work with, while still having an impressive 24.2 megapixel full-frame sensor that provides me with equally as impressive stills as its bigger brother the S5II.
Though I have to admit that I had some initial discomfort when I first started shooting without a viewfinder, working with the S9 has grown on me, and I now know how to use it to my advantage. I do, however, still prefer my S5II, since I simply worship working with the combination of an electronic viewfinder and a joystick – but that’s my personal preference.
Another great thing about the S9, is its battery life, which is second to none, making it the perfect camera for travel and outdoor adventures.
I’ve recently carried it around Valencia for two straight days, and surprisingly still had battery life – Panasonic officially states that you can shoot around 470 shots a battery, which is truly something special if you ask me
While I only just started shooting with it, I already figured that the S9 is a beast for stills. Add to that a weight of only 486 grams, and the fact I can easily switch my lenses between the S9 and S5II, and I’m pretty sure I will value it even more as time goes on.
My Lenses
Sigma 24-70MM F2.8
The Sigma 24-70MM F2.8 is by far my favourite lens and is basically always mounted to my Lumix S5.
The wide zoom range gives me the freedom to shoot beautiful landscape stills, while it’s also a brilliant lens to shoot street photography and portraits.
While it’s slightly larger than other 24-70MM lenses, the F2.8 makes it one of the most versatile zoom lenses in this zoom range. Add to that, that it’s insanely sharp and still relatively compact, and the Sigma 24 -70MM F2.8 becomes an excellent option for travel photography.
It’s one of the lenses that I wanted to add to my camera bag for a long time, so when I finally made the purchase, I couldn’t wait to plan my next trip overseas.

Panasonic Lumix 50MM F1.8
This lens was part of my Lumix S5 kit, and despite being a kit lens – the Lumix 50MM F1.8 has been an absolute beast.
With its F1.8, this lens is extremely sharp and is able to capture an excellent bokeh effect too, making it the perfect lens for street photography and portraits.
It also performs incredibly well in low-light situations, which makes shooting at night a lot more fun.

My drone
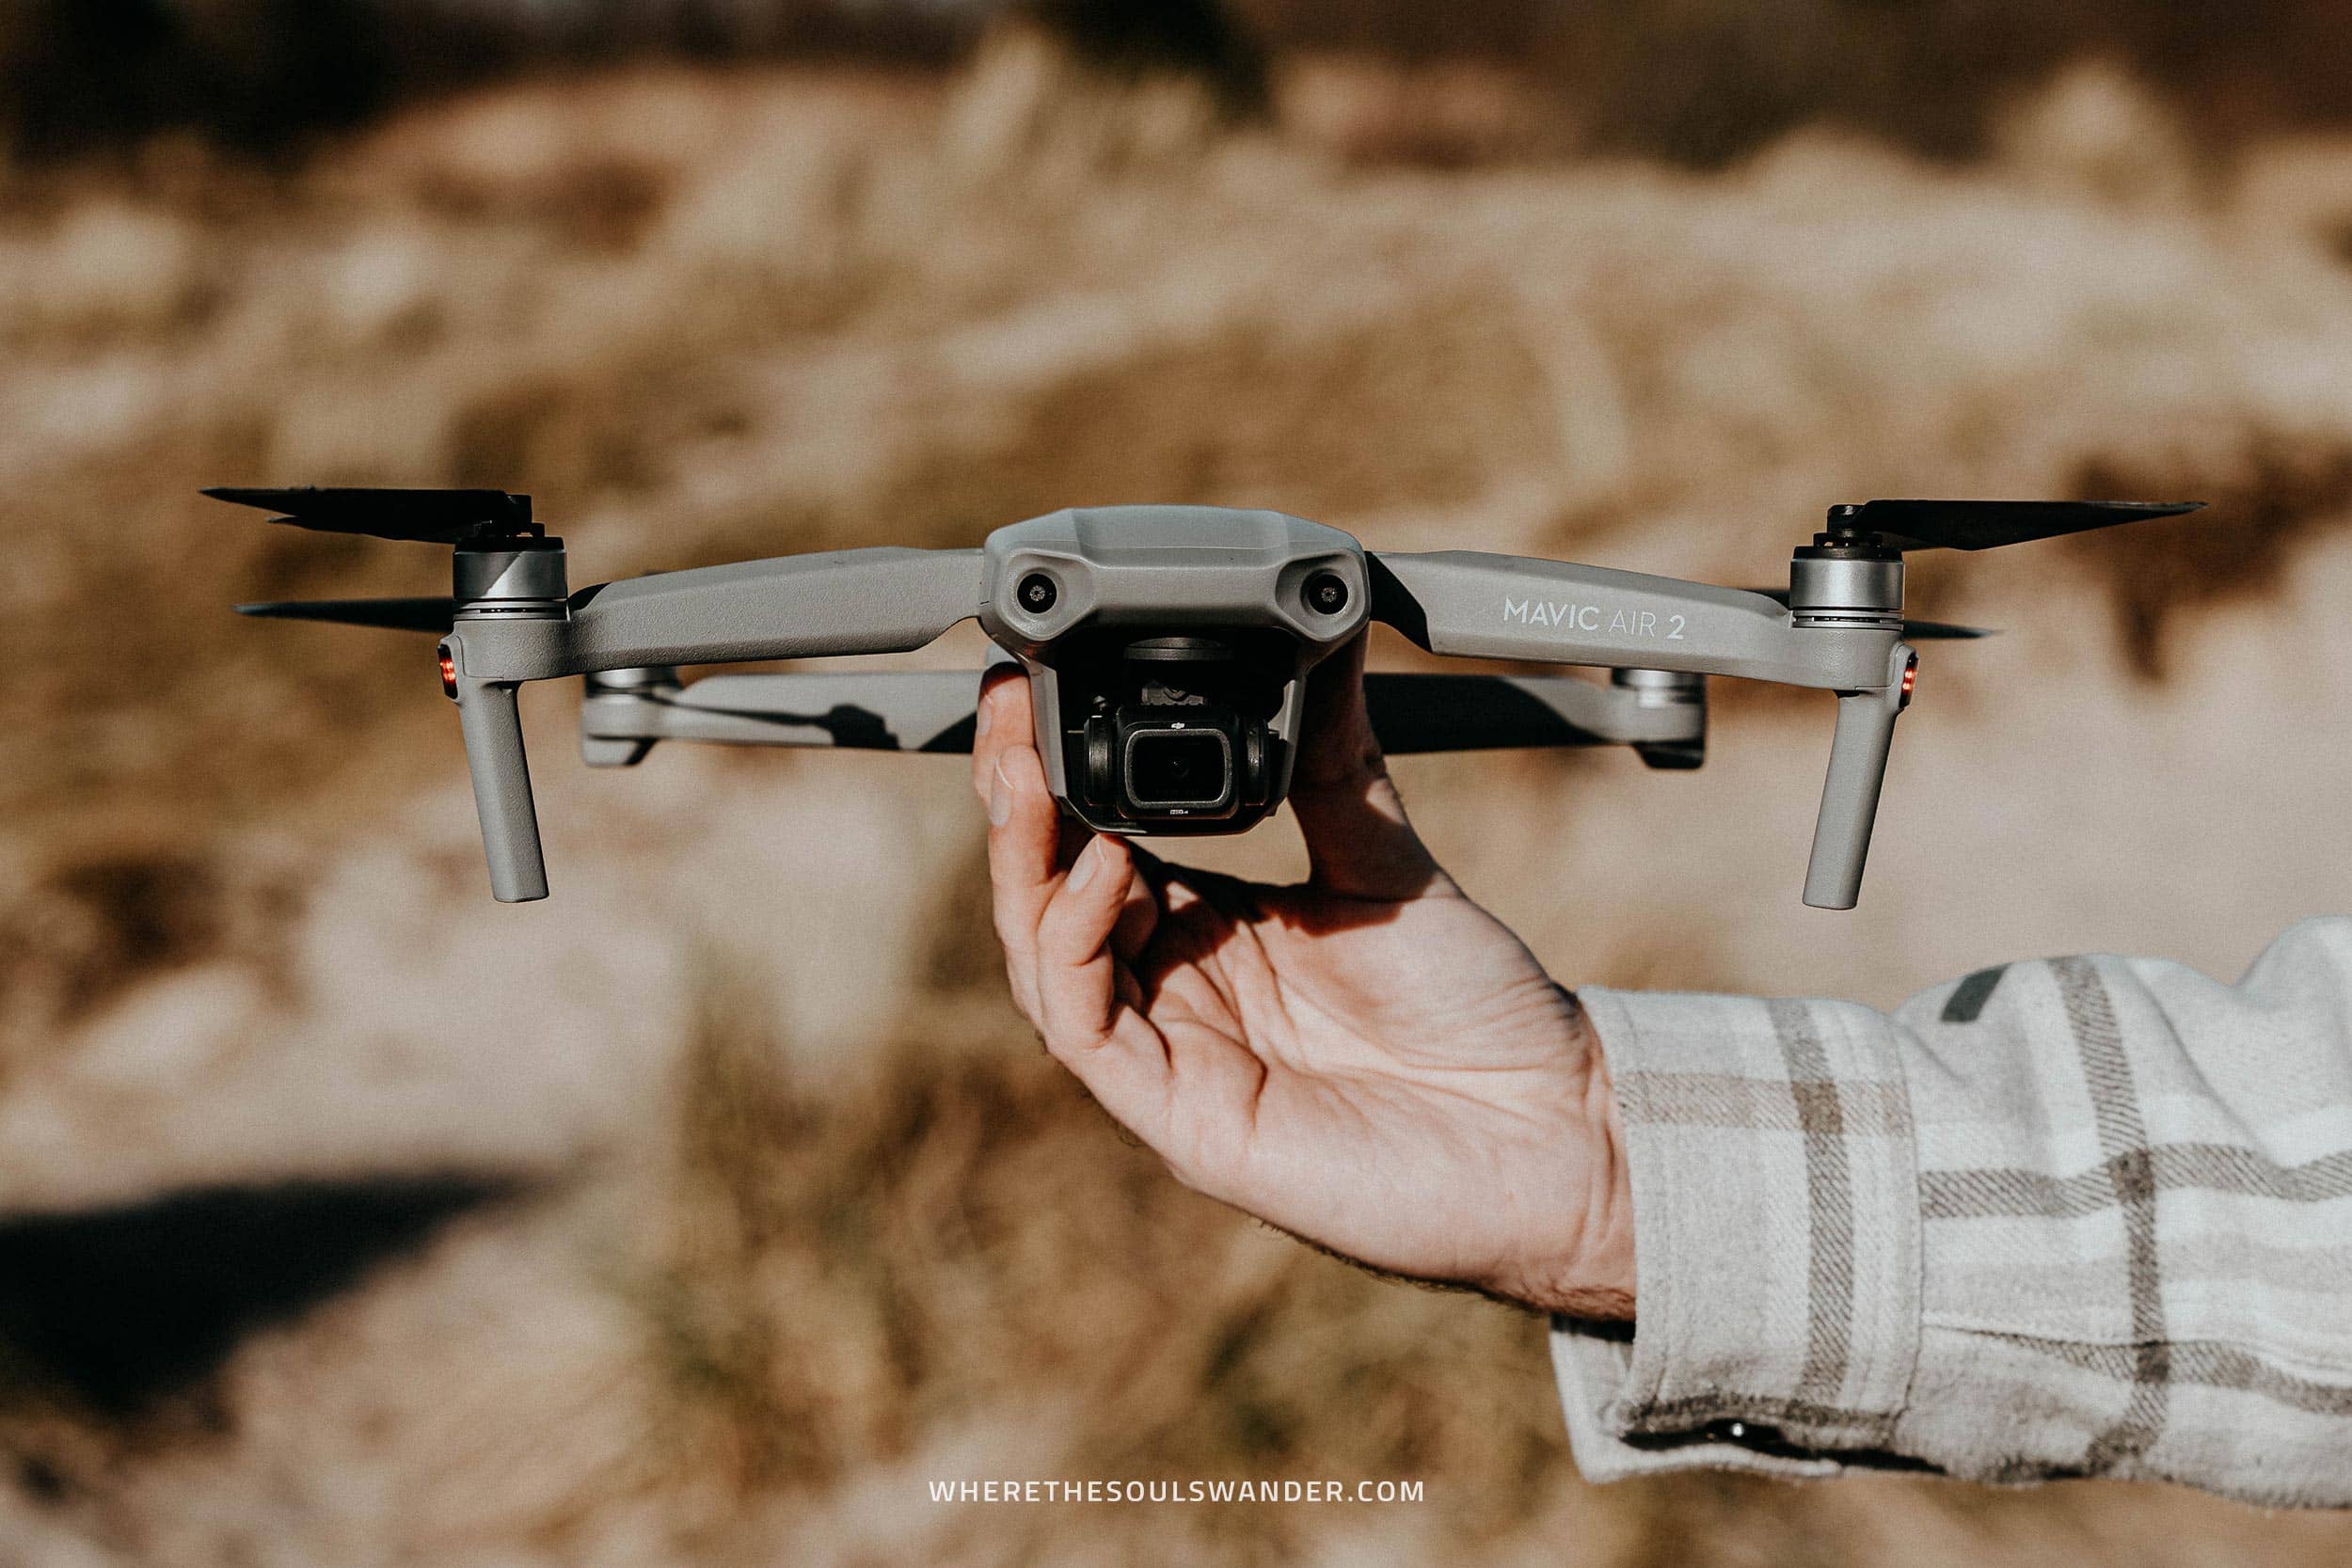
DJI Mavic Air 2
After using the DJI Mavic Air for over two years to get my aerial shots, I chose to replace it with DJI’s newer model; the Mavic Air II. To this day, I’m still pretty stoked about the upgrade.
The reason why I chose the Mavic Air II, is that it’s much lighter than DJI’s Mavic Pro series, while it still shoots high-resolution images in JPEG + RAW as well as high-definition 4K video, which makes it the perfect drone for travelling.
If there’s one thing that adds a new dimension to your travel photography game, it will definitely be the purchase of a drone.
For me, my drone has quickly become my favourite piece of photography gear, since it provides me with the options to capture a landscape or city from totally different perspectives.
My camera Bag
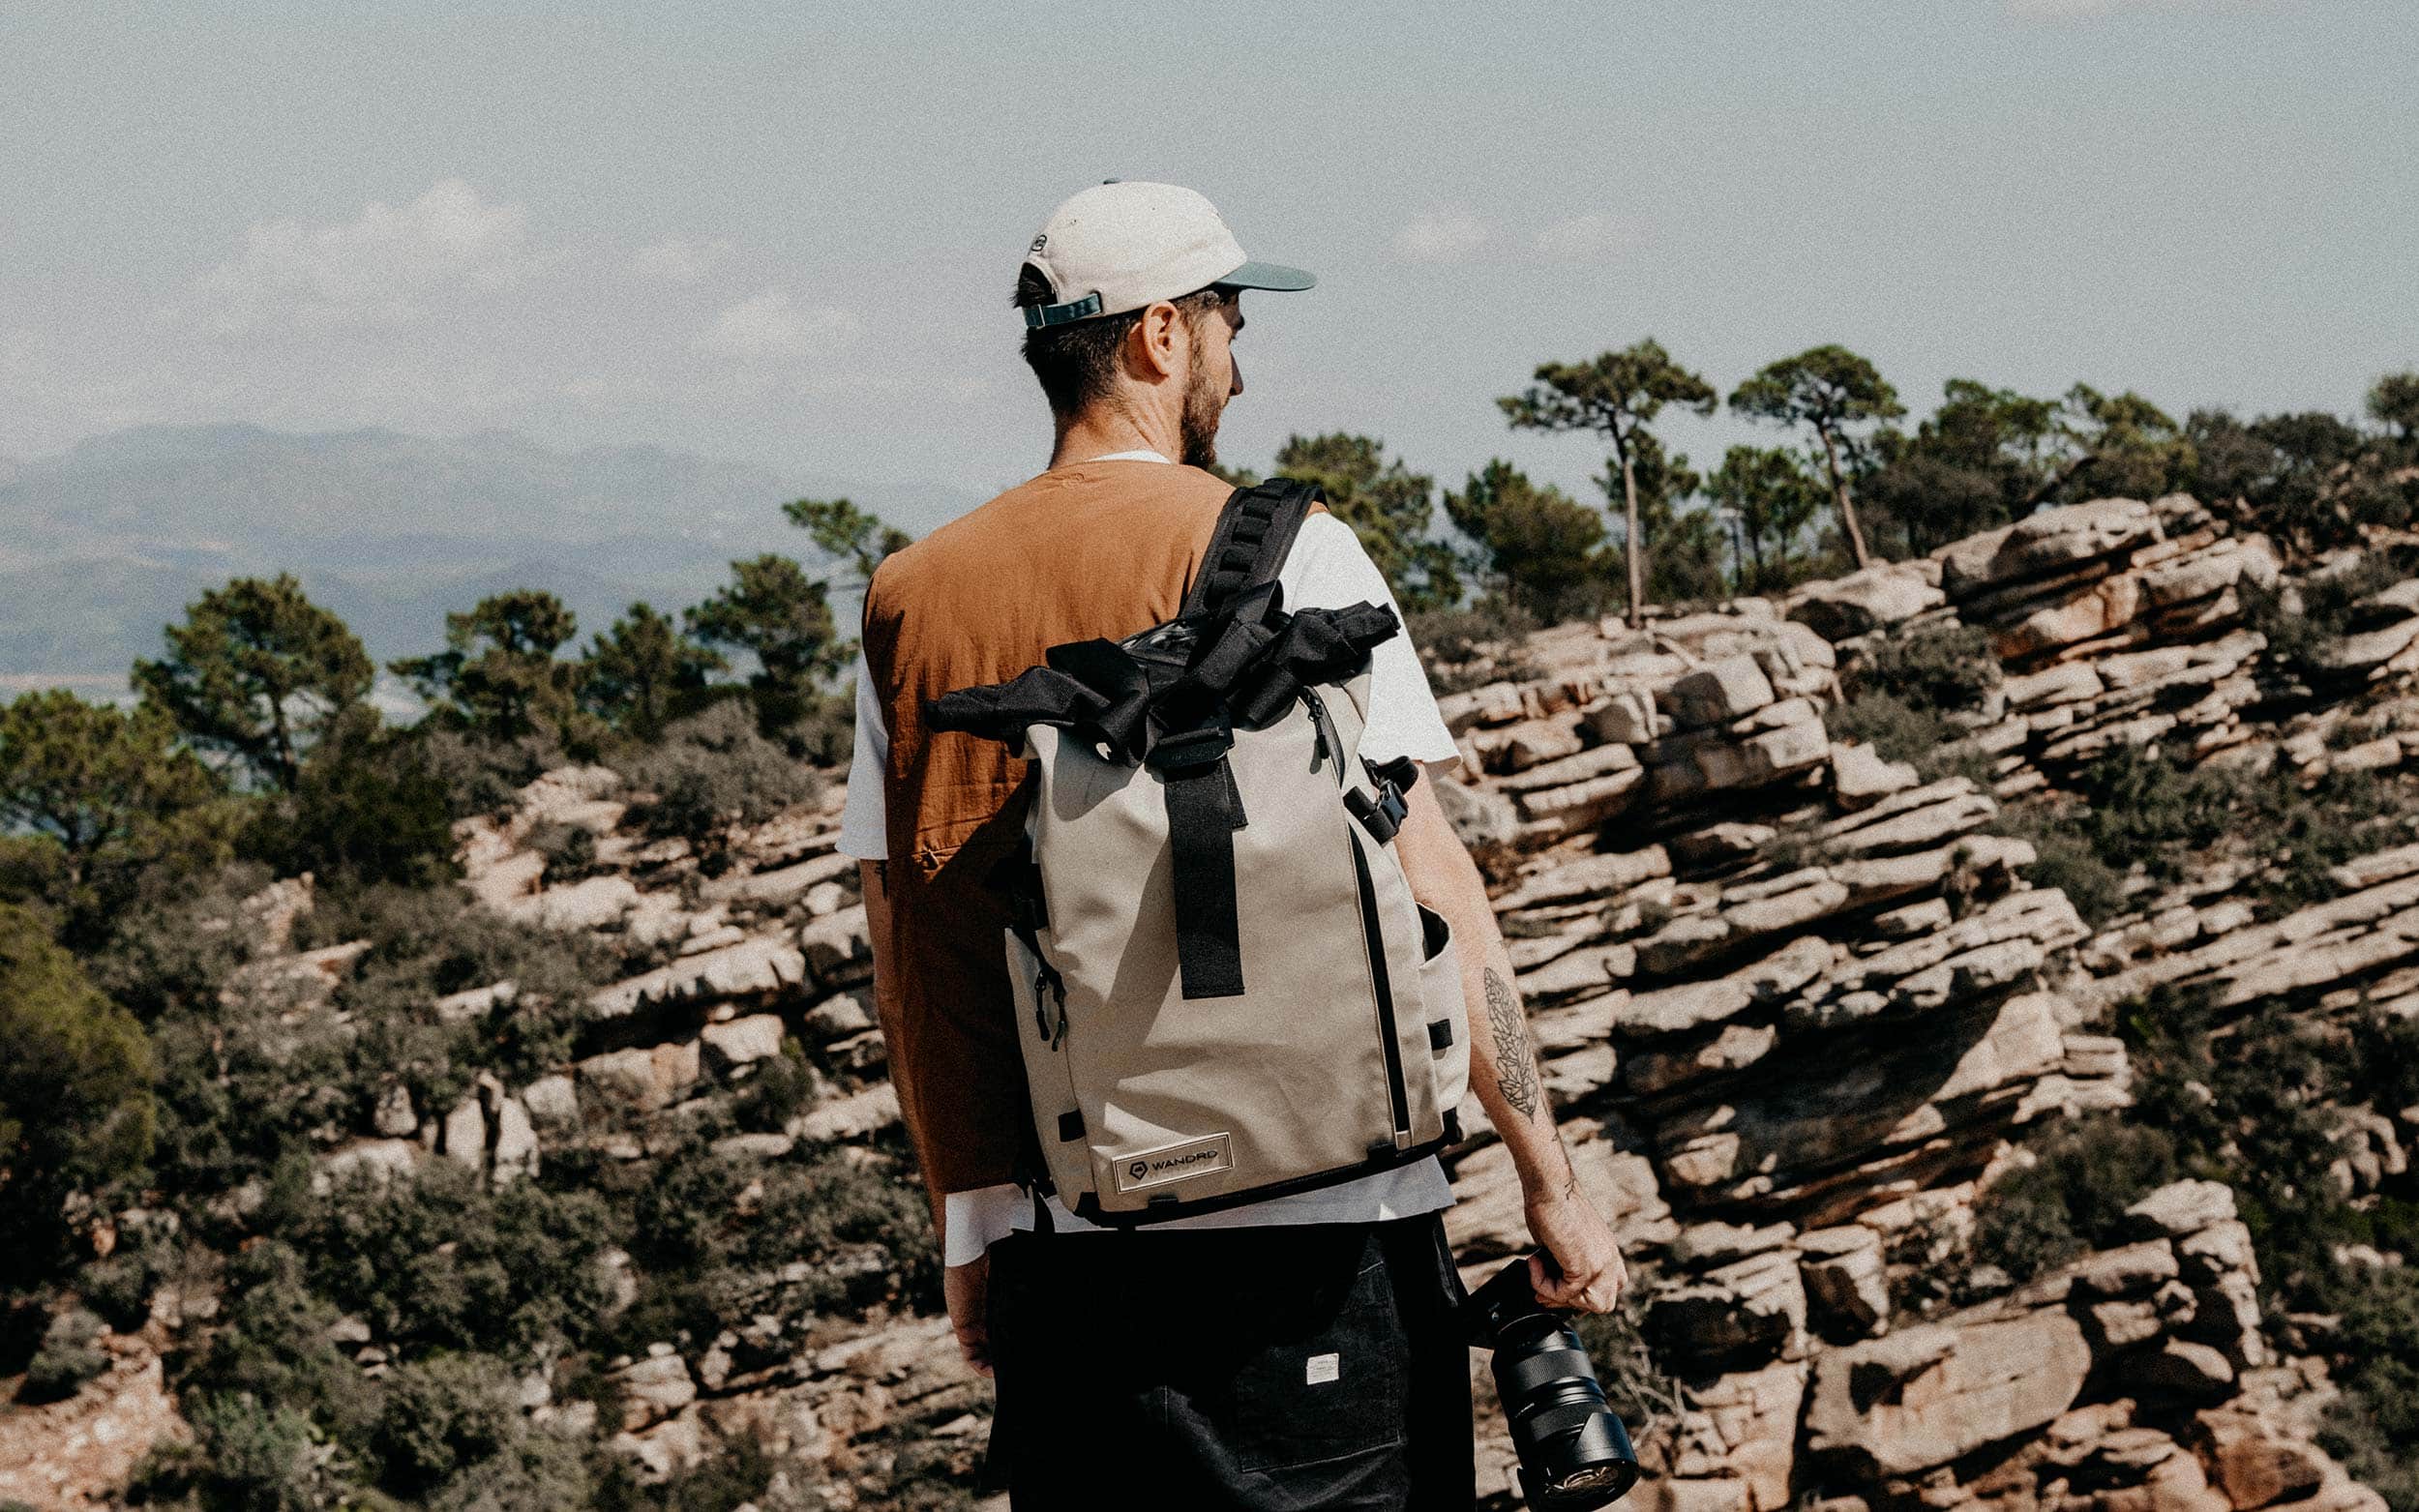
Wandrd PRVKE 31L
My go-to backpack for travel and everyday commuting is the Wandrd PRVKE 31L, a well-thought-out backpack with all the innovative spaces to keep my camera gear protected and organized in tough situations and environments.
The award-winning PRVKE backpack has a separate laptop sleeve, a secure passport pocket, and the possibility to organize your camera gear as exactly as you wish, to name but a few of the many handy features.
On top of that, the PRVKE is weather resistant and pretty damn comfortable, which for me, is an absolute must when you’re carrying around tons of heavy camera gear.
My camera accessories
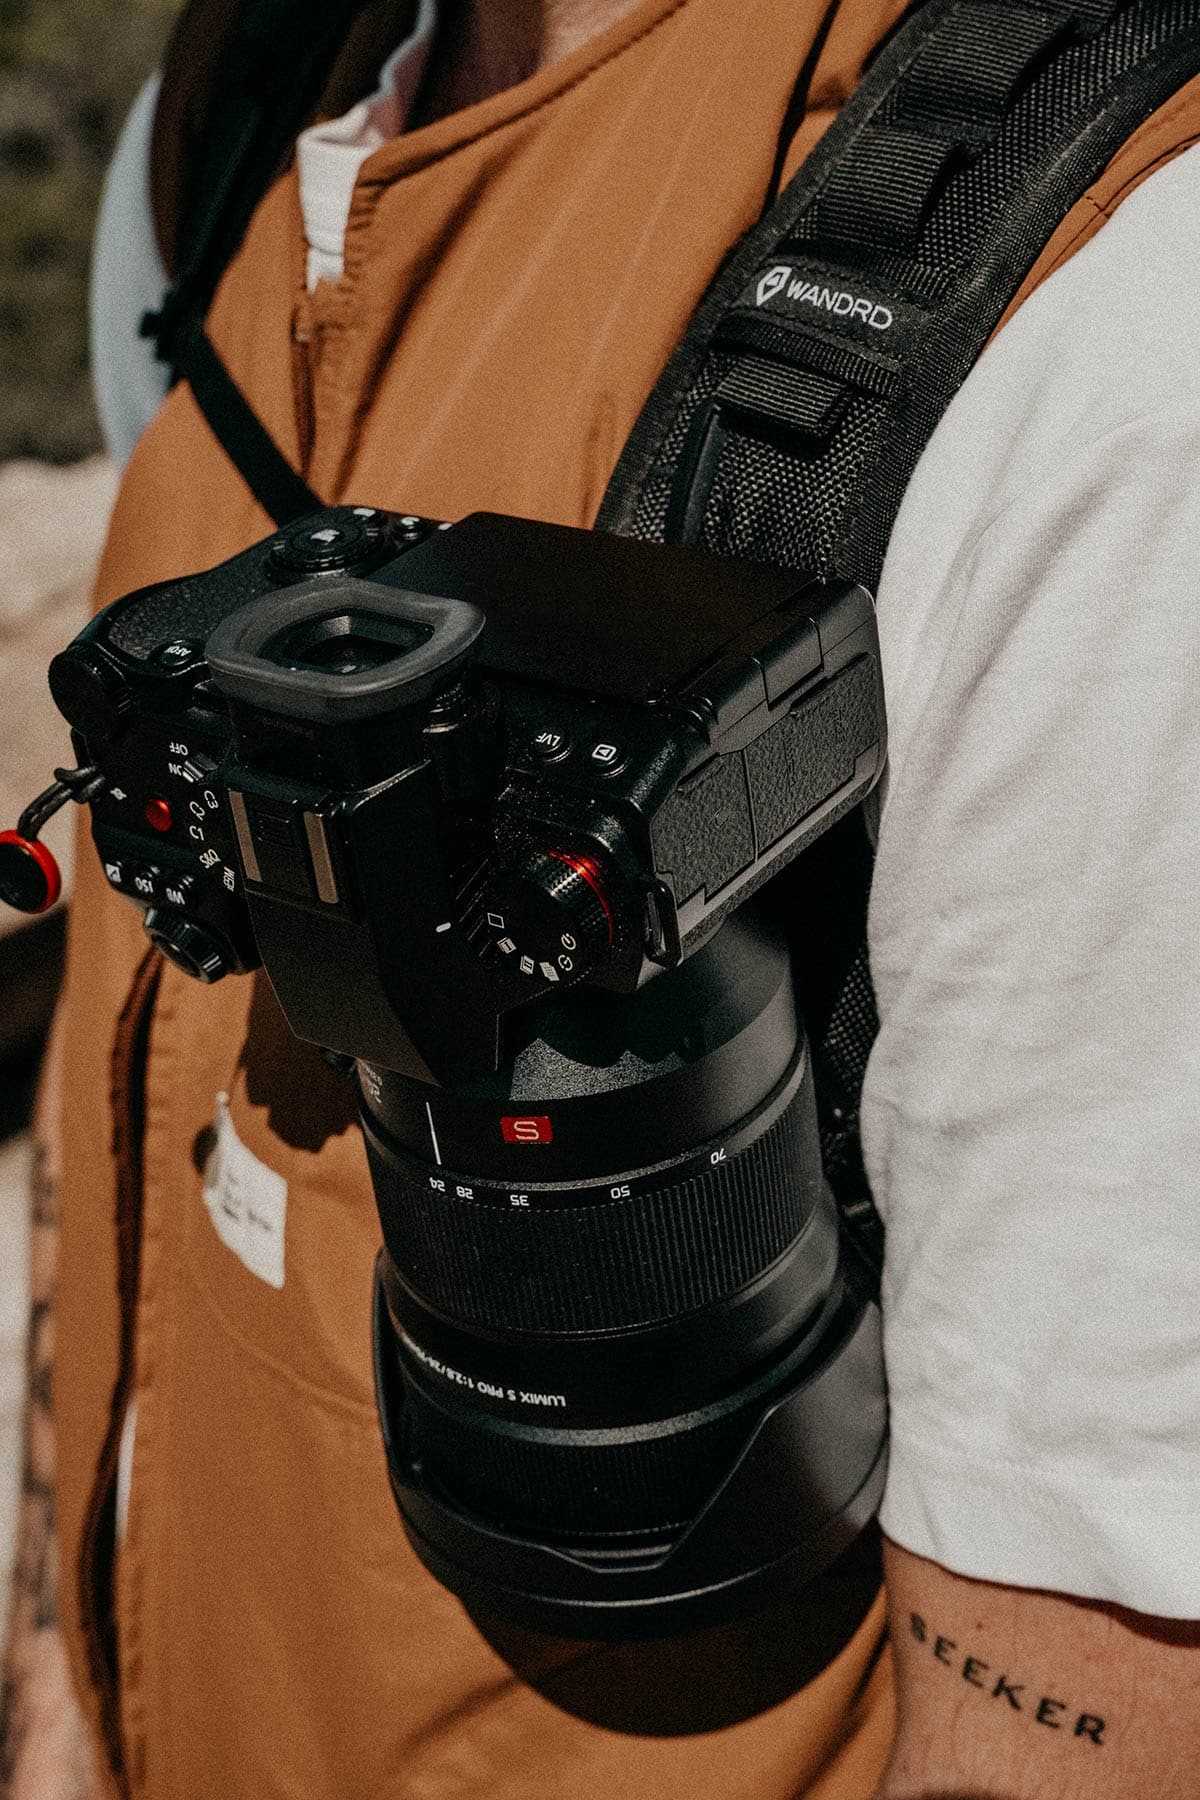
Peak Design Capture
My favourite piece of gear by a milestone, the Peak Design Capture clip is an easily accessible camera clip that gives quick access to your camera, while also keeping your camera stable and secure.
One of the greatest advantages of the Peak Design Capture is that you will have your camera in hand reach at all times, meaning you’ll easily capture a spontaneous scene.
On top of that, I feel confident when my camera is attached to the capture during my travels since it’s stable and completely locked while hiking or wandering around a jam-packed city.

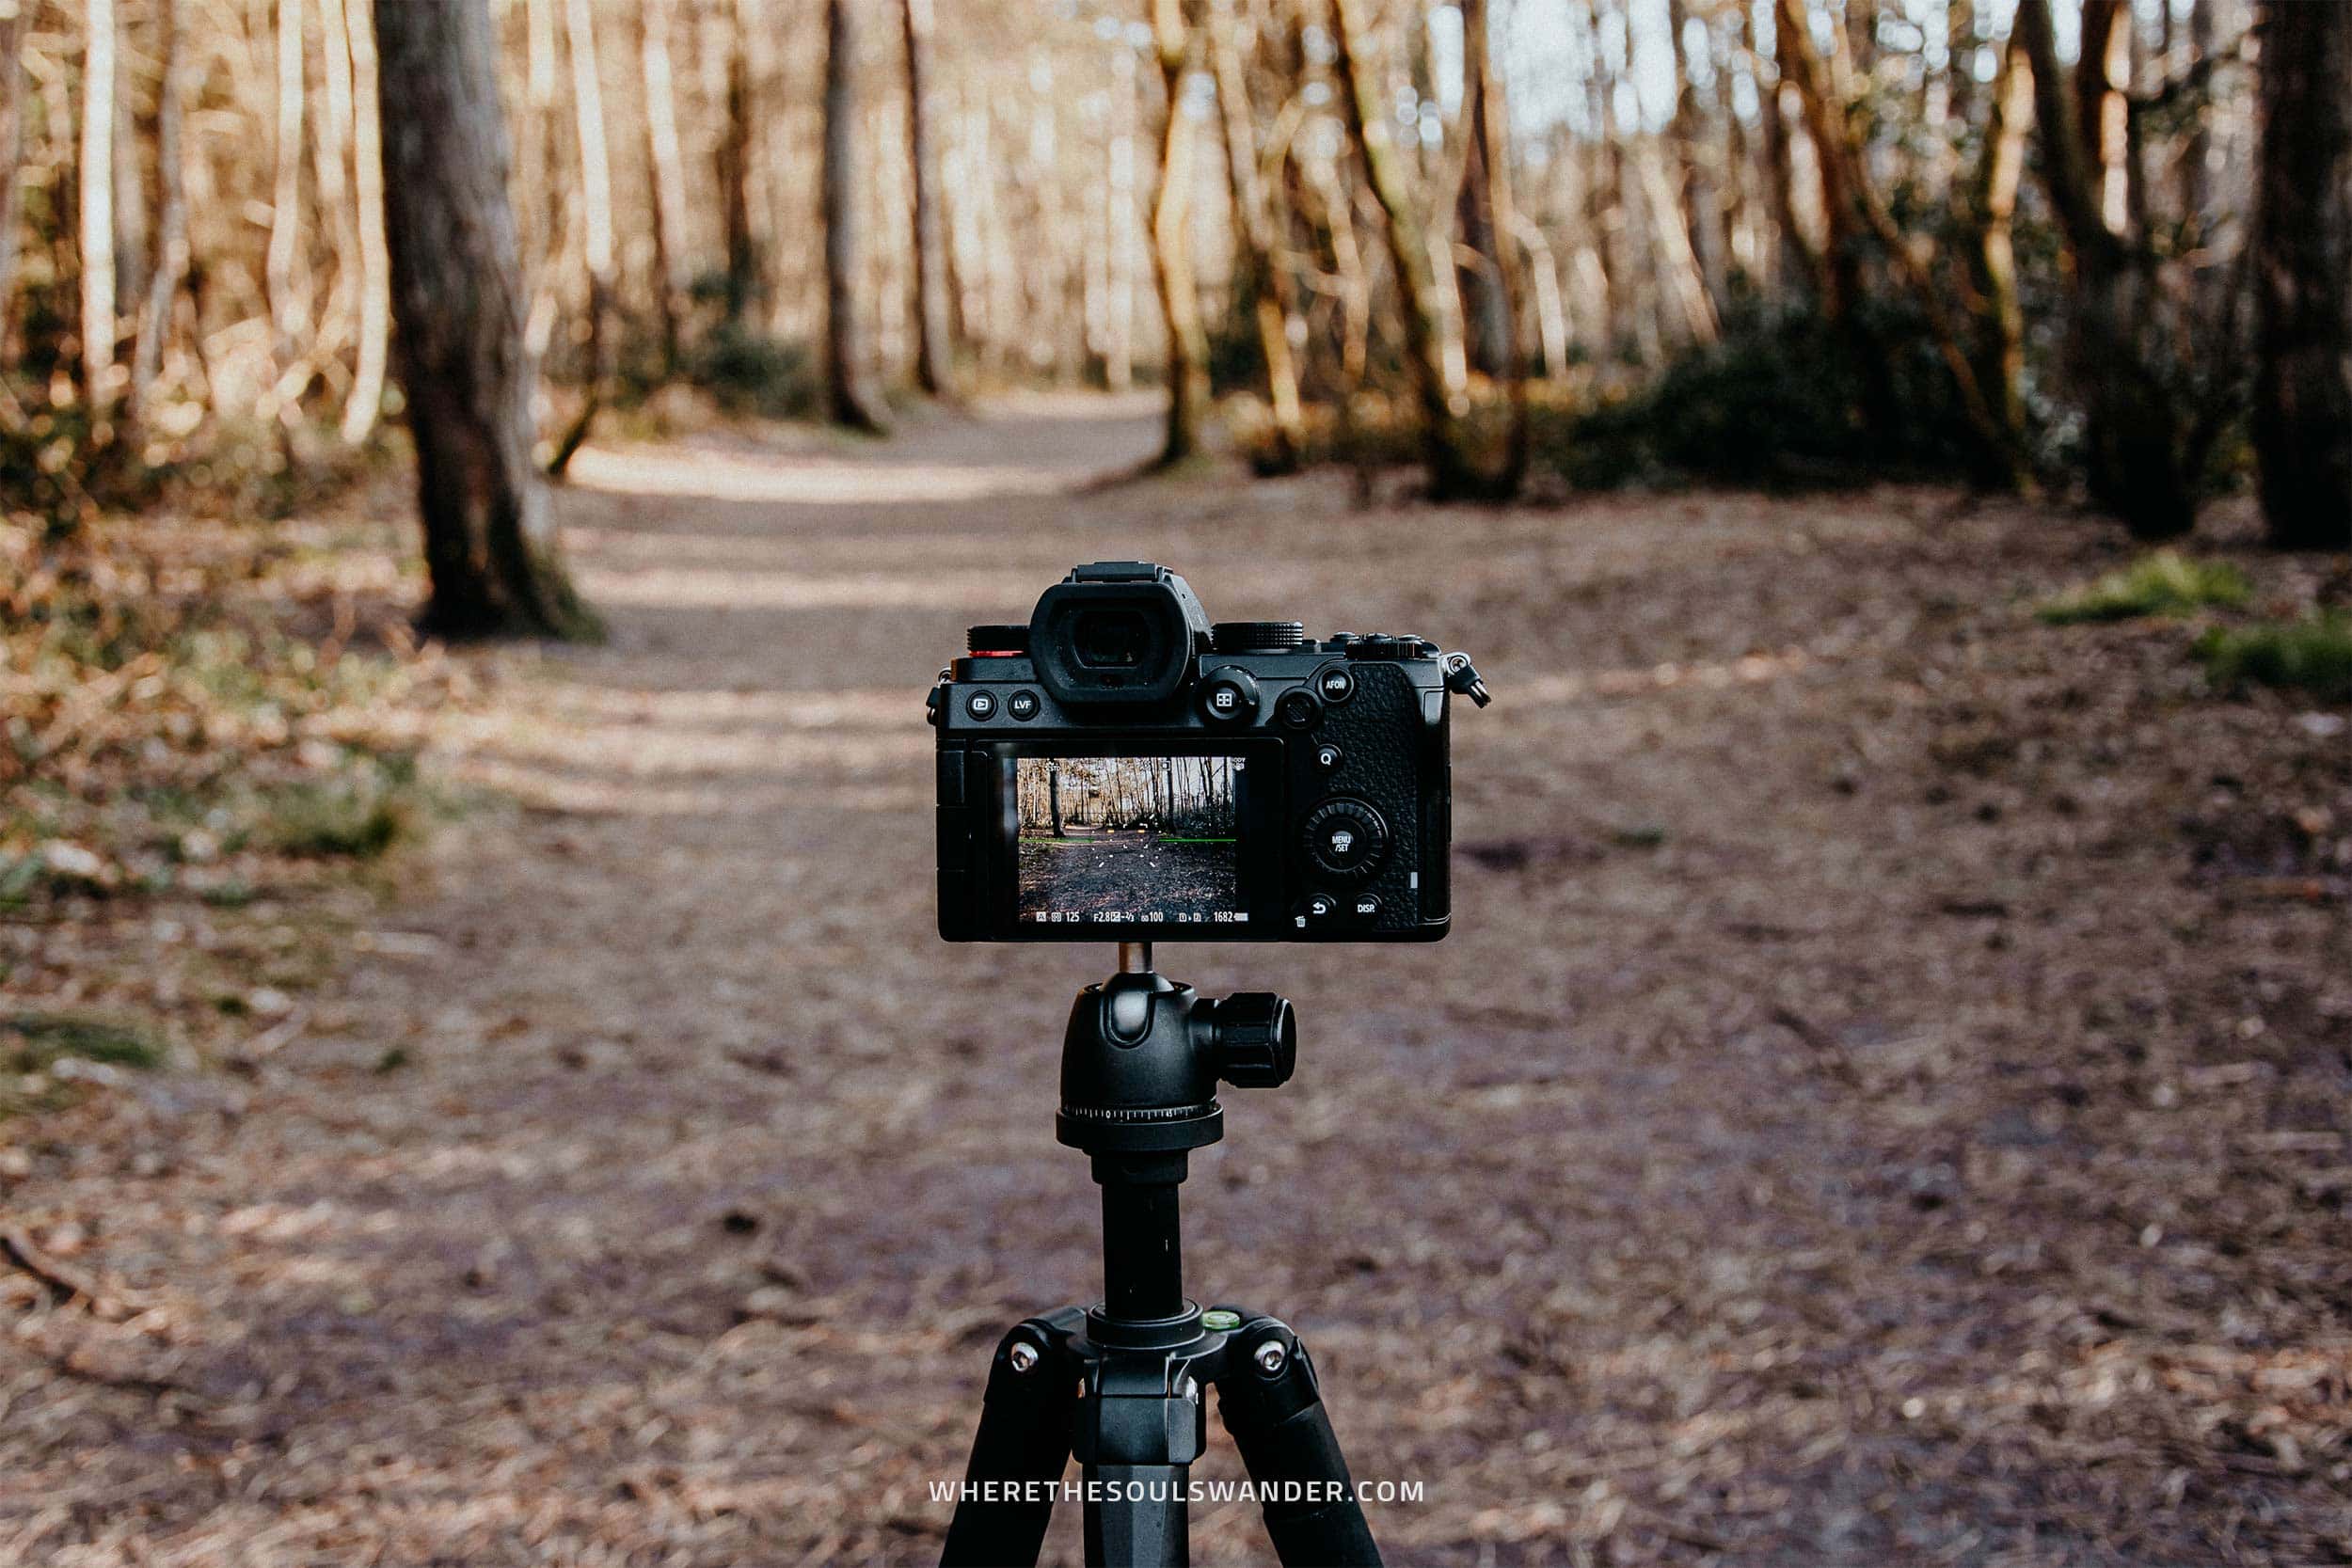
Cullmann Nanomax 400T Tripod
As a travel and landscape photographer, a tripod has become an essential part of my photography gear.
I often use my Cullmann Nanomax 400T Tripod in low light situations, or when I use the bracketing function of my camera to get the sharpest possible image of an incredible piece of scenery.
Additionally, it comes in extremely handy when getting shots around sunsets, sunrises and night.
In some cases, I also use it to get a shot with myself in it.
Since the Cullmann Nanomax 400T is rather compact, it is a perfect tripod for travel.
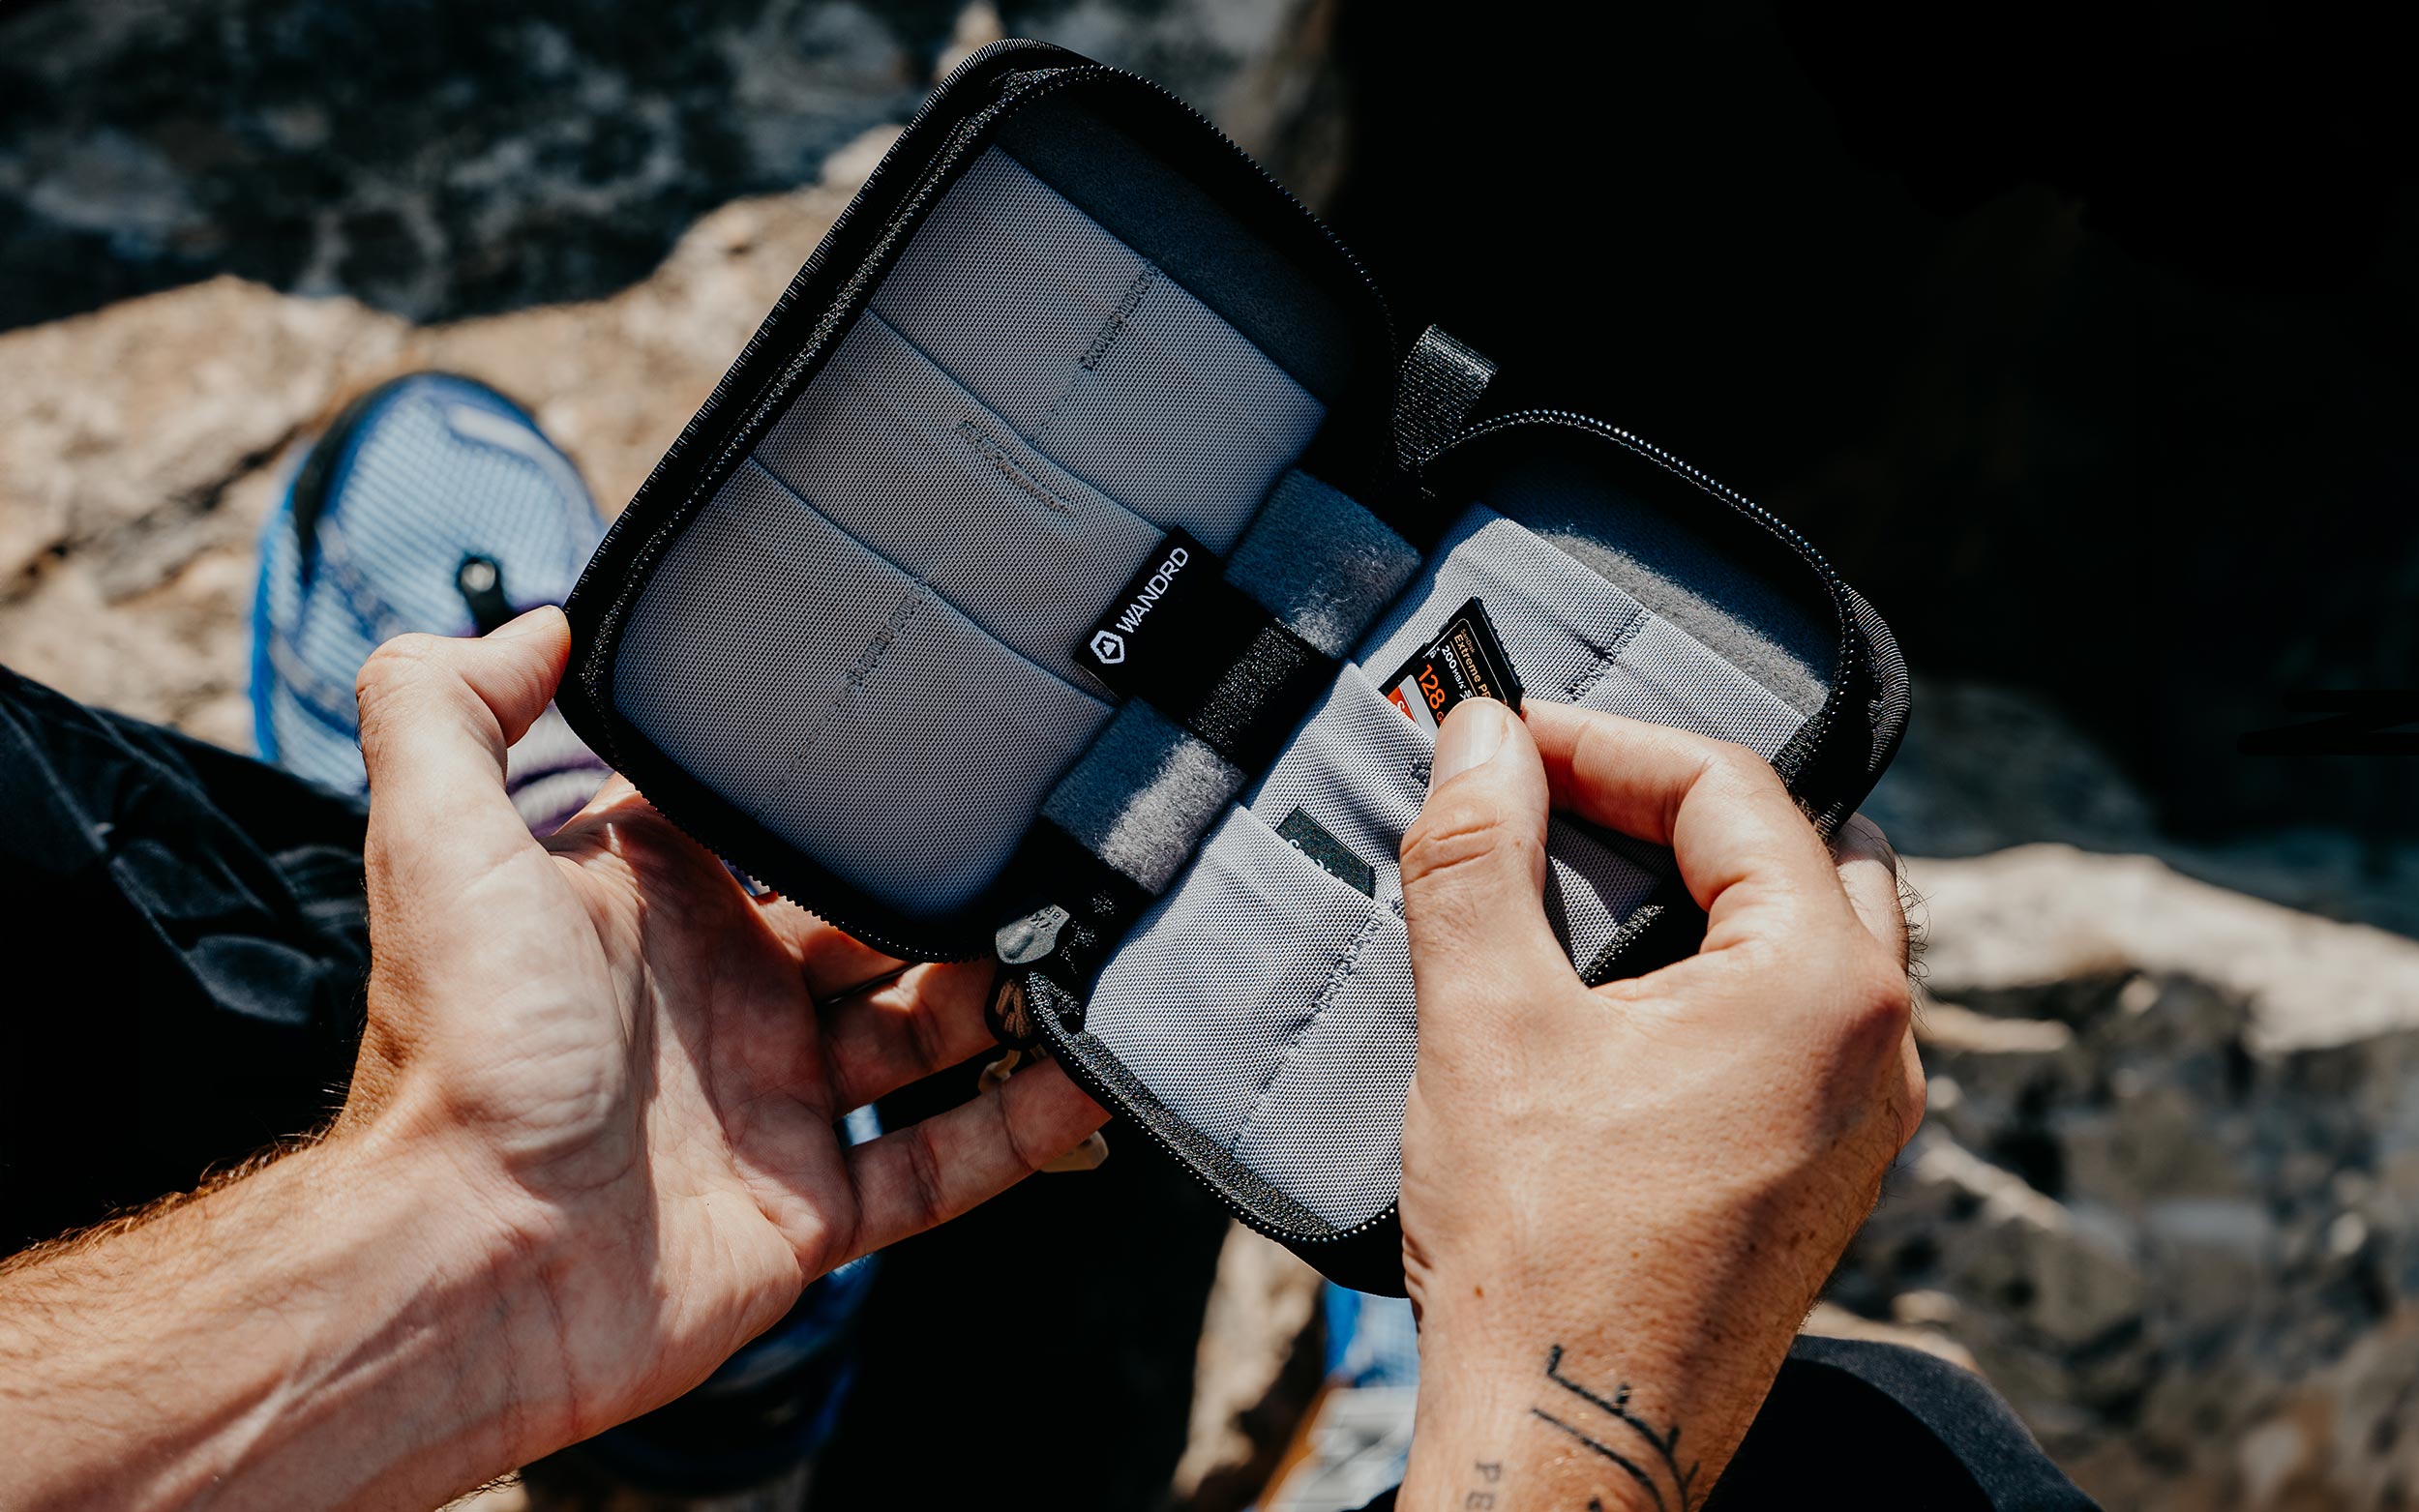
SanDisk Memory cards
Since I shoot in RAW with high-quality photography gear, I need quite a few SanDisk SD cards to keep me shooting while on the road.
My favourite option, and the one I keep coming back to again and again, are the SanDisk Extreme Pro, cards as they’re one of the fastest and most reliable options on the market.
With speeds of up to 300MB/s read and 260MB/s write, these SD cards can handle quite an impressive workload, which is of great value for my post-production workflow too.
Seagate Hard drives
To keep my content organized, I always have a Seagate Hard Drive within my backpack, so I can efficiently back up my photos during a trip.
As soon as I come home from my travels, I make an extra backup on a separate hard drive – cause we all know, losing your footage is the worst thing that could happen to a photographer.

Cleaning Kit
To me, nothing is more important than keeping my expensive lenses dust and fingerprint-free.
From my experience it doesn’t matter how mindful you are, there’s always a chance that you’ll find one or two greasy fingerprints on your lenses – that’s where a cleaning kit comes in handy.
For that reason, I’m always carrying a few microfiber Lens cloths and a lens pen to clean my glass. Additionally, I also use an air blower when there’s dust on my sensor.
MacBook Pro
My MacBook Pro is the foundation of all the work I do online, whether it’s editing photography, writing a new article or designing a logotype.
Not only is a MacBook Pro lightweight, but it also has the power to perform tasks with a heavier workload, such as editing photography for my blog or composing a video for Instagram or YouTube.
On top of that, I use it to sort out my accommodation, car rental and flights when on the road.

Adobe Lightroom + Photoshop
Over the course of my photography journey, I realized how many advantages a thoroughly thought-out post-production workflow impacts the quality of my photography.
With a background in graphic design, I started off right instantly, since I had the knowledge that the Adobe Creative Cloud software was ahead of the game.
While I personally use the complete Creative Cloud plan, I’d believe subscribing to the photography plan and learning how to use Adobe Lightroom + Photoshop is the best advice I can provide if you’re keen to elevate your photography by means of post-production.
While it might take quite some time to figure things out, it’s a brilliant piece of software that will help you create a style and add a distinctive look and feel to your images.
The photography plan comes as a monthly subscription via Adobe Creative Cloud, and start at $13,29 (€12,09) per month. For more information, visit the official Adobe website, and don’t forget to click on the link to receive a free 7-day trial.
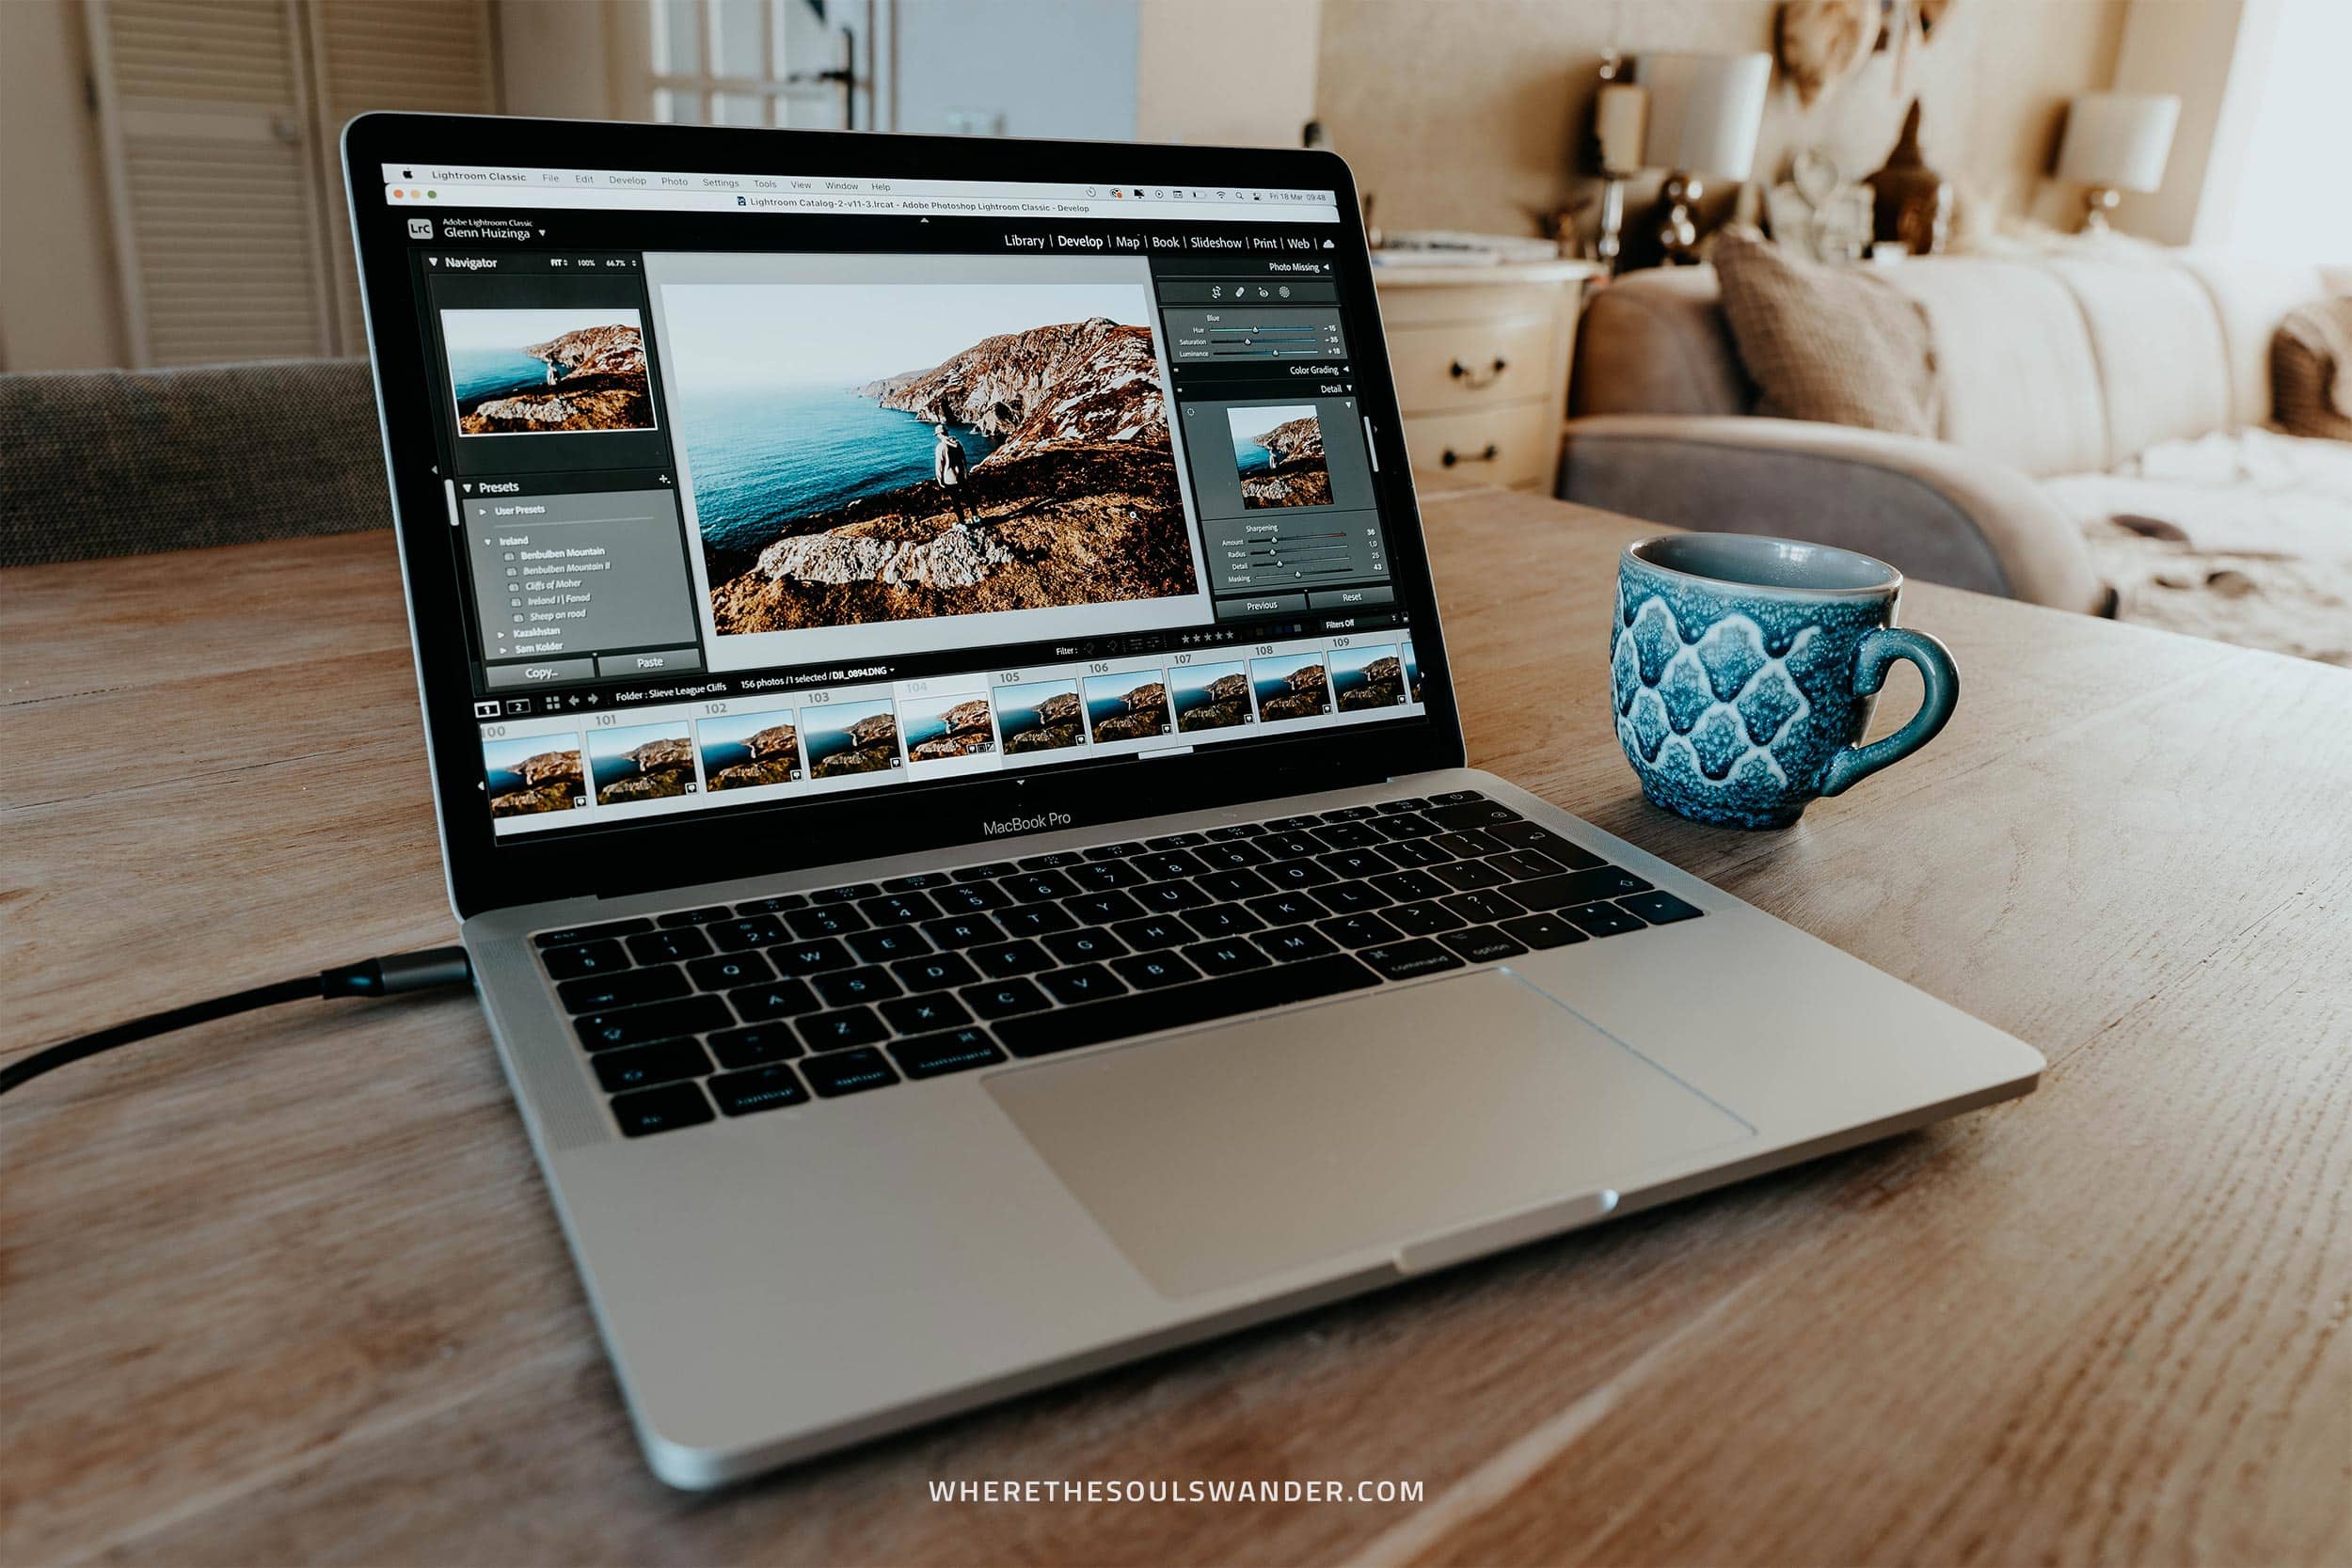
Cheers!
I’ve been on this travel blogging journey since 2019.
If you appreciate what I do here, these are some ways you can support me.
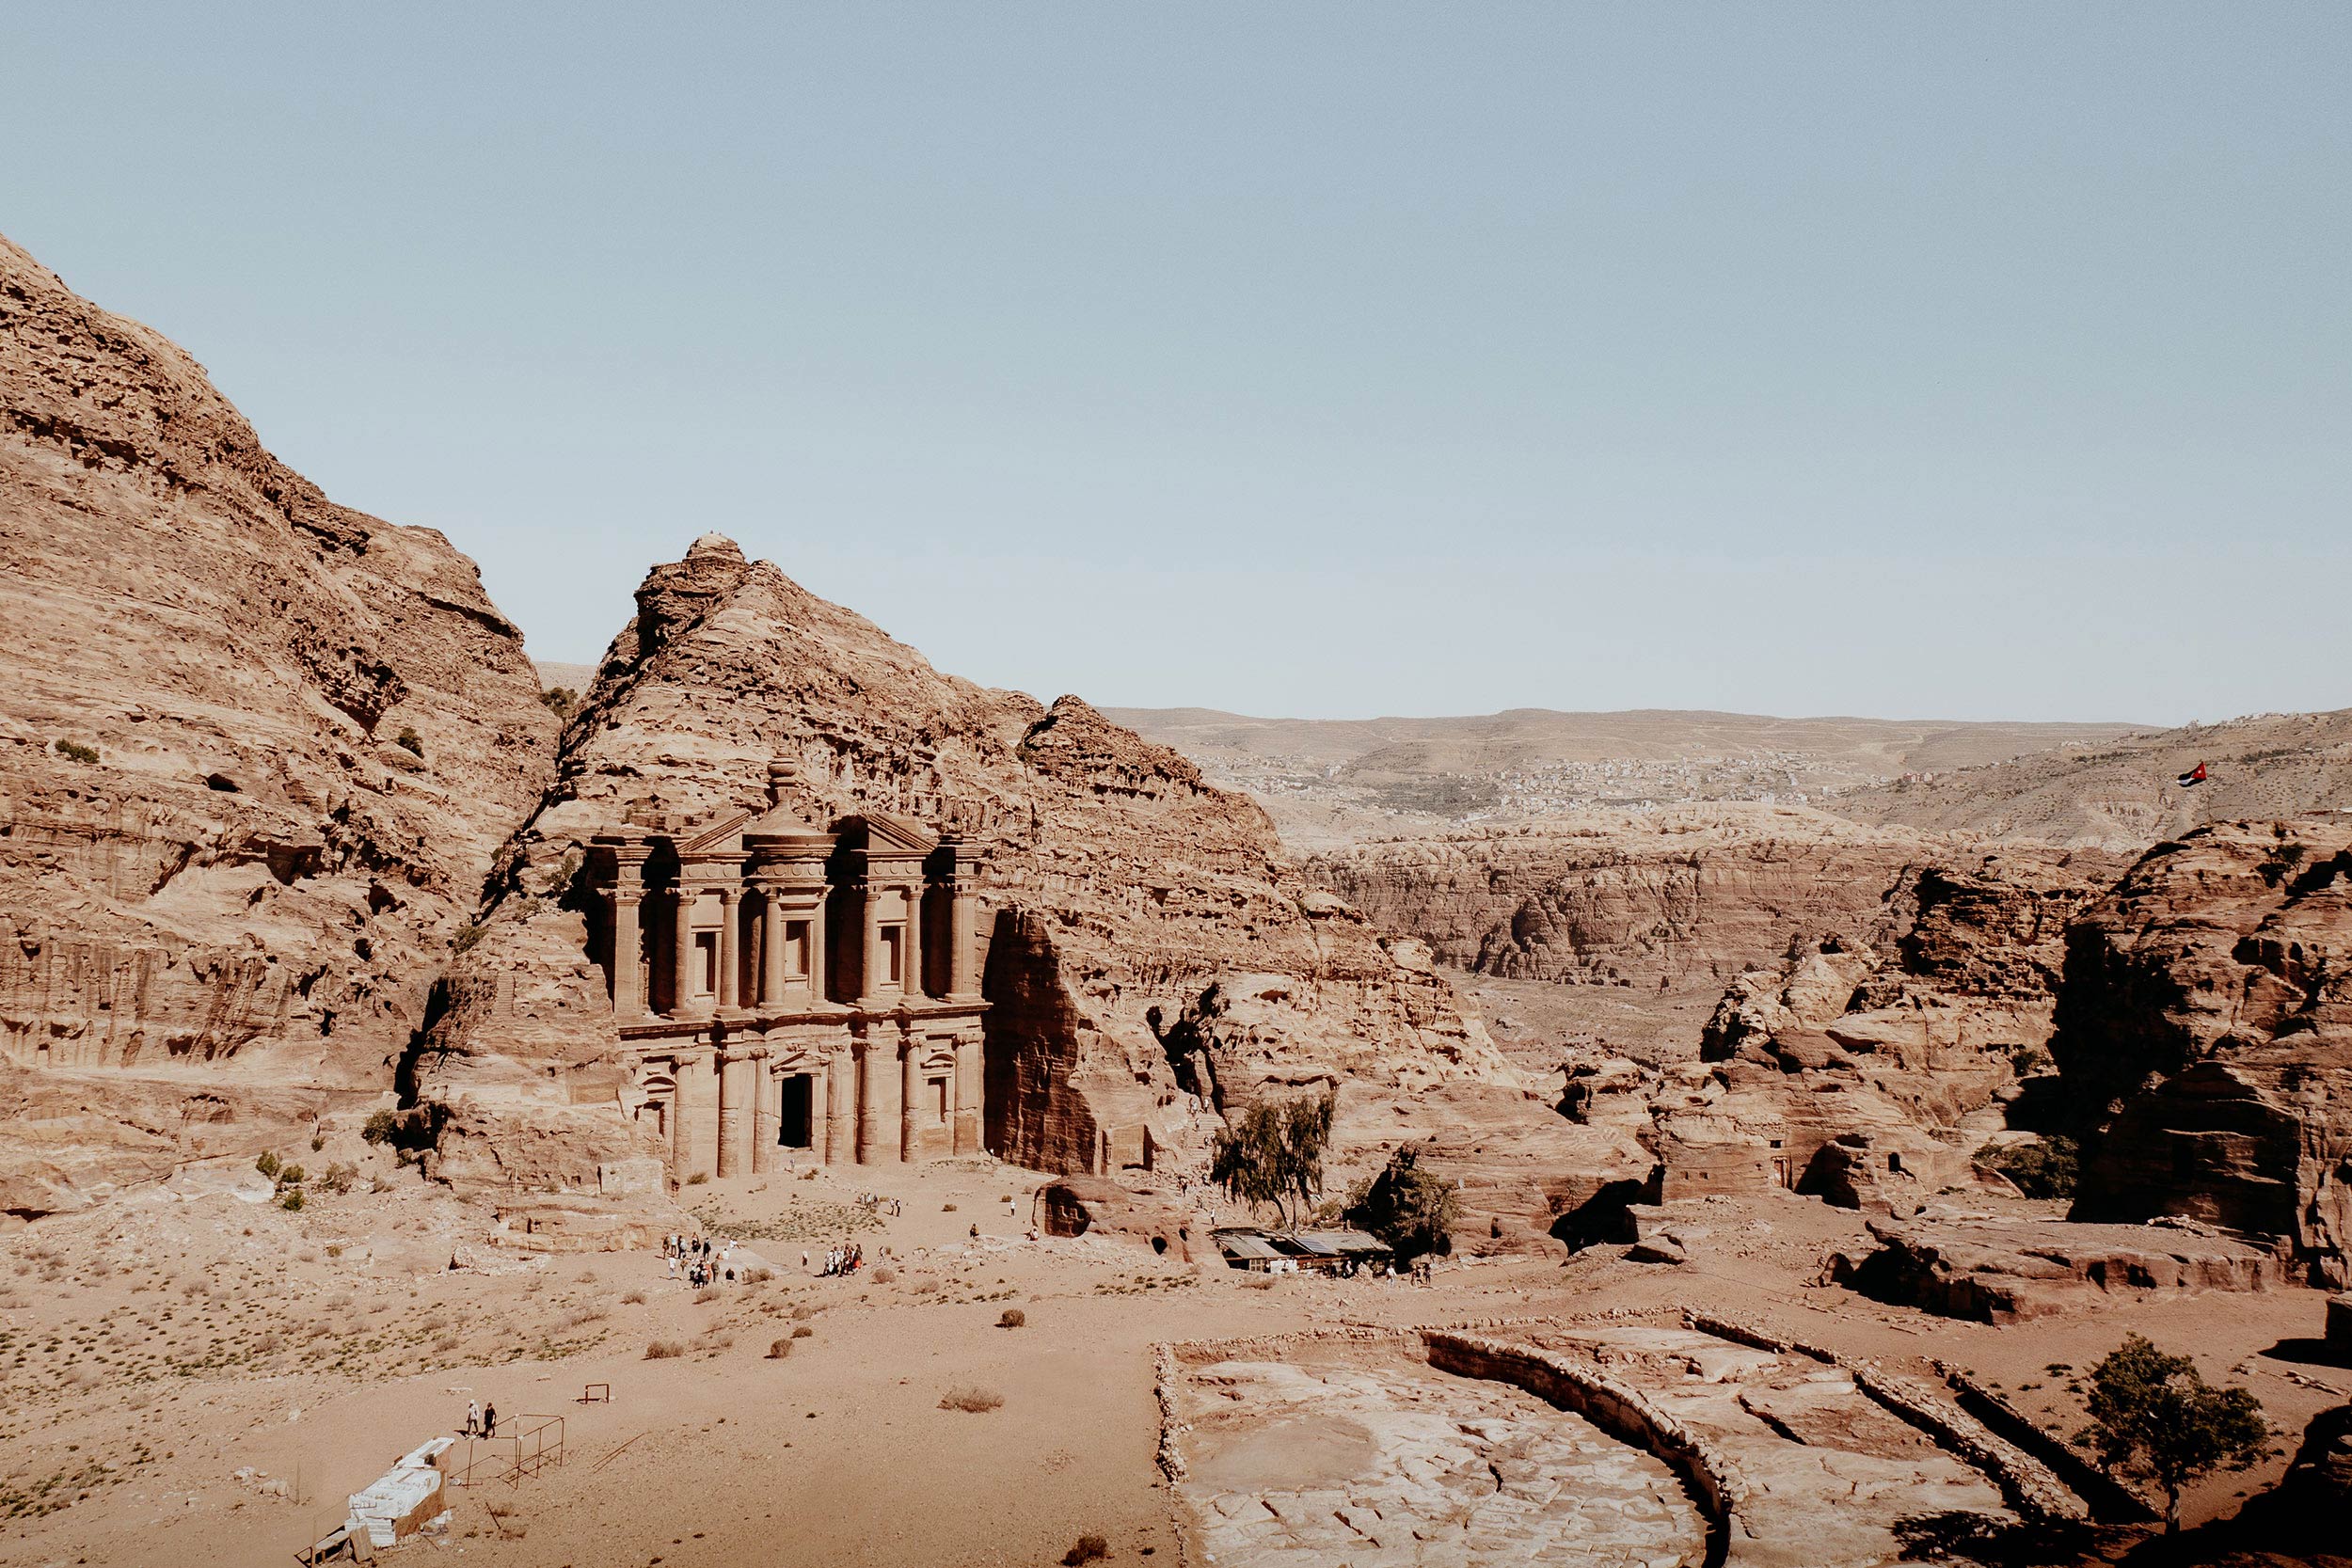
The Jordan Pass: 8 useful tips to get you going (2022 update)
It’s fair to applause the Jordan tourism board, as they made it incredibly easy to explore the country’s major tourist attractions.
With the clear initiative to help travellers throughout their journey in Jordan, they designed the Jordan Pass; an all-in-one sightseeing package that will save holders money, while also letting them travel more efficiently.
With access to over 40 tourist attractions, including Petra, Wadi Rum and Jerash, and the waiving of the tourist visa fees when staying longer than four days in the country, the Jordan Pass makes for an excellent deal, and certainly one I recommend purchasing.
To help you out, I’ve put together this in-depth Jordan Pass guide, featuring all the essential information, including how it works, the price, where to buy, which options to choose from, and more.
If you choose to use any of the links on this page, I receive a small commission at no extra cost to you. By using these links, you’ll have a direct impact on WTSW and support me to continue to create free insightful travel content for you. If you find any of my tips useful, you can support me by buying a virtual coffee here.
The Jordan Pass: 8 tips to get you going
#1 The Jordan Pass | A brief overview
Tailor-made by the official Jordan Tourism Board, the Jordan pass is the ultimate sightseeing package for those travelling to Jordan.
With the clear ambition to make travelling in Jordan as convenient as possible, the Jordan Pass was made to help visitors make the most of their trip, whilst they also save money and travel more efficiently.
It is good to mention, that the Jordan Pass comes in the form of a personalized digital document that will be scanned upon your arrival in the country, and once you visit the included sights.
Additionally, you can also print your Jordan Pass, since there’s a QR code on the ticket.
I’d personally recommend printing two copies of your pass, in case something happens to your phone and you lose access to your digital pass.
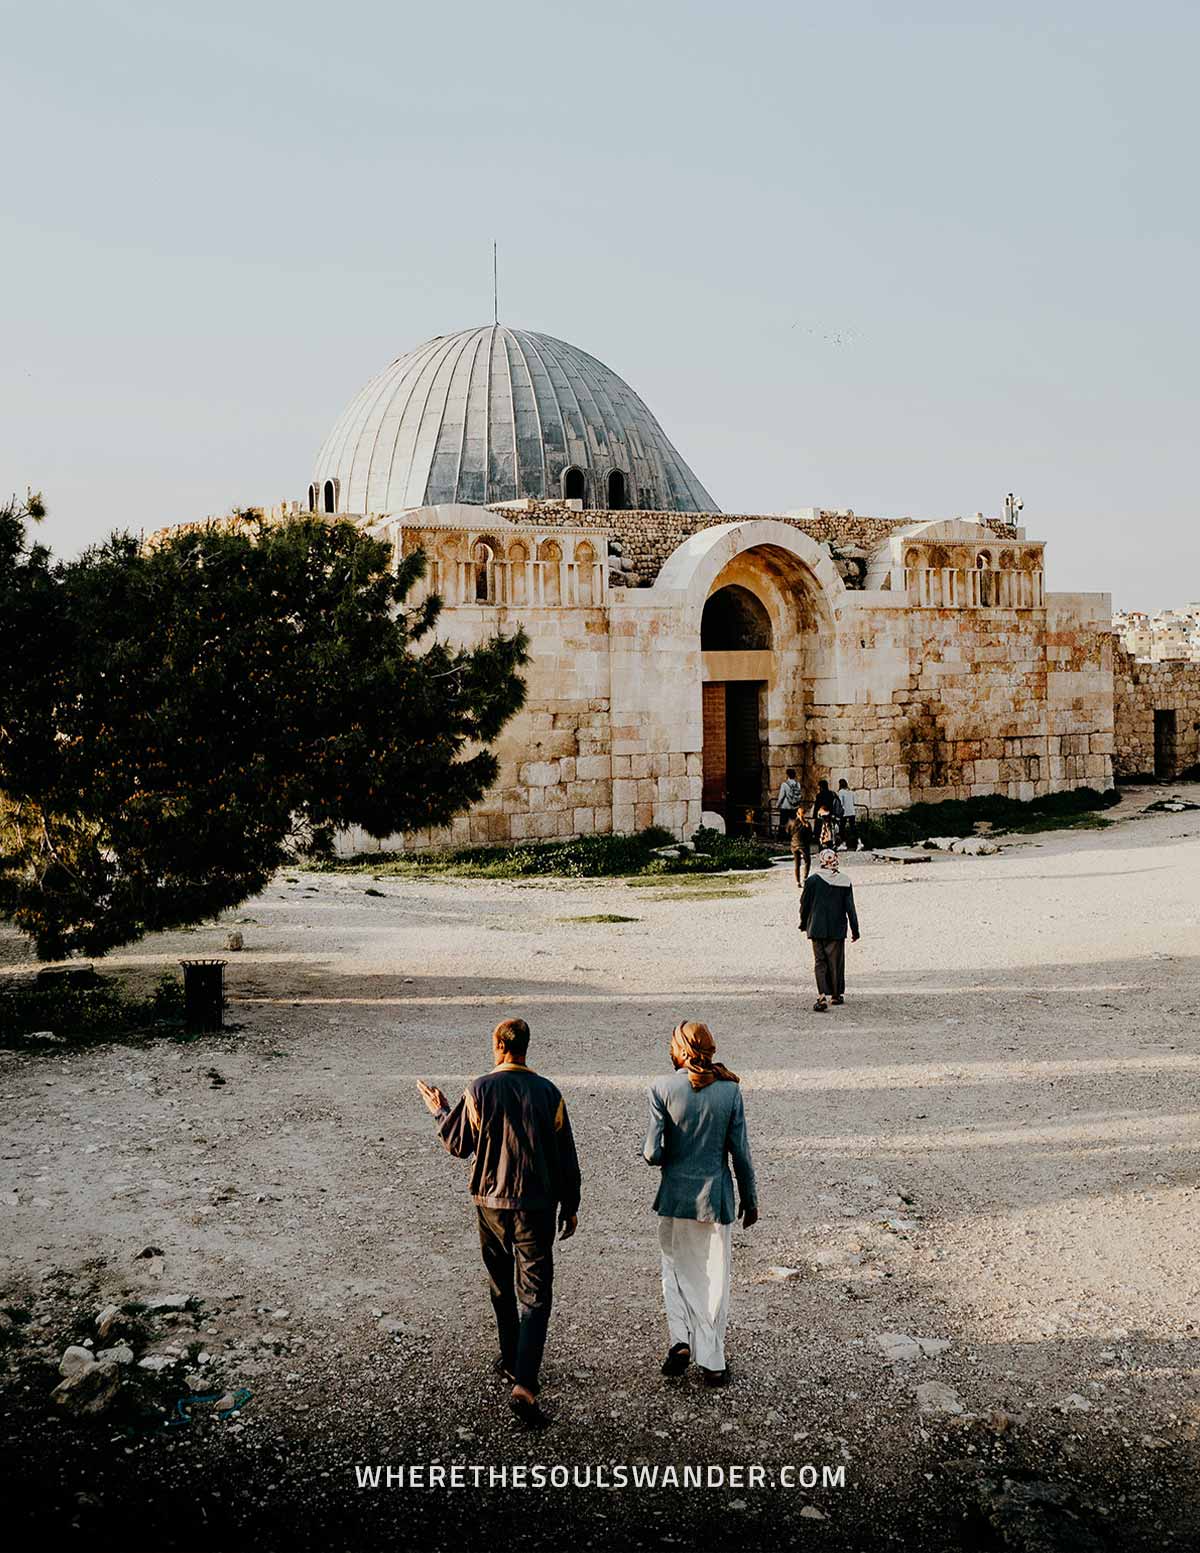
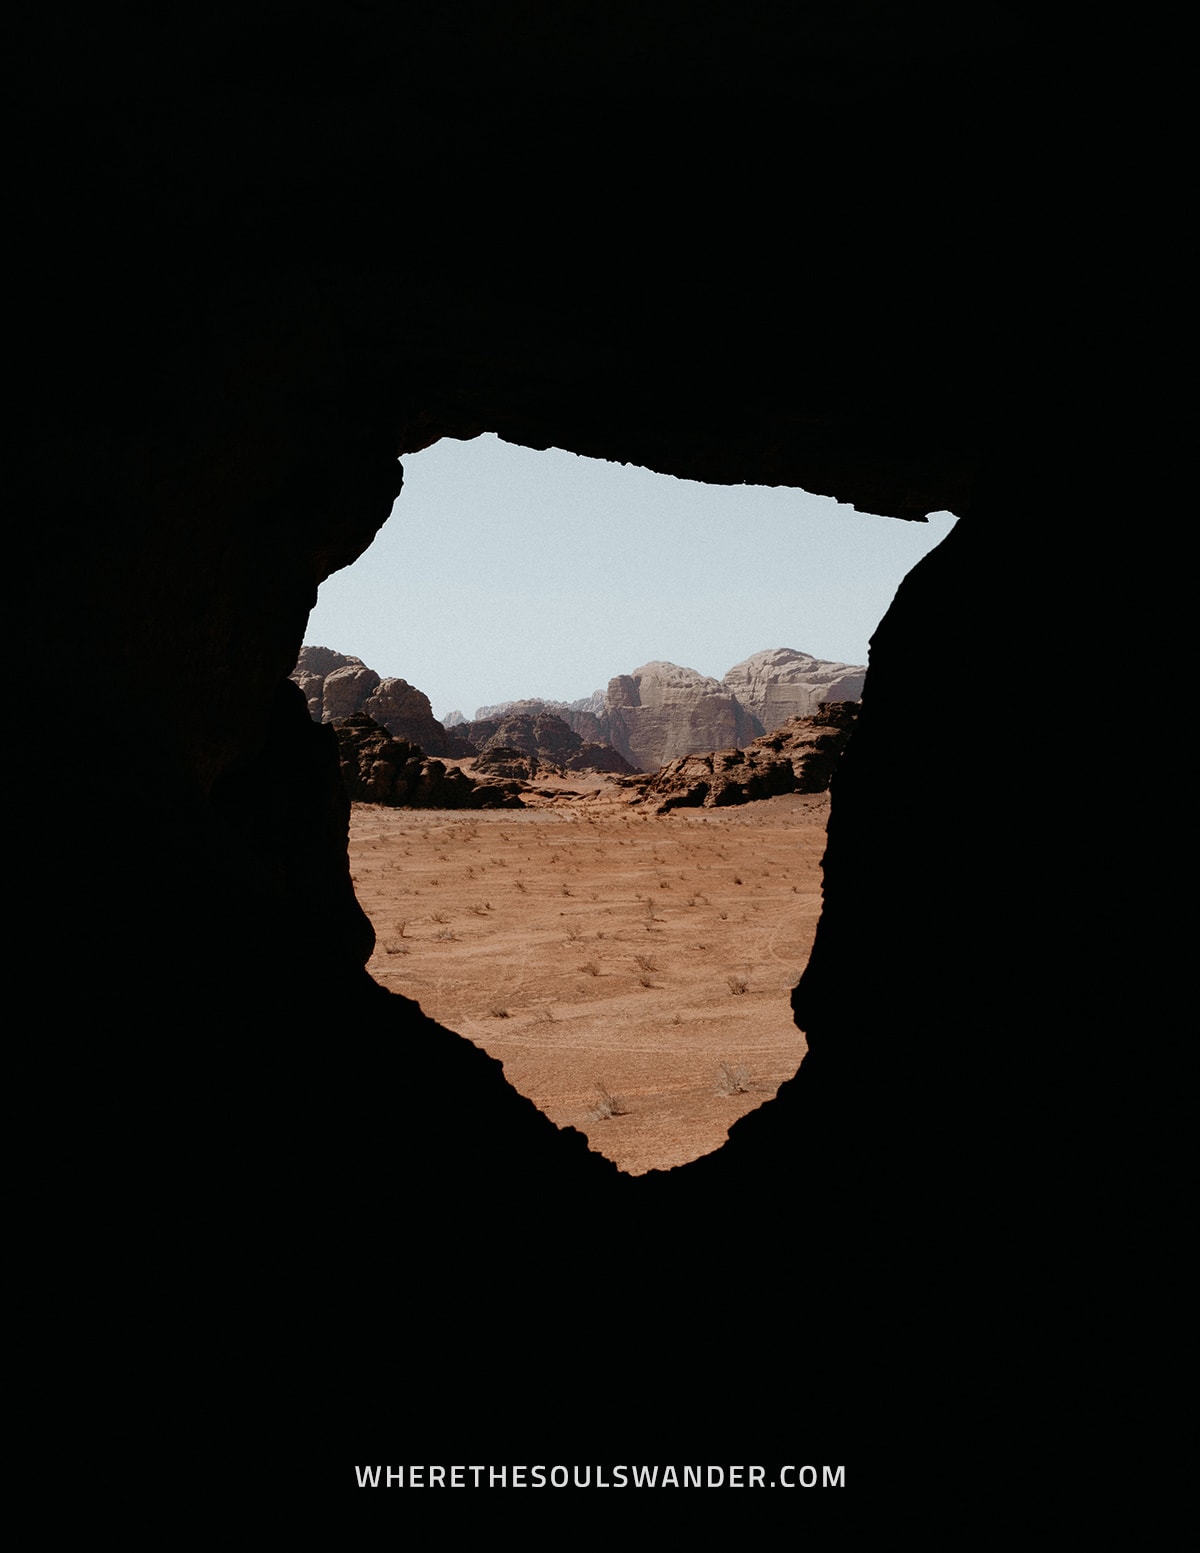
#2 The Jordan Pass price
Since there are three different options to choose from, the price of the Jordan Pass depends on one key factor; the number of days you plan to explore the ancient city of Petra.
The three options include:
Jordan Wanderer
One day access to Petra
70 JD (€90,-)
Jordan Explorer
Two days access to Petra
75 JOD (€97,-)
Jordan Expert
Three days access to Petra
80 JOD (€103,-)
I opted for the Jordan Explorer, since I planned two consecutive days exploring Petra, and would highly recommend anyone to do the same.
One thing worth noting is that if you spend less than three nights in Jordan, you’ll be charged the initial visa entry fee – 40 JOD (€52,-) when leaving the country.
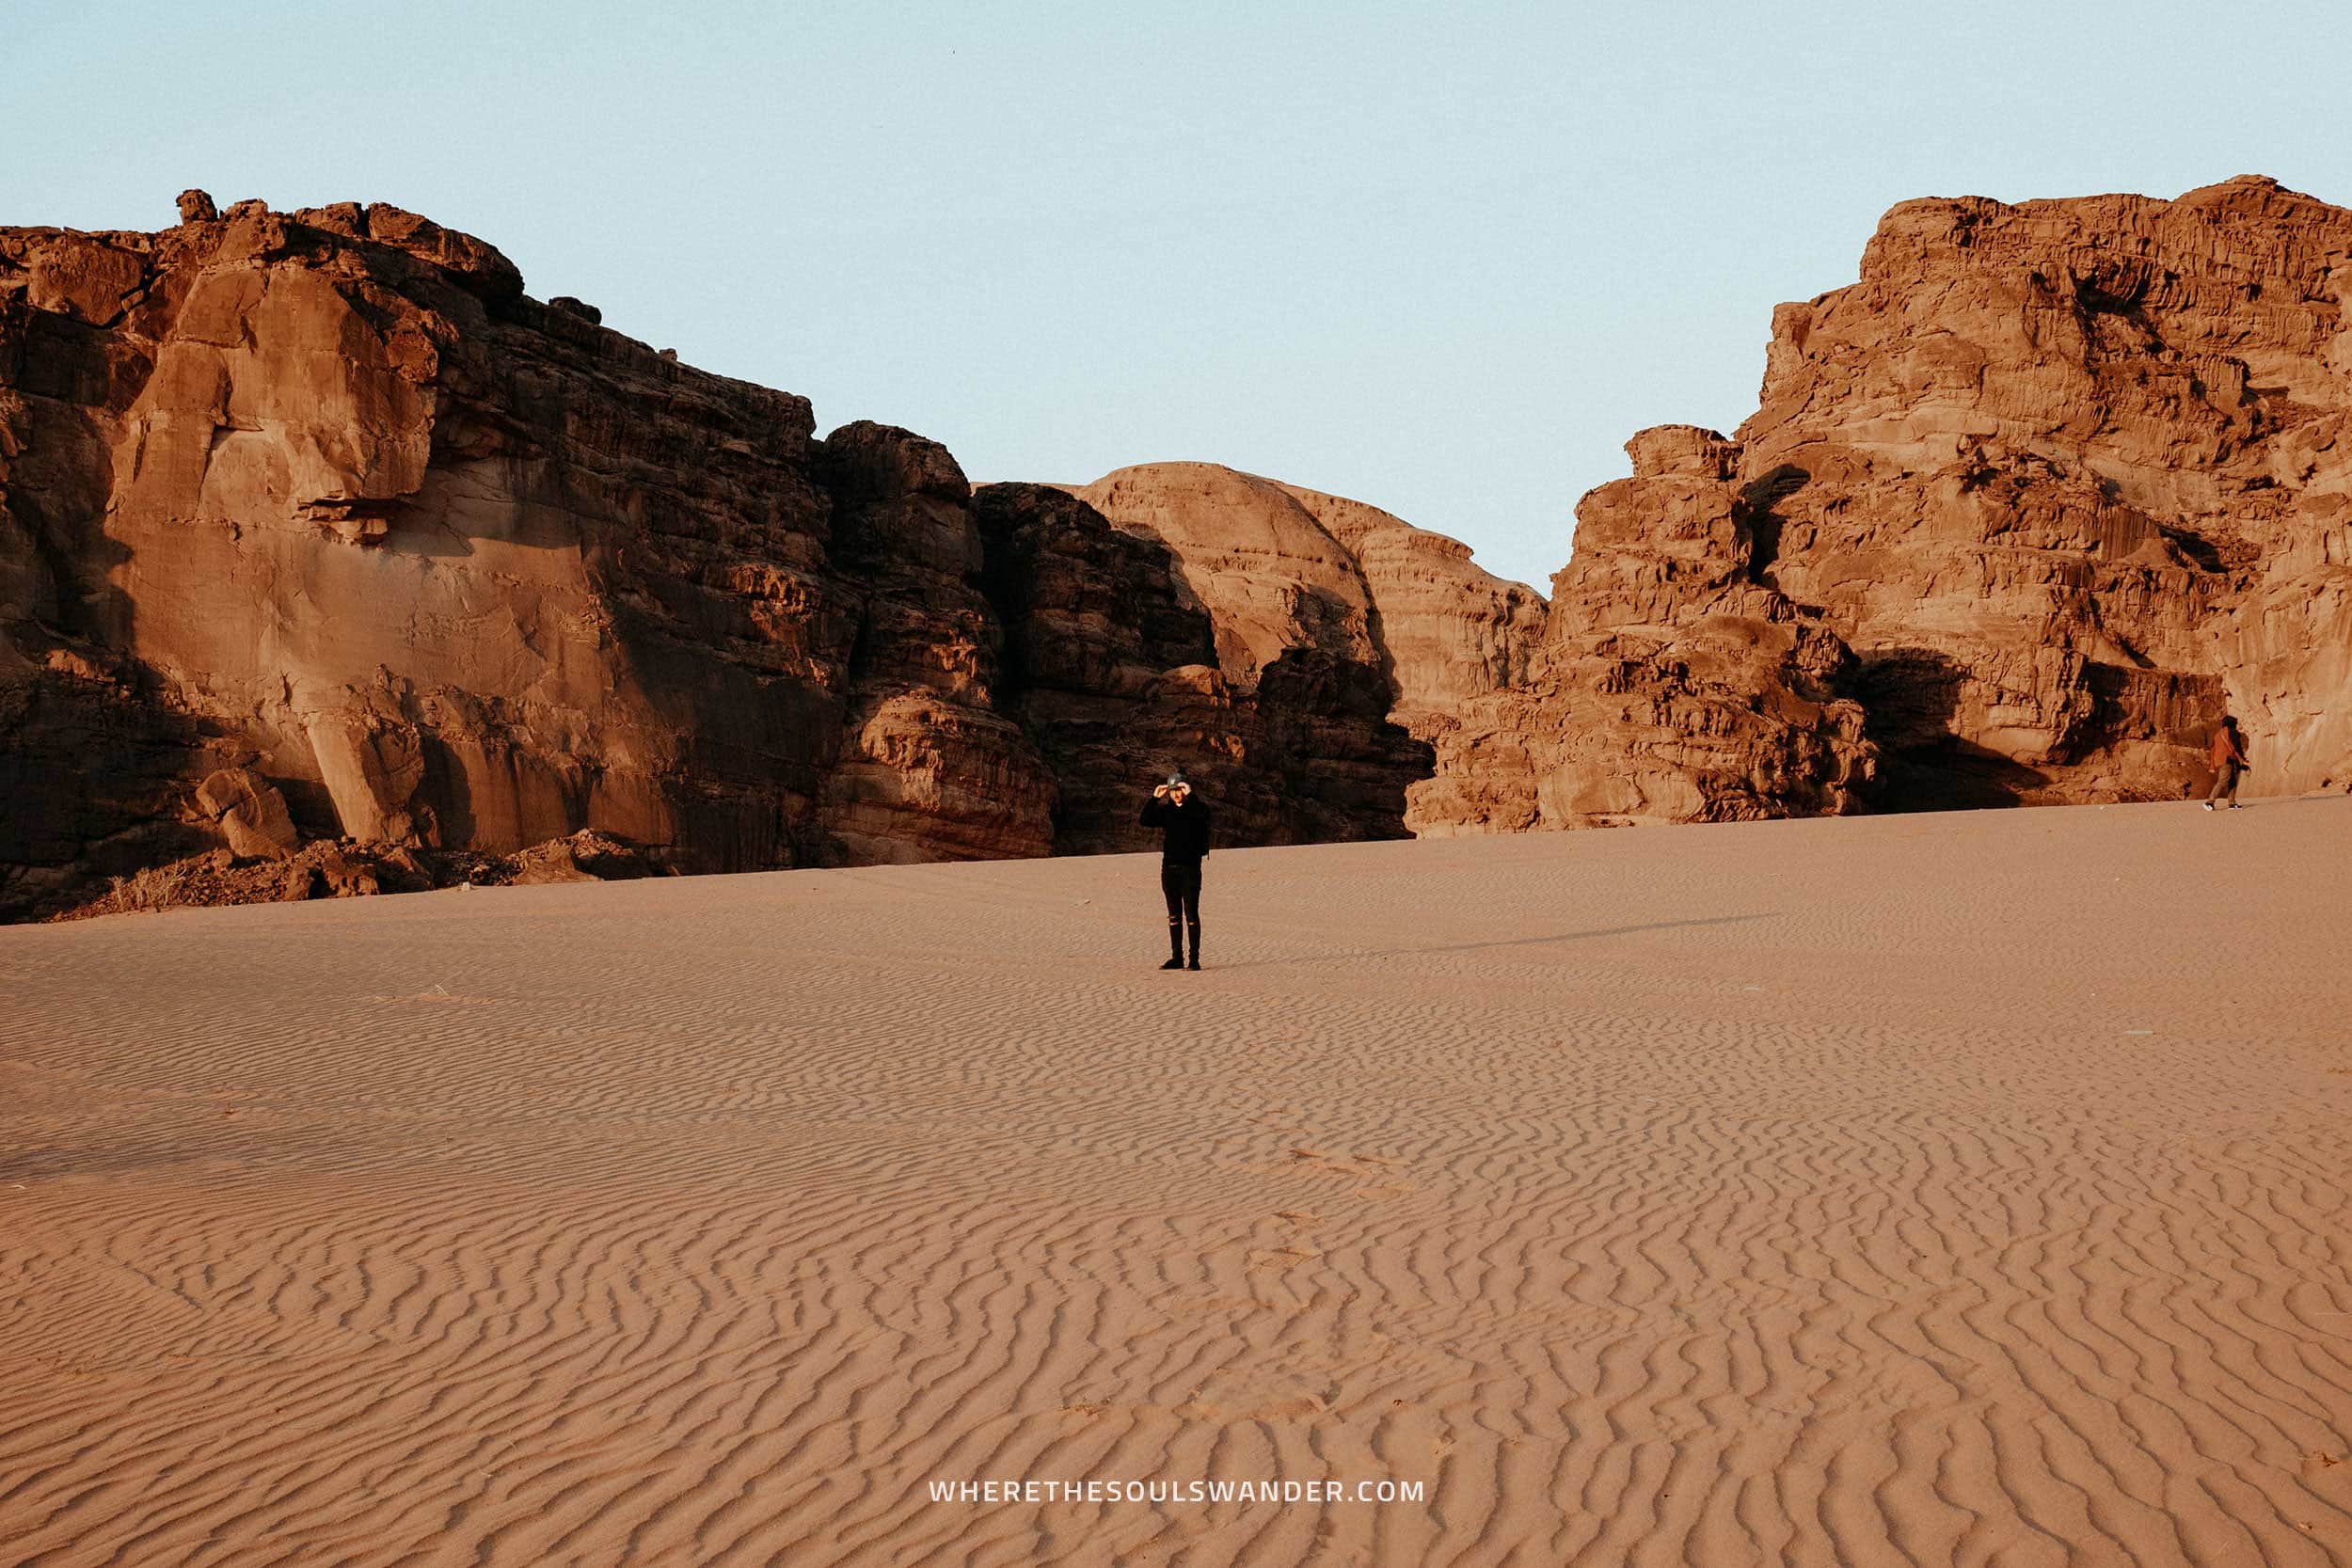
#3 Can I buy the Jordan Pass at the airport?
Unlike the Jordan tourist entry visa, it is unfortunately not possible to purchase your Jordan Pass upon arrival at the airport.
Though the online services are excellent, I totally understand why some travellers prefer buying it once they arrive in the country, especially if you don’t hold a credit card.
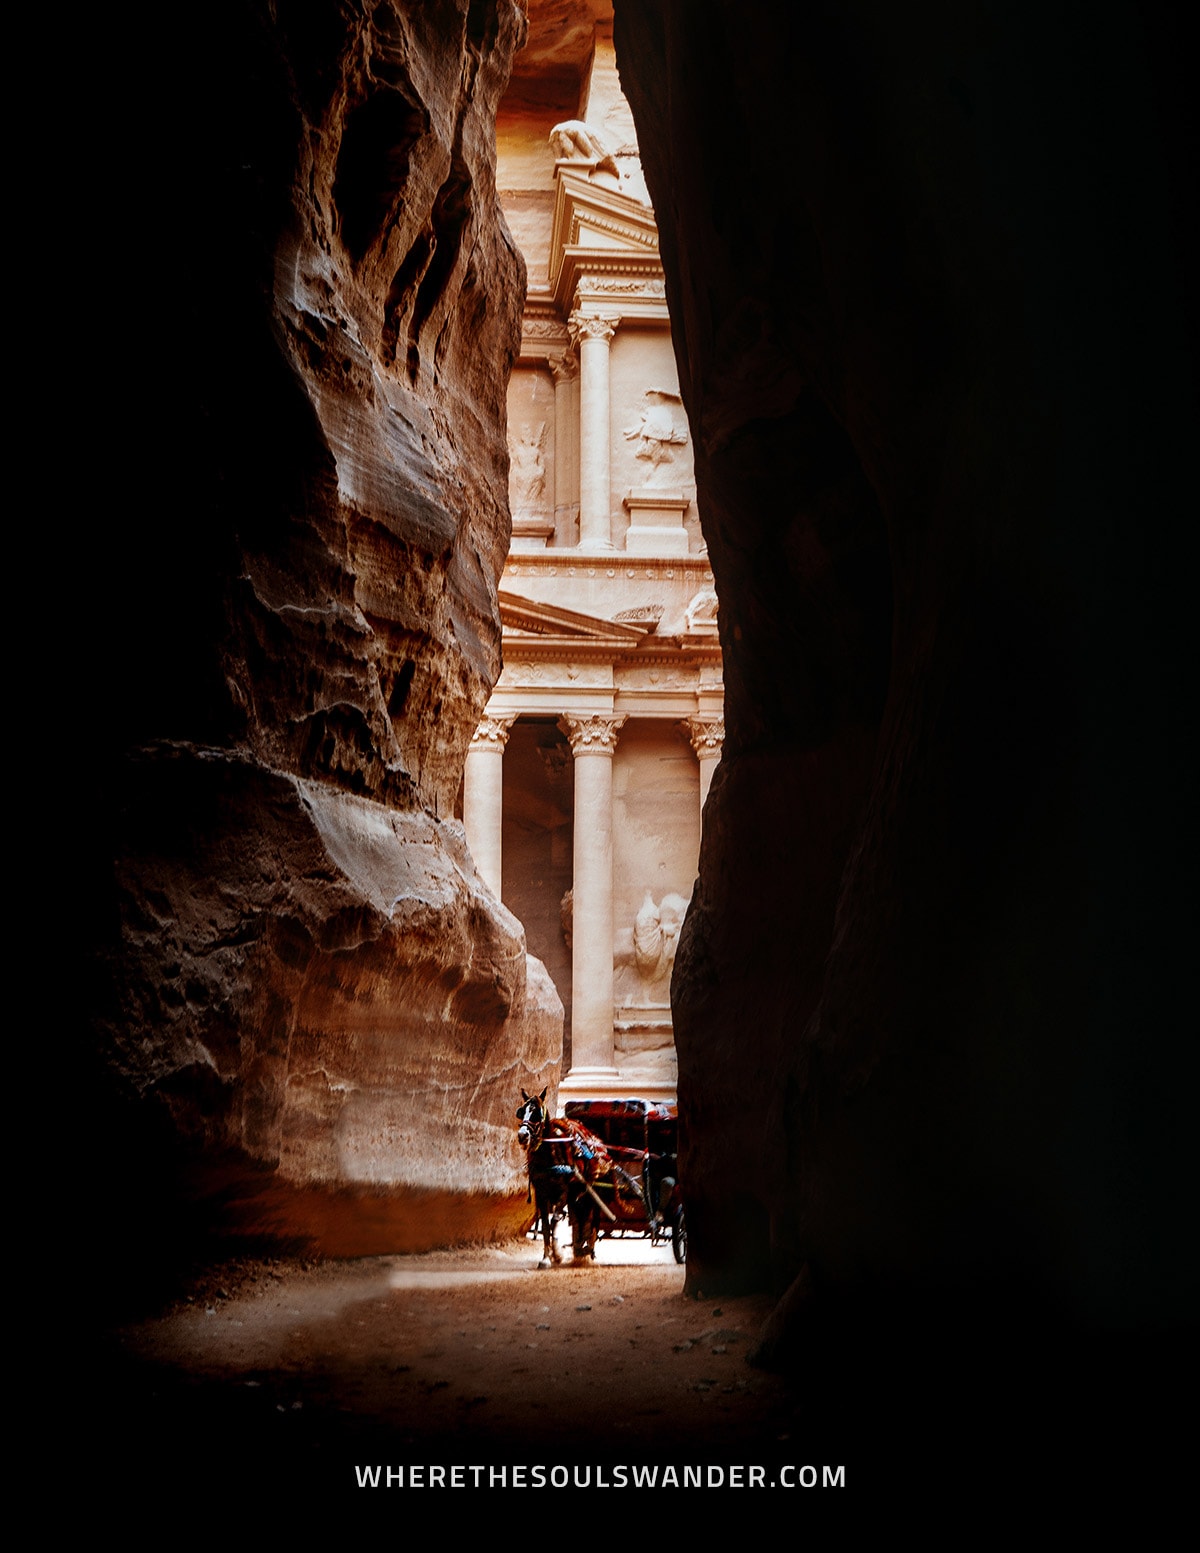
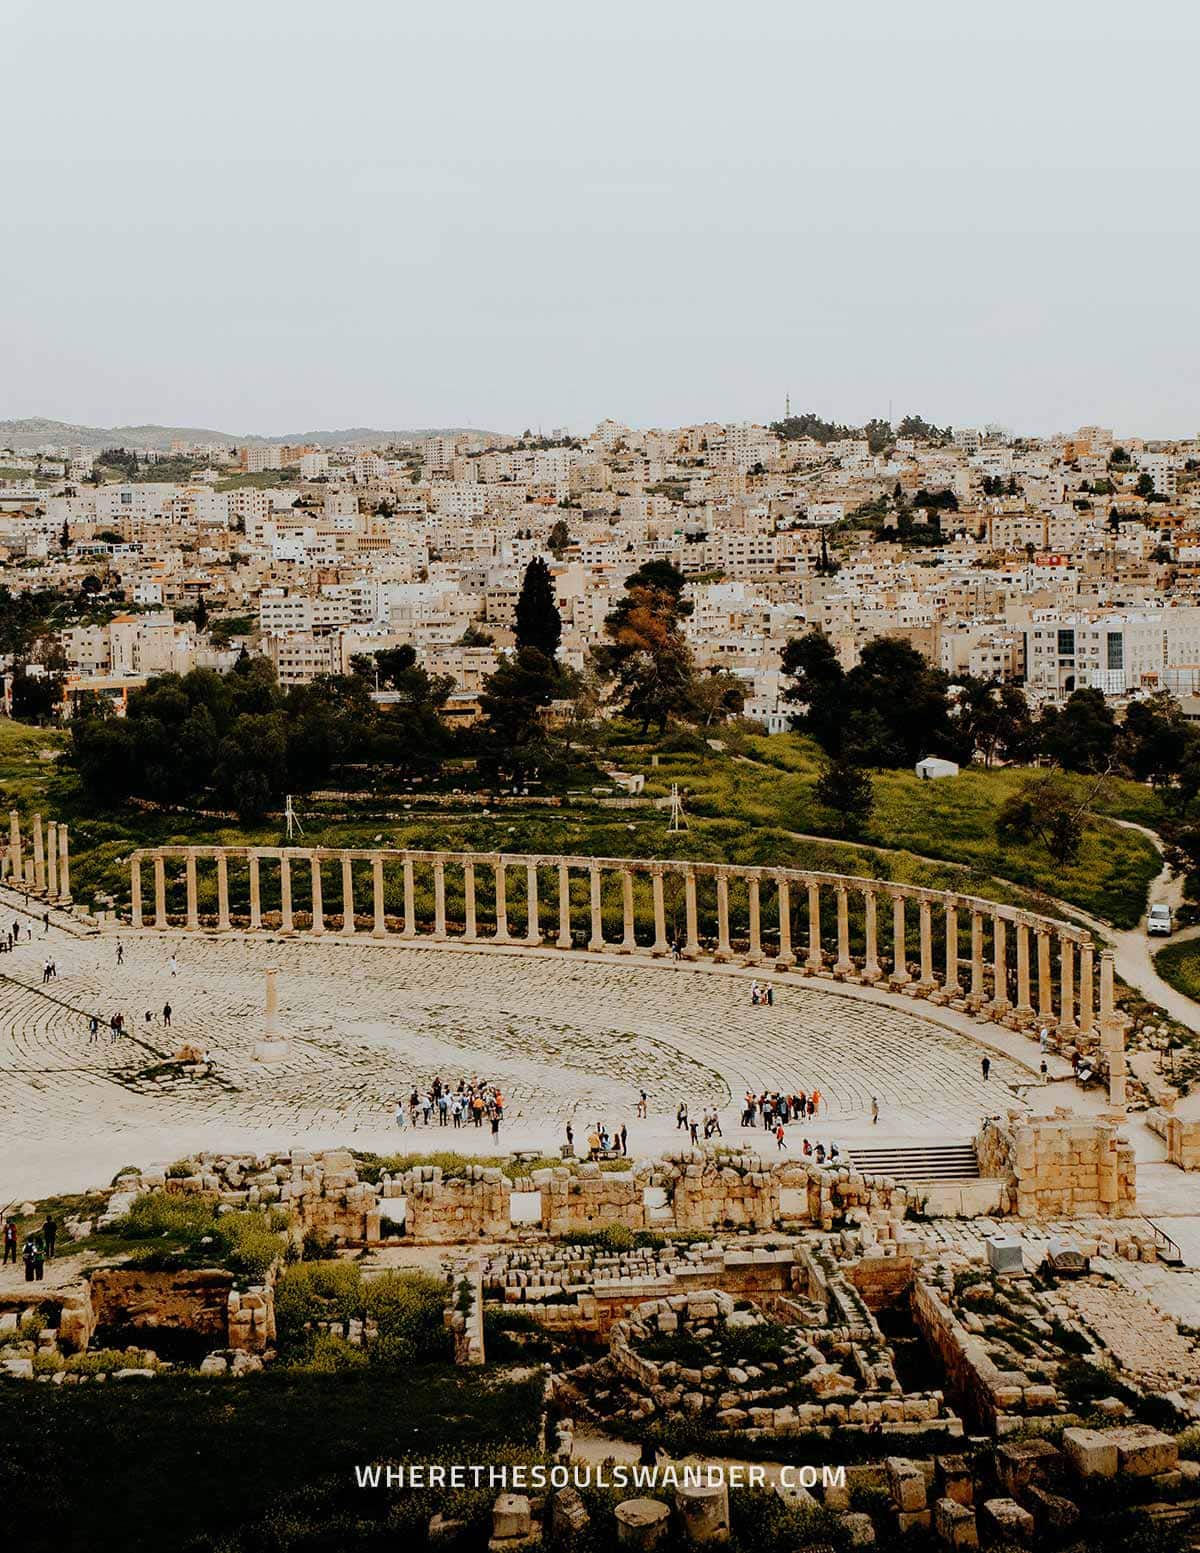
#4 So where to get the Jordan Pass?
Instead, you can only buy the Jordan Pass online via the official Jordan Pass website.
Since it takes a few days to process the order, I’d highly recommend purchasing your Jordan Pass at least one week in advance of your trip to Jordan.
Additionally, if your trip is somewhat spontaneously, you can also opt to speed up the process to 1 business day – do keep in mind that this comes at a price.
While I’ve read several stories about issues with the checkout process, I was fortunate enough to get my pass in one try. Still, this could be a great reminder of why you should buy your Jordan Pass in advance.
After purchasing the Jordan Pass, it will be valid for use within 12 months. Also, the pass will automatically expire 14 days after it was first scanned at one of the 40 attractions.
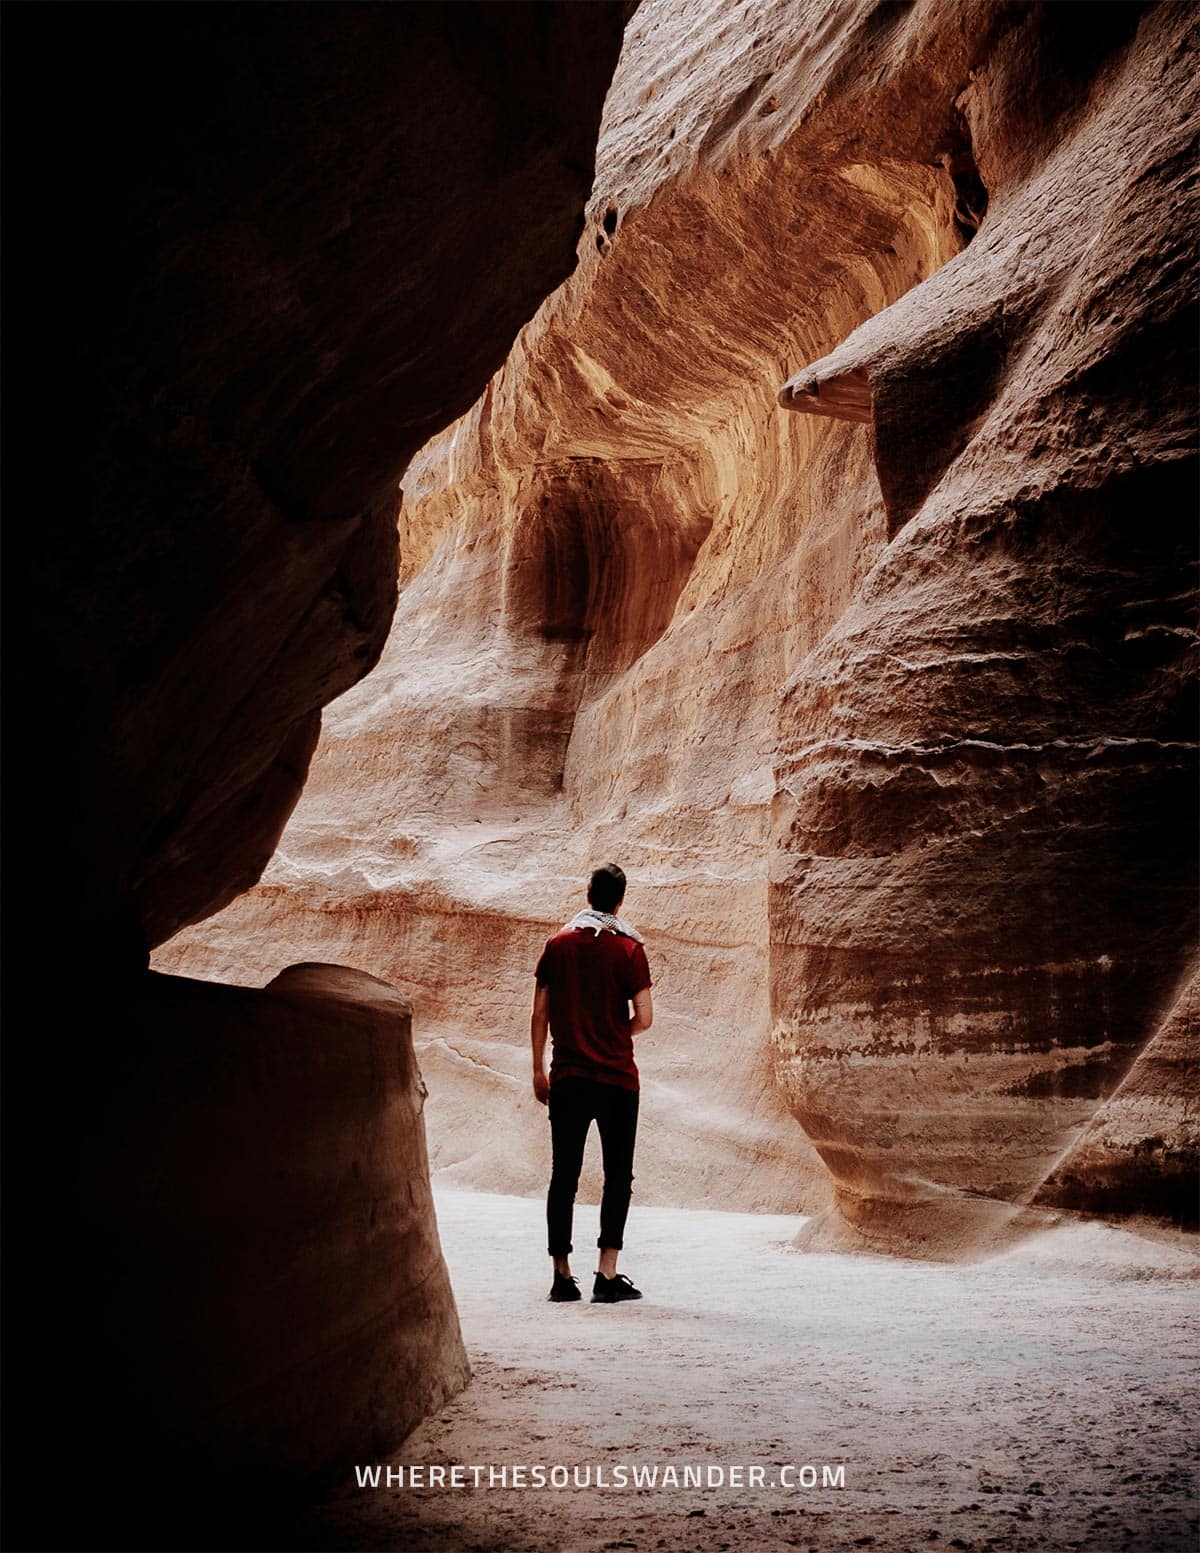
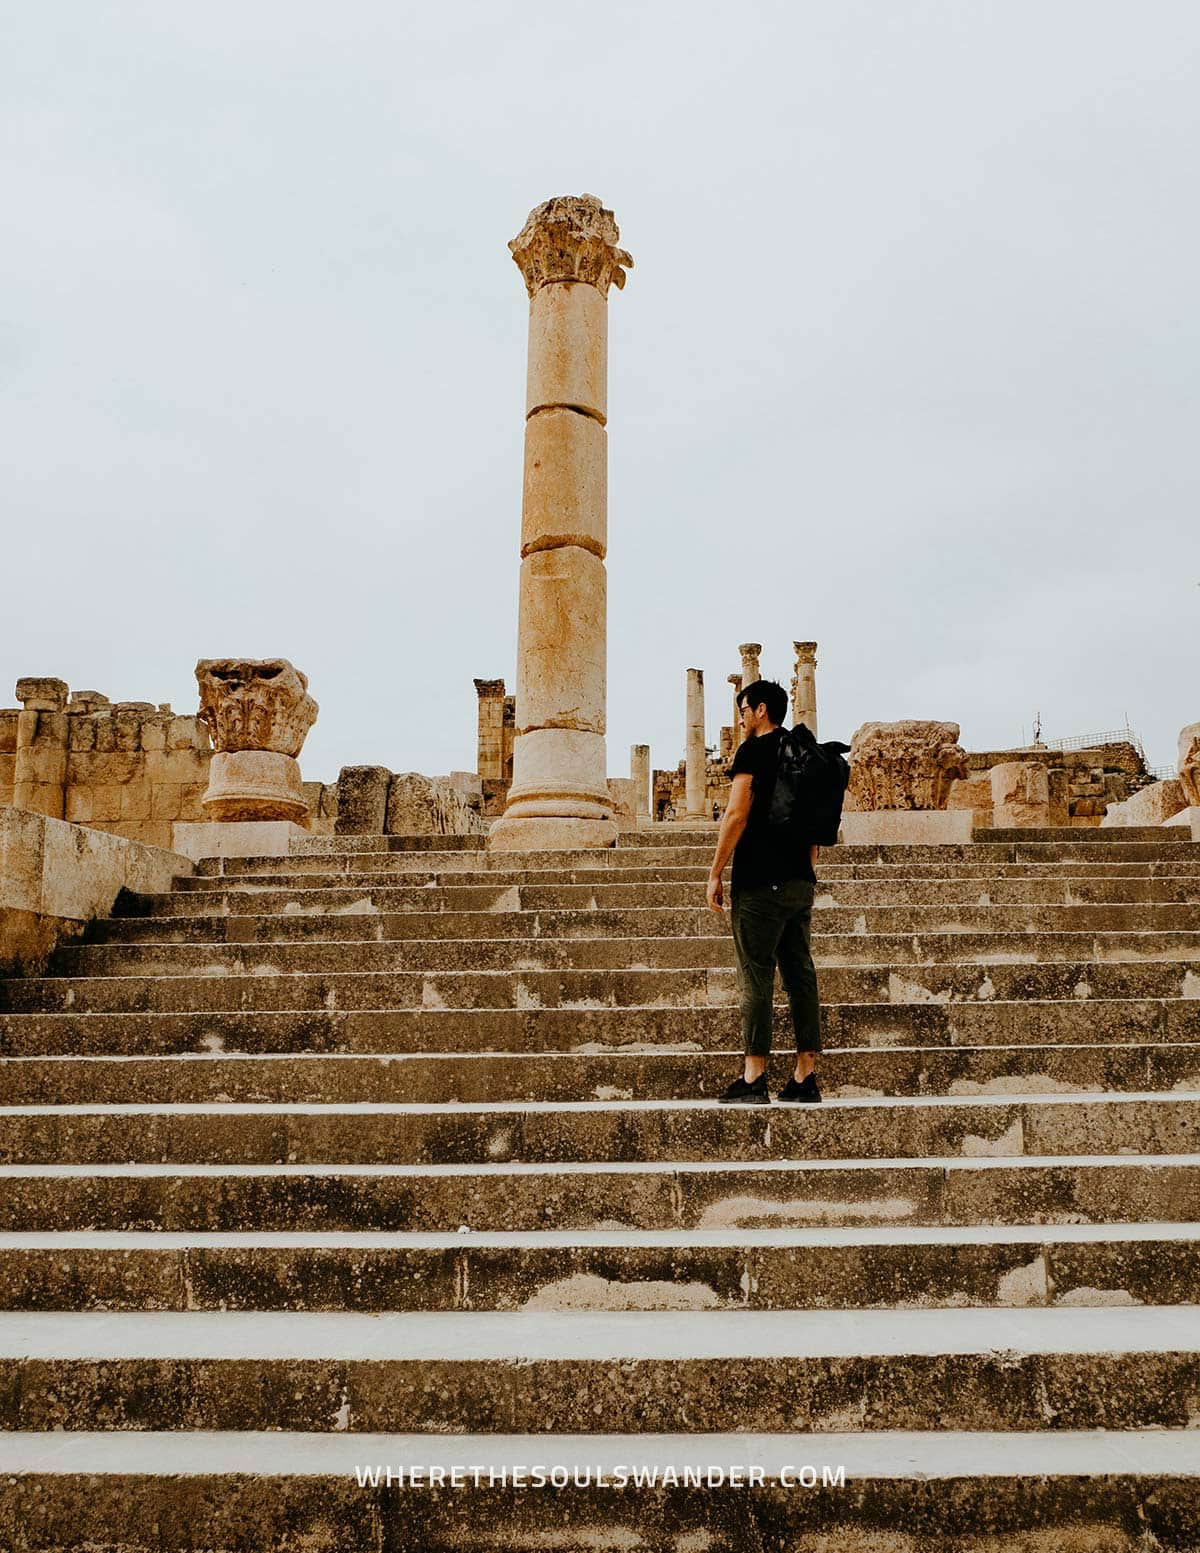
#5 The Jordan Pass | What sites are included?
The Jordan Pass grants holders free one-time entrance to over 40 tourist attractions in Jordan.
I’ve listed some of the most popular attractions included in the pass below:
Petra | Listed one of UNESCO’s New World Wonders, the ancient city of Petra really needs no introduction. This archaeological masterpiece is simply a must-visit for anyone travelling to Jordan.
Wadi Rum | Situated in the southern part of Jordan, the Wadi Rum is a vast protected desert reserve that is marked by towering rock formations and rippled sand dunes.
Jerash | Built by the Romans more than 6,500 years ago, the ancient city of Jerash is known as the largest and best-preserved site of Roman architecture outside of Italy.
The Roman Theatre | This 6,000-seat, 2nd-century Roman theatre is one of Amman’s most famous landmarks, and clearly, one to add to your list with things to do in Jordan.
Amman Citadel | Established in the heart of Downtown Amman lies the Amman Citadel, a citadel of incredible grandeur with a long history of occupation by many great civilizations.
Other attractions include Aqaba Castle, the Jordan Archaeological Museum, Karak Castle, and Madaba Archaeological Museum among others. See all the included attractions here.
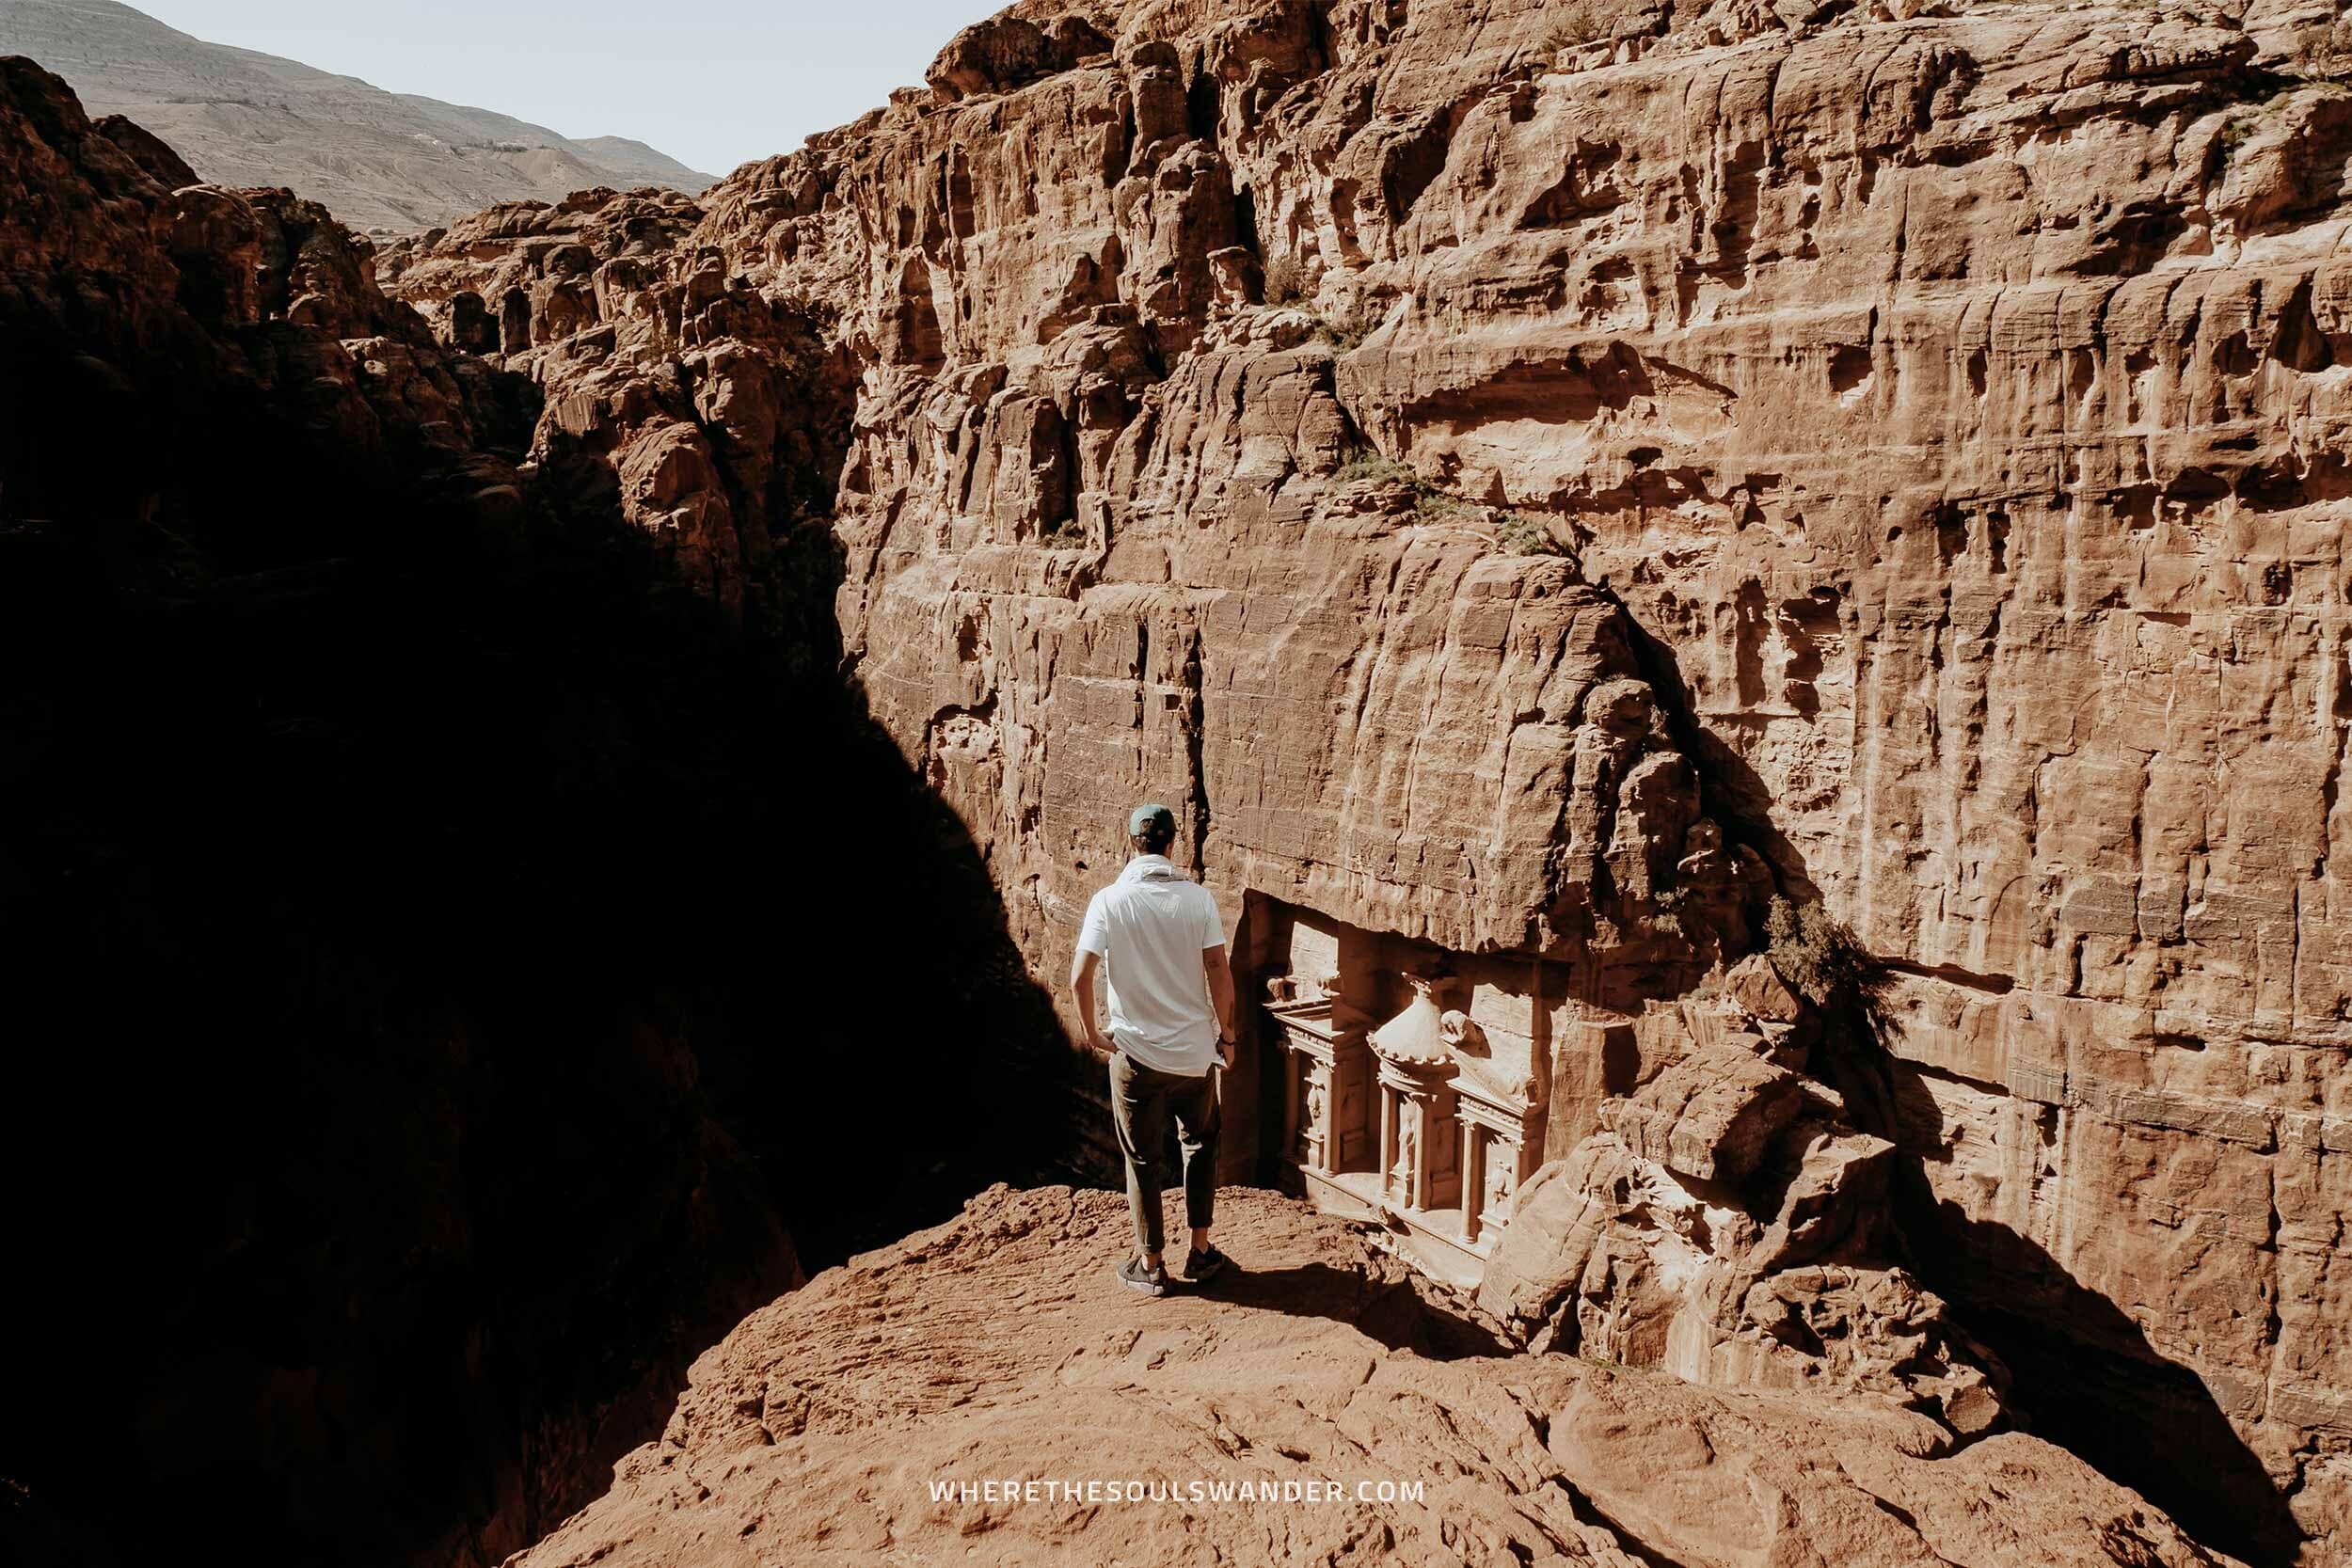
#6 What about your tourist entry visa?
On top of the free entrance to Jordan’s most popular highlights, the Jordan Pass will also grant holders a free tourist entry visa when staying a minimum of four days in the country.
But do be aware, you will be charged 40 JOD (€52,-) for the visa entry fee when leaving the country within the four-day mark.
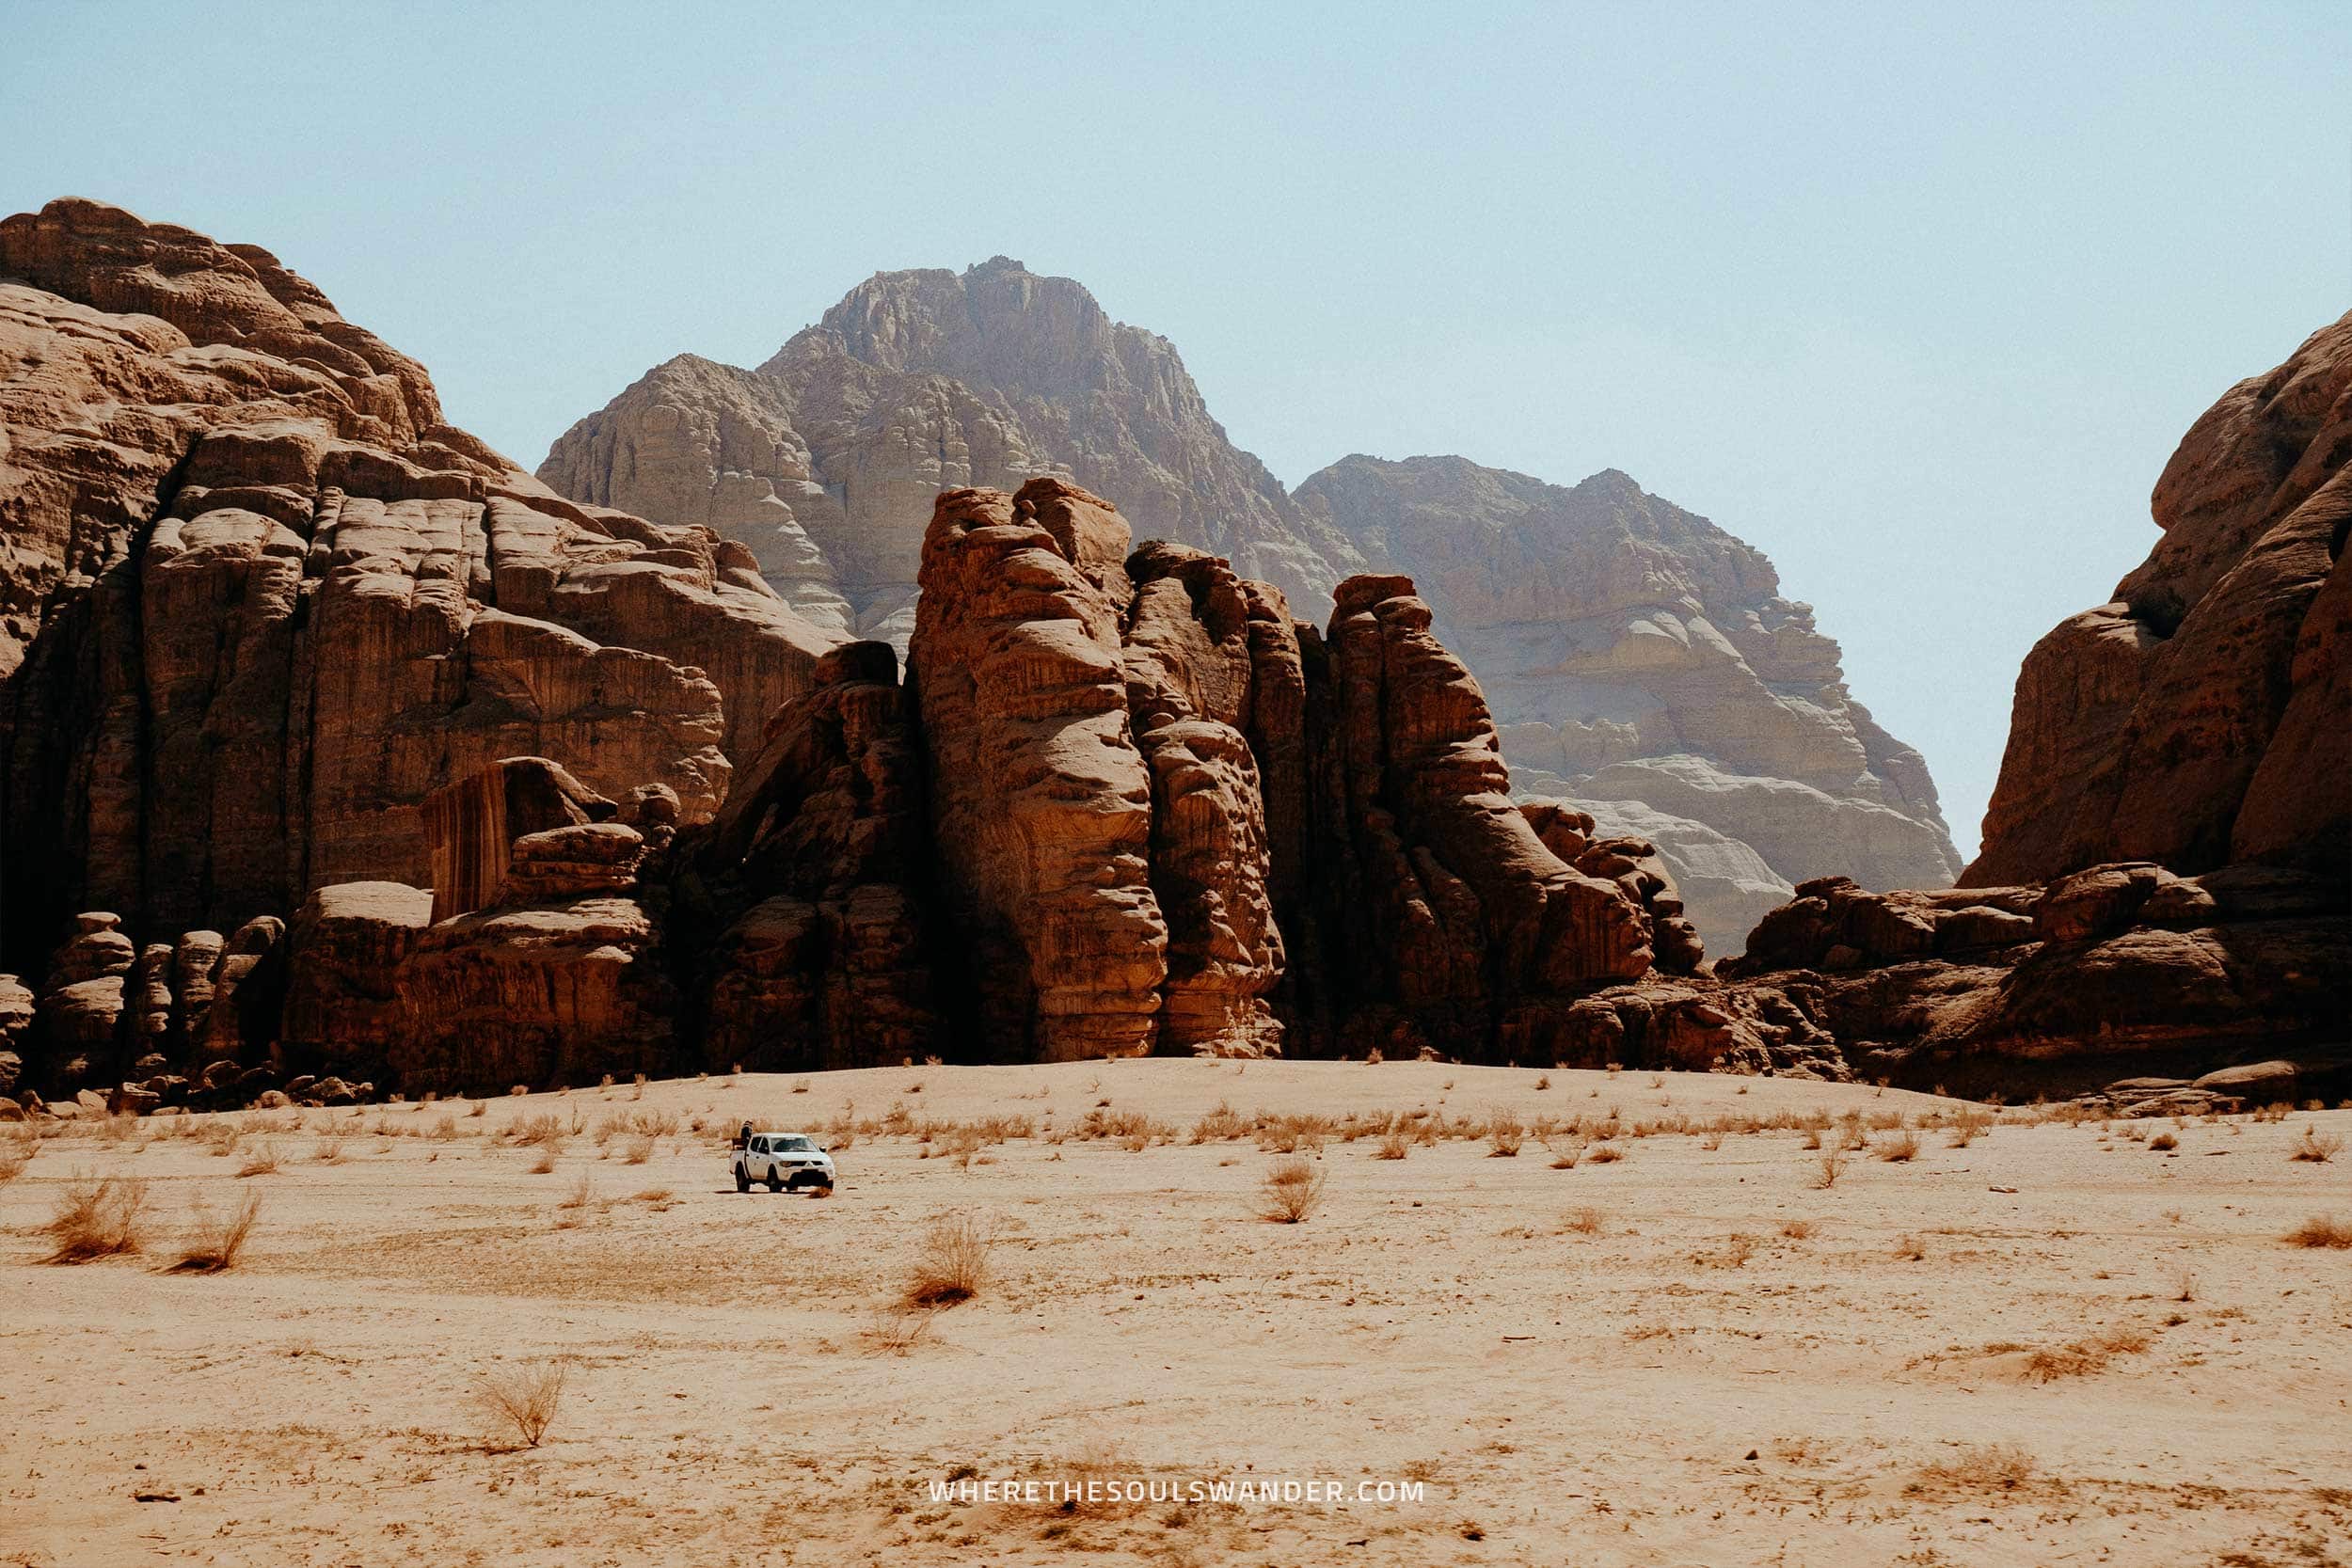
#7 The Jordan Pass | Is it worth it?
If you do the math, you’ll quickly come to the conclusion that purchasing the Jordan Pass will be worth every penny, given a day ticket to Petra and your Jordan tourist entry visa will combine for a total price of 90 JOD.
Meaning those two will already cost more than the three-day Jordan Expert Pass (80 JOD), which is the most expansive option and includes three days in Petra.
Not to mention, that by buying the Jordan Pass, you’ll also waive the entrance fee to Wadi Rum (5 JOD), Jerash (10 JOD), and the Amman Citadel (3 JOD), to name but a few.
Add to that, that the Jordan Pass allows you to skip the line at Petra, and the Jordan Pass turns into an absolute winner.
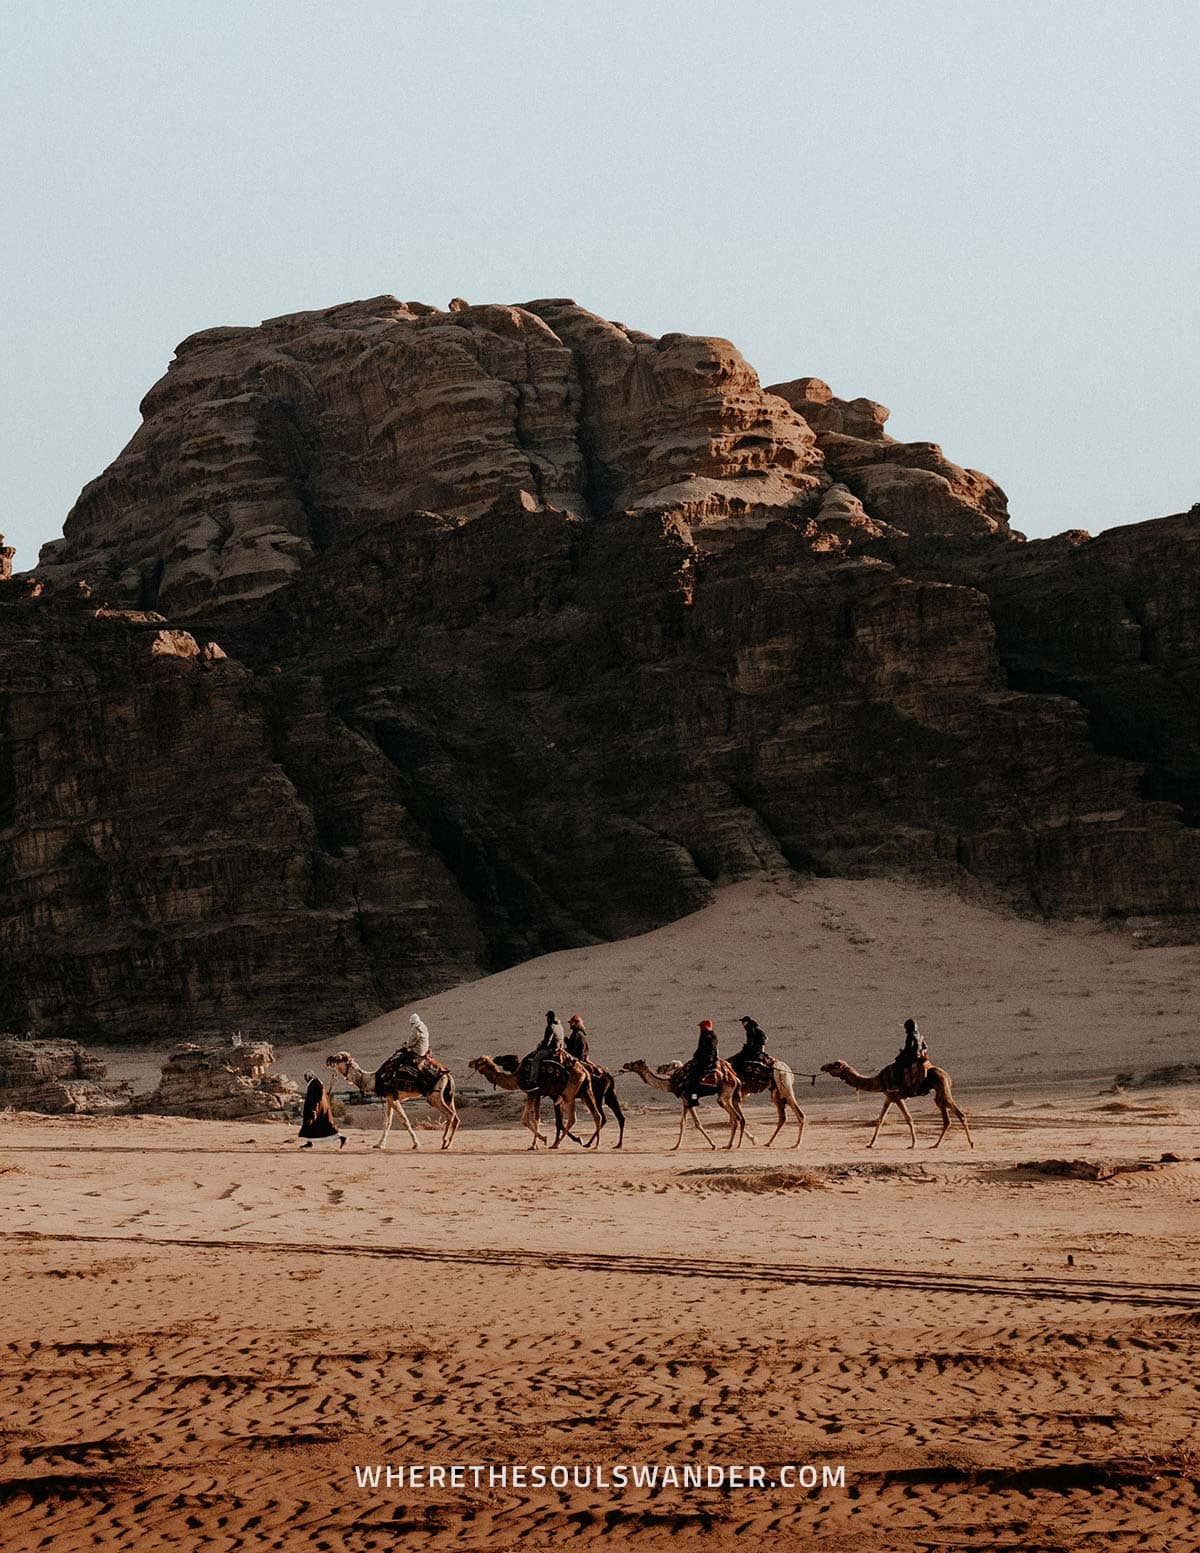
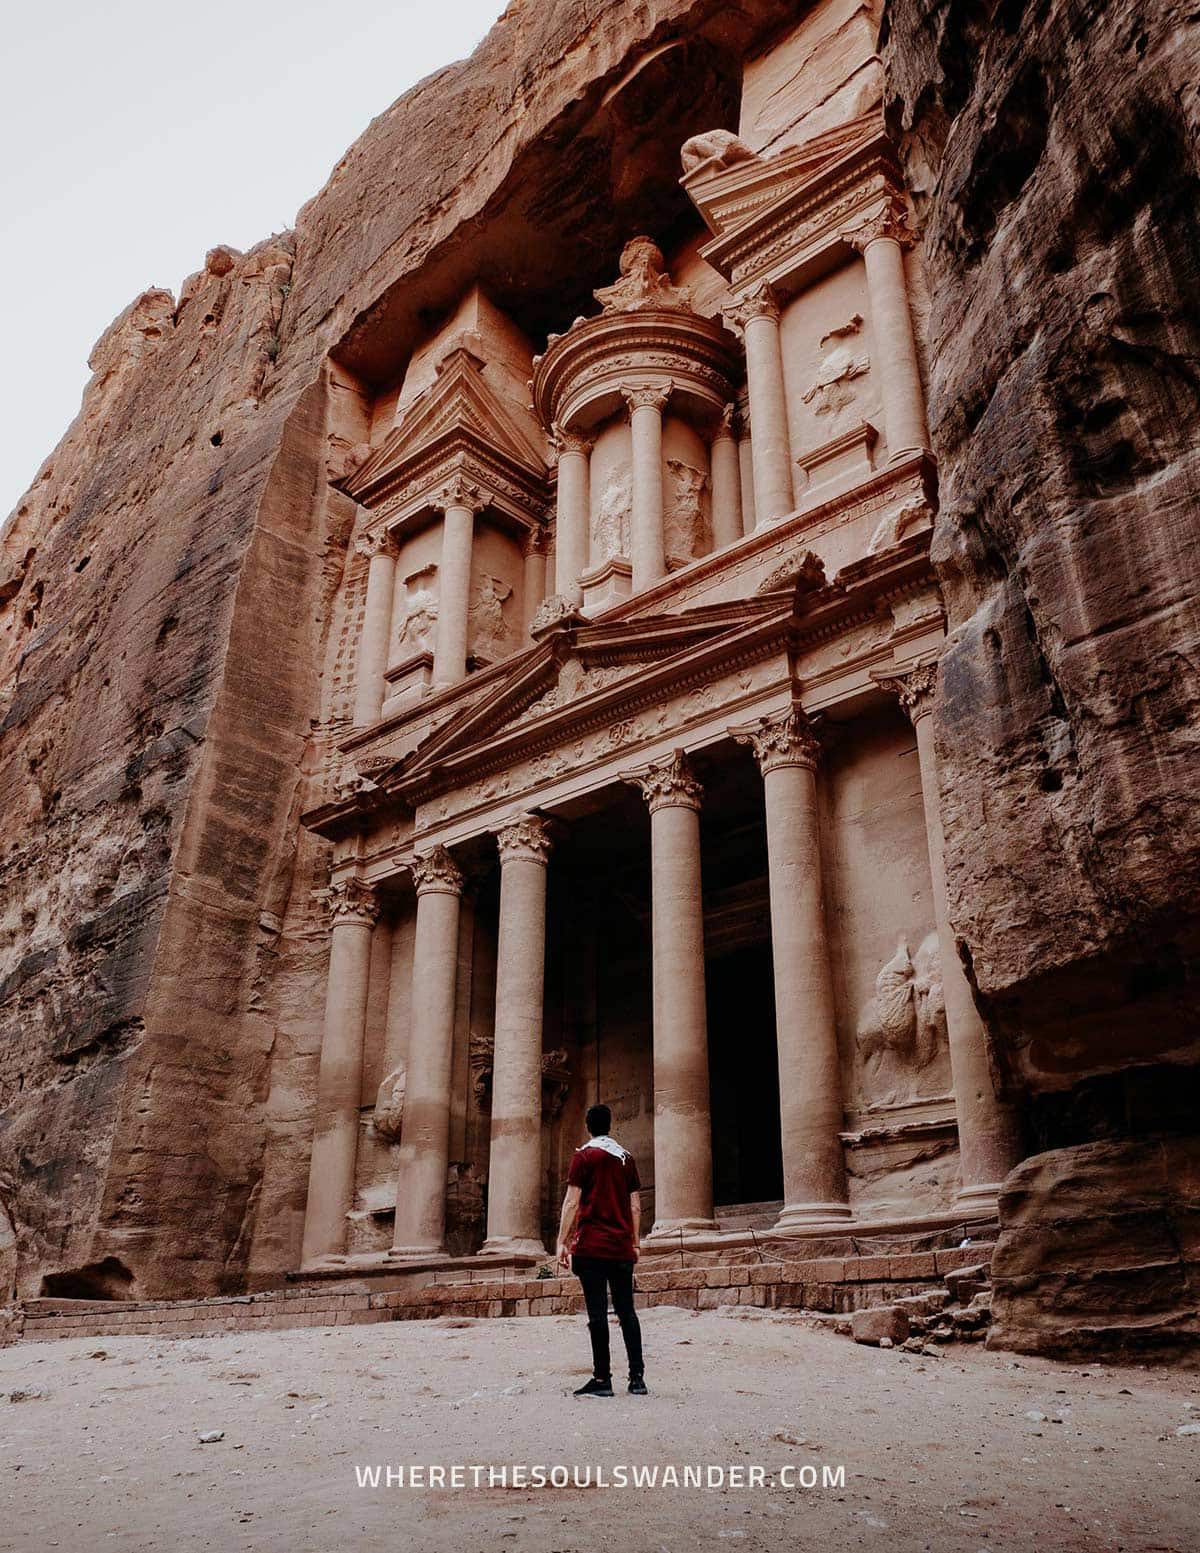
#8 Now its time to plan your Jordan itinerary
Now that you know all the nitty-gritty details about the Jordan Pass, it’s time to plan your adventurous road trip itinerary through Jordan.
If you’re curious about my 10-day road trip in Jordan, I’ve written an in-depth itinerary that brings you along all the major highlights of this incredible country, so make sure you give it a read too.
Additionally, I’ve also written detailed guides on Petra, Wadi Rum, the Dead Sea, Jerash and Amman.
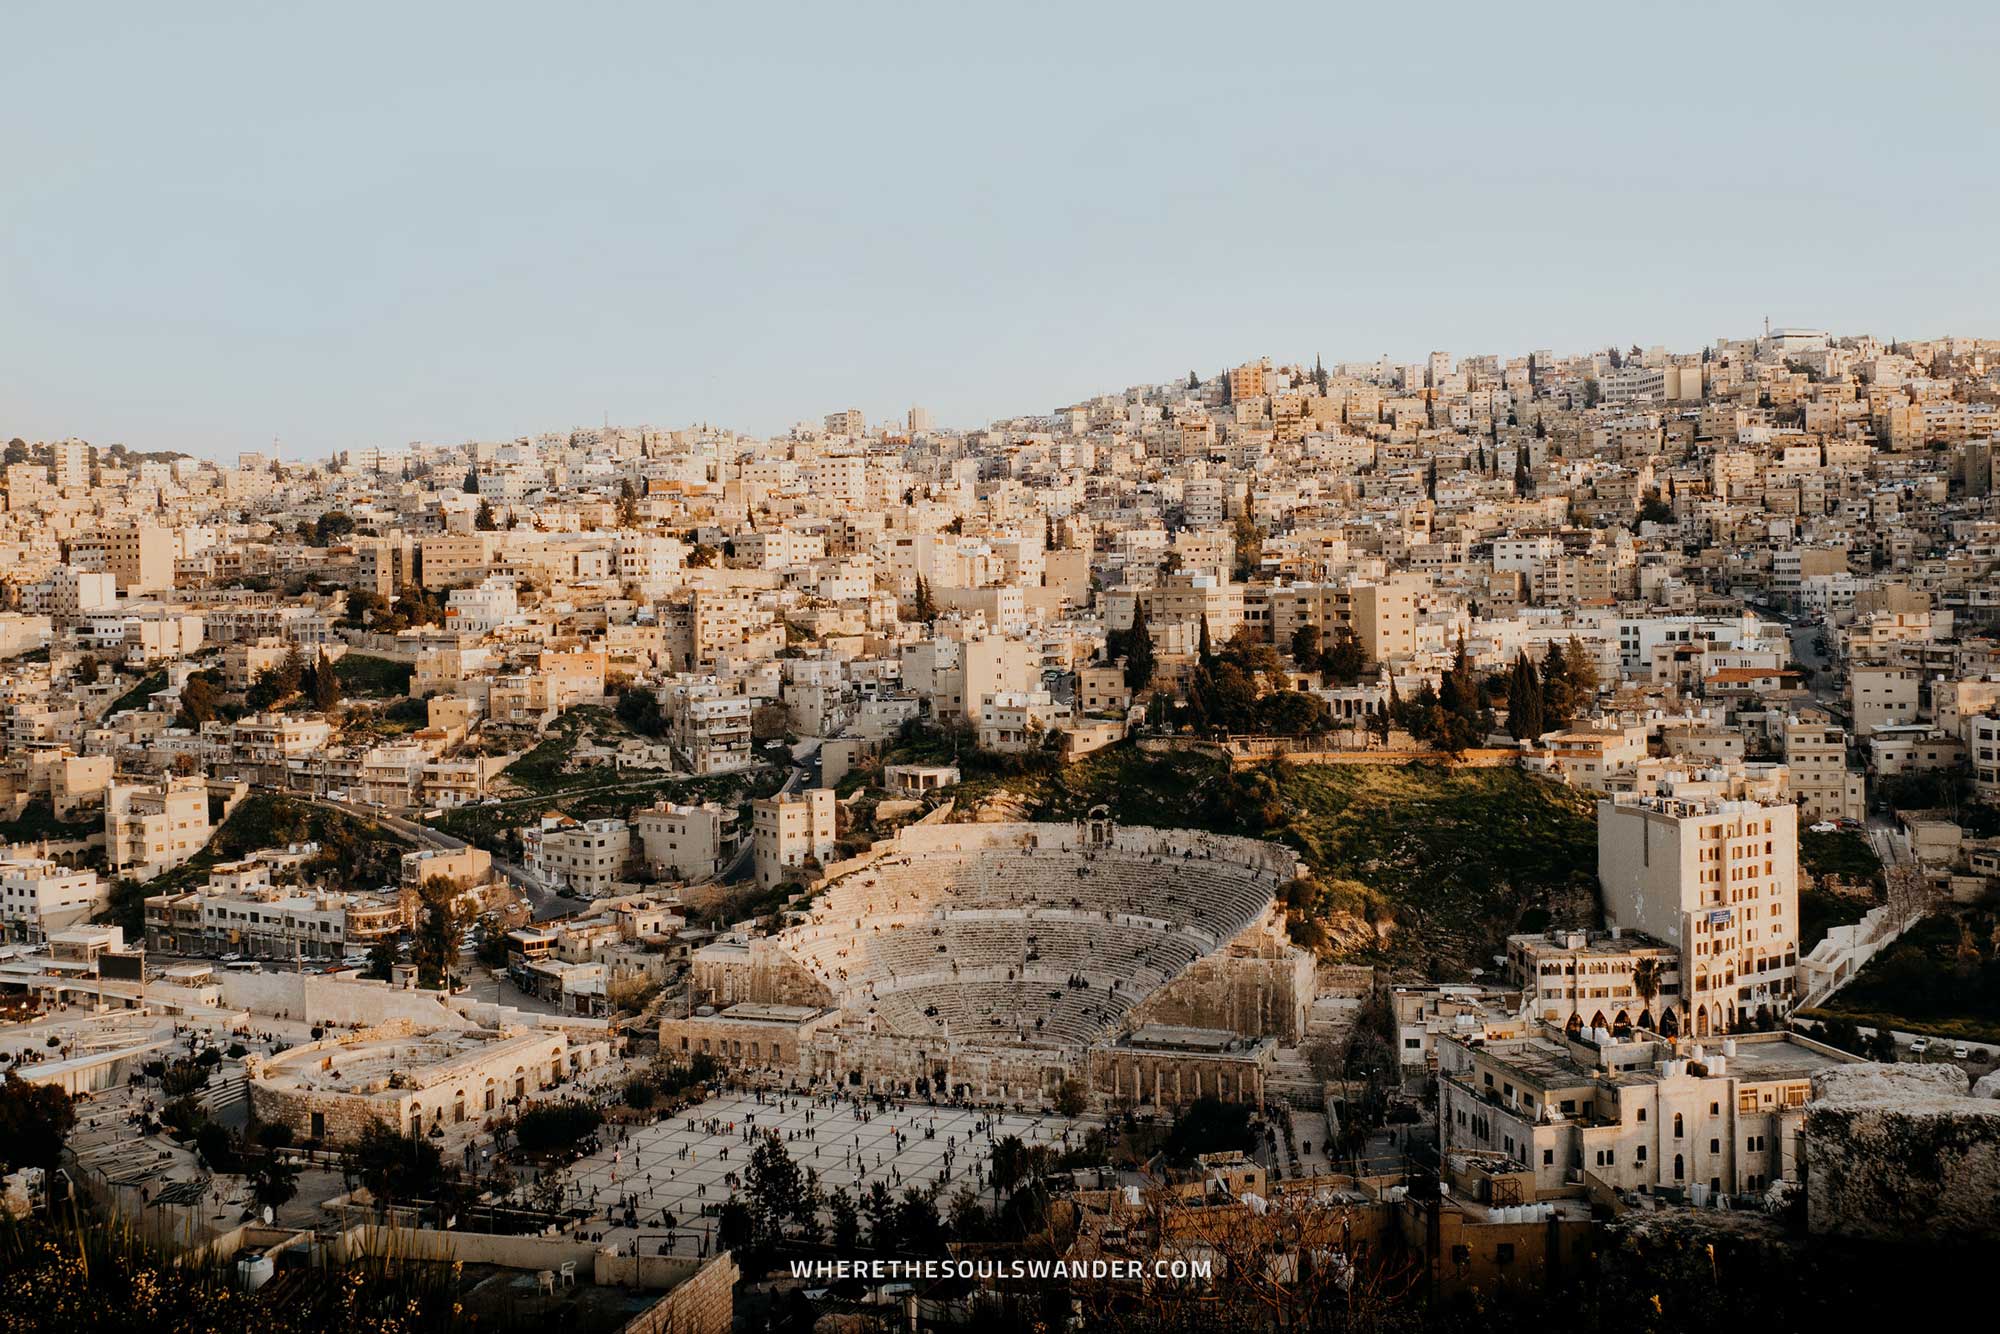
Safety in Jordan | Travel Insurance
When travelling this big, wide world, I never go on an adventure without my essential travel insurance sorted out, and though I felt completely safe in Jordan, I recommend anyone travelling here to do the same.
Though you would rather not think about the things that could go wrong, there’s always a chance that it might happen, and when that’s the case, it is better to be safe than sorry.
To help you find the right policy, I’ve listed two of my favourite options below:
Heymondo | Whether you’re going on a 3-week backpacking trip or planning a long stay somewhere abroad, Heymondo has excellent insurance options either way – plus full COVID-19 coverage and a handy app with 24-hour medical assistance. Readers of WTSW receive 5% off any insurance policy; for more information here.
Cheers!
I’ve been on this travel blogging journey since 2019.
If you appreciate what I do here, these are some ways you can support me.
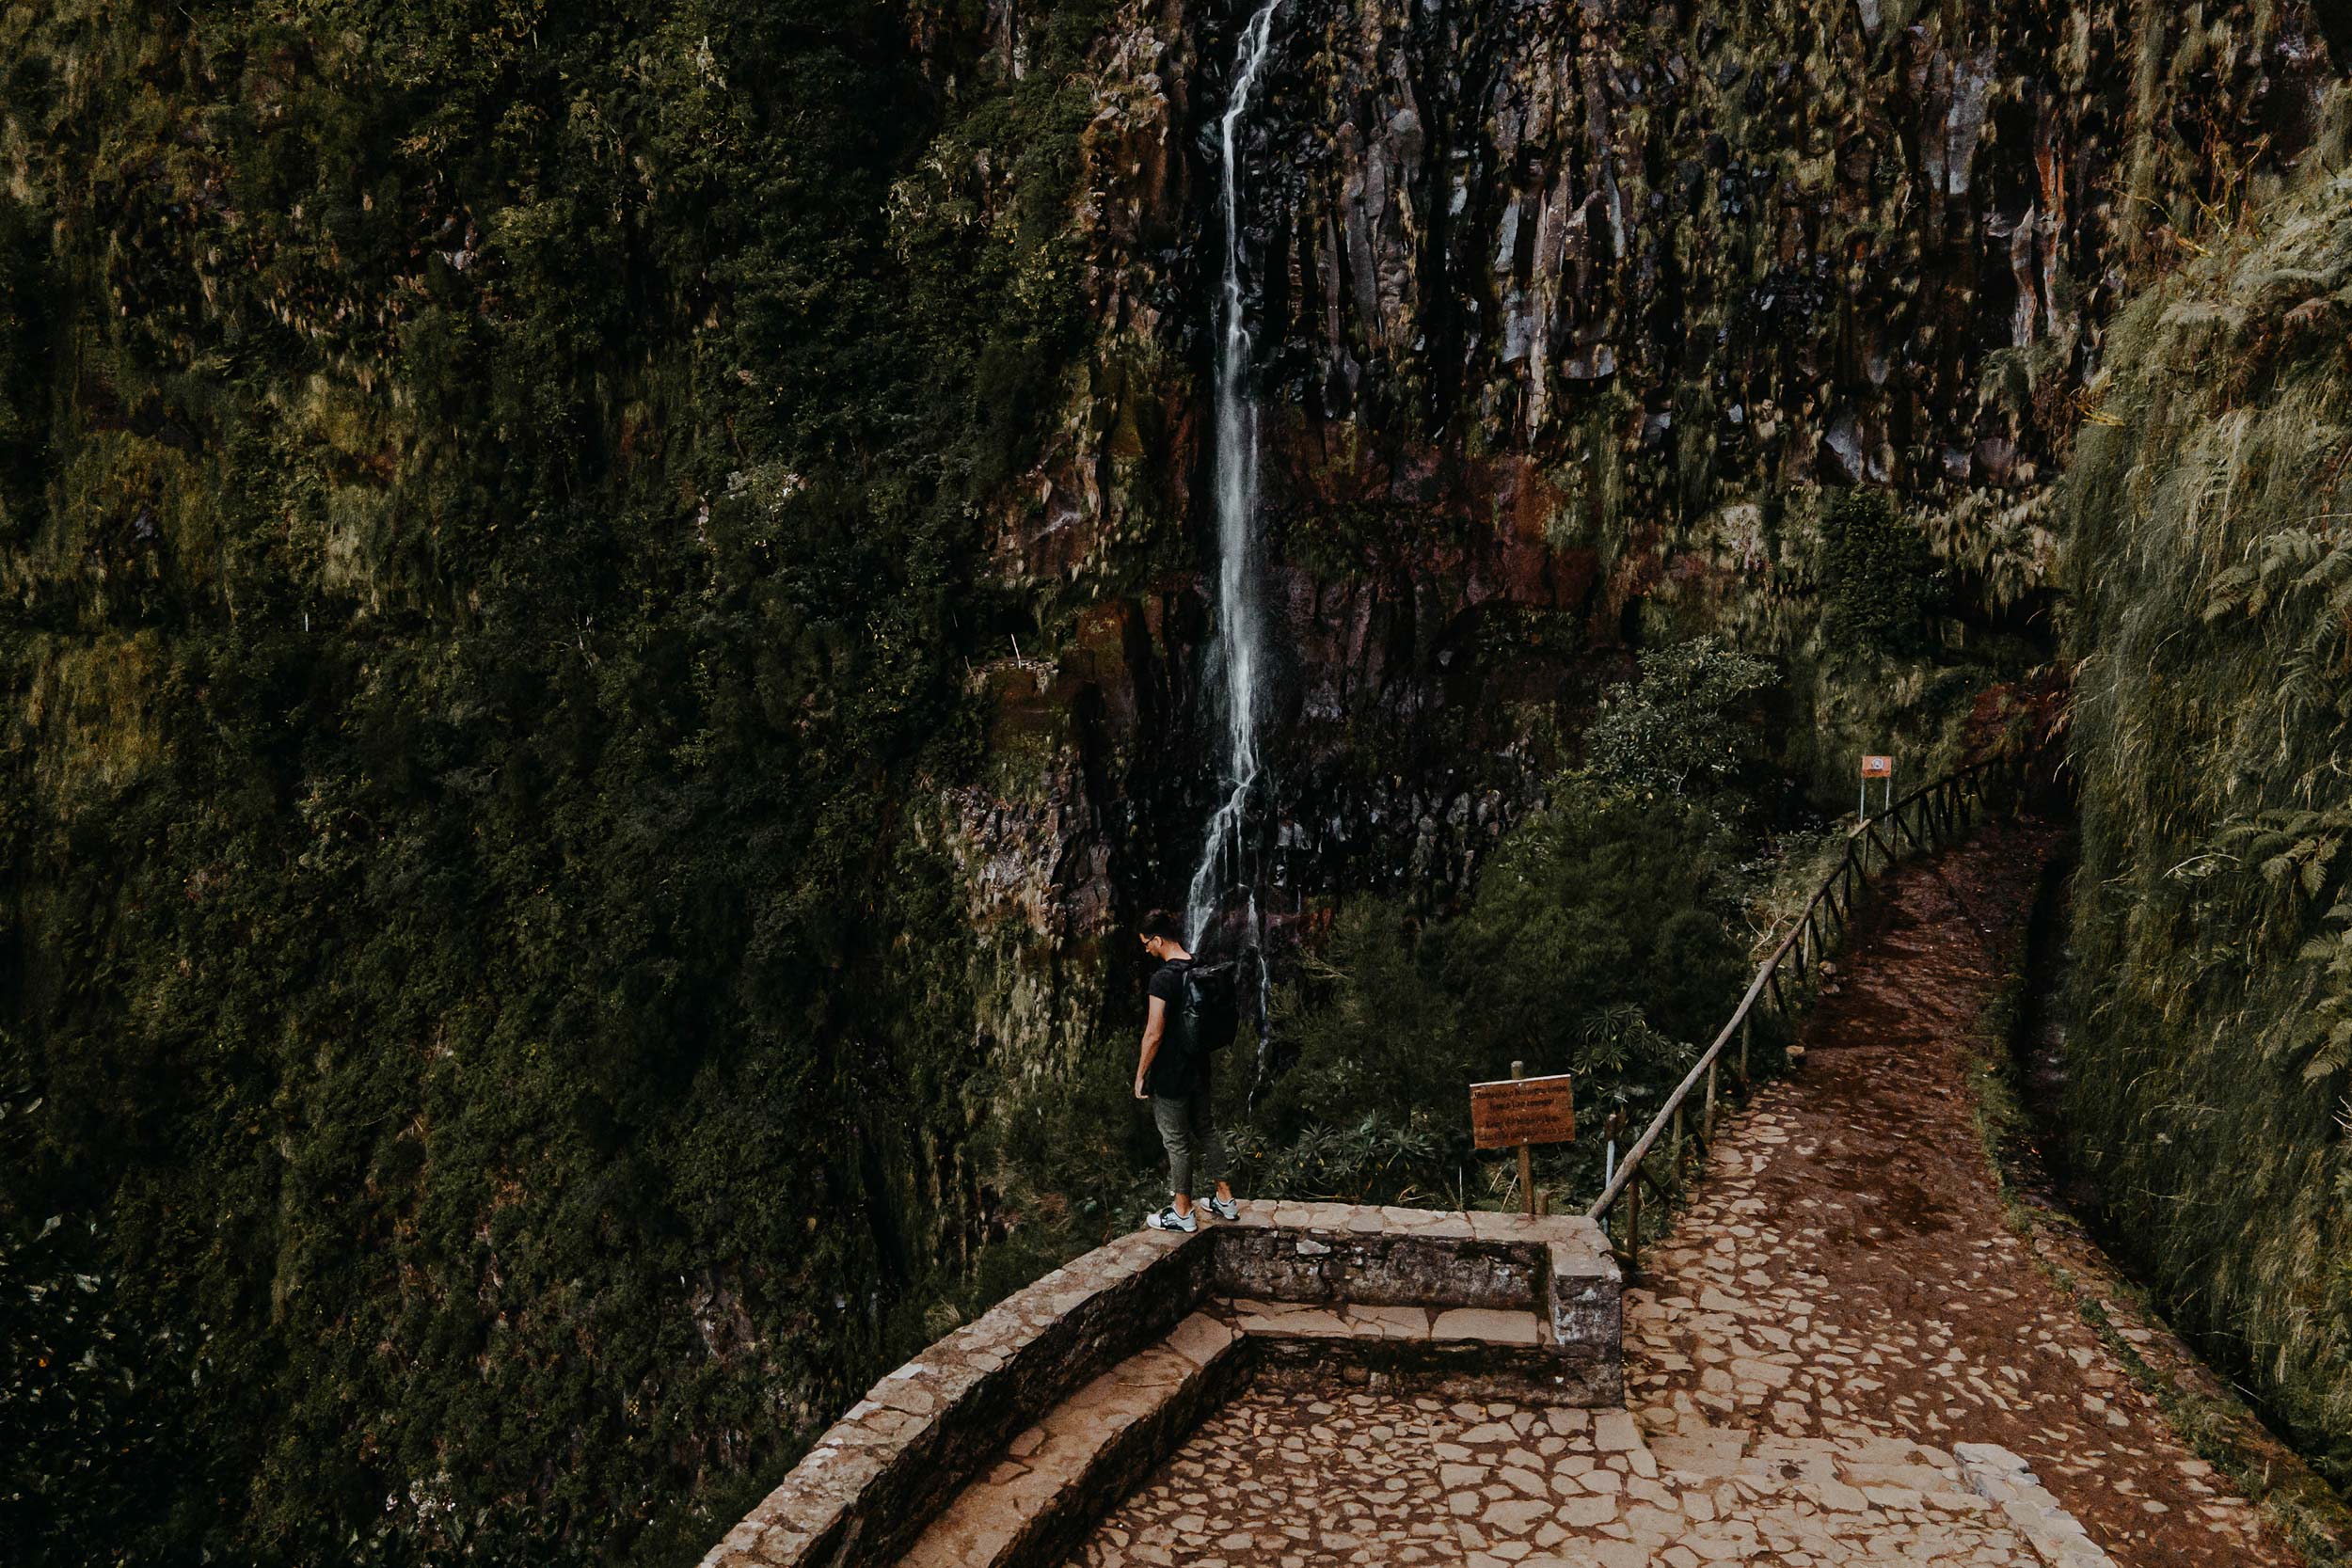
A complete guide to Levada das 25 Fontes, the PR6 hike on Madeira
Situated in the heart of the dense jungle that surrounds Rabacal, the Levada das 25 Fontes has righteously earned its reputation as Madeira’s best Levada walk.
The picturesque hike has become one of the most popular tourist attractions on the island, which isn’t a surprise given it leads hikers to two of Madeira’s most impressive waterfalls; the Risco Waterfall and the 25 Fontes Waterfall.
After recently doing the PR6 hike myself, I realized why Levada das 25 Fontes has become a traveller favourite, since the relatively easy hike is also one of Madeira’s most rewarding Levada Walks.
For that reason, I believe a visit to Madeira simply wouldn’t be complete without hiking the Levada das 25 Fontes in Rabacal – so make sure you add it to your list of things to do on Madeira.
To help you along your way, here’s my hiking guide to Levada das 25 Fontes, featuring a detour to the incredible Risco Waterfall, as well all the essential information – plus some of my best hiking tips.
If you choose to use any of the links on this page, I may receive a small commission at no extra cost to you. By using these links, you’ll have a direct impact on WTSW and my ability to continue to create free insightful travel content for you. If you find any of my tips useful, you can support me by buying a virtual coffee here.
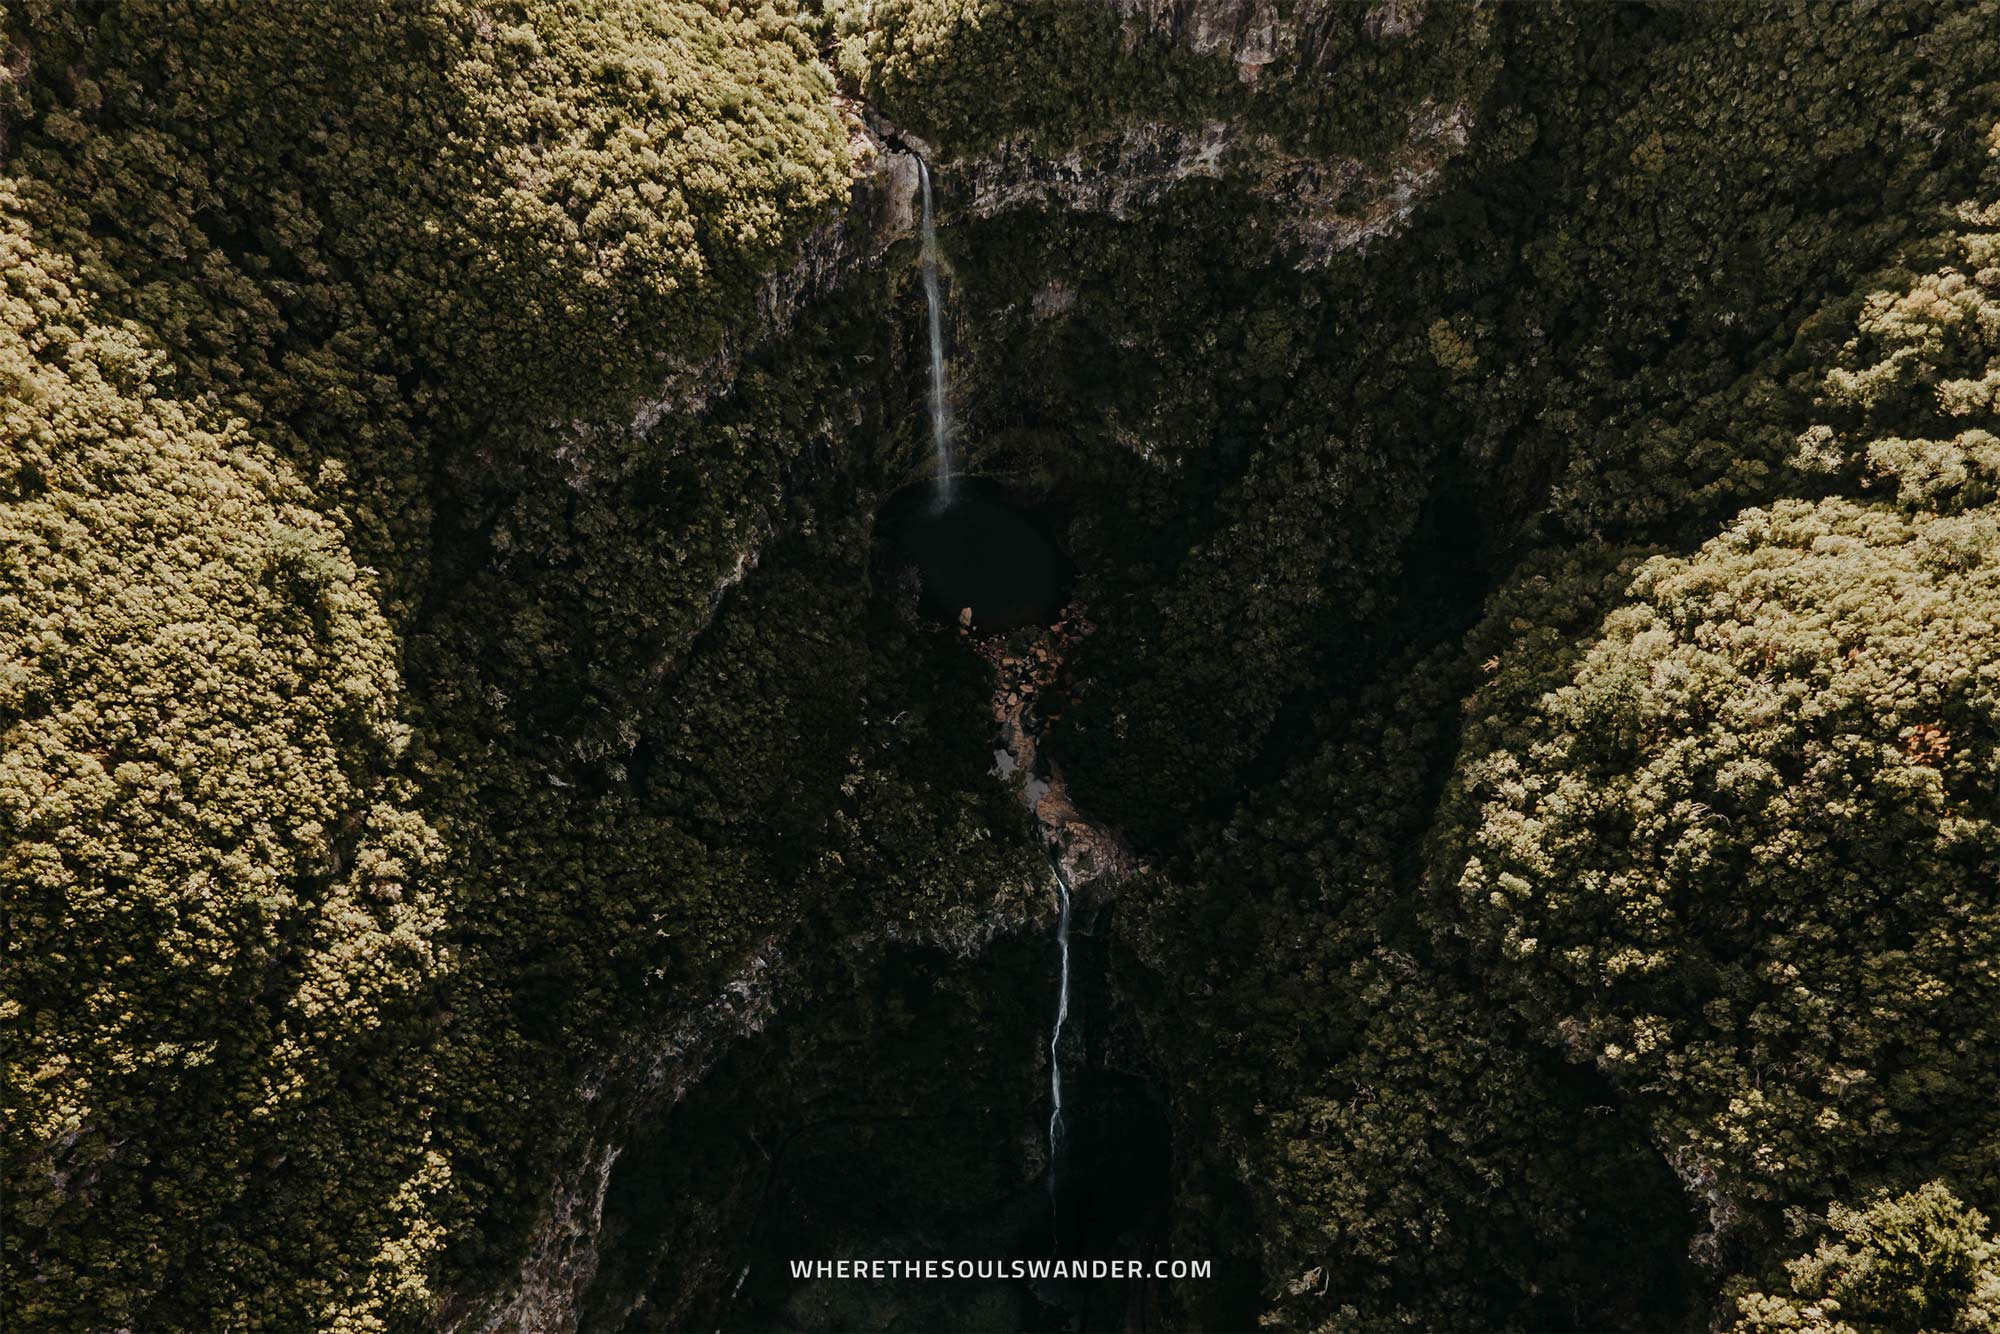
Where is Levada das 25 Fontes
Located in the heart of Rabacal is Levada das 25 Fontes, Madeira’s most popular Levada walk, and the one that guides you to both the Risco Waterfall and the 25 Fontes Waterfall.
Since there are two official starting points, I have to make clear that I will discuss the Rabacal route.
The Rabacal starting point of the hike is easily accessed by car and is situated roughly an hour’s drive from Funchal.
The details of the Levada das 25 Fontes hike
Difficulty | Easy
Hike distance | 9,2 km round trip
Hike duration | 3 hours
Elevation gain | 310 meters
How to get to Levada das 25 Fontes
CAR | If you’re familiar with my other Madeira articles, you probably know what I’m about to say; the most convenient way to explore Madeira is by car, so make sure you sort out a rental car before arriving on the island.
From Funchal, you will drive to Rabacal in just under an hour, where you will also find free parking. From the parking lot, it takes around 10 minutes to get to the start of the PR6 Levada das 25 Fontes hike.
If you haven’t sorted out your rental car yet, make sure you explore the options at Rentalcars.com. Not only do they have a wide range of cars on offer, but they also provide brilliant service and extra insurance options. Additionally, I also highly recommend DiscoveryCars.
TOUR | If you didn’t rent a car, don’t worry, this full-day tour of Levada das 25 Fontes and the Risco Waterfall is an excellent alternative option. The tour is provided by an experienced guide, plus it includes a jeep safari with hotel pickup and drop-off service from Funchal.
If you prefer going on a private tour, opt for this Levada das 25 Fontes tour instead. The 5-hour tour takes you to both the Levada das 25 Fontes, and the Risco Waterfall, yet the group size is limited to you and you’re friends.
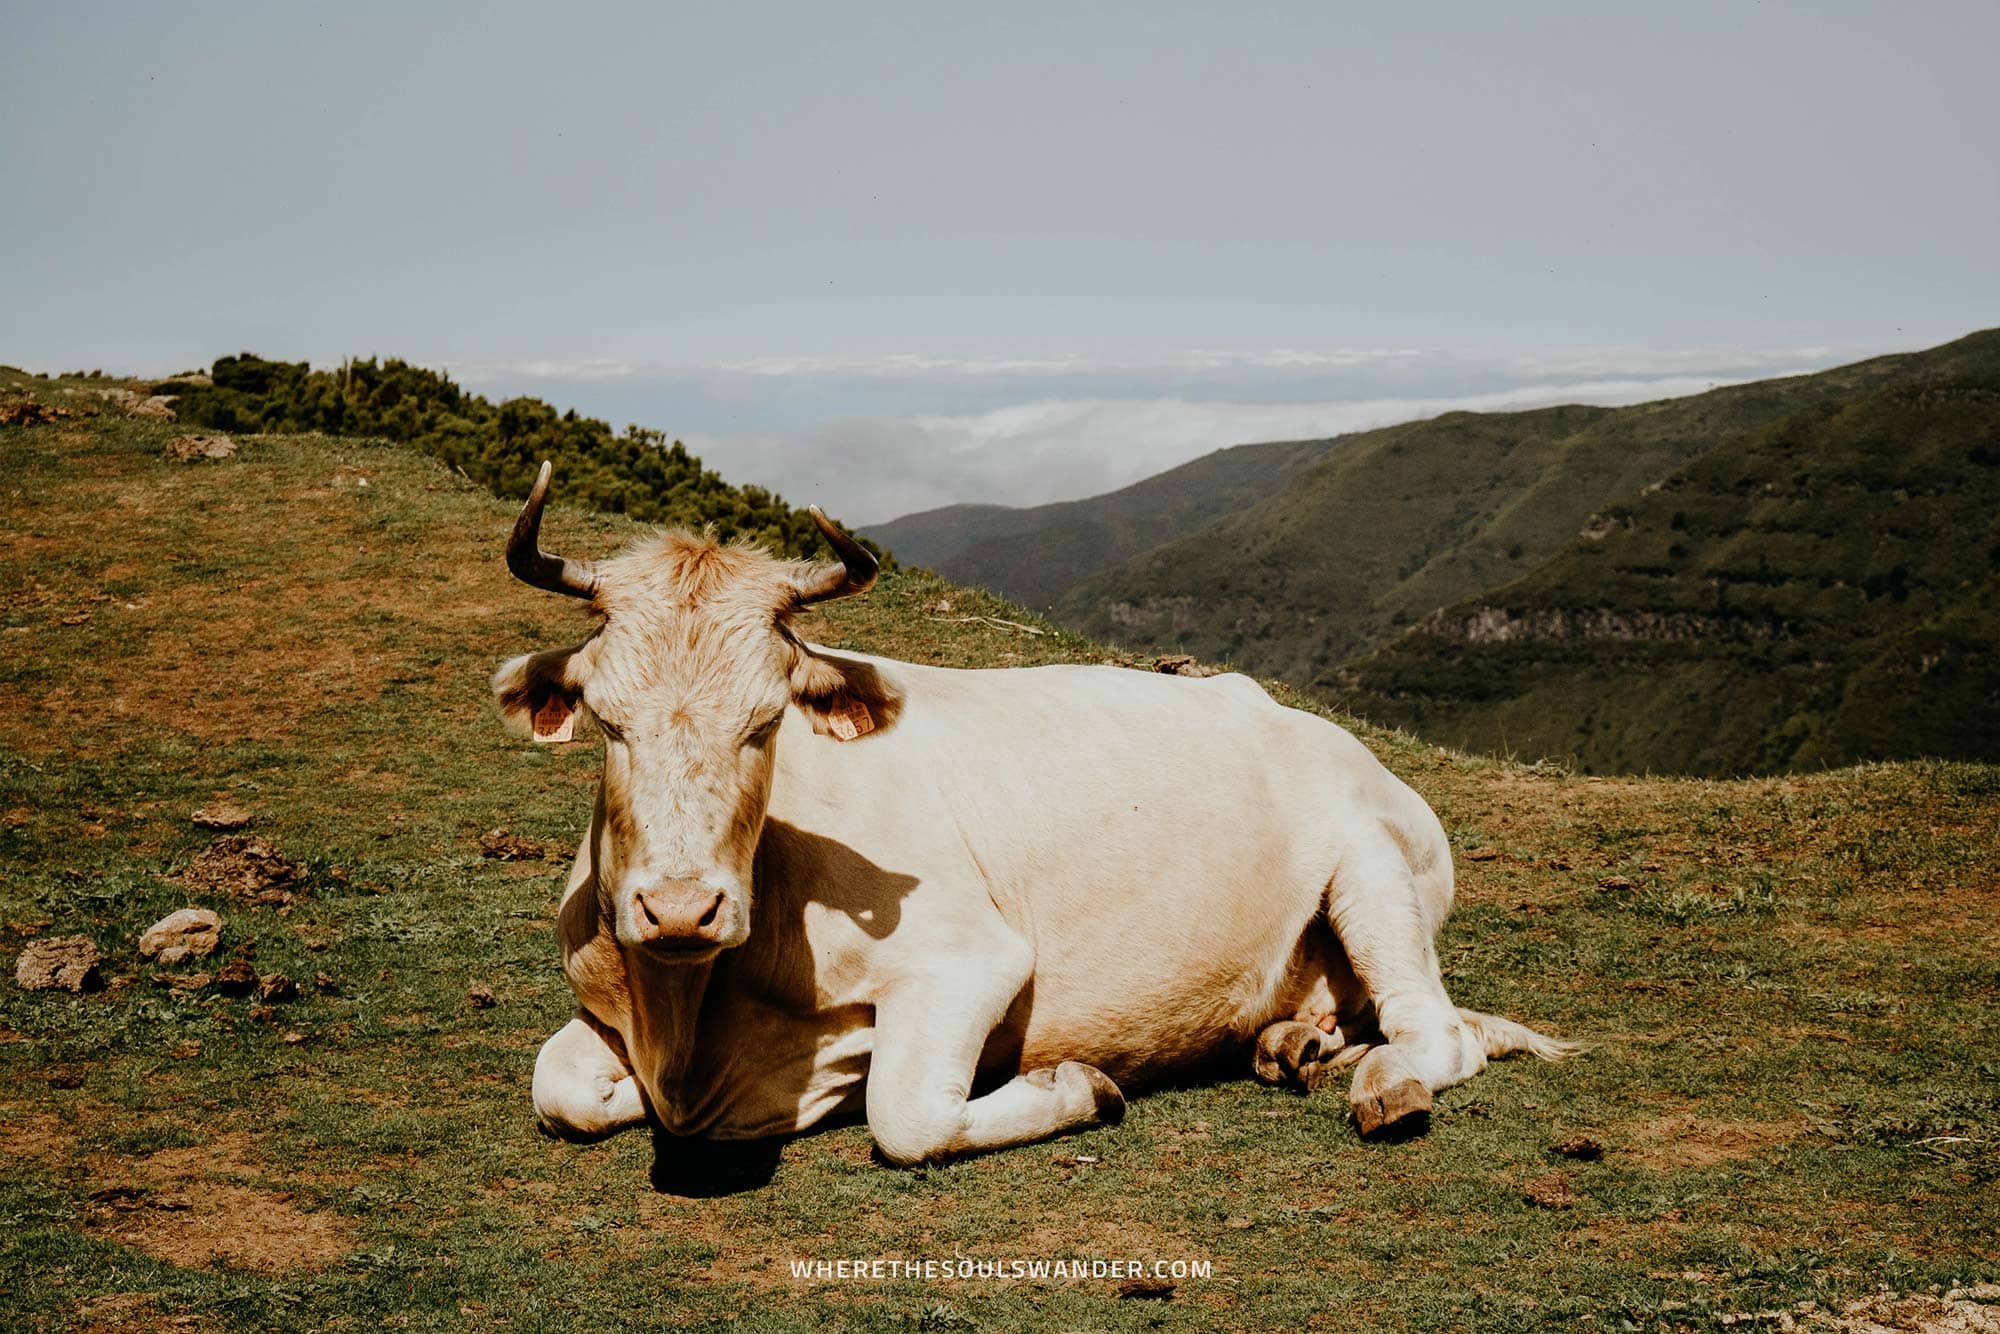
The Levada das 25 Fontes PR6 hike
Arrival at the Rabacal Parking
Once you arrive at the parking at the beginning of the Rabacal Route, you will notice one paved road down. From here, you can start hiking, or wait until a transfer bus picks you up.
Every 10 minutes, a bus will transfer people up and down at a cost of €5,- round trip. Do note that you can only pay by cash and that it operates between 10:00 and 18:00 every day.
I’ve you visit early, or simply want to hike the whole journey – it takes only 2 kilometres to get to the official start of the PR6 hike by foot.

Start of Levada das 25 Fontes
After following the paved road for about 20 minutes, you’ll reach the Forest House, this is where you’ll find the official beginning point of the PR6 hike.
From here, the path will guide you into a dense forest with plenty of twisting tree branches hanging above the path, as well as an iconic Levada aqueduct flowing abundantly along it.
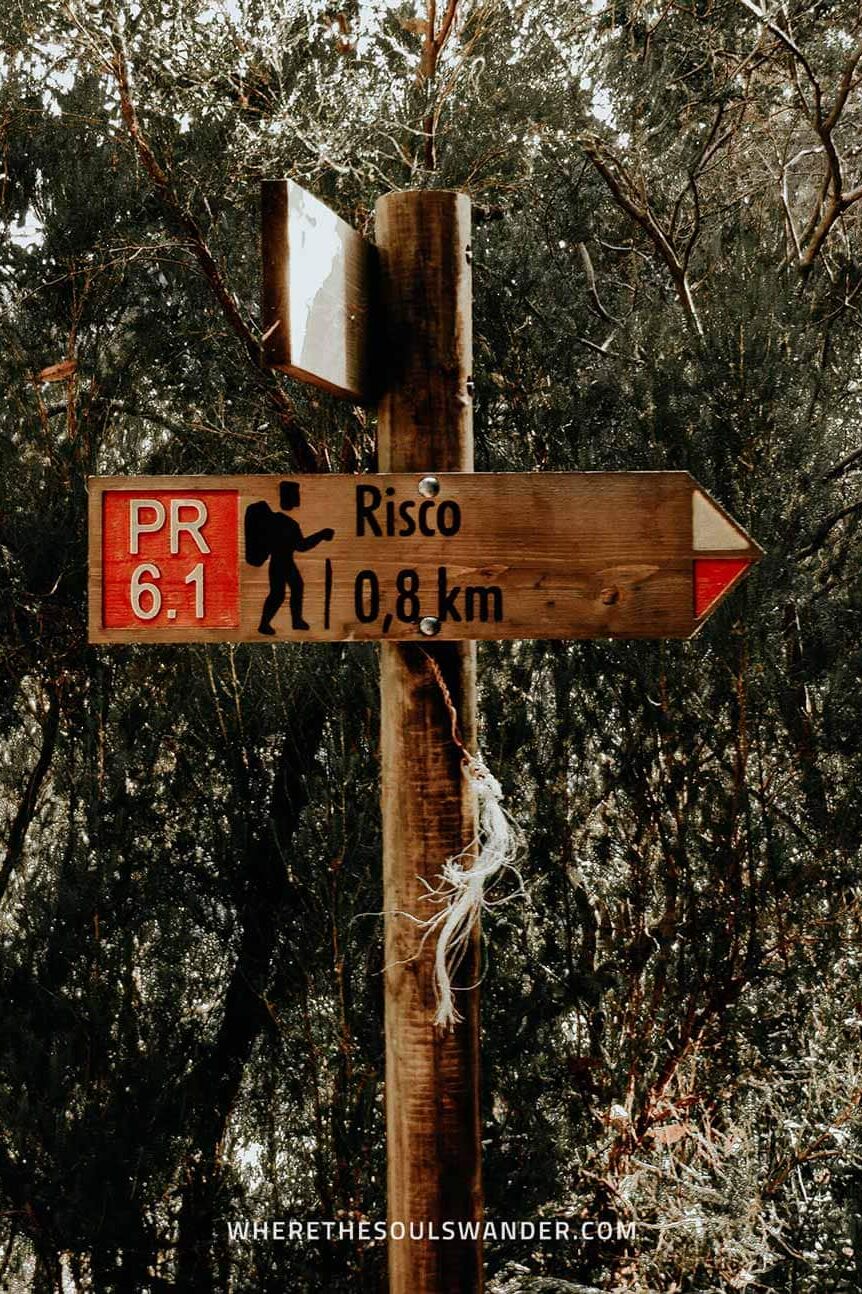

PR6.1 | Take a short detour to visit the towering Risco Waterfall
Around 2 kilometres into the hike, you’ll reach a crossroad that gives you the option to continue in the direction of 25 Fontes or take a short detour to the Risco Waterfall.
From this point on, I’d recommend taking the detour, especially given it takes only half an hour to see this impressive must-see waterfall.
After a couple of hundred metres, you’ll reach the stunning Risco Waterfall, a two-tiered waterfall with a height of approximately 100 metres.
While the waterfall is slightly less powerful during the summer months, it’s a pretty spectacular sight to behold at any time of the year.
Once you’ve taken some photos at the waterfall it’s time to head back to the crossroad, where you continue the PR6 path into the direction of the 25 Fontes waterfall.
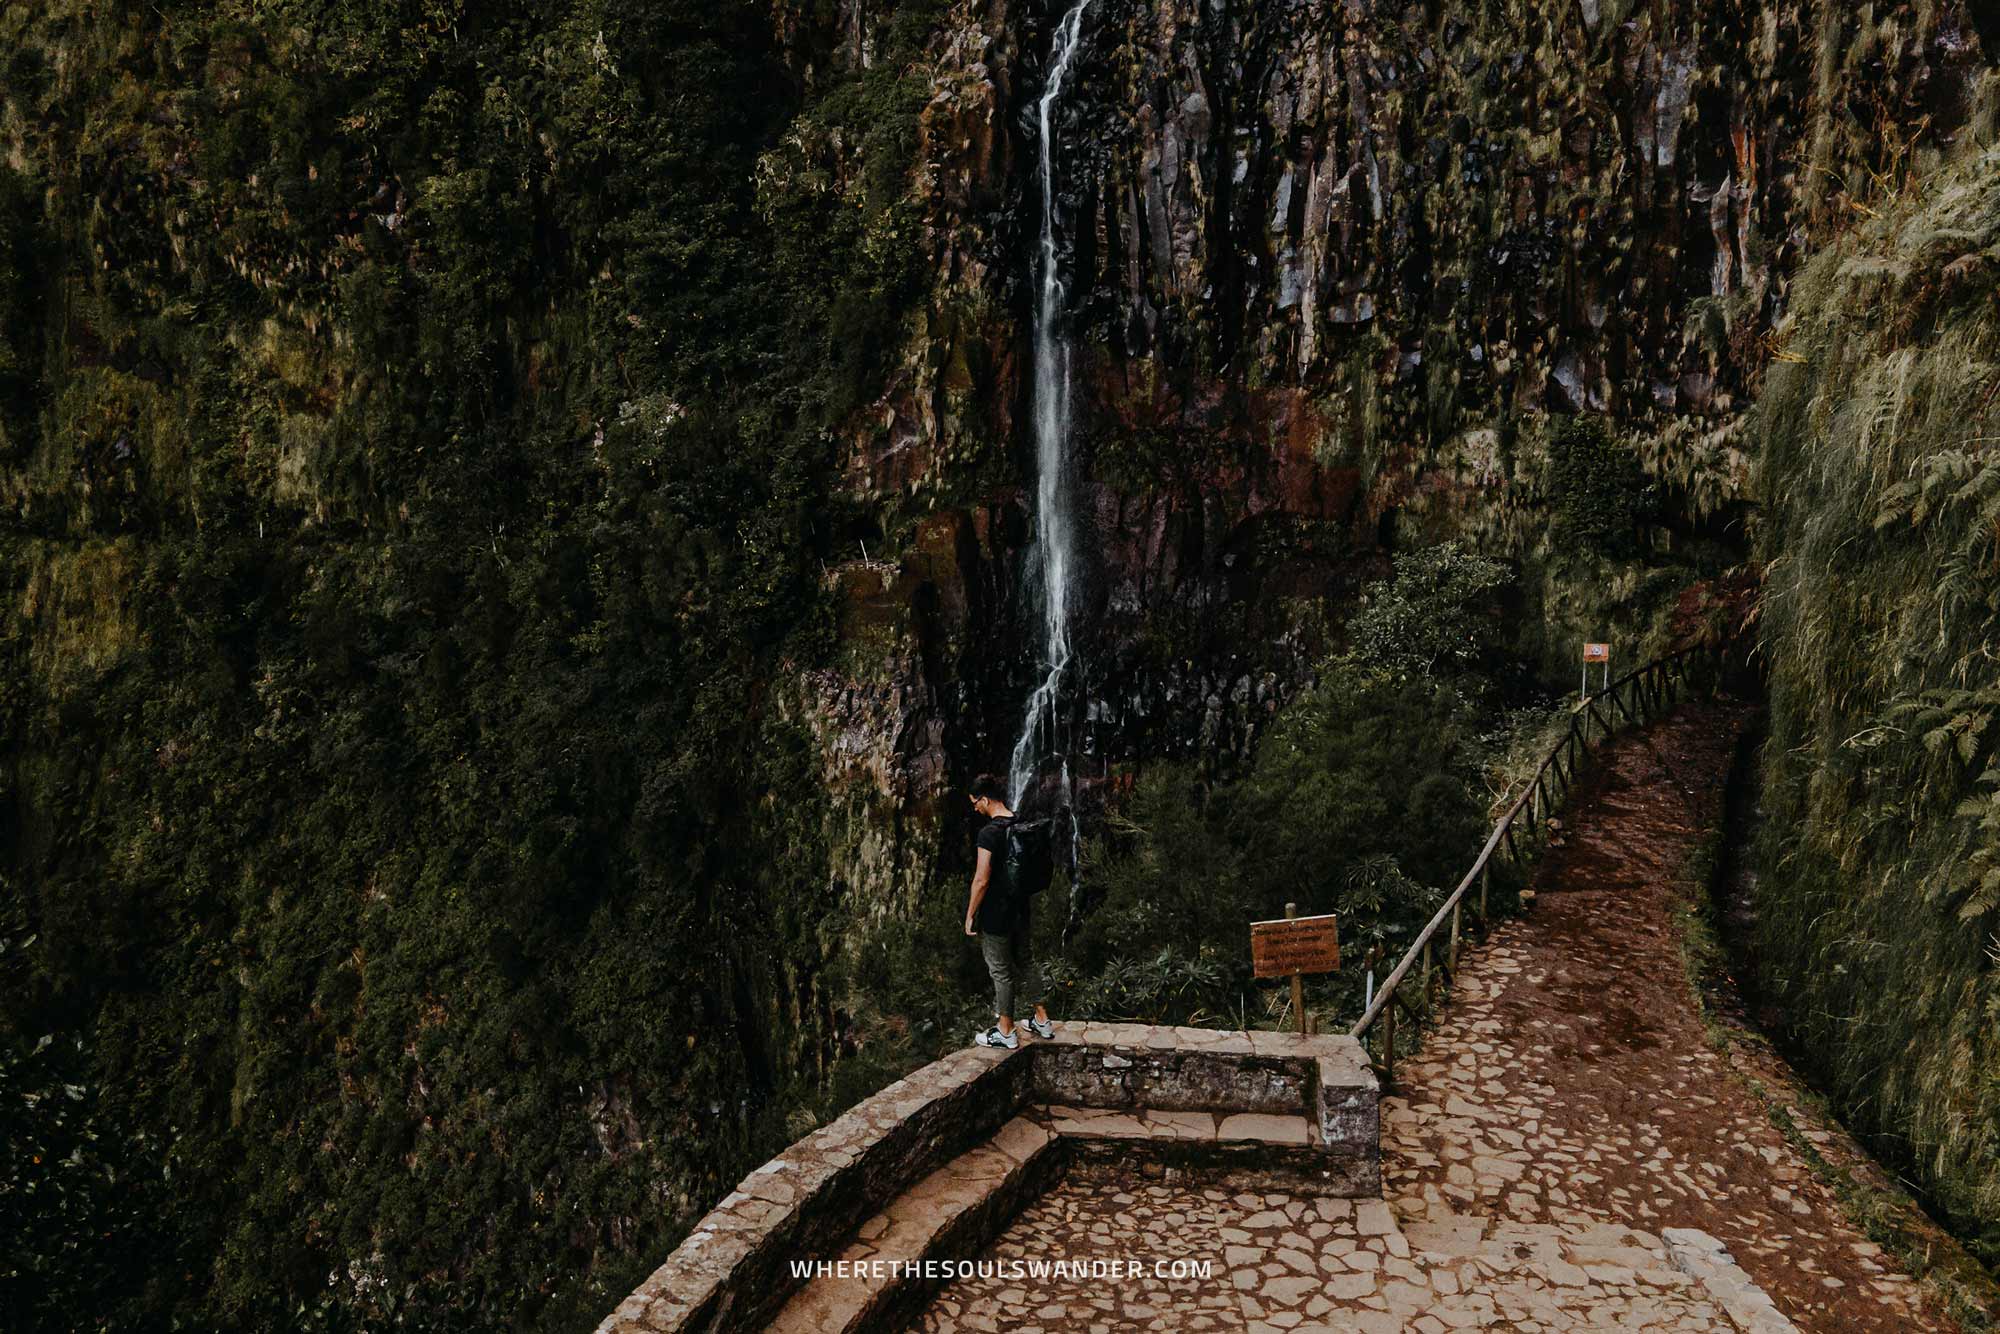
PR6 | Levada das 25 Fontes
Now that you’ve made it back to the intersection, continue on the main path on your left-hand side, which leads you into the direction of the 25 Fontes Waterfall.
This path starts with some steep steps down before you’ve reached the Levada, which is without question the most interesting part of the hike.
Along the way, you’ll stumble upon plenty of tunnels formed by overgrown branches, densely grown forest and beautiful tropical flowers, as well as Madeira’s iconic Levada aqueducts.
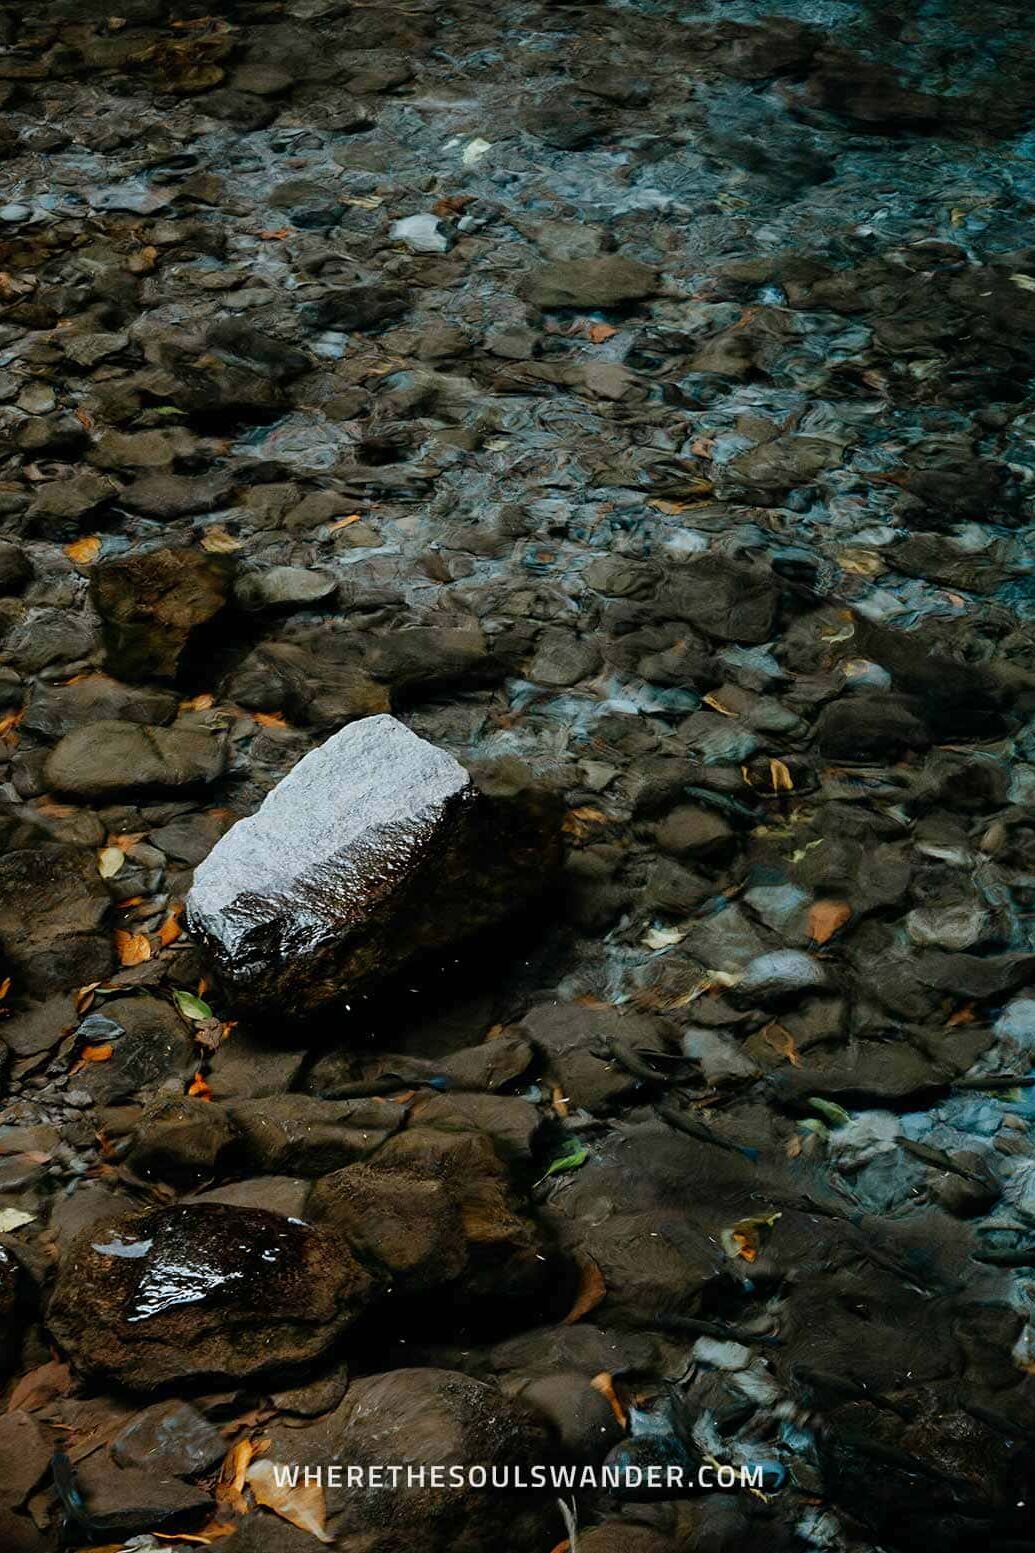
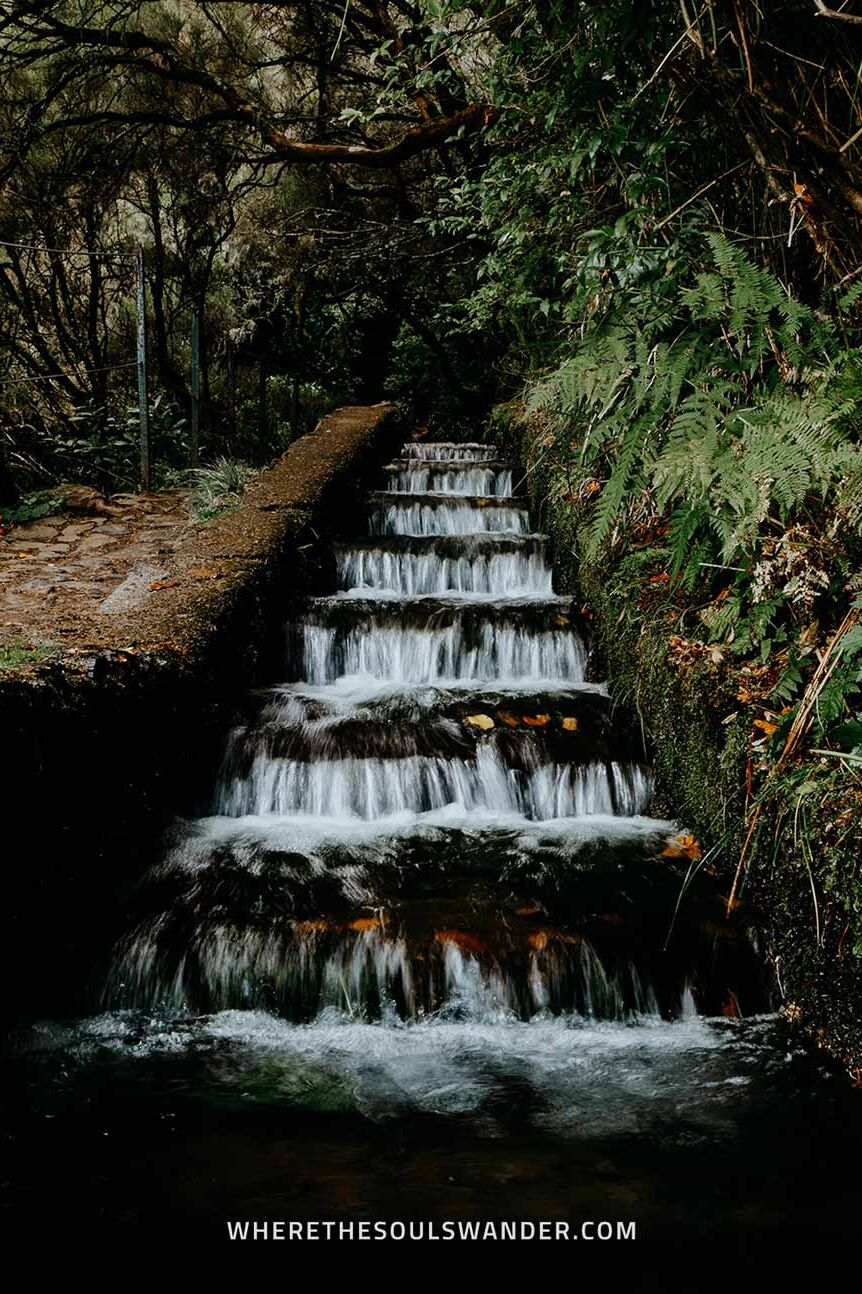
The 25 Fontes Waterfall
About 5 kilometres in the hike, you’ll reach the 25 Fontes Waterfall, an amphitheatre-like waterfall with, as the name might suggest, 25 waterfalls flowing along the wall of the waterfall, before dropping into a large central basin.
Due to the tropical circumstances, the waterfall is encircled with incredible flora, including lush vines, plants, and moss covering the walls of 25 Fontes.
While it’s totally possible to take a plunge into the waterfall’s basin, keep in mind that it will be freezing cold, even during the peak summer months.
Since this Levada walk is considered Madeira’s most popular, the 25 Fontes waterfall can become very crowded, so make sure you start off the hike a little earlier than your fellow travellers.
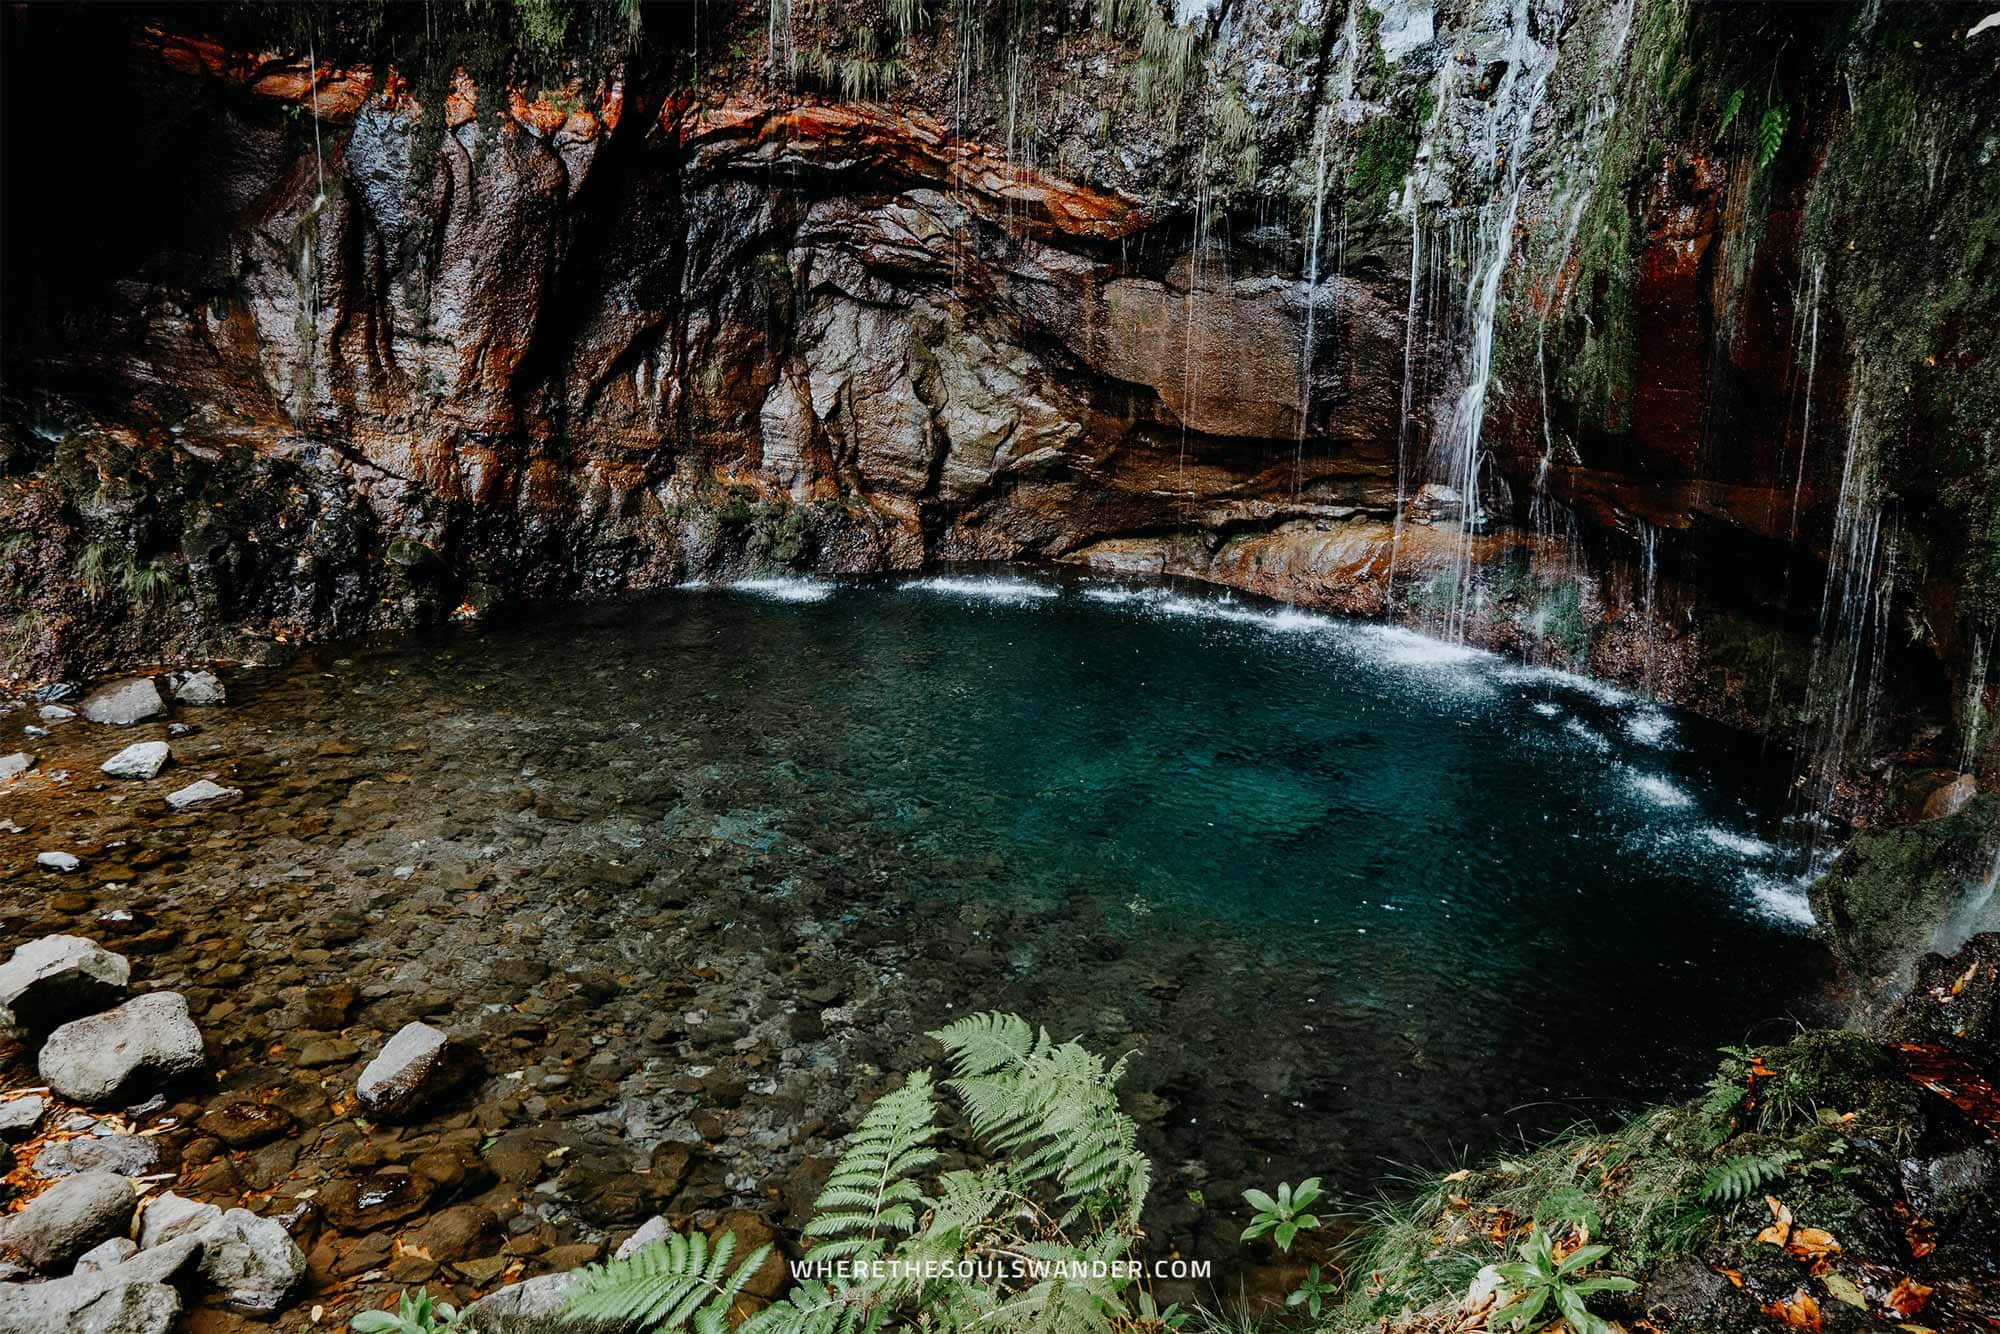
How to wrap up the Levada das 25 Fontes PR6 hike
After you’ve spent some time at the 25 Fontes Waterfall, it’s time to retrace your footsteps back to the beginning of the hike, where you’ll find the Rabacal Nature Spot Café.
Once arrived at the cafe, you can take a short coffee break, some snacks and refreshments, or a lunch, before heading back to the parking lot.
At this point, you could decide to hike back or take the bus directly to the parking. Since I had a day with lots of activities planned out, I decided to take the €3,- bus back to the parking lot.
Additionally, if you’re looking for some more adventure, take the Caltheta route, which leads you through the tunnel. Do, however, keep in mind that this route has a pretty steep climb up – plus that your car will most likely be parked at the Rabacal parking lot, which is pretty far from the end of the tunnel.
Levada das 25 Fontes | The essentials
The best time of day to do the Levada das 25 Fontes PR6 hike
As with most popular activities on Madeira, the Levada das 25 Fontes hike gets rather busy later in the day, so imagine what it’s like during the peak summer months.
For that reason, I’d say that the best time to follow this hike is early in the morning when it’s still relatively quiet in comparison to later in the day.
If you don’t mind sharing the experience with lots of other people, starting the hike in the late morning or early afternoon will do just fine too. However, make sure you wrap up the hike before it turns dark.

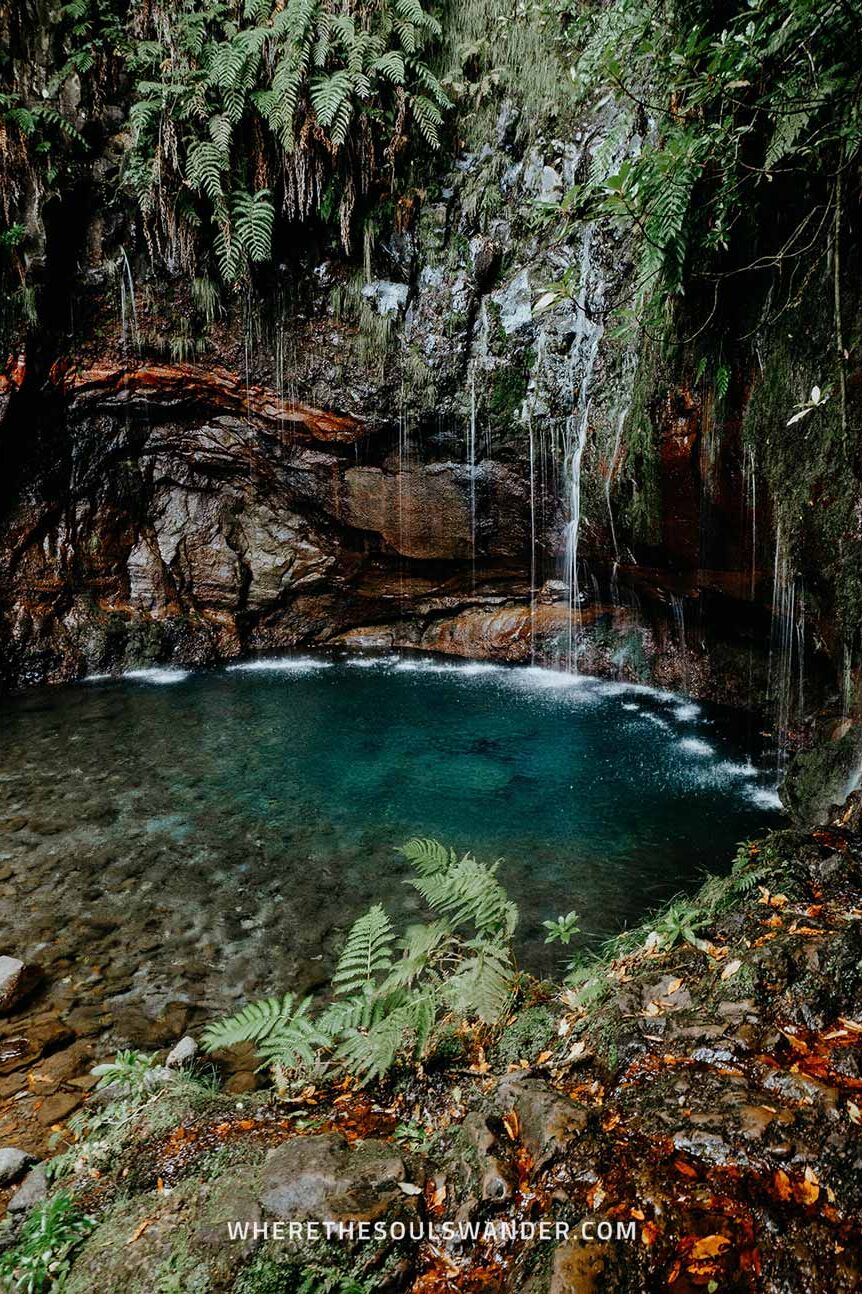
The best time of year to do the Levada das 25 Fontes PR6 hike
Madeira is known to have excellent weather year-round, yet this area is prone to slightly more rainfall, which makes sense given that waterfalls emerge from rainfall.
Therefore, the best time to visit the Levada das 25 Fontes PR6 hike and Risco Waterfall is during the summer months of June, July and August, when the waterfalls flow and the temperatures are good.
If you prefer travelling during the off-season like me, opt for the shoulder months of May, September or October. During this period, you experience smaller crowds, yet still have comfortable weather conditions.
I hiked the PR6 Levada das 25 Fontes at the beginning of October and had great circumstances – plus it was relatively quiet on the trail, which helped me get some good photography.

What to bring on your Levada das 25 Fontes hike
As with any hike, I believe it’s essential that you’re well-equipped before setting out on your adventure.
For that reason, I recommend anyone who’s planning to hike the Levada das 25 Fontes PR6 hike to do the same. To help you have a comfortable journey, I’d highly suggest bringing the following items:
Reusable water bottle | One travel essential that I carry with me at all times is the Grayl Geopress. This reusable water purification bottle allows me to fill up water from nearly every water source, making it one of my best investments to date.
Hiking boots or a good pair of sneakers | While hiking boots definitely provide more stability to your ankles, I believe you could easily do the PR6 hike in a good pair of sneakers – just be sure that they have a firm sole with enough grip, so you’re supported when things get slippery. I recently bought the New Balance Hierro v7, and am really happy with them, as they offer all the features of a hiking boot, while still looking like a dope sneaker.
Hiking poles | I did the PR6 hike without hiking poles, but if you have poor knees or prefer a little support during the more strenuous parts of the trail, I highly advise bringing a set of quality hiking poles. These Montem Ultra Strong Hiking Poles are light, collapsible, and a great value for the price.
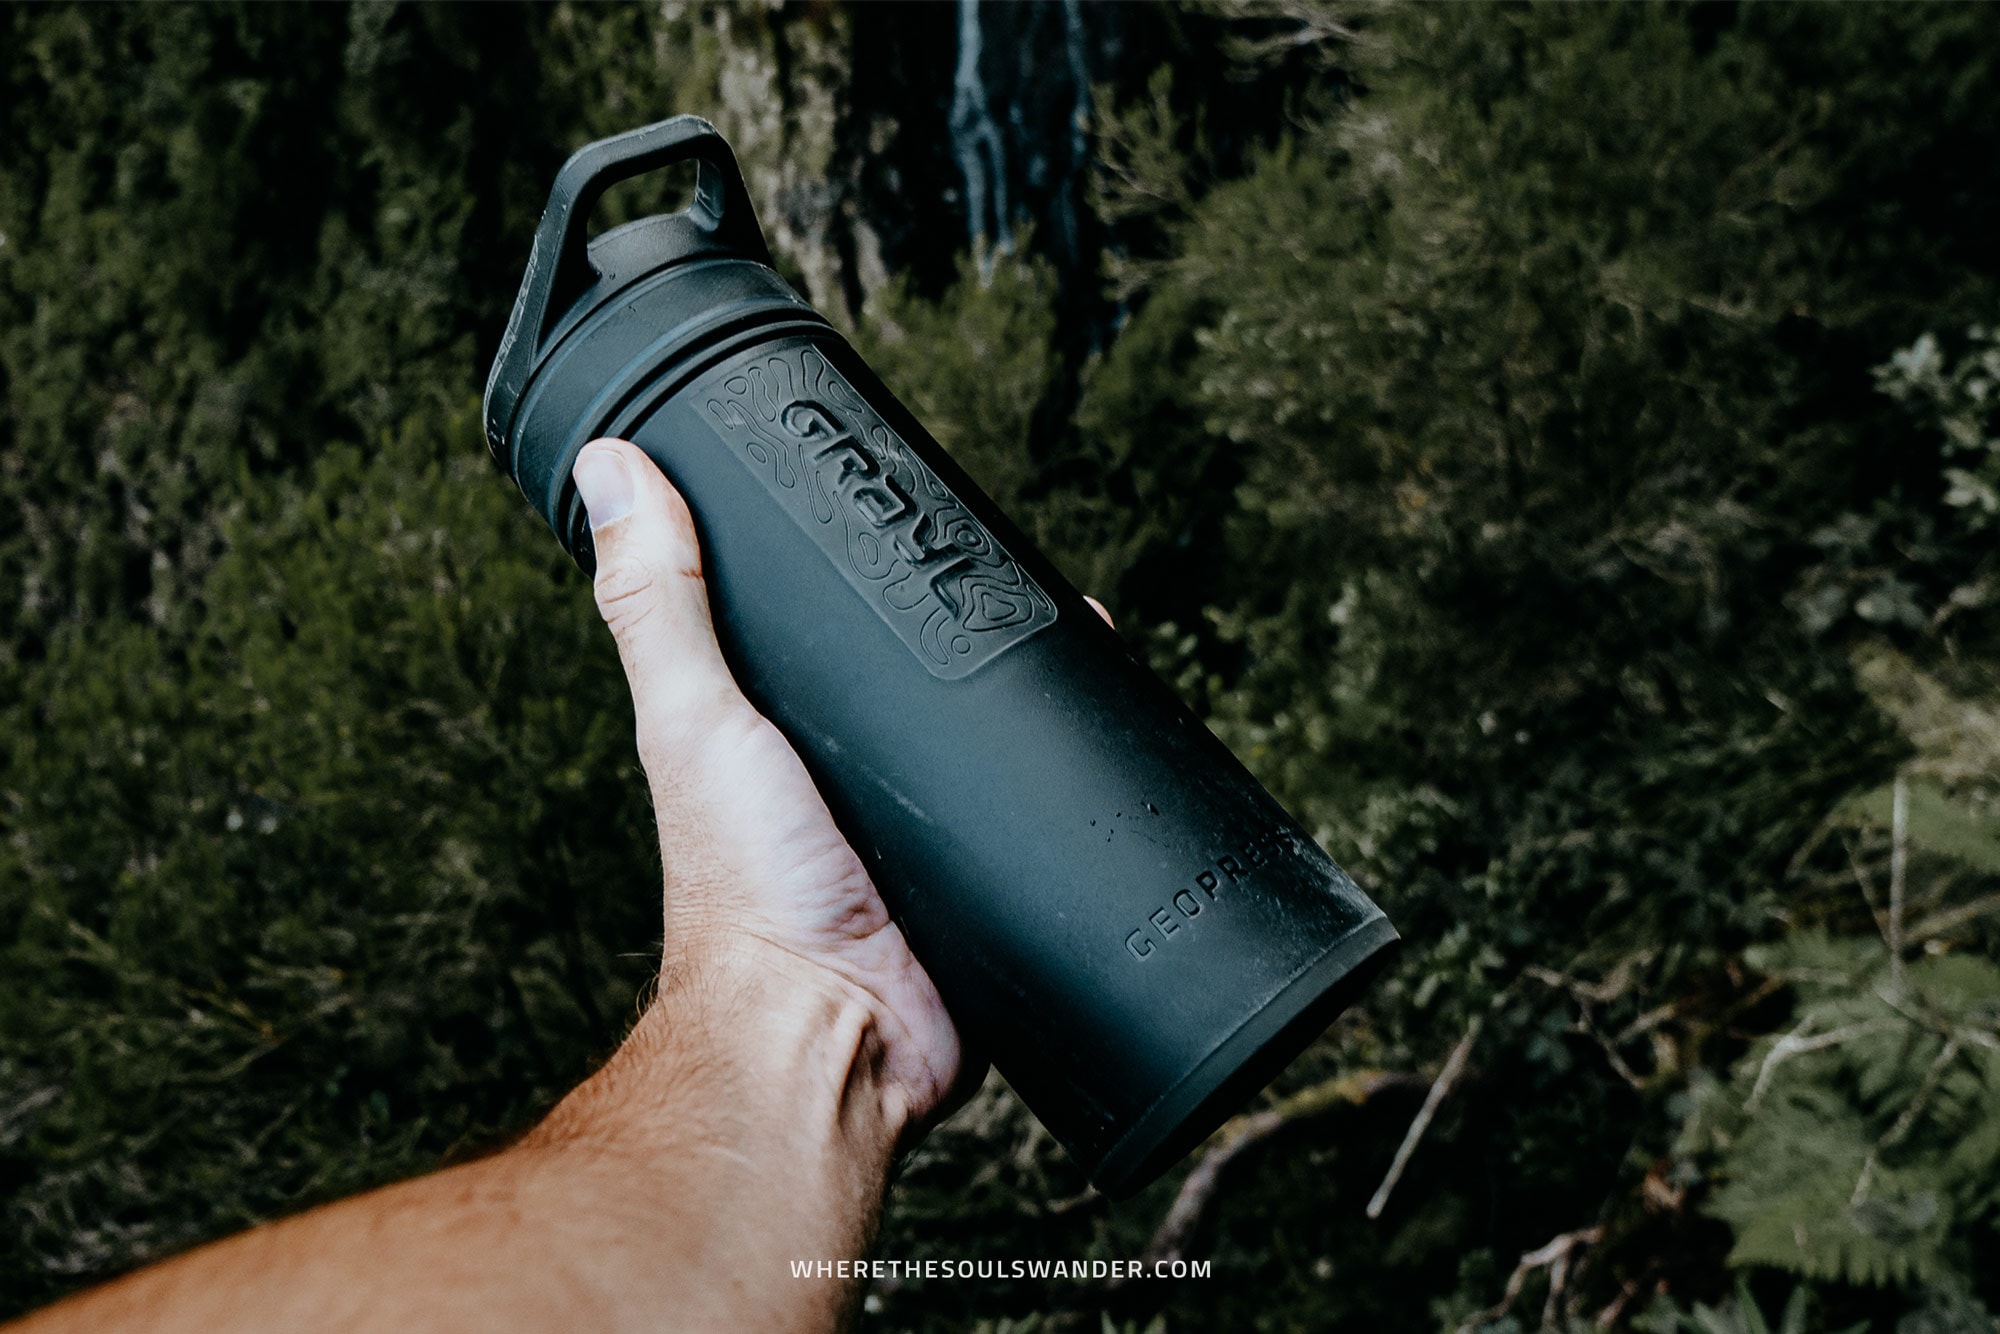
Where to stay on Madeira
Given Madeira is rather compact, I highly recommend anyone to base themselves in Funchal, Madeira’s vibrant capital city.
Funchal is an awesome city in its own right and is home to plenty of excellent accommodation options, is packed with history and culture, plus it has trendy restaurants and cafes at just about every corner.
To help you find suitable accommodation, I’ve listed three of my favourites below, one of which is marked – this is the place where I stayed.
+ Vila Baleira | This was my base for the whole of my trip, and if you’re seeking comfort without spending your entire budget straight away, Vila Baleira will be perfect for you too. Located within the popular Lido area, this hotel offers spacious rooms, comfortable beds, and a large rooftop terrace with a swimming pool. They also have a tasty breakfast spread, excellent wifi throughout the entire property, and a secured parking lot right under the property.
NEXT – Savoy Signature | This budget-friendly hotel in the centre of Funchal has spacious, modern-style rooms with comfortable double beds and a brilliant private bathroom with a rain shower. They also have an incredible rooftop swimming pool with amazing sea views. Double rooms at only €50,- per night make this place one of the best picks in Funchal.
Hotel Cajú | Set within the heart of Funchal, Hotel Cajú is a great place to stay, with stylish double rooms, friendly staff, and a small yet excellent in-house fitness centre. All bookings come with an exceptional breakfast too. One small downside though, they don’t have private parking.


Stay safe on Madeira | Travel insurance
Since travelling on Madeira is all about hiking and nature, I recommend everyone to sort out good travel insurance before setting out on their own adventure.
Where we prefer that everything goes smoothly during our travels, something unfortunate can happen at any moment, whether it’s an injury during a hike or an accident on the road.
For travel insurance, I use Heymondo, as they offer full covid-19 coverage, as well as a handy app with 24-hour medical assistance. Make sure you check it out – readers of WTSW receive 5% off any insurance policy too.
Keep on reading with these in-depth Madeira guides
Need more inspiration for Madeira? I’ve made plenty of guides that might interest you too.
Funchal | 9 Things to do in Funchal
Madeira driving Essentials | A guide to driving on Madeira
The best viewpoints on Madeira | 9 Incredible viewpoints on Madeira
Vereda da Ponta de São Lourenço | A guide to the PR8 hike
Pico do Arieiro to Pico Ruivo | A guide to the PR1 hike
Levada do Caldeirão Verde | A guide to the PR9 hike
Levada das 25 Fontes | A guide to the PR6 hike
Cheers!
I’ve been on this travel blogging journey since 2019.
If you appreciate what I do here, these are some ways you can support me.